
Assassin's Creed III Guide Walkthrough
Sequence 02

Boston

Welcome to Boston
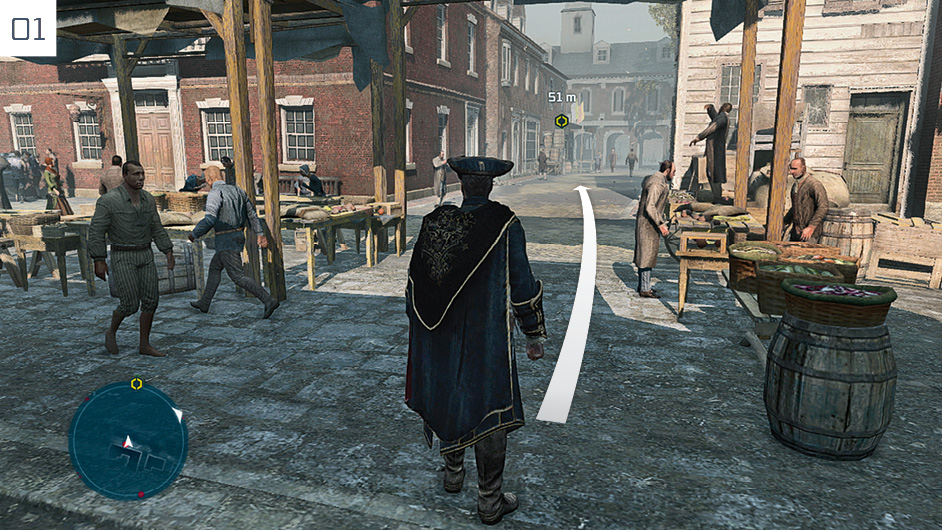
Walk with Charles Lee along the waterfront until you reach the end of the boardwalk, when Haytham’s companion will depart to acquire horses. Continue along the road, past the market stalls, then take a right to approach the waypoint marker at the end of the street, as shown here.
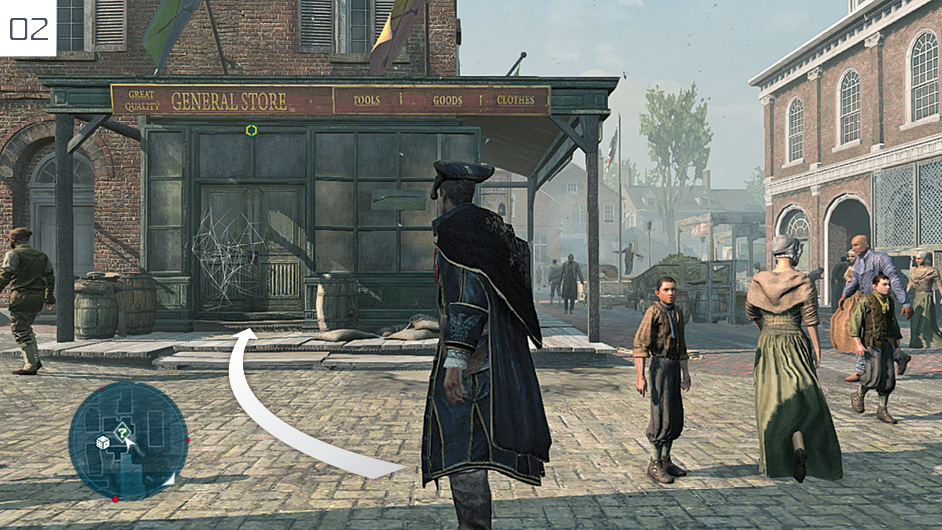
After the introduction to the singular Benjamin Franklin, enter the general store and purchase a Normal Sword and Flintlock Pistol as directed.
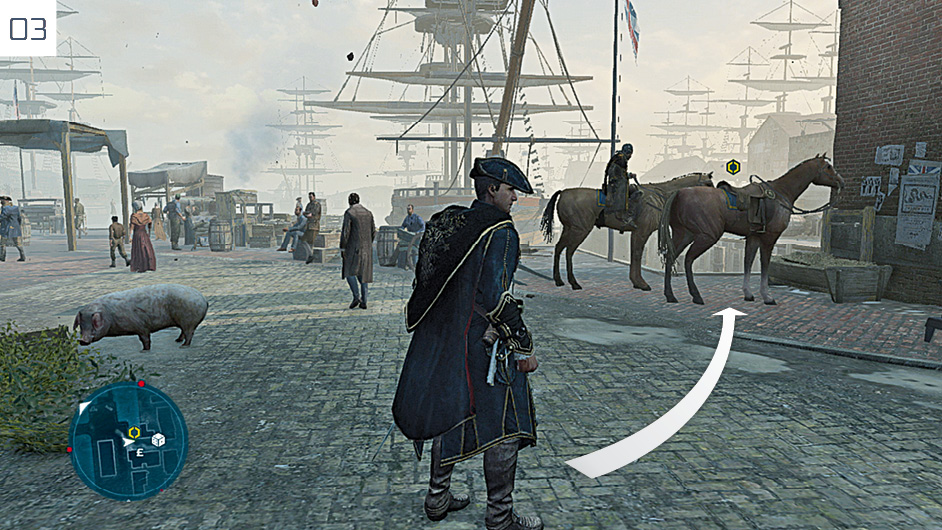
Leave the store and take the horse provided by Charles Lee, then ride with him to reach the Green Dragon Tavern. Dismount and enter the tavern, then follow Lee upstairs.
|
 Almanac Pages
|
 Making Money
Johnson’s Errand
Mission Overview
|
Optional Objectives |
|
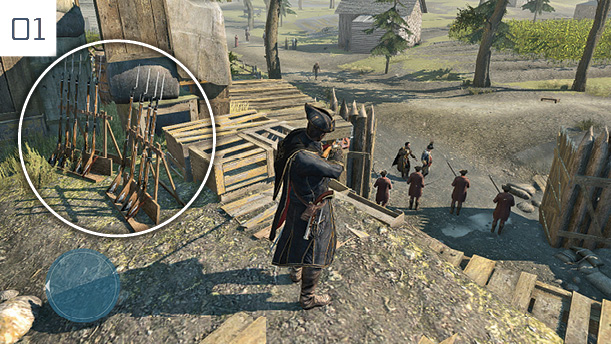
When the Memory begins, follow the onscreen instructions to shoot the sentry, then scramble up the bank directly ahead. Pick up a musket from the rack highlighted here, then fire on one of the guards at the gate; Lee and Johnson will tackle the remaining soldiers.
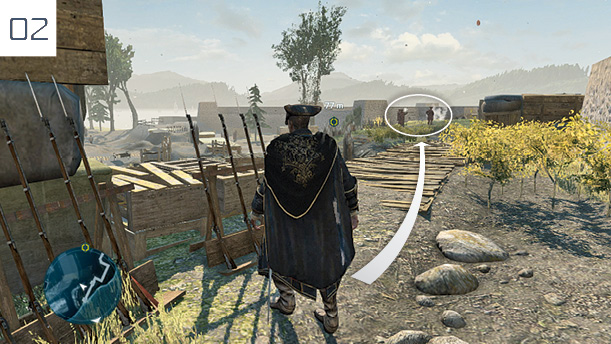
Drop the musket, and grab another from the rack; this removes the immediate need to reload. Approach the men engaged in target practice, and shoot one from a safe distance; when the other mercenaries rush you, dispatch them by any means you deem appropriate.
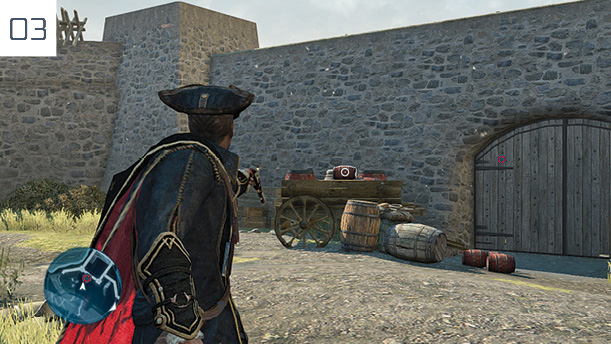
When directed to shoot the explosive barrels, be sure to use the  /
/ Precision Mode aiming function. Try to get a feel for the process of lining up shots: you’ll be using this again shortly. With the gate destroyed, reload and walk through the entrance.
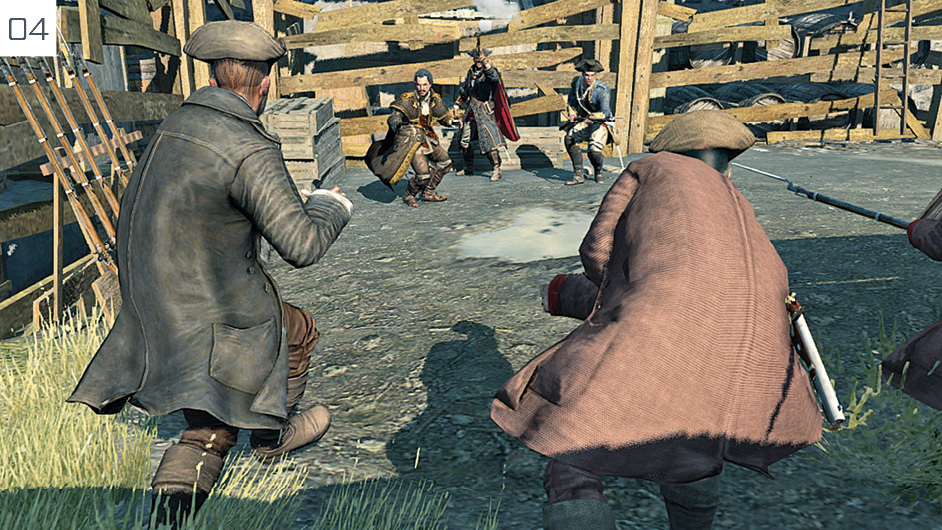
Retrieve the stolen chest (approach it and press  /
/ ), then defeat the mercenaries who arrive. You must ensure that Lee and Johnson sustain only limited injuries to complete an Optional Objective, so start with a swift pistol kill and then throw Haytham into the heart of the mêlée.
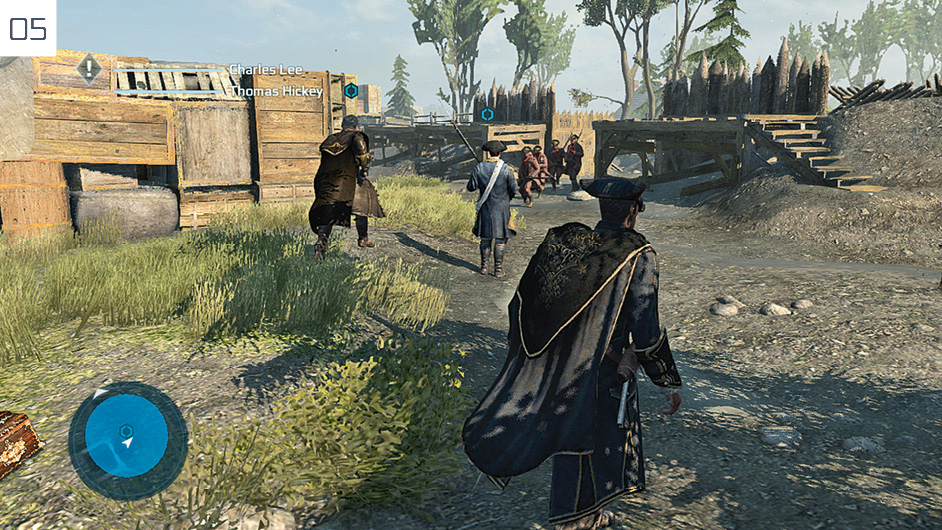
After the cutscene, loot the bodies to replenish your stock of ammunition, then follow your companions. There is another brief battle outside the archway. Once again, start with a firearm kill, then aim for quick takedowns. Pick up a fresh musket before you press forward. Note that you must remain in the circle marked in blue on the mini-map for the rest of this memory.
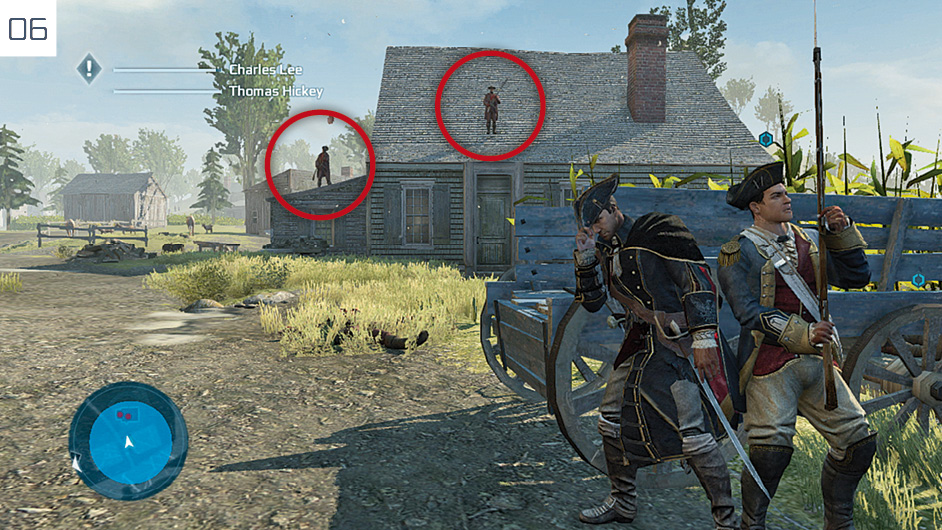
When you reach this road bordered by crops, be ready for an ambush. Engage the mercenary vanguard up close, then take cover from the marksmen behind the cart, as shown here. Watch them closely, and take note of the intervals between their shots. In each break, grab a musket and use the Precision Mode aiming function for simple kills.
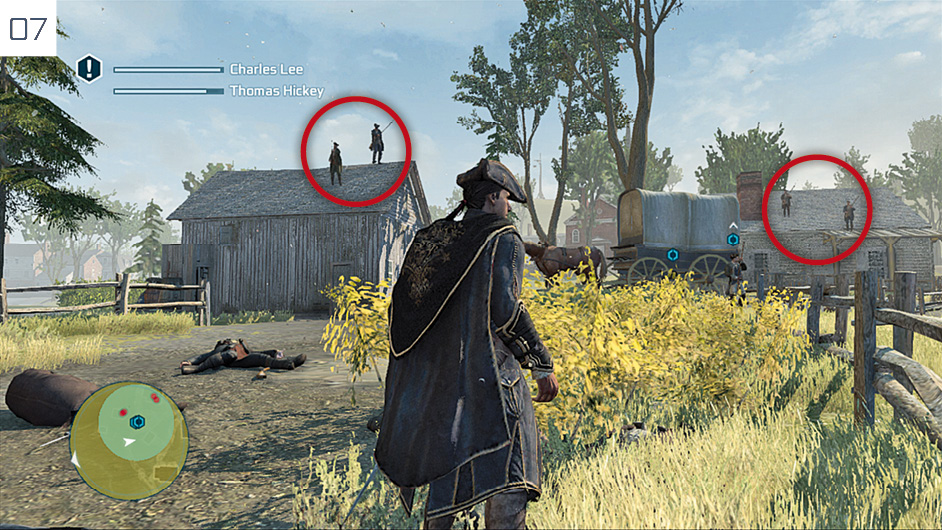
There is one final confrontation before the Memory ends. Once again, dispatch the initial wave with melee attacks, then use a musket to kill the four marksmen; deal with the two on the left-hand rooftop first. After eliminating all assailants, quickly loot bodies to replenish your stock of cartridges before you move to the waypoint.
The Surgeon
Mission Overview
|
Optional Objectives |
|
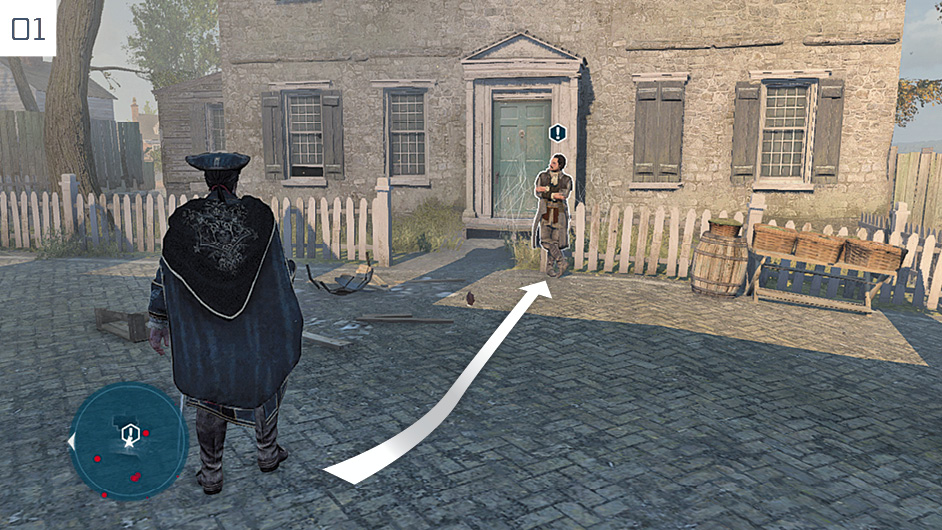
Speak with Charles Lee to begin this Memory, then exit via the door downstairs. Haytham is automatically transported to Ben Church’s house some way south of the Green Dragon Tavern. Interact with Lee to begin.
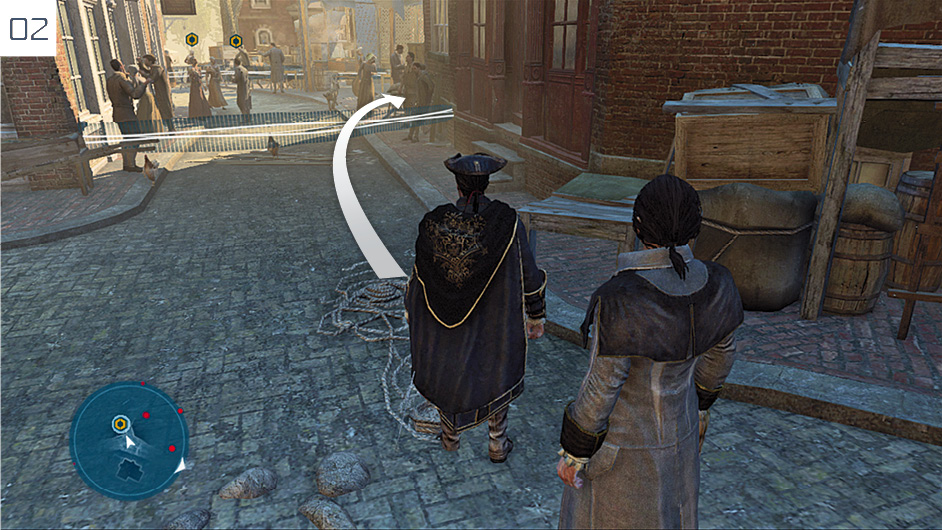
Approach the highlighted area to begin the eavesdrop. When prompted, approach the citizens standing against the building on the right-hand side of the street (see picture) to “Blend” and allay suspicion.
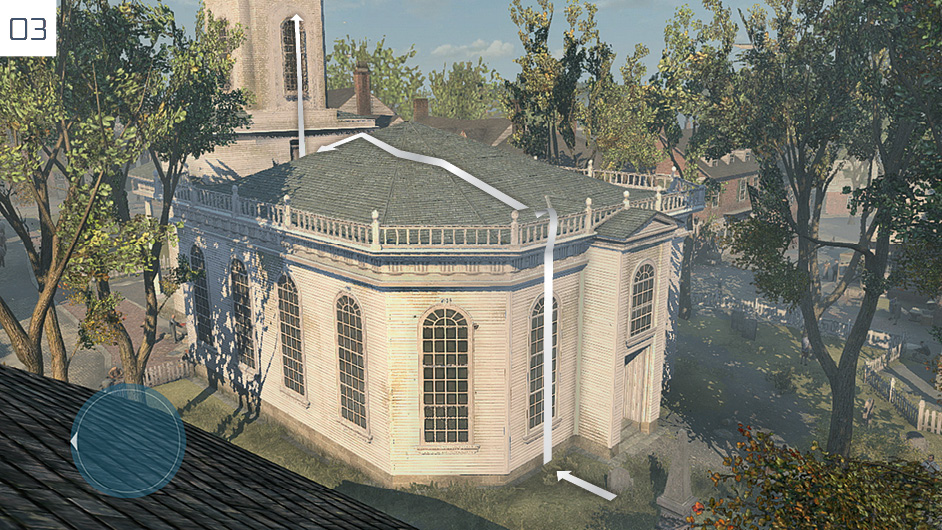
Take any route you please to reach the next waypoint: a cross on top of the steeple of the church pictured here. Begin your climb in the graveyard to avoid detection (there is a Sniper on a building to the south, though you can soon move out of sight if you are quick), then scale the tower to reach it.
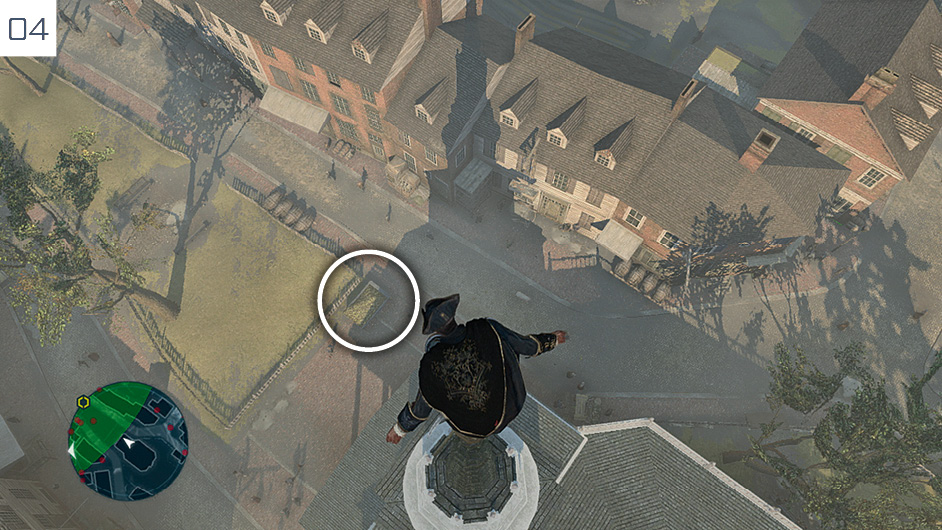
The cross is a special location known as a Viewpoint (see page 39). Once Haytham is perched on top of it, press  /
/ to “Synchronize”. When the brief cutscene ends, align Haytham with the cart highlighted here, then press
  +
+  /
/ +
+  and forward on
  to perform a Leap of Faith.
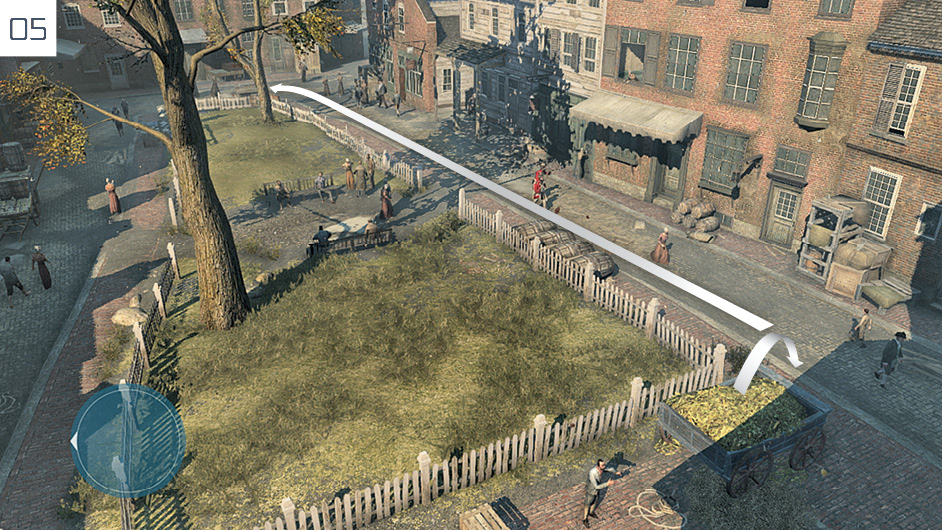
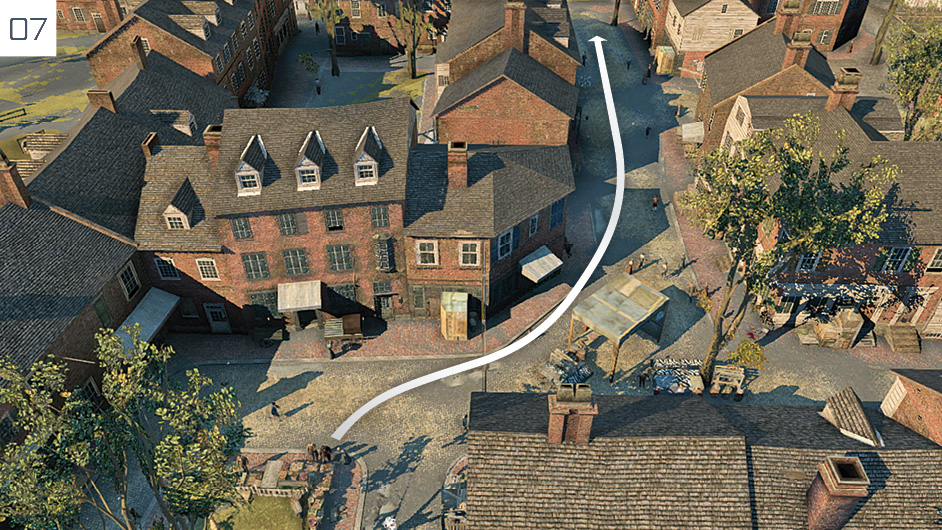
Haytham must now listen in on conversations at sites marked on the mini-map to ascertain the location of Ben Church. Though there are multiple eavesdrop opportunities in the green investigation zone, the steps we suggest here should guarantee that you fulfill Optional Objectives. Begin by leaving the hiding place to follow the path specified here.
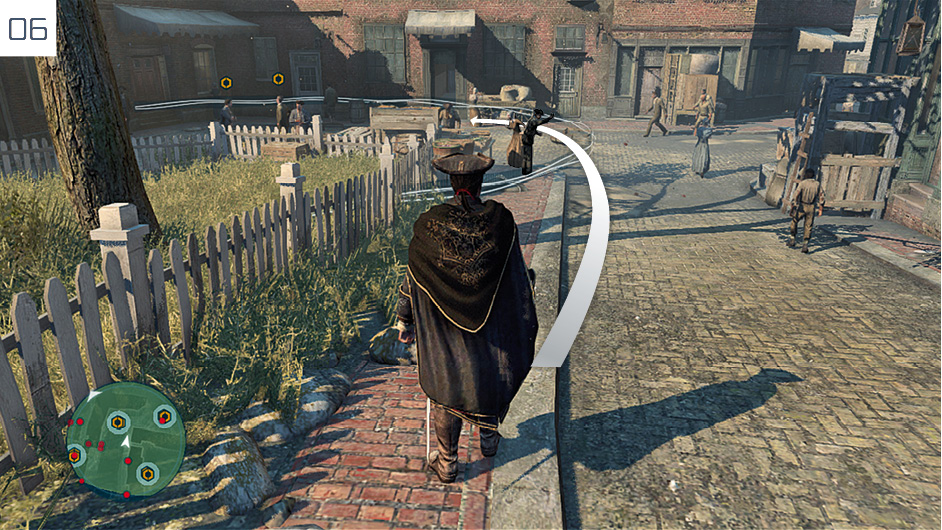
Stand by the produce stall to complete the first of three eavesdrops.
From this position, follow the road leading northeast until you reach the next eavesdrop zone close to a church.
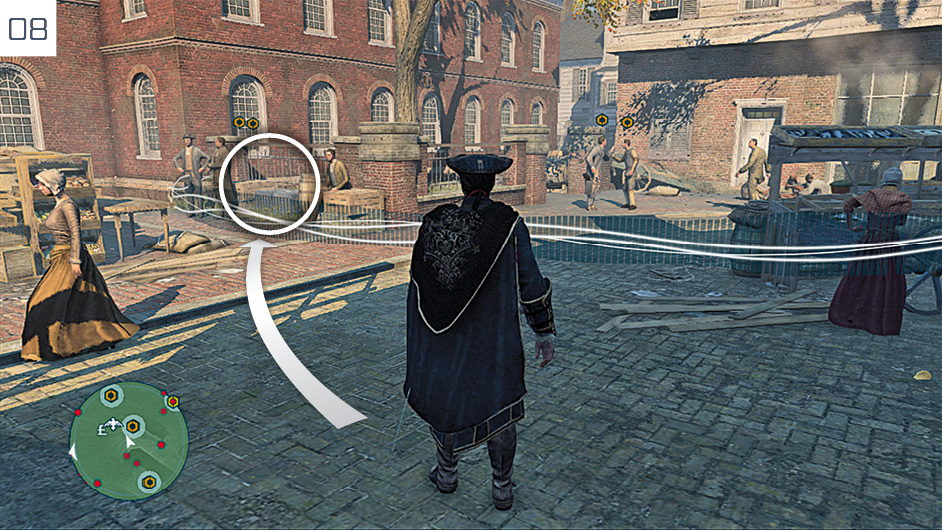
Take advantage of the highlighted Blend opportunity to snoop without incident.
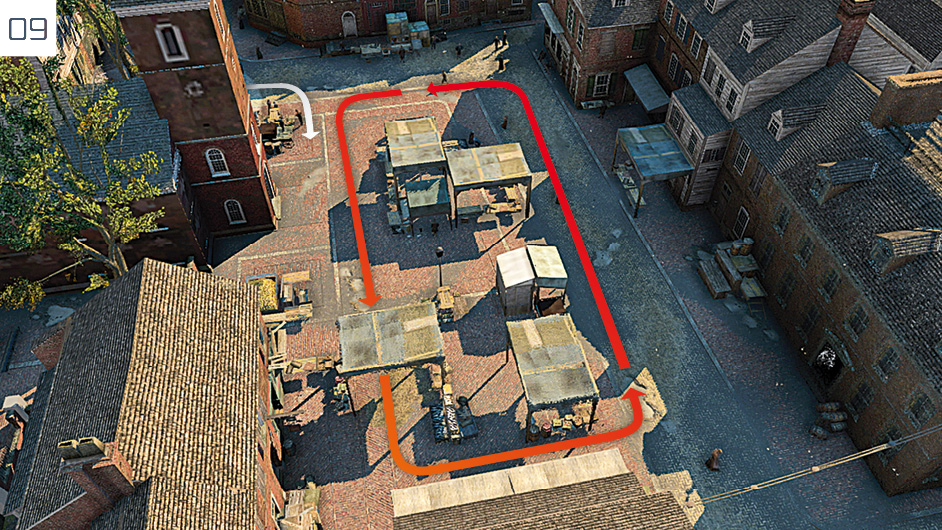
The final feat of reconnaissance is a little trickier, as it entails following two patrolling soldiers. These can be found in the square by the church mere steps away from the previous eavesdrop. Your targets walk a predictable anticlockwise route around the market area. Blend with nearby civilians, wait until they pass your position, then trail them from a safe distance within the marked zone until the task is complete.
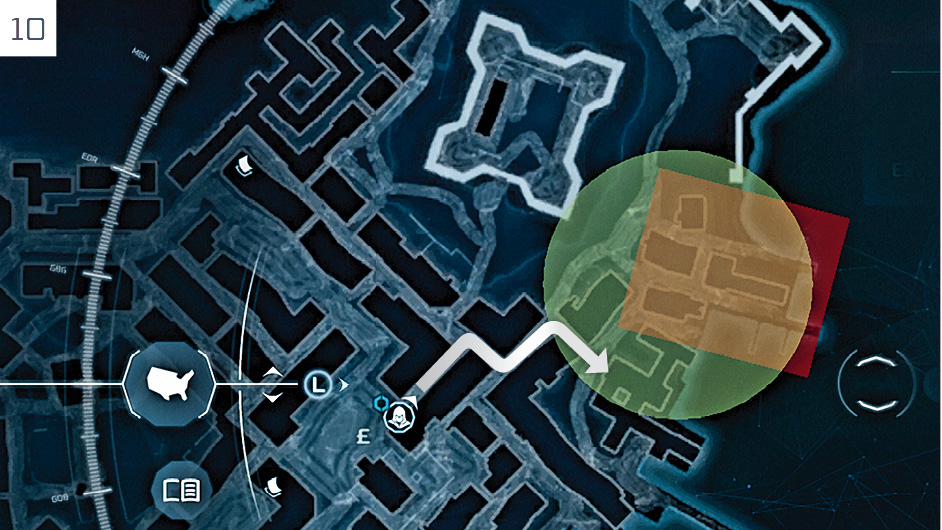
From the site of the last eavesdrop, take the short journey illustrated here to reach the next green investigation zone. It contains a Restricted Area: a zone marked in red where all soldiers will investigate Haytham on sight, and attack if they identify him. Stop when you reach a cart filled with hay.
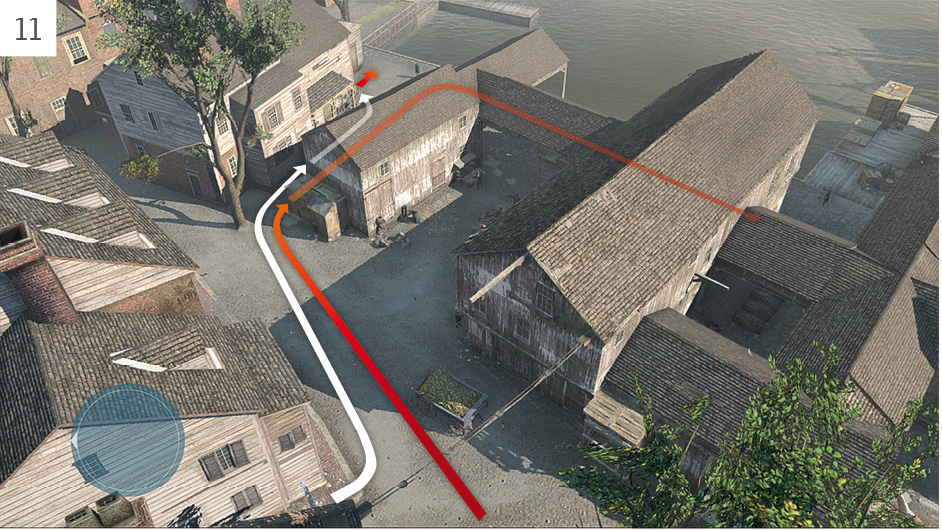
If you are not interested in completing the stealth-based Optional Objective, you can simply fight your way to the warehouse entrance. Those who would prefer a more subtle approach should stop and watch the street to the right by the hay-filled cart. There is a long guard patrol that you need to avoid for a successful infiltration of the area. When they pass and walk into the nearby alley, wait for five or six seconds, then walk calmly along the route marked in white until you see a stationary guard to your left.
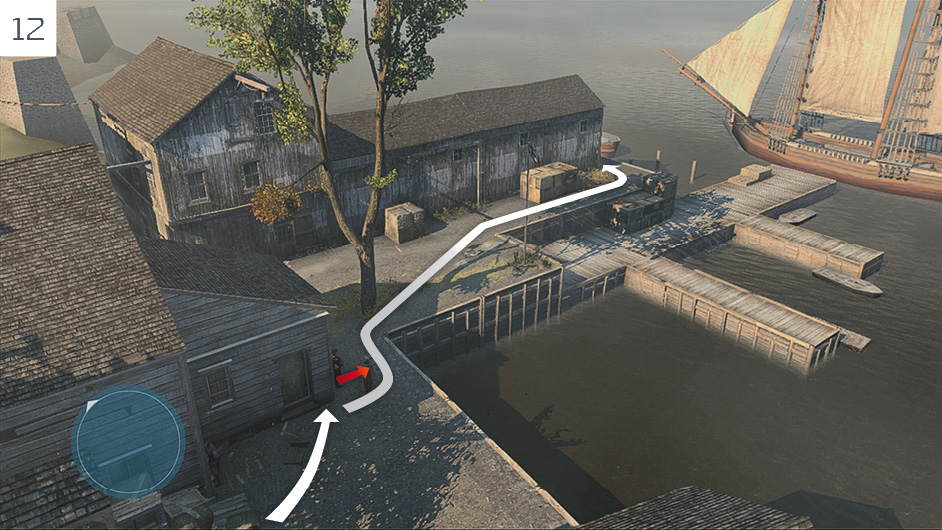
Press against the corner of the building and tap  /
/ to assassinate the stationary guard, then use the Fast Walk ability (hold
  /
/ ) to move to the north side of the warehouse at the heart of the Restricted Area. Approach the doorway and press
  /
/ to trigger a cutscene. Two guards might notice you and investigate, but they won’t have the time to raise the alert if you walk purposefully.
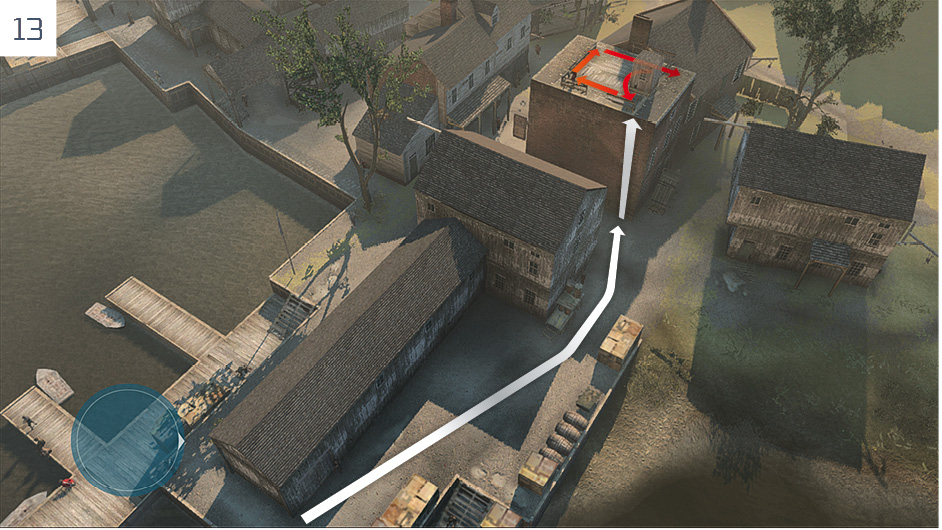
You now have three potential targets to pickpocket in order to obtain the warehouse key. The two on the boardwalks are surrounded by witnesses, but the final one on a rooftop to the west is alone. Climb the ladder and watch his movements. When he presents his back to Haytham, climb up and incapacitate him with a non-lethal takedown (see page 49). It’s not precisely pickpocketing as directed, but rifling through his pockets as he lies prone yields the same outcome. Return to the warehouse.
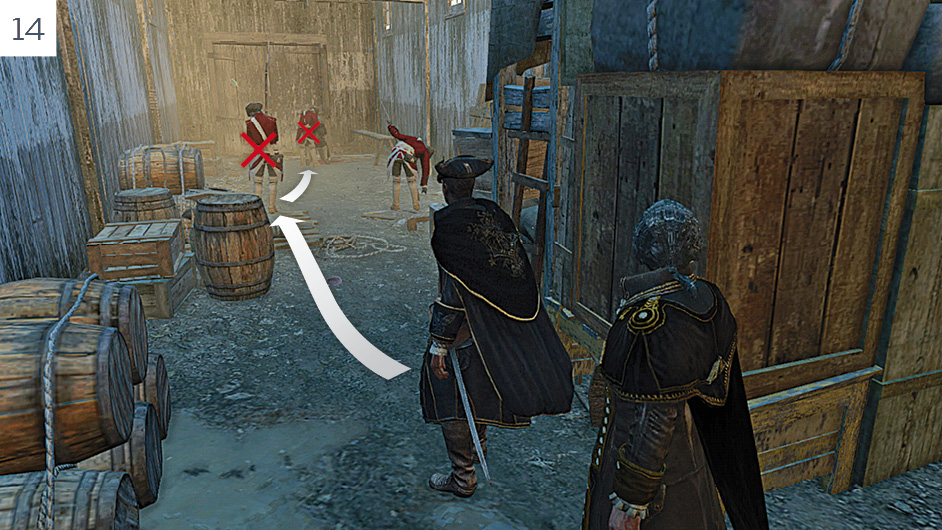
Inside the building, you must assassinate Cutter and his associates silently; should Haytham be detected, Church bears the immediate brunt of the forfeit. Switch to the Hidden Blade and approach the guard on the left. When you strike, Lee will follow suit with the adjacent guard. Dispatch Cutter to complete the Memory.
The Soldier
Mission Overview
|
Optional Objectives |
|
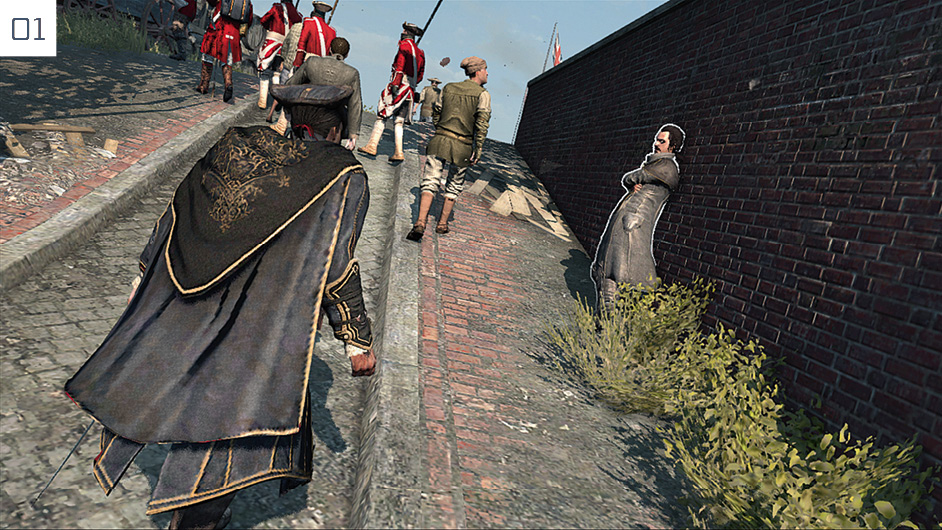
Enter the Green Dragon Tavern to trigger a cinematic; you will be automatically transported to the Memory Start location when it ends. Speak with Charles Lee to begin. After the cutscene, follow Lee to meet with Braddock.
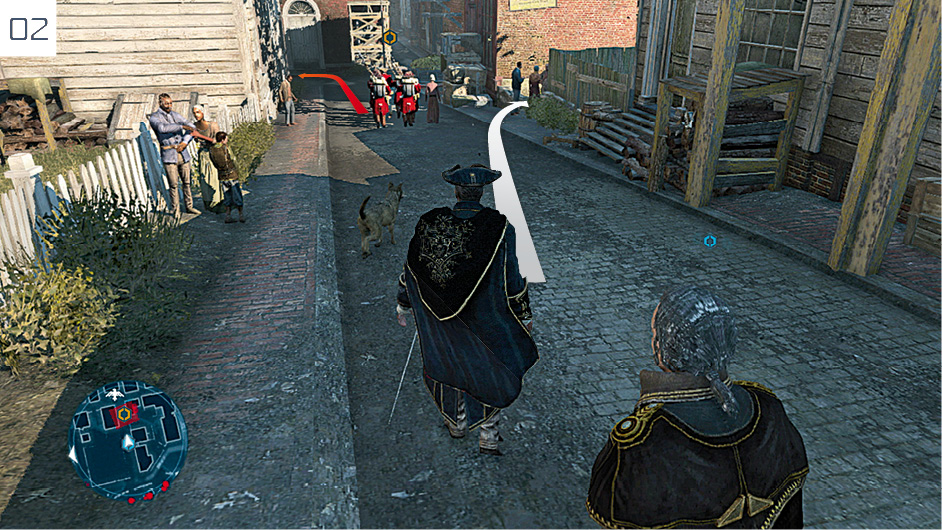
Trail the patrol from a safe distance. After the first portion of the journey along this road, stay behind Lee to avoid detection. Try to limit your potential visibility by Blending with civilians and hiding behind corners whenever possible.
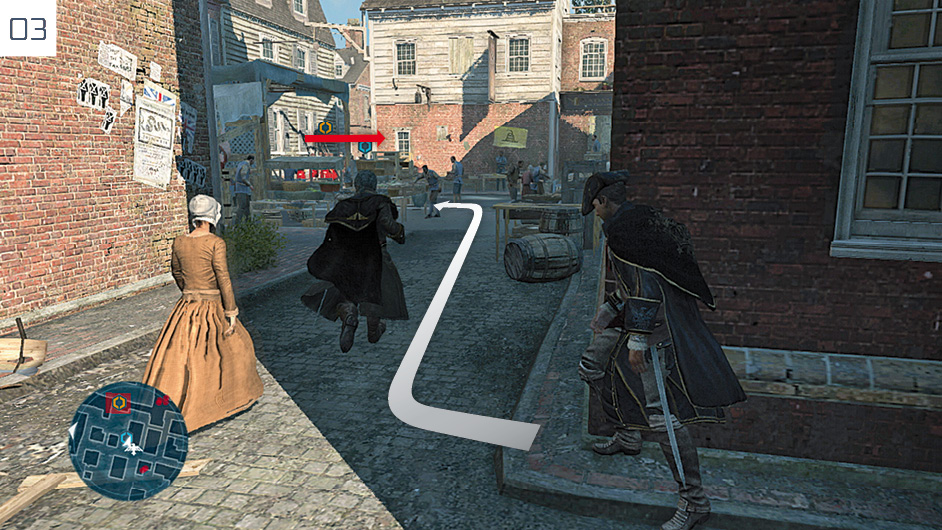
Though the onscreen timer that appears may cause a little anxiety on occasion, following Lee’s prompts and movements will suffice. Your contribution during stationary moments should be to use  to maintain visual contact with the patrol where possible.
Optional Objectives The closing battle of this Memory introduces two Optional Objectives that can be a little tricky on first attempt. Use the following tips to inform your strategy during the fight. If you are attempting a 100% complete playthrough, don’t forget that you can use the Reload Last Checkpoint option to restart the fight if things go awry.
|
 /
/ to break out of the combat stance and position Haytham accordingly to perform a kill or assassination. Note that Charles Lee may kill one of the Snitches as the battle opens, which makes things a little easier. During this part of the mission, the snitches are marked by a
  icon, which makes them easy to identify.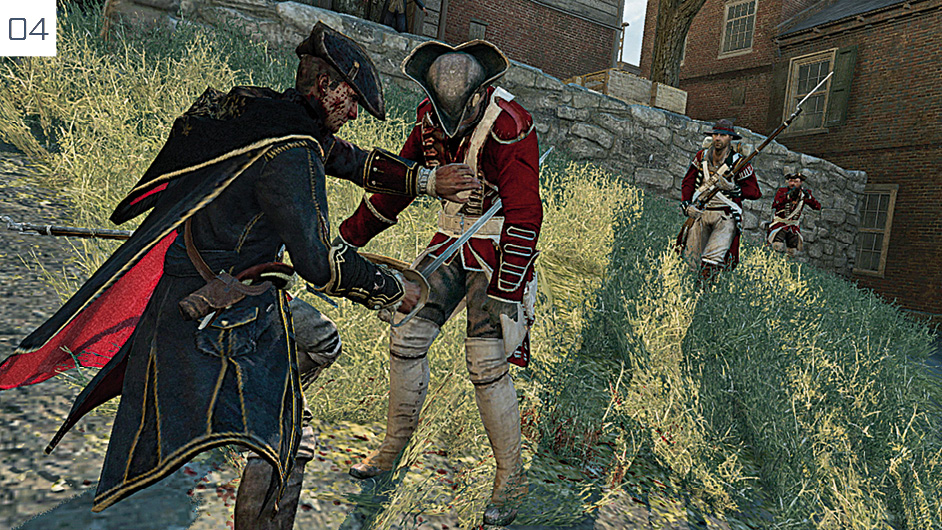
Once Lee has engineered a diversion, follow the soldiers into the back alleys. After the cutscene, you must disable Braddock and cut down his men in a fairly frantic fight. If you wish to complete the two Optional Objectives linked to this battle, see the accompanying box-out. When the final soldier falls, approach the beleaguered Braddock to bring the Memory to a close.
Infiltrating Southgate
Mission Overview
|
Optional Objectives |
|
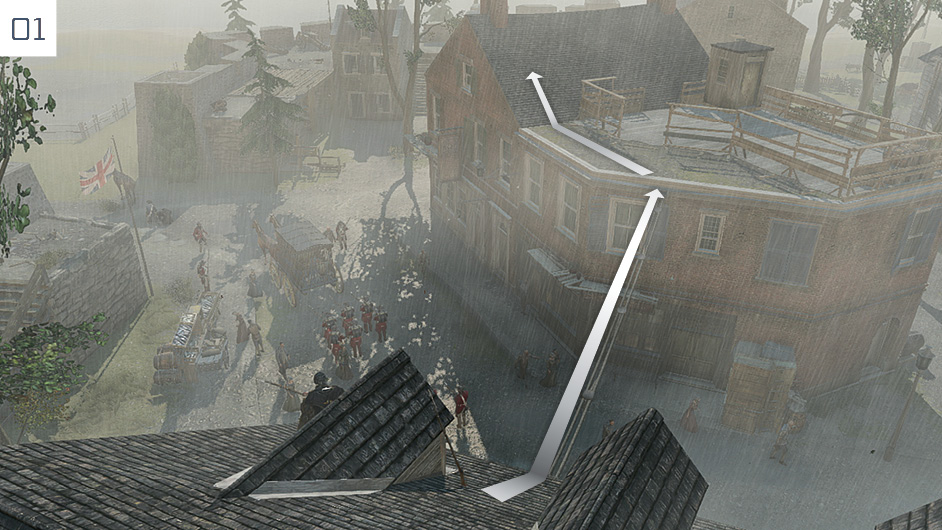
Enter the Green Dragon Tavern and speak with Charles Lee to begin the Memory. After the cutscene, grab the musket and move unseen to the rooftops on the opposite side of the street as the convoy passes beneath.
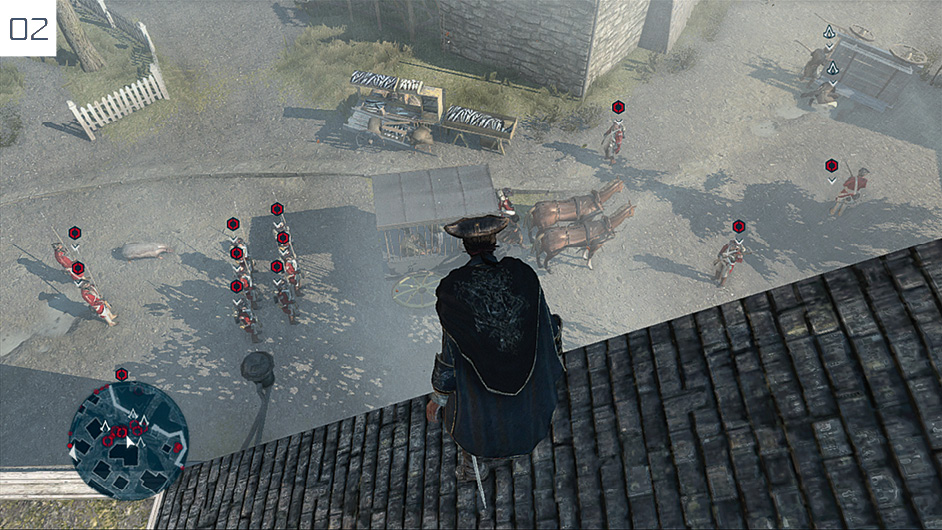
Spring the ambush by shooting one of the soldiers beneath your position, then immediately leap into the fray with an air assassination. With the assistance of Haytham’s cohorts, the battle is brutal but short.
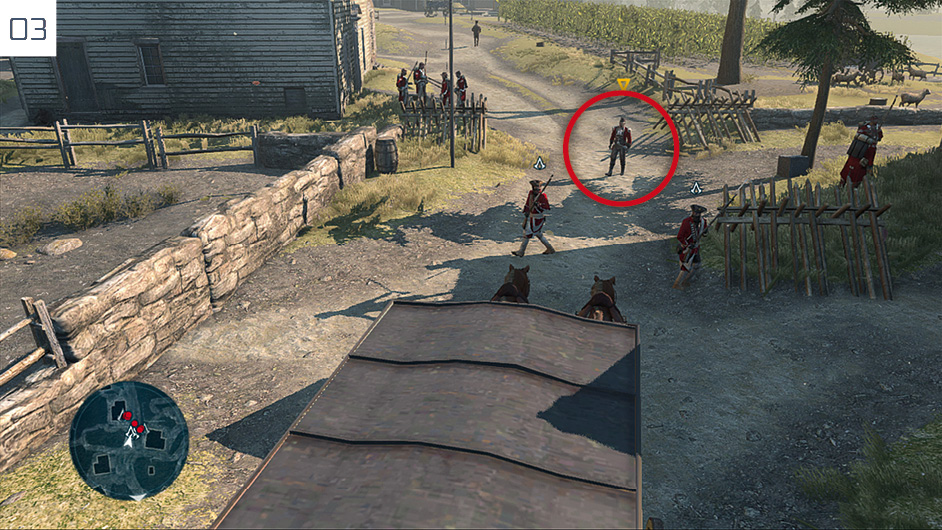
Haytham must now ride the appropriated cart to infiltrate the Southgate Fort. To avoid detection, you can order his allies to assassinate suspicious soldiers by pressing  /
/ . Time the strikes to occur when SSI detection meters appear. The first such flashpoint is pictured here.
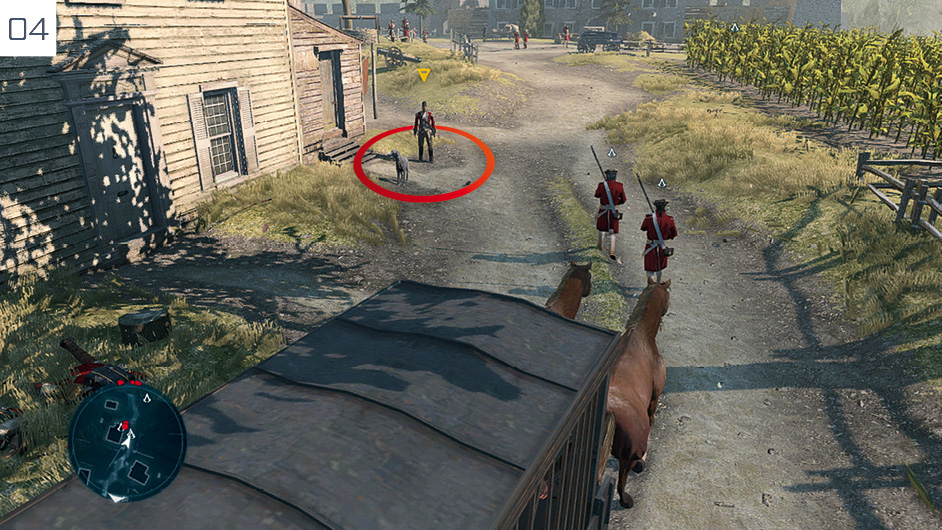
As you draw level with the house on the left, issue a command to silence the guard dog and the officer who arrives to investigate.
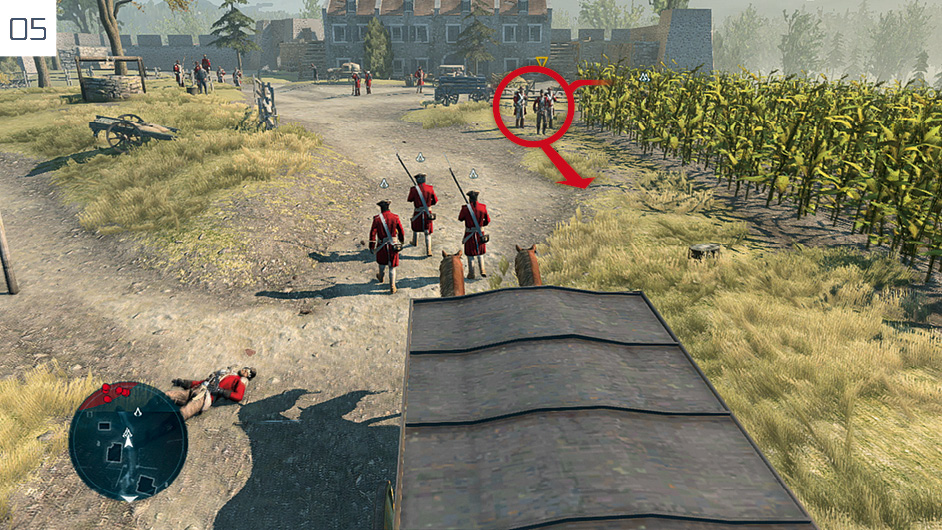
The next group of targets arrives from behind the crops on the right-hand side of the road.
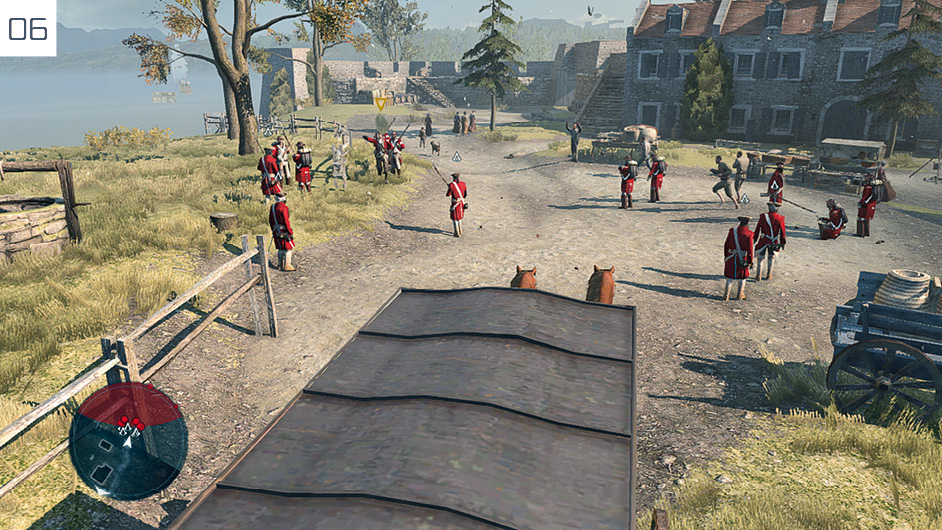
Finally, issue an order to have Haytham’s allies eliminate the last group of guards before you reach the fort.
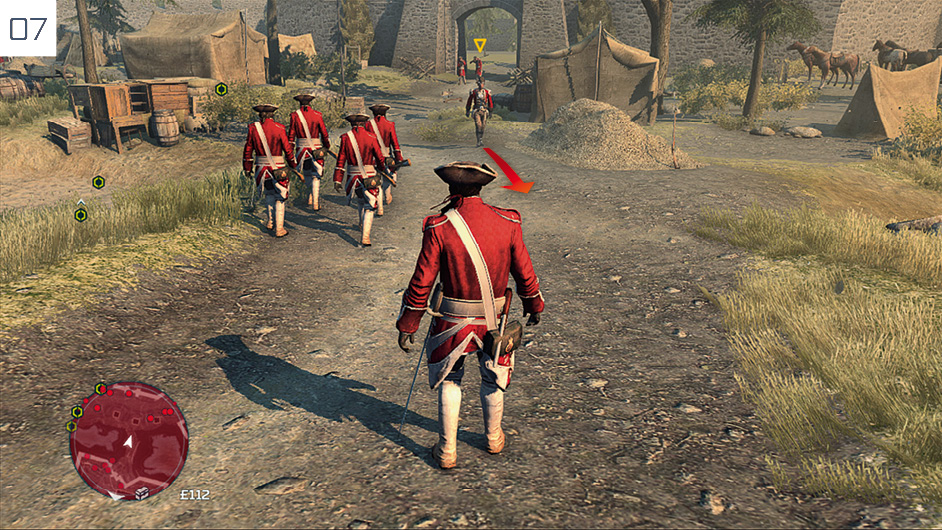
Inside the fort, walk along the path until you see this Officer approach. One of your allies will automatically arrest his curiosity before he can identify the interlopers.
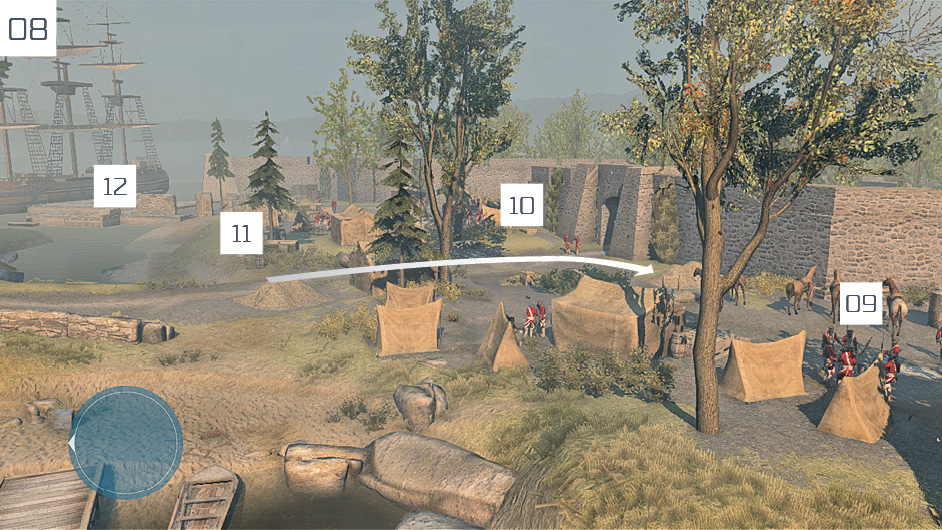
Haytham must complete the next section of the Memory without assistance, remaining undetected as he kills the General and frees three groups of captives. Our walkthrough will explain how to attend to them in the order specified in this screenshot. Follow the route marked here, at a pace no greater than Fast Walk, to move into position for the first step.
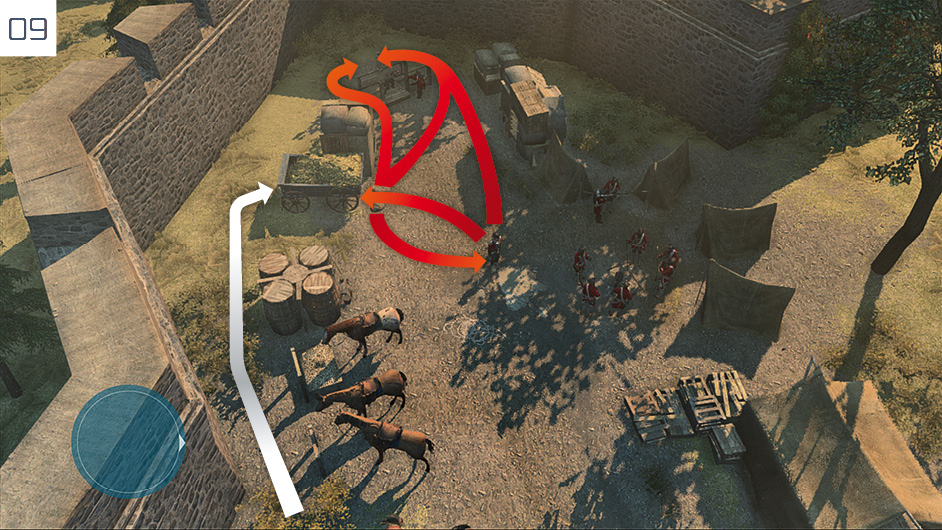
Hide in the hay cart as directed here and assassinate the General (who has a rather complicated and variable patrol pattern, as illustrated in the screenshot) from your hiding place with  /
/ .
.
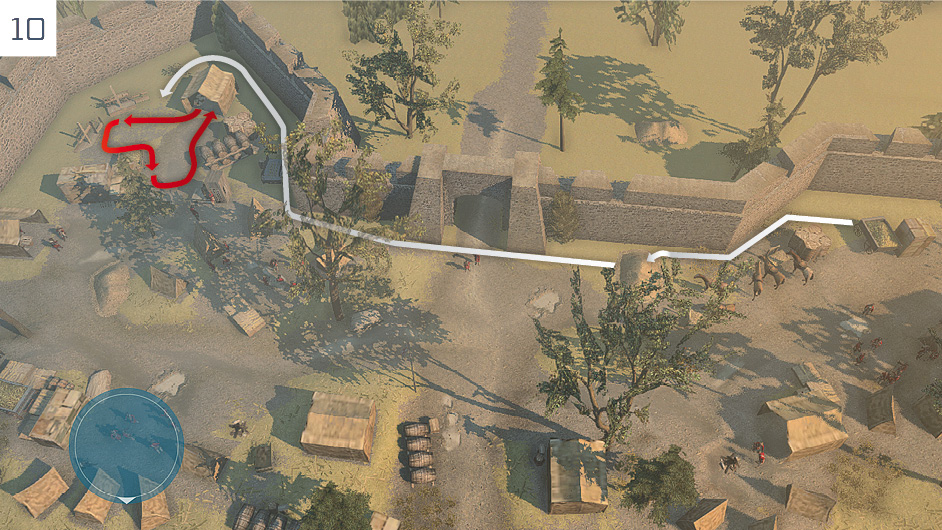
Proceed along the route detailed here (along the south wall) until you reach the Stalking Zone. When the Officer’s patrol brings him to your position, perform a low-profile assassination from your hiding place. Press  /
/ to free the captives.
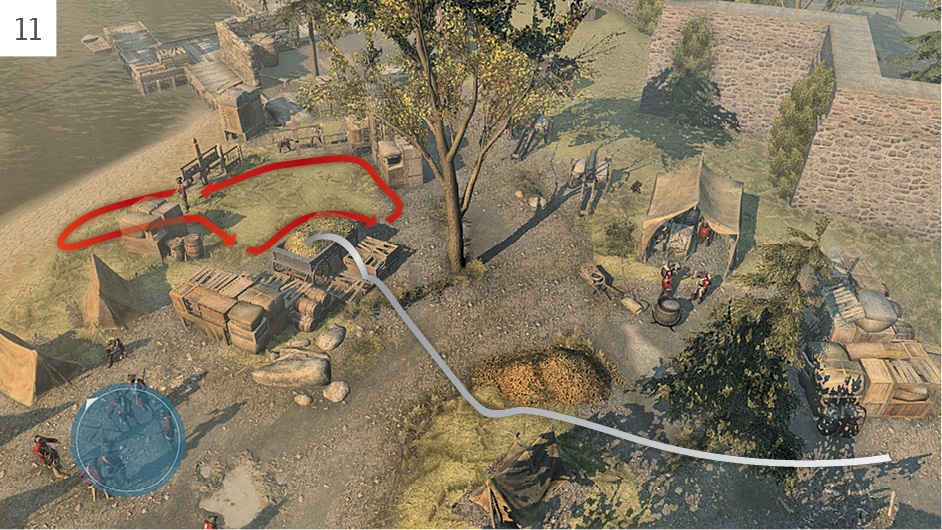
From your previous position, approach the second group of captives to the north. Once again, they are guarded by a single patrolling Officer (who you may need to circumvent from the west if he remains stationary at first). Watch and wait from a safe distance, then hide in the cart when he moves behind the crates. Perform a stealth kill when he gets close; you can then free the slaves.
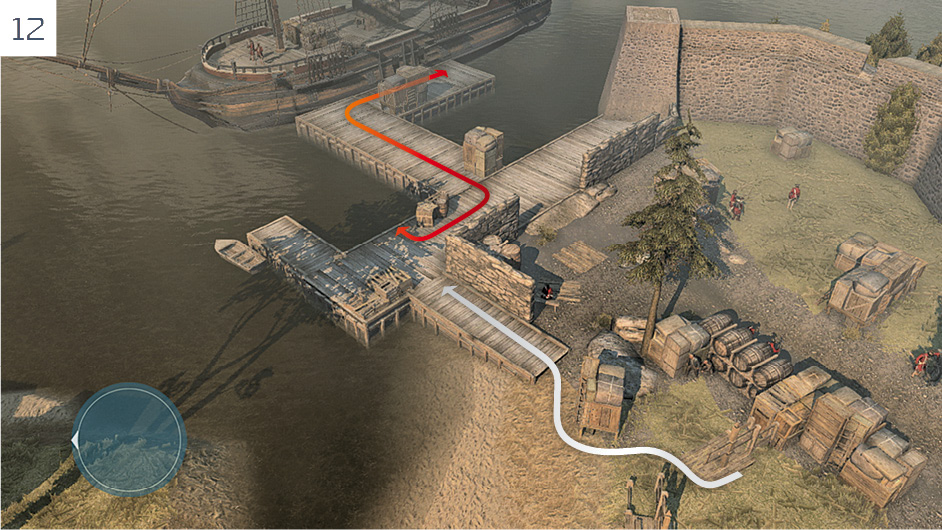
To reach the final captives, you must climb aboard the ship at the dock. Move into position at the wall as specified in the screenshot diagram, then wait for the Officer’s patrol to bring him to your position. When he is highlighted as he nears your position, press  /w to perform a neat and silent corner assassination. (You can also perform a corner assassination from the crates closer to the ship if the Officer is walking away when you arrive.)
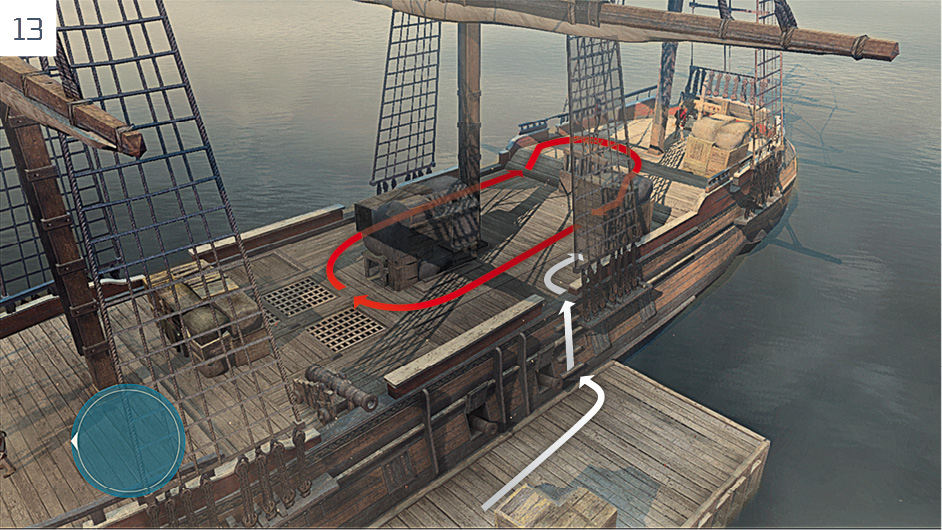
Scale the side of the ship and watch the patrolling Officer; you are free to ignore the two soldiers stationed at the front of the vessel. When the Officer moves to the stern, where the captives are held, move into position by the crates. When he approaches, perform a corner assassination as before.
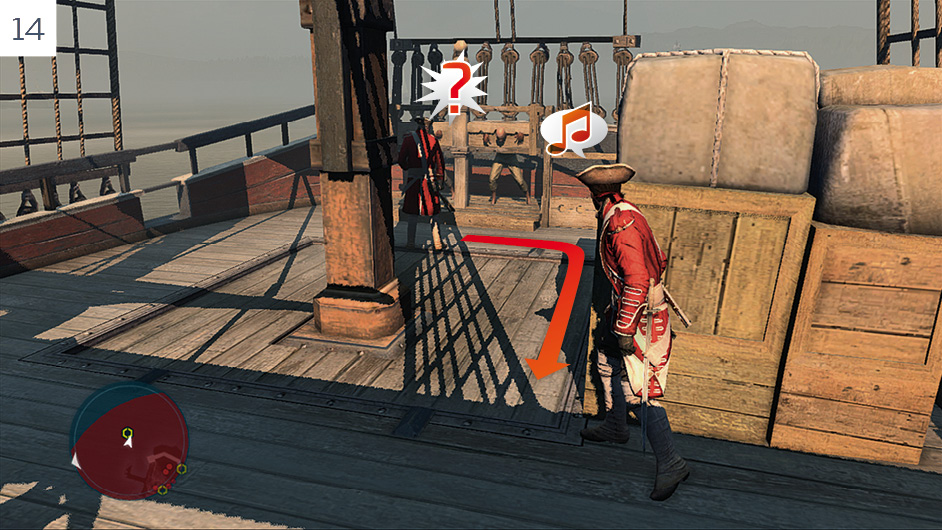
Move up to the next crates, position Haytham at the corner, then tap  /
/ to whistle, drawing the guard into position for another corner assassination – completing the related Optional Objective. You can now free the final group of captives.
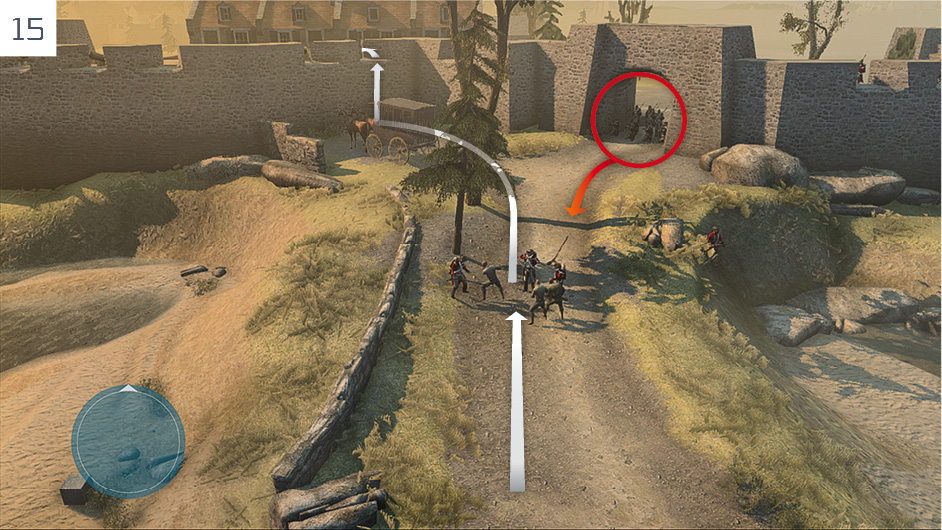
With the General killed in advance, you can now focus exclusively on avoiding firing line damage (see page 54) to complete the final Optional Objective. The first firing line occurs as a tutorial; a second scripted firing line takes place as you approach the archway to the north. Those seeking Full Synchronization should be careful to methodically ensure that a suitable human shield is always within range. Use the barrels behind the wagon to climb the wall to reach Silas.
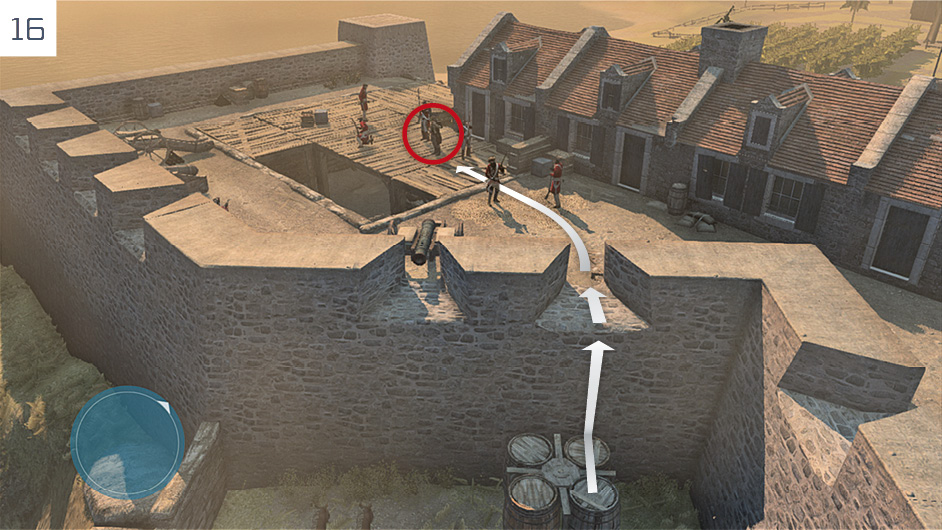
The Memory ends instantly with the death of Silas. We suggest that you approach and kill him immediately and without fanfare; we have highlighted him in this screenshot to help you to identify your target.