
Assassin's Creed III Guide Walkthrough
Sequence 11
Battle of the Chesapeake
Mission Overview
|
Optional Objectives |
|
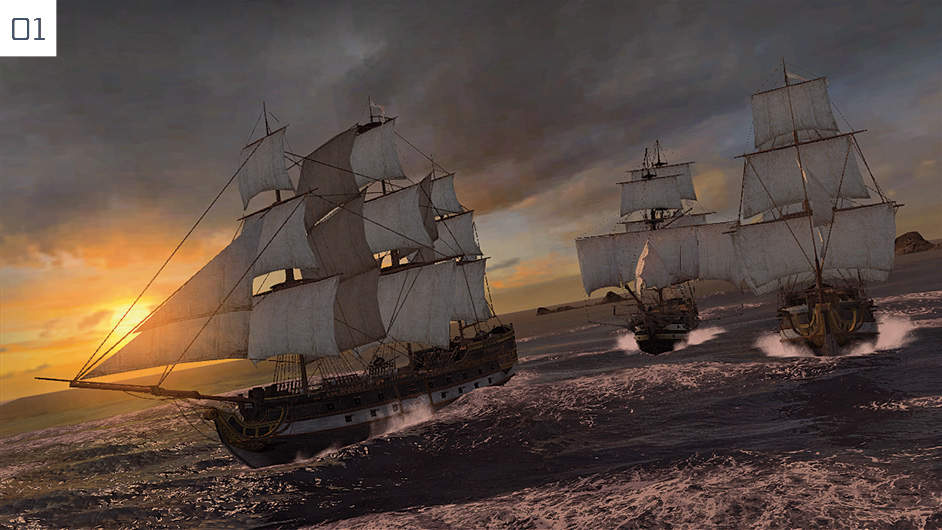
Head down to the Aquila and speak to Faulkner to access the naval map, then select the  icon to begin this Memory. Sail to the waypoint, being careful to avoid collisions with allied vessels. If you are not invested in Optional Objectives, you can simply adopt an aggressive and efficient strategy to beat this mission. If Naval Missions are not your forte, see page 171 for a variety of useful tips and guidelines. Our walkthrough here is primarily designed to assist players in their quest for Full Synchronization.
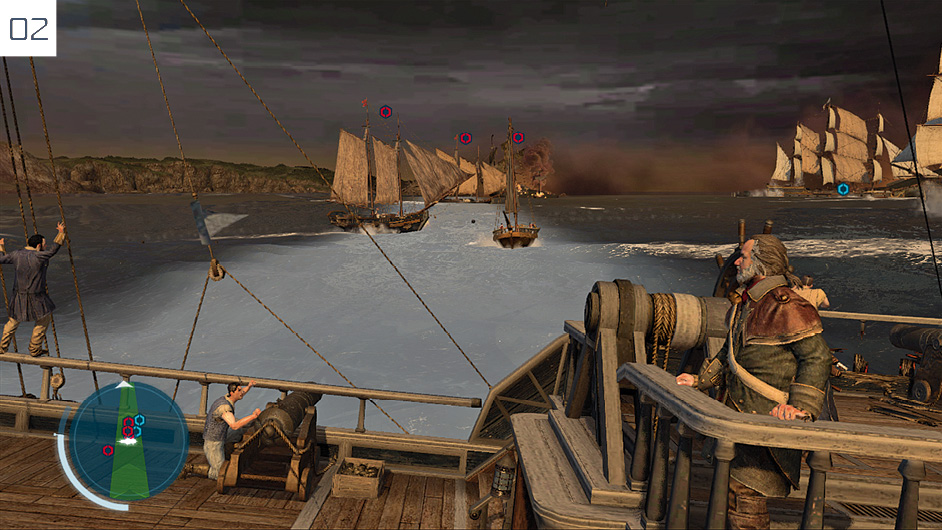
The opening battle presents your best opportunity to destroy three ships with a single broadside to complete the Optional Objective – and, indeed, this is something that you must attempt to complete immediately. Sail for the ships directly ahead, then turn when you draw close, to sink three schooners with a broadside. If you intend to obtain Full Synchronization, it’s wise to restart if you fail: there is a checkpoint just before the battle begins.
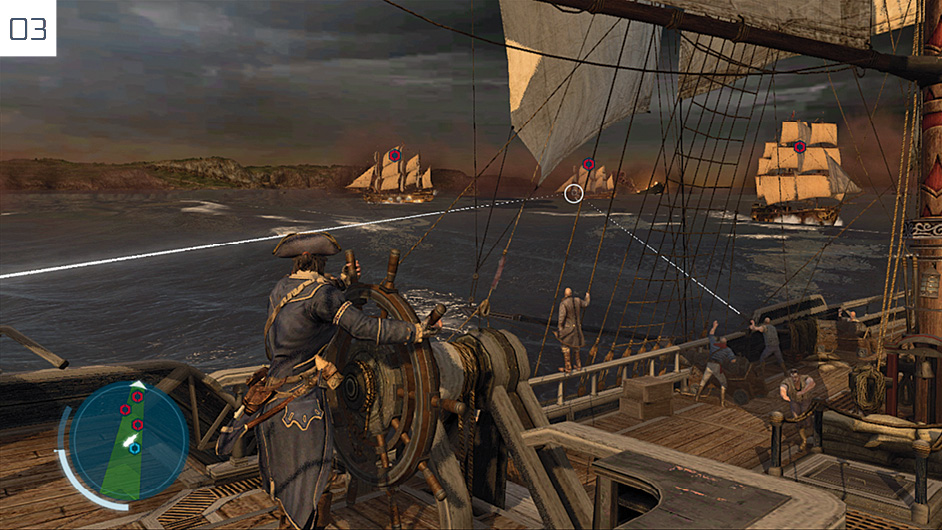
The next part of the engagement features several smaller vessels and a single frigate, which you can destroy by any means you prefer. Once the final ship has been sunk, three frigates will engage the Aquila and its sole remaining ally. To complete the Optional Objective that appears on their arrival, you must destroy two by hitting their powder stores with the swivel gun. As luck would have it, the ship to the right of the formation is vulnerable immediately: sail straight towards it, line up the swivel gun to hit the area marked by a white circle (as shown here), then release when the target is red for an immediate kill. The second is a little more demanding. Pick a ship, hit it with a broadside to weaken its structural integrity, and “scan” it by activating the swivel gun. If it alights on a weak point, steer and aim accordingly. If not, line up another broadside and try again.
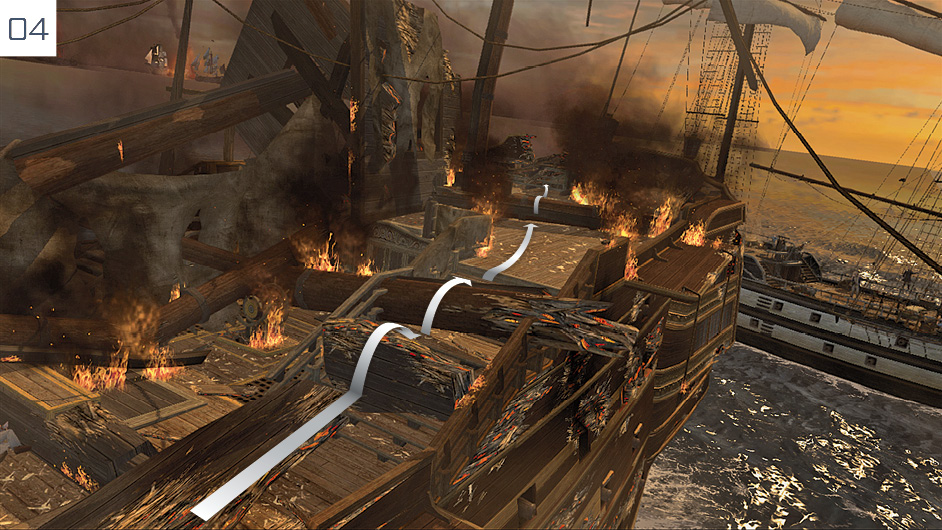
Sail into the green circle to locate the enemy ship, then immediately ram the Man-of-War to initiate boarding. Once Connor lands on the deck, remain stationary and defeat the first five opponents that engage him with Counter Kills to complete the final Optional Objective. With this accomplished, run along the deck and charge the firing line to disperse it. Once the initial group of soldiers has been eliminated, engage the captain and kill him to trigger a cutscene. You then have ten seconds to sprint through a short free run course to escape.
Lee’s Last Stand
Mission Overview
|
Optional Objectives |
Preparation |
|
|
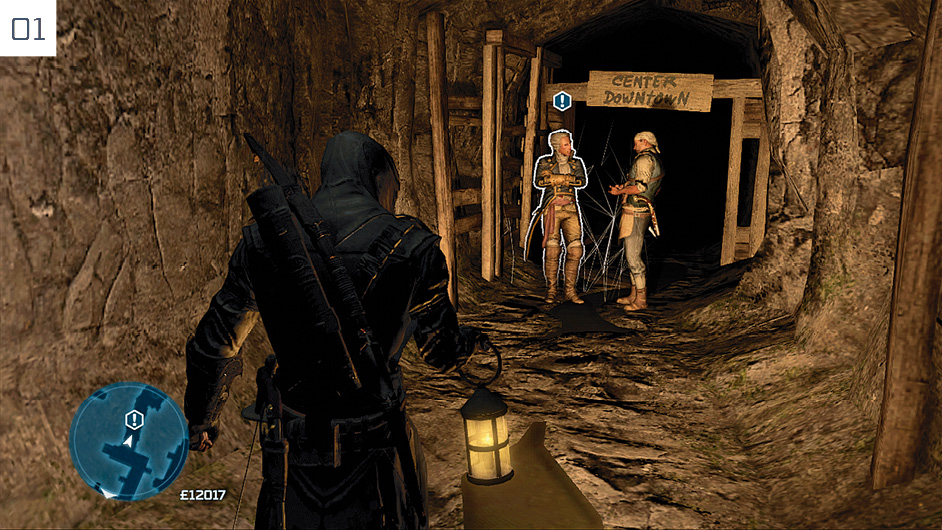
Connor lands on the east side of New York, with the next destination in his story to the southeast. When you are ready to begin, enter the New York Underground at the position marked by the customary  icon. Take a left turn when you reach a junction and you will eventually arrive at the Center Downtown exit: the official Memory Start position.
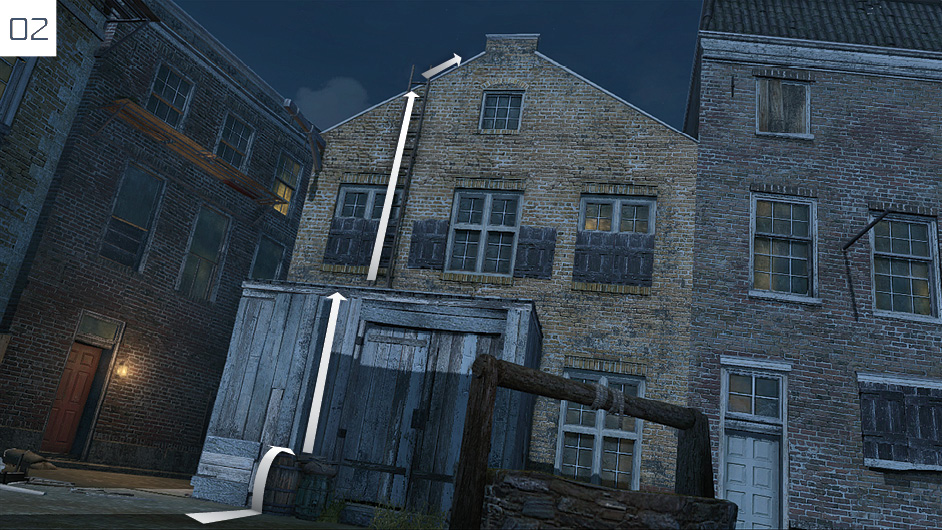
There are three Optional Objectives revealed when Connor reaches the surface. Start with the obvious move of assassinating the guard standing beside the well, then scale the building to the southeast and climb the ladder.
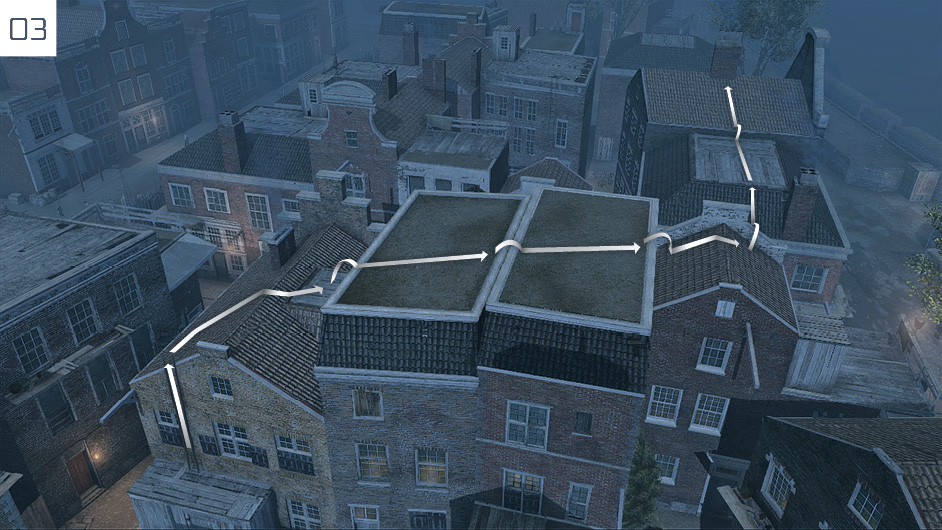
From the ladder, turn to the right and sprint over the two flat rooftops to reach a sloped roof just beyond. When you reach the white decorative frontage to this building, you will need to quickly perform a manual jump to leap to the next house in line.
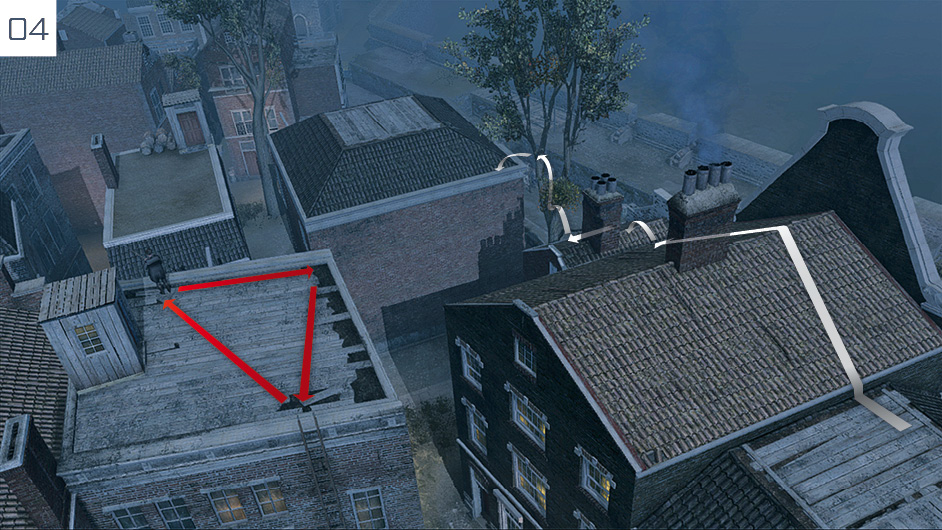
Stick to the right-hand side of the first roof to avoid the guard on the roof to your left: in fact, ignore his SSI meter entirely when it appears. If you run this section smoothly, it doesn’t matter for a second. Once you jump to the lower building, run to the right-hand side of the chimney and leap to the branch, then immediately jump to the building ahead.
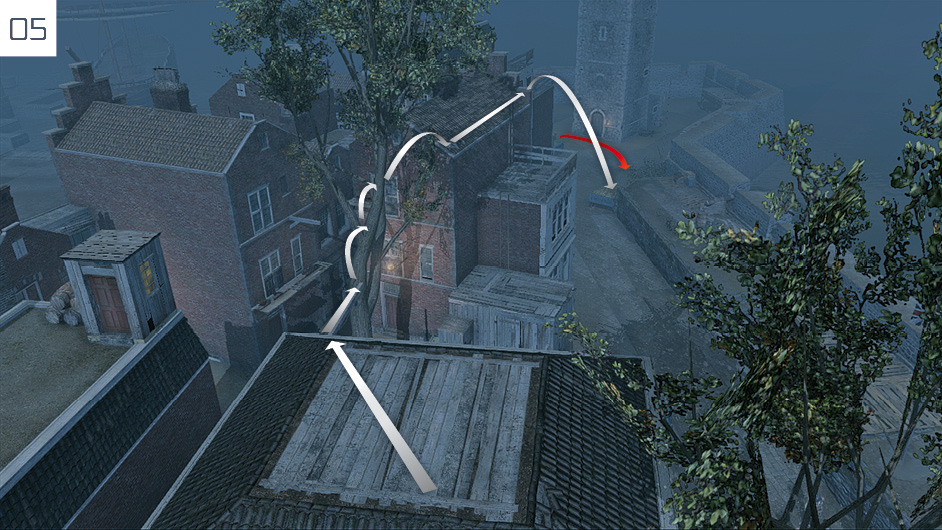
Sprint over the rooftop, then leap through the two V-shaped sections in the tree to reach the next building. Sprint along the right-hand side of the sloped rooftop and perform an immediate Leap of Faith into the hay cart below. There is a guard who moves between this cart and another nearby, so be ready to perform an immediate stealth assassination on landing. If he is further away, wait for his return.
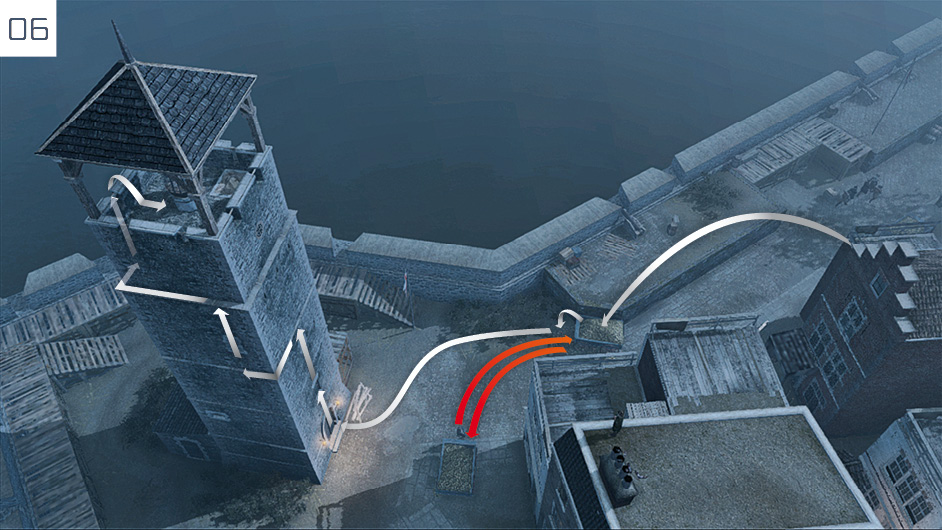
We repeat the guard’s precise movements on this screenshot for ease of reference. After his death, the final step is to climb the tower. Once again, this is an instance where you must simply ignore detection indicators and follow the route with speed and at least a modicum of precision. At the top, press  /
/ to light the signal fire.
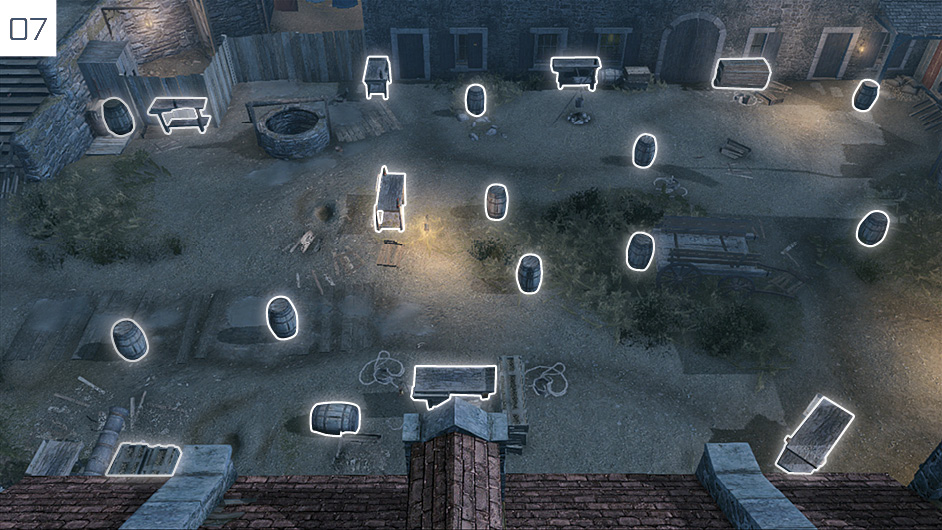
After the signal fire has been lit, move towards the waypoint to begin a climactic showdown. In the fight that ensues, position Connor next to the items highlighted here and press  /
/ as your opponent launches an assault, to execute contextual counter attacks. Once you have performed three of these, the closing cinematics of this Sequence will begin.