
Assassin's Creed III Guide Walkthrough
December 1, 2012
Power Source #2
Real Life = No AFS
Detection by security forces will automatically return you to a previous checkpoint during the infiltration of the stadium, so be very wary of the security forces stationed throughout the area. With the exception of Social Status Indicators when guards can see Desmond, the usual trappings and trimmings that make life relatively easy in the Animus are glaringly absent during this mission. Blending, for example, is not accompanied by the traditional sound effect and visual confirmation. Instead, you must trust in stealth abilities and techniques acquired in the Animus to work without the feedback you are accustomed to.
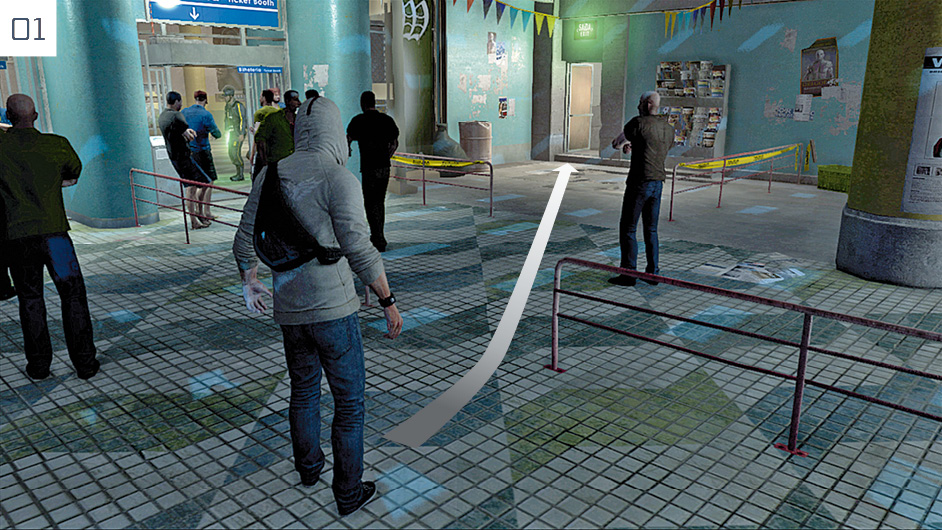
Walk along the tunnel and take the second left, up the staircase. Approach the queues to trigger a cutscene, then walk through the door to the right of the booths, as pictured here.
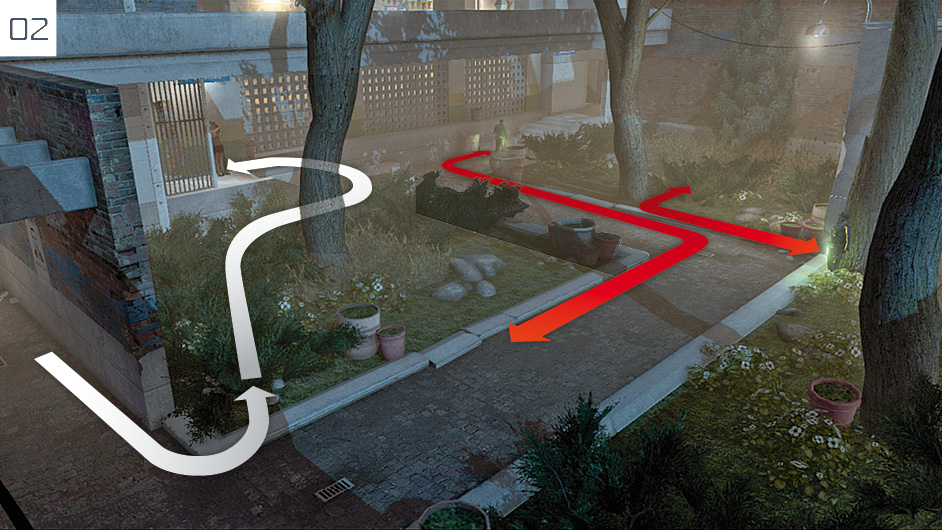
You will encounter a patrol in this area. Both guards walk together with their backs to Desmond when you first enter; take this opportunity to move into the Stalking Zone. They soon break and follow the patrol patterns marked here. When both are facing away from Desmond, go through the left-hand door by the couple locked in a perpetual embrace.
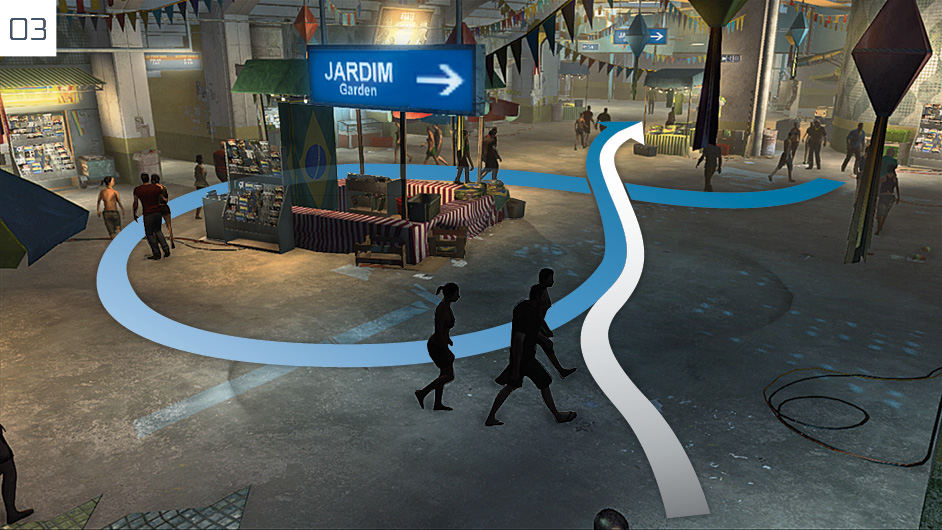
Once inside, there are guards questioning the crowds as they search for Desmond. Many civilians in this area appear to move in a broad figure of eight pattern. Merge with a group as directed here, and you can pass the first guards without incident. If you have issues with identifying the security forces at any point during this mission, just activate Eagle Vision to imbue them with a clear red highlight.
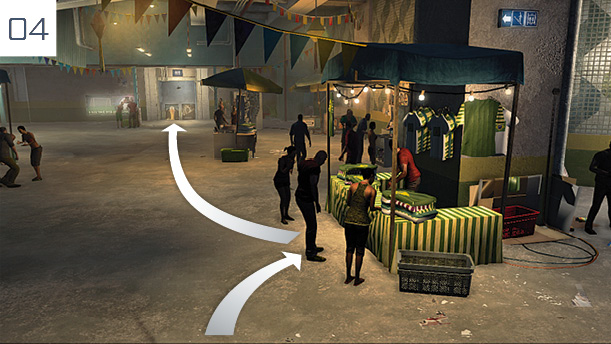
Blend at the stall if required, then calmly walk into the restroom area and take the second exit to bypass the security checkpoint.
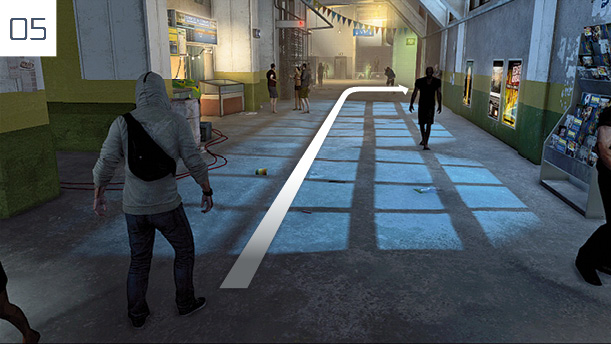
Take a right when you reach the green sign to avoid another security checkpoint.
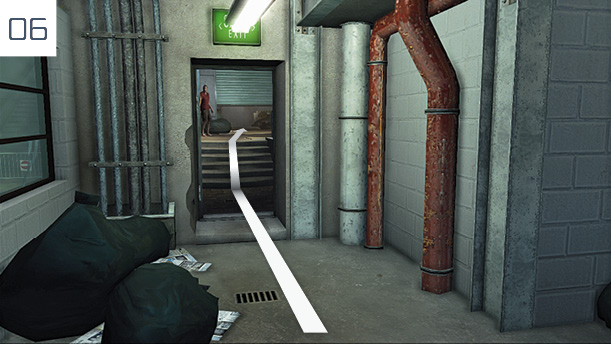
Cut through the maintenance area and duck beneath the partially open shutter door.
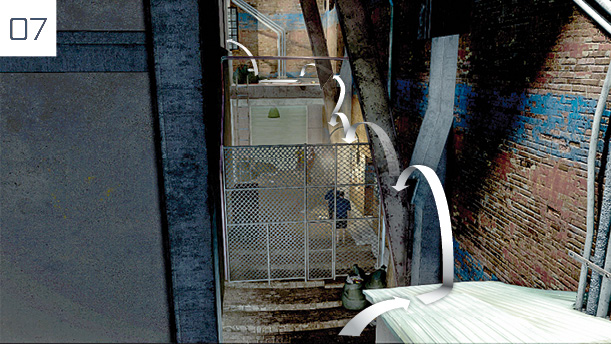
Climb onto the low roof, then jump over the fence to the other side. Clamber through the open window.
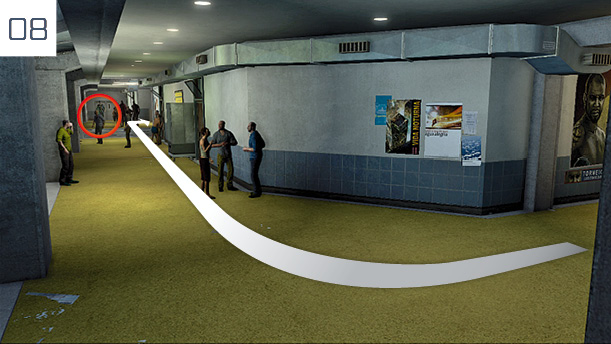
Walk up the stairs and follow the sole guard along the corridor until he comes to a halt, then Blend with the group of civilians closest to him. Once he walks past, enter the door on the right.
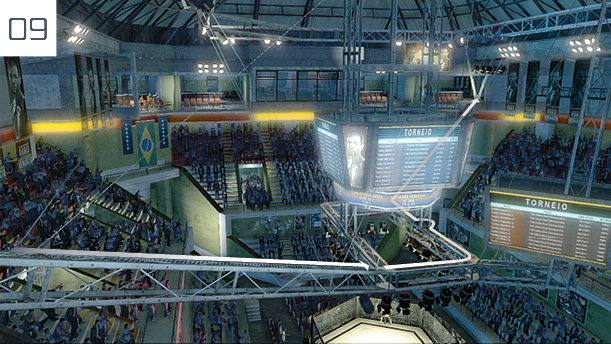
Climb out onto the catwalk and follow the route detailed here to cross to the opposite side of the stadium.
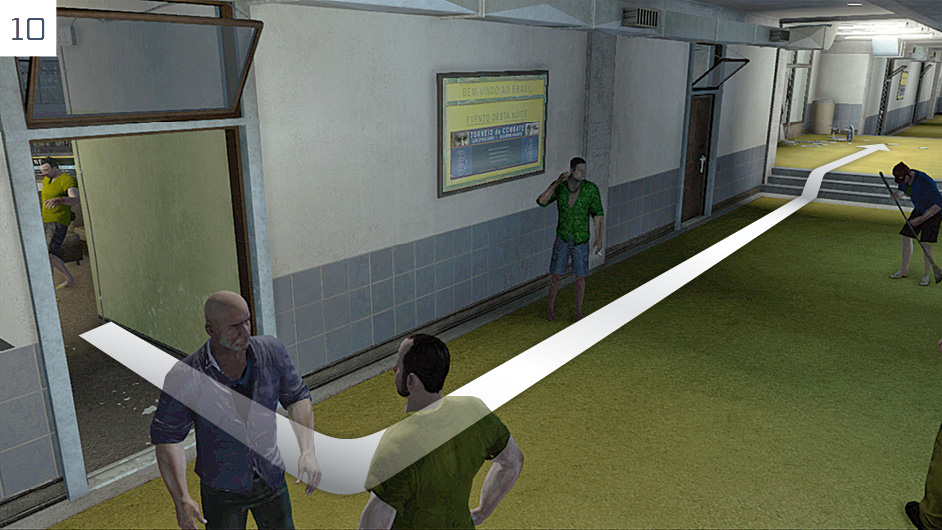
Take the sole exit to reach a corridor, then walk along it until a cutscene begins.
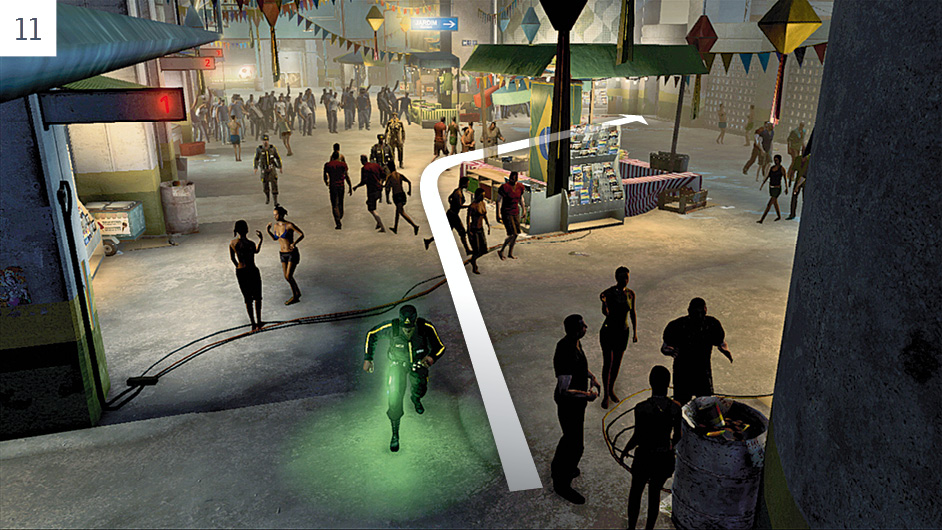
The previous restriction on open conflict is lifted as you chase Daniel Cross. The pursuit is linear, taking you back into the area that you infiltrated earlier. Though you can run straight from the entrance hall back into the small garden for a fight with Cross and several guards, there is a semi-secret alternative. Stop and fight the guards in the hall, then move outside and sneak up behind Cross for a silent takedown. This also enables you to eavesdrop on his phone call, if you wish. You must now retrace your steps to the Metro exit. Follow the blue signs until the mission ends with a cinematic.
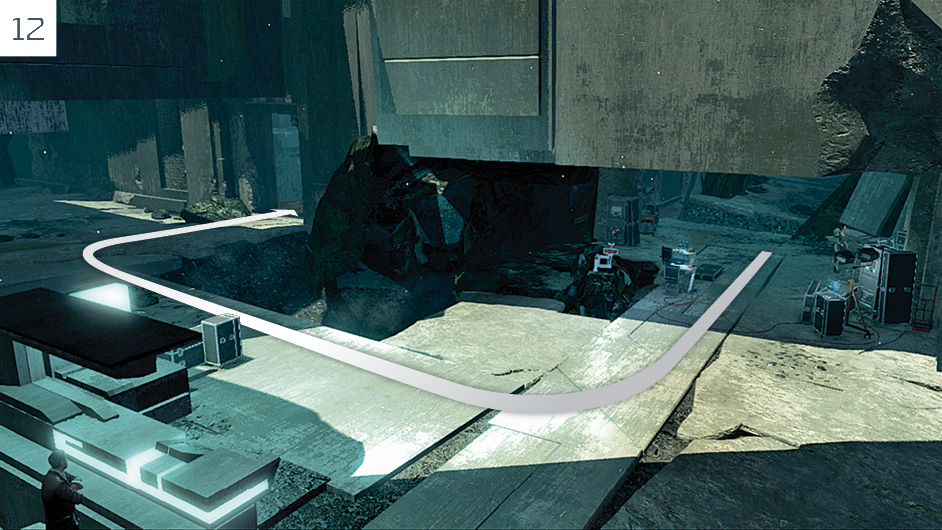
Back at the Grand Temple, we suggest that you put the second Power Source in place before you return to the Animus. This requires that the previous Power Source has been inserted in order to open the doorway shown above: see page 92 for details.
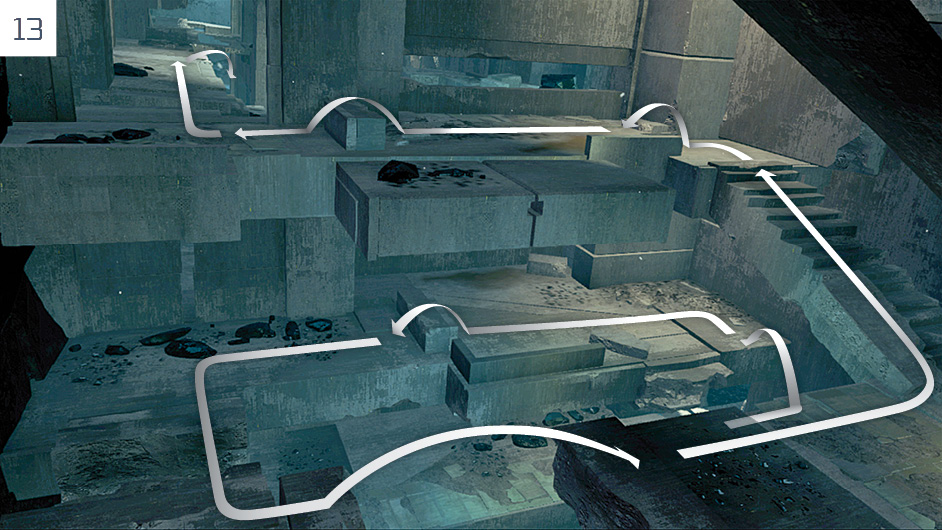
Jump over the broken stairways to reach the top floor of this new area, then enter the corridor. Glance briefly to the right: though you cannot reach it from here, the ghostly apparition of Juno highlights the area where the Power Source must be placed. Halfway through the corridor, drop to the bottom level and enter the small room.
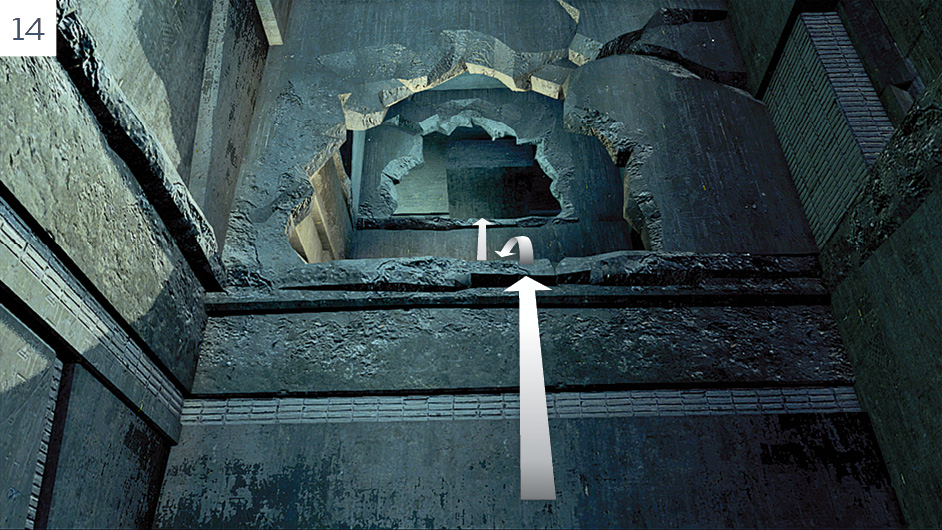
From inside the room, climb the two walls.
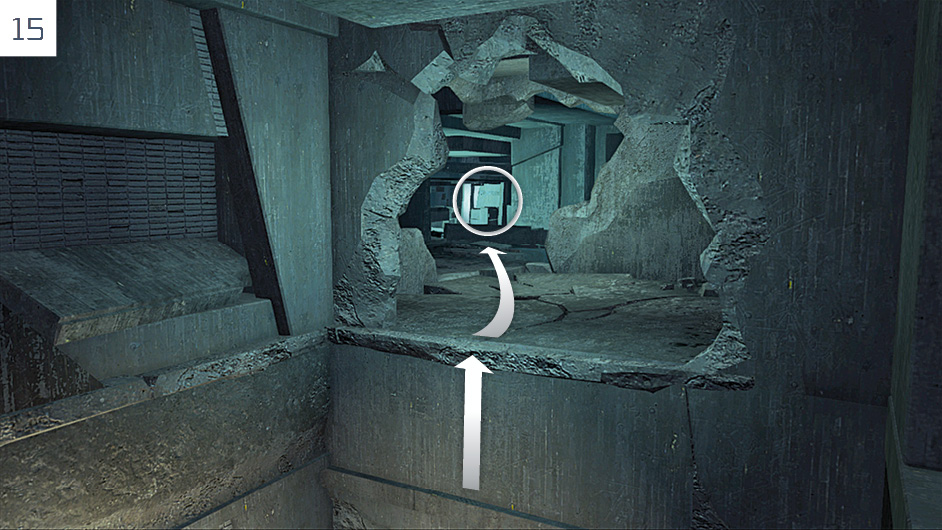
Finally follow the route highlighted here to place the second Power Source. You can then check Desmond’s emails at the terminal and speak to the other Assassins before you return to the Animus.