
Assassin's Creed III Guide Walkthrough
Sequence 05
DAVENPORT Homestead
A Boorish Man
Mission Overview
|
Optional Objectives |
|
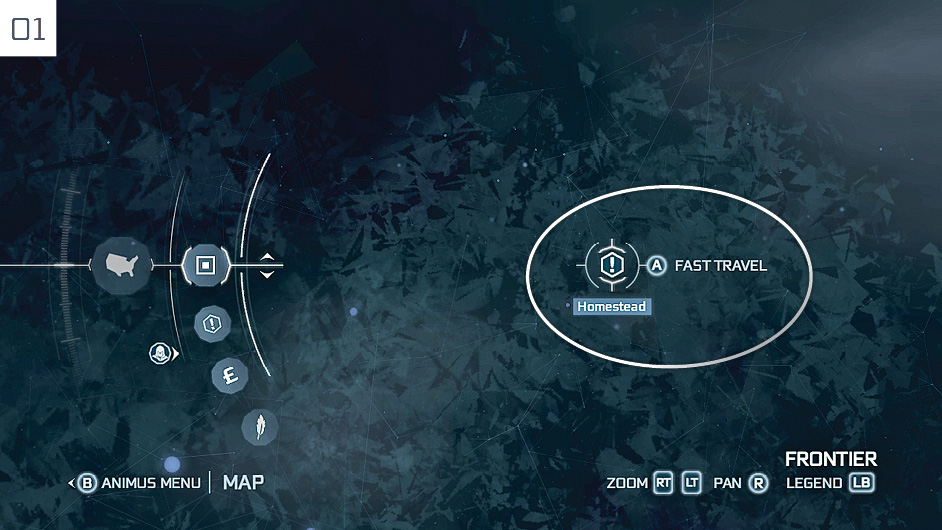
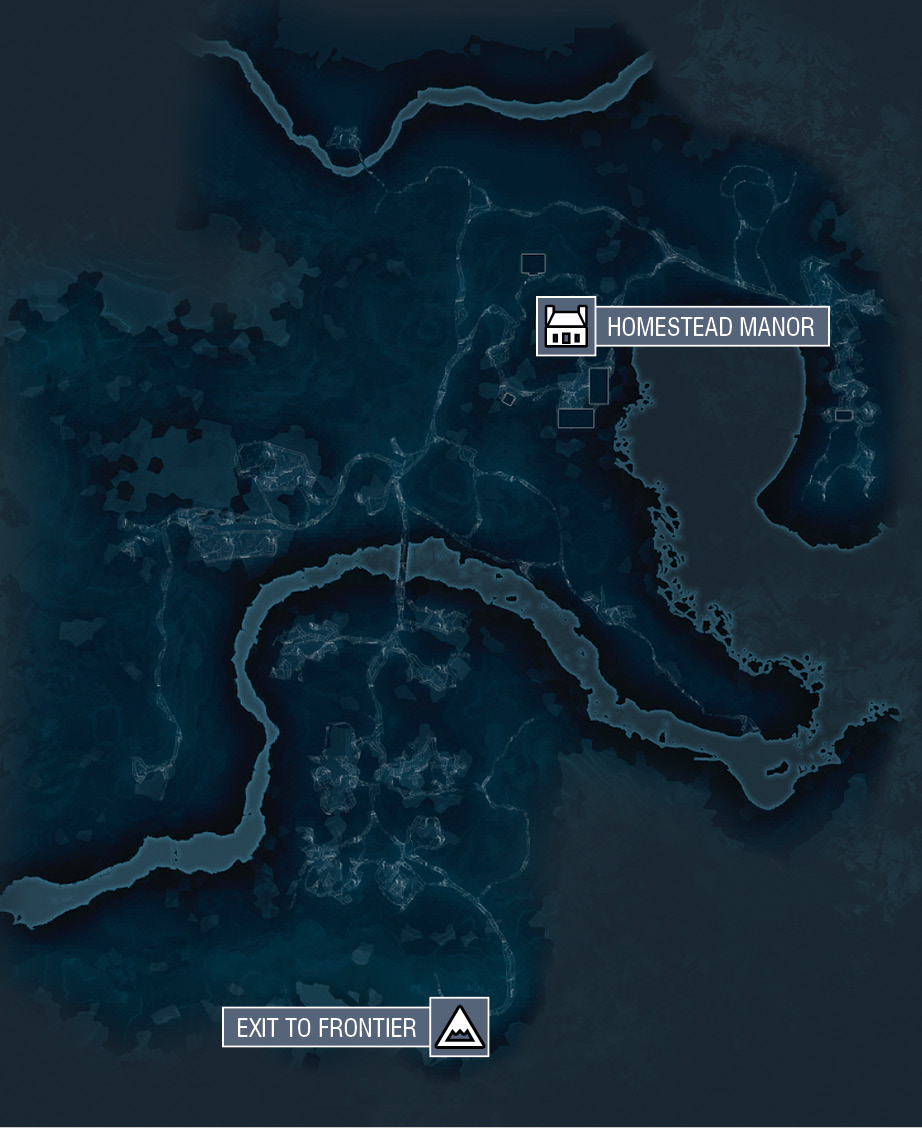
At the start of this Sequence, you must travel to a new region: the Davenport Homestead. You can either move to the map transition on foot, or select it from the main map to Fast Travel instantly. The Homestead is smaller and much easier to navigate than the rugged Frontier wilderness and urban sprawl of Boston. Perform a Leap of Faith from the log directly ahead of your starting position, then follow the trail to reach the Memory Start marker.
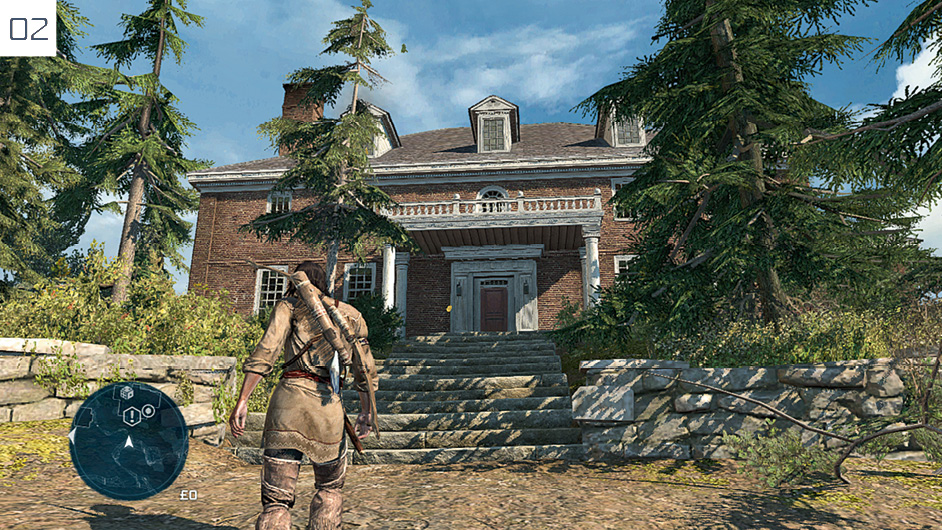
Approach the front door of the Manor, and press  /
/ to begin the Memory. The events that follow are designed to further the narrative, not challenge your gaming prowess, so simply run (and, on occasion, climb) to waypoint markers until Ratonhnhaké:ton awakes in the stable during a storm.
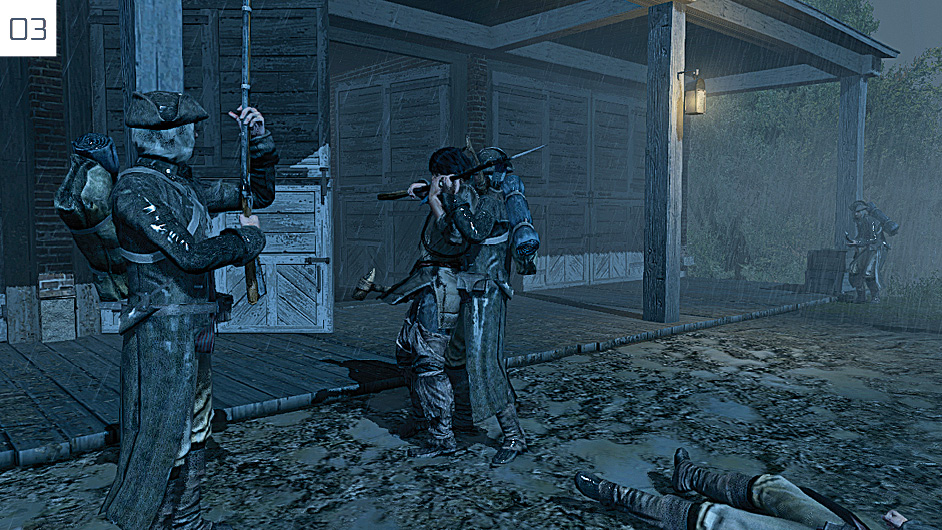
The mission’s sole Optional Objective is tied to this fight, so we recommend a cautious strategy based around Counter Kills. Some of the assailants may attempt grabs; press  /
/ to escape. If you feel that you are likely to fail the Optional Objective, feel free to return to the previous checkpoint to try again. When the brawl ends, and the following cinematic draws to a close, enter the Manor via the front door. Follow the old man when required until the Memory ends.
A Trip to Boston
Mission Overview
|
Optional Objectives |
|
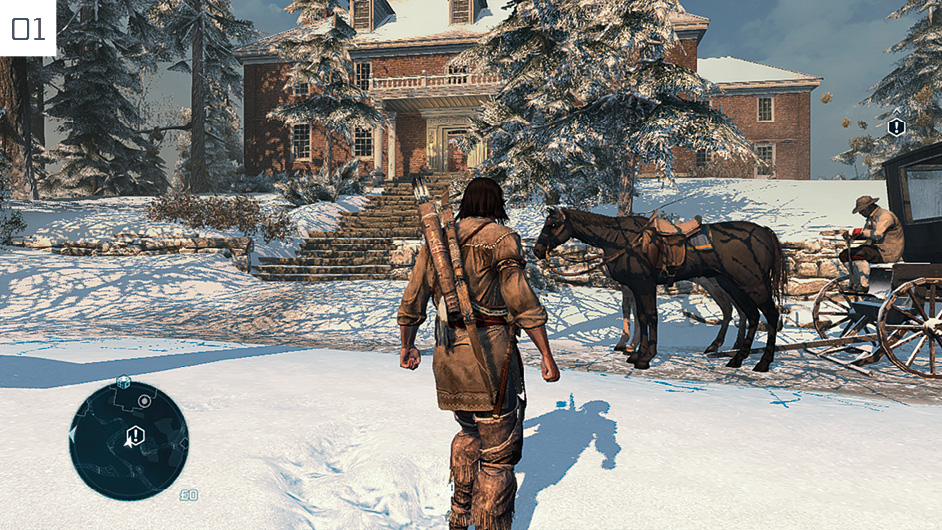
You begin in the Manor’s basement as Ratonhnhaké:ton recounts his experiences in training. Leave via the front door upstairs, then interact with Achilles. On arrival in Boston, walk with the veteran Assassin until a cutscene begins. Ratonhnhaké:ton now acquires the name Connor, which is the one we will favor from this point on. Follow the waypoint marker to reach the store, then enter. After the conversation with the shopkeeper, return to Achilles.
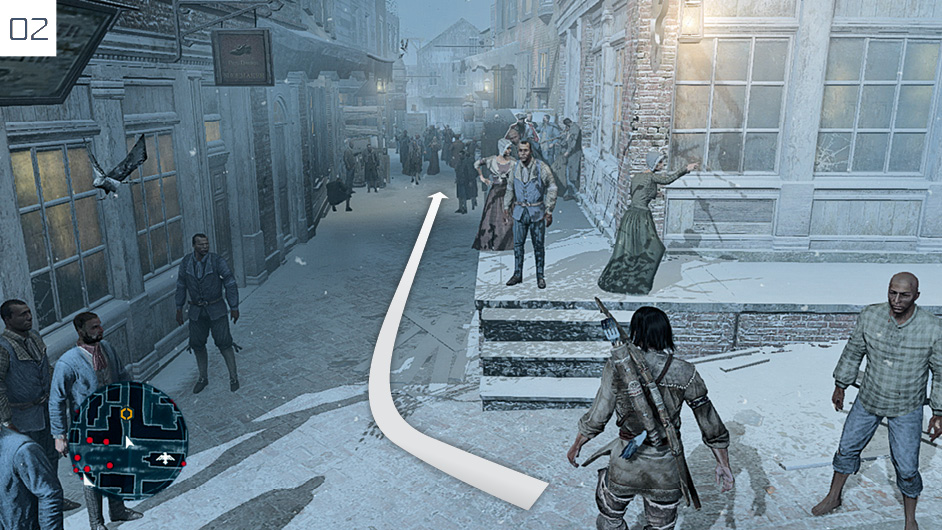
Walk with Achilles until the unrest escalates in a cinematic. When play resumes, tail the suspicious man through the alleyway, maintaining a safe distance and blending where possible to evade detection.
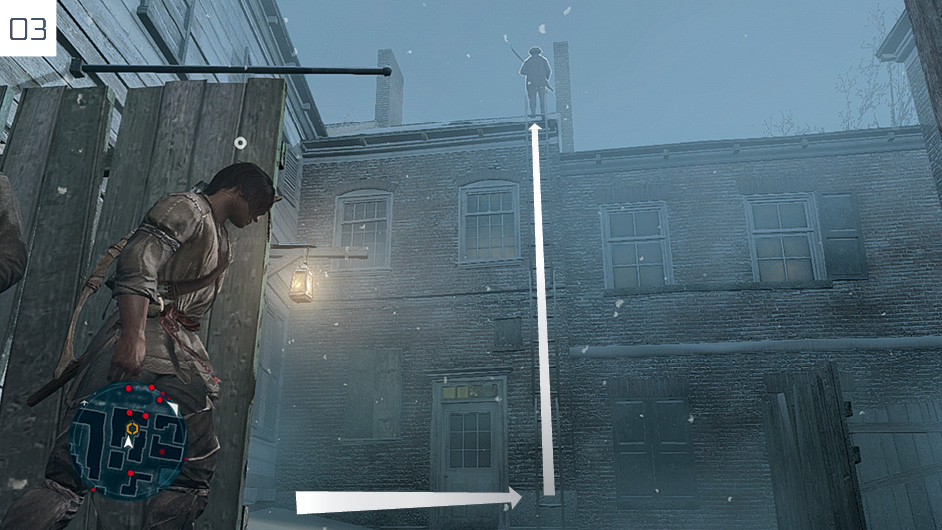
Once your target turns left, be careful not to move too close; when he climbs the ladder, follow him after he reaches the top rungs. On the rooftop, you can stand behind the chimney to stay out of sight. When the man halts in a position on the opposite side of the roof, a short countdown will begin. Run behind him and perform an assassination before the timer expires.
Connor must now escape the area – or, more specifically, the zone marked in red on the mini-map – and lose any soldiers giving chase. From your starting position, run to the northeast along the rooftop, using the tree as a stepping stone to reach the next building.
If you can make a successful jump to the next building in line, a safe haven awaits: a Leap of Faith into the cart marked here should enable Connor to evade his pursuers. If not, continue to the northeast and dive into the ocean: a consistently foolproof way to evade assailants is to find a solid body of water, then swim to safety.
Connor remains at maximum Notoriety when the Memory ends, which makes the process of reaching the next Memory Start marker fraught with danger. If your escape led you some distance away, there is a trick that you can use to reduce the journey: just select “Leave Animus” or “Quit”, then reload. Connor will restart much closer to the marker when you resume. Use Fast Walk and Blending opportunities to reach Sam Adams without incident.
Boston’s Most Wanted
Mission Overview
|
Optional Objectives |
|
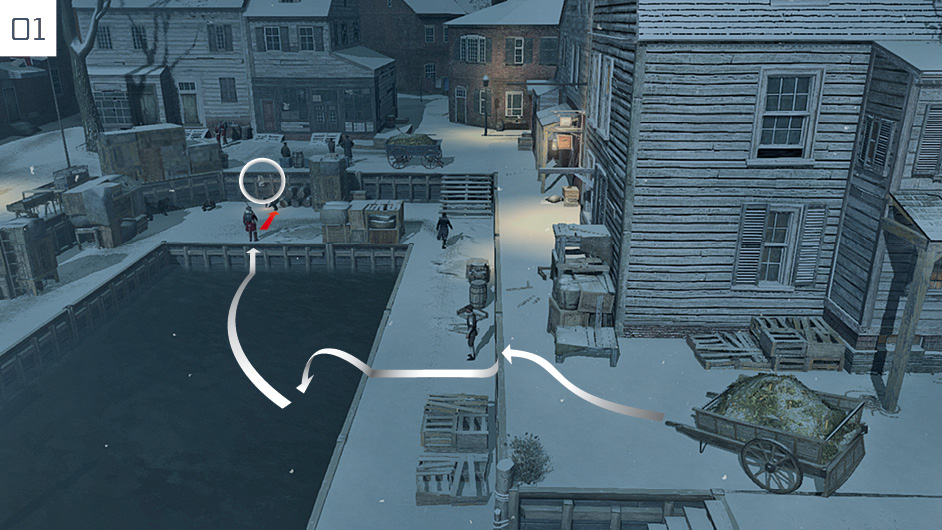
From your starting position by the hay cart, make your way to the first poster. Assassinate the nearby guard, then approach it and press  /
/ to tear it down.
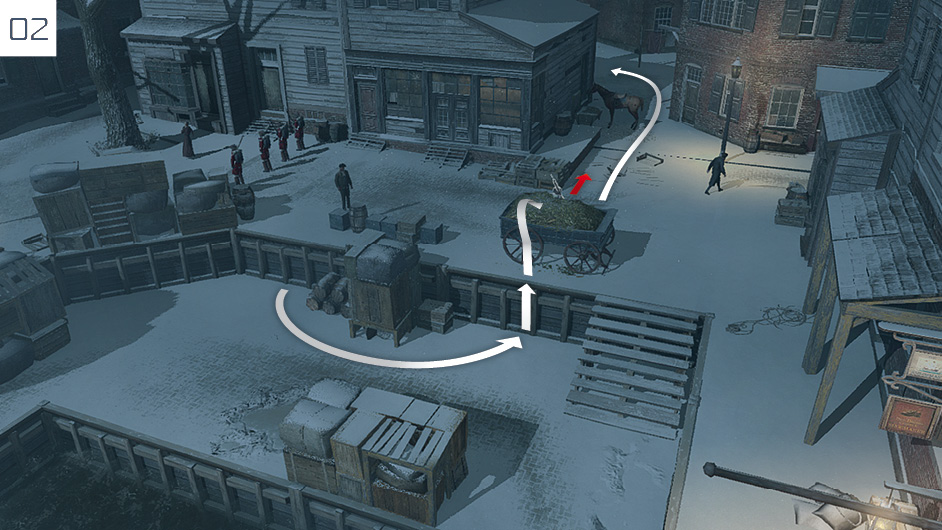
Jump into the hay cart and assassinate the soldier standing by it, then move behind the building, as illustrated here.
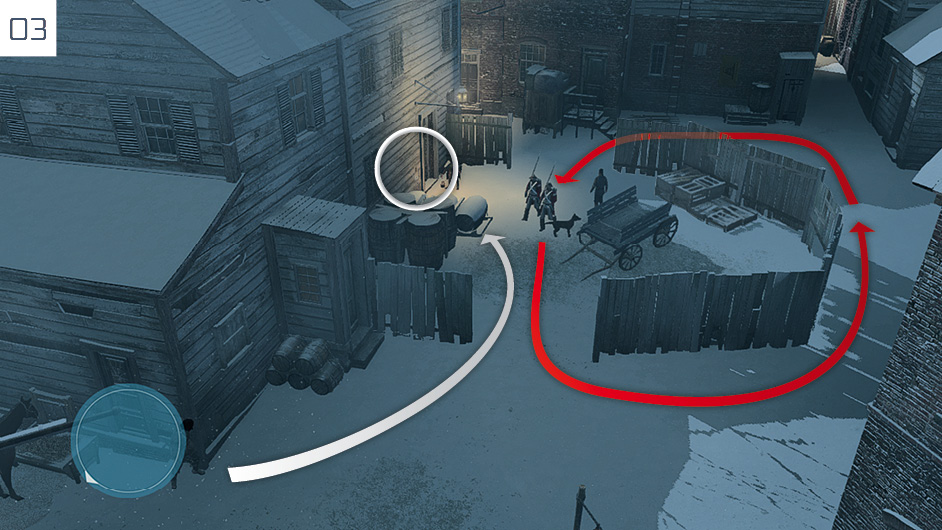
Wait out of sight until the two-man patrol moves behind the fence, quickly run to the poster and tear it from the wall, then partially retrace your steps to find Sam Adams at the center of a marketplace. He will introduce a second method used to reduce Notoriety – though only at a price, which is fortunately waived in this instance.
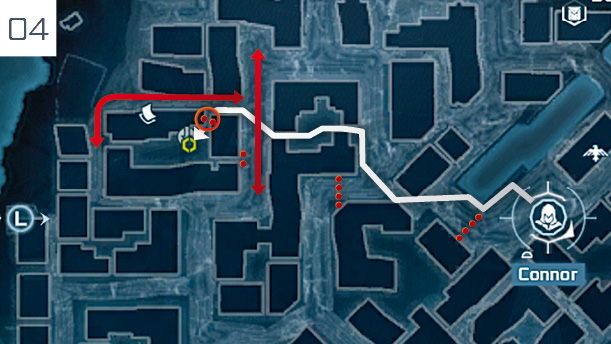
Follow the route outlined here to reach a secret tunnel entrance at the rear of the Green Dragon Tavern, avoiding checkpoints set up in the aftermath of the massacre. All possible points of entry to the area behind the tavern are blocked by guards. To complete the new Optional Objective, we suggest waiting and watching until the two nearby patrols move away, then deal with the pair of sentries on the north side of the building (circled on our map). Start with an assassination, then kill the second with the bow or a Counter Kill, whichever will be quicker. You can then immediately run to the tunnel entrance at the waypoint marker to advance the story before the bodies are discovered. Open conflict that brings all nearby soldiers into the fray will most likely cause you to fail the Optional Objective.
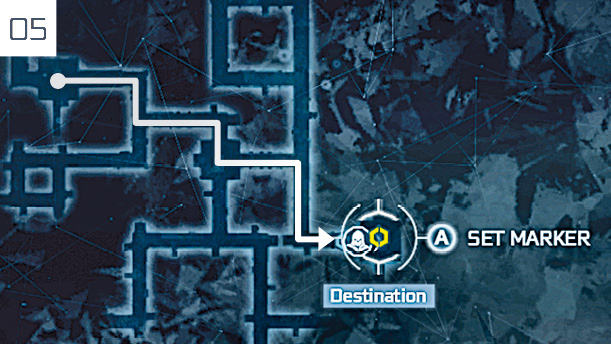
Inside the tunnels, follow the route shown here to reach the exit. Approach lamps and press  /
/ to mark explored areas: this is useful when you come to chart the Boston Underground to expand your Fast Travel network at a later date.
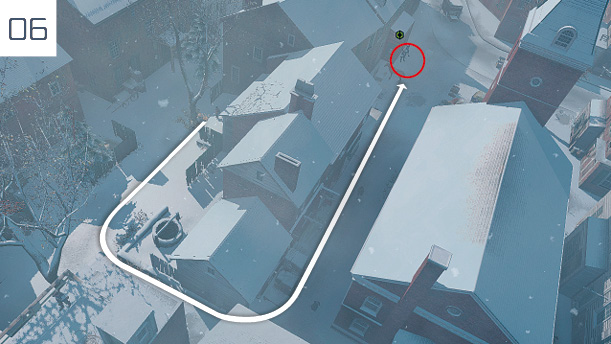
Back on the surface, make the short journey to the Printer’s Shop and defeat the two guards outside to gain entrance. When the cutscene ends, walk with Sam until the two part ways. Speak to the nearby Harbormaster and select the Davenport Homestead to return for the next main story Memory.
River Rescue
Mission Overview
|
Optional Objectives |
|
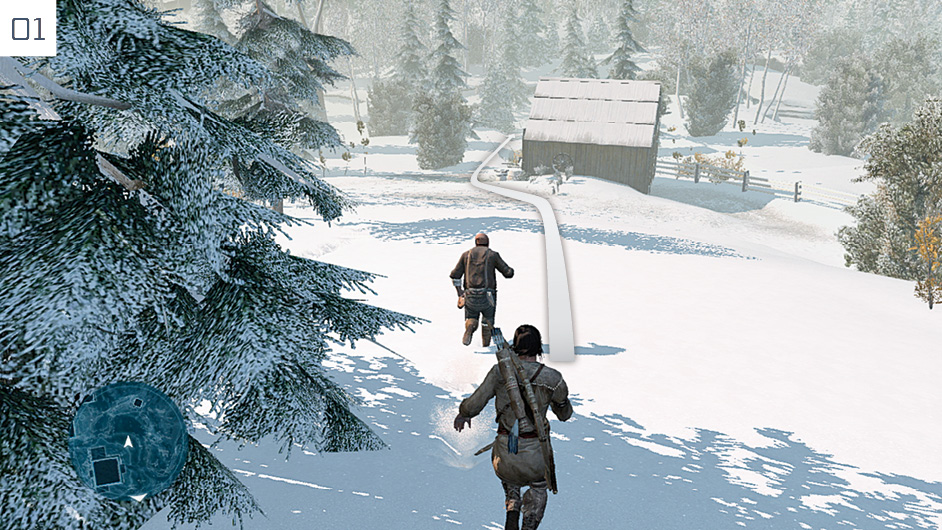
Return to the Manor to speak with Achilles; when the conversation is cut short, run outside and interact with the panicked man to begin this Memory. Follow Godfrey until you reach the riverbank.
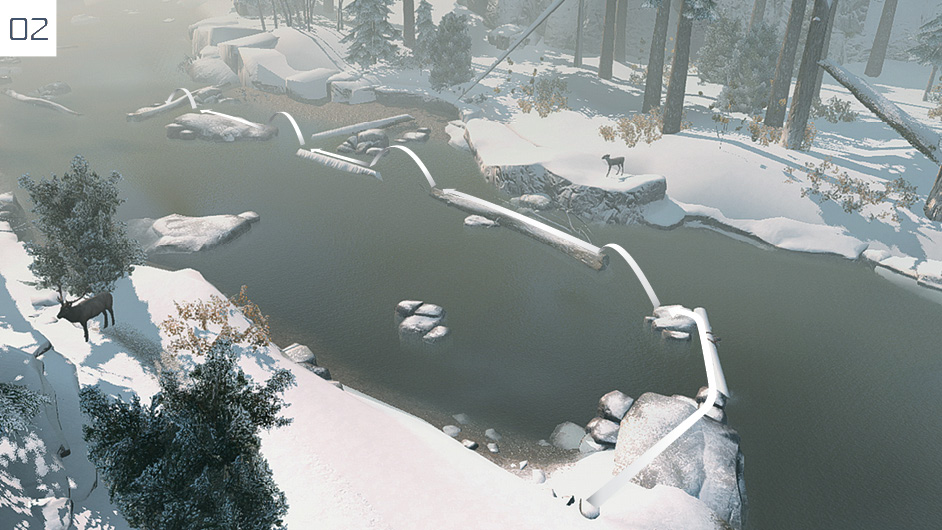
The Optional Objective for this short but fast-paced memory is to avoid falling or jumping into the river. There is a very specific route that enables you to do just that while keeping track with the beleaguered Terry. This course starts by taking you to the center of the river.
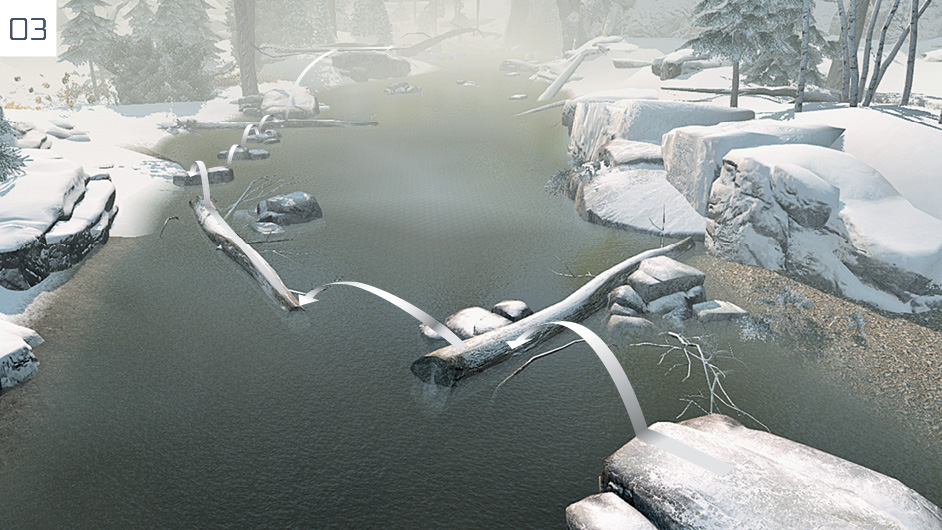
The course then delivers Connor back to the left bank. After running up the slope and past the two fallen trees, jump onto the log that overhangs the river.
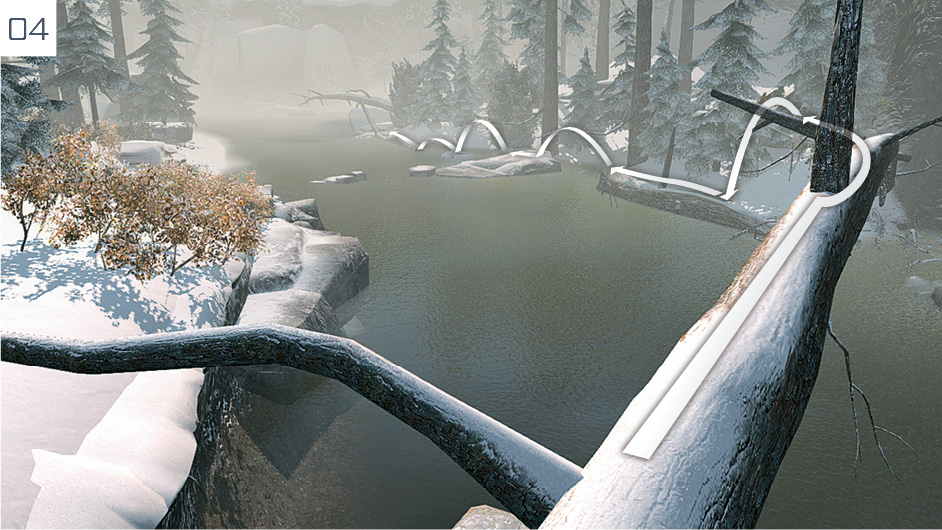
Use the log to reach the right-hand side of the river and continue your breakneck pursuit.
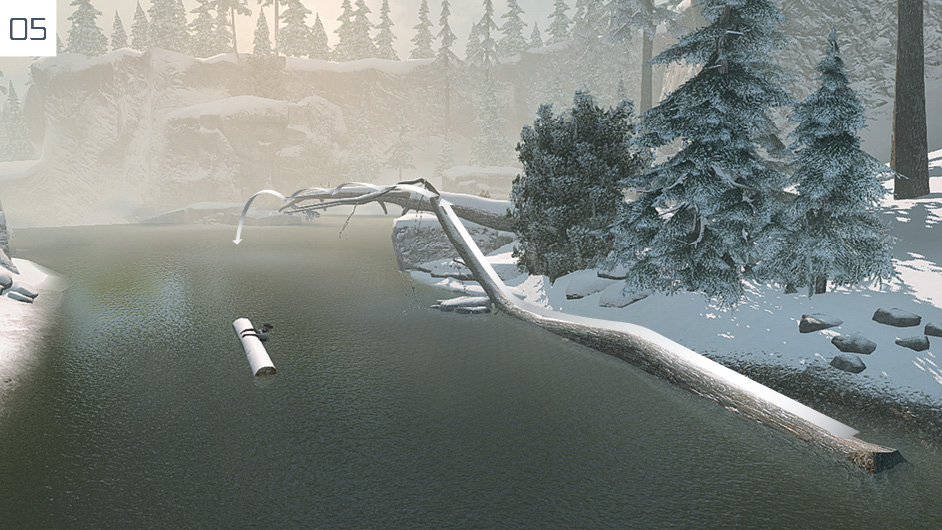
If you are making good time, your arrival at the final fallen tree pictured here will coincide with Terry floating below. When the onscreen prompt appears, dive from above to hand the final part of the rescue over to Connor. If Terry has already floated out of range, you cannot complete the Optional Objective – though the Memory only ends if you manually dive into the water. If you wish, you can use this opportunity to return to the previous checkpoint.
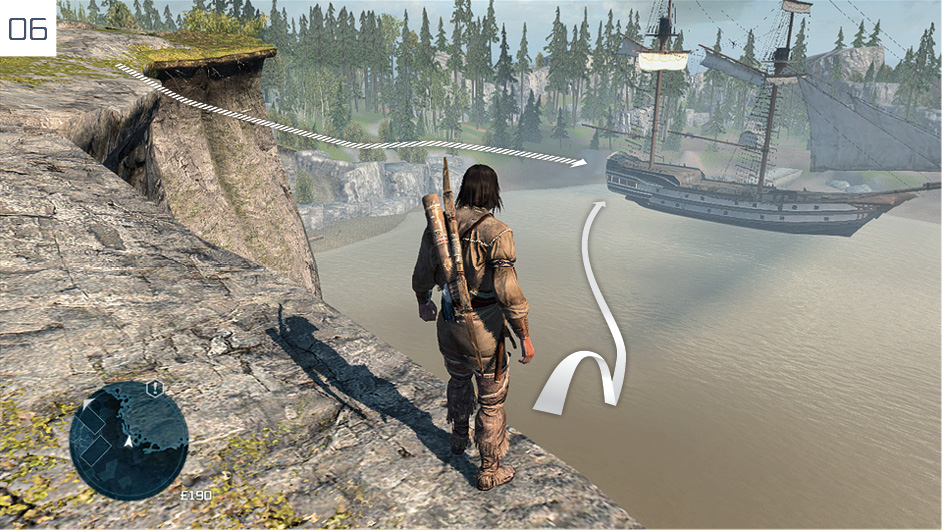
You can now either begin the Homestead Mission highlighted in the cutscene, or leave it for later and travel straight to Achilles to continue with the main storyline. When the cinematic ends, return to the Manor for a tutorial on managing the Homestead. After Connor narrates a leap forward in time, travel to the waypoint just beyond the restored Aquila to begin a new and exhilarating Memory…
The Hard Way
Mission Overview
|
Optional Objectives |
|
This Memory acts as an introduction to naval missions in Assassin’s Creed III, and offers a comprehensive appraisal of the core mechanics of movement and combat. Begin by speaking to Robert Faulkner, then select the mission icon ( ) on the map. As the onscreen instructions and spoken prompts leave little scope for confusion, our advice here will focus on fulfilling the Optional Objectives.
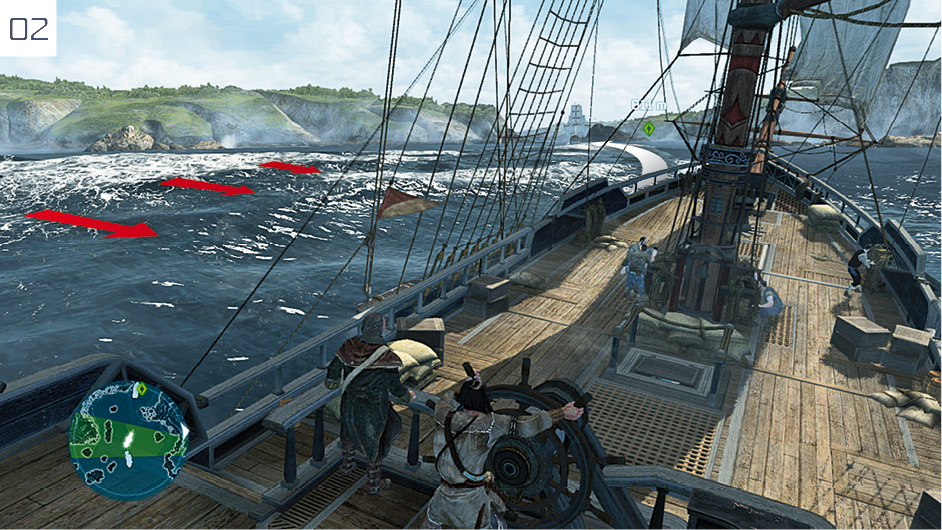
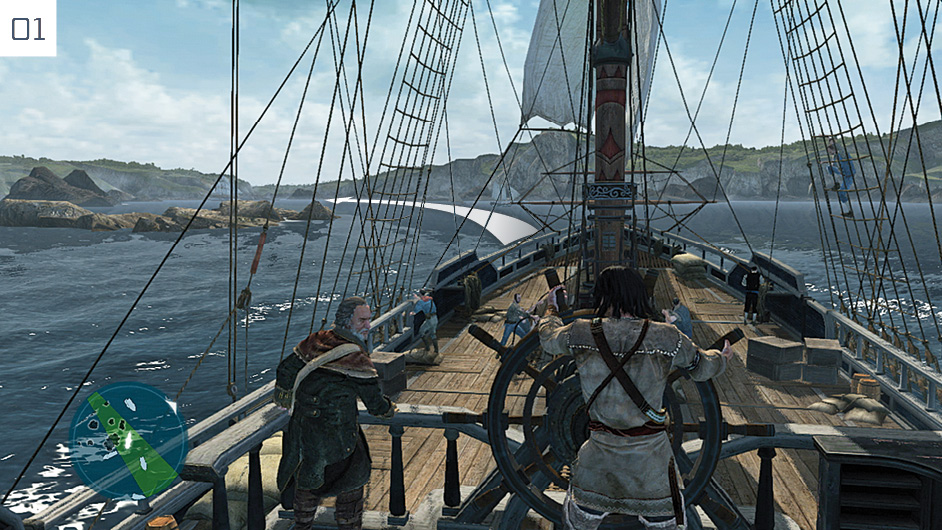
Navigating the channel to reach Martha’s Vineyard is easy: just follow the vessel directly ahead. Pay the rocks a wide berth, and be ready to press  /
/ to switch to half sail to avoid the effects of rogue winds and make tight turns (as pictured here).
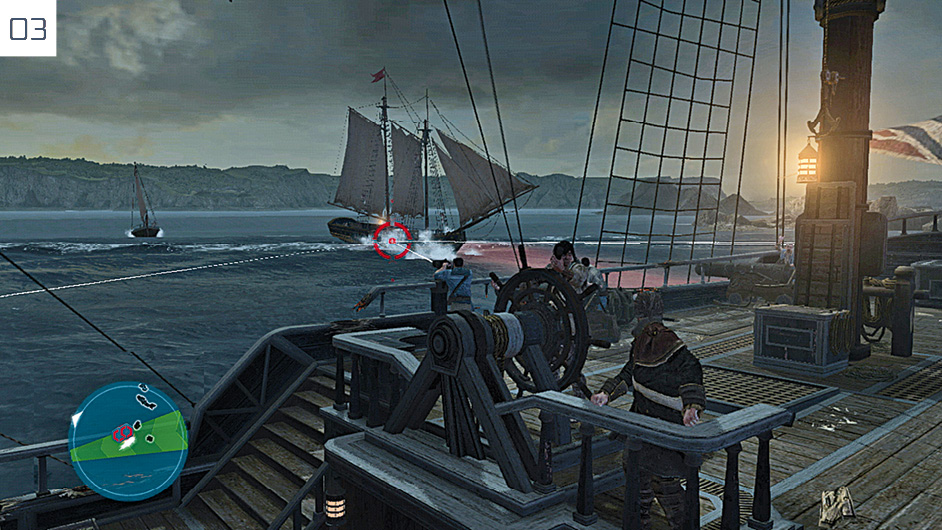
Once the ambush takes place, use the swivel gun ( /
/ ) to destroy the smaller vessels. The closer you are to an opponent, the easier it will be to release the trigger while the targeting cursor is red. You need to sink two of the small ships with this weapon to complete the related Optional Objective.
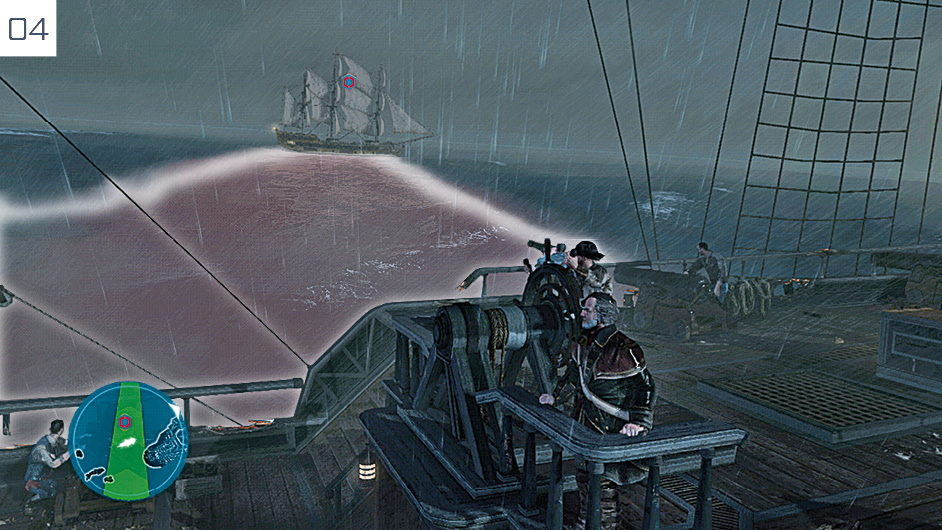
You must employ three successful uses of the “brace” ability to complete the final Optional Objective. Watch the opposing frigate carefully as it moves into position to fire a broadside salvo. When the water between the vessels is tinged with red (as shown here), the frigate is preparing to fire. Press  /
/ as its cannons burst into life to avoid or reduce the damage sustained. Once the secondary objective has been satisfied, sink the frigate to end the Memory.