
Assassin's Creed III Guide Walkthrough
Sequence 03
Unconvinced
Mission Overview
|
Optional Objectives |
|
 Enter the Green Dragon Tavern for a brief meeting with Charles Lee. When you return to the street outside, you can either ride to the Frontier exit at the very south of Boston, or use the Fast Travel system. If you arrive in the new area without a mount, use the Horse Whistle to summon Haytham’s steed.
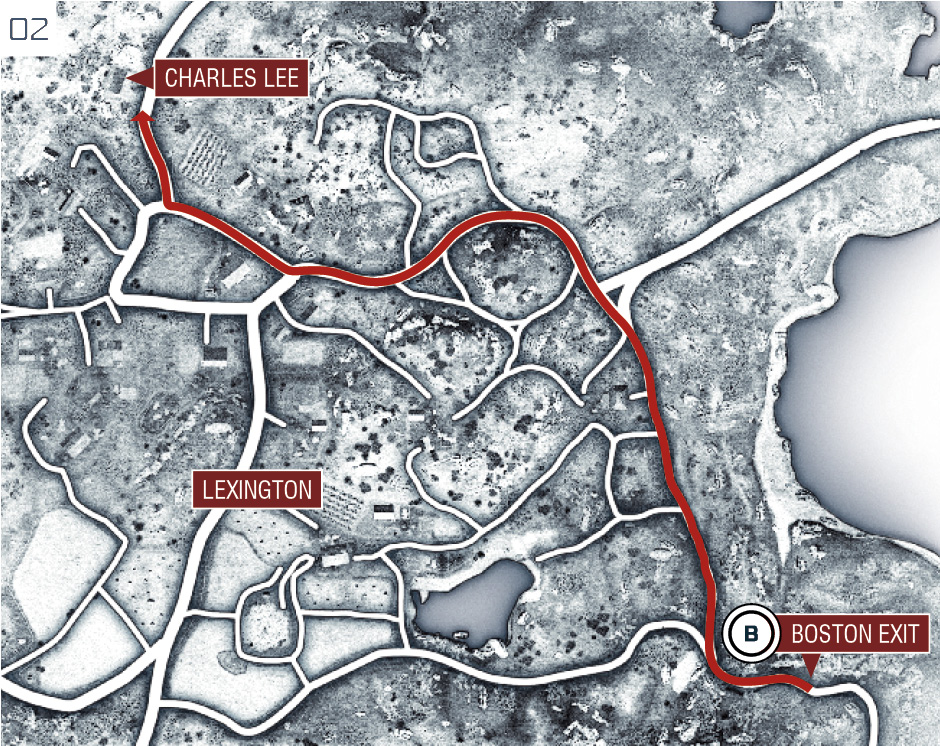
With no Synchronized Viewpoints in the Frontier area, finding Lexington (the settlement where Lee awaits Haytham’s arrival) can be a little confounding. Follow the directions on this map.
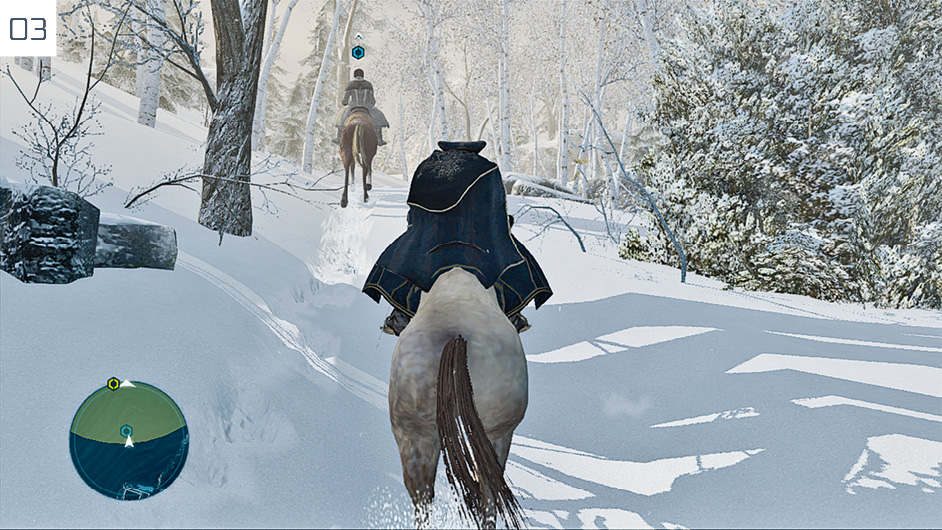
Speak to Lee to begin the mission, then saddle up and follow him until you arrive at the abandoned campfire.
Follow the fresh trail shown here; note that moving directly along it enables Haytham to walk a little faster than does wading through undisturbed snow.
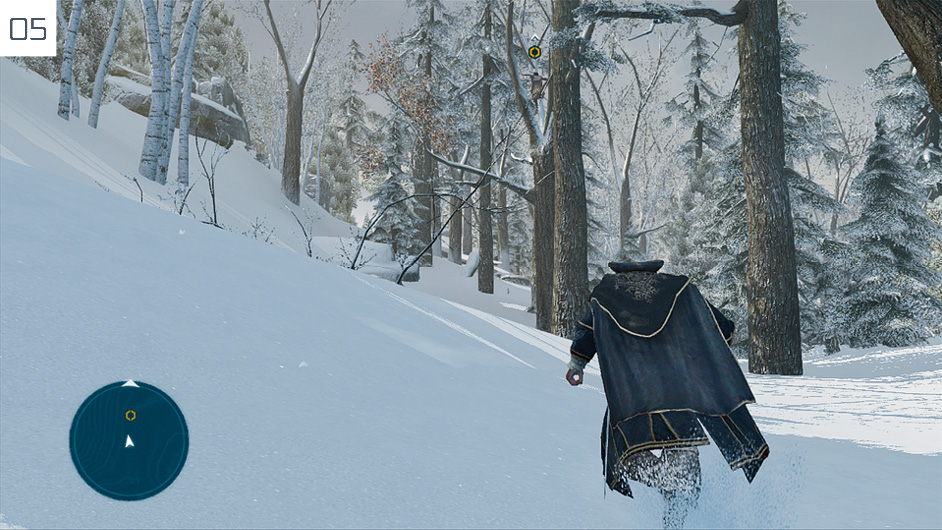
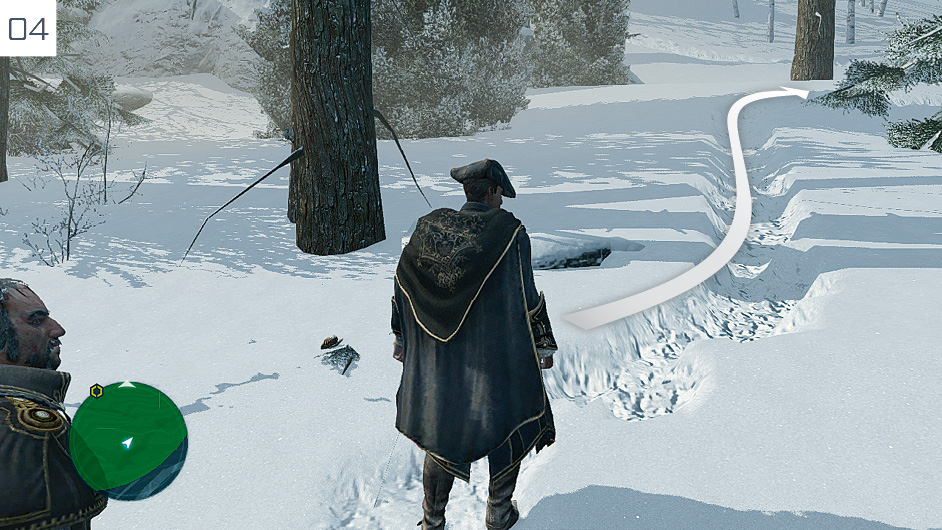
At the end of the trail is a clearing and, as you approach the crouched figure, a cutscene. When it ends, pursue the woman as she bounds from tree to tree; focus on the orange waypoint marker to more accurately track her movements.
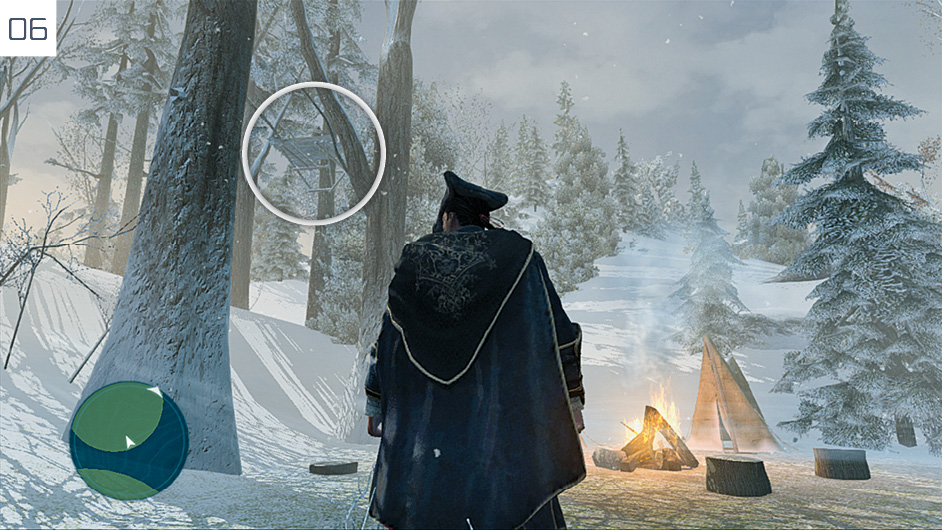
After the next cutscene, a pack of wolves will attack Haytham before he can continue his pursuit: see “Wolf Attacks” for details. When the encounter ends, look for a wooden platform approximately northwest of Haytham’s starting position, and activate Eagle Vision ( /
/ ) to identify the woman hiding there.
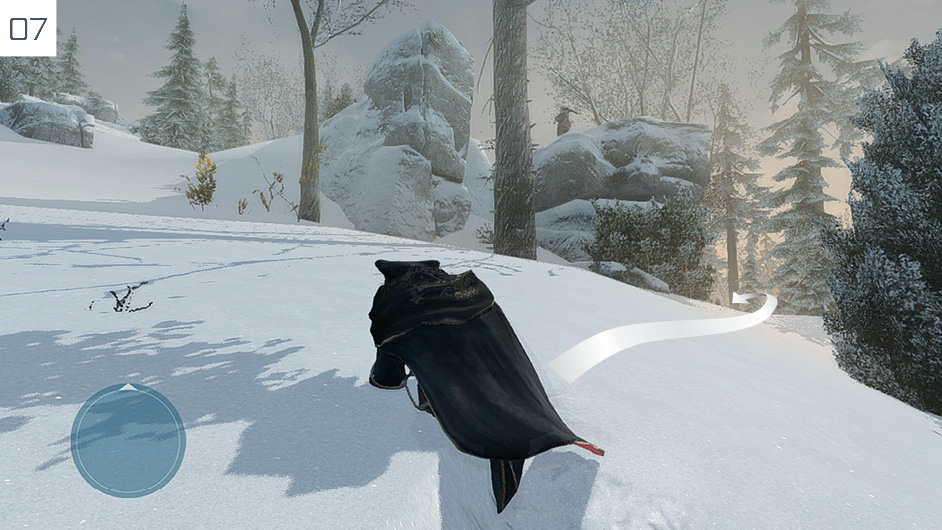
Once again, follow the woman at ground level as she moves through the trees above. When you approach the rocky outcrop shown here, turn right: this is the quickest way to intercept her.
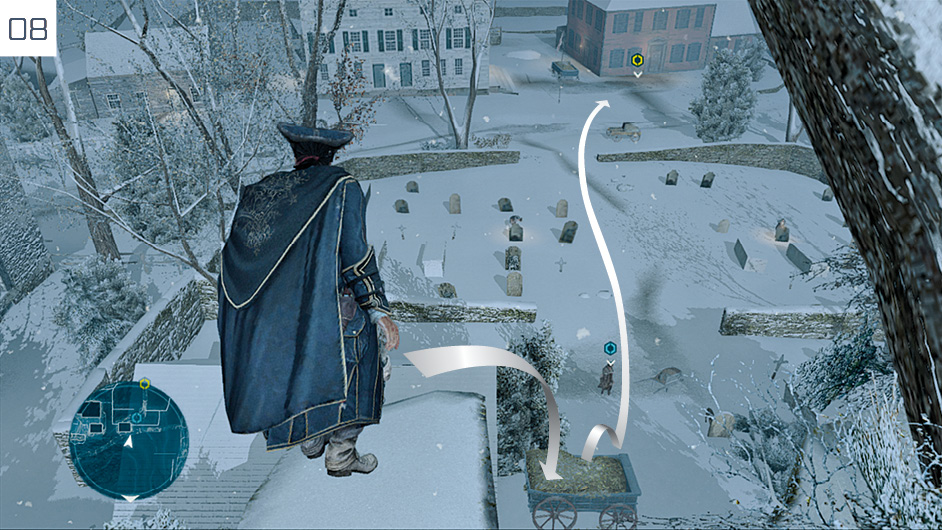
After Haytham and Kaniehtí:io reconvene outside Concord, perform a Leap of Faith from the ledge to the left of the tree, then enter the tavern at the waypoint.
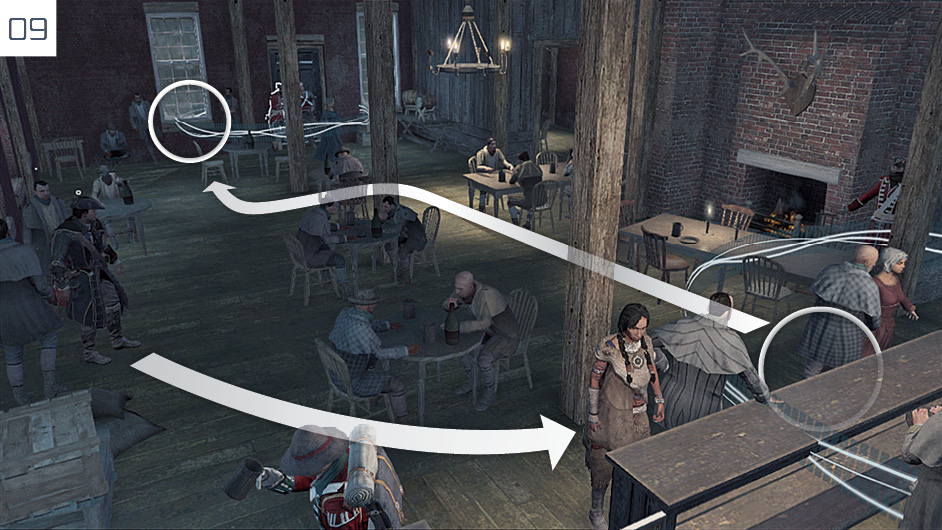
Blend with drinkers not of the military persuasion within the highlighted zones to successfully eavesdrop on two conversations. A fistfight ensues when Haytham attempts to depart. If you are keen to complete the Optional Objectives tied to this event, see “Tavern Brawl Tactics”.
Wolf AttacksTo complete the health-related Optional Objective, you must guide Haytham unscathed through an encounter with three wolves. 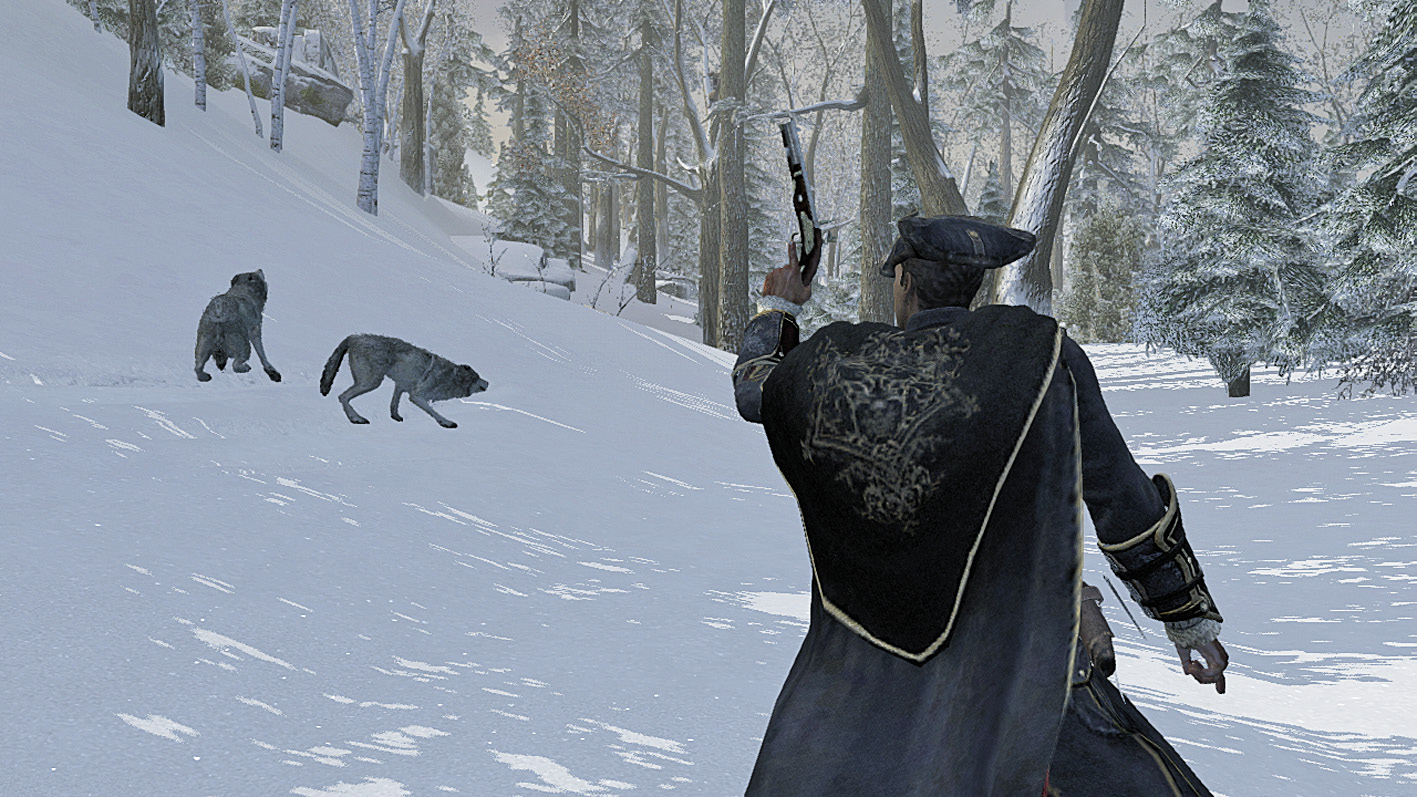
|
 /
/ rapidly to fend off the attack. Being savaged by a wolf drains Haytham’s Life Bar quicker than any other attack that you have faced so far, so a single struggle can lead you to fail the Optional Objective.
Tavern Brawl TacticsThe health-related Optional Objective still stands during the closing fistfight, along with a new challenge to defeat two enemies with context-sensitive attacks. 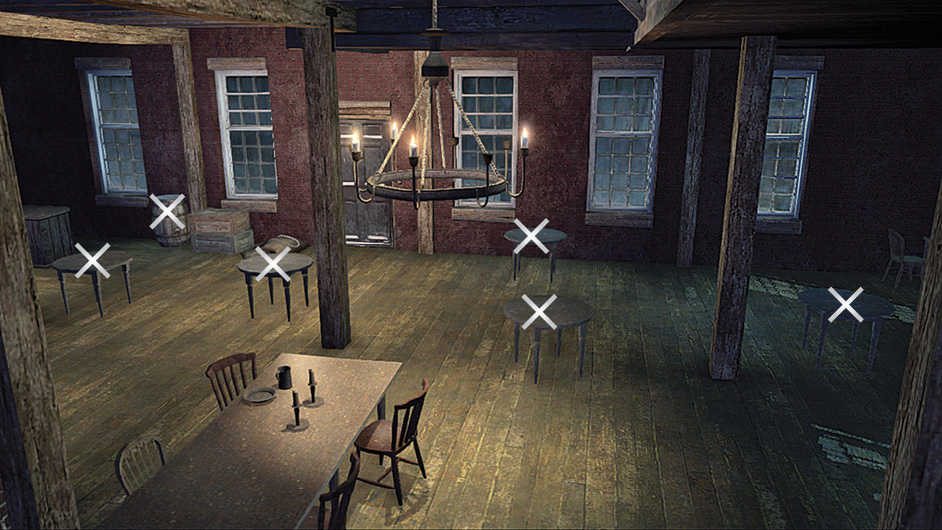
|
 /
/ twice when an opponent attacks) and use
  to direct
 Execution is Everything
Mission Overview
|
Optional Objectives |
|
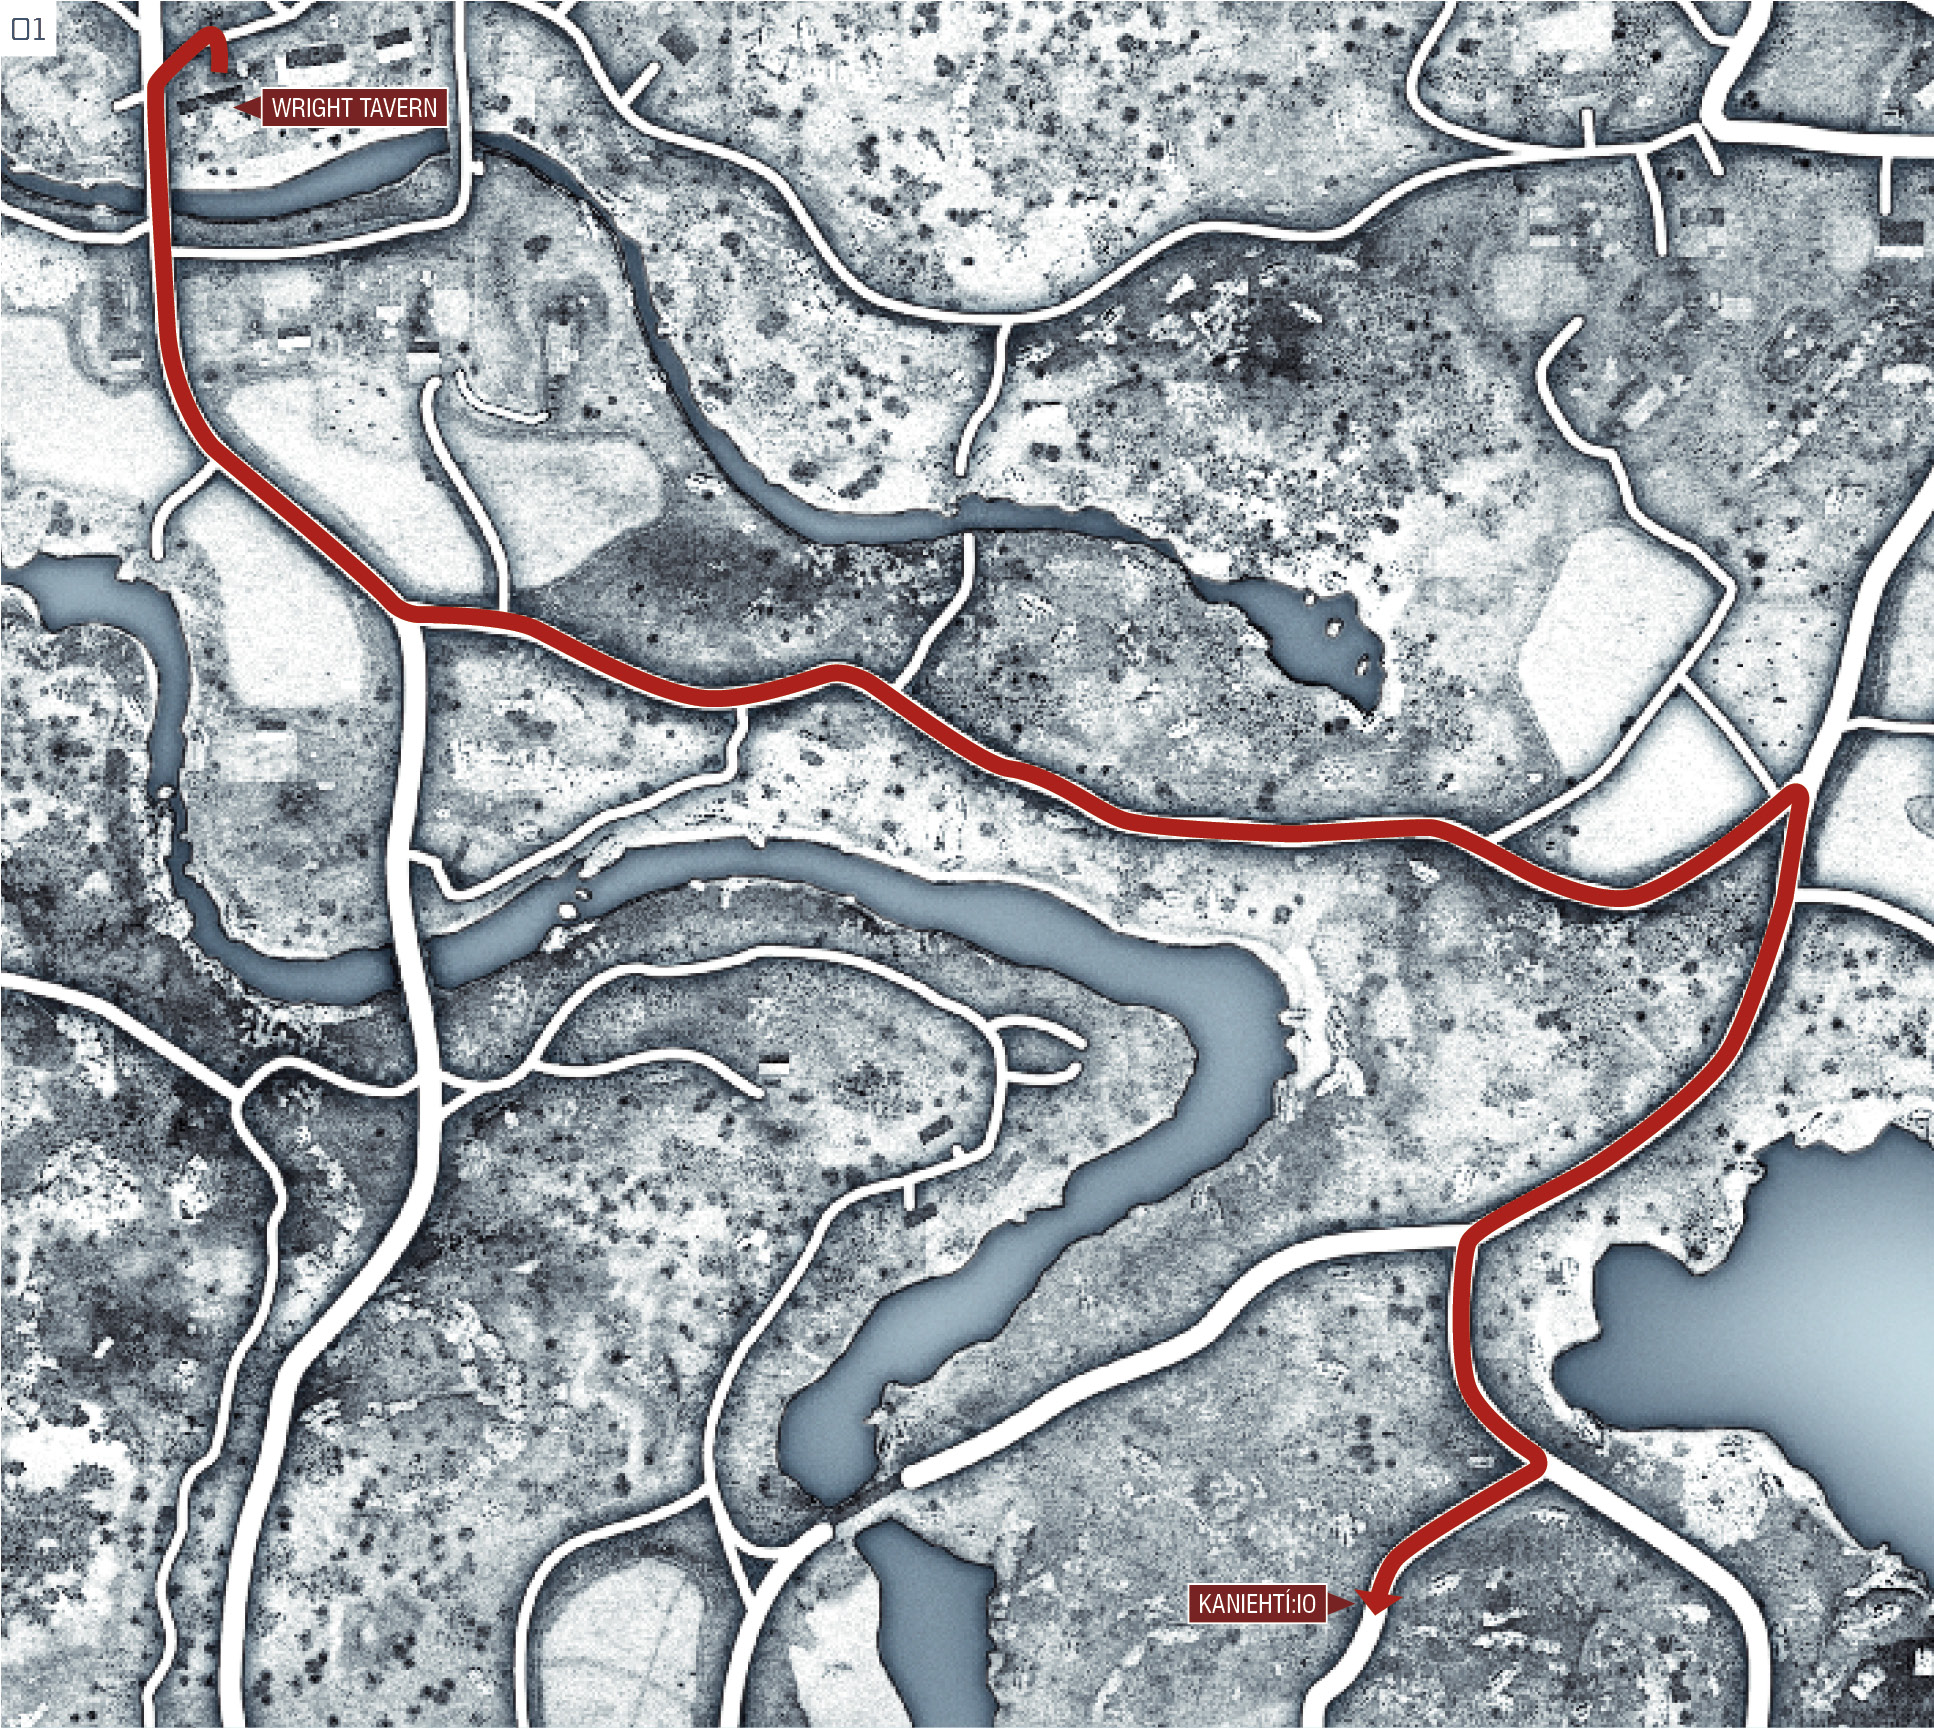
Take a horse and ride to the Memory Start position to the southeast via the route detailed here (a simple journey that follows main trails), then speak to Kaniehtí:io to begin. Note that you cannot unlock Viewpoints in the Frontier at this stage in the story; its mysteries are saved for a later Sequence.
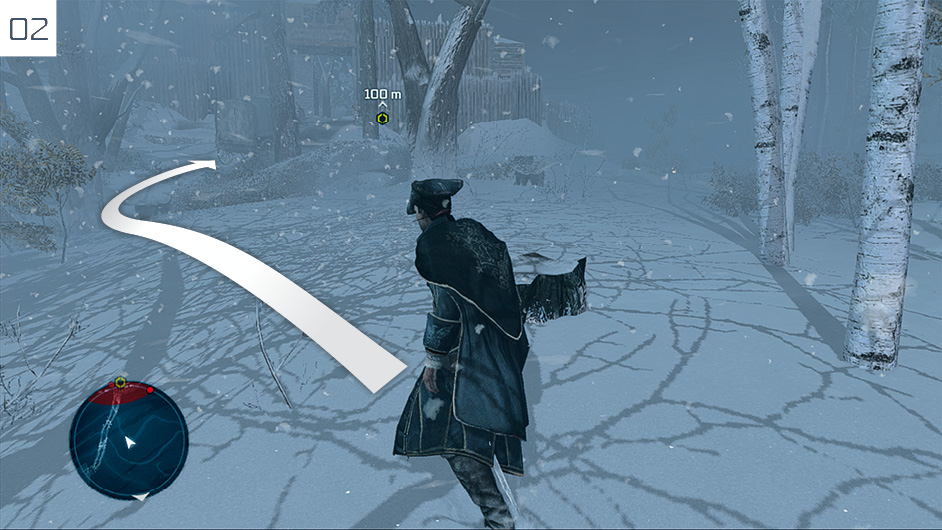
Under cover of the snowstorm, run towards the waypoint marker until you see a cart. Approach the back of it and jump inside, then wait for it to pass through the gate. Detection will lead to instant Desynchronization, so stealth is mandatory for the rest of the Memory.
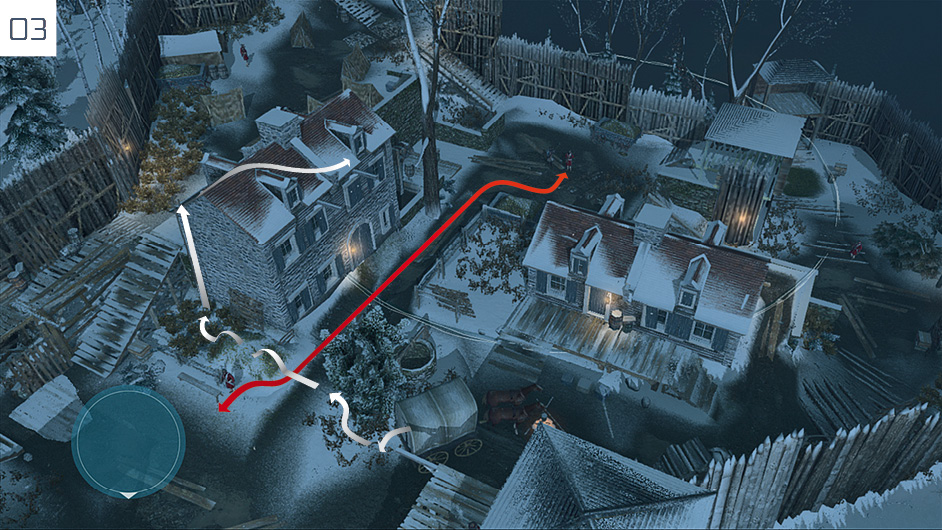
When the cart comes to a halt, drop into the foliage behind it and move slowly to remain concealed. Wait until the guard patrolling the path walks away from Haytham, then carefully climb to the rooftop and approach the eavesdrop area.
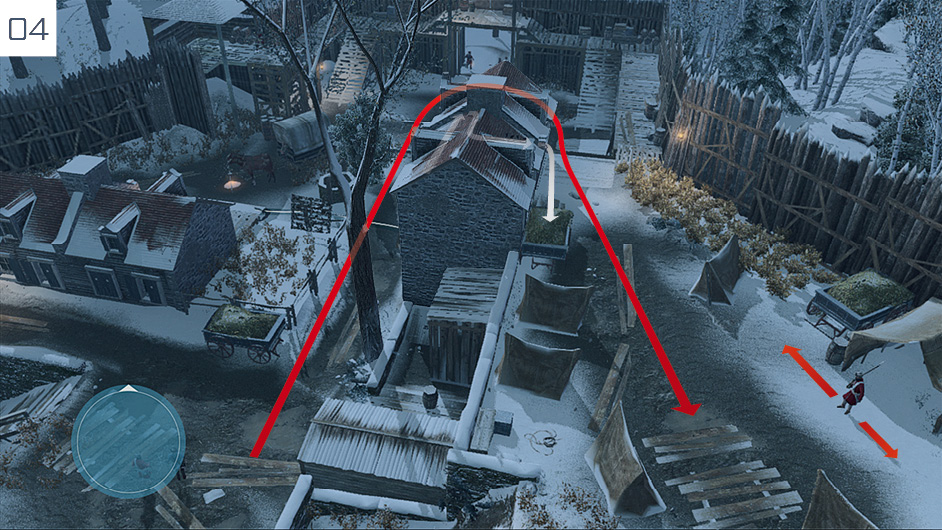
Move along the rooftop to stay out of sight while eavesdropping on the two soldiers as they stroll through the camp. When they pass the hay-filled cart in the upper area, wait for the nearby guard to look away, then drop into the hiding place. The eavesdrop will end shortly afterwards.
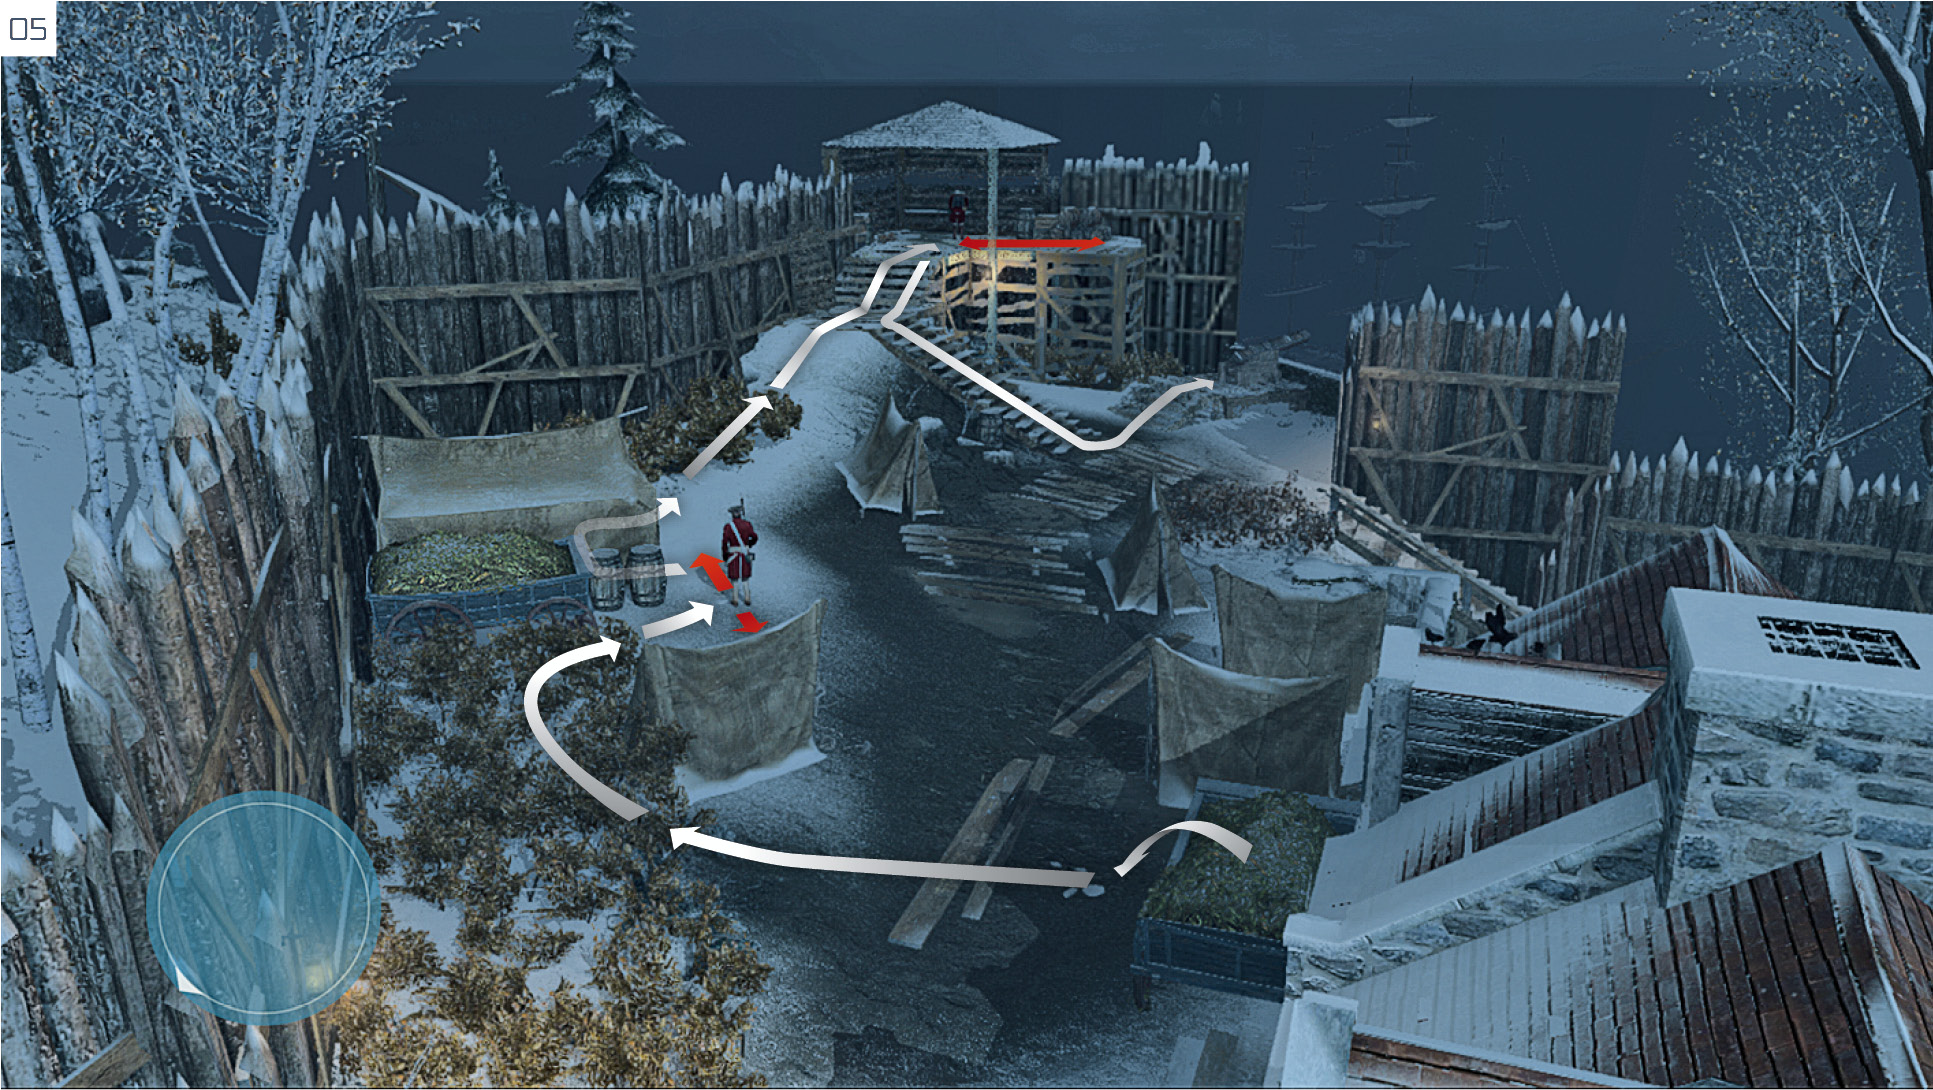
Move into the Stalking Zone and select Haytham’s fists in the Weapon Wheel. Sneak up behind the nearby guard when his back is turned and perform a non-lethal takedown from behind. You can then retrieve the tactical map from the tent. Completing the Optional Objective to sabotage the cannons also leads you to an easy escape route, so this would be our recommended strategy for all players. Start by creeping towards the second sentry and, once again, disable him with a non-lethal attack from behind. Begin your approach when he looks out to sea. You can then attend to the first cannon (approach it and hold  /
/ ) without fear of discovery.
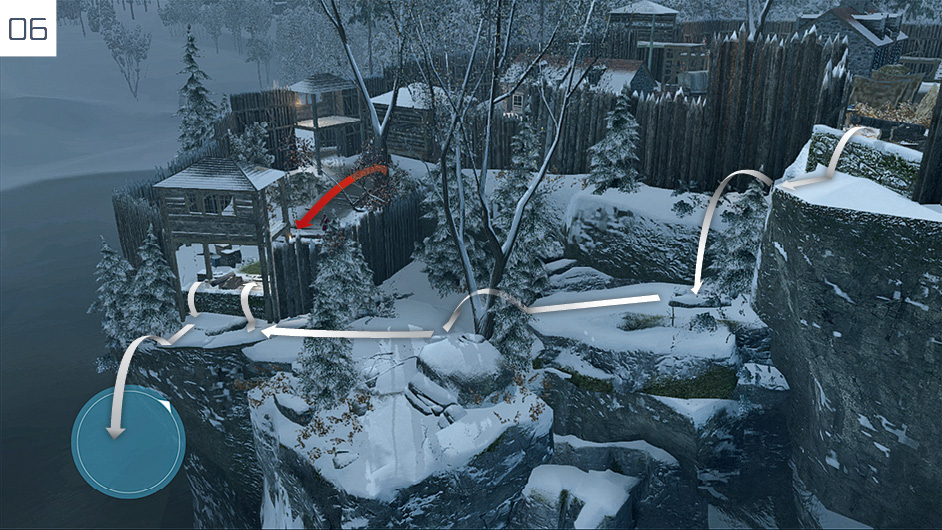
Hop over the small wall by the cannon, then follow the route illustrated here to reach the second. Stand out of sight and wait until the patrolling guard faces Haytham’s general position; when he turns to depart, quickly jump over the wall and move into position to disable the weapon.
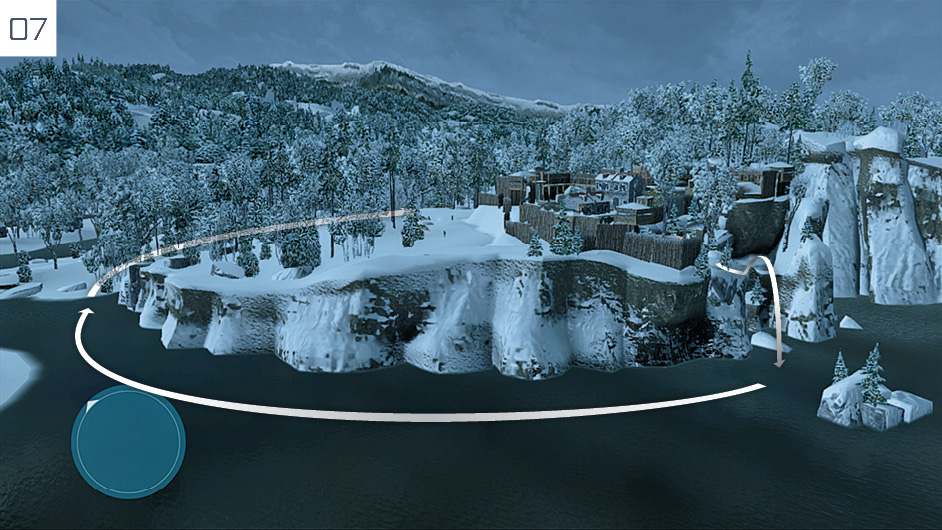
While it is possible to escape the fort on foot by disabling two further guards, it’s much easier to simply dive into the sea and swim along the river to the west. When you reach dry land, return to Kaniehtí:io to complete the Memory.
The Braddock Expedition
Mission Overview
|
Optional Objectives |
Preparation |
|
|
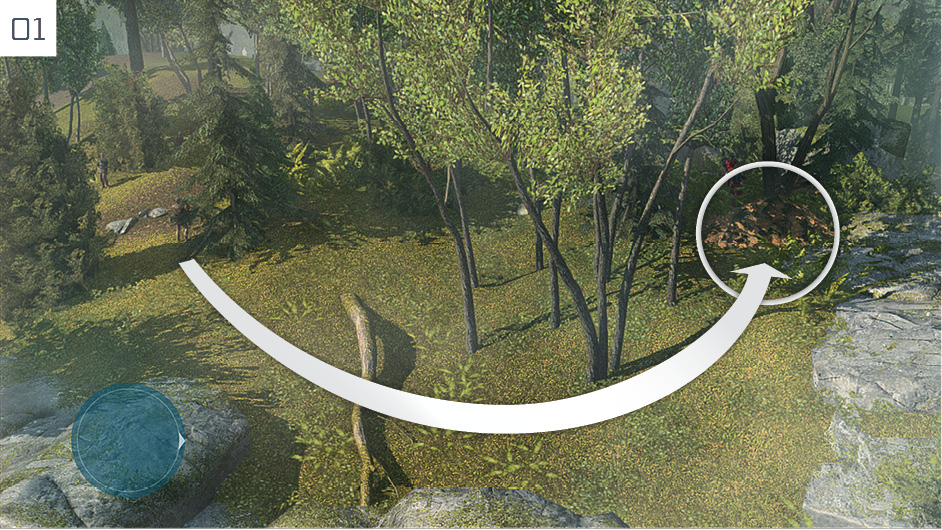
Return to the Wright Tavern in Concord and enter to begin the Memory. After the short (automated) journey on horseback, speak with Kaniehtí:io. When play resumes, follow the route marked here. Hide inside the Stalking Zone, then transfer into the pile of branches (a hiding place) when you are sure that no one is looking your way. There is a checkpoint just beforehand, so it’s easy to restart if something goes wrong.
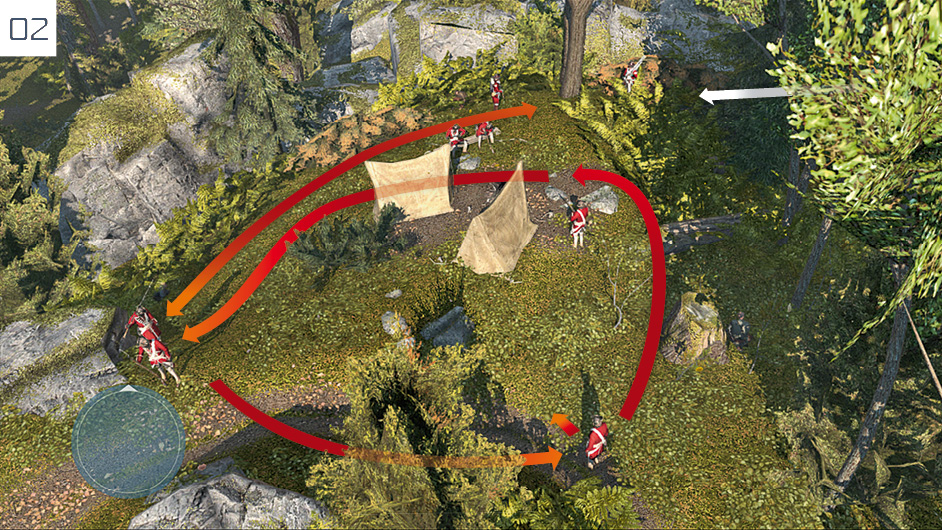
In addition to stationary soldiers, two guards patrol the camp: one on the north side makes regular walks between two positions, while your priority target walks a longer circuit. From your position inside the hiding place, silently assassinate the sentry standing nearby. You can then whistle to attract the attention of another guard, then kill him when he moves within range. These two deaths satisfy the Optional Objective: you can now enter open conflict to disable all guards in the area.
Follow the waypoints to reach Braddock’s position. When the cinematic ends, ride off in pursuit of the general; you must stay within range of him to avoid Desynchronization. Use the spur command (tap  /
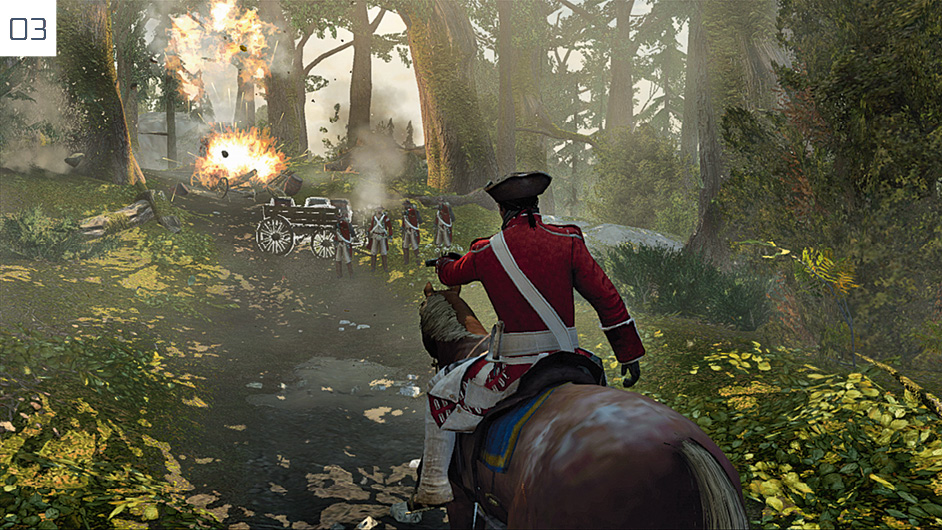
/ ) to urge your horse to greater speeds. The new Optional Objective challenges you to destroy three powder carts during the chase. Be ready to shoot them as soon as you move within range, then reload immediately to have a bullet ready for a subsequent opportunity. The first (pictured here) is encountered as you turn to the left at the start of the chase.
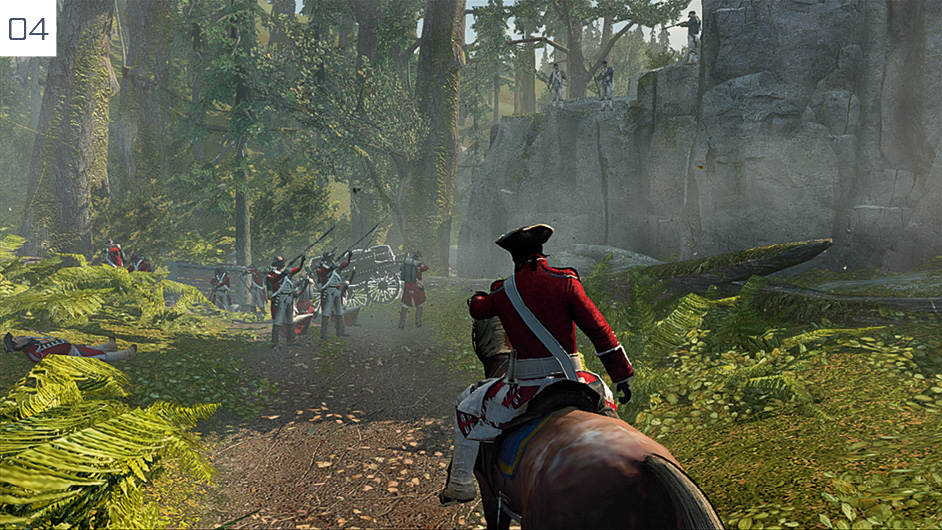
The second powder cart is found after you rejoin the track after cutting through the trees.
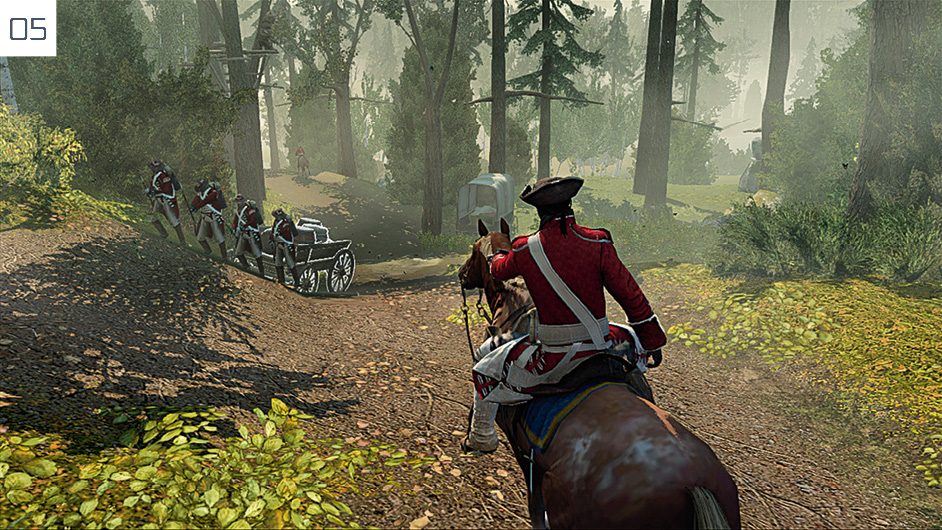
The third and final target is on the left-hand side of the track shortly after another powder cart falls from above. This marks the home stretch of the chase. After the cinematic, you can deal with Braddock in any manner you see fit.
 After another cinematic, Haytham returns to Boston. Entering the Green Dragon Tavern ends the Sequence in a similarly momentous fashion. The story then takes a quick detour back to the present day before Sequence 04 begins. You can use this opportunity to converse with the Assassins for optional conversations, and check the only available terminal to review emails received by Desmond during his time exploring Haytham’s memories. When you are ready to continue, approach the Animus and press any button.