
Assassin's Creed III Guide Side Quests
Benedict Arnold Missions
Exclusive to the PlayStation 3 release of Assassin’s Creed III, the Benedict Arnold Missions are a stand-alone adventure that you can begin at any time after completing “Missing Supplies” at the start of Sequence 09. The Memory Start marker is situated close to the northwest Frontier exit in New York. To begin, simply interact with the individuals at the location marked by the  icon. After Connor accepts the commission, travel to the same icon in the northwest of the map to visit West Point, a new and separate location where the events of this episode will take place.
Traitor in our Midst
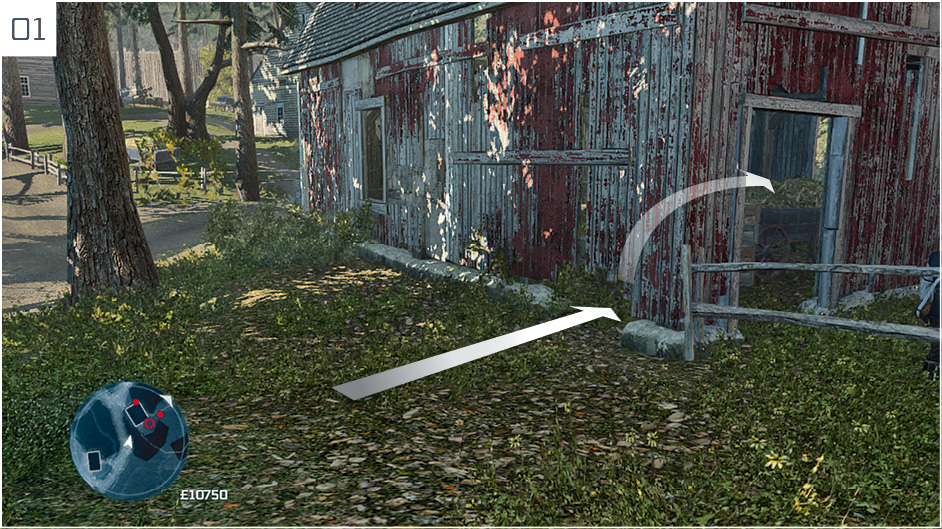
The first Memory Start position is just inside the West Point map, a short walk from the New York exit. Travel to the green search zone to the south. On arrival, a soldier at the back of a patrol is marked as the target that Connor must eliminate. After a short march, the patrol will reach an old red barn, which the target will patrol in a regular pattern. While there are several points of entry, the easiest is to slide through a gap close to the southeast corner of the barn, then hide in the hay cart inside ( 01). When the target approaches, assassinate him, then leave by the same route.
You must then travel to a pair of search zones and identify and eliminate two spies; they appear with a gold highlight when viewed in Eagle Vision. In the most northerly area, your target is located inside a tent on the west side of the Patriot camp. A single soldier makes a short patrol that approaches his position. Wait until this potential witness moves away, and you can perform a simple Hidden Blade assassination and leave before the body is discovered.
In the southerly search zone, the target can be found taunting a Redcoat prisoner in the stocks. There is a Stalking Zone just south of his position; if you enter this and wait for his arrival, you can assassinate him without fear of discovery.
The final task requires that you visit the Fort to the south, but this is a Restricted Area where guards will not take kindly to Connor’s presence. Walk through the gates and then turn immediately to the right to avoid detection; as you do so, the final target will jostle Connor as he runs past. Assassinate him before the other soldiers can react to end the Memory.
Showing Traitors the Way
Speak to the Patriot soldier close to the south corner of the Fort to begin. Pick up a crate from the ground, then jog to the waypoint marker. On arrival, place the crate at the marked position. When the traitor breaks from the crowd of brawling soldiers, chase after him. He wears the Scout uniform, but is unusually leaden-footed. Just sprint behind him and press  /
/ in close proximity to perform the Tackle move for a non-lethal takedown. The next step is to escort the prisoner to the Vulture, a ship waiting on a dock to the east.
A Spy Among Us
This Memory once again begins inside the Fort to the southwest. After receiving orders, you should carry a Powder Keg to the Powder Reserve as directed. After placing the first at the entrance, however, a new objective is given. Move into the Stalking Zone to begin the eavesdrop and, when the subjects move on, follow them from a discreet distance by utilizing Stalking Zones while remaining within the circular boundary. Outside the walls, a large Stalking Zone enables you to stay close to them without fear of detection.
When John Anderson moves away, use the numerous Stalking Zones behind him to stay within range – at a sensibly reserved distance – until after he convenes with his Redcoat conspirators and orders them to leave. Enter the cornfield and move towards the center, where Anderson will leap into a hay cart to change his uniform. Move into the nearby Stalking Zone before he emerges, and adjust your position to avoid a roaming Redcoat if required. Connor cannot be seen while moving through individual rows of crops as long as you don’t get too close to anyone.
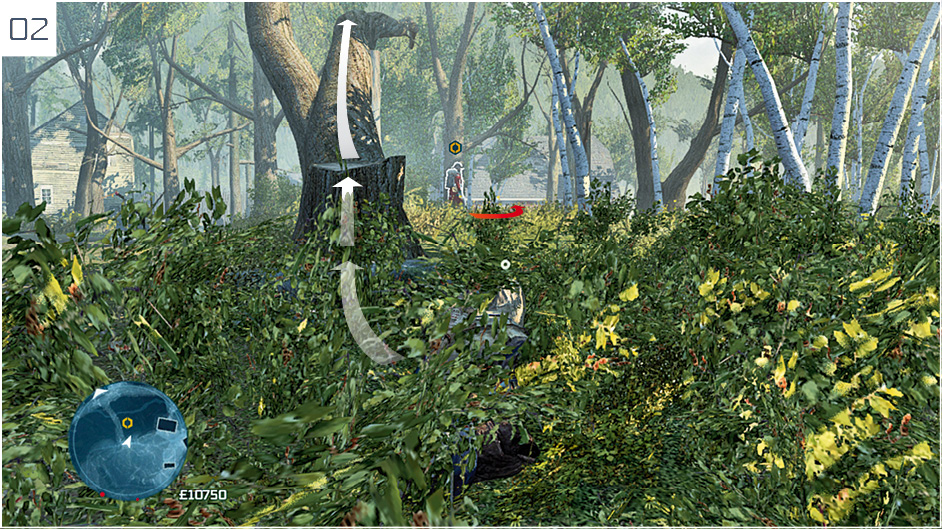
Once you leave the cornfield and reach a point where Anderson turns to regard the path behind him ( 02), climb the tree marked in our screenshot to continue the tail. Free run through the branches to reach the barn that featured in “Traitor in our Midst”, then watch on as he is intercepted by a Patriot patrol.
Battle of West Point
Return to the Fort for the final Memory of this side story. This features a lot of combat, so we advise that you have a full stock of consumables (particularly arrows) before you begin. The battle that ensues is rather chaotic, but you can emerge victorious by noting these simple tips:
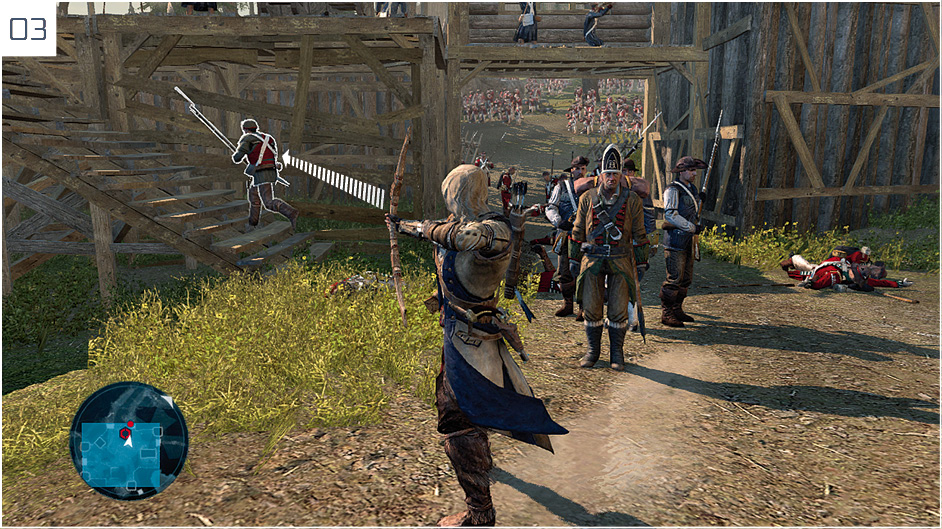
- Follow the onscreen instructions whenever they appear. The most important directives are those that specify that you must kill a “sniper” before he destroys the powder reserve (
 03). In these instances, disengage and eliminate the target marked by the
  icon immediately. If you have a clear shot, a single arrow will neutralize them instantly.
- In the battles at each gate, try to set up Kill Streaks to eliminate opponents efficiently: your adversaries are primarily of the Soldier archetype, so have no special resistances. Combo attacks are a waste of valuable time: just wait for a Counter Kill opportunity, then defeat as many targets as you can.
- When instructions appear telling you to defend another gate, break away to comply even if there are hostiles remaining in your current location. Troops entering a new gate will form firing lines to shoot at Connor’s allies. This will drain the meter on the left side of the screen at a greatly accelerated speed.
Once the final charge has been repelled, the closing cinematic of the Benedict Arnold Missions begins. You are then free to enter and explore West Point at any time, or replay individual Memories via the DNA Tracker. From a pure gaming perspective, West Point is a great area to complete many combat-oriented challenges for the Boston Brawlers and Thieves. There are no Notoriety penalties in this small region, so you can enter combat with impunity.
West Point Missions
Using the club challenges format, the West Point Missions are a collection of six bonus tasks that you can complete as and when you see fit. You can view your current progress via the Logbook entry in the Main Map menu. Note that you can complete these challenges anywhere in the game world, not just in the West Point area.
West Point Missions
|
Challenge |
Notes |
|
Use all of the recruit abilities twice. |
This simply requires that you obtain all six recruits via Liberation Missions, and use the unique abilities contributed by each apprentice twice. |
|
Stealth assassinate guards while they're distracted by a riot on five occasions. |
Simply start a riot by interacting with angry crowds found throughout Boston and New York, and then assassinate any guard that comes to investigate before they draw their weapons. This can only be accomplished during the opening moments of a riot. |
|
Perform a double assassination with a musket. |
Assassinate an opponent with a loaded musket, then immediately press |
|
Make five Snipers fall to their death. |
Ledge assassinations and kills that subsequently lead to a Sniper falling from a roof do not count, so the best way to do this is to perform unarmed combos to kick or barge Snipers from high rooftops. |
|
Kill a Snitch while he is escaping on five occasions. |
Find a patrol that includes a Snitch, start a fight with the group, then disengage and kill the Snitch the moment he starts to run away. |
|
Craft Artillery four times. |
This can be accomplished from Sequence 10 onwards. The recipe requires the Blacksmith (Lv. 4), the Woodworker (Lv. 3), Flints (a crafted material), Iron Ore (from the miner) and Oak Lumber (from the lumberers). |
 /
/ to shoot through the body to kill a second enemy.