
Assassin's Creed III Guide Side Quests
The Underground
Magic Lantern Puzzle Solutions
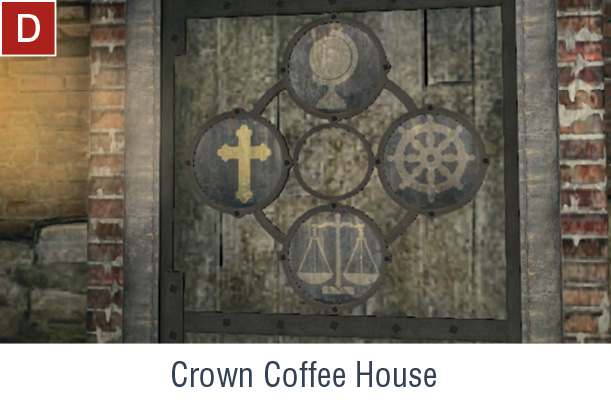
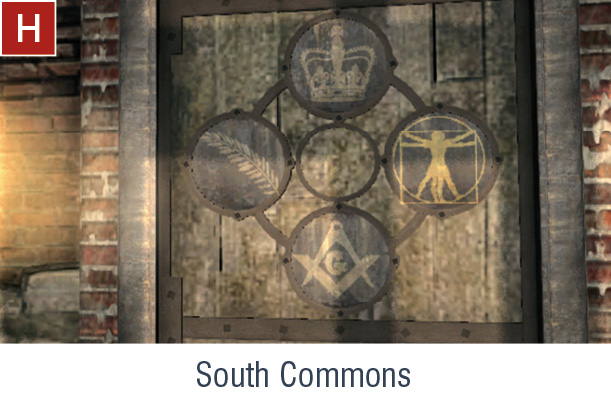
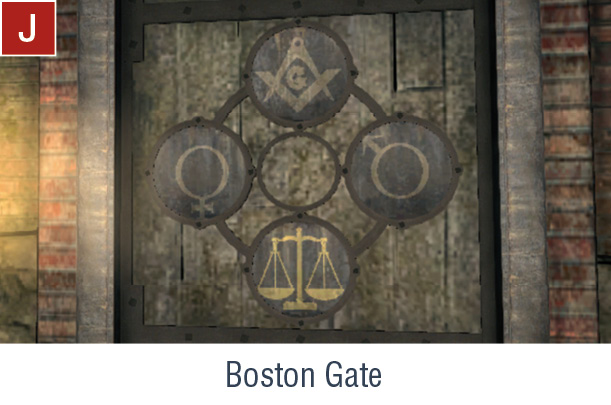
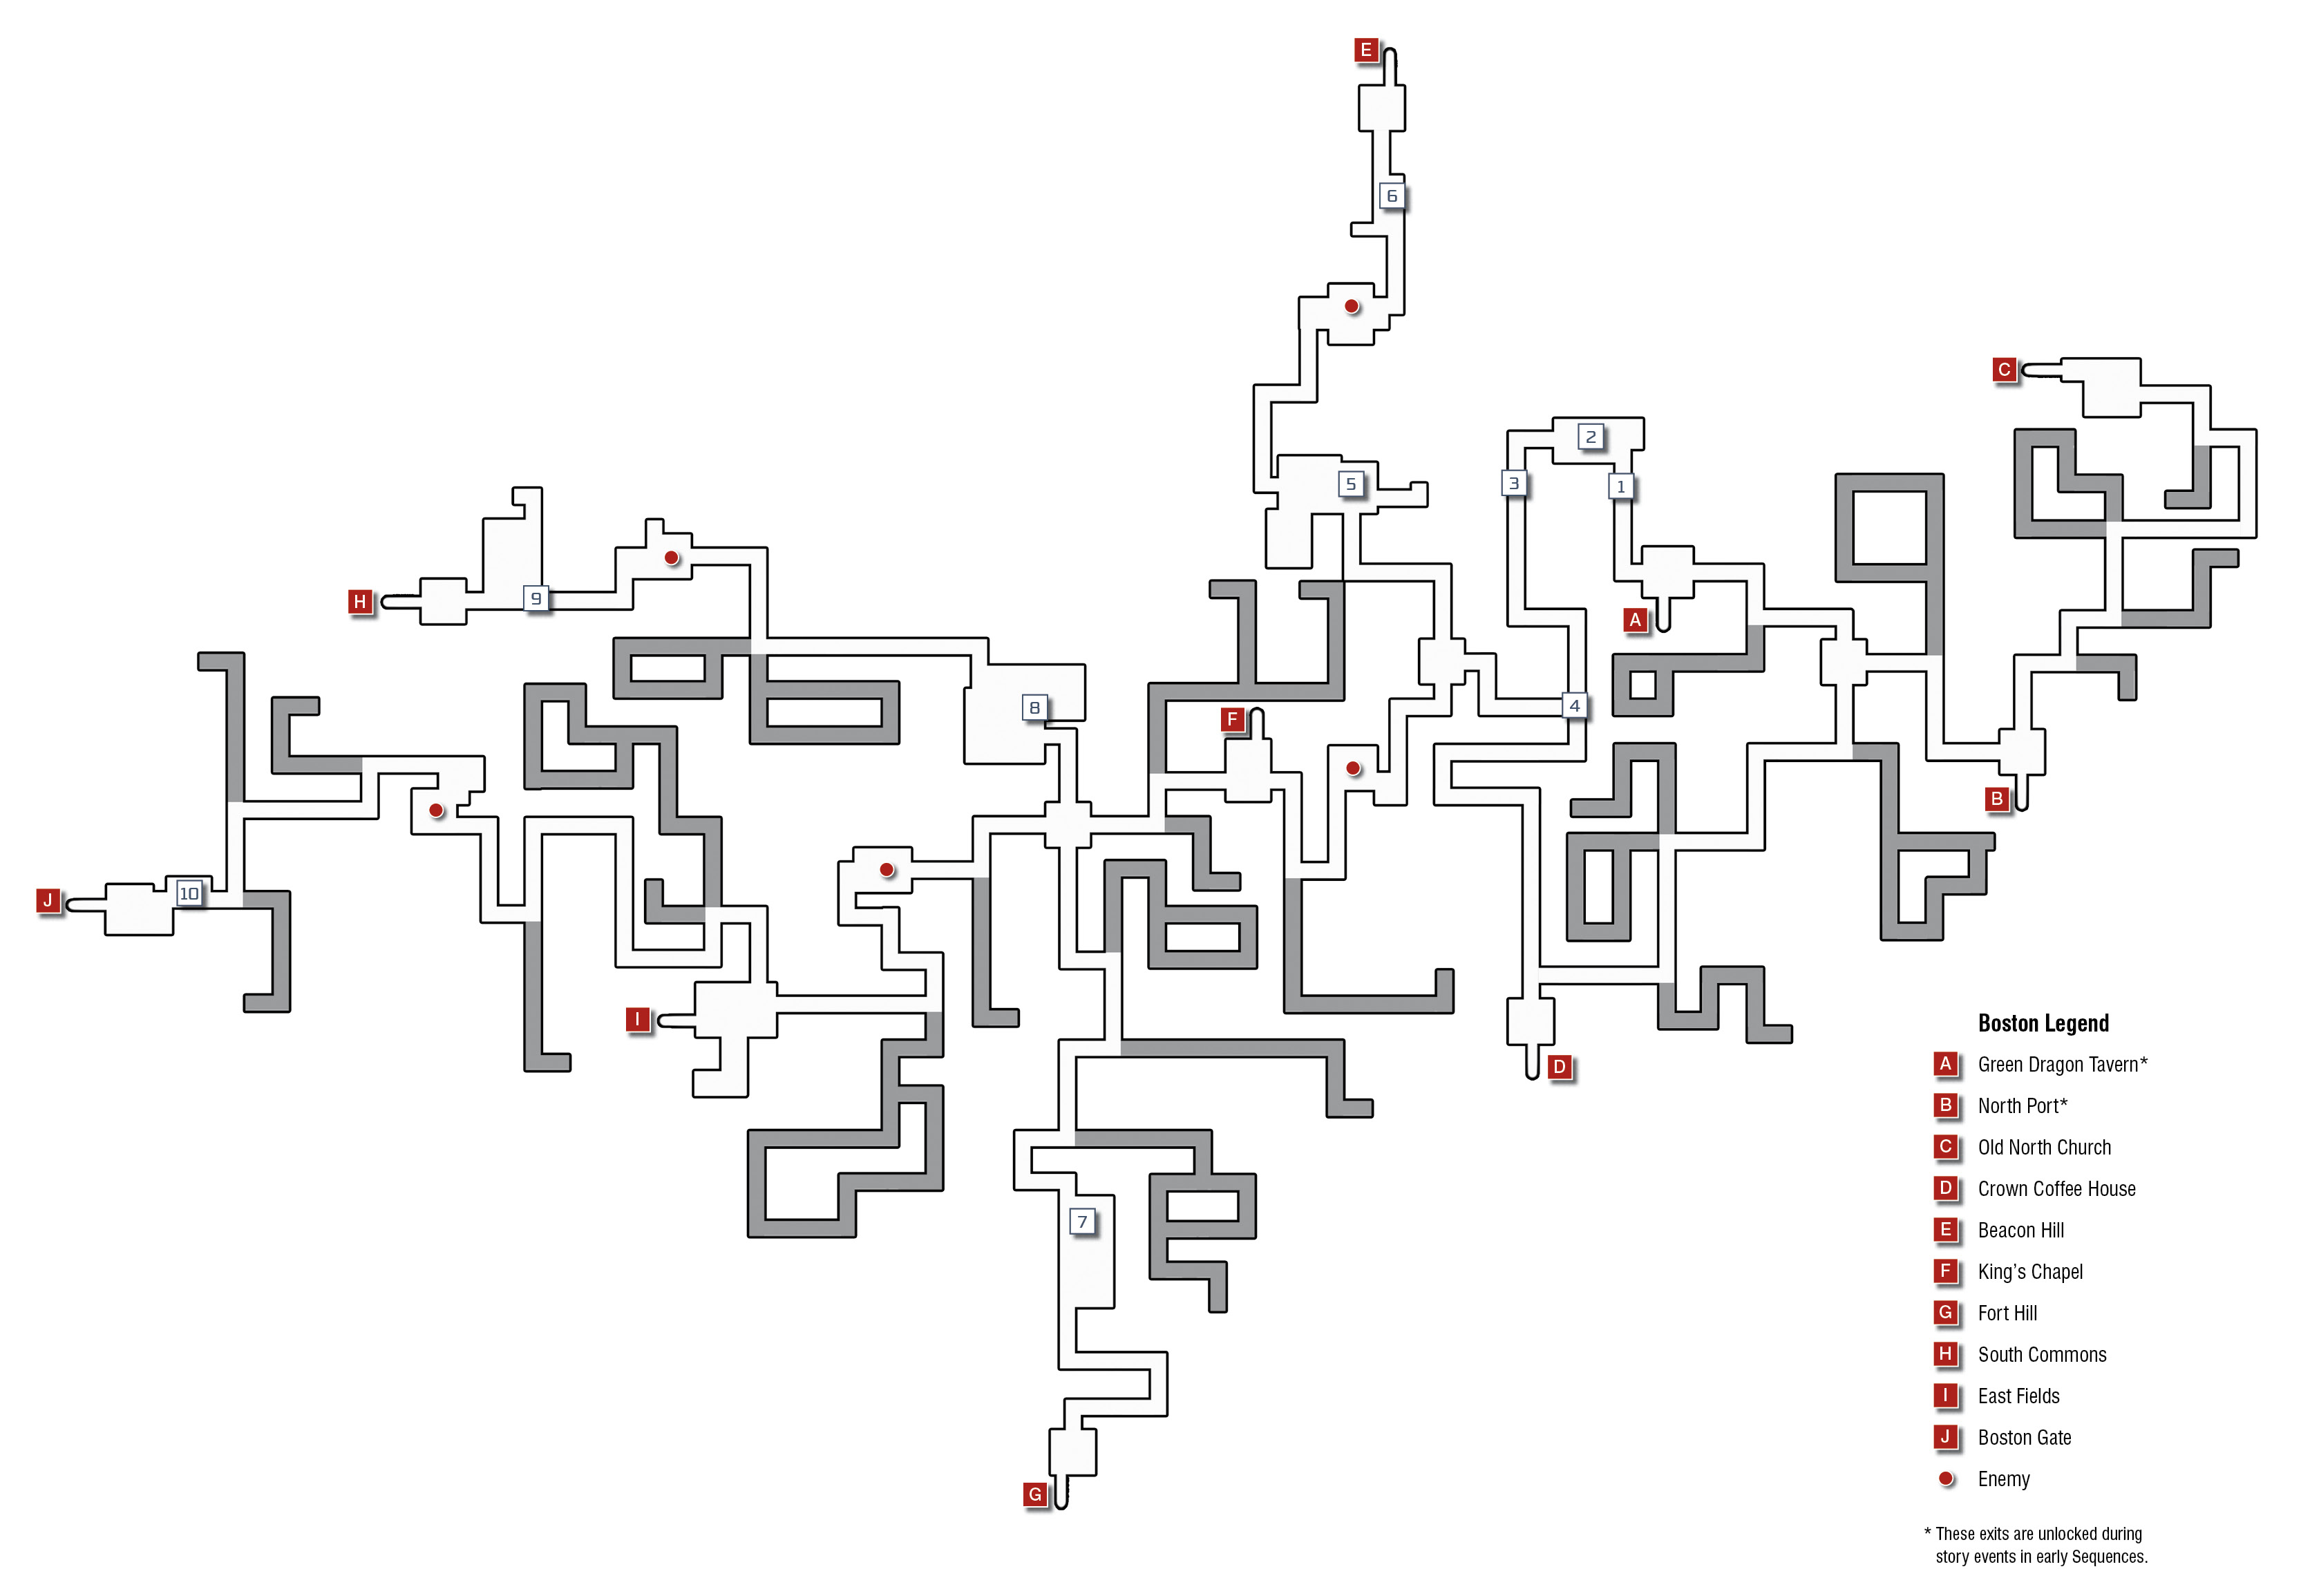
Over the following pages, we offer annotated maps and solutions to the challenges you will encounter in the Boston and New York Underground areas.
- We have grayed out all "dead ends" on the maps to make it clear that, unless you are aiming for full exploration of each area, these paths can be safely ignored.
- Letters are used to signify the positions of each exit, and also denote the ideal order of progression in each underground. The destinations of each lettered exit are revealed in the accompanying legend.
- Numbers correspond to the screenshots and advice that follow each map. These cover all puzzles and steps required to explore all essential areas.
- While it is possible to negotiate the dark tunnels with Eagle Vision alone, our walkthroughs presume that you carry the lantern at all times.
- You must complete a lockpick minigame, a “cranks and pulley” or Magic Lantern puzzle at each exit to unlock it as a Fast Travel destination and increase your Synchronization percentage.
- Finally, you should note that there are regular checkpoints throughout the Underground maps, which record each milestone of note – from opening a locked door, to completing a puzzle. To cut down on unnecessary walking, note that you can Fast Travel between unlocked underground exits.
 BOSTON
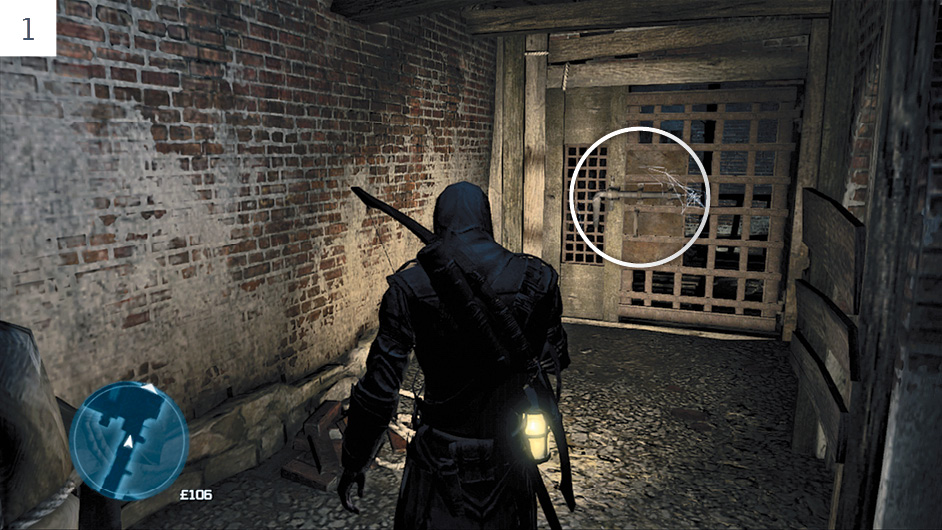
Interact with the gate to unlock it.
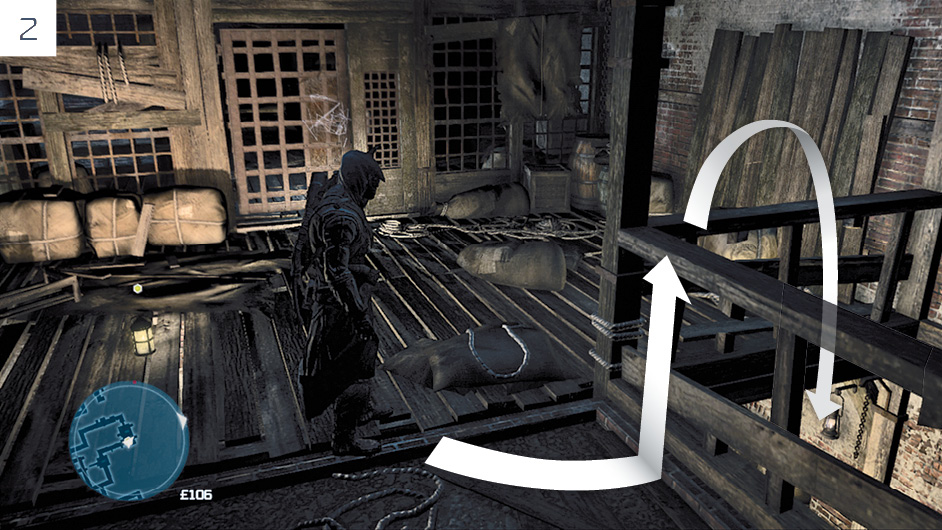
The next gate is bolted from the other side. Climb down to the lower level and follow the linear path to reach the other side. Unbolt the gate, then retrieve the lantern.
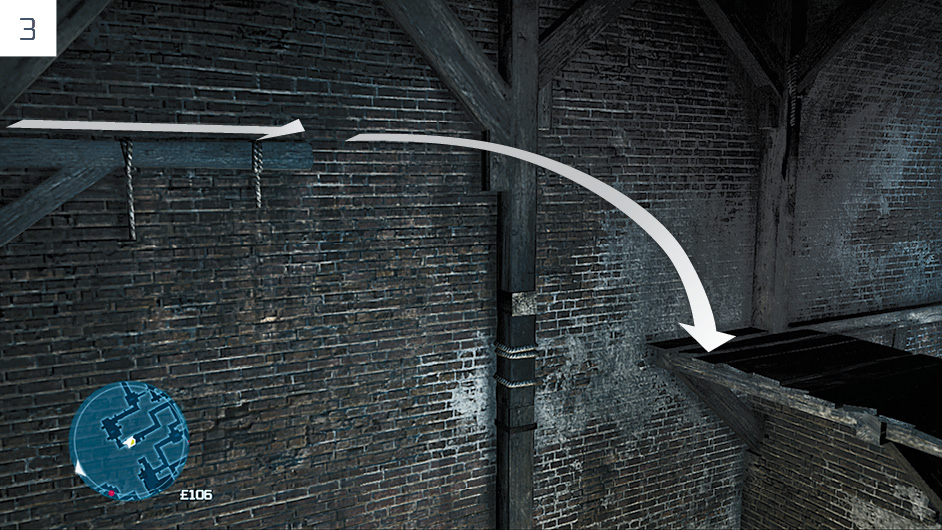
At the next gate, climb up via the crumbling brickwork on the west wall, then traverse to end of the wooden beam shown here. Hold  /
/ , press
  to the right and tap
  /
/ to jump to the platform. Climb down to open the gate and collect the lantern.
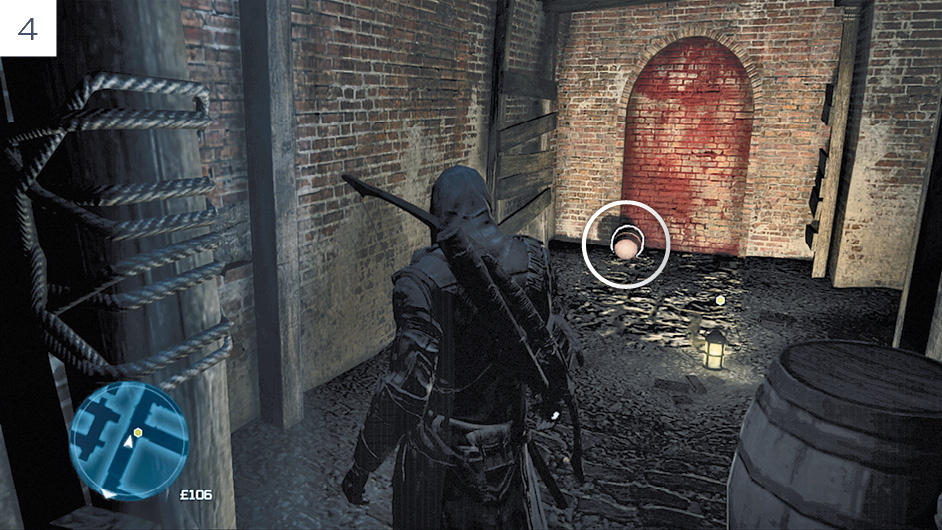
At this corner, there is a powder keg beside the barrel. Pick this up and position it in front of the red brick wall (as shown here), then stand well back and shoot it to reveal a new entrance. Further south, you must destroy a second wall in the same fashion. This path leads to the Crown Coffee House exit, though you can also reach this from the east side of the map.
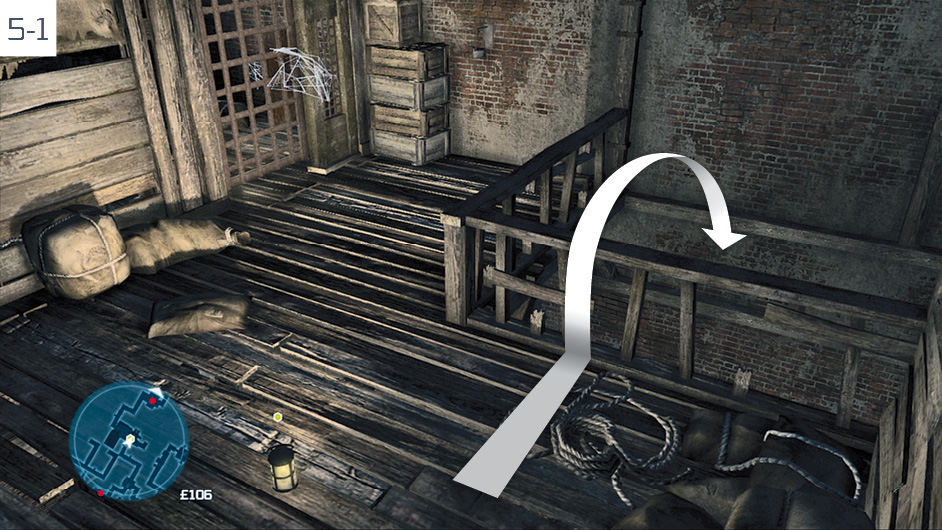
Climb down into the lower level as marked here.
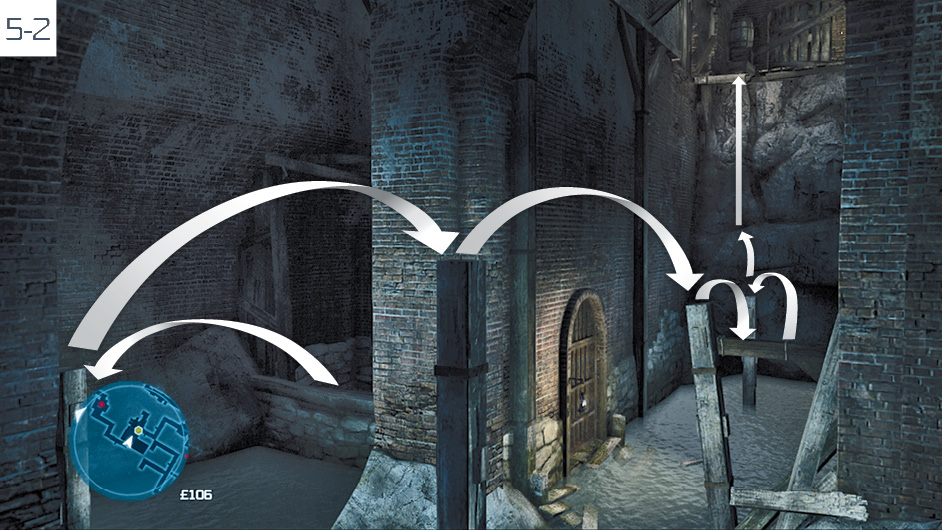
Use the posts and wooden beam to reach a wall, as shown here. You will need to perform a manual jump to reach the wall from the final post. Climb to the top and turn to face west. You can now jump via the beam to the pulley, which Connor will use to swing to the next area.
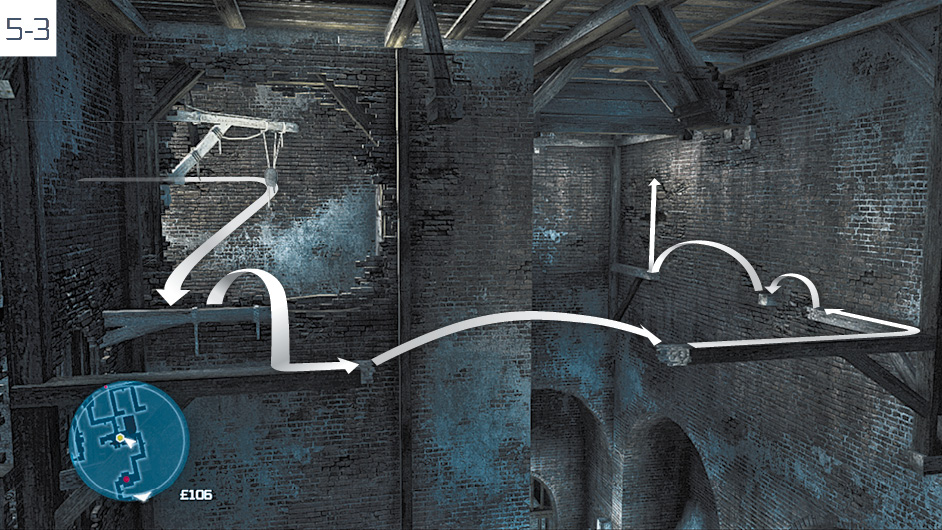
Using the beams on the wall (note that those closest to the camera here are shown from “outside” the playable area), traverse to return to the upper level. Unbolt the gate and collect the lantern.
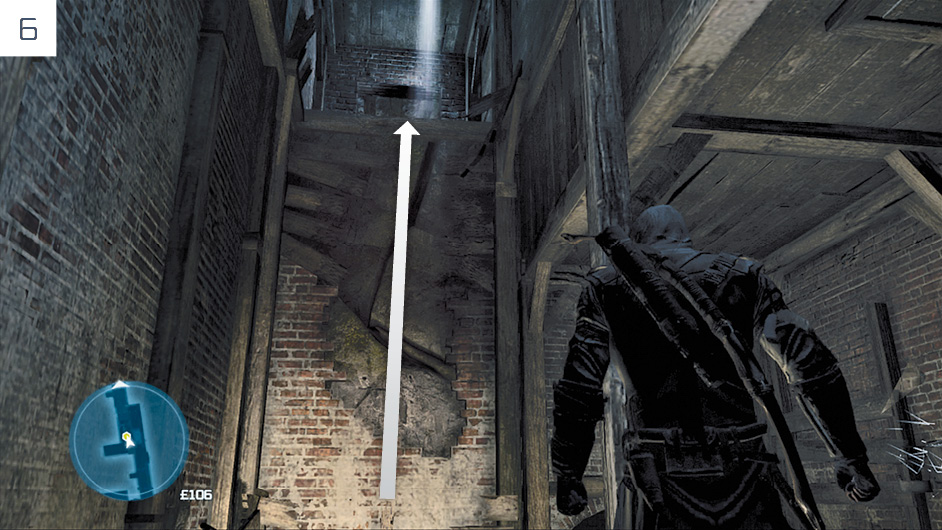
After fighting the brigands, climb this wall to reach the Beacon Hill exit.
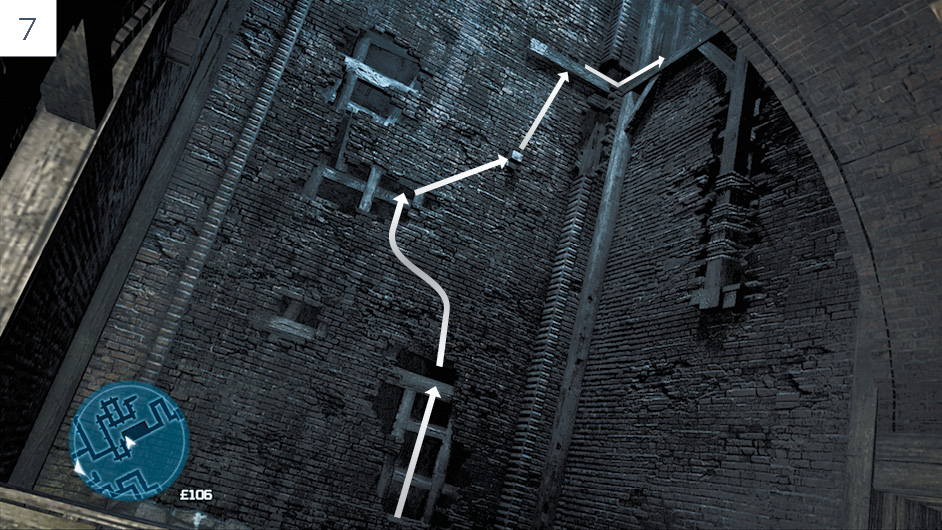
At this location, you must climb a wall and avoid the intermittent streams of water that flow from above. The path marked here is the fastest route. Stop in the central midpoint of the climb and time your final ascent to begin right after the flow of water from the right-hand side ends. Climb through the opening on the south wall and jump to the beam, then the wooden partition, then drop down and unlock the gate.
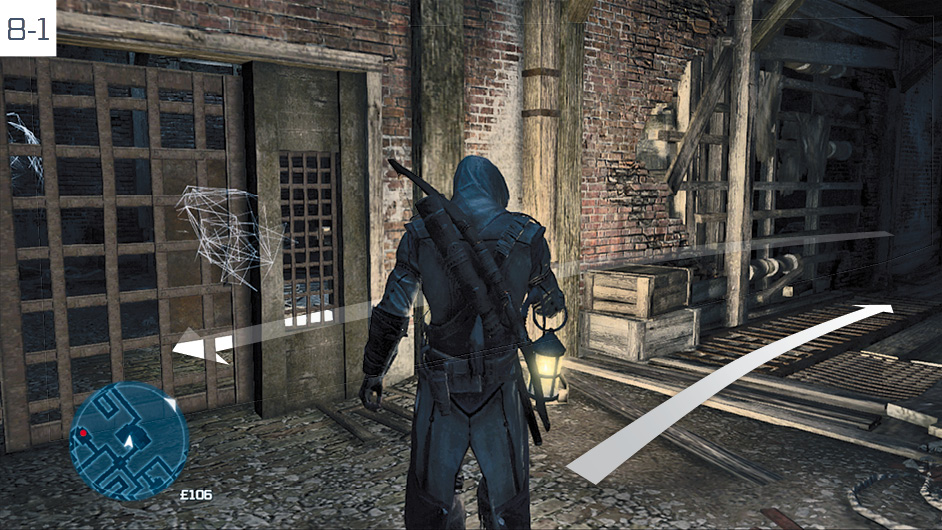
When you reach the door bolted from the opposite side, leave the lantern beside it and drop down through the opening to the north to reach a lower level. Follow the short free run path and climb up to the next room, then unbolt the door.
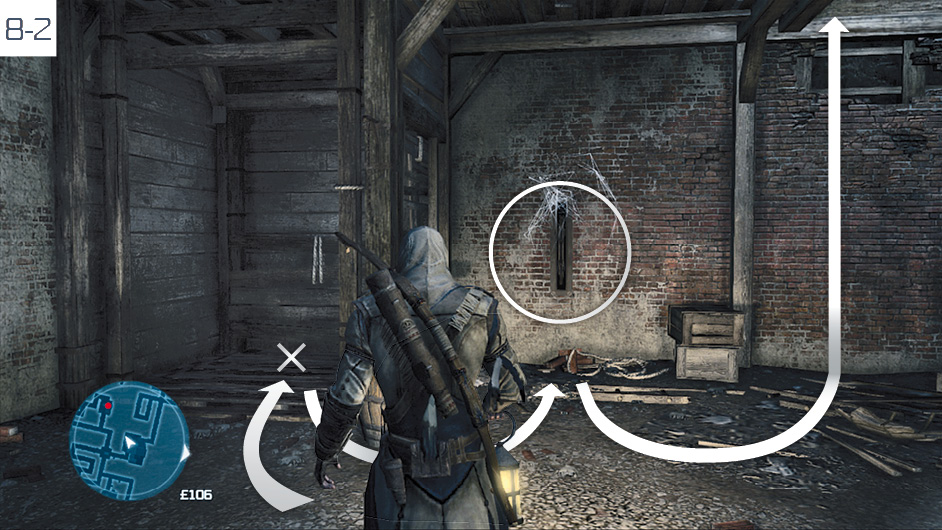
Place the lantern in the elevator, then use the mechanism to the right to move it to the room above. You can then climb up to follow it.
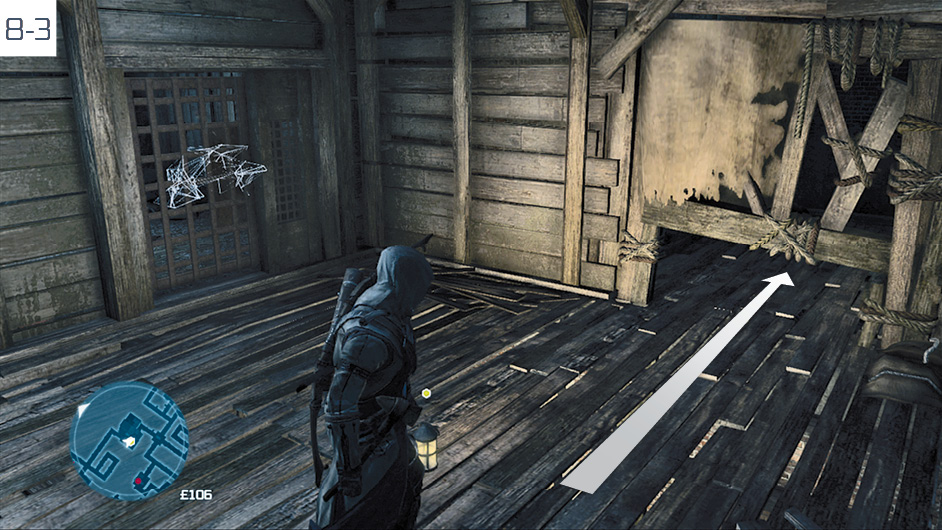
Leave the lantern where it is and slide beneath the gap shown here. Follow the free run course, using the pulley to swing around the corner, then drop down on the opposite side of the gate. Unbolt it, then collect the lamp and continue to the exit.
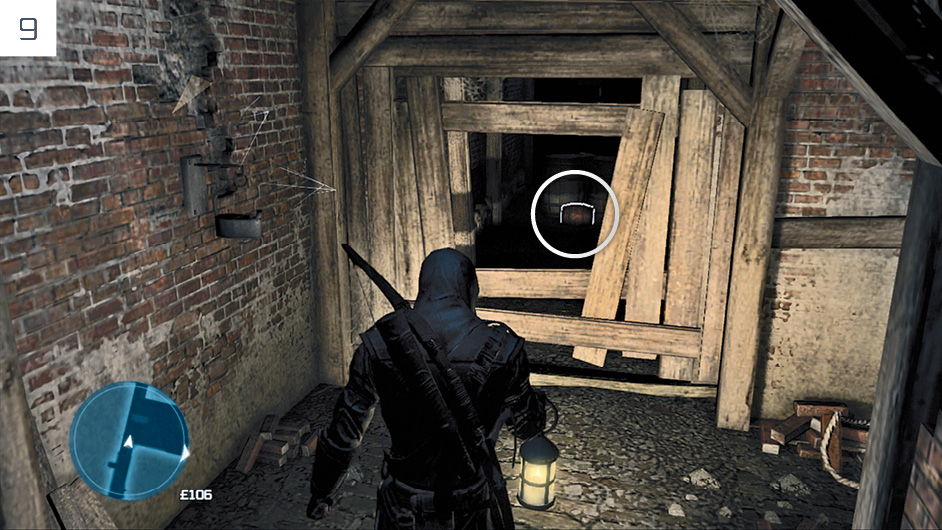
When you reach this position, shoot the powder keg through the gap to unblock the path further ahead.
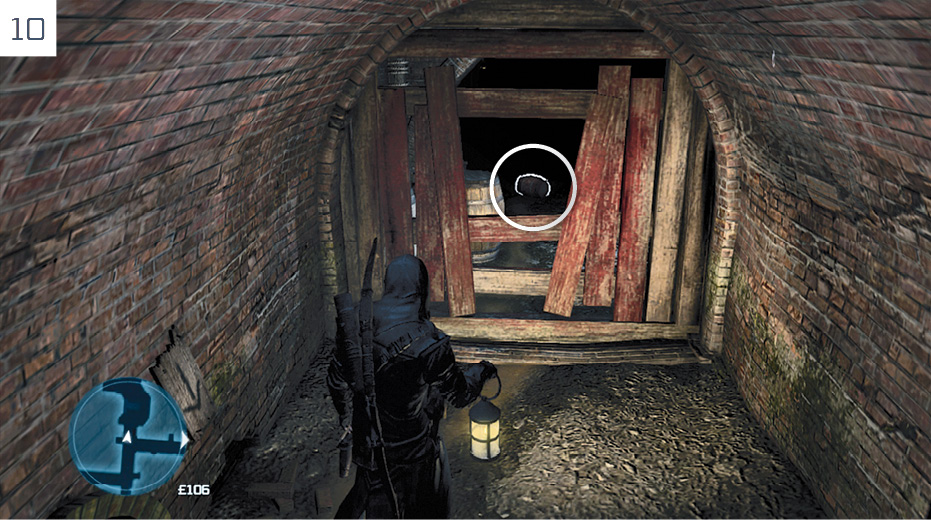
Shoot the powder keg to clear the path.
 New York
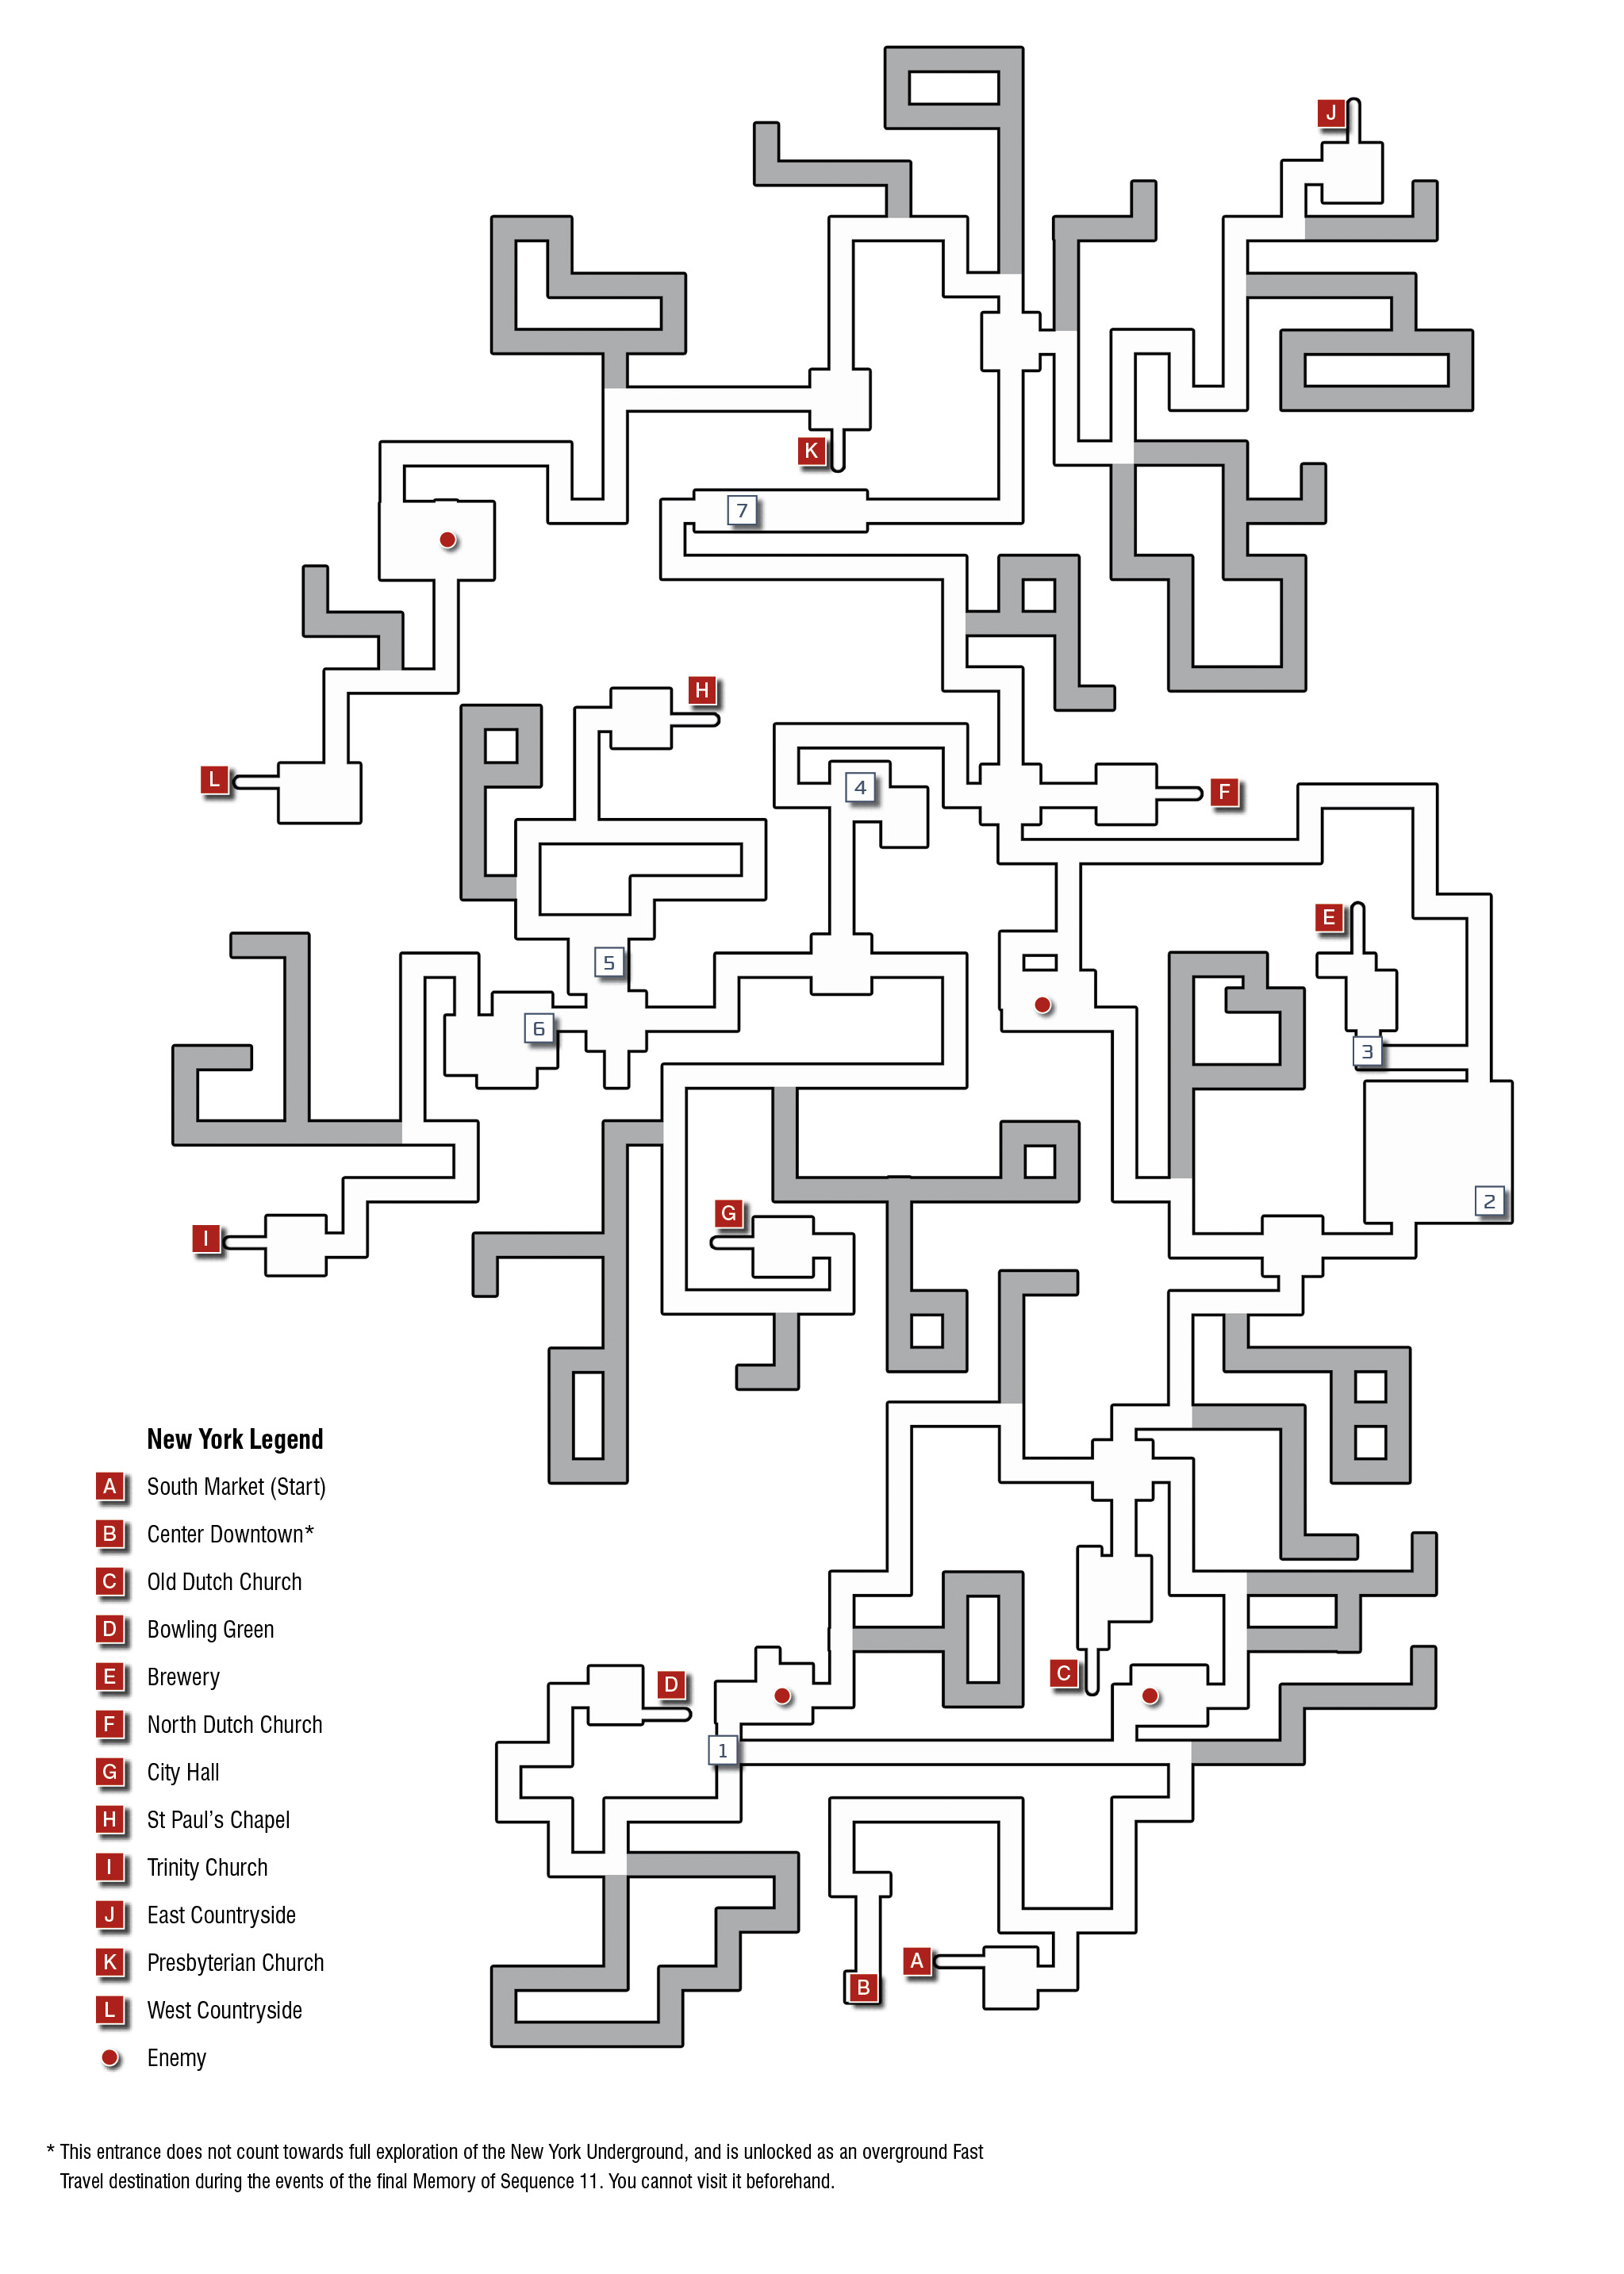
Magic Lantern Puzzle Solutions

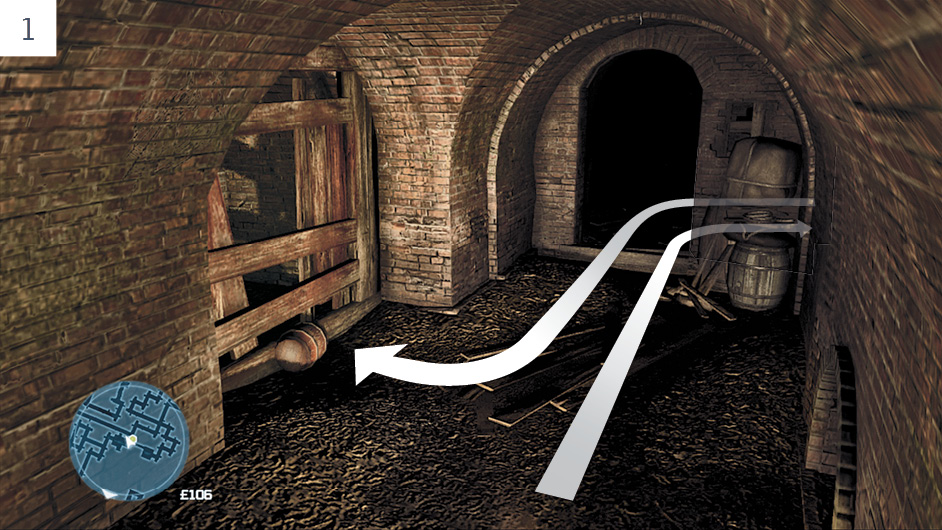
Pick up the powder keg situated a short walk away from this wooden fence, then place it in front of the barrier. Shoot it to open up the long tunnel that leads to the east. At the far end, you will find another powder keg that will enable you to destroy the wall.
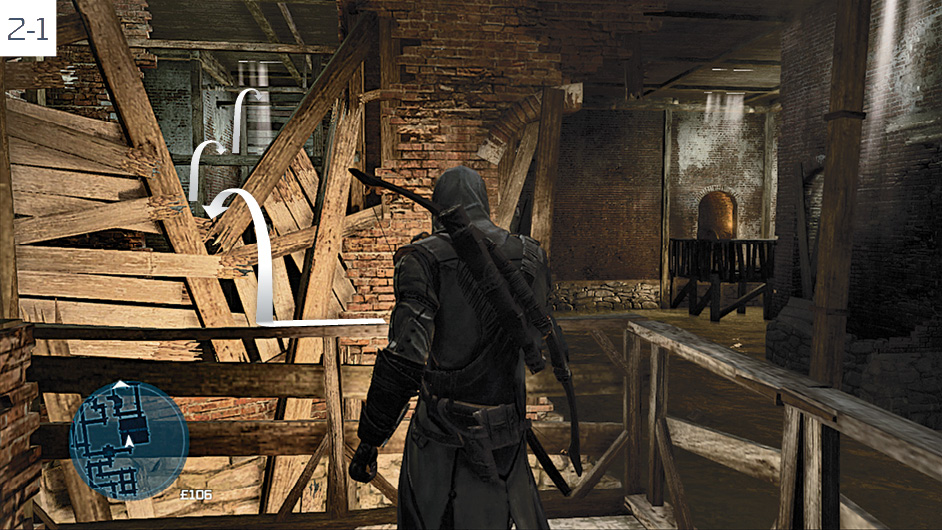
In this room, you must free run and climb to reach a platform in the northeast corner, where a replacement lantern awaits.
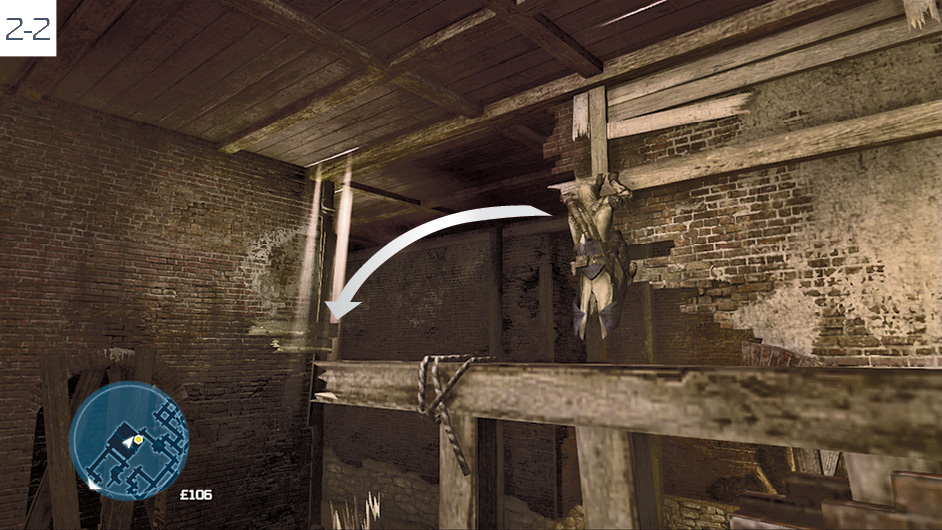
The path is easy to make out, but there’s potential for confusion when you reach this position. You must perform a Side Eject to reach the ledge to the left. Hold  /
/ , press
  to the left and tap
  /
/ to jump. Pick up the lantern and continue onward.
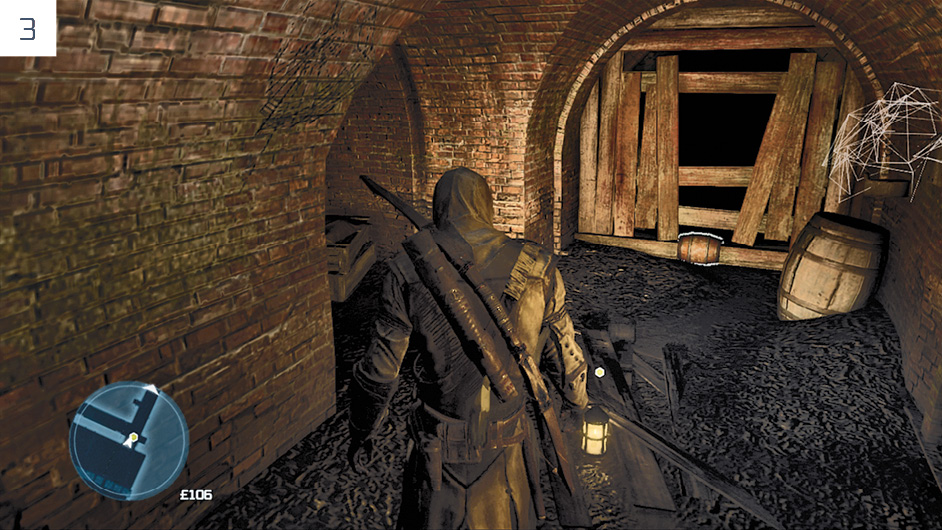
Collect the powder keg to the west of this position and place it in front of this wooden barricade. You can then shoot it to open up the path leading north. At the far end of this long tunnel, there is another wooden barrier that you must again destroy with a nearby powder keg.
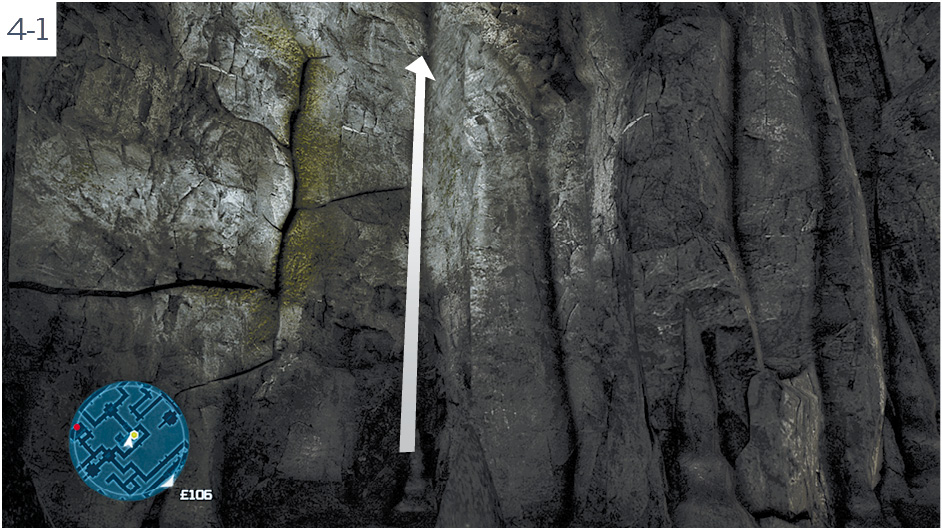
Leave the lantern outside the locked gate, then run to the east and climb the rock wall shown here. When the prompt appears, hold  /
/ and press
  /
/ to perform a Back Eject. Repeat this until you reach the top.
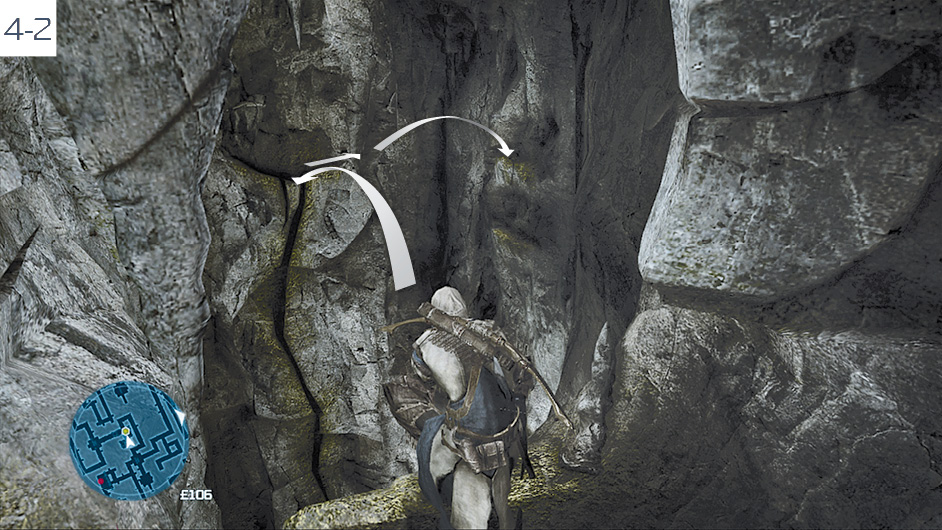
Traverse along the ledges until you reach this position. Jump over to the wall directly ahead. You now need to perform another Side Eject to reach the ledges to the right. Hold  /
/ , press
  to the right and tap
  /
/ to jump. When you land, perform a Back Eject to reach the next ledge. Jump down to the south and drop to the tunnel below to unbolt the gate and collect the lantern.
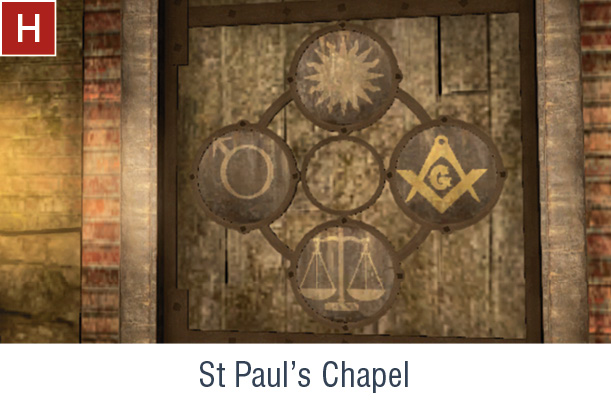
At the locked gate that prevents Connor from reaching the St Paul’s Chapel exit, climb up onto the platform to the east of the doorway. From here, you can shoot a concealed powder keg. Drop through the hole in the wall created by the explosion to unbolt the gate, then move the lantern inside.
To move beyond the next locked gate, climb via the route shown here. Shoot the powder keg to the east, then drop through the hole created to unfasten the bolt. Collect the lantern and move on.
Operate the mechanism to the right of the locked gate to lower an elevator platform just beyond it, then climb over to the other side. Unbolt the gate, then place the lantern on the platform.
Climb over the next bolted gate and jump over the water below to reach solid ground to the west. Operate the mechanism to lower a second elevator. As before, unbolt the previous gate, then bring the lantern through.
Climb the wall marked here. Jump over to the wooden beam in the next room, then Side Eject to the right to reach an opening. Drop down on the opposite side to unbolt the final gate and collect the lantern.
This is a slightly more demanding variation on a timed climbing puzzle encountered in the Boston Underground. You must climb via the route marked here, performing the Back Eject move to leap between the ledges on the two walls and avoid the torrents of water. From the beam at the top, leap to the pulley to reach ground level and unbolt the gate.