
Assassin's Creed III Guide Walkthrough
Sequence 06
On Johnson’s Trail
Mission Overview
|
Optional Objectives |
|
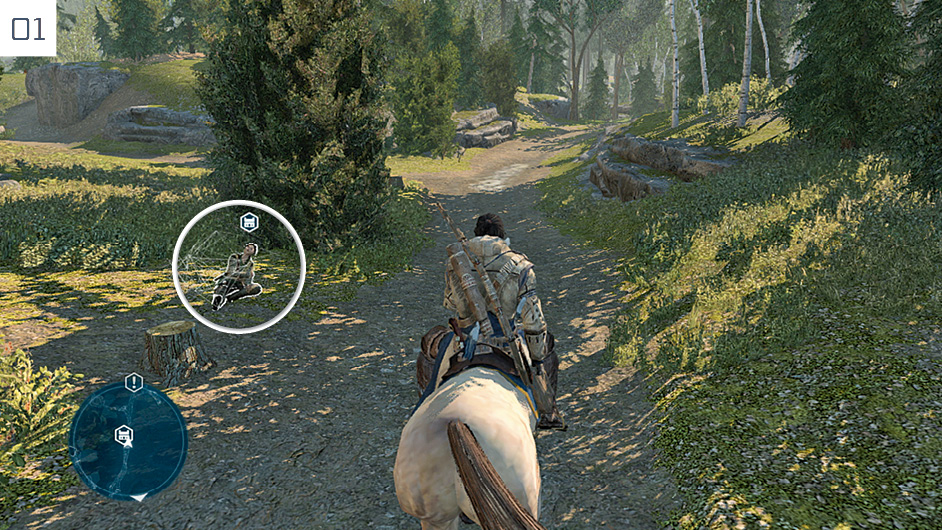
Before you leave the Homestead to begin this Memory, we strongly suggest that you complete the Silent Hunter mission (starting position highlighted here) to learn how to use your new Rope Dart weapon. It can be found a short walk to the southwest from the Manor; see page 194 for assistance. We would also advise that you familiarize and engage yourself with developing and exploiting the Homestead to increase your income. Starting now will make a big difference later in the story.
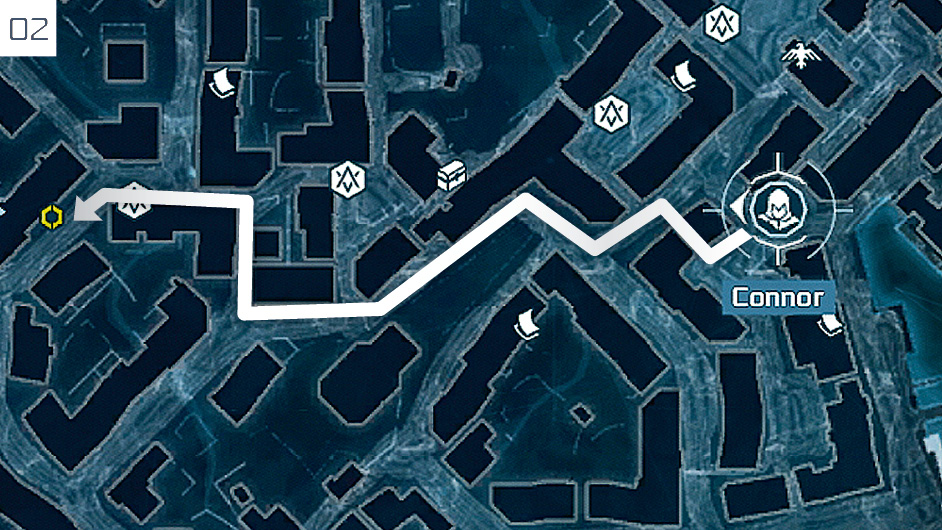
When you are ready to begin, Fast Travel to Boston. Make your way to the Memory Start marker at the docks and strike up a conversation with Sam Adams. Walk with him until a cinematic begins. When it ends, assist the indignant Frenchman in dispatching the four soldiers, then make your way to the meeting – tear a poster down if you have reached Notoriety level 1 to travel incognito. Do not tackle any tax collectors that you encounter during the journey, despite the onscreen prompts: you can deal with these later. Dispatching them now would increase your Notoriety.
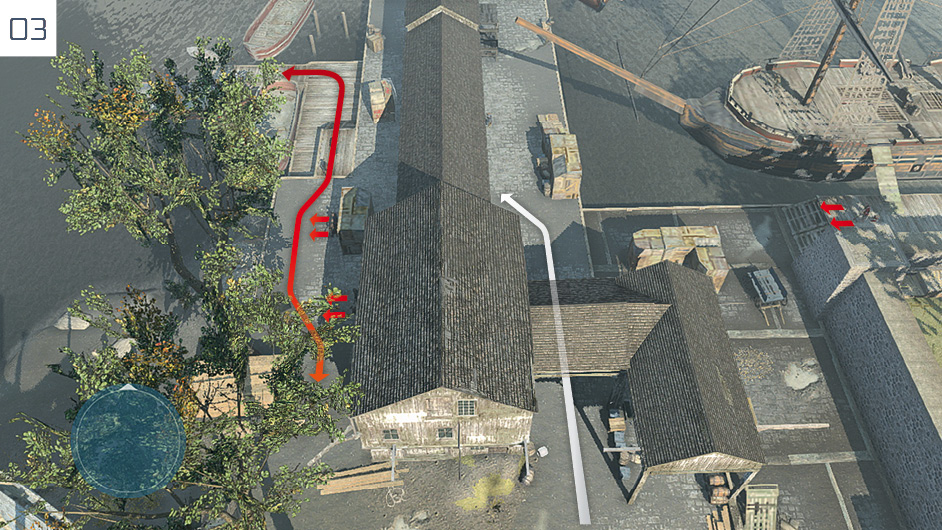
After the cinematic, leave the building and make your way straight to the waypoint at the docks – again, ignore tax collectors and smugglers for now. When you reach the Restricted Area, make your way to the east side of the circle, close to the imposing stone fort. If you approach the first cargo target as illustrated here, you can easily avoid the four stationary guards and single patrolling soldier on the west side of the building.
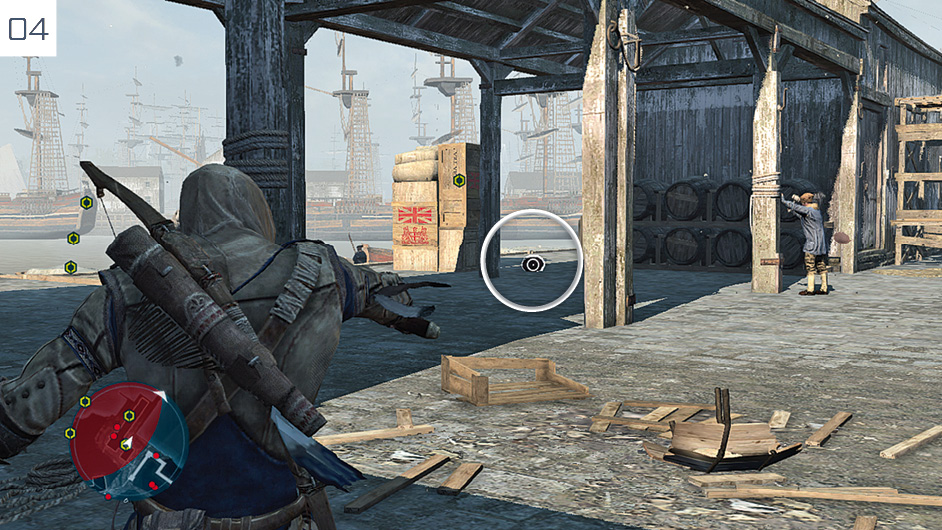
There is no direct prohibition on conflict in this Memory, but our stealth-oriented approach will enable you to fulfill all Optional Objectives with ease. If you do find yourself in combat, be sure to tear down Wanted posters afterwards to keep your Notoriety level under control. Wait until the patrolling soldier approaches the boardwalk, ready Connor’s pistol, then emerge from cover and target the powder keg on the ground with Precision Mode aiming ( /
/ ), and open fire.
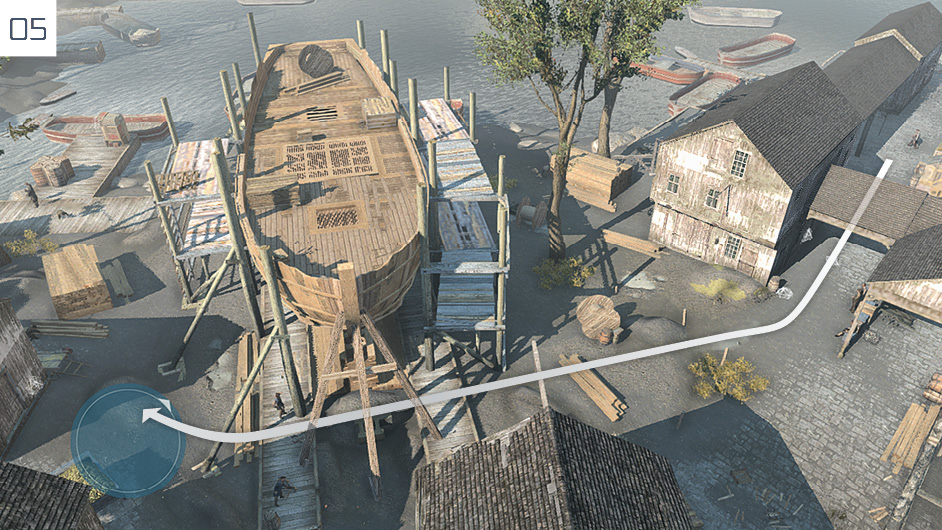
As soon as the powder keg explodes, escape via the route detailed here to leave the vicinity before the guards can move to investigate.
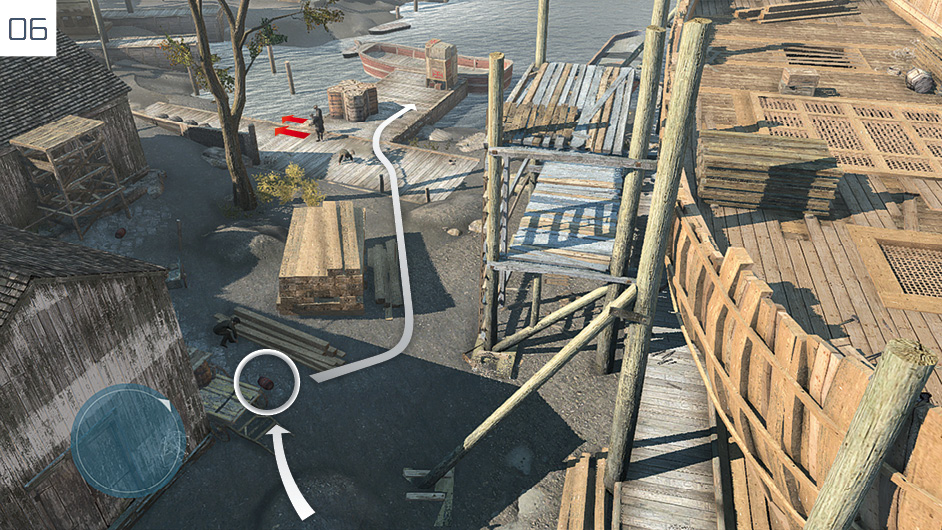
There is no powder keg next to the second pile of illegal cargo so, to complete the Optional Objective, pick up the one marked here, then calmly walk it over to the boardwalk. As long as you don’t break into a run, the two guards should be oblivious to your presence.
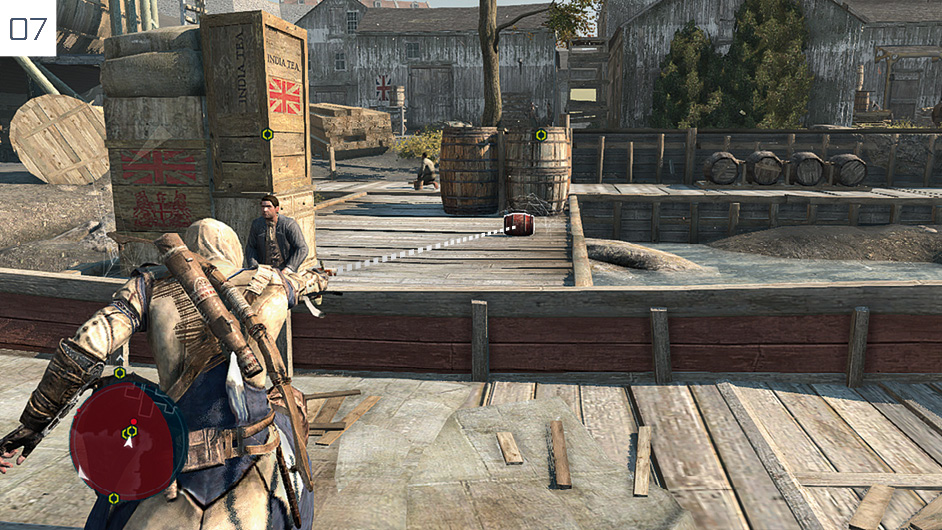
Drop the powder keg beside the cargo, then jump onto the boat to take your shot from a safe distance. As it explodes, turn and leap into the water. Dive beneath the surface (to reduce the chances of detection) as you swim to the next objective marker on the wharf directly ahead.
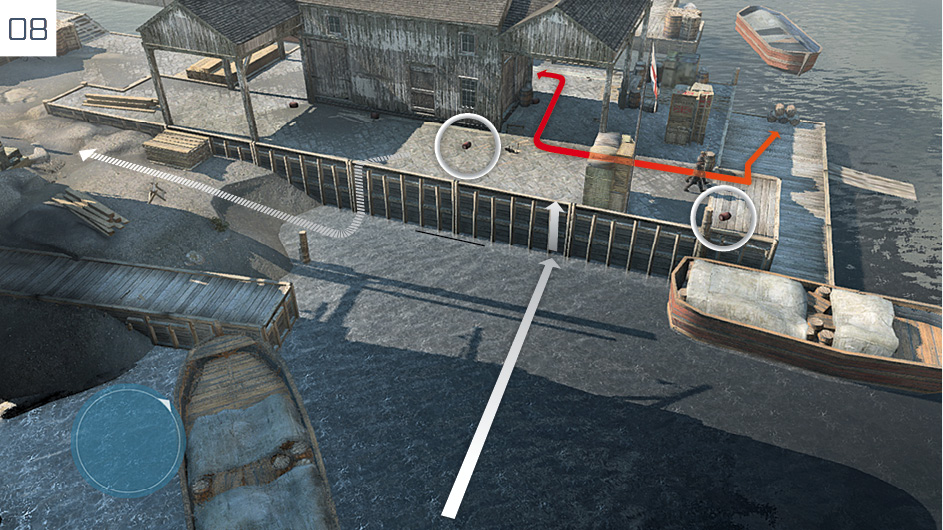
Climb onto the side of the wharf and observe the movements of the two guards. They move in formation, and will stand for a fairly lengthy duration when they stroll down to the boardwalk. This is your chance to climb up, position a powder keg next to the cargo, and shoot it as before. Immediately jump back into the water, then follow the path shown here to exit the Restricted Area.
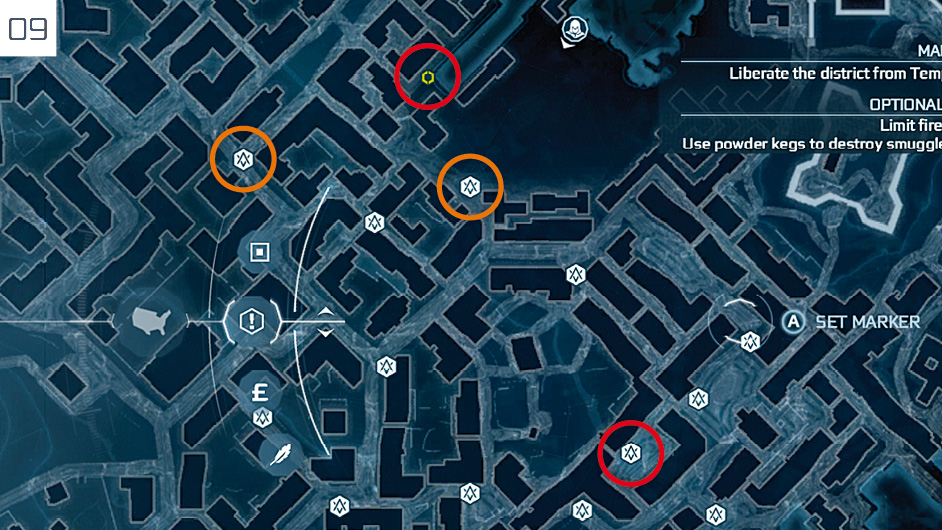
With this Memory’s principal challenge over, it’s now time to finish two final objectives: destroy crates carried by two smugglers (orange circle on our map ), and eliminate two groups of tax collectors (red circles). We’ve highlighted the easiest targets here, situated in areas that feature few or no additional hostiles.
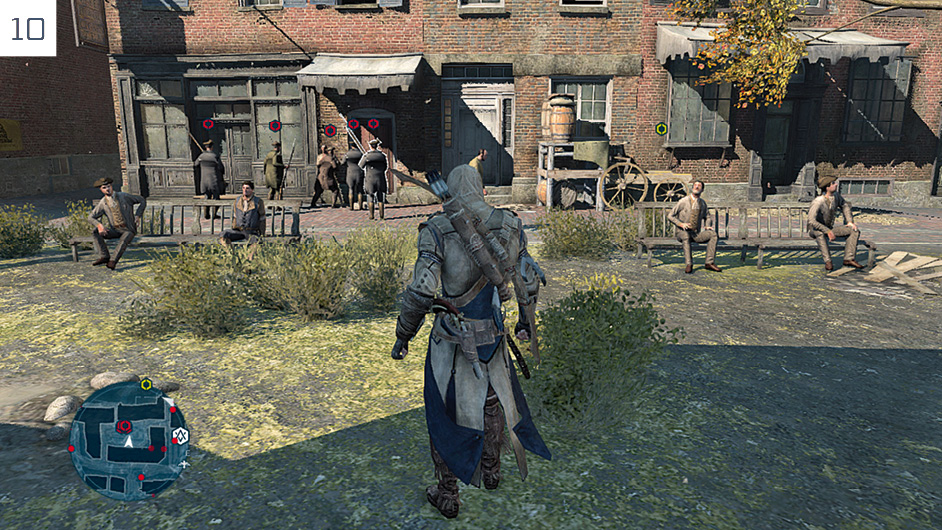
With tax collectors, start the battle with a suitable assassination. Of the two that we mark on the map, only the site close to the two highlighted smugglers may involve an intervention by a small Redcoat patrol. If you wait until they pass and move out of range, you can fight the tax collectors without additional complications. To keep your Notoriety level down and complete the related Optional Objective, be sure to tear down Wanted posters (which can be found close to both groups of tax collectors) after the battles.
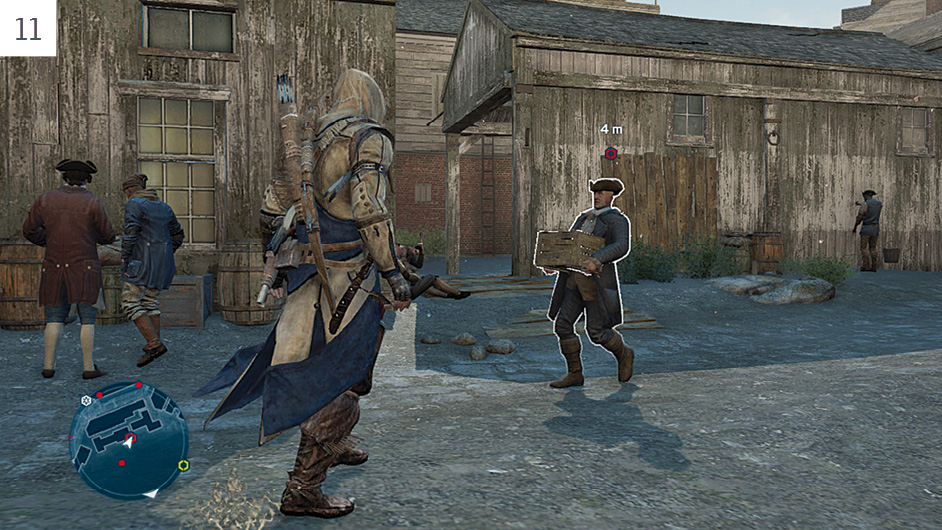
Smugglers are much easier to deal with. Ensure that there are no guards present (there certainly shouldn’t be with the sites we recommend), then simply run and barge into them. As the crate smashes to the floor, turn and sprint away to escape the smuggler. They will give chase, but soon lose heart.
The Angry Chef
Mission Overview
|
Optional Objectives |
|
 The first stage of this short and intense Memory has Connor trailing in the furious Chapheau’s wake as he seeks to remonstrate with British soldiers. The only real difficulty here is completing the challenging Optional Objectives – so this will be our focus in this section. Equip the Hidden Blades immediately: you’ll be needing them throughout.
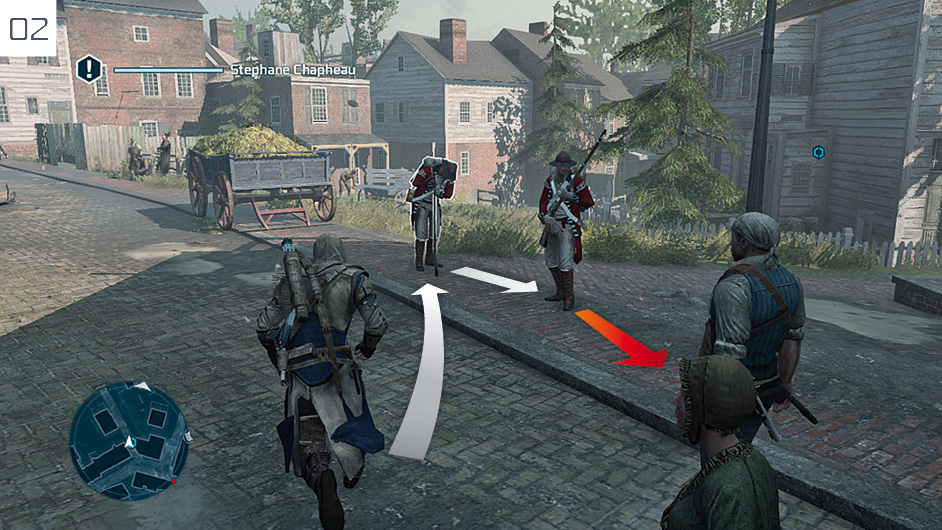
As Chapheau attracts the attention of the first two guards, move behind the most distant of the two and assassinate him, then Fast Walk and dispatch his partner before a fight can break out.
The Redcoats being assailed by the crowd do not attack, so feel free to ignore them. When you reach the next two, follow the same procedure as before. However, you need to be faster this time: get behind the most distant guard and try to assassinate him before the other reaches Chapheau.
The subsequent confrontation is much more testing, but there is a checkpoint just before it begins. Run behind the closest Grenadier and assassinate him, then his companion; you must then defeat the second pair in open conflict before the timer elapses. If you are quick, you can defeat the remaining Regular with a Counter Kill and then assassinate the Grenadier while he is distracted by Chapheau.
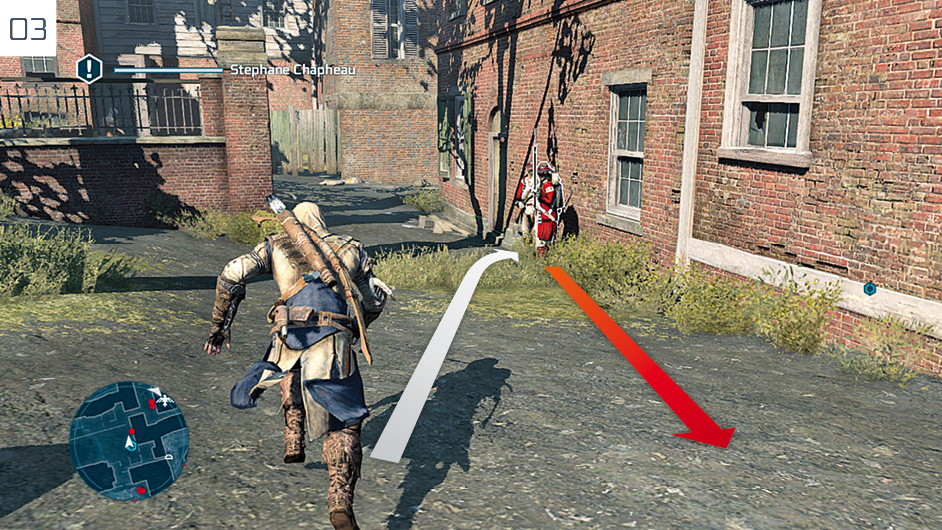
As you follow Chapheau through the alleyway, he will exit to the left. When you see two soldiers approaching, take the initiative and assassinate them. If you don’t, Chapheau will push one to provoke a fight.
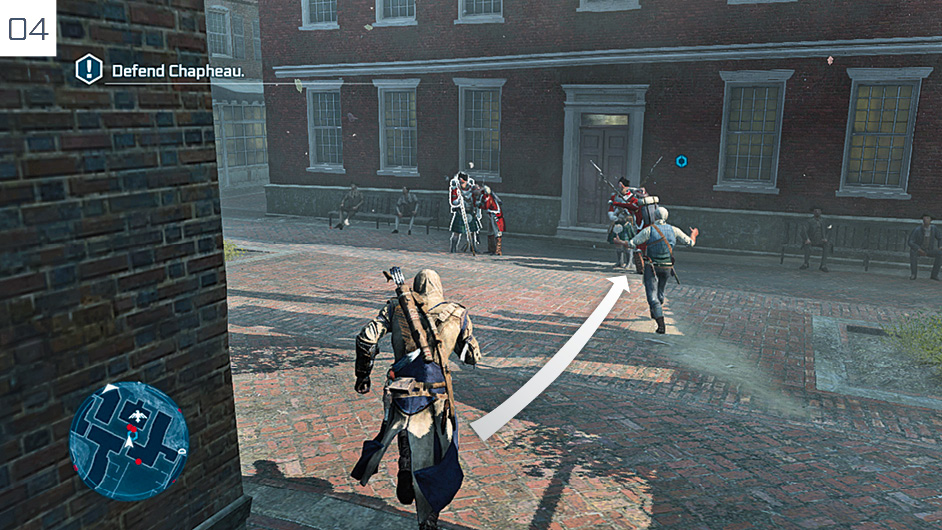
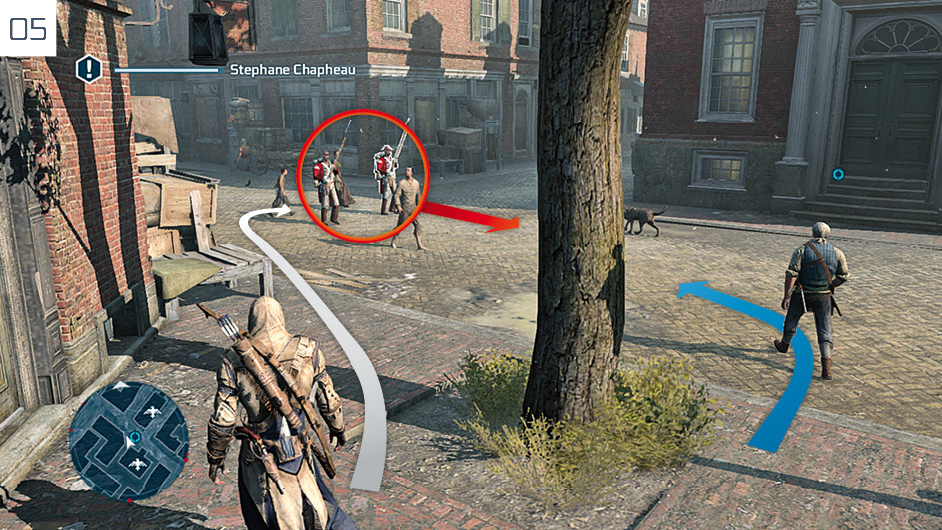
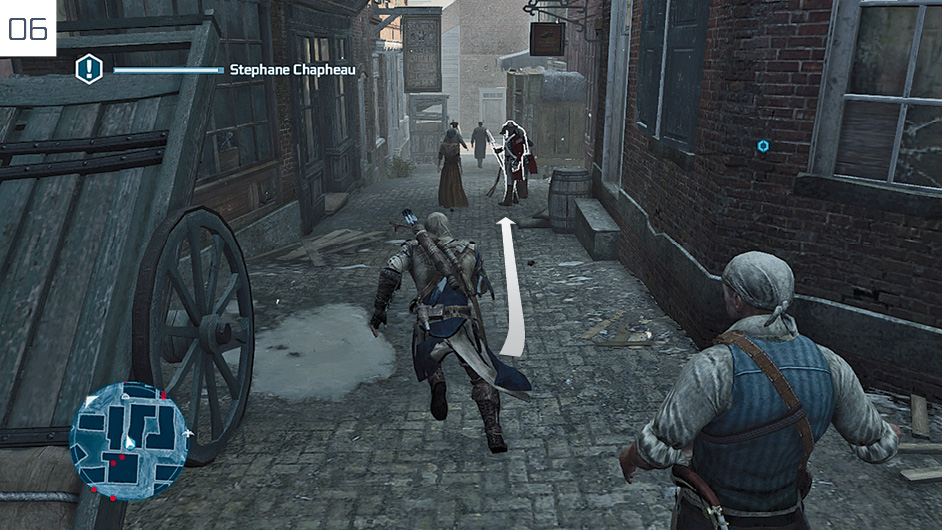
In a later alleyway, watch for two soldiers after Chapheau turns to the right. Once again, sprinting ahead to assassinate them is the safest strategy. After the cinematic, follow the onscreen instructions to direct Chapheau to the appropriate target.
The Tea Party
Mission Overview
|
Optional Objectives |
|
 After starting the Memory, your first objective when play begins is to eliminate the highlighted guards at the docks. This is a good opportunity to call Connor’s new Recruit into action. We suggest that you save him for the larger of the two groups, situated on the left-hand side of the ship from your starting position.
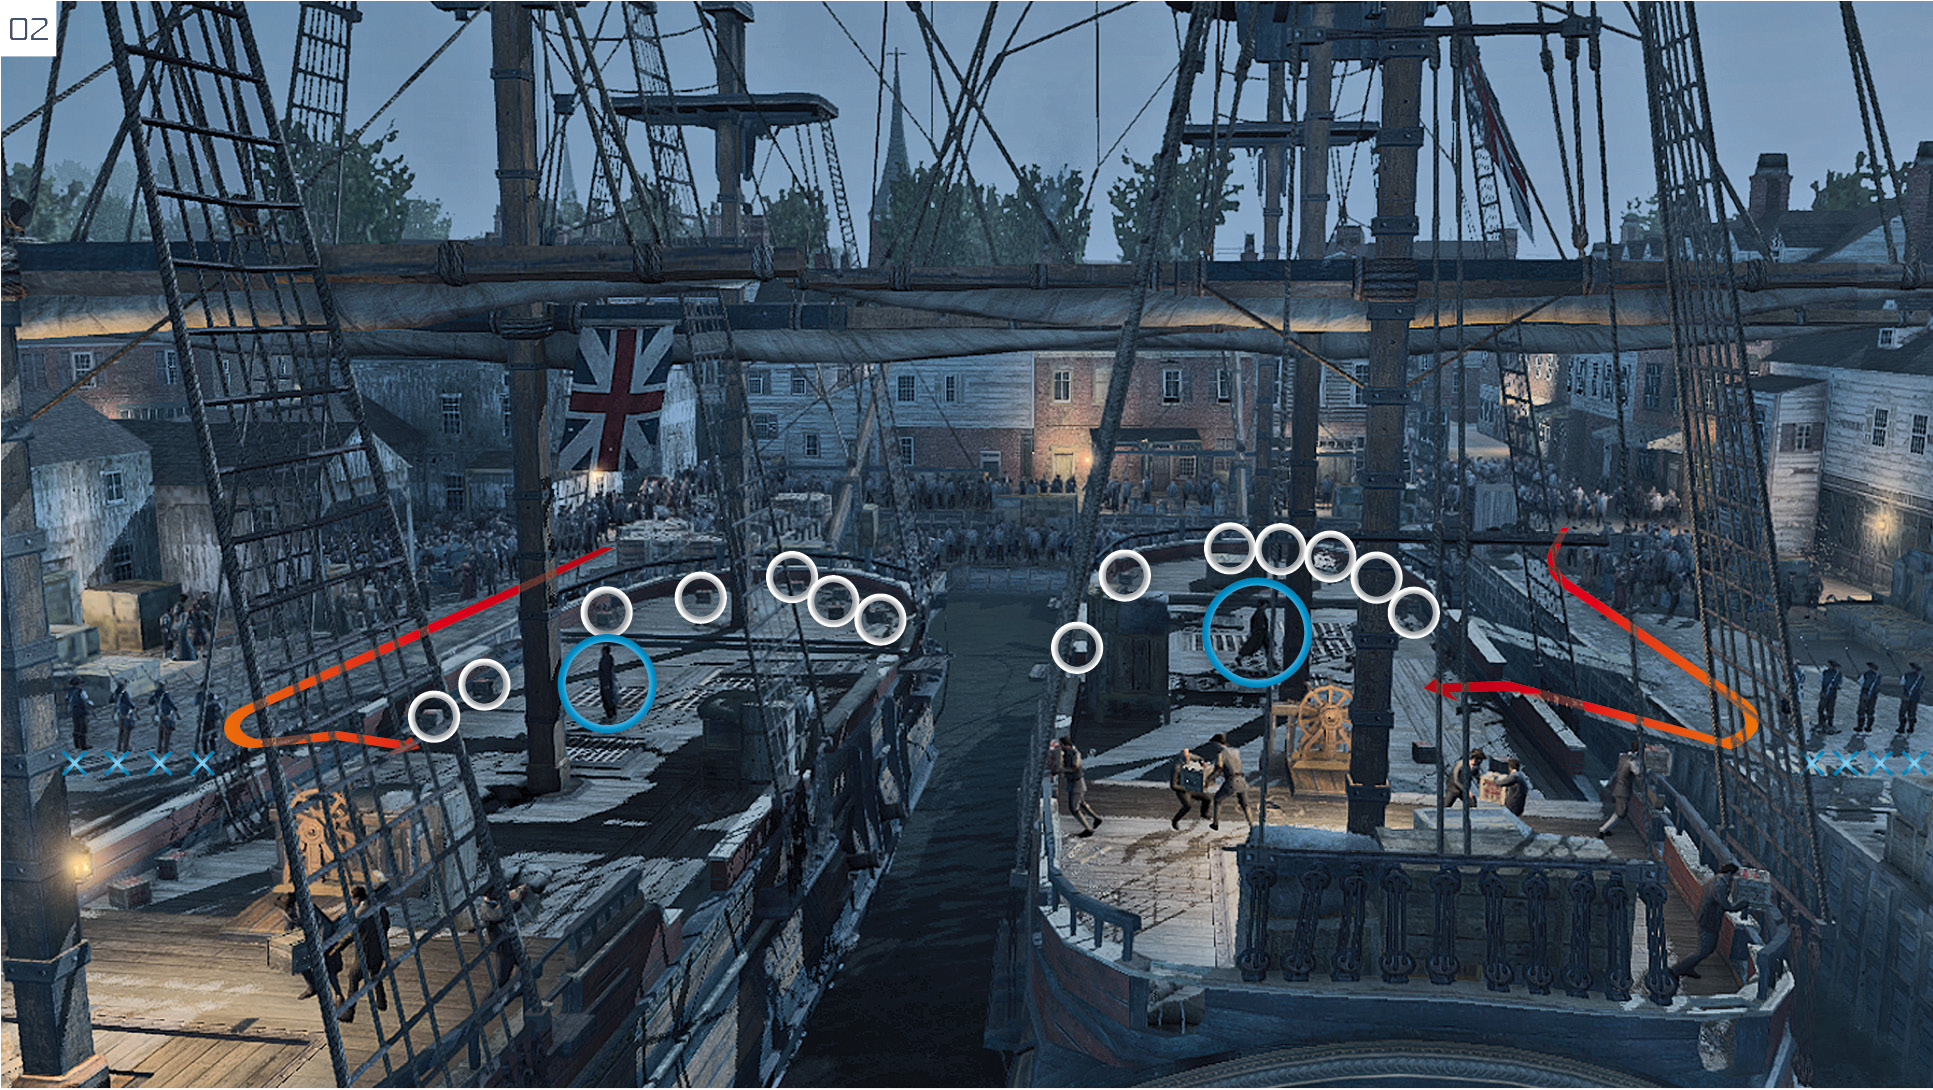
Once all fifteen targets have been killed, the main section of the Memory begins. As the challenges you face are primarily based around extended combat and situations that will vary on each playthrough, our guidance here will focus on tried and tested tactics. Study our annotated map of the action area. The two men that Connor must protect (Revere and Molineux, blue circles) will each remain on the decks of their respective ships. To the left and right of the two vessels, small gangs of allied soldiers (blue crosses) will attempt to stop the advance of aggressors. Enemies (red lines) will arrive on either jetty, and will attempt to board the ships via the gangplanks, attacking Connor and the men he is enjoined to protect. Finally, crates of tea (white circles) that Connor can throw into the water to satisfy an Optional Objective are mostly found close to the bow on both ships. Your task is to ensure that Revere, Molineux and, indeed, Connor do not fall before the timer expires. This is represented by the total quantity of tea dumped, regularly updated in the upper left-hand corner of the screen.
General Tips
- Start the Memory by dumping as many boxes of tea as you can; press
 /
/ to pick them up, then
  /
/ to hurl them into the water. Be careful with your aim: those hurled onto the dock do not count. Moments of calm where this is possible are few and far between later on, so you should aim to clear all ten immediately. You can ignore this step entirely if you do not intend to complete the Optional Objectives.
 - To perform the musket air assassination, grab a musket (there are gun racks on the ships), then hop onto the guard rail on either vessel to assassinate an opponent on the dock below. We suggest that you attend to this Optional Objective after you finish with the crates.
- Though the opening battles are quite trivial, the numbers of opponents you face soon increases. If you notice that Revere and Molineux are under attack by several opponents, respond immediately. Later in the battle, focus Connor’s energies on protecting whichever of the two has the least health remaining. Officers present the gravest threat to your allies.
- Don’t forget to call upon your new Assassin Recruit as events unfold. If you are busy fighting on one deck, you can direct him to attack soldiers on the next ship.
- You can easily hop between the two vessels, but the attacking soldiers will not do the same. Be very careful not to fall into the water: this can be disastrous.
- Though the Optional Objective to throw three soldiers into the water suggests that you must use the Counter Throw ability, you can also just punch or kick them whenever there is no obstruction to prevent their fall. This is far easier to perform if you engage a wave of soldiers on the dock when they first arrive.
Hostile Negotiations
Mission Overview
|
Optional Objectives |
|
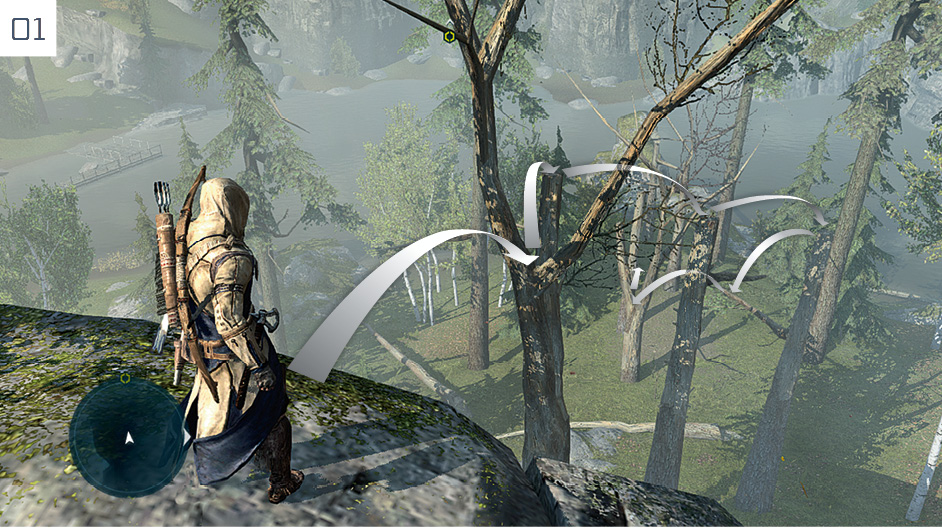
Fast Travel to the Homestead to find the Memory Start marker, then head to the Frontier to continue. Once again, this is a Memory where a desire to beat Optional Objectives increases its difficulty – but a stealth-based approach is also the most enjoyable way to conquer it. If you prefer action, you can alternatively follow the general path of the route we detail here as you cut a righteous swath to the meeting. Start by following the free run course illustrated here to reach the riverbank.
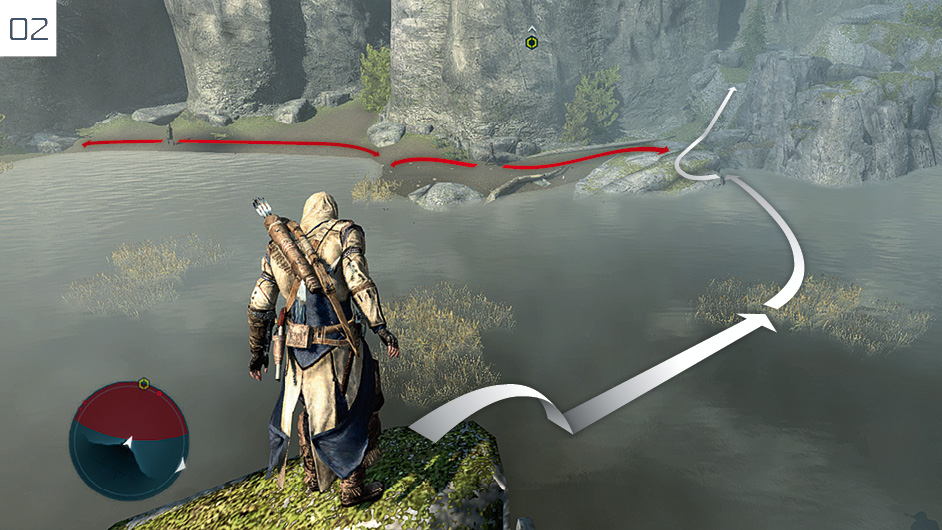
Cross the log to reach this rock outcrop and watch the guards at the far side of the water. You need to move over to the right, where only one sentry poses any form of threat. Swim into the position marked here when he moves to the leftmost section of his patrol (reeds in water offer the same stealth benefits as Stalking Zones), then stay close to the rocks until he reaches a position above Connor. Wait for a second or two when he turns away, then scramble onto the shore over the rock.
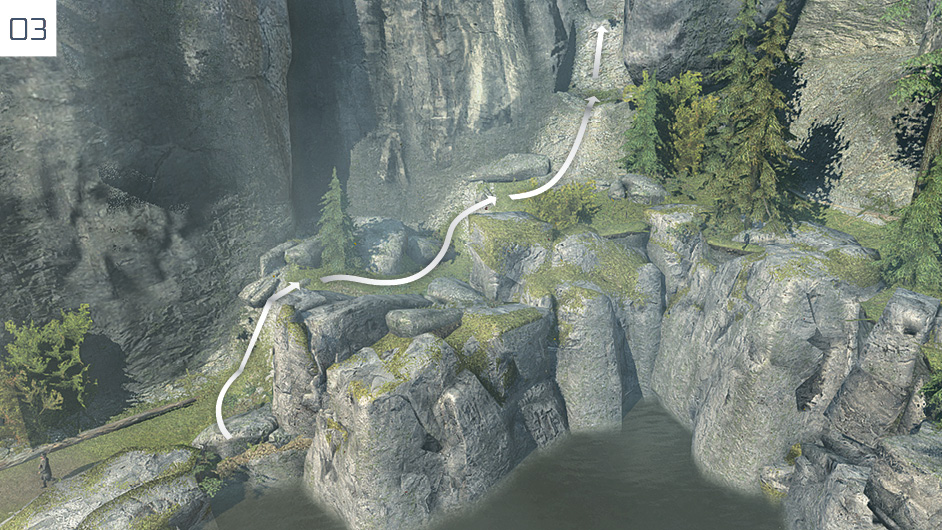
Run up the sequence of steep banks, following the route detailed here. It may seem as if you’re approaching a dead end, but that’s really not the case.
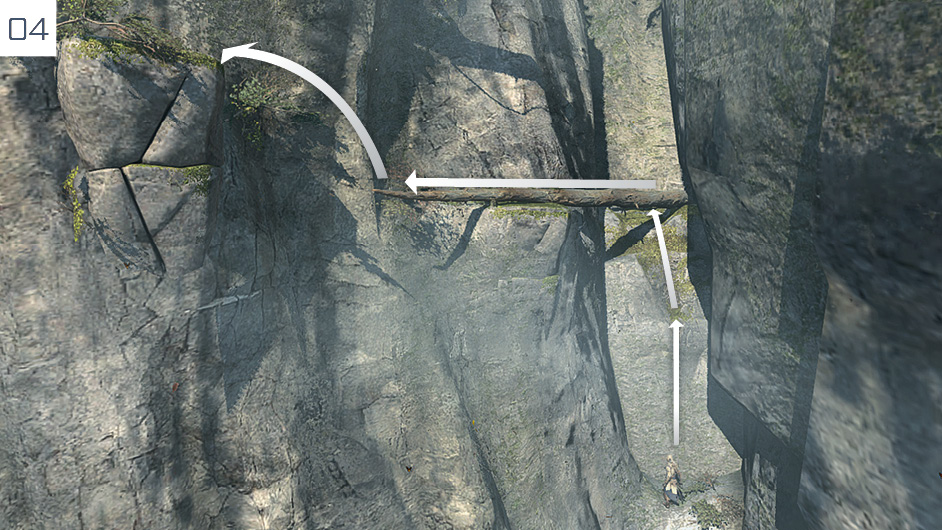
At the top of the bank in the alcove, there is a ledge that, though hard to see, enables you to begin climbing to the top of the cliff.
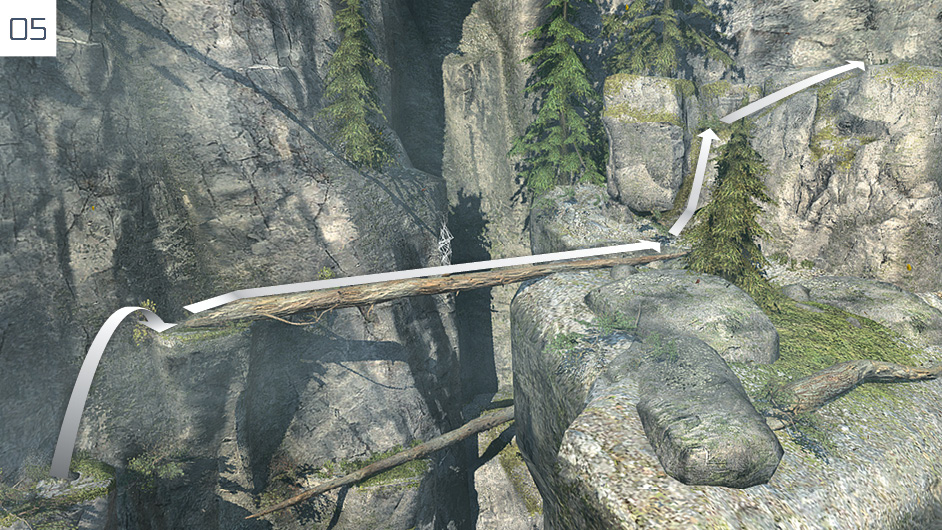
Unless you have already collected it, you will find a Feather as you cross the log on the penultimate stretch of the cliff ascent.
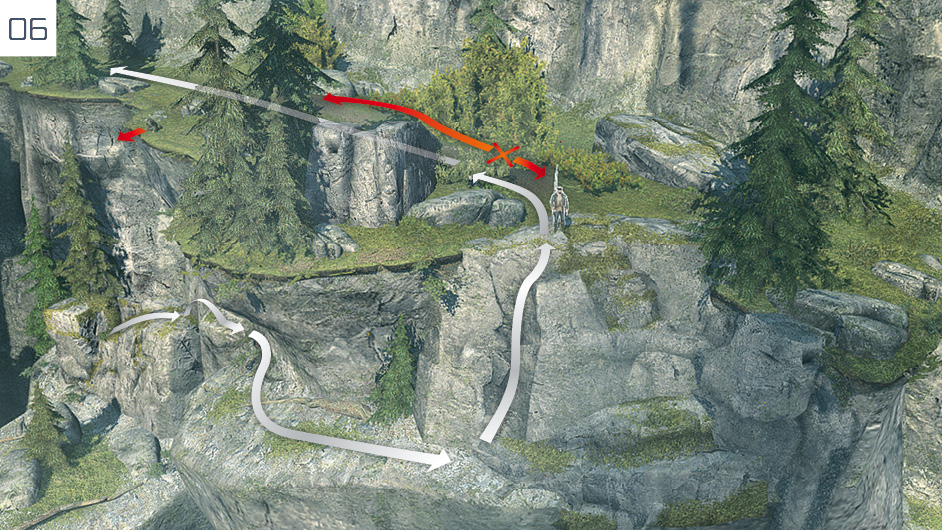
Be extremely cautious on this section of the climb. There is a guard at the top on a short patrol loop, and the ledge where he looks out over the lake is not at all suitable for an assassination. Stay out of sight until you see him move away on the mini-map, then climb up and hide in the small Stalking Zone for a silent kill on his return. You can calmly walk past the guard crouched by the cliff to the left – if you can resist the sociopathic urge to sneak over and kick him, that is.
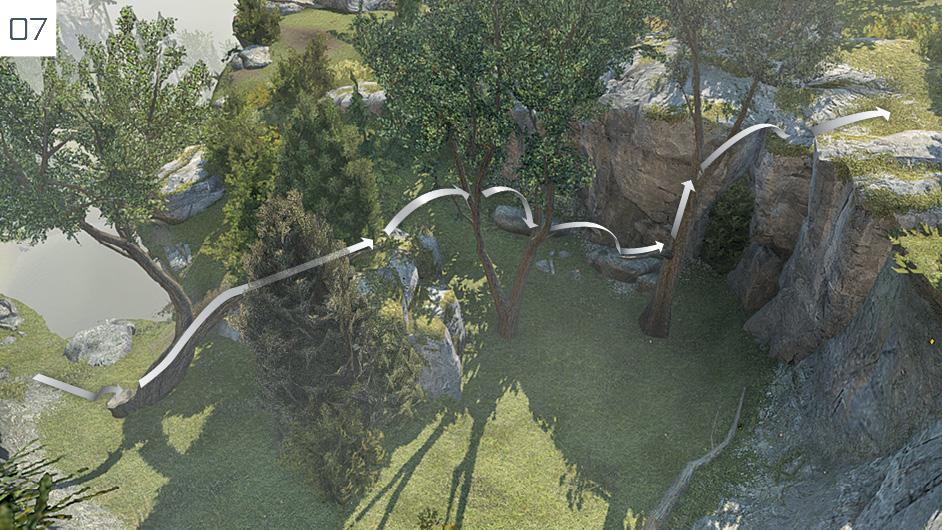
Free run through the tree-based course, ignoring the path to the left just beforehand – it leads to a difficult route featuring guards and a two-man patrol.
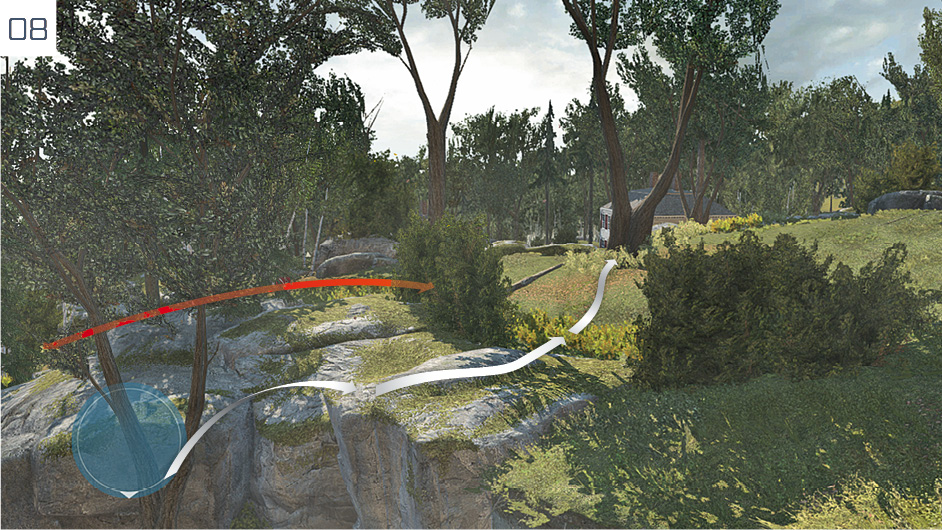
In the final V-shaped tree section, study the mini-map before you jump to solid ground – the slow, regular stroll taken by the two-man patrol mentioned earlier reaches the edge of this area. If the coast is clear, move forward via the Stalking Zones to approach the house. A cinematic will begin as you draw near.
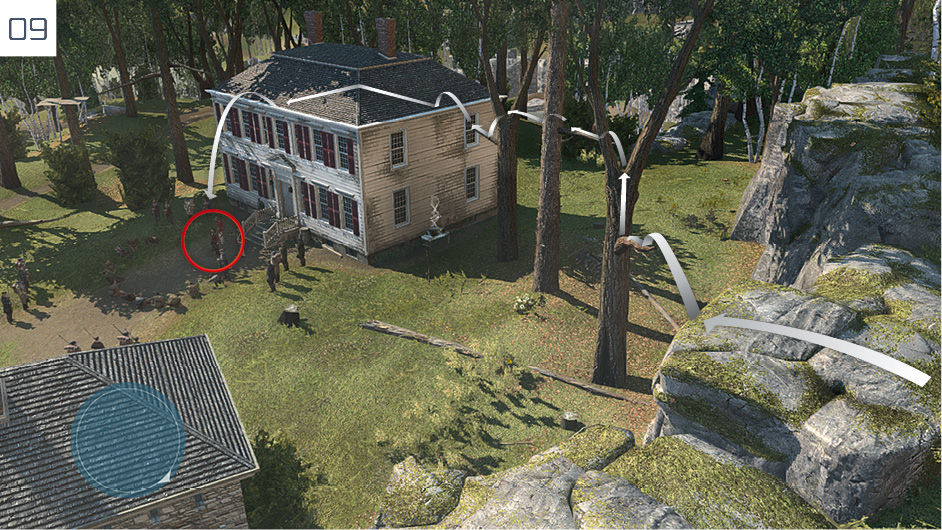
After the cutscene, a new Optional Objective is given: you must intervene before any Native Americans are killed – and this means that you’ll need to be extremely quick. From the Stalking Zone where you begin, wait for the two guards to turn away, then sprint in the direction of the house and follow this free run course. From the final position, perform an air assassination on Johnson. If you fail the Optional Objective beforehand – the timing is extremely tight – select Reload Last Checkpoint to try again.
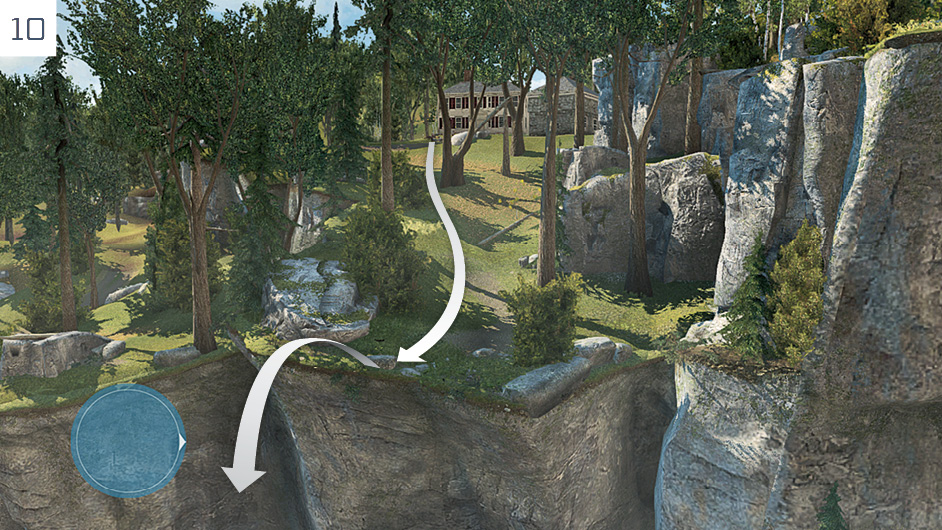
When play resumes, don’t stick around to fight – the reveal of the final Optional Objective should make your next step abundantly clear. From your position in front of the house, sprint down the slope until you reach the top of the cliff, then dive into the water below. Submerge and swim towards the reeds to stay out of sight; as you move away from the Templar guards, the Sequence ends.