
Assassin's Creed III Guide Reference & Analysis
Tools
While  /
/ is designated for melee attacks with Connor’s primary weapon,
  /
/ enables you to use items in the Tools category. Six of these items have an application in combat situations, or can be employed to create chaos and confusion during infiltrations or impromptu bouts of anarchy, and are the sole focus of this section. You can read more about the Horse Whistle and Throw Money ability in the Primer, and “Snares & Bait” in the dedicated Hunting section.
Use of ranged weapons and gadgets is limited only by Connor’s current stock of ammunition for each item. You can replenish consumables in multiple ways: from looting, crafting, purchasing them from merchants, or even resupplying the saddle bags on Connor’s horse once you have crafted them.
 Saddle Bags
Once they become available through the Crafting system, you can create Saddle Bags that are automatically placed on Connor’s horse. These are then loaded with a stock of consumable items in the Tools category. Whenever you need to resupply, you can use the Horse Whistle to summon Connor’s mount, then approach it and press  /
/ for an immediate inventory refill.
Saddle Bags: Capacity & Upgrades
|
Name |
Availability |
REFILLS |
|
Small Saddle Bags |
Through crafting after completing Sequence 09 |
Cartridges, Arrows |
|
Medium Saddle Bags |
Through crafting after completing Sequence 10 |
Cartridges, Arrows, Rope Darts, Smoke Bombs |
|
Large Saddle Bags |
Through crafting after completing Sequence 12 |
Cartridges, Arrows, Rope Darts, Smoke Bombs, Poison Darts, Trip Mines, Snares |
 Ranged Weapons
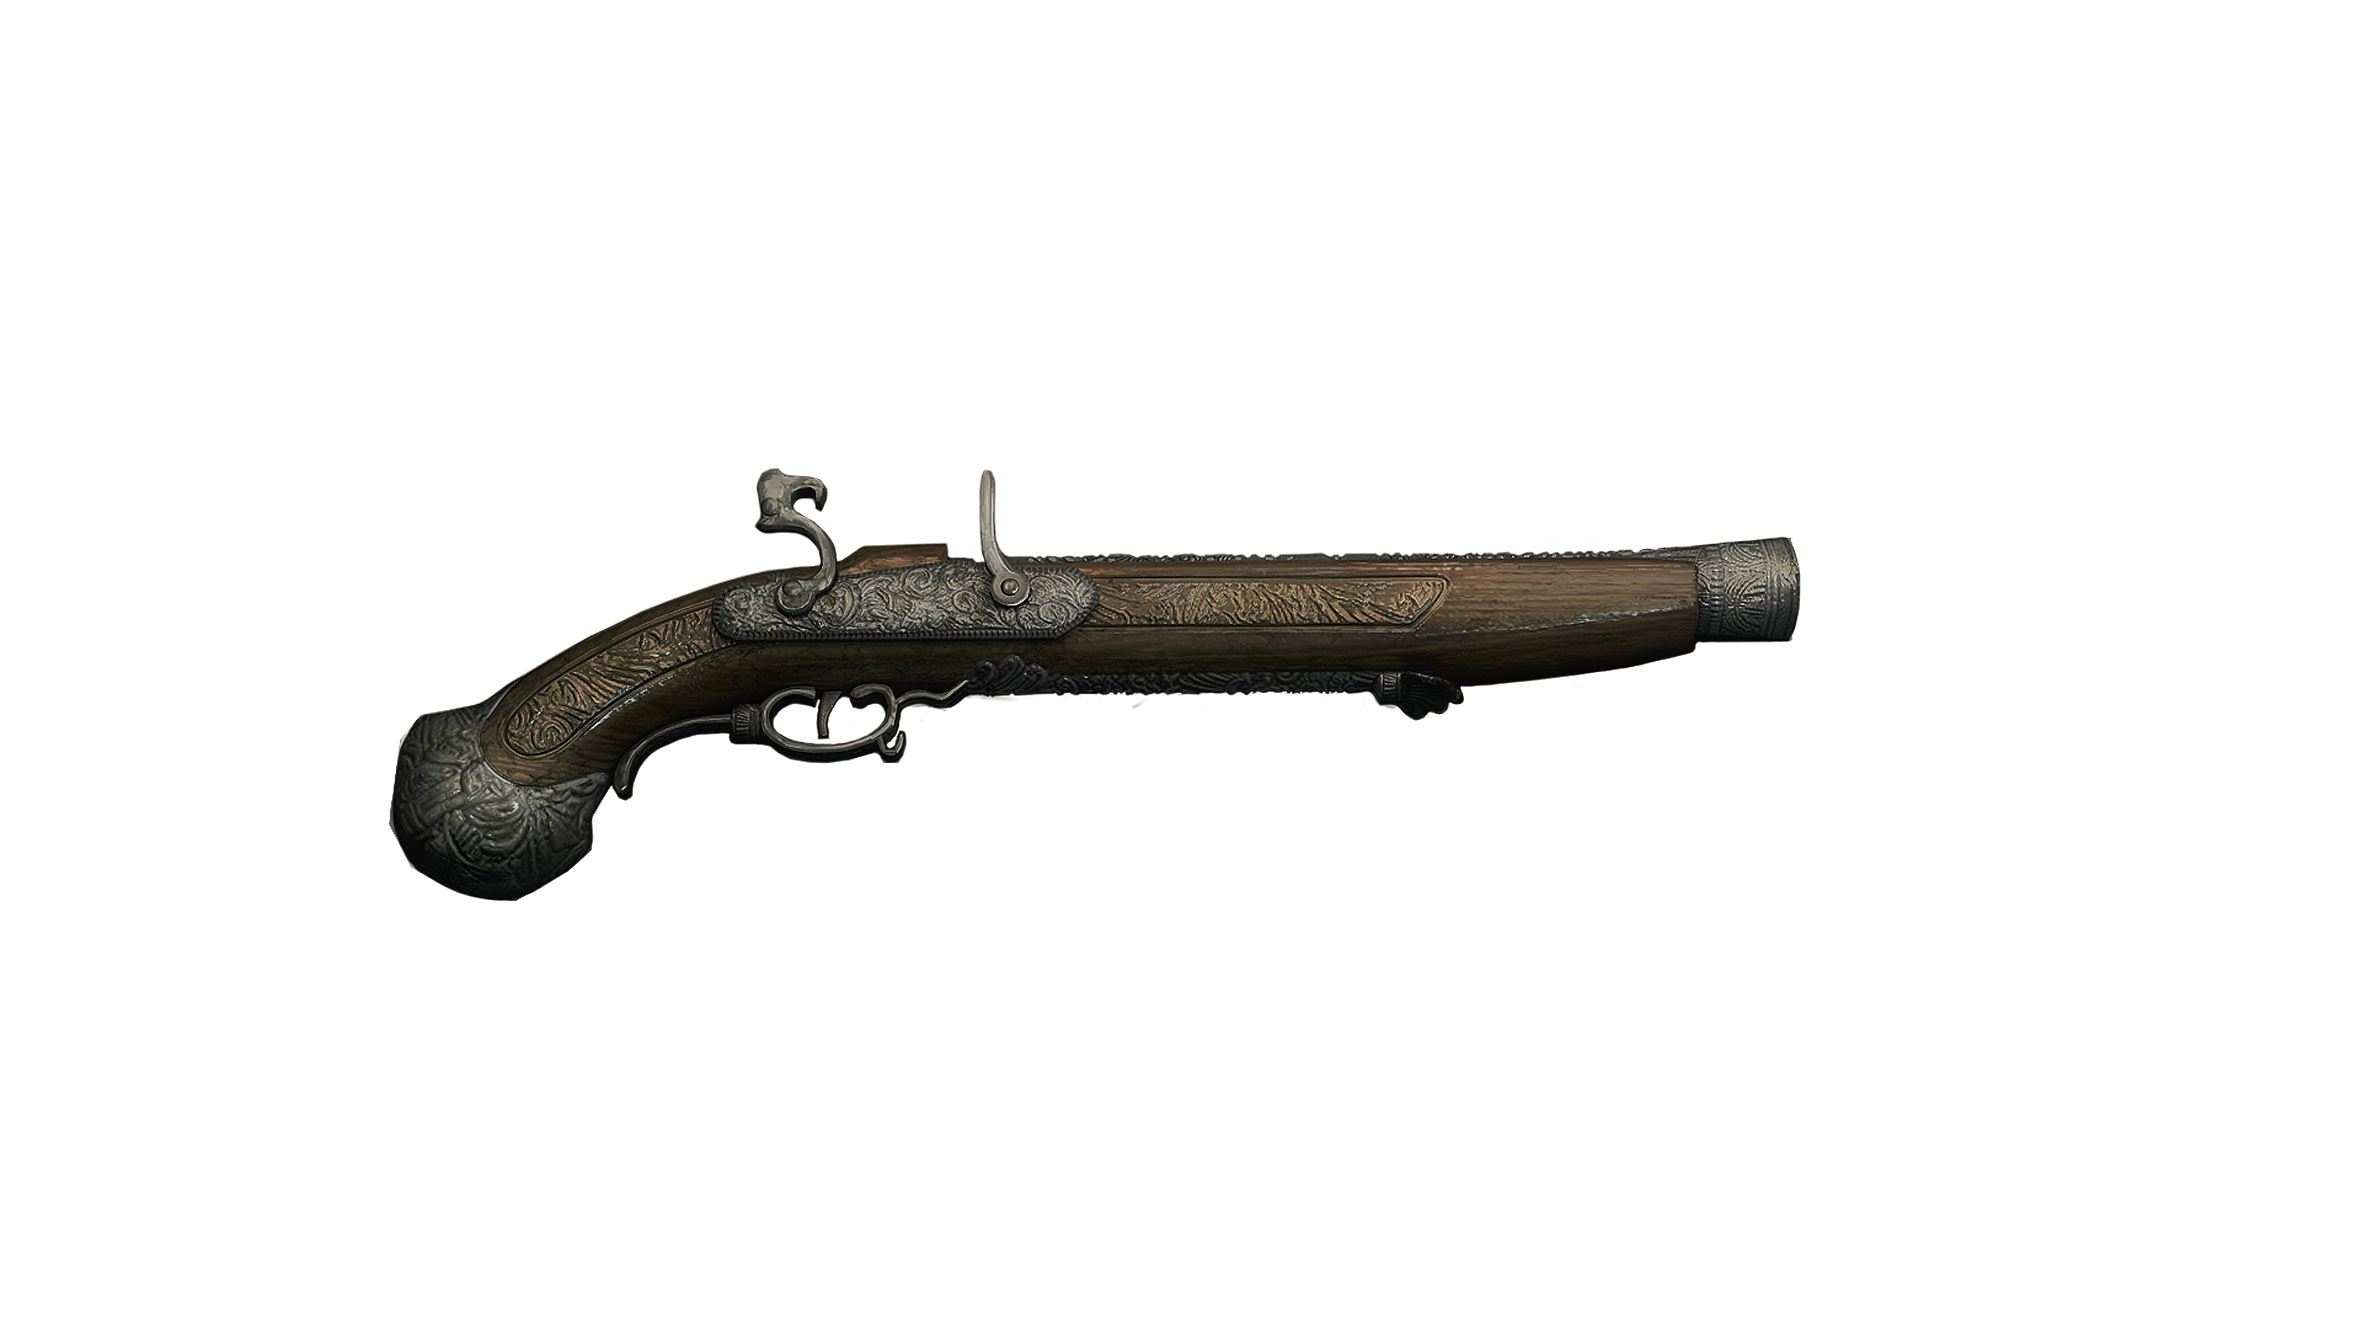
The primary use of Connor’s ranged weapons is to disable or wound targets from a distance. However, all four of these weapons can be employed at close range with the Special Counter move, which kills all but the strongest opponents instantly.
There is no stat that corresponds to the raw power of each bow or pistol shot. The damage output of these weapons is instead expressed in terms of amount of shots required to kill each archetype, as described in the accompanying table.
Ranged Weapons: Shots per Enemy Type
|
Name |
Short Range (0-17m) |
Long Range (17-25m) |
Weapon Shots per Reload |
Availability |
||||
|
Soldier/ Snitch |
Officer/ Scout |
Grenadier/ Jäger |
Soldier/ Snitch |
Officer/ Scout |
Grenadier/ Jäger |
|||
|
Bow (Reflex Shot) |
1 |
2 |
3 |
2 |
2 |
3 |
N/A |
Connor’s initial equipment |
|
Bow (Charged Shot) |
1 |
1 |
2 |
1 |
2 |
3 |
||
|
Musket |
1 |
1 |
2 |
1 |
1 |
2 |
1 |
From guards or racks |
|
Flintlock Pistol |
1 |
1 |
2 |
2 |
2 |
3 |
1 |
General Stores, Sequence 06 |
|
Duckfoot Pistol |
1 |
1 |
2 |
2 |
2 |
3 |
1 |
General Stores, Sequence 06 |
|
Double-Barrel Pistol |
1 |
1 |
2 |
2 |
2 |
3 |
2 |
General Stores, Sequence 09 |
|
Pitcairn-Putnam Pistols |
1 |
1 |
1 |
1 |
1 |
2 |
1 |
Complete Sequence 07 |
|
Italian Flintlock |
1 |
1 |
2 |
1 |
1 |
2 |
1 |
Through crafting |
|
Royal Pistol |
1 |
1 |
2 |
1 |
1 |
2 |
2 |
Through crafting |
|
English Flintlock Pistol |
1 |
1 |
1 |
2 |
2 |
3 |
1 |
Through crafting |
|
French Coat Pistol |
1 |
1 |
1 |
2 |
2 |
3 |
2 |
Through crafting |
|
Royal Navy Sea Service Flintlock |
1 |
1 |
1 |
1 |
2 |
3 |
1 |
Through crafting |
|
Naval Duckfoot |
1 |
1 |
1 |
1 |
2 |
3 |
1 |
Through crafting |
|
Pirate Flintlock |
1 |
1 |
1 |
2 |
2 |
3 |
2 |
In specific Collector’s Editions or as a preorder bonus |
|
Scottish Flintlock |
1 |
1 |
2 |
1 |
1 |
2 |
1 |
In specific Collector’s Editions or as a preorder bonus |
 Bow
Bow
This powerful and silent weapon is perfect for stealth kills from a safe distance or elevation. You can fire arrows in two different ways. To perform a reflex shot, with reduced stopping power and range, just tap  /
/ to fire at Connor’s highlighted target. To exploit the maximum potential of this weapon, you must hold
  /
/ until the bow string is fully taut, then release it to fire; note that you can cancel a “charged” shot by pressing
  /
/ before you let the arrow fly. The maximum 25 meter range of the bow is only available if you use Precision Mode aiming.
When employed with the Special Counter move, Connor will block his opponent’s attack, draw the bow, and kill them instantly with a point-blank reflex shot. Arrows used to kill adversaries can often be retrieved by looting their bodies once combat ends.
Bow: Quiver Capacity & Upgrades
|
Name |
Capacity/Upgrade |
Availability |
|
Default Quiver |
8 |
- |
|
Quiver Upgrade 1 |
+4 |
Through crafting |
|
Quiver Upgrade 2 |
+4 |
Through Uplay |
 Firearms
When you purchase a new pistol, its relative strength is expressed with the following stats:
- Rate of Fire: Governs the frequency of shots.
- Short Range: A measure of the efficiency of the weapon from 0 to 17 meters.
- Long Range: A measure of the efficiency of the weapon from 17 to 25 meters. Note that shots of this range require that you use Precision Mode aiming.
When choosing which pistol to carry, you should also take into account the number of shots it offers per reload, and the potential stopping power of each trigger pull: see the “Ranged Weapons: Shots per Enemy Type” table at the start of this section for details. The Duckfoot Pistol is loaded with three cartridges, for example, but it discharges its entire capacity at once. While this hand-held “shotgun” has its applications, a pistol that offers more than one shot per reload generally offers you greater tactical flexibility: loading cartridges into firearms in open conflict is an implausible course of action. Once you have the necessary artisans and resources at the Homestead, you can craft the Twin Holsters upgrade to enable Connor to carry two pistols at once, for a maximum of four potential shots before a reload is required.
As with the bow, a pistol is used by pressing or holding and releasing  /
/ (with
(with  /
/ cancelling aimed shots). More powerful than the bow,
pistols are particularly useful for killing Snitches as they run in search of reinforcements. However, this power and convenience must be weighed against attendant drawbacks. Pistols are astonishingly noisy, and will attract attention and close scrutiny over a wide radius. In open conflict, this may draw nearby patrols into the fray. It should go without saying that the pistol is not suited to stealthy infiltrations.
When employed with the Special Counter move, Connor will blast his opponent at point-blank range, killing them instantly. If the pistol is unloaded, Connor will attempt a standard Counter Kill – which will almost certainly fail against resistant archetypes.
FIREARMS: Cartridge Pouch Capacity & Upgrades
|
Name |
Capacity/Upgrade |
Availability |
|
Default Cartridge Pouch |
8 |
- |
|
Cartridge Pouch Upgrade 1 |
+8 |
Through crafting |
|
Cartridge Pouch Upgrade 2 |
+8 |
Through crafting |
|
Cartridge Pouch Upgrade 3 |
+8 |
Through crafting |
|
Cartridge Pouch Upgrade 4 |
+8 |
Through Uplay |
 Poison Darts
With the exception of a select few individuals who enjoy story-mandated immunity, Poison Darts incapacitate an afflicted target instantly – but it’s what happens afterwards that is perhaps most interesting from a tactical perspective. To throw a Poison Dart, press  /
/ when your intended victim moves within range, or use Precision Mode aiming to throw it over slightly longer distances. The affected adversary will instantly lose all interest in Connor – even if they previously had an active SSI meter – and stagger in a given direction (following an existing patrol route, if applicable), attracting the attention of everyone within range. When the dart’s payload finally overwhelms them, they will collapse to the ground, causing all guards within the vicinity to move to investigate. If you need to eliminate a target and move on without raising the alarm, or to create a localized diversion, Poison Darts are one of the most powerful weapons at Connor’s disposal.
Using Poison Darts in combat disables a target instantly. If employed with a Special Counter, Connor will simultaneously stab the target and hurl them aside (in a manner identical to a Counter Throw) in a single movement. Though they will clamber to their feet, their effective presence in the battle will be over; after a time, they will collapse. If a poisoned target is still standing after you kill the final active enemy in a battle, note that open conflict will not officially end until they fall to the ground.
Poison Darts: Pouch Capacity & Upgrades
|
Name |
Capacity/Upgrade |
Availability |
|
Default Poison Dart Pouch |
3 |
- |
|
Poison Dart Pouch Upgrade 1 |
+1 |
Through crafting |
|
Poison Dart Pouch Upgrade 2 |
+1 |
Through Uplay |
 Rope Darts
The Rope Dart has five combat applications, though it’s perhaps fair to say that this exotic weapon is best suited to situations where you can favor showmanship over speed and efficiency. Three of its five moves enable Connor to reuse a Rope Dart at a later date; we specify the two techniques where a unit of the item is consumed.
- From a tree branch or a beam above a suitable target, hold
 /
/ to strangle a target situated below.
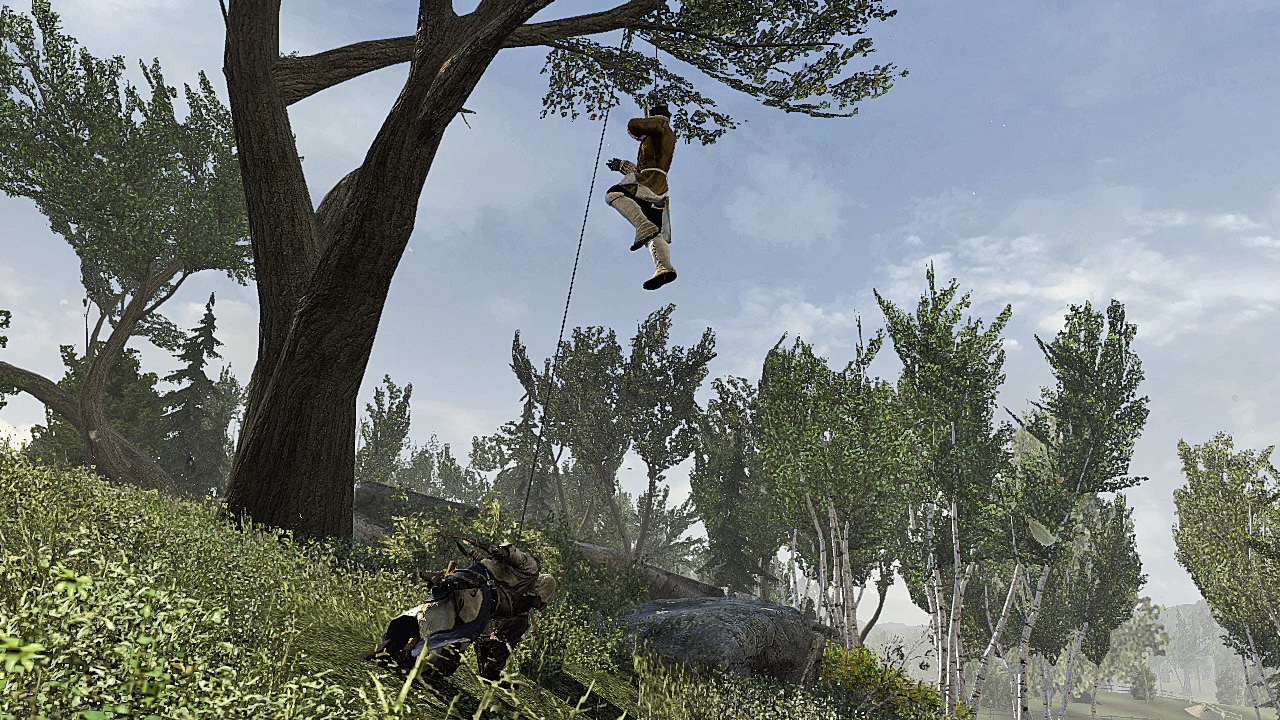
 - From a tree branch or a beam, hold
 /
/ and press
  in the appropriate direction to hang a target within range (
 01). This “Predator” move consumes one Rope Dart.
 - On the ground, while standing behind an oblivious target, hold
 /
/ to use the Rope Dart to pull an opponent towards Connor; when they stumble within range, he will kill them instantly.
 - In combat, tap
 /
/ to fire a Rope Dart at a target and pull them to the ground. If you are close enough, you can then perform an instant finishing move.
 - Last, but by no means least, employing a Rope Dart in a Special Counter is lethal against all archetypes. Using this attack consumes a Rope Dart for each kill.

Rope Darts: Pouch Capacity & Upgrades
|
Name |
Capacity/Upgrade |
Availability |
|
Default Rope Dart Pouch |
3 |
- |
|
Rope Dart Pouch Upgrade 1 |
+1 |
Through crafting |
|
Rope Dart Pouch Upgrade 2 |
+1 |
Through Uplay |
Gadgets
 Smoke Bombs

Depending on the demands of your current situation, a Smoke Bomb can be employed to create confusion and paralysis, enabling effortless kills of affected opponents, or to facilitate an easier escape. If flight is a prerequisite, dropping a Smoke Bomb in a confined space will incapacitate all pursuers who enter its area of effect ( 02).
02).
Though Connor and his allies are immune to the effects of Smoke Bombs, opponents inside the cloud (or those who enter it) are blinded, stunned and unable to move until the smoke dissipates. Anyone knocked outside the cloud will recover immediately.
Smoke Bombs: Pouch Capacity & Upgrades
|
Name |
Capacity/Upgrade |
Availability |
|
Default Smoke Bomb Pouch |
3 |
Complete Memory 03 in Sequence 06 |
|
Smoke Bomb Pouch Upgrade 1 |
+1 |
Through crafting |
|
Smoke Bomb Pouch Upgrade 2 |
+1 |
Through Uplay |
 Trip Mines

To plant a Trip Mine, hold  /
/ until the onscreen meter is filled. Potential hostiles who witness this act will immediately move to investigate, which may lead to undesirable consequences – so it’s wise to ensure that enemies are facing elsewhere before you begin. Once a mine has been planted, you will see two concentric circles (
 03). The solid inner circle represents the activation zone, while the outer ring indicates the potential blast radius.
The primary use of Trip Mines is to kill targets without being detected, especially if you know their precise patrol route. As a potential added benefit, the explosion will cause all nearby guards to run to investigate, which can be exploited as a decidedly indiscrete but effective way to infiltrate heavily guarded areas. If your intended target is stationary, you can attempt to lure them into the device by whistling from a corner or hiding place, or by moving Connor into the intended victim’s line of sight to lead them in the required direction.
You can lay traps that consist of multiple Trip Mines, but we strongly advise caution in areas that feature civilian traffic. Any non-allied NPC can trigger these devices, which will lead to Desynchronization if you kill too many innocents in quick succession. You should also note that, while Connor and his allies cannot trigger these devices, they may be injured if caught in the blast radius. If required, you can retrieve unused Trip Mines: stand over a device and tap  /
/ to pick it up.
Though it might seem foolhardy, Connor can employ Trip Mines for a Special Counter. Slapping the primed explosive to his opponent, he propels them away with force just moments before the device detonates. If Connor is surrounded, or fighting in close quarters, the resultant localized explosion can kill or knock down other hostiles – and yet fortune smiles upon the Assassin himself, who always escapes the effect.
Trip Mines: Pouch Capacity & Upgrades
|
Name |
Capacity/Upgrade |
Availability |
|
Default Pouch |
3 |
- |
|
Trip Mine Pouch Upgrade 1 |
+1 |
Through crafting |
|
Trip Mine Pouch Upgrade 2 |
+1 |
Through Uplay |