
Prima Games eGuides
primagames.com Browse Redeem a code Help
The Legend of Zelda: A Link Between Worlds eGuide
Sign in My Guides

Sign in or create an account

We'll email you a link. No password needed, and if you don't have an account yet, the link makes one.

By creating an account or signing in, you agree to our Terms of Service and Privacy Policy.

Have a password?

Had an account on the old eGuides site, or a code from a printed guide? Help and troubleshooting

Sign in with a password

By signing in, you agree to our Terms of Service and Privacy Policy.

Check your email

A sign-in link is on its way. It works once and expires in 15 minutes. Open it and you're in, with an account if you didn't already have one.

Contents

  • How to Play
    • Save Data Management
    • Understanding the Game Screens
    • Subscreens
    • Overworld Maps
    • Playing the Hero
    • Environment
  • Gear and Items
    • Consumable Items
    • Collectible Items
    • Dungeon Collectibles
    • One-of-a-Kind Items
    • Equipment and Gear
    • Quest Items
    • Weapons and Their Upgrades
    • Swords and Upgrades
  • Friends and Fiends
    • Enemies
    • Citizens of Hyrule and Lorule
    • Mini-Game Characters
    • Bosses
  • Walkthrough
    • Link's Awakening
      • Link's House
      • Hyrule Field
      • Blacksmith's Forge
      • Hyrule Castle
      • Sanctuary
      • Graveyard
      • Secret Passage to the Sanctuary
      • Sanctuary
    • Seeking Sahasrahla
      • Rude Awakening
      • Hyrule Castle
      • Kakariko Village
      • Hyrule Field Explorations
    • The Eastern Palace
      • Eastern Palace
    • Great Explorations, Part I
      • Hyrule Field
      • Meet Mother Maiamai
      • Kakariko's Secrets
      • Head for the Desert
    • House of Gales
      • House of Gales
    • Tower of Hera
      • Tower of Hera
    • The Master Sword
      • Hyrule Field
      • Lost Woods
      • Buy Something, Will Ya?
      • Hyrule Field
      • Hyrule Castle
    • Great Explorations, Part II (in progress)
      • Lorule Blacksmith
      • Lorule Field
      • What A Dump!
      • Lorule Field
      • The Skull Woods
      • Lorule Lake Region (Lorule)
      • Graveyard Region (Lorule)
      • Dark Ruins Region (Lorule)
      • Death Mountain (Lorule)
    • The Thieves' Hideout
      • The Thieves' Hideout
      • Thieves' Town
      • Sand Rod Action
    • The Desert Palace
      • Desert Palace
      • Titan's Mitt Tour
    • The Skull Woods
      • Skull Woods
    • The Dark Palace
      • Dark Palace
    • The Swamp Palace
      • Swamp Palace
    • Turtle Rock
      • Turtle Rock
    • The Ice Ruins
      • Ice Ruins
    • The Final Battle
      • Lorule Castle
  • Tour of Hyrule
    • Introduction
    • Lost Woods Region
    • Death Mountain Region
    • Sanctuary & Zoras Domain Region
    • Kakariko Village Region
    • Hyrule Castle Region
    • Eastern Ruins Region
    • Desert Region
    • Southern Ruins Region
    • Lake Hylia Region
  • Tour of Lorule
    • Introduction
    • Skull Woods Region
    • Death Mountain Region (Lorule)
    • Graveyard Region
    • Thieves Town & Lorule Castle Region
    • Dark Ruins Region
    • Misery Mire Region
    • Lorule Lake Region
  • Legendary Checklist
    • Items and Gear
    • Hyrule Chests
    • Lorule Chests
    • Pieces of Heart
    • Lost Maiamais

The Legend of Zelda: A Link Between Worlds Guide › Gear and Items

One-of-a-Kind Items

The following items are special and unique. They help Link obtain special items that he could not otherwise obtain.

Smooth Gem

Description: The smoothest gem around, it’s the prized possession of Oren, the queen of the water-dwelling Zora. It was stolen from her, and she needs Link to retrieve it for her.

Location: The thief who stole it sold it to a merchant in Kakariko Village, so the only option is to buy it back—for a whopping 200 Rupees! But don’t worry; the queen makes it worth your while.

Letter in a Bottle

Description: This letter has been stuffed into a bottle. The author seems to be in great peril and needs some premium milk. Get some for him, won’t you?

Location: Link needs Zora’s Flippers to some shallow water just east of the House of Gales. Bring the letter in a bottle to the Milk Bar and trade it for some premium milk, then hightail it to the man on the Death Mountain Trail!

Pendant of Wisdom

Description: This blue pendant is sign of true wisdom. This is needed to possess the Master Sword.

Location: Link obtains this item after defeating Margomill in the House of Gales.

Pendant of Courage

Description: This pendant proves a hero’s true courage. It is the second pendant needed to collect the Master Sword.

Location: This is given to you by Princess Zelda.

Pendant of Power
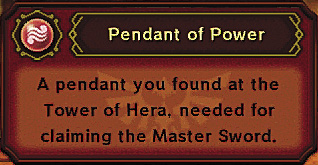
Description: The last pendant is the sign of true power. It’s the third pendant needed to obtain the Master Sword.

Location: Link obtains this item after defeating Moldorm in the Tower of Hera.

Keep reading with a free account

The first 3 sections of The Legend of Zelda: A Link Between Worlds are open to everyone. An account opens the rest of it, and every other guide in the archive. It's free, and there's nothing to buy.

Bought guides on the old Prima Games site? Your account and every guide you own moved here, so there's nothing to buy again. Sign in.

Create a free account Or browse our free guides

PreviousDungeon Collectibles NextEquipment and Gear