
The Legend of Zelda: A Link Between Worlds Guide Friends and Fiends
Enemies
The following are the enemies that Link will encounter throughout Hyrule, Lorule, and the dungeons that stand in your way to victory. For each enemy, we list the amount of damage they inflict on Link, how many hits it takes to defeat them, where they are located, and any tips or tricks to best them. Some may take quite a few hits to defeat, but remember to halve that amount once you get your hands on the Master Sword!
Armos
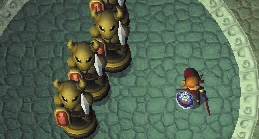
- Damage: 1/2 heart
- Hits to Defeat: 2
- Location:House of Gales
These jellyfish-like enemies can be red, blue, silver, and gold. They slowly approach and periodically surround themselves in electricity, and Link gets zapped if he attacks them with his sword while they’re sparking. Time your attack when they are not emitting electricity, or attack from afar with a ranged weapon. Red and gold Baris split into two smaller Biris when defeated; blue and silver Baris do not separate into Biris when slain.
Ball and Chain Soldier (Gold/Silver)
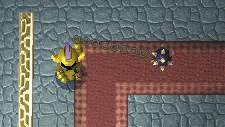
- Damage: 1/2 heart
- Hits to Defeat: 3
- Location: Death Mountain, Eastern Ruins, several dungeons
Armos are sneaky creatures because they appear as statues until you have approached close enough to smell them. Some may actually be statues, while others will shake to life and hop toward your location. They can’t be struck by the sword or bow while they’re at the height of their jumps. Have your shield ready to deflect their bodies when they hop into you, then slash at them in quick succession, or stand back and fire the bow to wipe them out from a safe range.
Bari

- Damage: 1 heart
- Hits to Defeat: 12
- Location: Hyrule Castle, Lorule Castle
Any soldier that chooses a ball and chain as a weapon has got to mean business and this brute is no exception. Sometimes the balls are on fire as well, so they can pack a punch. The best way to go about defeating them is to just run in close and slash furiously until they go down. Standing at a distance only serves to let them attack you with their ranged weapons.
Bawb
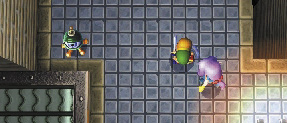
- Damage: 1 heart
- Hits to Defeat: 1
- Location:Thieves’ Hideout
These explosive foes follow Link around a room, and the slightest touch sets them off. Bawbs behave like bombs once they’re struck, flashing red for a few moments before they explode. Like bombs, Bawbs can be picked up and thrown just before they explode. Bawbs will continue to respawn in any room in which they’re found, so you can never truly defeat these dangerous but useful foes.
Biri
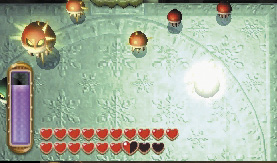
- Damage: 1/2 heart
- Hits to Defeat: 1
- Location:House of Gales
These remnants of a defeated Bari are quite small. They emerge as a group and can be easily taken out with the Fire Rod or a few bomb throws. Watch out though, because they still emit electricity from their tiny bodies.
Blob
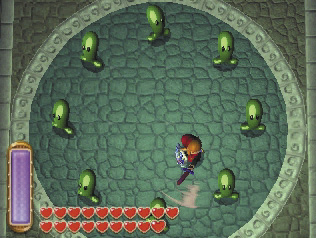
- Damage: 1/2 heart
- Hits to Defeat: 2
- Location:Hyrule Field
These guys are strewn about throughout Hyrule and can be found just about anywhere except caves and dungeons. Some hide underground and spring out when Link draws near. There is nothing much to beating these guys, so just walk up to them and slash away with your sword.
Blue Soldier
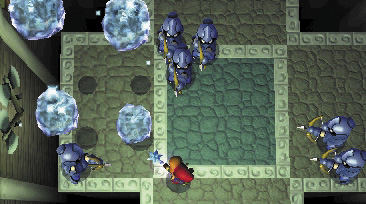
- Damage: 1/2 heart
- Hits to Defeat: 3
- Location: Hyrule Field and Hyrule Castle Grounds
These are a bit tougher than Green Soldiers. They carry bows, spears, and swords and can inflict more damage. They carry shields for defense, so slash at their flanks to produce a better result. Use the Fire Rod to hit them from a distance, but remember that their shields can also deflect fire.
Buzz Blobs
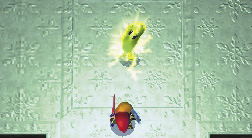
- Damage: 1 heart
- Hits to Defeat: 2
- Location: Sanctuary & Zora’s Domain, Desert Region, Southern Region, Lake Hylia Region
These cousins of the Blob appear wherever regular Blobs are encountered. Buzz Blobs are definitely tougher, because a current of electricity as a defense mechanism and sword attacks end up shocking Link in the process. To deactivate their defenses, use the Tornado Rod, and they will become just a regular Blob. You can also use the lamp or net to defeat them.
Chasupa
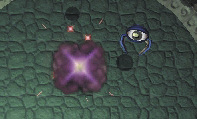
- Damage: 1 heart
- Hits to Defeat: 1
- Location: Caves
These one-eyed bats flap madly in Lorule’s more treacherous caves, flocking to attack Link much like Hyrule’s Keese. They’re easily slain but commonly appear in places where battling them is risky due to Link’s precarious surroundings.
Crow
- Damage: 1/2 heart
- Hits to Defeat: 1
- Location:Hyrule Field
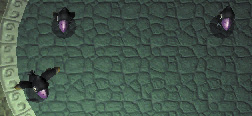
Crows perch atop pegs and can be seen throughout Hyrule, pretty much in every corner of the map. Crows take impeccable timing to defeat. They fly up above you to target your position, then swoop down for the attack. The trick is to stand your ground, then move to the side right as they start their descent, striking them when they come within arm’s reach.
Dacto
- Damage: 1 heart
- Hits to Defeat: 2
- Location: Skull Woods Region, Eastern Ruins Region, Lorule Lake Region
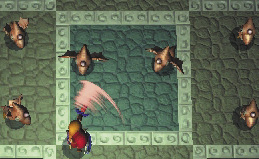
Dactos have the exact same attack pattern as Crows, so wait until they swoop down for the attack, step aside, and deliver a couple quick blows with your sword.
Dark/Light Ghini

- Damage: 1 heart
- Hits to Defeat: 4
- Location: Dark Palace, Treacherous Tower
These ghosts disappear and reappear when you least expect them to. They like to attack when it is the darkest, so use the Fire Rod, which will light the room as well as inflict major pain on these miscreants.
Dark Rat
- Damage: 1/2 heart
- Hits to Defeat: 1
- Location:Cavesand dungeons
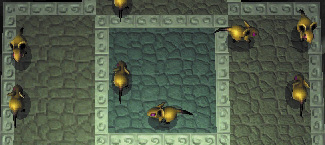
Find these baddies in dark caves. They are larger than regular rats and hunt in packs. Do not let them flank you, and use a well-placed blast from your Fire Rod to dispatch these dark dwellers.
Deadrock
- Damage: 1/2 heart
- Hits to Defeat: Special
- Location: Death Mountain Region
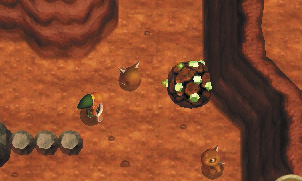
Deadrocks are very difficult to defeat but you can stun them for a few seconds by attacking them. They harden up and become almost invulnerable until they awaken again. Your best bet is to slash at one to stop them, and continue on your way. If you must defeat them, use bombs or the hammer to finish them off after they’ve taken stone form.
Devalant
- Damage: 1/2 heart
- Hits to Defeat: 2
- Location:House of Gales
- Damage: 2 hearts
- Hits to Defeat: 4
- Location: Sand Palace
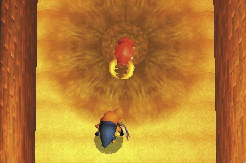
These buggers like to hide in the sand, so use their home to your advantage. Whip out the trusty Sand Rod, and shoot it in their direction to rip them out of hiding. Then, while they wriggle helplessly on their backside, slash repeatedly with your blade! Devalants can spit fireballs at you from afar, so be careful.
Eyegore

- Damage: 1/2 heart
- Hits to Defeat: 4
- Location: Towerof Hera/Houseof Gales
These goons pretty much just walk toward you without any sort of defense whatsoever, so just slash freely with your sword to defeat them.
Flamola
- Damage: 1/2 heart
- Hits to Defeat: 2
- Location:Turtle Palace
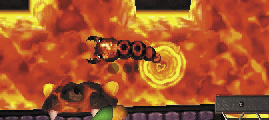
These are much like Swamolas, except they are made up of molten lava. They jump out of the lava below you randomly and are tough to dodge. Use the Ice Rod to freeze them, then finish them off with the Master Sword.
Fire Bubble
- Damage: 1/2 heart
- Hits to Defeat: 3
- Location:House of Gales
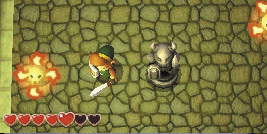
These flaming skulls speed around a room, bouncing off of objects in a hazardous fashion. Fire Bubbles are immune to attacks while their flames are lit . Extinguish the Fire Bubble’s flames with the Tornado Rod or Ice Rod. Hitting them with a gust of either rod’s power leaves them defenseless and open to a great big beat down.
Fire Gimos
- Damage: 1 1/2 hearts
- Hits to Defeat: 4
- Location:Turtle Palace
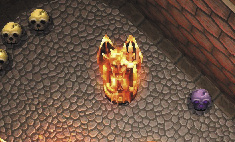
Attacking a Fire Gimos will only serve to hurt yourself, a lot. So use your head and don’t attack something covered in flames. Hit it with your trusty Ice Rod to freeze it, then slash it until dead.
Freezor
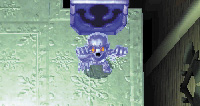
- Damage: 1 heart
- Hits to Defeat: 2
- Location: Ice Palace
Freezors act like a frozen statue until you stand too close, then they run after you. These mighty sentries are immune to Link’s blade. Don’t freak out though! Simply pull out your Fire Rod and blast them back to the ice age. Like Gimos, some Freezors never emerge from their frozen state.
Geldman

- Damage: 1/2 heart
- Hits to Defeat: 2
- Location:Desert Region
With little warning, Geldmen appear from under the sand and attack. Use your Sand Rod to draw them out; they’ll flee, dropping Rupees as they go. Once revealed, they can be easily dispatched by using the sword.
Gibdo
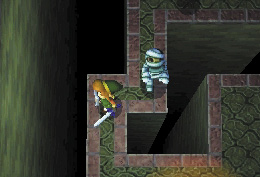
- Damage: 1 heart
- Hits to Defeat: 6
- Location:Skull Woods
This mummified monster lumbers toward you in a slow but steady pace. They take several attacks to drop, but if you use the lamp or Fire Rod, their bandages burn away and they become Stalfos. Using bombs also helps.
Gibo
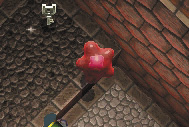
- Damage: 1/2 heart
- Hits to Defeat: 2
- Location:Turtle Palace
Gibos are much tougher when they have their pink core in the center. When they shoot it out at you, it can inflict damage, but it also leaves them the most vulnerable. Attack the pink center to destroy the entire gooey monster.
Gigabari

- Damage: 2 hearts
- Hits to Defeat:16 Location: Swamp Palace
This is just a larger form of Bari. It has the same attack pattern and will shock you if you get too close. Keep your distance and assail the slow monster with ranged attacks—the Hookshot and bow work quite nicely, and upgraded Fire Rod will blast it multiple times in a row. After suffering plenty of damage, the giant Gigabari bursts into a teeming horde of tiny gold Biris! Keep back and use the Hookshot or bow to slay these little beasts without giving them the chance to shock you.
Goriya
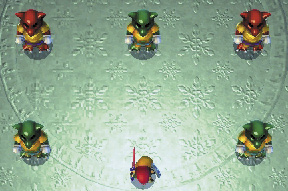
- Damage: 1 heart
- Hits to Defeat: 3
- Location: Dark Palace
These devious devils mirror Link’s movements, copying him as he moves around a room. Green Goriyas are easily bested with a swipe of Link’s blade, but the red ones are a bit more challenging, for they block Link’s frontal attacks! Try stunning red Goriyas with the Ice Rod, or simply heave bombs at them from afar. Red Goriyas will launch a fireball at Link each time they look directly at him—quickly raise his shield to block these fiery blasts!
Green Soldier
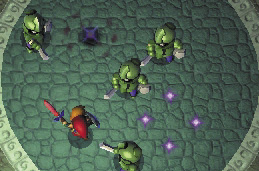
- Damage: 1/2 heart
- Hits to Defeat: 2
- Location: Hyrule Field and Hyrule Castle Grounds
These are some of the most common enemies in Hyrule and are fairly easy to defeat, but don’t be fooled! These guys will sometimes hide in tall grass and spring out once you cut the grass down. Use your Ice Rod to stun them, then defeat them before they thaw out.
Gyorm
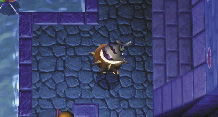
- Damage: 1 heart
- Hits to Defeat: 3
- Location:Swamp Palace
These little things ride around in a shell that serves as their only form of defense. Use your Hookshot to pull the little shellfish out of its shell, then slash it to defeat it.
Hardhat Beetle
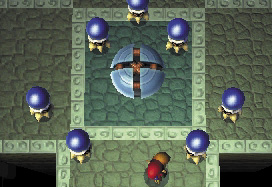
- Damage: 1/2 heart
- Hits to Defeat: 2
- Location:Tower of Hera
Attacking these hard-shelled foes with your sword only knocks you backward, which can be quite troublesome if you are standing on an edge of a cliff. Try stunning Hardhat Beetles with the hammer or Ice Rod so that you may move Link to a safe attack position (like putting his back to a wall) before striking.
Heedle

- Damage: 1 heart
- Hits to Defeat: 4–7
- Location:House of Gales
Heedles are large monsters whose tough hides burn with red-hot magma. Heedles also leave a trail of flame behind them wherever they go, making them dangerous enemies to pursue. Use the Tornado Rod to cool off Heedles, then strike quickly before they reignite. It takes plenty of hits to bring down these fiery foes.
Helmasaur
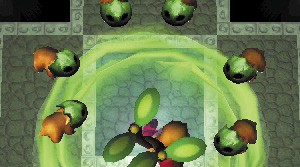
- Damage: 1/2 heart
- Hits to Defeat: 2
- Location:Thieves’ Hideout
These little creatures cannot be defeated by a frontal assault, as their thick masks block sword strikes. Use the Tornado Rod to spin them around or the Ice Rod to stun them, and then strike at their vulnerable flanks. Be quick on your feet, because they enjoy pushing you off ledges.
Hinox (Rock/Snow)
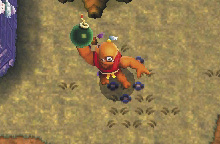
- Damage: 2 hearts
- Hits to Defeat: 30
- Location: Skull Woods Region, Sanctuary & Graveyard Region, Thieves’ Town & Lorule Castle Region, Eastern Ruins Region
These one-eyed beasts throw an unlimited number of bombs or snowballs that freeze you, and they do even more damage if they manage to ram Link. Their attacks pack a punch and their aim is dead on. Avoid them if you can, but if not, get in close and slash with your sword, which will knock them back and stun them.
Hokkubokku
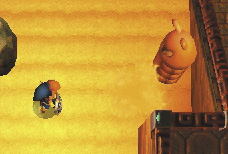
- Damage: 2 hearts
- Hits to Defeat: 4
- Location:Desert Palace
The Hokkubokku likes to burrow under the sand and attack from below, like several sand dwelling enemies. Simply target the monster with the Sand Rod to bring it to the surface and watch it run in fear. Without the cover of sand, it loses its courage. Slash at it to separate its different segments from its body until only a head is left, then end it with one last sword slash.
Hyu
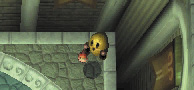
- Damage: 1 heart
- Hits to Defeat: 6
- Location: Thieves’ Town Region, Lorule Castle Region
These ghastly floating apparitions can appear out of nowhere and attack when you least expect them to. Never relax your guard when you see these devious specters about. It is best to run up on them and attack with some well-placed sword slashes.
Ice Bubble
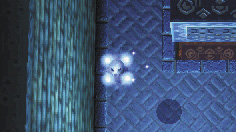
- Damage: 1/2 heart
- Hits to Defeat: 3
- Location: Ice Palace
Ice Bubbles are the same as Fire Bubbles, but with the opposite elemental defense. They have a shield of ice that needs to be extinguished by the Tornado Rod or the Fire Rod, which exposes the core to sword attacks.
Ice Gimos
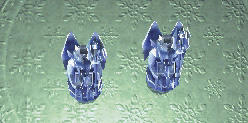
- Damage: 2 hearts
- Hits to Defeat: 6
- Location: Ice Palace
This enemy’s biggest weakness is the Fire Rod; one blast from that weapon and will melt it quite easily. Don’t let it get too close either because it will literally jump all over you.
Karat Crab
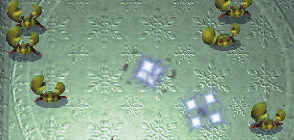
- Damage: 2 hearts
- Hits to Defeat: 2
- Location: Thieves’ Town & Lorule Castle Grounds, Lorule Lake Region
The Karat Crab moves exactly like the Sand Crab, but it inflicts more damage. As you would with Sand Crabs, damage them from afar, and if you must approach one, do so from the north or south to prevent it from sprinting sideways at you.
Keeleon
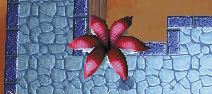
- Damage: 2 hearts
- Hits to Defeat: 4
- Location: Ice Palace
This plant-like creature can be easily dispatched with the good old Fire Rod. Just watch out for the bombs it likes to spit out. If you like, try tossing their bombs at other foes or surrounding objects. Just don’t get yourself blown up in the process!
Keese
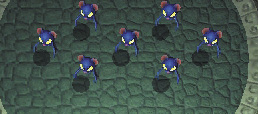
- Damage: 1/2 heart
- Hits to Defeat: 1
- Location: Inside caves and some dungeons
These flying enemies are easy to defeat because they take only one hit to destroy, however they often attack in packs, making it difficult to come out unscathed. Attack with the bow to defeat as many as possible before they get too close, then switch to the sword to take out any stragglers. The Tornado Rod is also quite useful for stunning Keese when they begin to swarm.
Kodongo
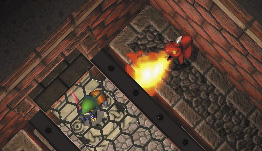
- Damage: 2 hearts
- Hits to Defeat: 4
- Location:Turtle Palace
These animals may look cute, but wait until they open their mouths. They send out far-reaching flames that pack a punch. Stand in one spot, wait for them to target you, then flank them while they are busy flaming where you used to stand. They remain stationary while spouting flames, so attack with all your might. Use the Ice Rod to freeze them from a distance.
Ku
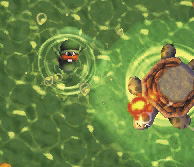
- Damage: 1 heart
- Hits to Defeat: 2
- Location: Lorule Lake Region
Much like Zora, these sea creatures will pop their head out of the water and shoot fireballs in your direction. They attack without warning and can also pursue Link on land. It is best to just dodge, dive, or block with the Hylian Shield and move along.
Leever
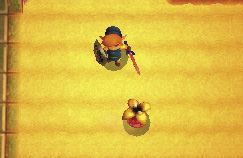
- Damage: 1 heart
- Hits to Defeat: 2
- Location:Desert Palace
These classic Legend of Zelda baddies live in soft sand, springing up from the dunes to ambush Link. Stay mobile whenever Leevers are about, watching the floor carefully to spot them as they begin to emerge. Be quick to cut down any Leevers you see, or else they’ll flee into the floor again, emerging to attack you someplace else.
Like Like
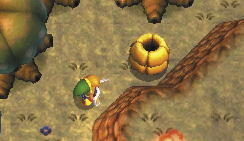
- Damage: Special
- Hits to Defeat: 2
- Location: Thieves’ Town & Lorule Castle Region, Some Caves, and the Rupee Rush minigames
Like Likes are frustratingly sneaky enemies. They are practically invisible until it is too late and Link in their grasp. They don’t damage Link, but they devour his regular shield, forcing him to return to a merchant to purchase another. Be on your toes and if you know where one is, approach it slowly, then attack as quickly as possible.
Lorule Soldier

- Damage: 1 heart
- Hits to Defeat: 4
- Location:Lorule Castle
These soldiers have some decent defense and really like to block. Flank them or attack them from the rear to really get through them quickly. Ice Rod, Ice Rod, Ice Rod.
Lynel
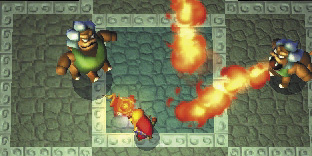
- Damage: 4 hearts
- Hits to Defeat: 30!
- Location:Death Mountain
Lynels are one of the strongest enemies that Link must face. Even with the Master Sword it will take more than a dozen slashes to fell this beast. Not only are they incredibly resilient, their fire breath attacks take 4 hearts off of your life gauge. Use the Ice Rod to stun them so that you can pummel them repeatedly. The Fire Rod or bow are great for long range attacks.
Mini-Moldorm
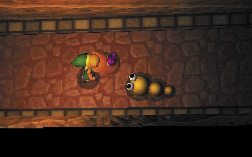
- Damage: 1/2 heart
- Hits to Defeat: 2
- Location: Death Mountain Trail, Dungeons
Mini-Moldorms have a very unpredictable movement pattern, moving in circular patterns toward you, then abruptly moving away from you. Use ranged weapons to stun or harm them from afar. Using the upgraded Ice Rod will give you enough blast radius to attack them before they get near you. A well-placed spin attack helps when there are multiple Mini-Moldorms.
Moblin (Blue, Red)
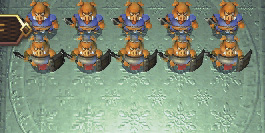
- Damage: 1 heart
- Hits to Defeat: 3 (Blue), 5 (Red)
- Location:Lorule Field
Moblins are a common enemy across Lorule, just as soldiers are the common enemy in Hyrule. They come in different colors and carry a variety of weapons including spears, swords, and shields. They are best defeated when you attack their flanks. They like to block with their weapons, so attack their sides or backs as best as you can.
Octorok
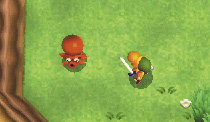
- Damage: 1 heart
- Hits to Defeat: 2
- Location: Eastern Ruins, Southern Region, Lake Hylia Region
Octoroks walk in a grid-like form going only left and right, up and down. These unpredictable enemies also shoot projectiles from their mouths, so keep that shield ready to deflect their attacks, then get close and attack with your weapon of choice.
Peahat
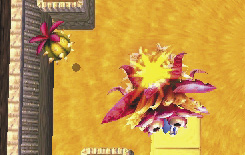
- Damage: 1 heart
- Hits to Defeat: 1 hit
- Location:Desert Palace
When you engage the boss, Zaganaga, it shoots these flying plants out of its mouth to distract and inflict grievous bodily harm. Use the Master Sword Beam attack to hit them from afar if your life gauge is full, or use the Fire Rod to hit them from a distance.
Pengator
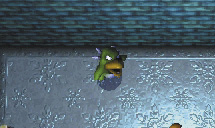
- Damage:1 hearts (small)2 hearts (big)
- Hits to Defeat: 4
- Location: Ice Palace
Pengators are very mean ducks. These things love to charge at you and will do anything they can to push you over a cliff or corner you to beat you unconscious. The best way to defeat them is to use your Tornado Rod to knock them on their bellies.
Poe
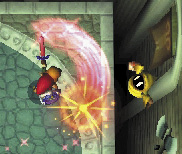
- Damage: 1/2 heart
- Hits to Defeat: 2 (Trickster Poes take 4 hits)
- Location: Sanctuary & Zora’s Domain, Skull Woods, Death Mountain, Thieves’ Town & Lorule Castle
Poes are vicious little spirits that haunt certain places. These hovering ghouls first appear in the Graveyard at the start of Link’s quest. Push the tombstones to reveal them, stand back, and swipe at them with your sword. Not much to it!
Popo
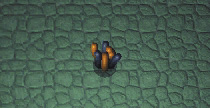
- Damage: 1 heart
- Hits to Defeat: 1
- Location: Death Mountain Region, Thieves’ Town & Lorule Castle Region, Eastern Ruins, Several Dungeons
These slow-moving monsters are easy prey for Link. They leave themselves open when they come up from the ground, so once you see them spout from the earth, stand over them and deliver the pain.
Rat
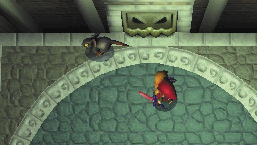
- Damage: 1/2 heart
- Hits to Defeat: 1
- Location: Dungeons
Rats hang out in dark, dank places such as caves and dungeons. Link first encounters them in the secret cave underneath the Graveyard that leads to the Sanctuary. They fight in groups, so back into a corner so they can’t flank you, and let them have it.
Red Spear Soldier
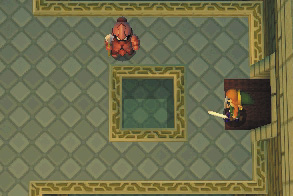
- Damage: 1/2 heart
- Hits to Defeat: 3
- Location:Hyrule Castle
Red Soldiers are more formidable than other soldiers, but they’re quite rare. Don’t attempt a frontal assault; instead throw a well-placed bomb behind them to destroy them like a pro.
Ropa
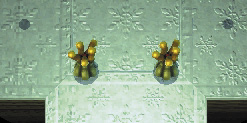
- Damage: 1 heart
- Hits to Defeat: 6
- Location: Skull Woods Region, Sanctuary & Graveyard, Thieves’ Town & Lorule Castle
Ropas are ugly monsters that hop around and pursue Link in many areas around Lorule. Use the Ice Rod to vanquish the enemy because they usually appear in groups of three or more. Still, their lack of mobility ranks them among the easiest of Lorule’s field fiends.
Rope
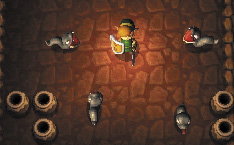
- Damage: 1/2 heart
- Hits to Defeat: 2
- Location: Dungeons
Ropes are sneaky and move around on their bellies like snakes. Be on guard when you spot them because they dart toward with surprising speed. Hit them before they get to you, or block them once with your shield then counter with some fancy swordplay.
Rupee Like
- Damage: Special
- Hits to Defeat: 2
- Location:Lake Hylia Region, Skull Woods Region, Eastern Region, Lorule Lake Region,some caves, and the Rupee Rushminigame
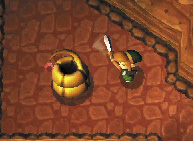
These sneaky creatures disguise themselves as tempting Rupees, then pop out and grab Link when he draws near to collect them. Instead of harming Link, Rupee Likes quickly devour his Rupees while he is being held. Mash buttons to break free of a Rupee Like’s grasp, then carefully dispatch it. You can identify Rupee Likes by the larger shadows cast by their Rupees while they’re in disguise. Slash at a suspicious Rupee, and if a hit is detected, you know it is a Rupee Like lying in wait.
Sand Crab
- Damage: 1/2 heart
- Hits to Defeat: 2
- Location: Sanctuary & Zora’s Domain, Southern Region, Lake Hylia Region
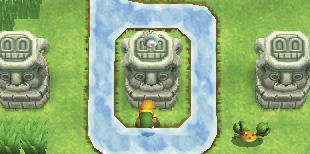
These crabs walk sideways in an unpredictable pattern. They shuffle slowly when moving north or south, but sprint with surprising speed when traveling east or west. Once they spot you, they will quickly charge. Be ready to strike as soon as they come close.
Skullrope
- Damage: 1 heart
- Hits to Defeat: 4
- Location:Swamp Palace
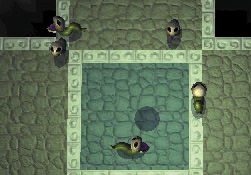
This stronger form of Rope has the same attack pattern. Their heads are stronger than the rest of their body, and they usually come in groups, so use an area attack such as the spin attack, or bring out the Ice or Fire Rod against them.
Slarok
- Damage: 1 heart
- Hits to Defeat: 3
- Location:Eastern Ruins Region, Lorule Lake Region
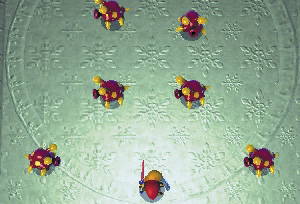
Like Octoroks, Slaroks walk in straight lines and shoot projectiles from their mouths in straight lines as well. Use your shield to block them and attack until they are defeated. Give them a taste of their own medicine, and use projectiles of your own.
Sluggula
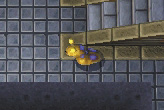
- Damage:1 1/2 hearts
- Hits to Defeat: 6
- Location:Thieves’ Hideout
These giant slugs move slowly, leaving a trail of slime—and bombs—behind them. The best tactic is to rain bombs down on these slow-moving enemies to cause major damage. Just don’t let them get too close!
Snap Dragon
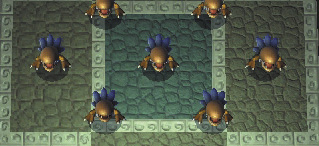
- Damage: 2 hearts
- Hits to Defeat: 3
- Location: Skull Woods Region, Thieves’ Town & Lorule Castle Region, Eastern Ruins Region
The giant mouths of these common Lorule foes are lined with razor-sharp teeth, and these dragons like to snap down on anything that gets in their way. Approach with caution and, if possible, attack with a long-range weapon.
Spiked Iron Ball
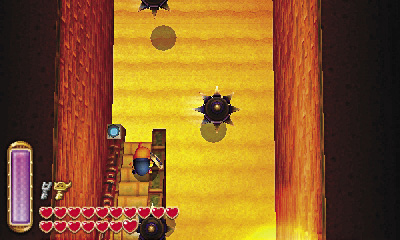
- Damage: 1/2 heart
- Hits to Defeat: Invincible
- Location:Tower of Hera, Desert Palace
This is more of a trap than an actual enemy, but it causes damage nonetheless. Time its movements and skillfully run past it. If you have the Ice Rod, use it to briefly stun them.
Stal
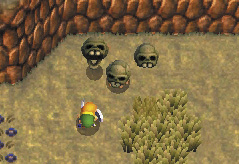
- Damage: 1/2 heart
- Hits to Defeat: 4
- Location: Lorule Field, most dungeons
Some of Lorule’s skulls are actually evil creatures called Stals in disguise. They spring to life and attempt to bite down on Link when he is closest. Just slash at them with your sword or use your Fire Rod to defeat them easily.
Stalfos
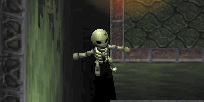
- Damage: 1 heart
- Hits to Defeat: 6
- Location:Dark Palace
Stalfoses are nimble skeletons that leap out of range of Link’s sword. Either use the sword to back them into a wall so they may be struck, or fire arrows at them from afar. Arrows are the better option, as they’re more likely to find their mark. Use the sword to keep the Stalfoses at bay while lining up your bow shots.
Swamola
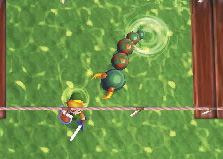
- Damage: 1/2 heart
- Hits to Defeat: 2
- Location: Eastern Ruins Region, Misery Mire Region, Lorule Lake Region
Swamolas leap out from the water to attack you as you swim. They do not relent and are difficult to target and defeat. Swamolas are best avoided, but Link can defeat them if he’s quick to strike after they’ve emerged. Try using the Ice Rod to stun and defeat Swamolas.
Taros
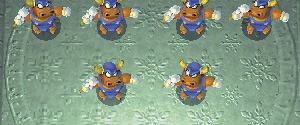
- Damage: 1 heart
- Hits to Defeat: 2
- Location:Lorule Field
These are a staple enemy in Lorule and can be found throughout the dark overworld. Taros come in red and blue varieties, with the red ones being a bit tougher to chop down. These beasts like to block with their spears, so slash at their flanks or from behind to dispatch them quickly, although it’s best to stun or slay these dangerous minions with ranged weaponry from a safe vantage.
Tektite
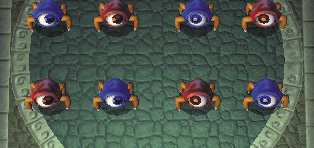
- Damage: 1/2 heart
- Hits to Defeat: 3 (Blue) 6 (Red)
- Location: Death Mountain Region, Eastern Ruins, Desert Region
Tektites will be familiar to any fan of the world of Zelda. These enemies hop toward your position relentlessly. They can’t be hit by the sword or bow while airborne. Use your Tornado Rod to stun them, then slash them with the sword. Or use the Fire or Ice Rod to hit them at a distance. Don’t let them get close!
Terrorpin
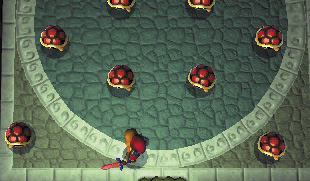
- Damage: 1/2 heart
- Hits to Defeat: 1
- Location:Tower of Hera
These evil turtles stalk Link while remaining hidden in the safety of their thick, hard shells. Terrorpins are invincible when they are upright. Use the Tornado Rod or hammer to flip them over on their backs, then slash with the sword.
Vulture
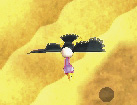
- Damage: 1/2 hearts
- Hits to Defeat: 2
- Location:Desert Region
Vultures, like Crows, fly out weapon range, then swoop down for the attack. They fly down to inflict damage, then curve around in a circle, which makes predicting their landing patterns difficult. Avoid their dive attack then they get close, slash away with your blade. Or simply knock these pests from the sky with the Ice, Fire, or Tornado Rods!
Wallmaster
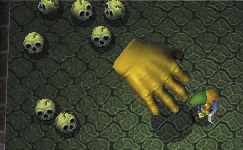
- Damage: Special
- Hits to Defeat: 4
- Location:Skull Woods
These creepy giant hands lurk around on dungeon ceilings. You can tell when they approach by the shadow that grows underneath you. If they grab you, they will take you all the way back to the dungeon entrance (or the most recently used entrance)—annoying! Wait for them to slam down on your position, run to the side, then slash as fast as you can to defeat this creature quickly. It will return after several seconds, but at least you’ll have a few moments of safety!
Water Tektite
- Damage: 1 heart
- Hits to Defeat: 1
- Location:Swamp Palace
These water versions of Tektites hop along the surface of the water and can be a threat when you cross the water they reside in. Use a long-ranged weapon like the Hookshot or bow to dispatch them, If you are caught in the water next to them, dive down below the water to dodge them.
Wizzrobes (Fire and Ice)

- Damage: 2 hearts
- Hits to Defeat: 2
- Location:Turtle Rock, Ice Ruins
These fellows are tricky and unpredictable. They like the hit-and-run tactic of shooting a magic projectile, then disappearing, only to reappear in another position to repeat the process. It is best to use the Ice or Fire Rod from a distance and be done with it.
Zazak
- Damage: 2 hearts
- Hits to Defeat: 5
- Location:Thieves’ Hideout
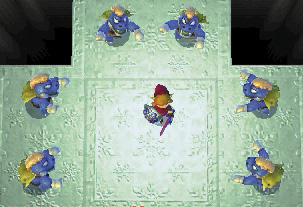
Zazak attack in packs but they walk toward you like zombies with no real combat tactics. Their arms are outstretched, but all they will get is sword slashes, which is the easiest way to dispatch them. Use the Ice Rod to stop them in their tracks, then pummel them the best way you know how. When you encounter larger groups of Zazaks, use the Tornado Rod or Ice Rod to stun them.
Zirro
- Damage: 1 heart
- Hits to Defeat: 1
- Location:Lorule Field
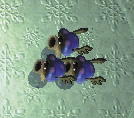
Zirro can be found throughout Lorule and are a difficult enemy to attack. They swoop down like Crows and Dactos but for a shorter time. They will also shoot projectiles out of their mouths, so keep that shield hand ready. Zirros are vulnerable to any of Link’s weapons when flying low, but while hovering on high, they can only be hit by the Fire Rod, Ice Rod, and Tornado Rod. It is best to attack this enemy from a distance.
Zora
- Damage: 1/2 heart
- Hits to Defeat: Ranged attacks only
- Location: Hyrule lakes and rivers
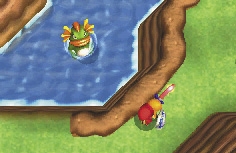
While Oren, queen of the Zora, may be on your side, the other Zora do not share her opinion of you. They will pop out of the water and shoot fireballs at Link, so block with a Hylian Shield, and if you are in shallow water or on a nearby dock, fire your bow or Hookshot a couple times at them to fell these stubborn sea creatures. Otherwise, simply dodge their fireballs as you explore Hyrule.