
The Legend of Zelda: A Link Between Worlds Guide Friends and Fiends
Bosses
You have fought through countless minions and enemies, intelligently and cleverly solved difficult puzzles, and you have just found the Big Key. Everything you have accomplished up to this point has trained you for this moment...the boss fight. Each of these dastardly giants stands between you and victory. Continue reading to find the tips and tricks to defeat each boss.
Margomill
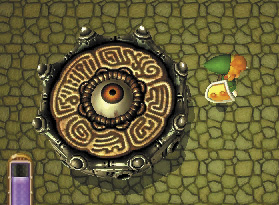
This towering boss is one of the first boss fights that you encounter. You face this strange boss at the end of your trials in the House of Gales. While Margomill may look intimidating, you can defeat this thing quickly if you follow the same pattern by hitting its weak point, its eye. As it spins around the arena, dodge as best you can and hit the circular levels until all but one are destroyed. Now is your chance to use the Tornado Rod to fly up and land next to the giant eye. Slash wildly to inflict major damage until you get thrown off. Repeat this process until it’s defeated. Long-range weapons are great for destroying the lower levels if you do not wish to get close to it. You can also hit Moldorm in the head with the Hammer to briefly stun it. This isn’t the most difficult boss fight, but you will still feel like a powerhouse when you are victorious.
Moldorm
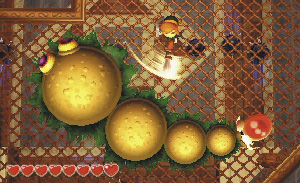
You might recognize this boss from The Legend of Zelda: Link to the Past, and if you do, you will know just how to win this fight. However if you need a refresher, remember to go for the tip of the tail! Moldorm slides around the arena in an unpredictable pattern. Be quick on your feet and move quickly to slash at the weak point on the tip of its tail. Each time you injure it, it crawls faster, so you have to be quicker too. Don’t worry if you are low on life, because if you hop down to the platform below and merge into the platforms, you will find hearts painted on the walls. Throwing bombs takes incredible timing and aim, but inflicts a great deal of damage as well. You will cut this thing down to size in no time.
Stalblind
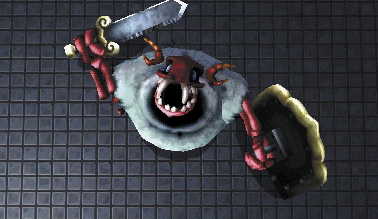
In your trials in the Thieves’ Hideout, you face this creepy skeleton at the very end. Stalblind wields a sword and shield and uses them with extreme prejudice. The trick is to use its shield to your advantage by wall merging into it. This confuses it and make it swing its shield behind it, which is your cue to merge out of the shield and unleash the fury of your blade on its backside. Continue this tactic until Stalblind smartens up and throws the shield away. Now Stalblind is much more ferociously powerful, but also defenseless. Dodge its swordplay and get in close to deliver some powerful blows. You can also use the bow, which is a great way to keep your distance and still deliver the pain. Later in the fight, Stalblind will detach its head. Dodge the its long sword and the disgusting black sludge it spews. Throw some bombs, shoot with your bow, or get in close to cut it up and you will achieve victory in no time!
Zaganaga
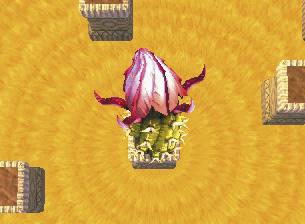
Once Link falls through the sand, he comes face to face with this plant-like creature whose only wish is to use Link for nourishment. You only have platforms to stand on, so using the Sand Rod is a must! Zaganaga will burrow underground, which may cause panic, but you can see where it is by the trail of a puff of sand moving around. Cast a wall of sand in its direction once it stops, and get in close to cut it up as much as you can before it leaves again. Definitely equip the Fire or Ice Rods as well; these cause a decent amount of damage, but also use up a lot of energy. Keep an eye on the gauge because you may need a sand pillar escape route. While Zaganaga has a dazzling attack that looks scary, it only takes half a heart. The real threat are the Peahats that it sprouts to hurt you. Use the Fire Rod to hit them from a distance, and collect the hearts that they drop to heal you if need be. Continue to make sand pillars to the giant plant and slash it up until it is no more. Zaganaga has a lot of life, so saddle up and be ready for a lengthy battle.
Knucklemaster
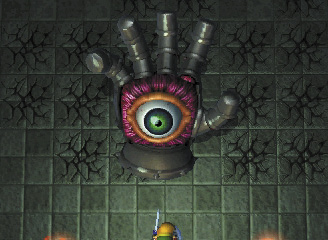
This is basically a giant Wallmaster with armor plating covering it everywhere, except for its eye on the palm side. At the beginning of the battle you will notice the many cracked floor panels, which come into play later. The biggest tip for this fight is to forgo any use of weapons that use up energy, because you will need all that you can get for wall merging. Trust us! Knucklemaster begins by balling up its fist and plowing it in your direction, so wall merge to become invincible and let it knock itself out! Step out of the wall quickly and slash its eye as much as possible. Continue this tactic until it gets angry and decides to change tactics by slamming down on you from above. Then it starts destroying the floor, making it quite difficult to find footing. Notice the large floor space with no cracks? Stay around there to reduce the number of floor panels being destroyed. Wall merge every time it slams down, then step out of the wall when it goes back up to recharge your energy as much as you can, because you will be spending the majority of the fight in the wall. Knucklemaster will try to punch you again, so wall merge and let it knock itself out again. Continue this tactic of wall merging when it slams down, as well as punching, then slash wildly with your sword when it is unconscious. When you get low in health, grab those painted hearts that line the wall of the arena!
Gemasaur King
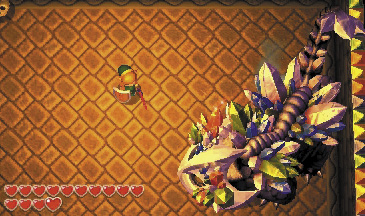
This giant ferocious beast likes to stalk Link slowly at first while shooting gems at him from afar. Dodge these early attacks by wall merging then popping out to throw a few items of your own. Its thick gems shield it from any form of frontal attacks, so throw some bombs at its face. As you hit it with bombs, parts of its Rupee shield will rain down around you; throw enough bombs and its entire mask of gems will be destroyed. This is when Gemasaur King becomes far more dangerous. This frustrated beast will begin charging around the arena in an attempt to ram you. Wall merge to dodge, then step out of the wall and either hurl bombs or get close and slash as much as you can. Once you hurt it enough, it lets out a loud roar, extinguishing the lights. The only thing you can make out are the beast’s bright eyes searching for you. Now might be a good time to panic. Wall merge to avoid its vicious tirade, and walk to a corner of the room to light the brazier to see what is going on. Now unleash your own form of fury and repeat the process until it’s defeated. Wall merge will be your only solace through this fight, so use it intelligently.
Argghus
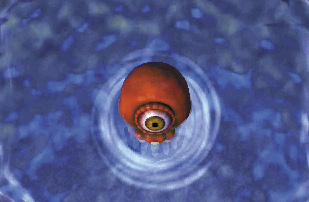
A creepy gigantic eye that shields itself with more eyes? That is not disturbing at all. The fastest way to get to inflicting some damage on this beast is to use the Hookshot to pull the eyes off individually, then slash each one to destroy it. Continue this process until the main eye is the only thing left, then go wild, slashing crazily at its cornea. If you wait too long to pull off the eyes, it will shoot the eyes at you, which catch fire and burn you. After you take off the eyes, it begins hopping, trying to stomp on Link. Continue to deliver the pain and it will eventually shoot laser beams out of its pupil, which can become pretty painful—avoid these blasts! The best trick is to use the Ice Rod to freeze this giant eye, to get in several slashes until it thaws back out. Just repeat this process and you can defeat this boss without even being hit once! The Ice Rod is by far the most useful tool in the game and this fight is no exception.
Grinexx
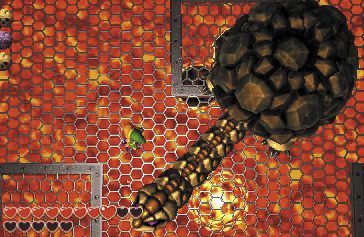
This giant rock-solid turtle begins by floating below the wire floor that you stand on, stopping in the open spaces to attack you with bursts of lava that can be pretty painful. This is where your best friend, the Ice Rod, comes in handy! As quickly as possible, cast an ice blast on the turtle through the open hole before it can shoot lava. Soon it hops up and joins you on the surface of the wire floor. This is where things get tense, because it will shoot its head out in your direction, and it has incredible range. The trick here is to—you guessed it—use the Ice Rod! Cast ice blasts every time this turtle extends its neck, which will freeze it for a few seconds, giving you plenty of time to slash it up. Continue this method until it self destructs.
Dharkstare
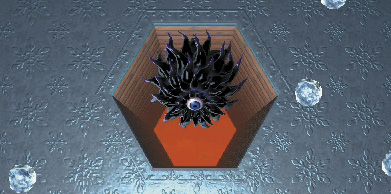
While the Ice Rod has been a dear friend, it needs to take a step back and let the Fire Rod take over. The Dharkstare is another giant eye that shields itself in thick ice, which needs to be melted with the power of your Fire Rod. Hit it three times with the Fire Rod to completely melt the outer shell. After you do this, watch out for the triangular laser attacks, which will cause heavy damage if you are trapped within the triangle. Stay on your toes and bob and weave to avoid this attack. Dharkstare will also shoot ice projectiles that will freeze Link if they connect with him. This monster regains the ice shield, which must be melted again with the Fire Rod. Once Dharkstare begins hopping around manically, your victory is close at hand. Attack with your mighty blade until it self destructs.
Yuga
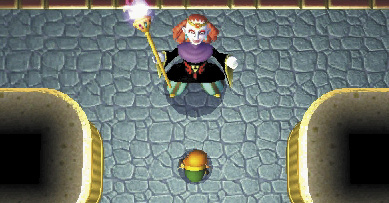
You have to fight Yuga a couple times throughout your adventure. The first time, Yuga splits into three forms, but only one is the real Yuga. They merge into the walls and reappear in separate areas. To spot the real Yuga, look for the only one with a flame at the tip of his staff. Once you find the real Yuga, it is imperative that you follow that Yuga and continue to attack him every time he comes back out of the walls. If you hit the wrong Yuga, a Green Soldier appears in his place. However this is not all bad, because defeating these soldiers is a great way to get hearts. Continue this pattern until you defeat Yuga and he runs off.
Yuga Ganon
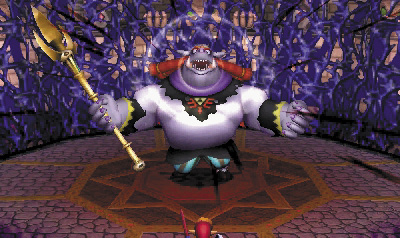
Yuga Ganon is much larger now and wields a large spear. Dodge the spear attacks, flank Yuga Ganon, and deliver as many blows as possible until he retreats. Once Yuga Ganon takes enough damage, he will hit an energy ball at you; deflect it until it hits Yuga Ganon and deals enough damage that he retreats into the wall. At this point Zelda gives Link the Bow of Light, which he must use to attack Yuga Ganon at his backside. Everytime you hit him in the back, Yuga Ganon will merge out of the wall, giving you enough time to slash him as ferociously as possible. Finish him off with a blast from the Bow of Light, which must be shot at his frontside to distract him, then immediately turn and fire in the opposite direction to get his back. Thus ends the rule of Yuga Ganon.