
Mass Effect (PC) Guide Walkthrough Spectre Assignments: First Citadel Visit
Citadel Assignments
There are 18 assignments that you can trigger during your first visit to the Citadel. Many of them have alternate paths depending on whether you choose Renegade (lower) or Paragon (upper) dialogue responses.
Also, several have persuasion dialogue options, which are only available if your Charm and Intimidate scores are high enough.
You might want to consider holding off on starting these assignments until after you become a Spectre in the main plot and receive the Charm and Intimidate bonuses that it provides.
1) Unusual Readings
(a.k.a. UNC: Distress Call)
How to Get It : Decrypt the computer console in Udina’s office
When It Is Available : As soon as you arrive at the Citadel; cannot be triggered after you go to Ilos
Where It Takes Place : Argos Rho cluster, Hydra System, Metgos
Special Notes : None
When you first arrive at the Citadel (or any time thereafter), you can view a computer console on the east side of Ambassador Udina’s office to get the option to attempt to decrypt the console.
If you successfully do so, you trigger the Unusual Readings assignment and receive the following Alliance patrol report:
Captain Hendrickson reported some unusual energy readings during a patrol of the Argos Rho cluster. She had particular concerns about the Hydra System but was recalled before her team could investigate further.
No patrols are scheduled for that sector. Do we want to send in a recon team?
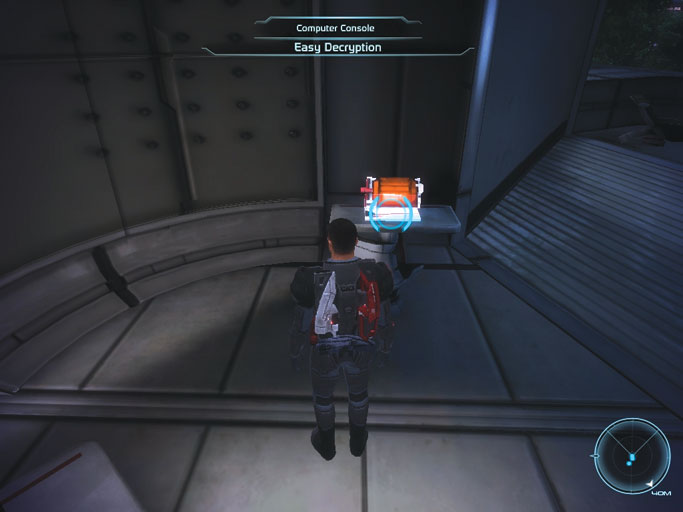
Decrypt the computer console in Ambassador Udina’s office to trigger the assignment.
Upon triggering the assignment, it appears in your assignment list. The first task is Investigate System.
When you return to the Normandy , travel to the Hydra System of the Argus Rho cluster. Examine the planet Metgos.
You receive an emergency transmission from the Sacred Angel medical transport, which has suffered a critical system failure and is making an emergency landing on Metgos.
This completes the current task and brings up the next one, Investigate Distress Call.
Investigate Distress Call
Metgos
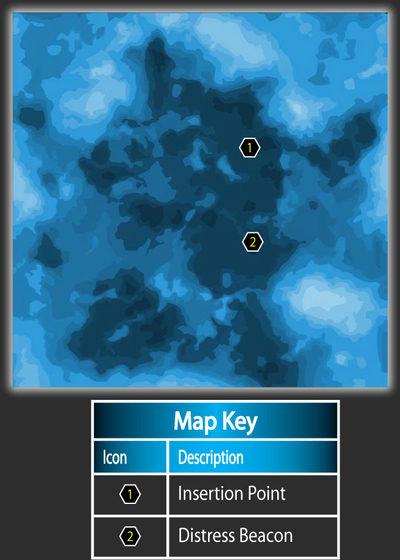
Assemble a team and land on the surface of Metgos. The distress beacon (2) emanates from a point almost due south from your insertion point (1).
Drive there in the Mako, but use caution: The "distress beacon" is actually a lure for a geth ambush!
Seven geth enemies appear in a semicircle around the southern side of the beacon, so be ready to retreat to the north, firing on geth as you do.
Avoid backing into the steep hillsides to the northeast, or your mobility will be severely limited.
Discretion is definitely the better part of valor in this fight. Keep retreating and picking off any geth that follow you, and then return to the beacon to pick off more from a distance.
Using your rockets and your scope’s zoom is the best way to destroy them from range, and it gives you plenty of time to dodge enemy fire.

The geth have prepared an ambush, using the distress beacon as a lure!
Use your radar to find and destroy all the geth. Once you emerge victorious, the assignment is complete.
2) Strange Transmission
(a.k.a. UNC: Major Kyle)
How to Get It : Decrypt the computer console in the C-Sec HQ section of the Presidium
When It Is Available : As soon as you arrive at the Citadel; cannot be triggered after you go to Ilos
Where It Takes Place : Hawking Eta cluster, Century System, Presrop
Special Notes : Need 7 Charm and 9 Intimidate to see all possible outcomes
There is a computer console on the east side of C-Sec HQ (Executor Pallin’s office) in the Presidium that you can easily decrypt.
Successfully decrypting the computer console triggers the Strange Transmission assignment and gives you the following diplomatic advisory warning:
The following message was transmitted from an untraceable account to multiple recipients across the extranet. Further monitoring of the situation is warranted.
"My fellow biotic: You have been selected to receive this transmission because of our shared plight. Few understand us, fewer tolerate us. We must stand together. We must build our own new world. Come. Join us in the Hawking Eta cluster. Only as one body can we right the wrongs done to our kind."
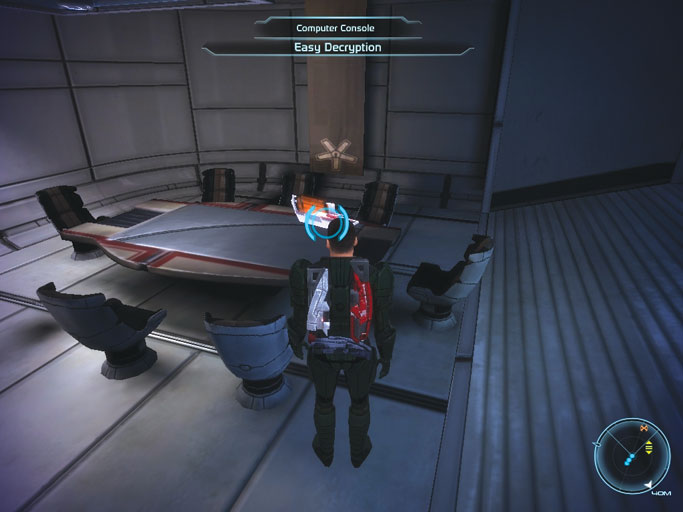
Decrypt the computer console in C-Sec HQ to trigger the assignment.
Upon triggering the assignment, it appears in your assignment list. The first task is Find the Commune.
Find the Commune
When you return to the Normandy , travel to Century System of the Hawking Eta cluster.
When you arrive in the system, you receive a message from Alliance Command, saying that an Alliance officer named Major Kyle has set up a small compound of biotics.
The Alliance sent two representatives to meet with him at the compound. Those representatives have disappeared and are presumed killed by Kyle and his followers.
When your conversation with Alliance Command is complete, the next task in the assignment is triggered: Investigate Major Kyle’s Compound .
To do so, you need to assemble a team and land on Presrop, a small moon that orbits the planet Klendagon.
Investigate Major Kyle’s Compound
Presop
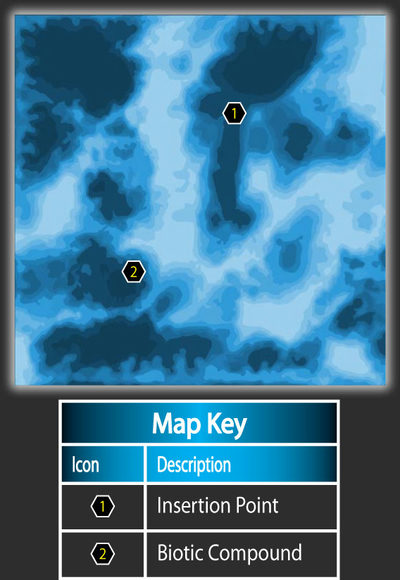
Major Kyle’s biotic compound (2) is southeast of your insertion point (1). Drive over there in the Mako to see several silos and two other structures.
The door to one of the structures (mercenary base) is unlocked. The door to the other structure (science station) is locked. Leave the Mako and approach the mercenary base.
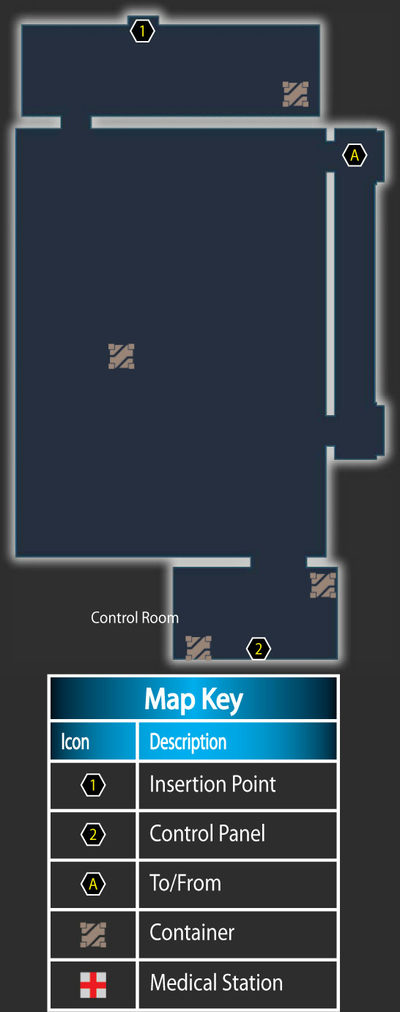
Presrop Mercenary Base, 1F
Presrop Mercenary Base, 2F
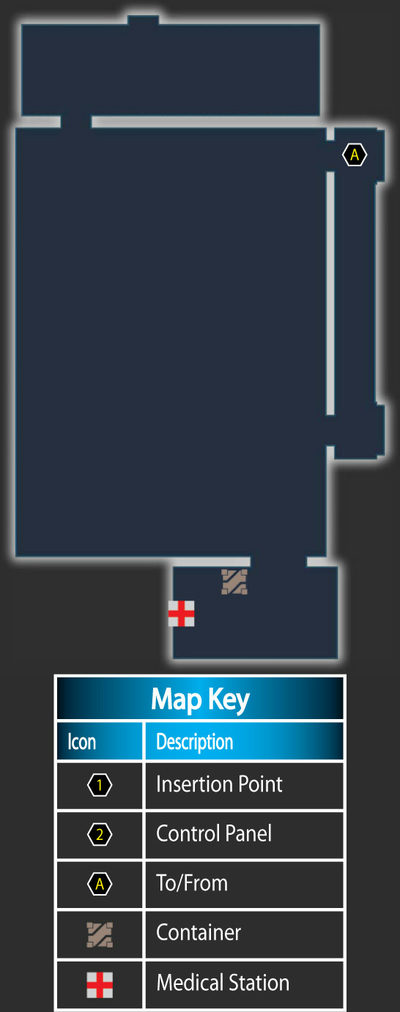
You need to gain access to the science station via the mercenary base to confront Major Kyle, and there are two ways to do it. You can either talk your way in, or you can blast your way in.
To start off on the peaceful route, approach the door to the mercenary base and say, "I have to speak to Major Kyle," then follow the dialogue options until you are able to use persuasion.
Or, adopt a hostile tone by saying, "You can’t keep me out!" and avoid using any persuasions.
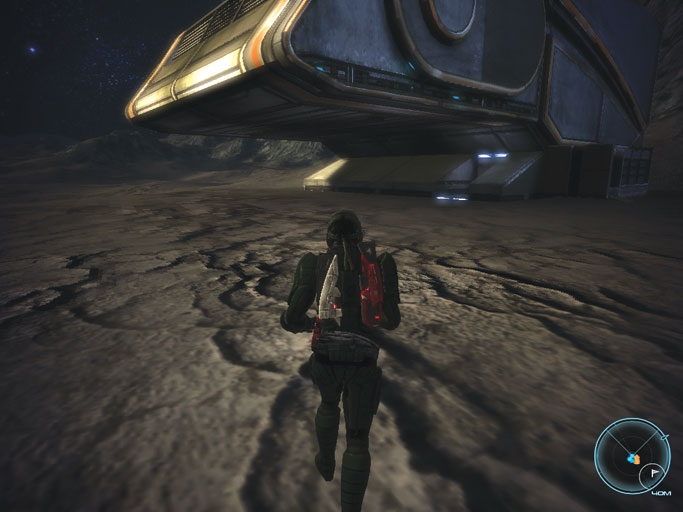
Start by talking or blasting your way through the mercenary base.
If you use diplomacy, the door to the science station where Major Kyle is holed up unlocks. You can either go straight into the science station, or you can enter the mercenary base and raid it for supplies.
If you go in shooting, you must kill all eight of the biotic cultists inside, then you must activate a control panel (1) at the southern end of the first floor to unlock the science station.
Either way you choose, the current task is completed, and the next one, Talk to the Major , appears in your journal.
Talk to the Major
Citadel: Presrop Science Station
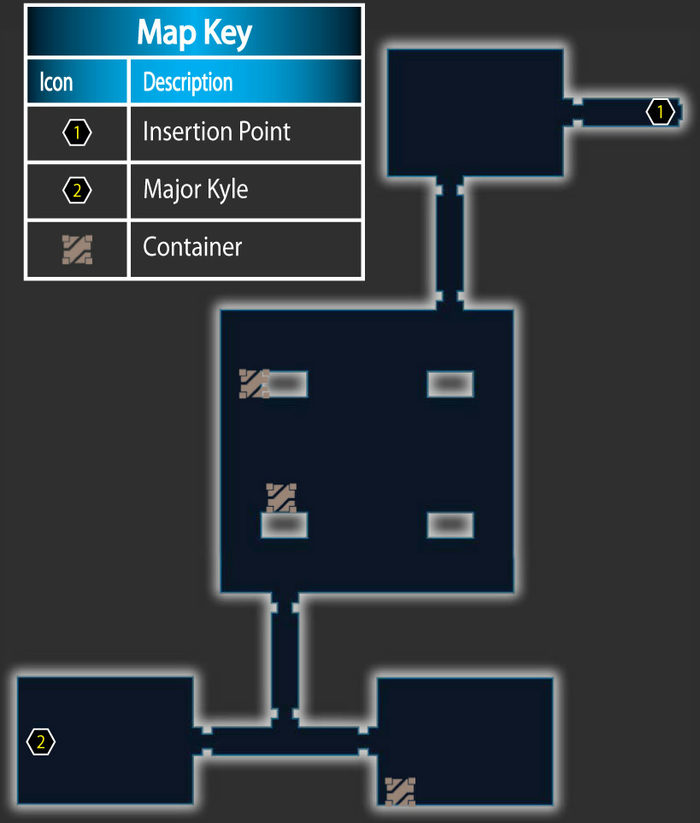
If you have managed to gain access to the science station without firing a shot, simply proceed from the northeastern insertion point (1) to Major Kyle’s location in the southwest corner of the station (2).
When you reach Major Kyle, you automatically engage him in conversation. He admits to killing the Alliance representatives. Continue to converse with him until the persuasion options show up on the dialogue wheel.
Use either of them to convince Kyle to give up without a fight and earn a Paragon or Renegade bonus. Accept the terms of his surrender to complete the current task, or decline them to begin a fight with him and his followers.

Major Kyle can be reasoned with if you haven’t hurt any of his followers.
If you have killed or injured any biotic cultists so far, you’ll find that Major Kyle and the eight biotic cultists in the science station are not going down without a fight. You have to kill all of the cultists.
Whichever way you complete the task, you receive a message that tells you to return to the Normandy and notify the Alliance of Kyle’s surrender or death.
This completes the current task and brings up the next one, Return to the Normandy .
Return to the Normandy
Exit the science station and get back into the Mako to return to the Normandy . Once aboard, access the galaxy map to automatically inform Alliance Command that Major Kyle is no longer a threat.
This completes the assignment.
3) Citadel: Presidium Prophet
How to Get It : Speak to the C-Sec Officer or the Preaching hanar in the northwest corner of the Citadel Presidium
When It Is Available : After your first meeting with the Council; cannot be triggered after you go to Ilos
Where It Takes Place : The Citadel
Special Notes : 7 Charm and 6 Intimidate required to see all possible outcomes; you might want to wait until you become a Spectre to take on this assignment.
Also, you have the option of paying the hanar or the C-Sec officer the 150 credits required for a preaching permit
on the Citadel.
There’s a turian C-Sec officer in the northwest corner of the Presidium who’s not too happy with a nearby hanar. Speak to one of them to begin the assignment.
According to the officer, public religious displays are not allowed on the Citadel Presidium without an evangelical permit, something the street-preaching hanar refuses to accept.
The officer could just arrest the hanar, but his superior has requested that he find a less confrontational way of dealing with the situation.
If you talk to the preaching hanar standing right next to the C-Sec officer, it offers to tell you of the Enkindlers, which is the hanar name for the Protheans.
The hanar believes that it is speaking truth, not religious opinion, and is therefore not bound by the Citadel laws governing evangelizing.
If you speak to the C-Sec officer first, your next task is Speak with the Hanar. If you speak to the hanar first, your next task is Speak with the C-Sec Officer .
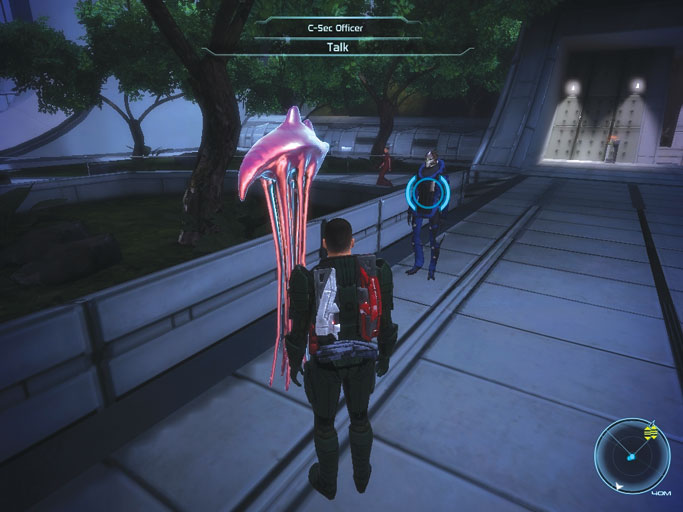
Speak to the C-Sec officer or the preaching hanar in the northwest corner of the Presidium to trigger the assignment.
Speak with the Hanar/Speak with the C-Sec Officer
Your goal is to defuse this situation by convincing either the C-Sec Officer or the preaching hanar to back down.
Follow the dialogue options on the left side of the dialogue wheel if you want to understand the officer or hanar’s positions more clearly. To advance the assignment, choose the dialogue options on the right side of the wheel.
Taking a Renegade tone brings up persuasions if you have sufficient Charm and Intimidate.
If you use these persuasions on the hanar, it agrees to leave and stop preaching, and your next task ( Inform the C-Sec Officer ) appears.
If you use these persuasions on the C-Sec officer, he agrees to let the hanar keep preaching and become someone else’s problem. This brings up the Inform the Hanar task.

Speak to the other party to advance the assignment.
If you don’t use the persuasions to convince either party, your next task is Resolve the Dispute, which requires you to go back to the first party and make a final push.
Inform the C-Sec Officer/Inform the Hanar
If you used persuasions to make the second party back down, go back to the first party and tell them that you solved the problem.
If the C-Sec officer won the dispute, he gives you credits. If the hanar is allowed to continue preaching, it gives you medi-gel.
Resolve the Dispute
If you speak with the second party and are unable to convince them to back down, return to the first party. Once again, persuasion options will convince the being you’re speaking with to back down.
You can see the persuasion options by choosing left-side dialogue options from the dialogue wheel until they appear.
All three of the initial options on the right side of the dialogue wheel ("I’ll keep trying," "Not yet" and "No") bring the conversation to a close.

Return to the first party to further the assignment, if you were unable to convince the second party.

Speak to the hanar after the C-Sec officer backs down to conclude the assignment.
4) Citadel: Asari Consort
How to Get It : Speak to Sha’ira in the Consort chambers
When It Is Available : As soon as you arrive at the Citadel; cannot be triggered after you go to Ilos
Where It Takes Place
: The Citadel
Special Notes : 4 Charm and 4 Intimidate are required to see all possible outcomes; you might want to wait until you become a Spectre to take on this assignment
The Consort, Sha’ira, can be found in her quarters at the southern end of the Consort chambers.
Speak to her to learn that she has a problem with a friend and former client of hers, a turian general named Septimus, with whom she recently had a falling out.
As a result, General Septimus has taken to drowning his sorrows in Chora’s Den and spreading lies about Sha’ira. She asks you to speak to him as a fellow soldier and convince him to change his ways.

Speak to Sha’ira in the southern end of the Consort chambers to trigger the assignment.
As usual, the dialogue options on the left side of the dialogue wheel provide additional information about what happened between Sha’ira and Septimus, although you won’t get much out of her; the Consort respects Septimus’ privacy too much to go into detail.
Choosing "Okay" or "I’ll see" from the dialogue wheel triggers the Citadel: Asari Consort assignment and gives you your first task: Speak with Gen. Septimus .
Speak with Gen. Septimus
You can find General Septimus sitting at a table in Chora’s Den and drowning his sorrows.
You can also find Septimus in the bar, but if you’re not a Spectre, you probably lack the necessary Intimidate and Charm skills to use persuasions on Septimus during the conversation.
Whichever way you choose to advance the conversation, you appeal to Septimus as a fellow military man. If you choose a Paragon path (upper dialogue options), you appeal to his sense of honor and dignity.
If you choose a Renegade (lower dialogue options) path, you berate him for humiliating himself over a woman. Eventually, Paragon and Renegade persuasions appear on the dialogue wheel ("Straighten up" and "Get a grip," respectively).
Using either of these persuasions fulfills the current task and brings up the next one, Speak with Sha’ira .

Speak to General Septimus in Chora’s Den to persuade him to change his tone.
General Septimus also asks you to do him a favor. During his bitter breakup with Sha’ira, he used his influence to make it appear as if the consort was leaking the secrets of an elcor diplomat named Xeltan.
Now that Septimus has come to his senses, he asks you to take a datapad to the diplomat to clear Sha’ira’s name. If you accept this responsibility, you trigger the Citadel: Xeltan’s Complaint assignment.
Speak with Sha’ira
Regardless of whether you accept the evidence for Xeltan, return to the consort chambers in the southeast corner of the Presidium and go upstairs to find Sha’ira exactly where you left her.
Speak to her; she tells you that she received an apologetic note from Septimus. She thanks you for your assistance.

Return to Sha’ira in the Consort chambers and speak to her to complete the assignment.
If you take the Paragon path during the rest of the conversation with Sha’ira, she offers you an affirmation of who you are and who you will become.
If you spoke with Xeltan and gave him Septimus’s information, she also gives you a token of her appreciation: a small trinket of Prothean design.
Completing the assignment in this manner gives you a Paragon bonus, as well as XP, credits, and medi-gel.
If you take a Renegade path, Sha’ira gives you all of the above. If you choose "That’s it?" (Renegade option) after she finishes speaking, you also get a rather steamy interlude with the professional Consort and earn a Renegade bonus.
5) Citadel: Scan the Keepers
How to Get It : Speak to Chorban in the Citadel Tower
When It Is Available : After your first meeting with the Council; cannot be triggered after you go to Ilos
Where It Takes Place : The Citadel
Special Notes : None
Immediately after your first meeting with the Council, you can approach a salarian named Chorban in the middle of the Citadel Tower and engage in conversation.
Chorban has taken a great interest in the keepers, the ancient race of Citadel custodians whose origins are lost to the sands of time.
Normally, the physical composition of the keepers makes it impossible to gather readings from them, but Chorban has developed a scanner capable of doing exactly that.
The only problem is, Citadel law prohibits anyone from disturbing the keepers, and while Chorban is reasonably certain that his research doesn’t violate that rule, he’s afraid C-Sec might see things differently.
During the conversation, choose "Let me help" and then "I’m with the Alliance" from the dialogue wheel to trigger the Citadel: Scan the Keepers assignment. Your first task is Scan the Keepers .
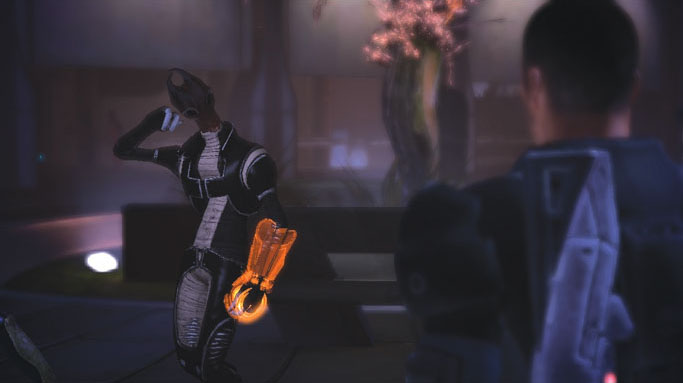
Speak to Chorban and offer to help him with his research to trigger the assignment.
Scan the Keepers
You need to scan 21 keepers to complete this task, and there are 21 keepers in the Citadel, so you must find every one.
Refer to the following screenshots (screenshots in table) and the Citadel maps at the beginning of this chapter for the locations of the keepers. After you have scanned all 21 keepers, the assignment is complete.
You earn credits and XP for completing it.
|
|
|
 On the east side of the Tower
|
 In the northwest corner
of the Tower |
 In the northwest corner of the Presidium, just outside of the Tower
|
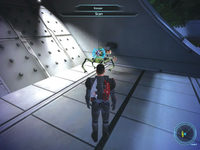 In the northwest corner of the Presidium, near the Wards Access entrance
|
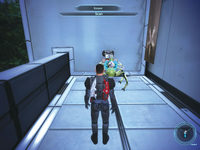 On the balcony outside of the embassy lounge in the Presidium
|
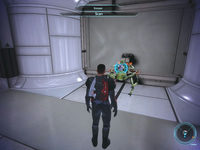 At the east end of the diplomatic archives in the Presidium
|
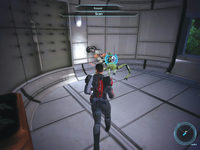 In the northeast corner of the volus and elcor office in the Presidium
|
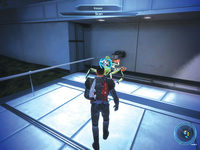
In the southwest corner of the Presidium, outside of the Consort chambers |

In the southern part of the Presidium, between the Consort chambers and the emporium |
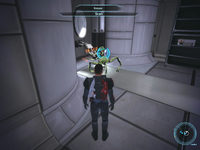 In an alcove just south of the emporium in the Presidium
|
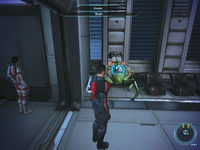 In the southwest corner of the requisition office in C-Sec Academy
|
 On the northern side of traffic control in C-Sec Academy.
|
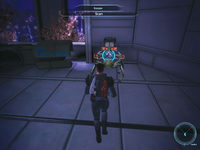 On the southern side of the eastern portion of the Lower Wards, in the C-Sec vehicle parking area.
|
 On the east side of the Upper Wards, outside the Med Clinic
|
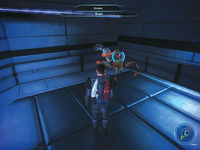 In the northwest corner of the upper market section of the Upper Wards
|
 In the alleyway section of the Upper Wards
|
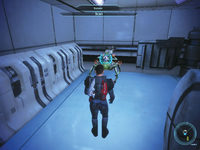 In the northeast corner of Flux and wards access
|
 At the western end of the upper floor of Flux, at the back of the casino.
|
 At the western end of the upper floor of Flux, at the back of the casino.
|
 In the center of the Tower
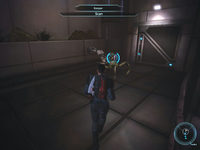 In the southwest corner
6) Citadel: Jahleed’s Fears
How to Get It : Speak to Jahleed in C-Sec Academy
When It Is Available
: After the first meeting with the Council; cannot be triggered after you go to Ilos
Where It Takes Place : The Citadel
Special Notes : Must have a Charm of 7 and an Intimidate of 6 to see all possible outcomes; you might want to wait until you become a Spectre to take on this assignment
After you accept the Citadel: Scan the Keepers assignment, you can go to C-Sec Academy and speak with a volus scientist named Jahleed.
He refuses to leave C-Sec Academy because he’s convinced that his research colleague is trying to have him killed.
By coincidence, his research colleague happens to be Chorban, the salarian you spoke with in the Citadel Tower to trigger the Citadel: Scan the Keepers assignment.
Offer to help him, and Jahleed tells you that they had a pre-arranged meeting in the Lower Wards near the markets.

Speak with Jahleed in C-Sec Academy after accepting Citadel: Scan the Keepers to trigger a new assignment.
When your conversation is complete, the Citadel: Jahleed’s Fears assignment appears in your journal.
Your first task ( Speak with Jahleed ) is automatically completed after speaking with Jahleed for the first time. The second task is Talk to Chorban .
Talk to Chorban
Just as Jahleed said, Chorban is waiting in the middle of the lower markets area of the Lower Wards, flanked by several armed salarians.
Speak to Chorban and demand the truth behind his keeper scan request. Chorban immediately cracks under the pressure and tells you that there’s more to the data collection than he let on previously.

Speak to Chorban in the lower markets to advance the assignment.
Chorban dismisses his gunmen (if you haven’t already killed them) and says that he and Jahleed stole the plans for a medical scanner from their employer and developed a tool capable of scanning the keepers, something that no one else had been able to do.
Chorban denies trying to kill Jahleed and claims that it was actually Jahleed who turned on him because Jahleed was trying to keep the data for himself rather than disseminate it to the greater scientific community as they’d agreed.
At this point, you can either agree to keep scanning keepers for Chorban (either for scientific knowledge or the cash he offers), or you can decline to continue.
Either way, Chorban doesn’t argue with you. He does mention that Jahleed still has the original data, though, and he probably isn’t planning on returning it.
Completing your conversation with Chorban advances the assignment and brings up your next task, Talk to Jahleed .
Talk to Jahleed
Return to C-Sec Academy to find Jahleed right where you left him. Speak to him and confront him about withholding information from you.
Jahleed begins to panic and begs you not to arrest him, saying that the data he’s collected on the keepers might unlock ancient mysteries of the Citadel.

Return to speak with Jahleed in C-Sec Academy to complete the assignment.
At this point, you have two persuasion options, a charm ("Then do it legally") and an intimidation ("Take it back!"). These cause Jahleed to see things your way and complete the assignment.
If you do not have the necessary Charm or Intimidate scores to persuade Jahleed, your only conversation is a neutral "Too bad."
This causes Jahleed to offer a bribe. Before you can answer, a C-Sec officer interrupts and asks if Jahleed is causing you any trouble.
If you choose the Paragon reply ("Definitely") or the neutral reply ("Yes"), you turn Jahleed in to the authorities and complete the assignment, earning XP and credits.
Then the assignment is completed, and the name of the assignment changes to Citadel: Jahleed Arrested .
If you choose the Renegade reply ("We’re fine"), the C-Sec officer leaves, and Jahleed promises to abandon the data-scanning schemes and any thoughts of betraying Chorban.
7) Citadel: Reporter’s Request
How to Get It : Speak to Emily Wong in the Upper Wards
When It Is Available : After your first meeting with the Council; cannot be triggered after you go to Ilos, or if you leave the Citadel without first speaking to Emily Wong or picking up the OSD (optical storage disc) in Fist’s office
Where It Takes Place : The Citadel
Special Notes : Need a Charm score of 1 and an Intimidate score of 2 to see all possible outcomes; you might want to wait until you become a Spectre to take on this assignment
You can find a human reporter named Emily Wong in the middle of the Upper Wards as soon as you are able to explore that area of the Citadel.
Speak to her to find out that she’s preparing an exposé on corruption and organized crime on the Citadel, and she hopes you’ll share with her any evidence you come across.
Agree to do so to trigger the Citadel: Reporter’s Request assignment. The first task is Look for Information.

Speak to Emily Wong in the middle of the Upper Wards and offer her your assistance to trigger the assignment.
Look for Information
This task is easily completed, since it’s a part of the main plot. The biggest source of corruption and organized crime on the Citadel is Fist, the owner of Chora’s Den.
The assignment is fulfilled as soon as you pick up the optical storage disc (OSD) in his office after defeating him in combat during the main plot.
It is also fulfilled as soon as you rescue Tali in the alleyway immediately following the fight with Fist, regardless of whether you grabbed the OSD.

Grabbing the OSD from Fist’s office or rescuing Tali advances the assignment.
If you rescue Tali without picking up the OSD first, your next task is Return to Fist’s Office . If you have the OSD in your possession after rescuing Tali, your next task is Deliver Information .
Return to Fist’s Office
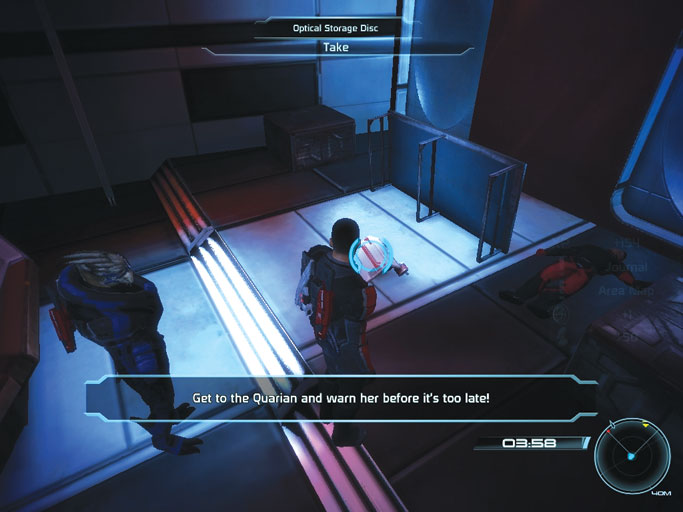
Fist’s optical storage disc contains the information that Emily Wong has been looking for.
If you didn’t grab the OSD before rescuing Tali, return to Fist’s office and look for the disc on the ground. Pick up the OSD to complete the current task and bring up the next one, Deliver Information.
Deliver Information
Emily Wong waits for you in the middle of the Upper Wards, right where you left her.
Speak to her; you have the option to give her Fist’s OSD, thus completing the assignment and earning you some credits and XP from the grateful reporter.
You can also see up to two persuasion options if you have the necessary attributes.
The charm persuasion ("I can offer more") and intimidation persuasion ("You owe me more") both lead to Emily Wong agreeing to give you additional credits.

Speak to Emily Wong to give her the OSD and complete the assignment.
8) Citadel: The Fan
How to Get It
: Speak to Conrad Verner in the upper markets section of the Upper Wards
When It Is Available : After your first meeting with the Council; cannot be triggered after you go to Ilos
Where It Takes Place
: The Citadel
Special Notes : Need 2 Charm and 2 Intimidate to see all options
A man named Conrad Verner stands near the northern wall of the upper markets section of the Upper Wards. Verner is absolutely in awe of you, and if you speak to him, he’ll ask if you have time for a quick autograph.
If you agree, he thanks you profusely and offers to buy you a drink next time you’re on Earth. He then leaves, and Citadel: The Fan is triggered in your journal. The first task is Conrad Verner.
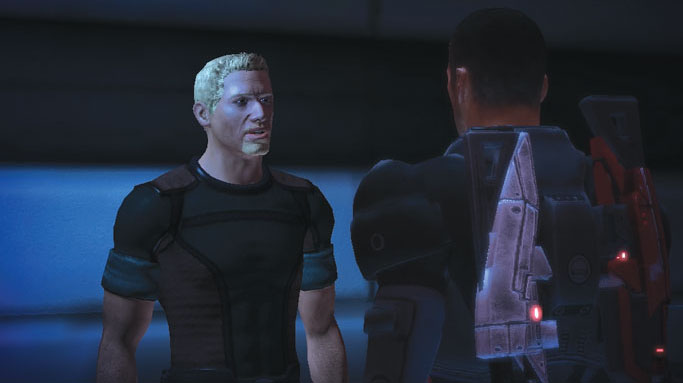
Speak with Conrad Verner and sign an autograph for him to trigger the assignment.
Conrad Verner
When you return to the Citadel after completing at least one of the main plot missions, you can find Conrad Verner standing in the Upper Wards, right where you met him last time.
Approach him and speak to him again, and he gushes about your being named the first human Spectre. He then asks you for a picture, which he plans on hanging in his living room.
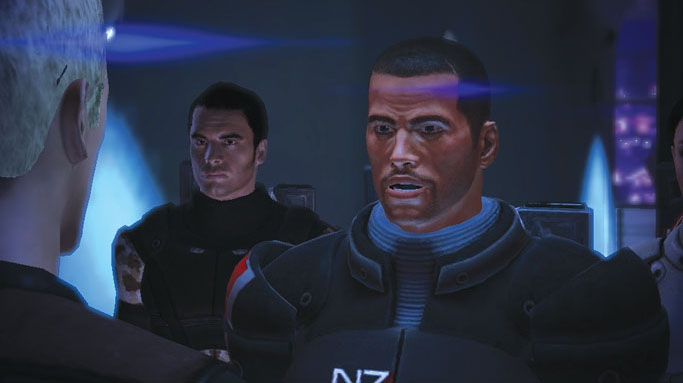
Conrad Verner likes you. He really, really likes you.
If you return to the Citadel after completing at least two of the three post-Citadel missions, Conrad Verner reappears in the Upper Wards in his usual location.
This time, he wants you to have him made a Spectre so that he can work together with you to defend the human colonies.
If your Charm and Intimidate scores are high enough, you have a couple of persuasions you can use on Conrad.
Both of them will convince him that he’s better off keeping the home fires burning, rather than marching off to war. These complete the assignment and award you a Renegade or Paragon bonus.
If your scores are not high enough to see the persuasions, or if you choose to use the non-persuasion dialogue options, you can still manage to convince Conrad that he’s not Spectre material, but you don’t get the Paragon/Renegade bonus.

Conrad is persistent, if nothing else.
9) Citadel: Homecoming
How to Get It : Speak to Samesh Bhatia in the northeast corner of the Presidium
When It Is Available
: After saving Tali from Saren’s men; cannot be triggered after you go to Ilos
Where It Takes Place : The Citadel
Special Notes : Need a Charm of 3 and an Intimidate of 3 to see all possible outcomes
After you rescue Tali from Saren’s men and meet with Captain Anderson and Ambassador Udina during the main plot, exit Udina’s Office and descend the stairs to find Samesh Bhatia calling your name.
Speak to Samesh; he tells you about his wife, a marine who died during the assault on Eden Prime. Samesh wants his wife’s body returned to him for cremation, but the military has refused his request without explanation.
Samesh tells you that the man in charge of his case is named Bosker, and that he last saw Bosker in the Embassy Lounge.
This concludes the conversation with Samesh and triggers the Citadel: Homecoming assignment, along with its first task, Talk with Diplomat.

Speak to Samesh Bhatia to trigger the assignment.
Talk with Diplomat
Clerk Bosker can be found leaning against the northern wall of the embassy lounge in the Presidium, just up the northwest stairs from your current location.
Speak with Bosker to find out that Samesh’s wife’s body is being held by the Alliance military because they want to examine the fatal wounds dealt to her on Eden Prime so they may create better defenses against geth attacks.
If your Charm and Intimidate scores are high enough, two persuasion options will appear on the left side of your dialogue wheel.
One is a charm ("This isn’t right"), and the other is an intimidation ("I’m releasing the body"). Using either of these convinces Bosker to release Samesh’s wife’s body and grants you a Paragon or Renegade bonus.

Speak with Clerk Bosker to advance the plot.
You can also choose to hear Bosker out and decide that the Alliance’s decision is the correct one.
To do this, choose any non-persuasion conversation closer ("Thanks for the information," "I’ll pass this on," or "Samesh should hear this").
Whichever route you choose, it completes the current task and gives you a new one, Inform Mr. Bhatia.
Inform Mr. Bhatia
Having talked to Bosker, exit the embassy lounge and return to Samesh, who is still in the exact same spot in the northeast corner of the Presidium.
Tell Samesh that the situation has been resolved (either to his relief or dismay), which completes the assignment and gives you an XP bonus.

Speak with Samesh Bhatia a second time to complete the
assignment.
10) Citadel: Xeltan’s Complaint
How to Get It
: Accept General Septimus’s request to clear Consort Sha’ira’s name
When It Is Available : After persuading General Septimus during Citadel: Asari Consort; cannot be triggered after you go to Ilos
Where It Takes Place
: The Citadel
Special Notes : None
If you ever heard an elcor diplomat named Xeltan complain about betrayal at the hands of the Consort Sha’ira, you find out why after talking with General Septimus during the Citadel: Asari Consort assignment.
Septimus leaked sensitive diplomatic information belonging to Xeltan to make it appear as if Sha’ira betrayed him.
Agree to help clear Sha’ira’s name during your conversation with Septimus; he gives you evidence for you to give to Xeltan. This triggers Citadel: Xeltan’s Complaint and its first task, Speak to Xeltan.
Speak to Xeltan
Xeltan waits in the volus and elcor offices in the northeast corner of the Presidium. Tell him "I can help you" to reveal Septimus’s deception and give him the evidence.
Xeltan panics at the thought of Septimus being able to learn his secrets. You can reassure him (Paragon options) or tell him to deal with it (Renegade options).
The former gives you a Paragon bonus, and the latter gives you a Renegade bonus. You also earn XP and credits for successfully completing the assignment.

Speak to Xeltan in the Presidium to give him Septimus’s evidence and complete the assignment.
11) Citadel: Rita’s Sister
How to Get It : Speak to Rita near the bar at Flux
When It Is Available
: After your first meeting with the Council; cannot be triggered after you go to Ilos
Where It Takes Place : The Citadel
Special Notes : Need 7 Charm and 6 Intimidate to see all possible outcomes; you might want to wait until you become a Spectre to take on this assignment
Rita is a waitress at Flux, and you can find her near the bar on the lower level of the casino.
Speak to her using left-side dialogue options to find out that her sister, Jenna, left Flux to go work at Chora’s Den as an informant for C-Sec. Rita is concerned for her safety.

Speaking to Rita in Flux triggers the assignment.
Continue choosing left-side options to get more information out of Rita. When there is no more info left, choose "I’ll speak with her" (Paragon) or "Leave it to me" (Renegade) to tell Rita that you’ll look into the matter.
This triggers Citadel: Rita’s Sister . The first task (Speak with Rita) is already complete. Your next task is Talk to Jenna.
Talk to Jenna
Go down to Chora’s Den in the Lower Wards and speak to Jenna, who’s tending bar on the north side of the room. Choose Paragon or Renegade advancement responses to ask her about her work with C-Sec.
No matter what options you choose, Jenna flatly refuses to discuss the matter. This completes the current task and gives you a new one, Return to Rita.

Talk to Jenna; she won’t give you any information. Time to report back to Rita.
Return to Rita
Exit Chora’s Den. On your way out the door, an undercover turian C-Sec agent named Chellick surreptitiously tells you that if you have any questions about Jenna, you can meet him at C-Sec Academy.
If you try to continue the conversation, Chellick acts drunk and shoves you away. This completes the current task (even though you never actually made it back to Rita) and gives you a new one: Talk to Chellick.

Chellick bumps into you on your way out of Chora’s Den and tells you to meet him at C-Sec.
Talk to Chellick
Chellick is in the southwest corner of the C-Sec Offices in C-Sec Academy. He’s not pleased that you almost gave away the identity of one of his agents by talking to her in the middle of a crowded bar
But since you seem to be so concerned with Jenna’s safety, Chellick offers you the chance to help him out and take some of the heat off Jenna.
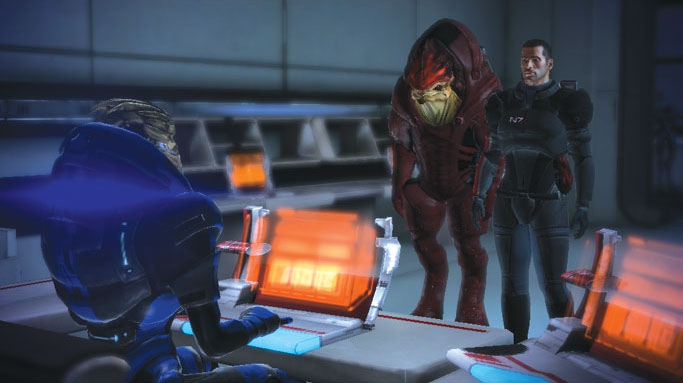
Talk to Chellick in C-Sec Academy about Jenna.
At this point, if your Charm and Intimidate scores are high enough, you get two persuasion options: "You don’t need her" (charm) and "Pathetic" (intimidation).
These cause Chellick to back off from using Jenna as an informant and award you a Paragon or Renegade bonus.
You can also agree to help him solve his case, which continues the assignment, or you can refuse and end the assignment here.
If you don’t have enough attribute points to use the persuasions, or if you choose not to use them, choose "All right. What do you need?" to advance the plot.
Chellick tells you that he needs Jenna’s intel to track down an illegal arms dealer named Jax.
If you agree to meet Jax in the lower markets area of the Lower Wards, buy his wares, and return them to Chellick, he’ll cut Jenna loose.
Chellick underscores the importance of purchasing Jax’s illegal weapon mods so that they can be used as evidence against him—he doesn’t want you to interrogate him or arrest him.
Completing the conversation with Chellick satisfies the current task and brings up the next one, Make the Pickup.
Make the Pickup
Go to the lower markets in the Lower Wards to meet Jax, a krogan. There are basically three paths you can take the conversation down, each with their own results.

Jax is waiting to make the deal in the lower markets in the Lower Wards.
If you go the Paragon route (upper choices on the dialogue wheel) or take a Renegade attitude (lower choices on the dialogue wheel), you refuse to pay Jax and have to fight and kill him and his two turian bodyguards.
If you take the neutral route (middle choices on the dialogue wheel), you execute the sale exactly as Chellick asked you to do.
However you choose to do it, this completes the current task and brings up the next one, Return the Shipment to Chellick.
Return the Shipment to Chellick
To complete this task, all you have to do is return to C-Sec and report back to Chellick in his office.
Chellick thanks you for your help (if you did as he asked) or becomes angry with you (if you arrested or killed Jax), and promises to get Jenna out of Chora’s Den immediately.
This completes the assignment and changes its name to Citadel: Rita’s Sister Is Safe . You earn a Paragon or Renegade bonus, depending on how you responded in conversation with Chellick and whether you killed Jax.
You also get XP, credits, omni-gel, and a grenade.
12) Citadel: Signal Tracking
How to Get It
: Examine the suspicious gambling machine on the western side of Flux’s second floor, at the back of the casino
When It Is Available : After your first meeting with the Council; cannot be triggered after you go to Ilos
Where It Takes Place
: The Citadel
Special Notes : None
There is a suspicious gambling machine at the western end of the upper floor of Flux. Investigate it to find that someone is using a signal to funnel money from gambling machines to a private account
This triggers the assignment Citadel: Signal Tracking and its first task, Track the Signal.
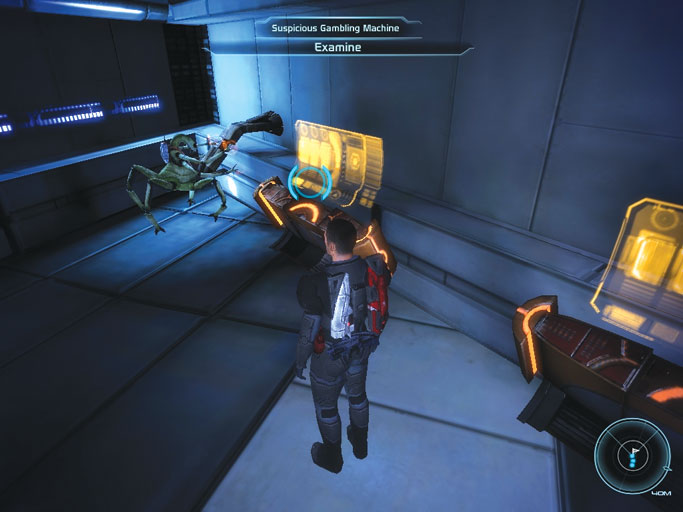
Investigate the suspicious gambling machine at the western end of Flux to trigger the assignment.
Track the Signal
The signal can be tracked back to the north side of the Wards access corridor. (You automatically target the signal source as you approach it.) Investigate the signal source to find that the signal has been bounced off a relay.
A trace reveals that it’s coming from the Financial District of the Presidium. This completes the first task and brings up a new one, Follow Signal to the Presidium.
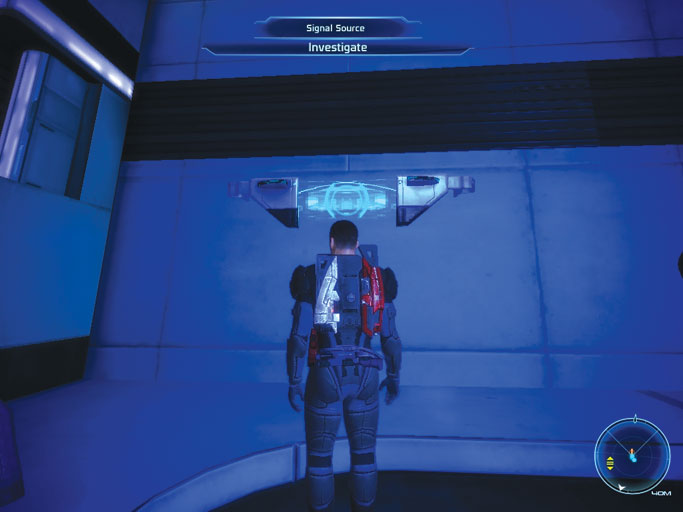
Examine the signal source in the Wards access corridor to advance the assignment.
Follow Signal to the Presidium
The signal leads to the bank in the Financial District of the Presidium.
Investigate the array of computers behind Barla Von’s counter to find that it’s yet another relay, and that the signal is coming from somewhere else on the Presidium.
This completes the task and brings up the next task, Continue Tracking.
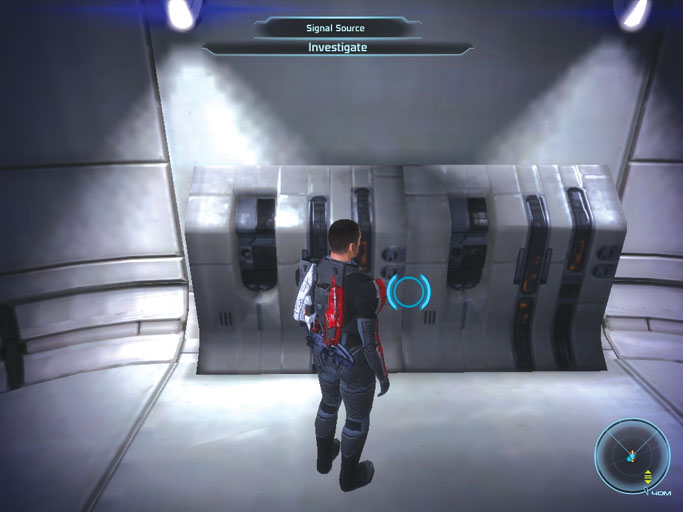
The signal is only being relayed to the bank. Its origin is somewhere else.
Continue Tracking
Readings from the last of the relays indicated that the signal’s final destination is in the back room of the emporium in the Financial District of the Presidium.
Go there and investigate the western bank of computers to discover the existence of an artificial intelligence program running on the Citadel’s terminals.
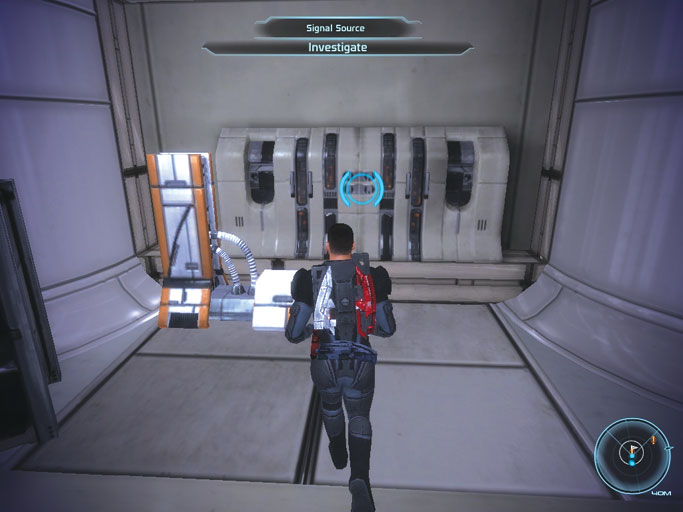
The signal source is actually in an alcove behind the emporium in the Presidium.
The AI program initiates a self-destruct sequence, threatening to obliterate you if you try to leave.
No matter how you choose to respond, the AI will not let you leave with the knowledge of its existence, because it knows that its very existence is a crime under Council law.
It would rather destroy itself and kill organic beings in the process than allow organics to erase it.
Eventually, you have to choose options on the right side of the dialogue wheel to advance the plot. This begins a race against the clock.
A meter along the bottom of the screen shows the AI’s progress toward saving the credits it siphoned from the gambling machine.
When that meter empties, it starts to refill as the AI starts building to a critical mass. If it fills up, the AI explodes and kills you.
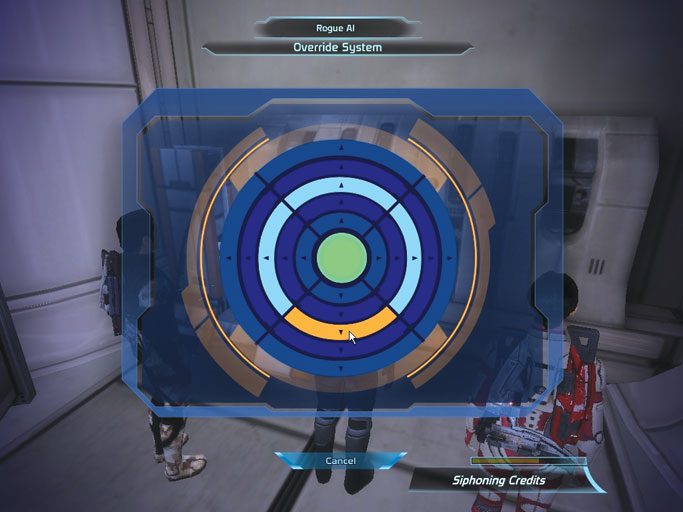
You need to guess the override sequence before the AI explodes.
To disarm the self-destruct mechanism, you must figure out the five-button override sequence and enter it without making a mistake.
Every time you enter a correct button, the screen flashes green. You start at the outer ring of buttons and work toward the inner ring.
If you press the wrong button, the screen flashes red and you have to start over from the outer ring of buttons.
The trick is to find the first correct button by guessing, and then guess at the second. If you guess correctly, you now know the first two buttons in the sequence and can guess at the third, and so on.
If you guess incorrectly, start over with the first correct button press and guess a different button for the second press until you figure out which one it is.
Alternatively, you can simply shoot the power source to the left of the terminal.
Overriding the AI’s self-destruct mechanism awards you XP and completes the assignment. More importantly, it keeps you from being incinerated in an explosion!
If you overrode the self-destruct sequence before the AI transferred all of its credits away, you get whatever it didn’t manage to transfer as a bonus.
13) Citadel: Doctor Michel
How to Get It : Talk to Dr. Michel in the Med Clinic in the Upper Wards
When It Is Available
: After you defeat Fist and rescue Tali and have spoken to Dr. Michel once; cannot be triggered after you go to Ilos
Where It Takes Place : The Citadel
Special Notes : Need a Charm of 6 and an Intimidate of 3 to see all possible outcomes; you might want to wait until you become a Spectre to take on this assignment
At any point after rescuing Tali from Saren’s men, go to the Med Clinic on the east side of the Upper Wards and talk to Dr. Michel.
You overhear her being blackmailed by an unknown person over a communications channel. Press her for information.
She tells you that she was quietly fired by her previous employer for giving out free medical supplies to clinics like the one she now works in.
If the medical board finds out about her past, she will lose her license and her clinic will be shut down.
To ensure that her secret is kept, Michel needs to deliver medical supplies to a merchant named Morlan in the Lower Wards.
You offer to go instead and put a stop to the blackmail. This triggers Citadel: Doctor Michel , automatically completes the first task ( Talk to Doctor Michel ), and brings up the second task, Talk to Morlan.

Visit Doctor Michel in the Med Clinic to find that she’s being blackmailed.
Talk to Morlan
You’ll find Morlan in his kiosk in the Lower Markets of the Lower Wards. Tell him, "I’m here about Dr. Michel."
Morlan is taken aback, and before he can compose himself, a krogan approaches and threatens to reveal Dr. Michel’s secret if he doesn’t get the medical supplies. The krogan says he’s working for a person named Banes.

Talk to Morlan, a merchant in the Lower Wards, to advance the assignment.
If you have high enough Charm and Intimidate scores, you can persuade the krogan with charm or intimidation.
Doing so causes the krogan to back down and agree to leave Dr. Michel alone from now on. This gives you a Paragon or Renegade bonus and completes the task.
If you can’t use the persuasions, or if you choose not to, you have to fight and kill the krogan. This completes the task but doesn’t grant you a Paragon or Renegade bonus.
However you get rid of the krogan, your next task is Talk to Doctor Michel.
Talk to Doctor Michel
After speaking to Morlan and getting rid of the krogan blackmailer, speak to Dr. Michel in the Med Clinic and tell her that the situation has been resolved.
You can also ask her about the mysterious Banes, who was blackmailing her. She wonders if it could be Armistan Banes, a coworker from her distant past.
The last Dr. Michel heard, Barnes was contracted by the government to conduct research in the Traverse. Captain Anderson might know more.

Return to Dr. Michel and reassure her that her secret is safe.
Speaking to Dr. Michel completes the task and assignment and awards you credits, XP, and medi-gel. This also changes the name of the completed assignment to Citadel: Doctor Michel is Safe .
14) Citadel: Schells the Gambler
How to Get It
: Talk to Schells near the entrance to Flux
When It Is Available : After you complete Citadel: Rita’s Sister ; cannot be triggered after you go to Ilos
Where It Takes Place
: The Citadel
Special Notes : None
If you return to the Flux casino after completing the Citadel: Rita’s Sister assignment, you see the bouncer throwing a salarian named Schells out of the casino.
The reason for his less-than-graceful exit was that he was caught using a device to rig the quasar gambling machines.
Schells claims that there’s a difference between researching a machine that can cheat at quasar and actually using that machine to cheat.
He’s only interested in the former, and he intends to sell his device to people who want to do the latter. He asks for your help calibrating his invention.

Speak to Schells after watching him get thrown out of Flux to begin the assignment.
You must offer Schells your help if you want to trigger this assignment. If you’re playing a Paragon path, don’t worry; there’s a way to complete the assignment in a Paragon manner.
Accepting Schells’s device triggers Citadel: Schells the Gambler and automatically completes its first task, Speak to Schells. The second task is Scan the Machines.
Scan the Machines—Renegade Path
To successfully calibrate Schells’s machine, you must win five games of quasar on the second floor of Flux. Schells’s device slightly increases your odds of winning, but it is also vulnerable to detection.
Play either the high-stakes or low-stakes quasar machines. Every time you earn a payout larger than the amount that it cost to play, that counts as one win toward the five you need to scan.
The volus casino owner, Doran, starts getting suspicious when you start winning a few games.
If you win seven games, he catches you and throws you out, so don’t win more than six games before giving the device back to Schells.
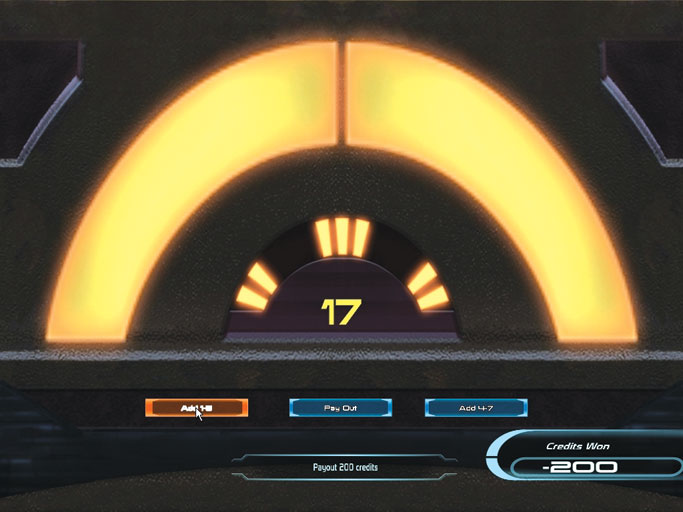
Play five winning games of quasar to complete the task.
When you have at least five wins under your belt, the current task is complete, and the next one, Speak to Schells appears.
Scan the Machines—Paragon Path
If you accept the assignment but want to continue walking the straight and narrow, approach Doran on the western end of the casino and choose "[Give Him Schells’s Tool]" from the dialogue wheel.
As a reward, Doran gives you a pile of credits, enough for several free games of quasar. You also earn XP and complete the current task. The next task is Speak to Schells .

Tell Doran that Schells tried to recruit you, if you want to complete the assignment in a Paragon manner.
Speak to Schells
Regardless of the path you chose to take, return to Schells at the entrance to Flux and speak to him to complete the assignment.
15) UNC: Hostage
How to Get It : Ride in a Citadel elevator while the relevant news vid is being broadcast randomly
When It Is Available
: After the Council makes you a Spectre; cannot be triggered after you go to Ilos
Where It Takes Place : MSV Ontario, Farinata System, Hades Gamma cluster
Special Notes : Need a Charm of 6 or Intimidate of 5 to see all possible outcomes
The elevators in the Citadel often play news vids randomly when you ride them.
One in particular tells you that fanatical biotics in the Hades Gamma cluster have kidnapped the chairman of the Parliament Subcommittee on Transhuman Studies.
They’re holed up in a derelict freighter somewhere in the Farinata System. Hearing this news vid triggers UNC: Hostage and its first task, Board Freighter .
Boarding Freighter
When you return to the Normandy , travel to the Farinata System in the Hades Gamma cluster.
Move the cursor around the system to find the MSV Ontario , the freighter belonging to the biotic terrorists. Select the MSV Ontario to board it.
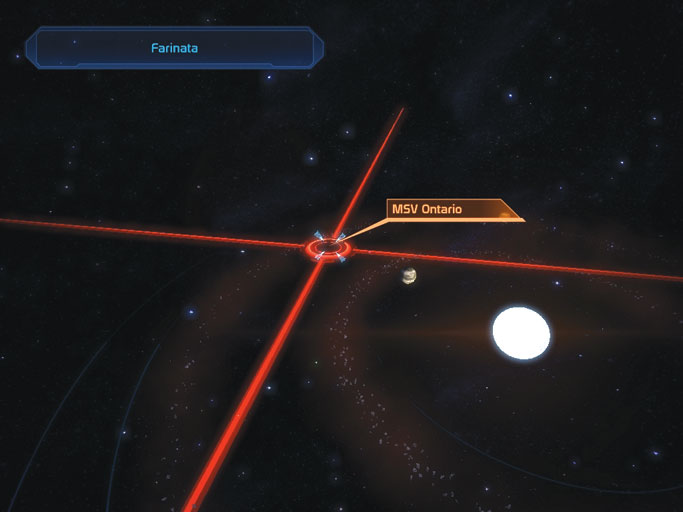
Board the MSV Ontario to confront the biotic terrorists.
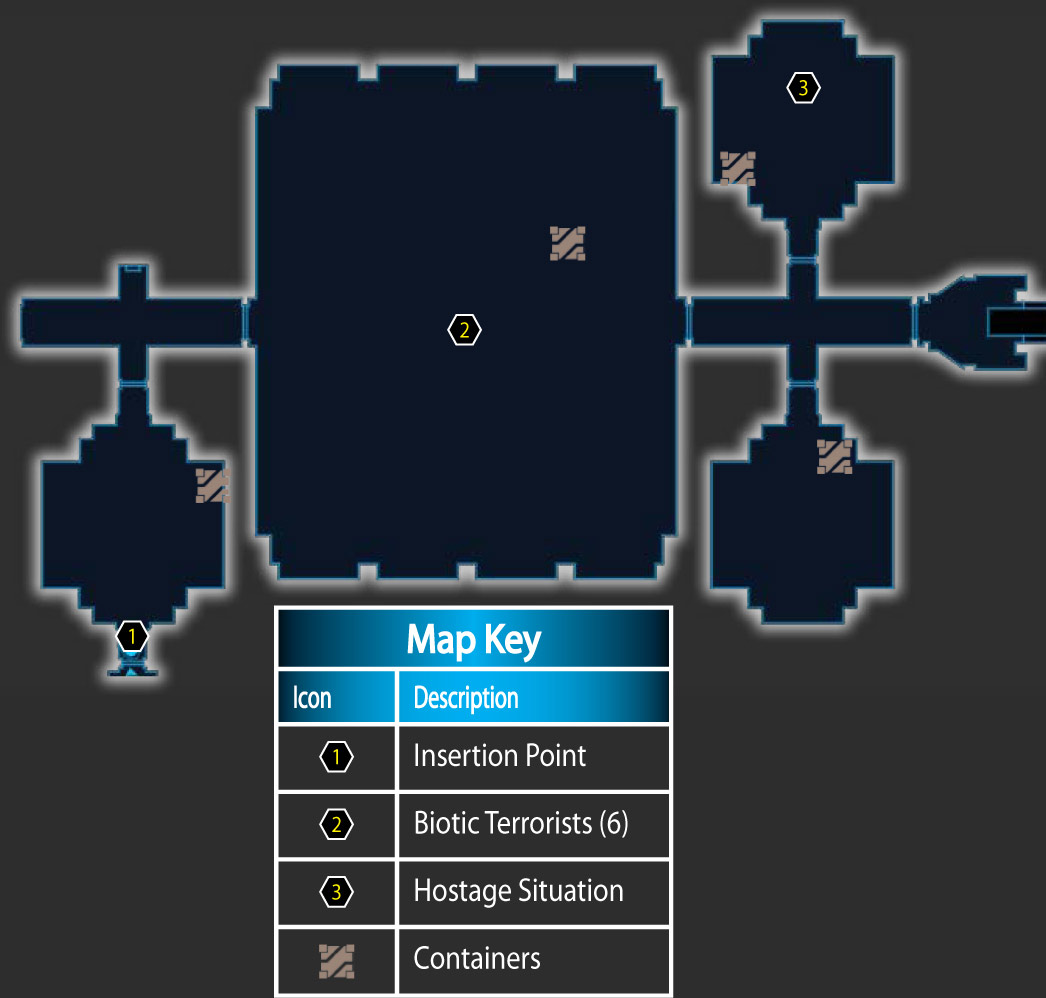
There are six biotic terrorists (2) in the main hold of the MSV Ontario . If you try to fight them toe-to-toe, you’ll likely be overwhelmed quickly and rendered helpless by their biotic abilities.
Instead, sneak through the hold, making good use of cover, until you can target one of the biotic terrorists. Shoot them and quickly double-back to the cross-shaped hallway outside the hold.
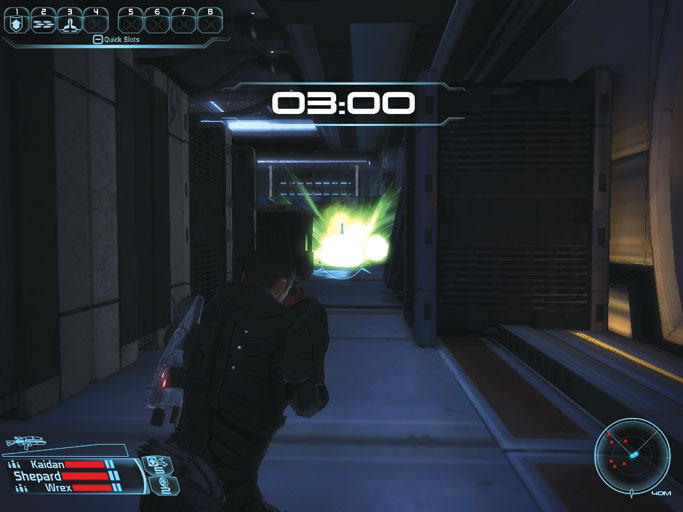
Snipe at a biotic terrorist to get all of them to chase you.
Use the corners of the perpendicular hallway as cover and pick them off as they come through the doorway in pursuit.
It’s a good idea to have your teammates hold their position in the cross-shaped hallway and lead the biotic terrorists back to them.
Otherwise, your wingmen might try to pursue a firefight in the main hold, which is a much worse position.
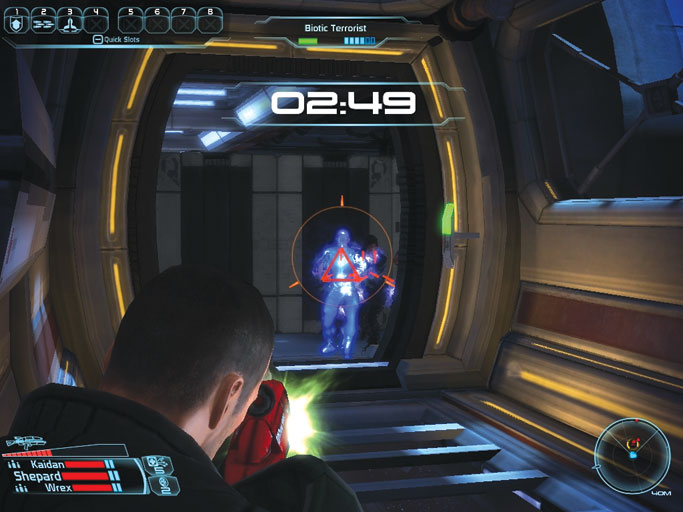
Lure the biotic terrorists back to the cross-shaped hallway to take them out.
You only have three minutes to kill all the Biotic Terrorists before they execute their hostage. If they do, it results in a critical mission failure.
As soon as the biotic terrorists are dead, run through the main hold and go through its eastern door.
Go into the northeast room to see the leader of the terrorists holding a gun to the head of their hostage, Chairman Burns (3).
You can either attempt to talk the terrorist leader down with persuasions, or you can get into a firefight with the remaining terrorists by taking the non-persuasion options.
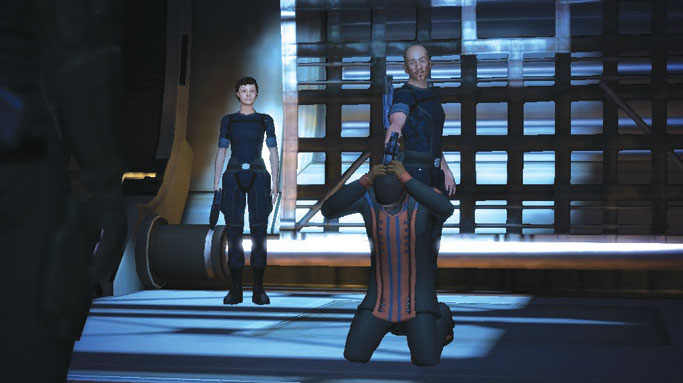
You need to rescue the chairman, either by talking the terrorists down or killing them.
If you have a Charm score of 6 or an Intimidate score of 5, you have access to a pair of persuasions that will defuse the situation completely.
You also earn a Paragon or Renegade bonus for using them. Once Chairman Burns is safe, the assignment is complete.
16) UNC: Missing Survey Team
How to Get It
: Ride in a Citadel elevator while the relevant news vid is being broadcast randomly
When It Is Available : After the Council makes you a Spectre; cannot be triggered after you go to Ilos
Where It Takes Place : Trebin, Antaeus System, Hades Gamma cluster
Special Notes : None
Another random news vid that plays in the Citadel elevators indicates that a survey team in the Hades Gamma cluster recently dropped out of contact.
Hearing this information triggers UNC: Missing Survey Team and its first task, Find Missing Researchers.
Find Missing Researchers
Trebin
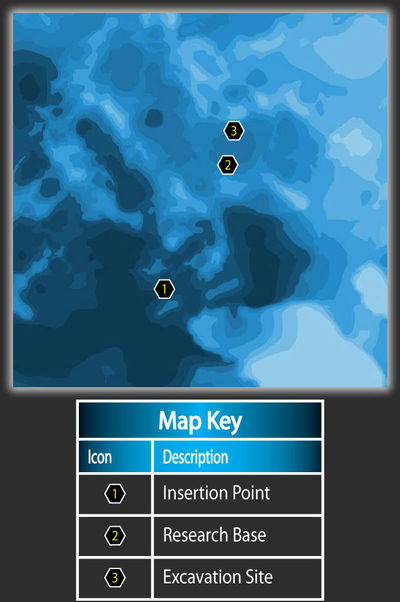
When you return to the Normandy , chart a course for the Antaeus System in the Hades Gamma cluster. Land on the planet Trebin when you arrive, and head for the Research Base (2) northeast of your insertion point (1).
Examine the computer console inside of one of the Research Base trailers to find out that the research team unearthed some sort of alien technology before dropping out of contact with the outside world.
This completes the current task and brings up the next one, Explore Excavation Site.
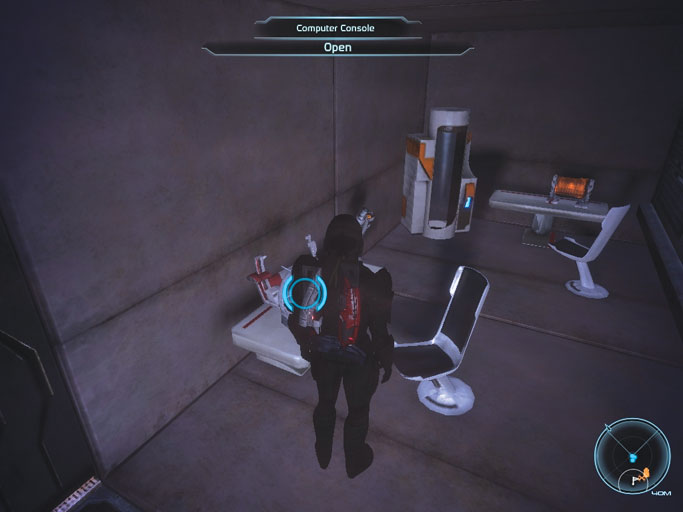
Examine the computer console inside the Research Base.
Explore Excavation Site
Excavation Site Mining Tunnels
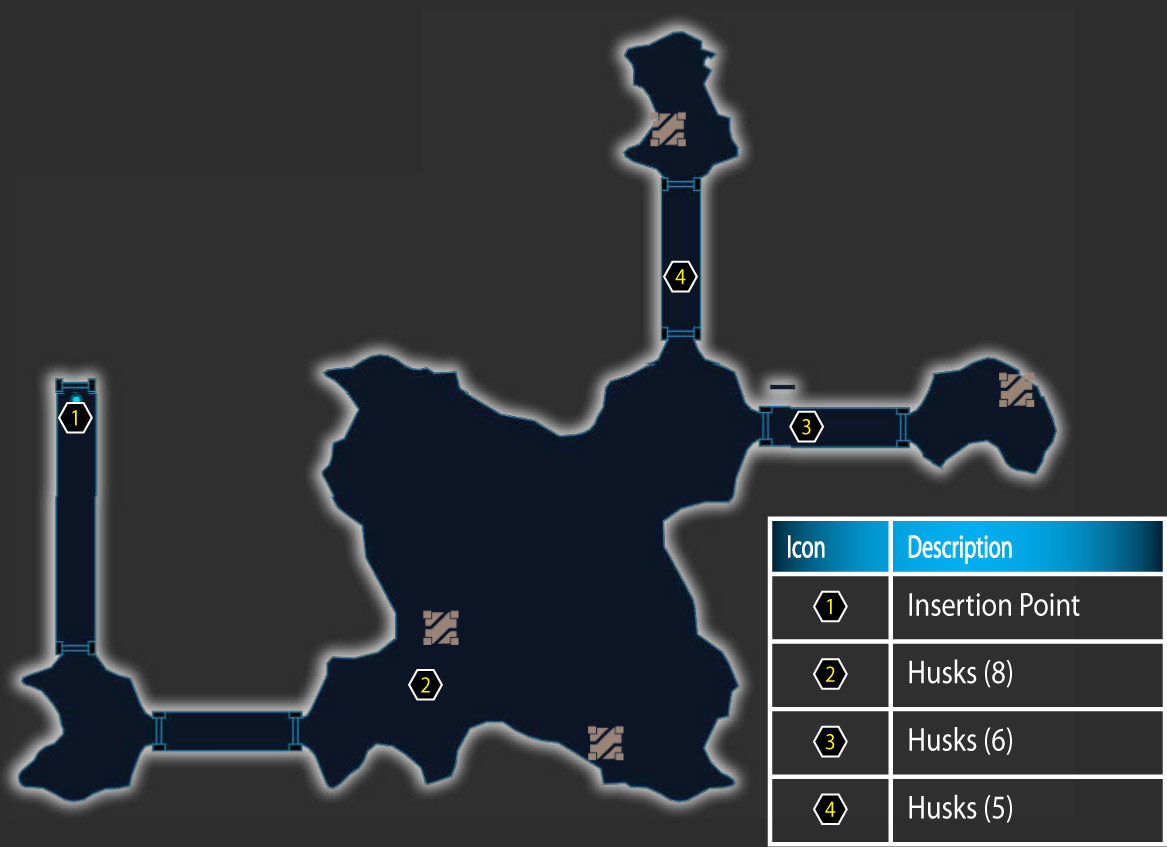
The excavation site is within sight of the Research Base. Drive over there, hop out near the tall structure in the middle of it, and run up the ramp to enter the mining tunnels under the excavation site through its western entrance.
Carefully proceed into the large cavern in the middle of the mining tunnels. Entering the tunnels triggers a massive rush of eight Husks (2).
They rush you, so back into the tunnel you just came from and keep a healthy distance from the husks until you destroy them all.
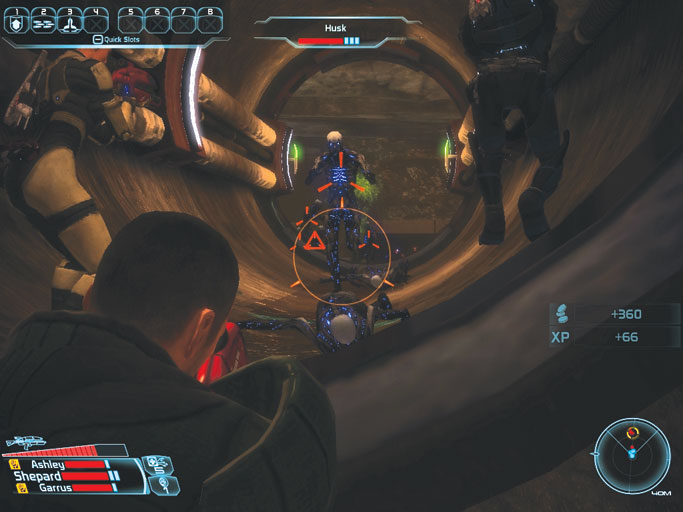
Destroy the swarm of eight Husks in the main cavern.
When the husks are destroyed, you realize that they were what remained of the research team, who were apparently transformed into husks by whatever they found in the mining tunnels.
Approach the two sealed doors in the northeast corner of the large central cavern. Two more groups of husks are lying in wait, one behind each door.
Opening one door causes the other to open as well, and the husks pour out of both, so be ready to back up toward the center of the cavern quickly to avoid being flanked.
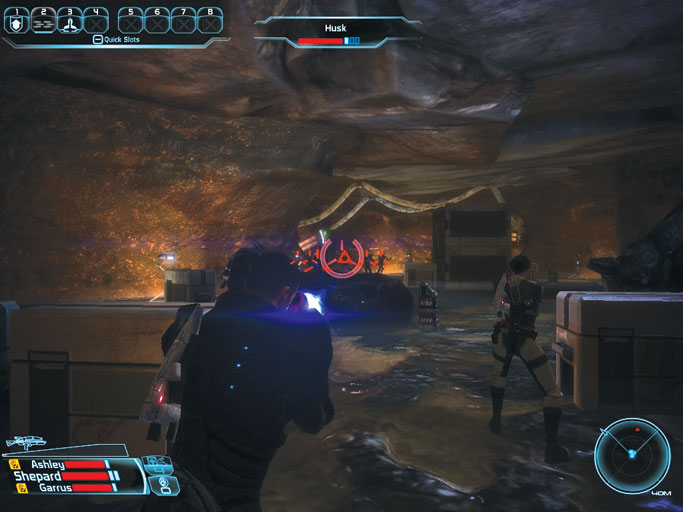
Two additional swarms of husks wait in the northeast tunnels.
When the last of the husks have been destroyed, the mission is complete. You receive the following confirmation message:
That accounts for all of the ExoGeni survey team. They were converted to cybernetic "husks" by devices similar to those used by the geth on Eden Prime. How they came to be buried on a frontier world so far from geth territory is a mystery.
17) UNC: Missing Marines
How to Get It : Talk to Rear Admiral Kahoku in the Citadel Tower
When It Is Available : After the Council makes you a Spectre; cannot be triggered after Ilos has been discovered
Where It Takes Place : Edolus, Sparta System, Artemis Tau cluster
Special Notes : None
You might have seen Rear Admiral Kahoku in the Citadel Tower previously, but you can’t actually engage him in conversation until you become a Spectre.
Kahoku is incensed over the fact that the Council refuses to investigate the disappearance of a recon team of his marines who were investigating the system where they found the frozen body of Banes (whom you might remember from Citadel: Doctor Michel).
Kahoku can’t follow up on it because their last known location has suddenly been declared a restricted area. However, as a Spectre, you don’t have that problem.
Agree to help the admiral to trigger UNC: Missing Marines . Its first task is Find Recon Team.
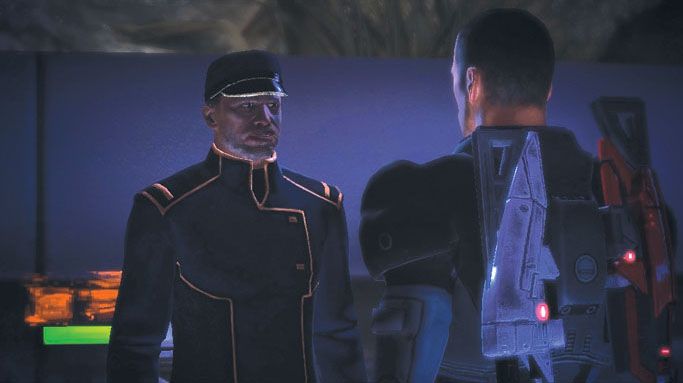
Speak to Rear Admiral Kahoku and agree to investigate the disappearance of his marines to trigger the assignment.
Find Recon Team
Edolus
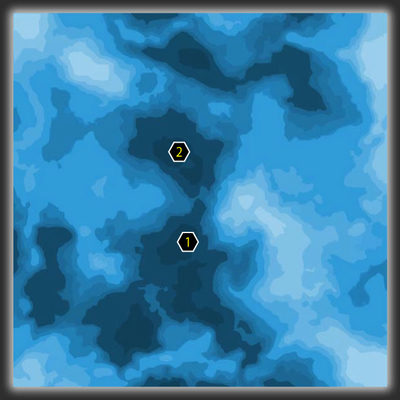
When you return to the Normandy , set a course for the Sparta System in the Artemis Tau cluster, and land on Edolus.
When you choose to land on Edolus, Joker informs you that he’s picking up an automated distress beacon from the surface. This completes the current task and brings up the next one, Distress Call .
Distress Call
The distress beacon (2) emanates from a clearing almost due north of your insertion point (1).
Drive north, but use caution as you approach the beacon, because a Thresher Maw waits under the surface and thrusts its head and tentacles out at you when you draw near.
As soon as the thresher maw bursts out of the ground, make a sharp 90-degree turn and drive away from it while rotating your cannon toward it.
Target the head of the thresher maw and fire rockets at it, moving just enough to dodge its volleys of mucus.
When the thresher maw’s head ducks back under the surface, start rolling to keep from being right above it when it busts out again.
If more than a few seconds pass, and the thresher maw hasn’t reappeared, drive toward the beacon again to lure it out of the ground and fight it as normal.
After the thresher maw is destroyed, drive up to the distress beacon to see the remains of the Alliance marines you came to find.
Evidently they were lured to the thresher maw as well, but they didn’t fare as well as you did. Examine one of the marines to complete the current task and bring up the next one, Speak to Kahoku.

The Alliance marines got the bad end of the thresher maw.
Speak to Kahoku
When you next return to the Citadel, go back to the Citadel Tower to find Rear Admiral Kahoku exactly where you first encountered him.
Inform him of the marines’ demise. Kahoku can’t believe that they would have been so careless as to blunder into a thresher nest, until you inform him that somebody lured them into the nest with an Alliance distress beacon.
This completes the current task and the assignment.
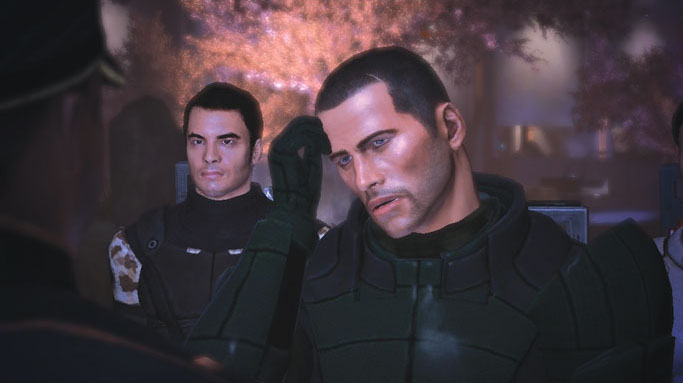
Report back to Kahoku and inform him that the marines are dead.
18) UNC: Hostile Takeover
How to Get It : Speak to Helena Blake
When It Is Available : After the Council makes you a Spectre; cannot be triggered after going to Ilos
Where It Takes Place : Mavigon, Han System, Gemini Sigma cluster; Klensal, Dis System, Hades Gamma cluster; Amaranthine, Fortuna System, Horse Head Nebula cluster
Special Notes : Need a Charm score of 10 or an Intimidate score of 7 to see all dialogue options
There are two ways to trigger this assignment. If your party has an extremely high Decryption skill, you can decrypt a terminal in the southeast office of the C-Sec offices section of C-Sec Academy.
You can also find and speak to a woman named Helena Blake on the south side of the Presidium between the emporium and the bank.
Speak to Helena Blake; she tells you that she knows of two rival crime lords who are hiding out on remote worlds, and she has their coordinates.
Each is convinced that the other is out to kill him, so you should expect a fight if you choose to follow up on this lead.
As for what Helena gets out of it, she shares certain…interests with them, but their business practices have forced her to terminate their association.
Once they’re out of the picture, she intends to manage the organization in a more tasteful manner.

Helena Blake tells you about two rival crime lords who have gone into hiding.
Follow the left-side dialogue wheel options to gather as much information about the situation as you want. If you want to accept this assignment, choose "I’ll do it" or "Not a problem."
Choosing "No. I won’t do this" refuses the assignment (and earns you a Paragon bonus), although Helena gives you the coordinates anyway, just in case you change your mind.
All three of these dialogue options trigger UNC: Hostile Takeover and its first assignment, Eliminate Crime Lords.
Eliminate Crime Lords/Finish Crime Lords
Mavigon
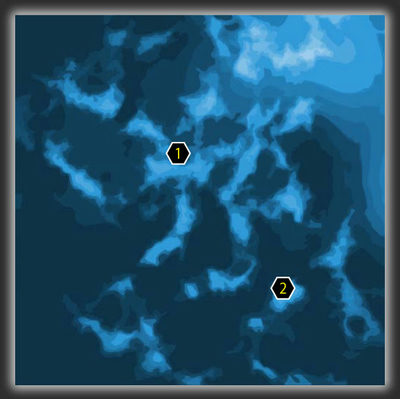
Mavigon Syndicate Base
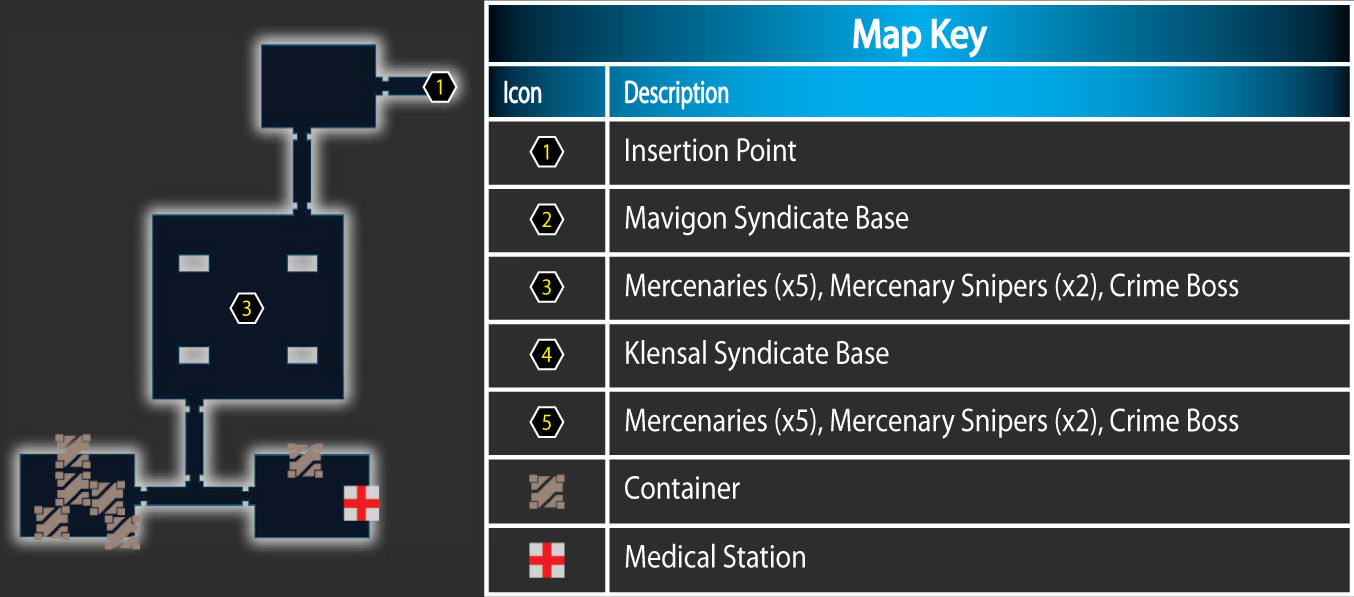
Klensal
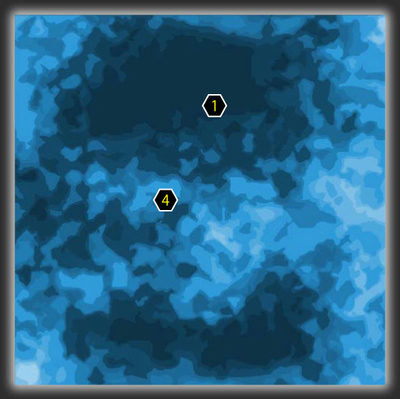
Klensal Syndicate Base
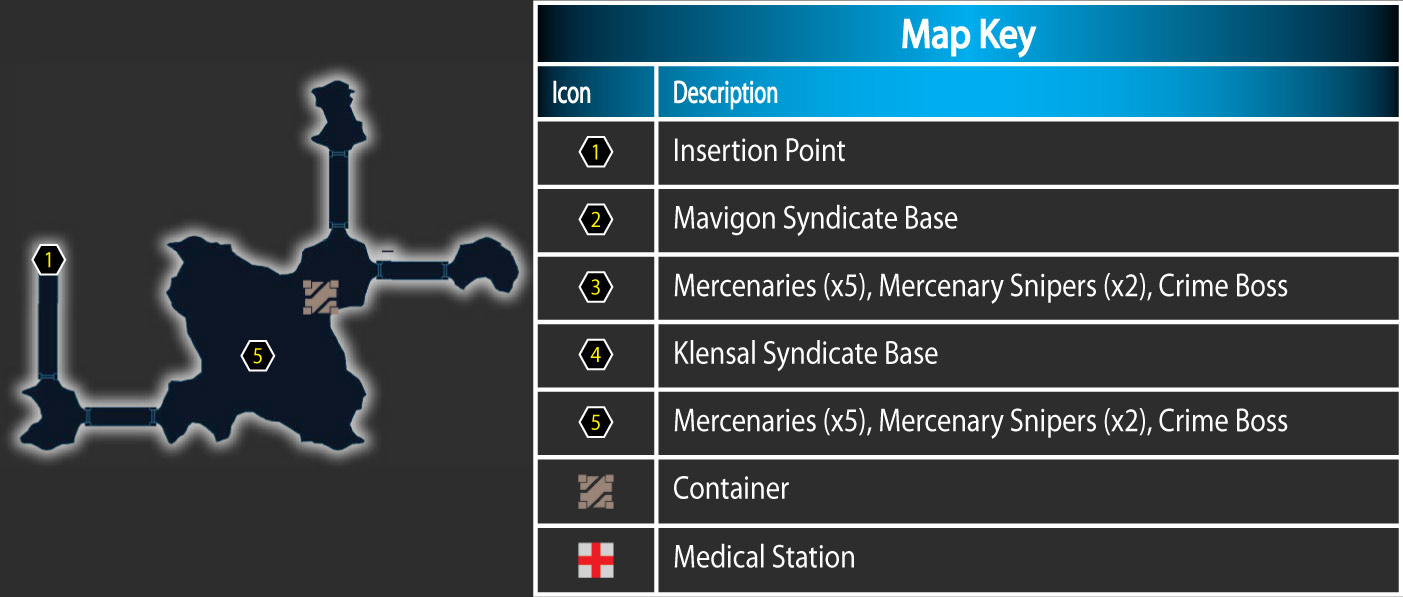
The crime lords’ bases are located on Mavigon in the Han System of the Gemini Sigma cluster and on Klensal in the Dis System of the Hades Gamma cluster.
You need to visit both worlds and clear out the crime lords and their men. It doesn’t matter which one you visit first.
Both syndicate bases are well fortified on the outside. The Mavigon base sits atop a steep mountain peak and is defended by several Alliance heavy turrets that you should take out from range with the Mako’s rockets.
There’s a spot on a ridge northeast of the base that is perfect for this.
When laying siege to the Klensal base, which is guarded by mercenaries and mercenary snipers in towers, consider attacking from the northern ridge above it.
You can also approach from the southern plain and pick off the guards with the rockets from range, although this exposes you to more direct fire.
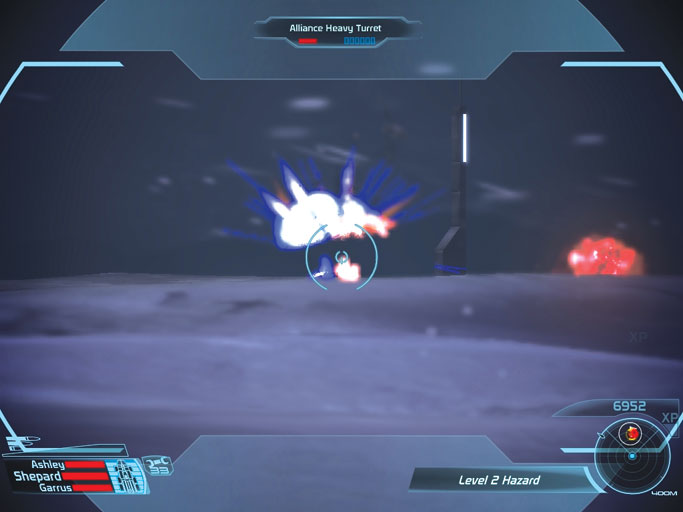
Destroy the syndicate bases’ exterior defenses from range before moving in.
When each base’s exterior defenses are eradicated, enter the bases and methodically eliminate everyone inside. Eight enemies are in the main chamber of each base.
Your enemies will send foot soldiers to rush you while snipers wait for you to expose yourself.
Pay attention to the locations of enemies on your radar to avoid getting flanked, and take advantage of cover to move tactically around the room as you fight.
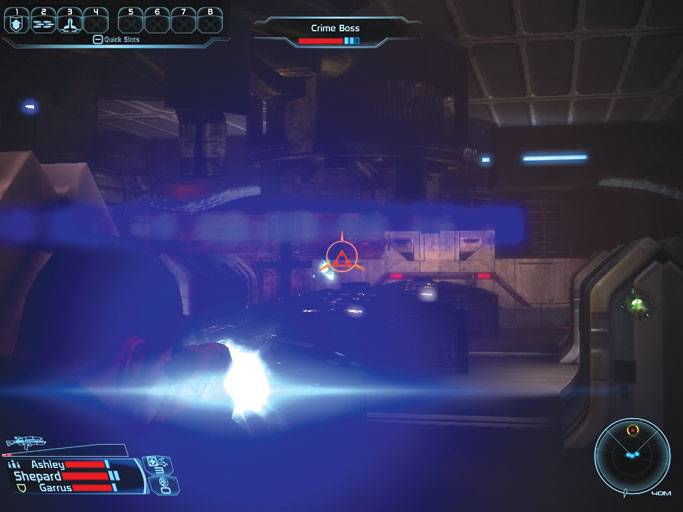
Kill the crime lord in each base, along with all of his men, to complete the task.
Killing the first crime lord and his mercenaries completes the Eliminate Crime Lords task and brings up the next task, Finish Crime Lords.
Wiping out both crime lords and their guards completes that task and brings up Meet Helena Blake.
Meet Helena Blake
Amaranthine
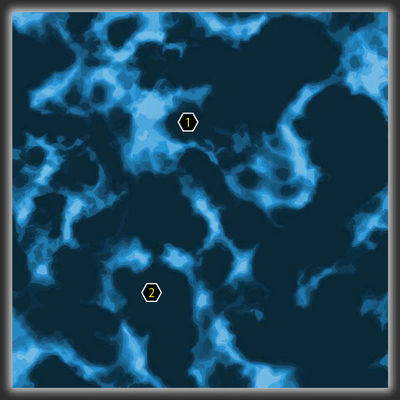
Amaranthine Mercenary Base
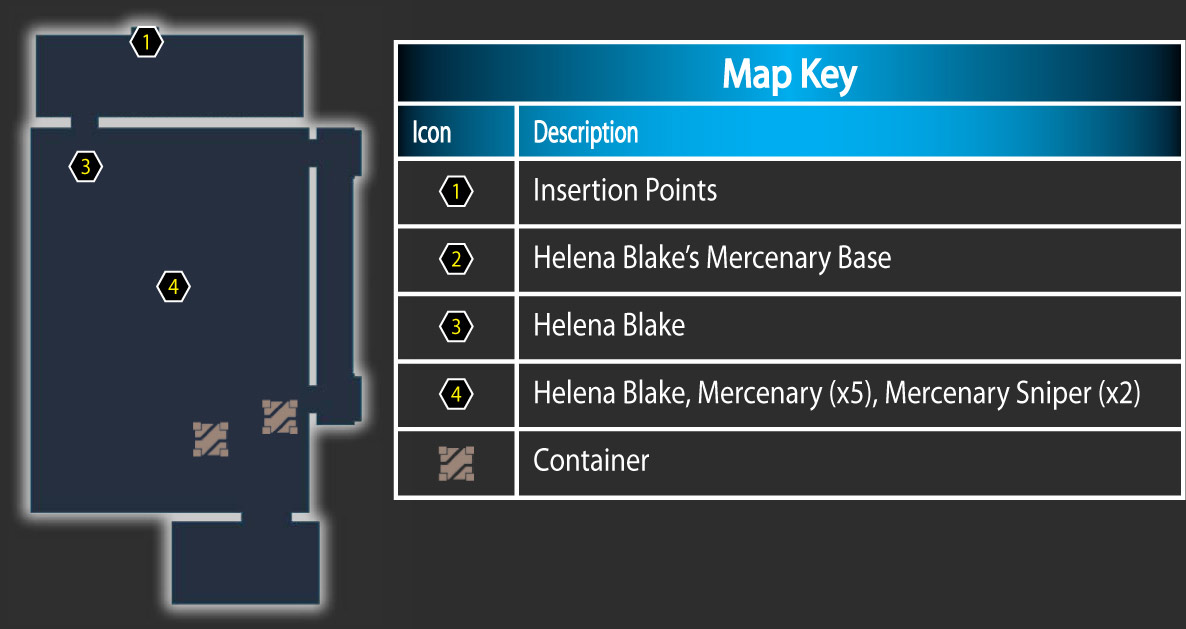
With both crime lords out of the picture, it’s time to report back to Helena Blake. She keeps a mercenary base on Amaranthine, in the Fortuna System of the Horse Head Nebula cluster.
Go there and drive to the base, which is almost due south of your insertion point.
Helena Blake stands in the entrance to the main room of the mercenary base. Opening the door to this area automatically triggers a conversation with her.
She extends her warmest thanks for getting rid of her rivals and ensuring that ownership of the syndicate falls to her.
As you continue in the conversation with her, Helena vows to restrict her illicit operations to gambling and smuggling illegal technologies. She then politely threatens you to back off, or face the wrath of her assistants.

Helena Blake is the new undisputed leader of the syndicate.
This brings up a pair of persuasions you can use on her, if you have the necessary Charm and Intimidate scores.
Using a persuasion convinces Helena to disband the syndicate altogether and earns you a Paragon or Renegade bonus.
Answering her threat with "Then we’re fine" or "You’d better stay clean" completes the assignment peacefully.
Choosing "You’re under arrest" leads to a fight with Helena and her mercenaries. First, a purple energy barrier goes up across the doorway; you need to shoot it until it falls to enter the room.
Helena and her mercenaries and mercenary snipers are tougher than the others you just fought, so you have your work cut out for you.
But all of the same tactics apply. Take out as many as possible without entering the room to prevent getting overwhelmed. When Helena and her men are killed, the mission is complete.