
Mass Effect (PC) Guide Essentials Combat
Command Structure
All Spectres will become well-versed in command structure during the natural course of their career. While giving orders is an important responsibility, it can’t be taken lightly.
You must first be familiar with all aspects of combat intel before you are fully qualified to understand the causality of conflict situations.
Every action taken in battle could result in the loss of a squad member. Every carelessly-chosen response could cost you and your team tens of thousands of credits and fleeting opportunities to follow valuable leads.
An informed Commanding Officer (CO) will undoubtedly have a long and productive career. Now let’s get into the logistics of commanding your squad in battle.
Squad Selection
Any time Shepard leaves the Normandy (either on foot when docked at a spaceport or via the M35 Mako when dropped groundside), a squad must be selected to come along. Two squad members are chosen from any individuals currently under Shepard’s command.
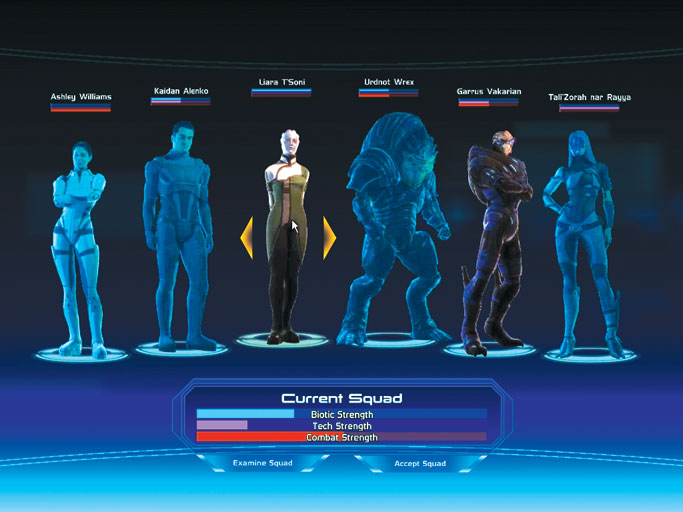
At the Current Squad selection screen, you give orders to the team and choose two members for the current away mission.
The selection screen displays pictures of each squad member. If any of their pictures are blacked out, that member is either dead or not currently a part of the crew.
Squad selection is up to an agent’s personal preference, however, the choice should be weighed heavily by several factors:
- Away mission’s overall objectives and dominant threat condition
- CO’s military specialization
- Need for a balanced versus specialist squad
Squad members have definitive strengths as indicated by the HUD bars above their portraits in the selection screen. The following table outlines each squad member’s strengths and should be considered thoroughly when selecting your new team.
| Ashley Williams | Liara T’Soni | Tali’Zorah nar Rayya |
|
|
|

|
| Kaidan Alenko | Urdnot Wrex | Garrus Vakarian |
|
|
|
|




Given the strengths of your individual squad members in either combat, biotics, or tech, you can easily see how a squad can become biased toward one skill set.
As you select team members, the Current Squad HUD at the bottom of the selection screen lights in up in real time to indicate the cumulative squad strength across the three skill sets.
The first variable in the overall squad strength equation is Shepard’s military specialization or "class." As previously discussed in this guide, this determines the CO’s strengths across the same three skill sets as outlined for your squad members above.
With no squad members added yet on the selection screen, Shepard’s strengths are visible on the HUD immediately. Any further change in the squad summary HUD is purely due to additional squad member choices.
There are many different potential squad combinations but here are some examples to consider:
| Shepard’s Specialisation | Squad Member 2 | Squad Member 3 | Description |
|---|---|---|---|
| Soldier | Liara T’Soni | Tali’Zorah nar Rayya | A well-balanced, purist team that has access to all talents across all three skill sets. |
| Engineer | Ashley Williams | Liara T’Soni | |
| Adept | Ashley Williams | Tali’Zorah nar Rayya |
Combat Squad
| Shepard’s Specialisation | Squad Member 2 | Squad Member 3 | Description |
|---|---|---|---|
| Any | Ashley Williams | Urdnot Wrex | For heavy combat situations, Ashley’s strict combat bias is a huge benefit and Wrex’s battle hardiness makes him a highly effective tank. |
Biotic Squad
| Shepard’s Specialisation | Squad Member 2 | Squad Member 3 | Description |
|---|---|---|---|
| Any | Liara T’Soni | Kaidan Alenko | Liara is a must for COs favoring high biotic use; Kaidan isn’t as powerful as Liara with half of his focus taken up by tech talents. |
Tech Squad
| Shepard’s Specialisation | Squad Member 2 | Squad Member 3 | Description |
|---|---|---|---|
| Any | Garrus Vakarian | Tali’Zorah nar Rayya | Tali and Garrus together should be able to crack any security system, override any electronic device and hack nearly any enemy AI units. |
Squad Tactics and Field Orders
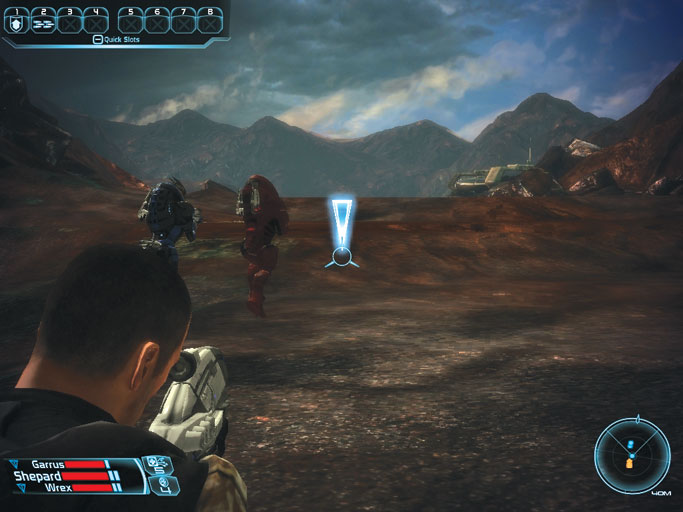
The CO is required to assess any combat situation before engaging opposition or risk rushing in to certain doom. During a conflict, be aware of your surroundings and present resistance in order to give the most effective squad orders.
CO’s who lead a charge into every battle will have short and potentially disastrous careers indeed. Battles are won with patience and by using the correct tactics against specific targets.
The targets are covered later in this chapter. Right now, we focus on the role of a CO: giving field combat orders.
Directing squad movement to hold, rally, or take point can lead to immediate shock-and-awe victories over less organized resistance or turn the tide when you’re losing important ground in combat.
Using the arrow keys in combat gives access to three immediate squad orders:
- Take Point [Up] (Sends squad to the location you’ve specified.)
- Rally [Down] (Brings squad back to your location and they follow you.)
- Hold [Right] (Squad holds current position and takes cover.)
- Focus Fire [Left] (Entire squad focuses fire on one specific enemy.)
Using these basic commands creatively can evolve into more complicated tactics in open areas. Shepard can send the squad anywhere in LOS (line of sight), even hundreds of meters away out in the open, planetary surfaces, which gives the snipers in the squad a dramatic advantage over your enemies.
A few example scenarios and associated tactics follow:
Ambush : Locate a bottleneck in the architecture or topography when outdoors and order the squad to hold their location at some nearby cover that you’ve chosen to maximise their protection from the rear and sides.
As CO in this instance, Shepard can take point and selectively engage enemy forces to drawn them into the chokepoint where the squad can engage at will and decimate the enemy ranks with weapons and talents.
Bait and Hook : Find Shepard some effective cover and send the squad in slowly toward enemy forces with a "take point" command. Have them move only short distances and from cover feature to cover feature to avoid alerting all nearby enemies to the squad’s movement.
Use this very stealthy tactic to whittle down larger enemy battalions when you’re outnumbered and bait individuals away from their groups and back into secluded areas within range of weapons or talents.
Have the squad rally back to Shepard as soon as enemy forces are engaged, drawing in a few at a time. Highly-skilled snipers (especially Infiltrators) should be able to make shot after shot as the enemy units line up like varren in a barrel.
Flank and Crossfire : Creating a crossfire situation is often the easiest way to distract and destroy enemy ranks with minimum effort.
The point team is ordered into a flanking (side) position off to the left or right of enemy forces, close enough to draw their fire and engage the forces, all while Shepard attacks from the front, or, ideally, the opposite side.
Being caught in the middle of a crossfire situation is pretty much the worst-case scenario every soldier hopes to avoid. Employing this tactic often leads to victory. When enemy units have to watch fire from two directions at once, that means they’re not firing as much.
You’re significantly reducing their ability to help their units in a firefight, or else they are likely to be overcommitting themselves in one direction only, exposing their weak side to half of your team.
Designating Weapons
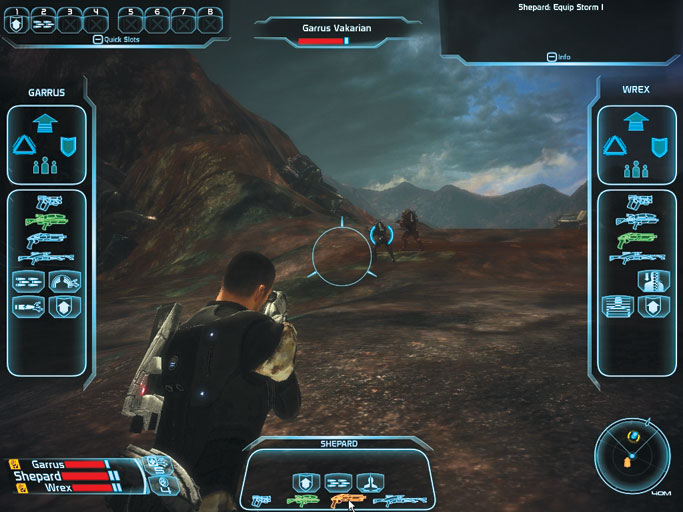
Press [Space] anytime during combat to pause the action and give orders to the squad to change weapons.
The weapon selection wheel is split into three segments: one each for Shepard and the two squad members. By mousing over any of their weapons, the HUD display changes to indicate whether the individual is trained with that weapon.
Select the desired weapon and click the left mouse button to give the order to switch. It’s a really bad idea to order someone to use a sniper rifle when they’ve received no training as a sniper.
In doing so, you effectively take them out of the battle while they try to figure out what end shoots and what end is the stock.
Executing Talents
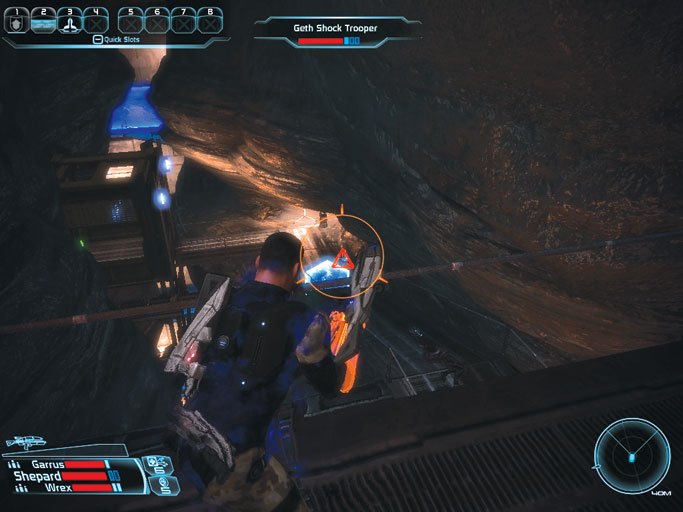
Giving orders to the squad to use any of their available talents and abilities during combat uses the same selection wheel interaction as described above for choosing weapons.
The pause is also in effect, which is useful for organizing your thoughts so you may give clear orders during battle.
When the Talent Wheel is activated, all available powers for each squad member are displayed. Status states immediately indicate whether the power is used, selected, currently recharging. The power is grayed out if it’s unusable at the time.
Many talents require that Shepard have LOS (line of sight) to the target regardless of whether the power is being executed by the CO or by a supporting squad member.
Many other talents affect only the person using them, such as Immunity, Barrier, or Marksman. Learn the difference between all the talents and use your quickslots for easy access.
It’s very important to become familiar with each type of power and its specific area of effect so you know when and where the talents are best applied in combat. We will teach you all you need to know in the upcoming section on talents and abilities.