
Dragon Age: Origins Guide Essentials The Party
Tactics
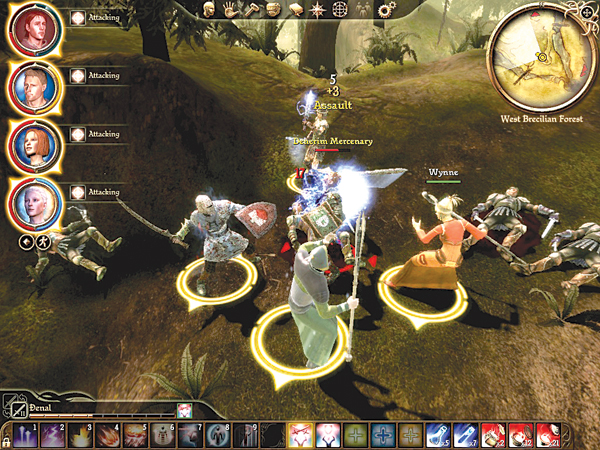
Tactics are not just about figuring out the correct movement and attack procedure in a battle. In Dragon Age: Origins the Tactics screen is a tool used to customize your party's actions and reactions based on the current combat situation.
You unlock more tactic slots for each companion by leveling up and spending skill points on Combat Tactics.
The more tactic slots your companion has, the more "programming" you can do to have them behave appropriately in various predicaments when you aren't directly controlling them, or when you don't want to pause the game and would like your party to continue in real-time.
In the Tactics menu, each character has base preset options and behavior patterns from which to choose. First, set these to the appropriate play style for each character.
For example, you should probably set your tank with a "defender" preset and a "defensive" or "default" behavior mode. A ranged DPSer might have an "archer" preset and "ranged" behavior mode.
After the base preset and behavior mode is selected, each character has a number of customizable slots, which really open up your combat options.
The first tactic slot will be the first priority and so on down the slots in descending priority order. You can choose options that affect your self, ally, enemy, individual party member, or controlled party member.
Tactics can trigger actions based on status (rooted, slowed, grabbing, movement impaired), health percentages, mana or stamina levels, armor type, type of attack, surrounded by enemies, and more.
Once conditions are met, you can deactivate and activate whatever combination of talent/spells you desire.
For example, you can set one slot to check if you are surrounded by at least two enemies and then activate Captivating Song, or set your final slot to always switch to your melee weapon if all spell options are exhausted. Remember to save your new preset as a Custom save for future use.
Basic Tactics
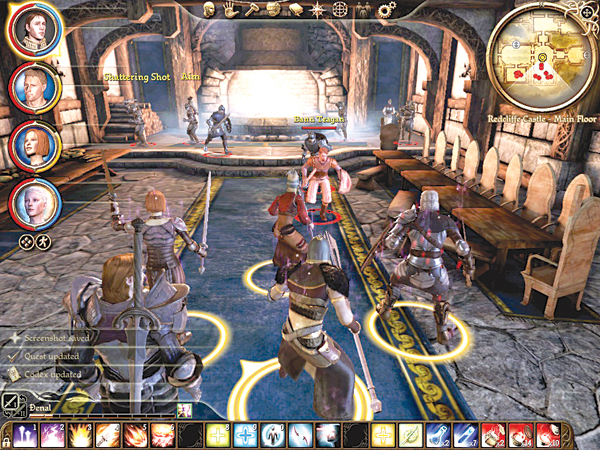
Choose the following options for the basic tactic combos. Experiment with various conditions to get exactly what you want on the battlefield.
Attack -
Enemy, condition (such as nearest or magic-using), Attack (or activate a specific talent/spell)
Defense - Self, condition (such as low health or being attacked), Use Ability or Use Mode (any defensive talent or spell)
Aid Ally -
Ally, condition (such as low health or being attacked), Use Ability or Use Mode (any defensive talent or spell)
Use Potion (or any item) - Self, condition (such as Health < 50%), Use health poultice (most powerful or least powerful)
Let's take a look at how you could program a balanced party of warrior (tank), mage (healer), rogue (DPS and crowd control), and mage (ranged DPS):
Warrior (Tank)

Preset : Defender
Behaviour : Defensive
- Self: Any (Activate: Threaten)
- Self: Being attacked by a ranged attack (Activate: Shield Cover)
- Self: Surrounded by at least two enemies (War Cry)
- Enemy: Health >= 75% (Shield Bash)
- Enemy: Health >= 50% (Overpower)
- Enemy: Nearest Visible Mage (Holy Smite)
1. The warrior activates Threaten at the start of each battle to direct all future threat at himself.
2. If enemies are attacking at range, the warrior activates Shield Cover (instead of standard Shield Defense).
3. This warrior is a champion. When surrounded by more than a single enemy, he triggers War Cry. If he also has Superiority, this combination may knock enemies off their feet in addition to buffing companions.
4. Against a healthy opponent, the warrior first tries Shield Bash to stun the enemy.
5. Against a moderately healthy opponent, the warrior tries Overpower second to chip away at health.
6. This warrior is also a templar. Whenever he spots an enemy mage, he casts Holy Smite to smack the spellcaster with spirit damage and drain the caster's mana.
Mage (Healer)

Preset : Healer
Behaviour : Defensive
- Self: Being attacked by a melee or ranged attack (Activate: Rock Armor)
- Self: Mana or Stamina < 50% (Group Heal)
- Self: Mana or Stamina < 25% (Use Lyrium Potion)
- Self: Health < 75% (Heal)
- Self: Health < 75% (Regenerate)
- Ally: Health < 75% (Heal)
- Ally: Health < 75% (Regenerate)
- Ally: Mana or Stamina < 25% (Rejuvenate)
- Enemy: Target using ranged or magic attack (Earthquake)
- Enemy: Target of Alistair (Switch to ranged weapon)
1. If an enemy targets the healer, she will activate Rock Armor for protection.
2. This is a timer effect. You don't want to cast Group Heal early in the fight or it will be mostly useless. Once the healer's mana drops below 50 percent, the tactics will check to cast Group Heal. As soon as its available for the rest of the battle (unless the healer gains mana above 50 percent), Group Heal goes off.
3. Once the healer's mana drops below 25 percent, the healer quaffs a lyrium potion to replenish mana.
4. The healer checks for damage on herself. If health is below 75 percent, she casts Heal on herself.
5. If Heal isn't available due to cooldown, or the healer's health is still below 75 percent, she casts Regenerate on herself.
6. The healer checks for damage on an ally. If health is below 75 percent, she casts Heal on the ally.
7. If Heal isn't available due to cooldown, or the ally's health is still below 75 percent, she casts Regenerate on the ally.
8. If an ally's mana or stamina drops below 25%, the healer casts Rejuvenate to replenish mana or stamina.
9. If all healing options are clear, the healer switches into offensive mode and casts Earthquake (or your favorite AoE spell) at a ranged or magic-wielding enemy. Avoid casting on melee targets or else you may catch your party members in the AoE. To counteract this problem, you can switch to a single-target spell such as Stonefist.
10. If mana is exhausted, or there are no ranged enemy targets, the healer uses her staff to fire at the tank's enemy.
Rogue (DPS)
Preset : Scrapper
Behaviour : Default
- Self: Any (Venom)
- Self: Any (Dueling)
- Enemy: Target of Alistair (Pinpoint Strike)
- Enemy: Target rank is elite or higher (Upset Balance)
- Self: Being attacked by a melee attack (Dirty Fighting)
- Enemy: Target of Alistair (Attack)
1. The rogue coats his weapon with poison at the start of the fight for extra DPS.
2. The rogue is a duelist. He activates Dueling for added bonuses.
3. Once he is in position, the rogue will attack the tank's target with a series of critical blows.
4. If the enemy is ranked above the normal foe, the rogue will try to stun the foe with Upset Balance.
5. If an enemy attacks the rogue in melee, he'll stun it with Dirty Fighting.
6. When he's out of special options, the rogue will always attack the tank's target.
Mage (DPS)

Preset : Damager
Behavior : Ranged
- Self: Surrounded by at least two enemies (Mind Blast)
- Enemy: Target between medium and long range (Fireball)
- Enemy: Target rank is elite or higher (Crushing Prison)
- Enemy: Target rank is elite or higher (Paralyze)
- Enemy: Target using magic attack (Mana Drain)
- Enemy: Nearest visible (Lightning)
- Enemy: Nearest visible (Arcane Bolt)
1. If surrounded by more than a single enemy, the mage defends himself by stunning enemies with Mind Blast.
2. The mage casts a medium- or long-range Fireball at the enemy.
3. If a foe is ranked higher than normal level, the mage attempts to root it with Crushing Prison.
4. If a foe is ranked higher than normal level, and Crushing Prison failed, is on cooldown, or there is a second opponent who fulfills the conditions, the mage attempts to root it with Paralyze.
5. If the mage spots an enemy spellcaster, he will sap its mana with Mana Drain.
6. Otherwise, the mage will chose the nearest target and blast away with Lightning (or your favorite single-target spell).
7. If Lightning is on cooldown, the mage will hit the nearest target with Arcane Bolt (or another single-target spell).