
Dragon Age: Origins Guide Essentials The Classes
The Warrior: Character Builds
With the game's best weapon talent trees, you can create dozens of warriors who each wield something a little different in combat.
Don't feel constrained to play according to the following warrior models to the letter; take bits and pieces that appeal to your play style and add your own spin. However, these are basic models for a tank, melee DPS warrior, or ranged DPS warrior.
Each shows you how to choose your talents up to level 20, what talent chains are effective, how specializations fit in, and sample combat strategies for that model.
Tank Model
| Level | Talent |
|---|---|
| 0 | Shield Bash (Dwarf Noble or Human Noble) |
| 1 | Powerful, Shield Defense |
| 2 | Shield Balance |
| 3 | Shield Wall |
| 4 | Threaten |
| 5 | Shield Block |
| 6 | Shield Cover |
| 7 | War Cry (Champion) - First Specialization Available at This Level |
| 8 | Bravery |
| 9 | Shield Tactics |
| 10 | Shield Pummel |
| 11 | Overpower |
| 12 | Shield Mastery |
| 13 | Death Blow |
| 14 | Rally (Champion) - Second Specialization Available at This Level |
| 15 | Motivate (Champion) |
| 16 | Superiority (Champion) |
| 17 | Shield Expertise |
| 18 | Assault |
| 19 | Pinning Shot |
| 20 | Crippling Shot |
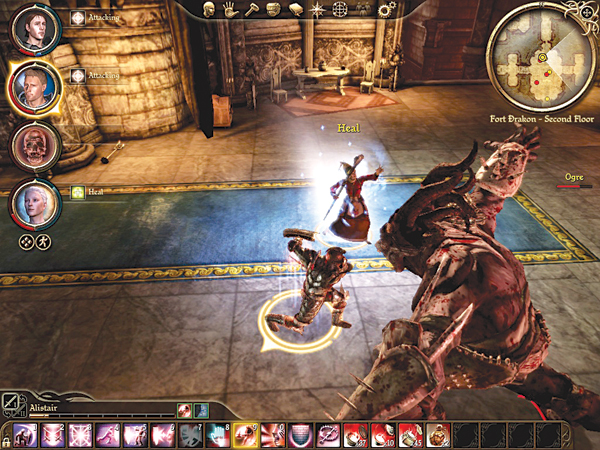
A tank protects his companions and deals significant damage to boot. He generally concentrates in the Warrior school and the Weapon and Shield school.
Leveling
Choose a Dwarf Noble or Human Noble if you can. They come with the built-in Shield Bash talent, which puts you one talent into the Weapon and Shield school and exactly where you want to be.
Sink your initial five points into strength and spend your skill point on Expert Combat Training, both of which satisfy your early talent prerequisites.
At level 1, pick up Powerful and Shield Defense. Level 2 gives you Shield Balance. At level 3, choose Shield Wall. Level 4 is an automatic choice: Threaten.
In three levels, you now have the core of your tanking defense ready to go. Shield Defense is a great all-purpose protection stance; Shield Wall defends even better, but at the cost of reduced damage, which may not matter much if you have enough damage-dealers in the party.
Shield Balance reduces the penalty to battle with a shield in your off-hand—another crucial talent for a Weapon and Shield warrior. Threaten should stay on in almost any fight to draw most of the threat to you.
When you reach levels 5 and 6, add Shield Block and Shield Cover to the mix. You could go with more offense here, but in this model we're concentrating on building the best defensive juggernaut we can to hold the line for your party.
Stick with defense first, offense second. Make sure that you have 16 dexterity at this point to pick up Shield Cover.
You want the champion specialization by level 7 if at all possible. You can gain the champion specialization by completing the "Arl of Redcliffe" and "Urn of Sacred Ashes" quests and freeing Arl Eamon from his illness.
If you can't get it by level 7, add it as soon as you can. The first champion talent, War Cry, hits all nearby enemies with an attack penalty, and it really shines when you gain Superiority at level 16.
At level 8, invest in Bravery. It gives bonuses to damage, physical resistance, mental resistance, and critical chance. In other words, it helps all facets of combat.
Continue to add points to dexterity and strength as you level so you're prepared to meet the prerequisites of more advanced talents.
With 20 dexterity at level 9, you can finally gain Shield Tactics. This may be the most important talent a good tank needs, because it prevents enemies from scoring flanking bonuses against your warrior.
No matter where your tank stands now, which is usually in the middle of an enemy swarm, it's just like he's facing the enemy head on.
Next switch to offense for two levels. At level 10, pick up Shield Pummel, and at level 11, purchase Overpower. Shield Pummel is a two-hit combo that can stun an opponent; Overpower is a three-hit combo that can knock a target down.
Your strength and dexterity scores need to be in the mid-20s to open up your new talents.
Another milestone comes at level 12 with Shield Mastery. The majority of your offensive and defensive abilities gain bonuses with Shield Mastery.
At level 13, you cap out the Warrior school when you gain Death Blow. Now, whenever your warrior slays an enemy, stamina gets restored. With enough killing, you can continuously operate your talents.
For levels 14 through 16, study all the rest of your champion talents. Rally and Motivate enhance the entire party's offense and defense, but Superiority is the coup de grace.
Now when you trigger War Cry, it has a chance to knock down all enemies around you and give you a great advantage in battle.
At levels 17 and 18, fill out the rest of your Weapon and Shield chains. If you lean toward defense, learn Shield Expertise first; if you lean toward offense, get the four-hit combo Assault (requires 32 strength).
Your final two points could be spent on almost anything. You could pick up Precise Striking and Taunt in the Warrior school to give yourself another method of drawing threat.
You could experiment with Two-Handed or Dual Weapon. Instead, we'll add a ranged component with Pinning Shot at level 19 and Crippling Shot at level 20. If you can't reach them on foot, pull out the bow and give them a reason to come to you.
Talent Choices
A tank concentrates on the defensive gems in the Warrior school, such as Powerful, Threaten, and Bravery.
Other than that, a tank maxes out the Weapon and Shield school to take advantage of all its defensive components, with a little offense thrown in for good measure. No matter the enemy configuration, your tank should have an answer for it.
Specialization
The champion's War Cry hampers enemy attacks. Rally and Motivate increase offense and defense for your party.
Superiority knocks enemies off their feet if they fail a physical resistance check.
Battle Tactics
Meet the enemy head on and intercept any attack on your companions. Unless you have Shield Tactics, you don't want to let yourself get surrounded where you fall prey to flanking bonuses.
Instead, choose a tactical location that shields you from some enemy attacks while protecting your party's flanks. Use Threaten or Taunt to pull the threat toward you and away from companions.
Study your situation and choose the correct defense accordingly. For strict defense, go with Shield Wall, which boosts armor and prevents you from getting knocked down (a huge headache for your party if you don't have an off-tank ready to jump in).
If you want more offense, go with the standard Shield Defense instead. If you're unsure on how the battle will go, always opt for more defense.
Once your defensive position is secure, think about dealing damage back to the monsters nearest you (or any ones who seem like they want to break free of your grasp).
You can use Overpower and Assault to inflict serious harm. Save Shield Bash and Shield Pummel when you want to stun or knock down a target, especially if your health is low or an enemy is on another companion.
Melee DPS Model
| Level | Talent |
|---|---|
| 0 | Shield Bash (Dwarf or Human Noble) |
| 1 | Pommel Strike, Powerful |
| 2 | Mighty Blow |
| 3 | Indomitable |
| 4 | Stunning Blows |
| 5 | Powerful Swings |
| 6 | Critical Strike |
| 7 | Berserk (Berserker)—First Specialization Available at This Level |
| 8 | Resilience (Berserker) |
| 9 | Two-Handed Strength |
| 10 | Constraint (Berserker) |
| 11 | Two-Handed Sweep |
| 12 | Final Blow (Berserker) |
| 13 | Sunder Arms |
| 14 | Shattering Blows—Second Specialization Available at This Level |
| 15 | Sunder Armor |
| 16 | Destroyer |
| 17 | Precise Striking |
| 18 | Taunt |
| 19 | Disengage |
| 20 | Perfect Striking |
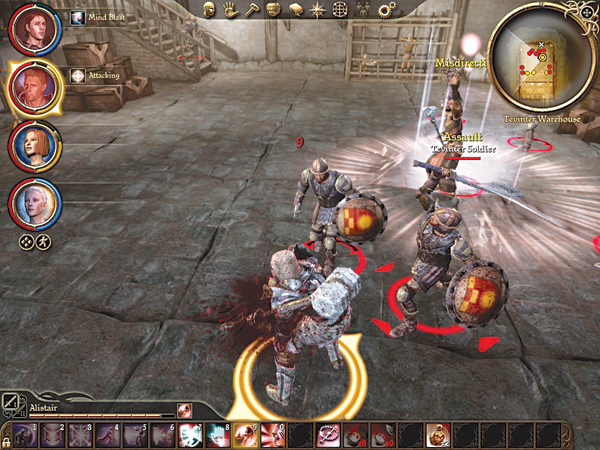
Concentrate on dealing combat damage as quickly as you can without pulling too much threat.
Leveling
Begin with a Dwarf or Human Noble to start with the Shield Bash talent (always a handy backup). Because most of what a melee DPSer loves to do is deal hand-to-hand damage, you only have to worry about strength.
Spend all five of your initial character creation points on strength. Up through level 6, all your attribute points should be spent on strength, and all your skill points should go toward Combat Training.
To maximize your DPS role, you need to achieve 34 strength and Master Combat Training by level 6. After that, you can pretty much spend your attribute and skill points freely.
At level 1, select Pommel Strike and Powerful with your first two talent points. Pommel Strike gives you a knockdown attack, and Powerful enhances your health and reduces fatigue; useful defensive abilities, but the offense will come in bunches soon.
At level 2, Mighty Blow begins a run to some major offense by level 6. Mighty Blow gives a bonus to attack and, if the blow connects, scores a critical hit on the target.
Indomitable at level 3 serves as a stepping stone talent to reach the better offensive top-tier talents; you may use Indomitable against creatures such as golems who you know will knock you down, but otherwise all your efforts go toward offense and you can leave it off.
At level 4, make sure you have 28 strength and Expert Combat Training to select Stunning Blows. It's a passive talent that can make a world of difference: all your blows have a chance to stun the enemy.
At level 5, Powerful Swings increases your damage; however, it gives a penalty to attack and defense until you gain Two-Handed Strength at level 9.
If you've maxed out your strength and skills properly, you can pick up Critical Strike at level 6.
Critical Strike promises an automatic critical hit and massive damage to a single target. Use it in any one-on-one fight or when you have lots of stamina in a longer fight.
At level 7, dip into the berserker specialization. One way to get this one is to work on the Orzammar quests early in the game; Oghren joins you on the "Paragon of Her Kind" quest and will teach you the specialization if you befriend him.
These quests can be tough at lower levels, however, so you can also purchase the specialization from Gorim at the Denerim Market. Berserk increases damage for each of your strokes, though your stamina will suffer a bit.
Resilience at the next level helps offset Berserk's stamina penalty, as does Constraint at level 10. Speaking of offsetting penalties, Two-Handed Strength, at level 9, minimizes the penalties from Powerful Swings.
At level 11, Two-Handed Sweep gives you an option against multiple foes. You deal normal damage, but can knock them off their feet. Berserker's Final Blow at level 12 hits an opponent with a massive blow inflicting damage proportional to all of your stamina (which is expended in the process).
For the next four levels, invest in the Sunder chain: Sunder Arms, Shattering Blows, Sunder Armor, and Destroyer (requires 30 strength).
If you like, feel free to buy part of this chain earlier for extra damage penetration, but you will lose out on some AoE and suffer penalties while using talents such as Powerful Swings.
The chain can dramatically alter a battle against heavily armored foes, or massive foes such as golems.
Your final four levels pick up the offensive Warrior chain: Precise Striking, Taunt, Disengage, and Perfect Striking. Taunt lets you off-tank if necessary, while Disengage is a nice option to reduce threat and shed enemies if the onslaught becomes too much.
Talent Choices
In this version of a DPS warrior, your combat skills revolve around a two-handed weapon that, though slower, generally deals the most DPS of any weapon.
Most of your talents maximize damage potential, with a few that give you AoE or stunning capabilities. It's possible to branch out into Archery and Dual Weapon, but you don't want to spread yourself too thin or you won't max out your two-hander's damage.
Specialization
Berserker is a big plus as soon as you can achieve it. The extra damage from the specialization is exactly what you want in a DPS melee class.
The stamina penalty can be rough; however, two of your talents minimize the penalty, and the last talent, Final Blow, will win you some battles.
Battle Tactics
Be patient. You can deal a huge amount of damage, which means if you attack too swiftly, you may pull the threat off your tank.
You won't be much use to the group with four enemies stomping on your shredded corpse. Wait for the tank to set up, then attack from the flank or rear and cut through enemy after enemy.
It's fine to go all out on an enemy and even pull it off the tank so long as it dies almost immediately.
Watch the battle and see where you're most needed. If you have off-tank skills, pick up any stragglers that go for the healer or other non-tank companions.
The quicker the enemies drop, the less damage the party receives, so bounce from weakest enemy to weakest enemy as you help the tank chop away at the numbers.
Save your big special effects (stuns, critical strikes, etc.) for bosses or tough enemies that just won't go down with the normal party tactics. If the tank looks to be in trouble, pull out all the stops and dive into the main enemy line.
Ranged DPS Model
| Level | Talent |
|---|---|
| 0 | Pinning Shot (Dalish Elf) |
| 1 | Crippling Shot, Rapid Shot |
| 2 | Shattering Shot |
| 3 | Critical Shot |
| 4 | Suppressing Fire |
| 5 | Melee Archer |
| 6 | Scattershot |
| 7 | Arrow of Slaying—First Specialization Available at This Level |
| 8 | Righteous Strike (Templar) |
| 9 | Cleanse Area (Templar) |
| 10 | Aim |
| 11 | Defensive Fire |
| 12 | Master Archer |
| 13 | Mental Fortress (Templar) |
| 14 | Dual Striking—Second Specialization Available at This Level |
| 15 | Holy Smite (Templar) |
| 16 | Riposte |
| 17 | Cripple |
| 18 | Punisher |
| 19 | Dual-Weapon Training |
| 20 | Dual-Weapon Finesse |
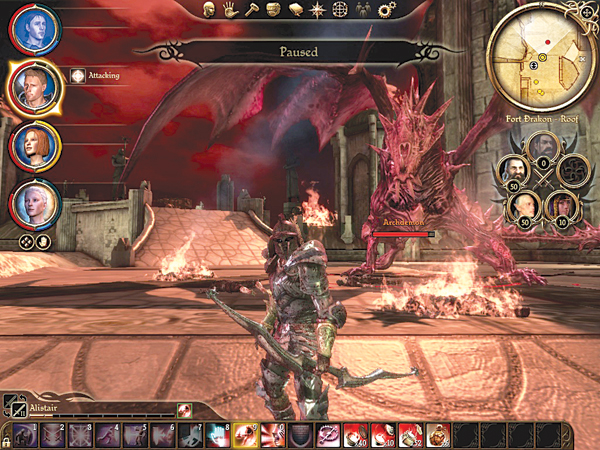
Much like an offensive mage, a ranged DPS warrior concentrates weapons and talents on enemies at a distance. He focuses on the Archery school, and may dip into some talents, such as Dual Weapon, when melee becomes imminent.
Leveling
Begin as a Dalish Elf and you start with the Pinning Shot talent. As you'll be working with a bow and dual weapons, load up on dexterity. Your goal is to have 27 dexterity and Master Combat Training by level 6.
1.With your first two talent points at level 1, choose Crippling Shot and Rapid Shot. You now can hamper someone's attack and defense with Crippling Shot or reload much faster with Rapid Shot. Shattering Shot at level 2 imposes an even greater penalty to a foe's defense as it reduces armor value.
2. If you have 21 dexterity and Expert Combat Training at level 3, select Critical Shot. If you hit, Critical Shot inflicts critical damage and a bonus to armor penetration. Follow that up with Suppressing Fire at the next level to further encumber targets with attack penalties.
3. At level 5, slip in Melee Archer. It's an all-around useful ability: it prevents attacks from interrupting your firing.
4. You reach your first pinnacle at level 6 with Scattershot. This awesome talent automatically stuns your target and deals normal damage, then splinters off and does the same to all nearby enemies. Use this effectively against enemy spellcasters or large enemy groups to impede flanking attempts.
5. If you can reach 30 dexterity by level 7, you gain Arrow of Slaying. This scores an automatic critical hit against all but high-level opponents, and it's another offensive threat you can deliver.
6. At level 8, search out the templar specialization. Ask Alistair if you're friendly, or you can pick up the training manual at the party camp vendor. The first talent, Righteous Strike, lets you drain mana with any successful melee strike against an enemy spellcaster.
You may have to get close to use this talent, but it's generally worth it against spellcasters, and it opens the door for the better templar talents later, such as Cleanse Area at the next level.
This removes all magic effects on your party, which is great when you have negative debuffs on the group, but watch that you don't strip the good buffs in the process.
7. The next three levels, 10–12, fill out the rest of the Melee Archer chain: Aim, Defensive Fire, Master Archer. Use Aim for more offense and Defensive Fire when you fear return fire. Master Archer improves almost every Archery talent.
8. At level 13, Mental Fortress gives you a huge upgrade to your mental resistance. At level 14, you branch into melee combat with Dual Striking.
Now that your ranged abilities are maxed out, select Holy Smite at level 15 (which decimates enemy spellcasters by dealing damage and draining mana), then spend the rest of your points beefing up your melee combat.
9. Riposte at level 16 gives you a stunning attack, which can help tremendously by getting you out of tight melee spot and allowing you to move to a new location and return to your ranged attacks.
Level 17's Cripple can also hamper enemy movement while you escape. Level 18's Punisher may knock the enemy down, but it's more about dealing big melee damage when you are absolutely engaged in hand-to-hand fighting.
10. Because you've devoted a few talents to fighting with two melee weapons, your final two talents help offset the dual-weapon penalties: Dual-Weapon Training and Dual-Weapon Finesse.
By this point, you'll destroy them at range, and should they limp into melee range, you're not half-bad nose-to-nose either.
11. Talent Choices: The Archery school and all its ranged surprises are your bread and butter. Dual Weapons provide some support talents in case an enemy gets close enough to melee.
12. Specialization: Templar enhances your skill in taking down enemy spellcasters. Righteous Strike can be fantastic once you reach higher levels and can tap into your Dual Weapon talents.
Cleanse Area and Mental Fortress bulk up your defensive abilities. Holy Smite gives you another powerful ranged attack that will destroy an enemy spellcaster in a single energy burst.
13. Battle Tactics: Once the battle begins, stand your ground. Let the tank and other melee DPSers embrace the enemy.
You want to nuke them from afar. Unlike a mage who stays in the rear, however, the ranged DPS warrior can enter melee with his better armor, weapons, and Dual Weapon talents at higher levels.
14. Survey the battlefield and pick your targets wisely. Concentrate fire on the tank's target to bring it down quicker, or look for injured foes that you can drop with an arrow or two. If you see an enemy spellcaster in the enemy's rear, make it your priority.
You don't want it getting off damaging spells. Same goes for enemy archers. If your melee companions can't reach them, it's your job to stop them from pelting the team with damage.
15. On offense, your rotation goes something like this: Aim, Pinning Shot (against moving targets), Critical Shot (against near-dead targets), Arrow of Slaying.
On defense, go Defensive Fire, Crippling Shot, Suppressing Fire, and Scattershot (especially against enemy spellcaster or enemies charging at you).
16. As a ranged DPS warrior, you have much of the offense of a DPS mage, yet you can still wear most of the better armor and use high quality weapons.
Keep on the go to avoid enemy melee encounters and let your arrows serve as warnings to any new darkspawn that stumble across the field of arrow-strewn corpses.