
Prima Games eGuides
primagames.com Browse Redeem a code Help
Dragon Age: Origins eGuide
Sign in My Guides

Sign in or create an account

We'll email you a link. No password needed, and if you don't have an account yet, the link makes one.

By creating an account or signing in, you agree to our Terms of Service and Privacy Policy.

Have a password?

Had an account on the old eGuides site, or a code from a printed guide? Help and troubleshooting

Sign in with a password

By signing in, you agree to our Terms of Service and Privacy Policy.

Check your email

A sign-in link is on its way. It works once and expires in 15 minutes. Open it and you're in, with an account if you didn't already have one.

Contents

  • Maps
    • Ferelden
      • Map of Ferelden
    • Dwarf Commoner
      • Dust Town
      • Commons
      • Tapster's Tavern
      • Beraht's Shop
      • Proving Grounds (Dwarf Commoner)
      • Beraht's Hide
    • Dwarf Noble
      • Ozammer Royal Palace
      • Diamond Quarter
      • Proving Grounds (Dwarf Noble)
      • Ruined Thaig
      • Outskirts
    • City Elf
      • Alienage
      • Arl of Denerim's Estate (Exterior)
      • Arl of Denerim's Estate (Interior)
    • Dalish Elf
      • Forest Clearing
      • Elven Ruins
      • Dalish Elf Camp
      • Return to Forest Clearing
      • Return to the Elven Ruins
      • Return to Dalish Elf Camp
    • Human Mage Origin
      • The Harrowing
      • The Circle Tower (Human Mage Origin)
      • The Repository
    • Human Noble Origin
      • Castle Cousland By Day
      • Castle Cousland (Night)
    • Ostagar
      • King's Camp
      • Korcari Wilds
      • Return to King's Camp
      • The Tower of Ishal
    • Lothering
      • Lothering
      • Lothering Chantry
      • Dane's Refuge
  • Essentials
    • Basics
      • Key Terms
      • Experience and Leveling
      • Your Health
      • Race
      • Class
      • Skills, Talents, and Specializations
      • Items
      • Combat
      • The Map
      • The Codex
      • Making choices
    • Character Generation
      • Gender and Race
      • Class
      • Specializations
      • Appearance and Voice
      • Attributes
      • Origin Stories
    • The Classes
      • Levelling
      • Skills
      • The Warrior: Strengths
      • The Warrior: Attributes
      • The Warrior: Skills & Talents
      • The Warrior: Weapons
      • The Warrior: Talent Tables
      • The Warrior: Specializations
      • The Warrior: Character Builds
      • The Mage: Strengths
      • The Mage: Attributes
      • The Mage: Skills & Spells
      • The Mage: Schools & Gear
      • The Mage: Talent Tables
      • The Mage: Specializations
      • The Mage: Character Builds
      • The Rogue: Strengths
      • The Rogue: Attributes
      • The Rogue: Skills & Talents
      • The Rogue: Schools & Gear
      • The Rogue: Talent Tables
      • The Rogue: Specializations
      • The Rogue: Character Builds
    • The Party
      • Buddy Basics
      • Group Dynamics
      • Dealing with Threat
      • Healing
      • Combat Roles
      • Configurations and Engagement
      • Tactics
    • Companions
      • Understanding Companions
      • Alistair
      • Leliana
      • Morrigan
      • Oghren
      • Shale (DLC Only)
      • Wynne
      • Zevran
      • Dog
      • Loghain Mac Tir
      • Sten
    • Supporting Cast
      • NPCs
    • Traveler's Guide
      • Thedas
      • History
      • Ferelden Society
      • Life In Fereldan
      • Fereldan Timeline
      • People of Ferelden
      • Elsewhere
        • Geography
    • Equipment
      • Equipment Basics
      • Vendor Shopping
      • Weapons
      • Armor
      • Accessories
      • Rune Enchanting
      • Crafting
      • Usable Items
      • Gifts
      • Downloadable Content Items
    • Races
      • Elves
    • The Bestiary
      • The Monster Manual
    • Encounters
      • World Encounters
      • Plot Encounters
      • Random Encounters
  • Walkthrough
    • Walkthrough
      • Tour of Ferelden
      • Essential Locations
      • Dwarf Commoner Origin
      • Dwarf Noble Origin
      • City Elf Origin
      • Dalish Elf Origin
      • Mage Origin
      • Human Noble Origin
      • Ostagar
      • Lothering
      • Broken Circle
      • Arl of Redcliffe
      • Urn of Sacred Ashes
      • Paragon of Her Kind
      • Nature of the Beast
      • The Landsmeet
      • The Final Onslaught
      • Warden's Keep (DLC Only)
      • The Stone Prisoner (DLC only)
    • Side Quests
      • Blackstone Irregulars
      • Brecilian Forest
      • Chanter's Board
      • The Circle of Magi
      • Denerim
      • Favors for Certain Interested Parties
      • Korcari Wilds
      • The Mages' Collective
      • Orzammar
      • Ostagar
      • Party Camp
      • Redcliffe
      • Warden's Keep (DLC Only)
      • Wide Open World
    • Achievements and Trophies
      • PC Achievements
      • Console Achievements
  • DLC
    • Companions
      • Shale
    • Warden's Keep
      • Walkthrough
    • The Stone Prisoner
      • Walkthrough

Dragon Age: Origins Guide › Essentials › The Party

Buddy Basics

The Party

The name of the game should give you a clue that monstrous beasts are in store for you. From dungeon depths to snowy mountaintops, your four-person party will battle anything from devastating dragons to drooling darkspawn.

Unless you want to end up as chew toys for ogres, hone up on the basics and learn expert party dynamics.
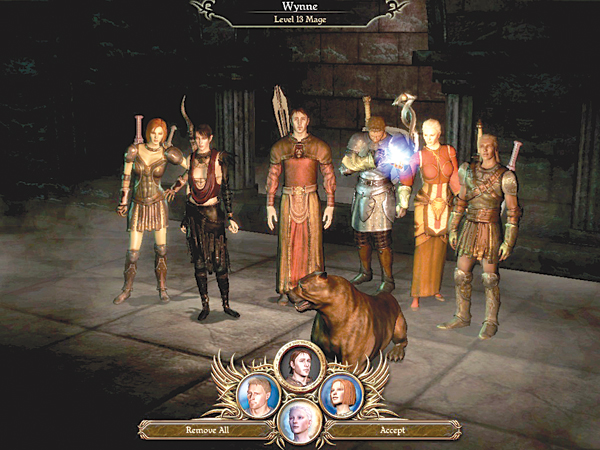
You begin your adventuring career on your own. As the story unfolds, you meet companions who join your party and become your allies in battle.

A companion could be a fellow Grey Warden like Alistair, or the unlikeliest of allies, Zevran, an Antivan Crow sent to assassinate you. It's up to you to decide which companions you travel with, because you can have only three companions at once.

The rest remain behind at party camp, a place easily reached from the world map that serves as haven for you and your companions, fully equipped with a dwarven merchant to buy excess goods and sell you wares at a discount.

Each time you leave party camp, you can pick three new companions to accompany you, and in certain non-hostile regions, you can use the Party Configuration button on your top menu to immediately switch companions.

Keep reading with a free account

The first 3 sections of Dragon Age: Origins are open to everyone. An account opens the rest of it, and every other guide in the archive. It's free, and there's nothing to buy.

Bought guides on the old Prima Games site? Your account and every guide you own moved here, so there's nothing to buy again. Sign in.

Create a free account Or browse our free guides

PreviousThe Rogue: Character Builds NextGroup Dynamics