
Dragon Age: Origins Guide DLC Warden's Keep
Walkthrough
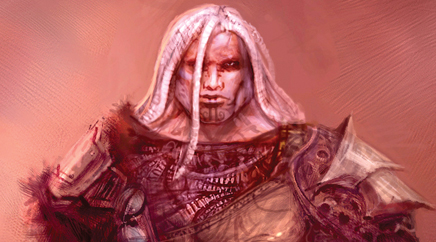
Soldier's Peak
A. Once you have downloaded "Warden's Keep," you will find Levi Dryden at party camp. Visit him there and accept the quest to Soldier's Peak. The new location will appear on your world map, and Levi will take you to the snowy hills outside the fortress.

B. As you enter the main compound, ghosts appear at the gate and reenact the first part of the tale of what befell the Grey Wardens at Soldier's Peak. If you travel a little farther toward the steps leading up to the keep entrance, an ambush springs.
Arland undead rise from the ground to the northeast in the courtyard before the stairs, while a second set of Warden skeletons appears to the west near the codex statue. Tackle the Arland undead first, then swing around and battle the Warden skeletons. If you're quick, you can launch ranged attacks and whittle down the numbers before they overwhelm your party.

C. More dead Wardens hold the staircase leading up to the keep entrance. A Warden master scout and its skeleton followers attack with deadly accuracy as they pelt you with arrows. Return fire with ranged AoE spells, such as a Fireball or Tempest, and once the smoke clears, send your melee DPSers up to clean up the survivors. When you are healed back up, enter the keep through the main doors.

First Floor

A. On the first floor, the second room holds an arcane horror and lesser rage demons. Nail the arcane horror with stuns and root talents/spells and rip through the lesser rage demons. Once the lesser foes have fallen, concentrate the party's power on the arcane horror to bring it down. If you want a little more battle experience and extra loot, open the door to the west and fight Commander Athlar and a bunch of Warden skeletal archers.
B. Head to the east and then north to the back room. The Archivist and its demonic lackeys appear and attack. Take the same tactics as you did with the arcane horror in the prior room. Once you finish off all foes, read the Archivist's Book for more of the keep's tale.

Second Floor
A. In the large open chamber near the second floor stairs several magic circles glow on the floor. As you approach, the rage demon and dead Wardens from out of the keep's past materialize. Though the rage demon can abuse your party, you must defeat the dead Wardens on the magic circles first. The Wardens power up the rage demon, and it's nearly impossible to deal enough damage to kill the rage demon while the dead Wardens continuously heal it. With the magic circles empty, you can focus your party's firepower and eliminate the rage demon with your tank taking the lion's share of the combat damage.

B. Unfortunately when you reach the northeast chamber, you find Levi's ancestor, Sophia, possessed by a demon. If you have a very high Persuade skill, you can convince Sophia to seal the tear in the Veil that is letting all these demons through to the keep. If you don't have a very high Persuade score, or you want to head to Avernus's Tower anyway (recommended if you want two new talents for your class), agree to help Sophia against Avernus in the tower. You can always change your mind later on. Leave via the exit door to the tower.

C. A magical barrier blocks exit from the second floor. A few shambling skeletons bar your way too. You must first speak with Sophia to remove the barrier and pass through to Avernus's Tower.

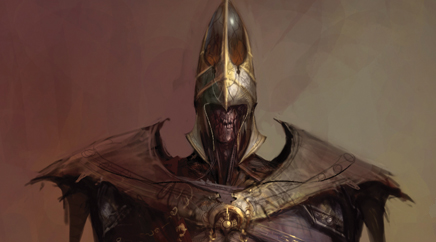
Avernus's Tower
A. Warden skeletons and traps guard the bridge leading to Avernus's Tower. Don't charge across the bridge. Hold your ground and take down the skeletons with ranged attacks. If you have a rogue, disarm the set of leghold traps that litter the bridge just in front of the second floor entrance.

Inside the tower, Warden corpses defend the second room. Defeat them and then study Avernus's ability notes (northeast corner near the door) and book (on the table). Avernus has conducted some horrific experiments, but his perserverance has paid off with new advances for all three classes. If your conscience can handle it, drink the Alchemical Concoction to gain two new talents/spells. (See the Avernus's New Abilities sidebar for more info.)
B. Enter Avernus's chamber and hear his side of the story. You have a choice to make: side with Sophia or Avernus. Both are corrupt, but which one do you want to champion?

Avernus's New Abilities
Avernus has discovered two new talents/spells for each class. If you drink the Alchemical Concoction on the table before Avernus's chamber, you gain two of the following Power of Blood talents based on your appropriate class:
Warrior
Blood Thirst:
The warrior's own tainted blood spills in sacrifice, increasing movement speed, attack speed, and critical hit chance. For as long as the mode is active, however, the warrior suffers greater damage and continuously diminishing health.
Blood Fury:
The warrior sprays tainted blood to knock back nearby enemies, which they may resist by passing a physical resistance check. The gush of blood, however, results in a loss of personal health.
Mage
Dark Sustenance:
A self-inflicted wound lets the mage draw from the power of tainted blood, rapidly regenerating a significant amount of mana but taking a small hit to health.
Bloody Grasp:
The mage's own tainted blood becomes a weapon, sapping the caster's health slightly but inflicting Spirit damage on the target. Darkspawn targets suffer additional damage for a short period.
Rogue
Dark Passage:
Tapping the power of tainted blood makes the rogue more nimble, able to move more quickly while using Stealth, and more likely to dodge a physical attack.
The Tainted Blade:
The rogue's blood gushes forth, coating the edges of weapons with a deadly taint. The character gains a bonus to damage determined by the cunning attribute, but suffers continuously depleting health in return.
Avernus vs. Sophia
After speaking with Avernus, return to Sophia. If you side with Sophia, slay Avernus with Sophia's help. If you side with Avernus, slay Sophia with Avernus's assistance. It doesn't matter who you side with to complete the quest. As with most boss fights, have your tank grab Avernus's or Sophia's attention and try to disrupt your foe from getting off any big attacks. Rotate through your party stuns to keep your foe off-balance.

Watch AoEs in the chamber's tight quarters, but unleash as much DPS as you can in a short amount of time to avoid major counterattacks.
New "Warden's Keep" Items
Want some new gear to deck out your character? There are 10 new pieces in the "Warden's Keep" quest line, each of which can be found from random loot drops or some story/sidequest events:
- Antique Warden Crossbow (Warden Master Scout's body in Soldier's Peak)
- Asturian's Might (reward for "Ancient History" side quest)
- Robes of Avernus (Avernus in the Avernus's Tower area)
- Shadow Belt (reward for "Ancient History" side quest)
- Starfang (greatsword; Mikhael in the Grey Warden base, part of the "Super Metal" random encounter)
- Starfang (longsword; Mikhael in the Grey Warden base, part of the "Super Metal" random encounter)
- Warden Commander Armor (Sophia in Soldier's Peak)
- Warden Commander Boots (Sophia in Soldier's Peak)
- Warden Commander Gloves (Sophia in Soldier's Peak)
- Winter's Breath (rage demon in abomination form on the second floor of the keep in Soldier's Peak)
Closing the Veil
After the final battle, your ally will attempt to seal the Veil in the chamber with the magic circles. Battle through a series of increasingly more difficult enemies that appear out of these circles: lesser rage demons, greater shades, ash wraiths, and a powerful desire demon. Speak with your ally and Levi one last time and the keep is in Grey Warden hands once again.

Warden's Keep
With the end of the quest, Levi and his family establish a new Warden's Keep which you can visit throughout the rest of the game. Levi and his brother, Mikhael, become new vendors for you: Levi sells accessories and crafting supplies; Mikhael is a blacksmith and sells weapons and armor.
If you have the meteorite material from the "Super Metal" random encounter (see the Random Encountes chapter), Mikhael will fasten the metal into a fine blade. Perhaps the greatest resource at the keep is the super-useful party storage chest. Load up whatever you don't want to lug around into the chest and return when you need the extra supplies. Its capacity is huge, so you won't be stuck destroying items again.
