
Dragon Age: Origins Guide Essentials The Classes
The Mage: Specializations
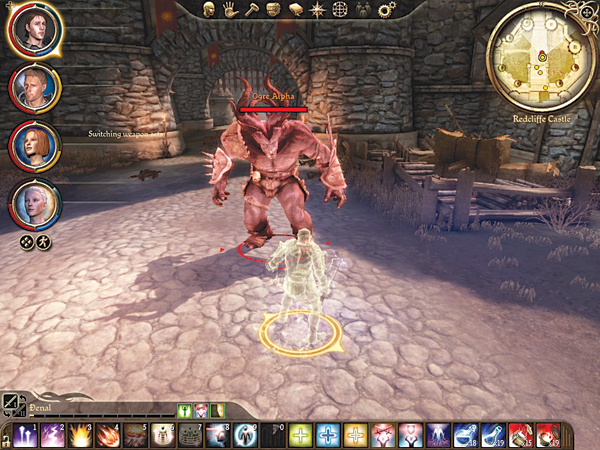
Each class has two specializations (out of four) that they can learn during the game. Your first specialization can be learned at level 7; your second at level 14.
Most companions can teach a specialization, though your approval rating must be high enough for the companion to want to teach you. Morrigan, for example, can teach the mage's shapeshift specialization.
Specializations are difficult to achieve, but very rewarding if you gain one. As long as the specific abilities fit with your play style and character breakdown, a specialization is generally worth spending points in over regular spells.
You should definitely experiment with specializations. A pure healer could, for example, specialize in shapeshifter to add some offense to the mix and some defense if they generate too much threat. Here are some suggested play style fits for the four specializations:
Arcane Warrior
- Primary: Melee/ranged mage (standard ranged spells with arcane warrior abilities for melee component)
- Secondary: Mana powerhouse (use Fade Shroud to regenerate mana faster) or tanking capability
Blood Mage
- Primary: Enemy control (use Blood Control to possess enemies to fight for you)
- Secondary: Health resilient (use Blood Sacrifice to heal self along with standard healing spells)
Shapeshifter
- Primary: DPS mage (shapeshifter melee attacks complement ranged spells)
- Secondary: Health resilient (use Flying Swarm to avoid health damage)
Spirit Healer
- Primary: Main party healer (Group Heal essential for party survival)
- Secondary: Savior (return dead comrades to life with Revival)
Mage Specializations
Learned From: The Presence in Brecilian Ruins ("Nature of the Beast" quest line)
| Specialization | Talent Name | Prerequisite Level | Description | Cost (mana/stamina) | Upkeep (mana/stamina) | Fatigue (% mana/stamina) | Ranged | Cooldown (sec.) | Area of Effect Radius (ft.) |
|---|---|---|---|---|---|---|---|---|---|
| Arcane Warrior | Combat Magic | 7 | While this mode is active, the arcane warrior channels magic inward, trading increased fatigue for an attack bonus and the ability to use spellpower to determine combat damage. Aura of Might and Fade Shroud improve the effects. Additionally, regardless of whether the mode is active, an arcane warrior who has learned this spell may use the magic attribute to satisfy the strength requirement to equip higher-level weapons or armor. | 0 | 50 | 50 | No | 10 | 0 |
| Aura of Might | 12 | The arcane warrior's prowess with Combat Magic grows, granting additional bonuses to attack, defense, and damage while in that mode. | 0 | 0 | 0 | No | 0 | 0 | |
| Shimmering Shield | 14 | The arcane warrior is surrounded by a shimmering shield of energy that blocks most damage and grants large bonuses to armor and all resistances. When active, however, the Shimmering Shield consumes mana rapidly. | 0 | 40 | 5 | No | 30 | 0 | |
| Fade Shroud | 16 | The arcane warrior now only partly exists in the physical realm while Combat Magic is active. Spanning the gap between the real world and the Fade grants a bonus to mana regeneration and a chance to avoid attacks. | 0 | 0 | 0 | No | 0 | 0 |
Learned From: Desire Demon in Fade ("Arl of Redcliffe" quest line)
| Specialization | Talent Name | Prerequisite Level | Description | Cost (mana/stamina) | Upkeep (mana/stamina) | Fatigue (% mana/stamina) | Ranged | Cooldown (sec.) | Area of Effect Radius (ft.) |
|---|---|---|---|---|---|---|---|---|---|
| Blood Mage | Blood Magic | 7 | For as long as this mode is active, the blood mage sacrifices health to power spells instead of expending mana, but effects that heal the blood mage are much less effective than normal. | 0 | 0 | 5 | No | 10 | 0 |
|
Blood
Sacrifice |
12 | The blood mage sucks the life-force from an ally, healing the caster but potentially killing the ally. This healing is not affected by the healing penalty of Blood Magic. | 0 | 0 | 0 | Yes | 15 | 0 | |
| Blood Wound | 14 | The blood of all hostile targets in the area boils within their veins, inflicting severe damage. Targets stand twitching, unable to move unless they pass a physical resistance check. Creatures without blood are immune. | 40 | 0 | 0 | Yes | 20 | 10 | |
| Blood Control | 16 | The blood mage forcibly controls the target's blood, making the target an ally of the caster unless it passes a mental resistance check. If the target resists, it instead takes great damage from the manipulation of its blood. Creatures without blood are immune. | 40 | 0 | 0 | Yes | 40 | 0 |
Learned From: Morrigan (Companion, Varathorn (Dalish Camp)
| Specialization | Talent Name | Prerequisite Level | Description | Cost (mana/stamina) | Upkeep (mana/stamina) | Fatigue (% mana/stamina) | Ranged | Cooldown (sec.) | Area of Effect Radius (ft.) |
|---|---|---|---|---|---|---|---|---|---|
| Shapeshifter | Spider Shape | 7 | The shapeshifter can transform into a giant spider, gaining a large bonus to nature resistance as well as the spider's Web and Poison Spit abilities. The caster's spellpower determines how powerful the form is. With Master Shapeshifter, the mage becomes a corrupted spider, growing still stronger and gaining the Overwhelm ability. | 0 | 50 | 5 | No | 90 | 0 |
| Bear Shape | 8 | The shapeshifter can transform into a bear, gaining large bonuses to nature resistance and armor as well as the bear's Slam and Rage abilities. The caster's spellpower further enhances this bear's statistics and abilities. With Master Shapeshifter, this form transforms the caster into a powerful bereskarn and gains the Overwhelm ability. | 0 | 60 | 5 | No | 90 | 0 | |
| Flying Swarm | 10 | The shapeshifter's body explodes into a swarm of stinging insects that inflict nature damage on nearby foes, with the damage increasing based on the caster's spellpower and proximity. While in this form, the caster gains Divide the Storm, and any damage the shapeshifter suffers is drawn from mana instead of health, but the caster regenerates no mana. The swirling cloud of insects is immune to normal missiles and has a very good chance of evading physical attacks but is extremely vulnerable to fire. With Master Shapeshifter, the character gains health whenever the swarm inflicts damage. | 0 | 30 | 5 | No | 60 | 0 | |
| Master Shapeshifter | 12 | Mastery of the shifter's ways alters the forms of Bear Shape and Spider Shape, allowing the caster to become a bereskarn and a corrupted spider, both considerably more powerful than their base forms. In those forms, the shapeshifter also gains Overwhelm. Additionally, the Flying Swarm shape drains health from foes whenever the main swarm inflicts damage. | 0 | 0 | 0 | No | 0 | 0 |
Learned From: Wynne (Companion), Wonders of Thedas (Denerim, after Landsmeet starts)
| Specialization | Talent Name | Prerequisite Level | Description | Cost (mana/stamina) | Upkeep (mana/stamina) | Fatigue (% mana/stamina) | Ranged | Cooldown (sec.) | Area of Effect Radius (ft.) |
|---|---|---|---|---|---|---|---|---|---|
| Spirit Healer | Group Heal | 7 | The caster bathes allies in benevolent energy, instantly healing them by a moderate amount. | 40 | 0 | 0 | Yes | 20 | 0 |
| Revival | 8 | The caster revives fallen party members in an area, raising them from unconsciousness and restoring some health. | 60 | 0 | 0 | Yes | 120 | 2 | |
| Lifeward | 12 | The caster places a protective ward on an ally that automatically restores health when the ally falls close to death. | 55 | 0 | 0 | Yes | 30 | 0 | |
| Cleansing Aura | 14 | While this mode is active, waves of healing and cleansing energy emanate from the caster, restoring health to all nearby allies every few seconds and curing the injuries of allies very close to the caster. | 0 | 60 | 5 | No | 30 | 10 |
Party Responsibilities

Ask yourself two questions when playing a mage: "Are you primarily a damage-dealer or a healer?" and "Are you the only mage in the party?"
If you want to perform the damage role, you will naturally concentrate on ways to harm your opponent. If you want to play the role of healer, regeneration and rejuvenation spells are in order.
If you're the only mage in the party, you must take some healing spells as part of your repertoire.
Another important question: "What need do you fulfill best?" Perhaps, you may look at your other three companions and fill in the void that they lack.
For example, if you have a warrior concentrating on two-handed weapons, a backstabbing rogue, and your sword-and-shield tank, DPS would seem to be covered while healing/party buffs are lacking.
On the flip side, if you have a spirit healer such as Wynne in the group, you can stretch out to damage spells and maybe supplement her talents with a heal or two.
In the end, though, you should choose the role that you want your mage to be and work the team around that. If you want to play DPS, go for it and make sure you have Wynne involved.
If you want to play the healer, drop Wynne and pick up Morrigan or another DPS-driven companion. If you want to play a little DPS and a little healing, you might be able to swing it as a single mage, or you may need help from one of the companion mages; it all depends on your combat style and tactics.
One thing all mages should strive for is to remain in the background and avoid threat whenever possible.
You aren't built for melee combat (unless you spec an arcane warrior properly), and if you draw threat, you will die quickly. Don't pull targets away from your tank, except, possibly, if they are near death and easy kills.
The mage ranks highest of the three classes in versatility. You can deal damage, heal, control large enemy groups, buff your party, and more.
Save your mana for the right reactions at the correct times and you'll excel in this class. So long as you remember not to lead the battle charge, your magic will work wonders in fights.