
Jagged Alliance: Back in Action Guide Essentials Weapons and Equipment
Grenades
When you need a little crowd control or if you encounter a tight cluster of enemies, grenades can be the most effective weapon of choice.
They are equipped in the quick use slot, and the distance and accuracy of these projectiles rely on a merc’s strength and skills.
There are four types of grenades in Jagged Alliance: Back in Action . Although some are similar in nature, each type has different functionality and different uses.
| Grenades | Image | Description | Price | Weight | Efficiency | Range |
|---|---|---|---|---|---|---|
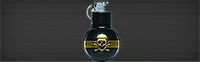
| Gas Grenade |
|
This grenade releases tactical dispersion gas that reeks havoc on exposed eyes and skin. | $170 | 450 gr | 80 | 8 m |
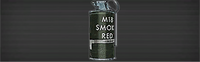
| Smoke Grenade |
|
Now they see you, now they don't. When properly employed, this smoke grenade will leave your opposition thinking they're dealing with Houdini himself. | $180 | 450 gr | 0 | 8 m |
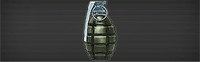
| Frag Grenade |
|
This standard army issued fragmentation grenade is packed with TNT and has a pull-ring, pressure-released firing trigger | $180 | 450 gr | 100 | 6 m |
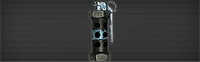
| Stun Grenade |
|
This grenade creates a massive vacuum that deprives the surrounding impact area of oxygen as waves of air rush back into its core. | $180 | 450 gr | 0 | 6 m |
Frag Grenades
Frag grenades are the most damaging grenades and are excellent for hitting multiple enemies. They explode shortly after being thrown and damage anyone in a wide area around the projectile.
They are best used to wipe out stubborn enemies behind cover or anytime you can’t get a clear line of sight on a tough foe. Most enemies will scramble from these deadly explosives, but even that is a bonus because it can be used to flush out foes from behind cover.
Try to use suppressive fire from one merc while another tosses a frag grenade in their general direction. If they run, you get a few free shots in their back and, if not…boom.
Smoke Grenades
Smoke grenades are basically defensive grenades that create a dense wall of smoke to obscure the enemy’s vision and line of sight.
They can be very useful if you want to sneak past enemies without being spotted or giving them a good chance to shoot you.
Smoke grenades also can be used if you are planning a retreat and want to cover your squad when they disengage from combat.
Stun/Flash Grenades
Although this projectile doesn’t have the explosive and damaging effect of a frag grenade, it can be just as deadly.
Both types perform the same function, which is that they temporarily stun anyone in their vicinity. This includes your squad as well the enemies, so make sure your mercs are out of the area of effect before you use the grenades.
They are great for indoor combat when tossed into a room full of enemies, but they can be used anytime to stun the opposition and prevent return fire.
Gas Grenades
Like the smoke grenade, this projectile also creates a thick cloud of smoke. However, the gas emanating from this grenade is toxic.
Its noxious fumes will incapacitate any enemies who don’t get clear of the gas range quick enough. They can be used anywhere, but they really excel in close quarters, such as inside buildings.