
Jagged Alliance: Back in Action Guide Essentials Bootcamp
World Map
The World Map is the entry point for each of the cities and locations in the game. It serves as an overview of all Arulco. Initially, it is covered in a fog of war. As you take over areas and move your squad around the map, the fog of war is lifted to reveal nearby locations.
Using this map, you can click a location to find out more information about what enemies are stationed there and what bonus the area could provide. This is important info you can use to decide if it is worth going to that location and the type of resistance you will encounter.
Also, a simple scan of the World Map with the mouse will reveal the type of terrain you will encounter, which helps you plan what type of camouflage you might need.
Movement
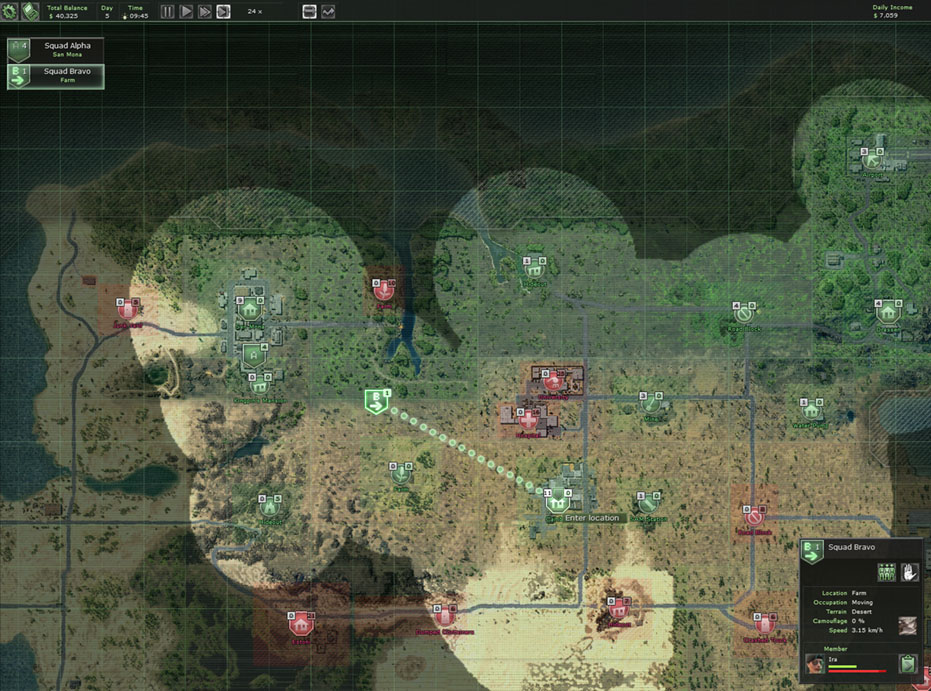
Your squads are represented as a green pentagon on the map, which will be initially filled with red locations. You can safely click on any location to get more info about it without sending your squad there.
You must right-click on your squad and then click somewhere on the map to give them marching orders. Also, you don’t have command them to just go from enemy area to area.
They can be commanded to move anywhere on the map to remove the fog of war and expose part of the map.
There are two additional settings on the top of the map that can control the actual path you take, such as direct path or simply the fastest route available.
Also, a tactical advantage to controlling where you move on the map is that you can decide where to enter the combat zone. There is a transparent red box around each location you can enter.
The direction you chose to approach will determine where your squad appears in the tactical view when they enter that spot.
You can use this to your advantage by leaving an area and approaching from a different position to move your squad quickly across the map and hopefully into a better starting spot.
The one important aspect about moving on the World Map is that is consumes stamina. This effect is carried over if you decide to attack an enemy location. It will permanently (while you are in that area) reduce your energy as indicated by a black bar representing your energy limit.
Your energy will not completely fill your bar and will be capped where the black line is. The only way to remove this stigma is to return to the World Map and rest.
Low energy in combat can cripple your squad, so make sure to rest after you’ve covered a large distance on the World Map.
Control Time Flow
During combat in the tactical view, time does not tick away. The only passage of time occurs when you are on the World Map. Moving on the World Map can be a slow process because of its substantial size but you can use the arrow controls at the top of the screen to pause and speed up the flow of time by 24 times.
Changing the rate at which time passes is very useful when trekking a long distance on the World Map. It also can be used to pass time quickly as you circle an area to plan an assault for night ops.
Squad Management
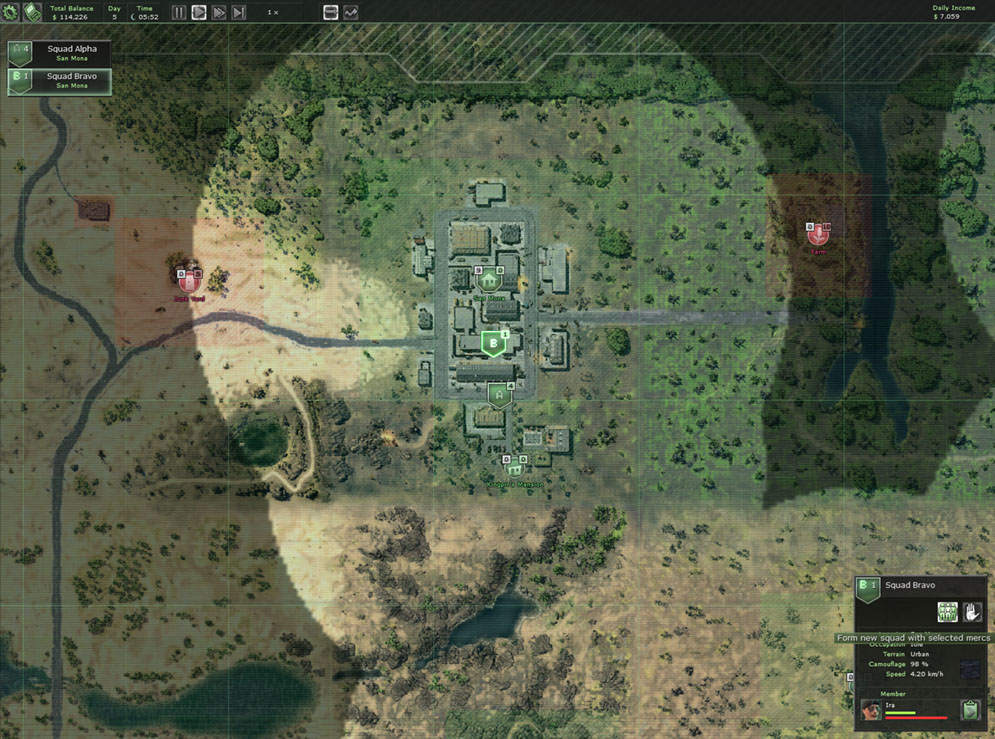
Each squad is represented by the green pentagon on the map. The upper right-hand corner displays how many mercs are in that group.
When you select a squad, you will see the stats for the entire group including speed, camouflage, terrain, location, and occupation.
Also, this view will reveal all the soldiers in the squad, providing a quick view of their health and stamina. This view will allow you to examine all of the mercs gear and stats.
The other functions that are accessible when you select a squad are split and merge groups. To separate a merc from the current group, select the one you want to go and click the leave squad button.
This will create a new squad in the same location with that merc as the sole member. Merging a squad is a simple task of selecting one group and telling it to move to another squad. The maximum size of a squad is six mercs.
Speaking of squads, yours are not the only ones that can appear on the World Map. Deidranna will try to take back any areas you have conquered.
She will send squads of her own, represented by a red pentagon, and will usually attack the closest and weakest area next to her occupied territories.
You can engage these foes directly on the World Map by directing your squad to move to their location.
Locations
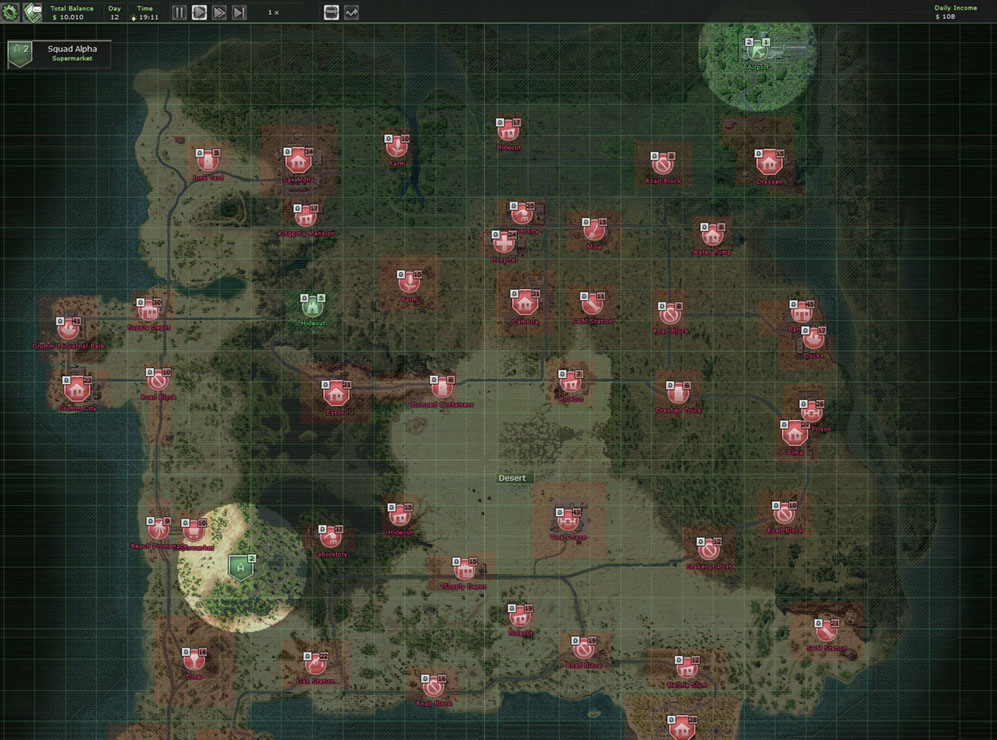
Each of the red area on the map represents a location controlled by Diedranna’s forces. Clicking on these locations will give you a brief description of what you can gain by controlling the area, the number and levels of enemies, and their loyalty to the queen.
Once you have entered the combat zone and overtake the strategic targets, the icon on the World Map will turn green. The stats will change to represent their loyalty to your rebellion, along with the number of local militia ready to join your cause.
An additional stat will be displayed that shows the daily income from that location. Many locations have tactical advantages, such as revealing areas of the map, generating a large sum of income, or increasing the money or loyalty from surrounding areas that you have conquered.