
Gears of War 2 Guide Cog Armory
Large Weapons
You can carry up to two large weapons in any combination. If you greatly favor one specific large weapon, feel free to carry it around and just swap out your secondary slot.
If you’re comfortable with a range of weapons, don’t hesitate to freely equip new weapons as you encounter them in the campaign.
In multiplayer, large weapons are typically the most powerful and most sought-after gear on the battlefield. Securing and employing the power weapons available on each map is a crucial skill to master.
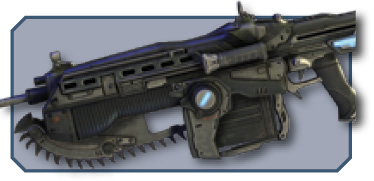
Lancer
Weapon Statistics
| Clip Size | 50 |
|---|---|
| Max Ammo | 550 |
| Rate of Fire | 550/m |
| Reload Time | 2.5s |
Damage Statistics (Player),Short/Medium/Long
|
Casual Damage |
Casual Melee |
|
80/80/48 |
Special |
|
Normal Damage |
Normal Melee |
|
56/56/33.6 |
Special |
|
Hardcore/Insane Damage |
Hardcore/Insane Melee |
|
40/40/24 |
Special |
Damage Statistics (AI)
|
Casual Damage |
Casual Melee |
|
20/20/12 |
Special |
|
Perfect Active Reload Bonus |
Special Weapon Notes |
|
Increases damage for the reloaded shots by 18-22% per shot. |
Chainsaw bayonet instantly kills human-sized or smaller enemies. |
Description: If you’re looking for a weapon that’s useful in most situations, the Lancer is perhaps the best all-around weapon in the game, and it comes as standard equipment for all Gears.
At a distance, the Lancer’s solid rate of fire make it effective for suppressing an area or quickly downing a target out of cover. Up close, you can blindfire effectively around cover. At extreme close range, the brutal chainsaw can be used to lethal effect.
Close Range: Blindfire is solid at close range, though it pales in comparison to real close-range weaponry. Just be aware of what your enemy is using. Longshot? Good! Shotgun? Bad!
If an enemy is advancing into this range, you can possibly take him down by cover-firing or even just blindfiring, but stay alert. If multiple enemies are closing on your position, it’s time to relocate, not stand and fight.
At extreme close range, you can use the Lancer’s brutal chainsaw bayonet, instantly killing all human-sized and smaller Locust.
Medium Range: The Lancer excels at medium range, where its solid accuracy and good rate of fire make for great damage output, even against targets behind cover. You can usually accurately target the smallest exposed limbs to deliver damage.
Against targets moving in the open, the Lancer can down them very quickly if you track them while they are exposed.
Blindfiring at this distance is mediocre at best. You can inflict a bit of damage if you’re moving from cover to cover. You’re usually better off getting behind cover more quickly with a cover slip and roadie run than you are risking enemy fire in the open.
If you’re blindfiring at an enemy directly approaching your cover, you can usually deliver a decent amount of damage.
Long Range: The Lancer is mediocre at great distances.
You can deal damage, but it tends to be very expensive in terms of consumed ammo. Plus, you usually have to stay exposed longer in order to aim carefully at a distant target.
If you have no better options, don’t hesitate to take some shots, but you might want to look at the terrain and see if you can move in safely.
Cover: The Lancer is okay against targets in cover, but not great. Against targets exposing themselves to fire, it does well, particularly at medium range. If they’re mostly concealed and blindfiring or not shooting at all, you’ll have a harder time dealing damage efficiently.
Try to reposition to a flanking angle. Or, at the very least, move to expose part of the target, even if you’re not at a full ninety-degree angle.
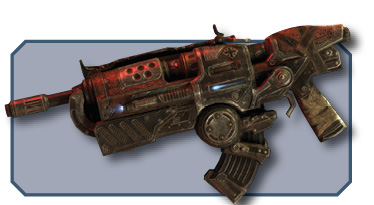
Hammerburst
Weapon Statistics
| Clip Size | 17 |
|---|---|
| Max Ammo | 306 |
| Rate of Fire | 250/m |
| Reload Time | 2.5 |
Damage Statistics (Player),Short/Medium/Long
|
Casual Damage |
Casual Melee |
|
160/160/96 |
192 |
|
Normal Damage |
Normal Melee |
|
112/112/67 |
134 |
|
Hardcore/Insane Damage |
Hardcore/Insane Melee |
|
80/80/48 |
48 |
Damage Statistics (AI)
|
Casual Damage |
Casual Melee |
|
40/40/24 |
48 |
|
Perfect Active Reload Bonus |
Special Weapon Notes |
|
18%-22% damage bonus. |
Can zoom, can be fired semi-auto or automatic. |
Description: The Hammerburst is the Locust analog to the COG Lancer. It’s standard equipment for most Locust Drones you encounter throughout the game, so it’s always available to you as a primary weapon if you choose to use it instead of the Lancer. One great perk of the Hammerburst is that you get head shots with it, so it prevents the Kantus from reviving downed Locust. As an enemy weapon, there is usually plenty of ammo to pick up afterward.
The Hammerburst lacks the Lancer’s chainsaw bayonet, but that isn’t it’s only weakness at close range. Rather than the Lancer’s sustained automatic fire, the Hammerburst fires a bit more slowly. But it can be fired in semi-auto mode more quickly if you squeeze the trigger rapidly.
In exchange, the Hammerburst is slightly more accurate at a distance, hits harder per shot, and can zoom in slightly, making it a better mid-long-range weapon compared to the Lancer’s superiority at close-mid range.
Close Range: The Hammerburst does not excel at close range. Your best bet is mashing semi-auto as fast as you can squeeze the trigger. The resulting lack of accuracy isn’t much of a problem up close—you’re nearly guaranteed to hit something. Otherwise, another option is a melee hit. You’re better off disengaging and getting some distance if you’re under attack by more than a single enemy.
Medium Range: The Hammerburst is very solid at medium range, though semi-automatic fire becomes more difficult to use accurately, depending on your target. It’s great against enemies with a larger profile: Reavers, Boomers, etc.
Long Range: The Hammerburst isn’t great at long range, but it is good, and it’s better than the Lancer. You can zoom in and fire small bursts, or fire in semi-auto with excellent accuracy.
Cover: The Hammerburst is very similar to the Lancer against targets in cover—it’s okay, but not great. You do have the advantage of zoom though. Even against targets at medium range in cover, zoom can help you fire accurately at the smallest bits of exposed Locust.
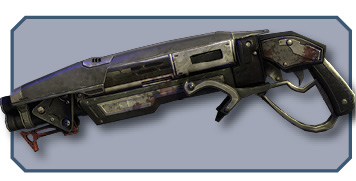
Shotgun
Weapon Statistics
| Clip Size | 8 |
|---|---|
| Max Ammo | 39 |
| Rate of Fire | 50/m |
| Reload Time | 3 |
Damage Statistics (Player),Short/Medium/Long
|
Casual Damage |
Casual Melee |
|
900/900/600 |
1000 |
|
Normal Damage |
Normal Melee |
|
630/630/420 |
700 |
|
Hardcore/Insane Damage |
Hardcore/Insane Melee |
|
450/450/300 |
500 |
Damage Statistics (AI)
|
Casual Damage |
Casual Melee |
|
247/247/165 |
275 |
|
Perfect Active Reload Bonus |
Special Weapon Notes |
|
20% damage bonus |
Inflicts heavy melee damage. |
Description: The premiere close-range weapon, the Shotgun is ideal for blasting apart Locust in your face. The Shotgun is particularly strong against smaller Locust, such as Wretches and Tickers.
It’s often best to use the Shotgun while you’re mobile, not up behind cover. Blindfired over cover, the shotgun is mildly useful against Locust closing on your position. But it’s difficult or impossible to hit targets at a distance with any accuracy.
Close Range: The Shotgun is ideal. It can inflict grievous wounds up close. It’s usually best to fire the Shotgun on the move, as you don’t need precise accuracy with the Shotgun’s cone-like spread.
Medium Range: At medium range, it’s better than you might expect. The only real issue is that firing it from the hip exposes you to considerable danger in most fights, especially on higher difficulty levels.
You can blindfire over or around cover even at medium range and deal decent damage to targets in the open. This is especially true for targets moving toward you. Trying to hit enemies farther away or behind cover isn’t worth your time.
Long Range: The Shotgun is exceedingly poor at long range; don’t use the Shotgun in these situations.
Cover: The Shotgun isn’t great against targets behind cover, but it can be good if you’re moving up to close range. Cover does little good against the shotgun’s spread at fairly close range. Again, evaluate the situation carefully before you advance. You can get into trouble moving up on enemy positions if reinforcements arrive midway through the battle.
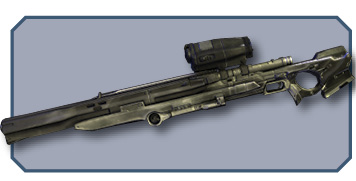
Longshot
Weapon Statistics
| Clip Size | 1 |
|---|---|
| Max Ammo | 23 |
| Rate of Fire | 60/m |
| Reload Time | 3 |
Damage Statistics (Player),Short/Medium/Long
|
Casual Damage |
Casual Melee |
|
840/700/700 |
840 |
|
Normal Damage |
Normal Melee |
|
588/490/490 |
588 |
|
Hardcore/Insane Damage |
Hardcore/Insane Melee |
|
420/350/350 |
420 |
Damage Statistics (AI)
|
Casual Damage |
Casual Melee |
|
360/300/300 |
360 |
|
Perfect Active Reload Bonus |
Special Weapon Notes |
|
10% damage bonus. |
Headshots are instantly fatal to nearly all humanoid Locust. |
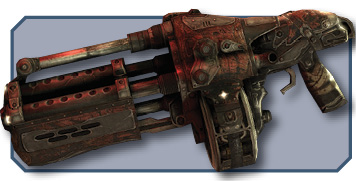
Description: The Longshot is the premiere long-distance weapon in the COG arsenal. Its slow rate of fire and precise accuracy render it less effective up close, but it is very powerful through much of the campaign.
In general, keeping the Longshot and your preferred medium-to-close-range weapon on hand is very effective for nearly all campaign chapters. Many battles start with Locust that you can snipe safely from a distance before you switch to weaponry more appropriate for a brawl.
Close Range: Bad. Very bad. Don’t use this weapon up close if you can avoid it. A last-second snapshot to the head can take down a single Locust. If you’re getting swarmed by a group, this is the last weapon you want in your hand. Switch to something more appropriate or back off. However, the Longshot is strong as a melee weapon.
Medium Range: The Longshot isn’t bad at medium range. The rate of fire puts a damper on how much damage you can inflict. But if you take precise shots, you can down a lot of Locust fairly quickly. Evaluate the situation before you commit to this weapon at medium range. If you’re in a stalemate of a firefight and there aren’t any good approach avenues for flanking the enemy (or getting flanked by them), using the Longshot is usually fairly safe and effective.
Long Range: Not surprisingly, the Longshot is perfect at long range. This is essentially the best weapon in the game at great distance. Really, it’s one of the only effective weapons at this range. Any time you have a Longshot and Locust Snipers aren’t around, you have the upper hand for as long as foes stay at a distance.
Cover: The Longshot is surprisingly good against covered foes. You can target even the smallest bit of exposed enemy. Plus, any time the target moves or reloads behind low cover, you might get a split-second shot at its melon. Watch for these opportunities to up your headshot count.
Boomshot
Weapon Statistics
| Clip Size | 1 |
|---|---|
| Max Ammo | 11 |
| Rate of Fire | 60/m |
| Reload Time | 2.5 |
Damage Statistics (Player),Short/Medium/Long
|
Casual Damage |
Casual Melee |
|
1050/1050/630 |
1260 |
|
(Bomblet) 300/300/180 |
n/a |
|
Normal Damage |
Normal Melee |
|
735/735/441 |
882 |
|
(Bomblet) 210/210/126 |
n/a |
|
Hardcore/Insane Damage |
Hardcore/Insane Melee |
|
525/525/315 |
630 |
|
(Bomblet) 150/150/90 |
n/a |
Damage Statistics (AI)
| Casual Damage | Casual Melee |
|---|---|
|
525/525/315 |
630 |
| Perfect Active Reload Bonus | Special Weapon Notes |
|
23%-28% larger blast radius, 6 bomblets instead of 3. |
The Boomshot’s explosion causes nearby humanoid Locust to cower. Detonates three bomblets on impact. |
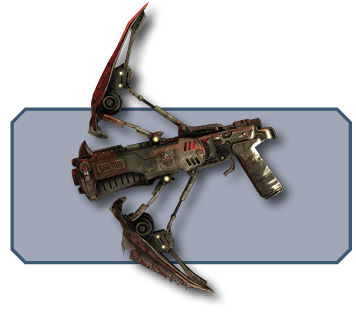
Description: Perhaps the most powerful ‘normal’ weapon besides the Torque Bow, the Boomshot fires clustered grenades that detonate on impact, inflicting lethal damage to a single target or solid radius damage to nearby enemies. The explosion also stuns neighboring enemies, temporarily disabling them. This is great for stopping an onslaught of fire.
Boomshot ammunition and availability tend to be limited. You rarely find the weapon, except from downed Boomers, who aren’t particularly common. You can resupply ammo from Locust ammo crates, but not from COG ammo crates—Locust crates are red rather than blue.
The Boomshot can close Locust Emergence holes with its explosions.
Close Range: This weapon is dangerous at close range! You can use it effectively in these situations, but you must be very careful, or you’ll end up fragging yourself along with your target.
Medium Range: The Boomshot is ideal at medium range. It’s easy to hit with and easy to kill with. Targets in the open are so much meat, while you can hit those behind cover with the splash damage.
Long Range: It’s not great at long range. The Boomshot’s arcing trajectory makes long-distance shots dicey, as your targets can actually move out of the danger zone before the shots impact. Plus, landing your shots precisely is difficult. If there are a lot of enemies in an area, go for it—splash damage is sure to cause some pain.
Cover: The Boomshot is decent against enemies behind cover. It can damage or kill targets by splashing off of any hard surface that’s beside, behind, or above them. The best bet is nailing direct shots against grouped enemies. But if you really want to kill a particular enemy that’s behind cover, the Boomshot can do the job.
Torque Bow
Weapon Statistics
| Clip Size | 1 |
|---|---|
| Max Ammo | 11 |
| Rate of Fire | 60/m |
| Reload Time | 3 |
Damage Statistics (Player),Short/Medium/Long
|
Casual Damage |
Casual Melee |
|
1416/1416/849 |
1699 |
|
Normal Damage |
Normal Melee |
|
991/991/594 |
1189 |
|
Hardcore/Insane Damage |
Hardcore/Insane Melee |
|
708/708/424 |
849 |
Damage Statistics (AI)
|
Casual Damage |
Casual Melee |
|
708/708/424 |
849 |
|
Perfect Active Reload Bonus |
Special Weapon Notes |
|
25% larger blast radius, 25% greater damage. |
Under-charged shots can be ‘bounced’ off hard cover to deliver the explosive warhead behind cover or around corners. |
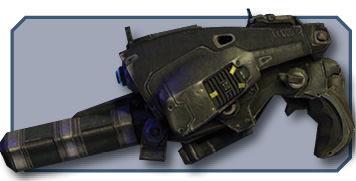
Description: An unusual weapon, the Torque Bow builds up tension as you hold the trigger, gradually straightening its projectile’s arc of travel.
Once it’s charged enough, the explosive ‘arrow’ will stick to a target. This guarantees that the stuck target suffers massive damage from the impact and resulting explosion.
Like the Boomshot, the Torque Bow’s availability is often limited in the campaign. When you have the weapon, you can use Locust ammo boxes to refill it. Save your shots for dangerous targets: Theron Guards, Palace Guards, etc.
Be very careful around enemies using this weapon. Watch for the glow of a fully-charged shot. If you see it, stay behind cover until the shot is fired. Because the Torque Bow automatically fires if it’s charged for too long, you can usually avoid taking direct shots while you’re exposed.
Close Range: The Torque Bow isn’t good at close range. You need time to charge the weapon, and you usually need time to aim it too.
The overall fire rate is slow, making this a poor choice up close. However, it does have a rather cool melee execution…
Medium Range: The Torque Bow is very good at this range. You have time to fully charge the weapon and pick your target. You can aim with enough accuracy at this distance to peg a target in low cover, which is nearly always fatal.
Long Range: This weapon is decent but not spectacular at long range. You can often nail targets at this distance, but you must be precise, which can be difficult if you’re under fire from anything closer. If you don’t have a better long-range alternative and you really want to kill a distant enemy, take the shot.
Cover: The Torque Bow is surprisingly good against enemies behind cover. It’s fatal to targets if you stick the shot. As long as you aim carefully, you can nail exposed regions and reliably kill the target.
Hammer of Dawn
Weapon Statistics
|
Special Weapon Notes |
|
Must spot target area for several seconds before the satellite fires. |
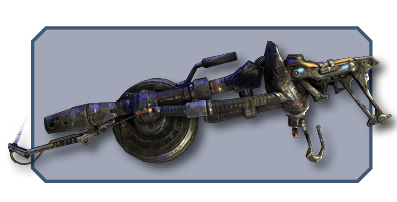
Description: Strictly speaking, the mighty Hammer of Dawn is not an actual weapon, at least not the part that you carry. It’s a targeting device for the orbiting COG military satellite system. As the damage rains down, you can guide the devastating bombardment by moving the target painter along the ground.
The Hammer of Dawn’s only real downsides are that you gain access to it very late in the campaign, and it requires open sky to use. Otherwise, fried Locust!
Close Range: This isn’t a great close-range weapon. You have to paint the target for a few moments before the devastation commences. Plus, the resulting blast wave can be dangerous!
Medium Range: The Hammer of Dawn is a superb medium-range weapon. Locust at this range are easy prey.
Long Range: It’s just as good at long range as it is at medium distance. If you can see it and sight it, then you can kill it.
Cover: The Hammer of Dawn is fantastic against enemies behind cover. The roving wave of destruction can easily incinerate targets behind objects. But again, you must have open sky to use it.
Scorcher
Weapon Statistics
| Clip Size | 50 |
|---|---|
| Max Ammo | 300 |
| Rate of Fire | 850/m |
| Reload Time | 2.5 |
Damage Statistics (Player),Short/Medium/Long
|
Casual Damage |
Casual Melee |
|
1400/1400/840 |
1680 |
|
Normal Damage |
Normal Melee |
|
980/980/588 |
1176 |
|
Hardcore/Insane Damage |
Hardcore/Insane Melee |
|
700/700/420 |
840 |
Damage Statistics (AI)
|
Casual Damage |
Casual Melee |
|
700/700/420 |
840 |
|
Perfect Active Reload Bonus |
Special Weapon Notes |
|
20% distance bonus. |
None. |
Description: A short-range weapon, the Scorcher is a nasty flamethrower, ideal for incinerating the Locust up close and personal. The Scorcher’s jet of flame is extremely easy to aim as you walk around, but it is range-limited—past a certain distance, you simply can’t hurt anything.
Perfect reloads with the Scorcher are important, as they extend the flames’ range, letting you toast targets just a bit farther away.
Close Range: The Scorcher is superb for clumped packs of enemies. The continuous flame jet is ideal for pumping out continual damage on an entire group without pauses—unlike the Shotgun.
On the downside, you must get close to deliver this damage. Using it from cover is less impressive, though you can very easily blindfire it around corners or over low cover.
Medium Range: Past a certain point, the Scorcher can’t even reach a target, but it is fairly effective at a close-medium distance, depending on the enemy composition and terrain. Wretches are prime flame bait, while massed Snipers and Torque Bow-wielding Locust are somewhat less so.
Long Range: The Scorcher is no good at long range; it simply can’t reach that far!
Cover: For hitting enemies behind cover, the Scorcher is decent. The weapon’s flames do not ‘flow over’ the front of cover, but you can hit any exposed portion of an enemy in cover. This is pretty easy to do, given the giant cone of flame you can project.
Of course, this necessitates closing on a covered enemy with a relatively short-ranged weapon. Be mindful of enemies to your flanks if you advance in the open to use the Scorcher in this fashion.