
Disgaea D2: A Brighter Darkness Guide Walkthrough Finale: The Eternal Netherworld
Finale: The Eternal Netherworld
Defeating Barbara gets her to join your party for the duration of the last Episode. She joins up at level 50, with a Ziegfried, a Duralumin Shield, a General’s Helm, and a Robe of the Magi. Her presence in the castle also unlocks the Armor Knight class for character creation if it wasn’t already available.
Barbara is slow, but has a high Counter rate and comes with a broad assortment of Sword, Axe, and Spear skills. You can use her as an effective meat shield or, if you give her a couple of Movement-boosting accessories, as a front-line damage dealer.
The Cheat Shop’s minimum multiplier drops to 0% in this episode, and its maximum becomes 150%. You can find two of this Episode’s treasure chests on Laharl’s throne and in his bedroom. The third is perched on top of the fence near Meaver, and you’ll have to pass the Double Jump bill in the Dark Assembly in order to reach it.
Ever Shifting Lands
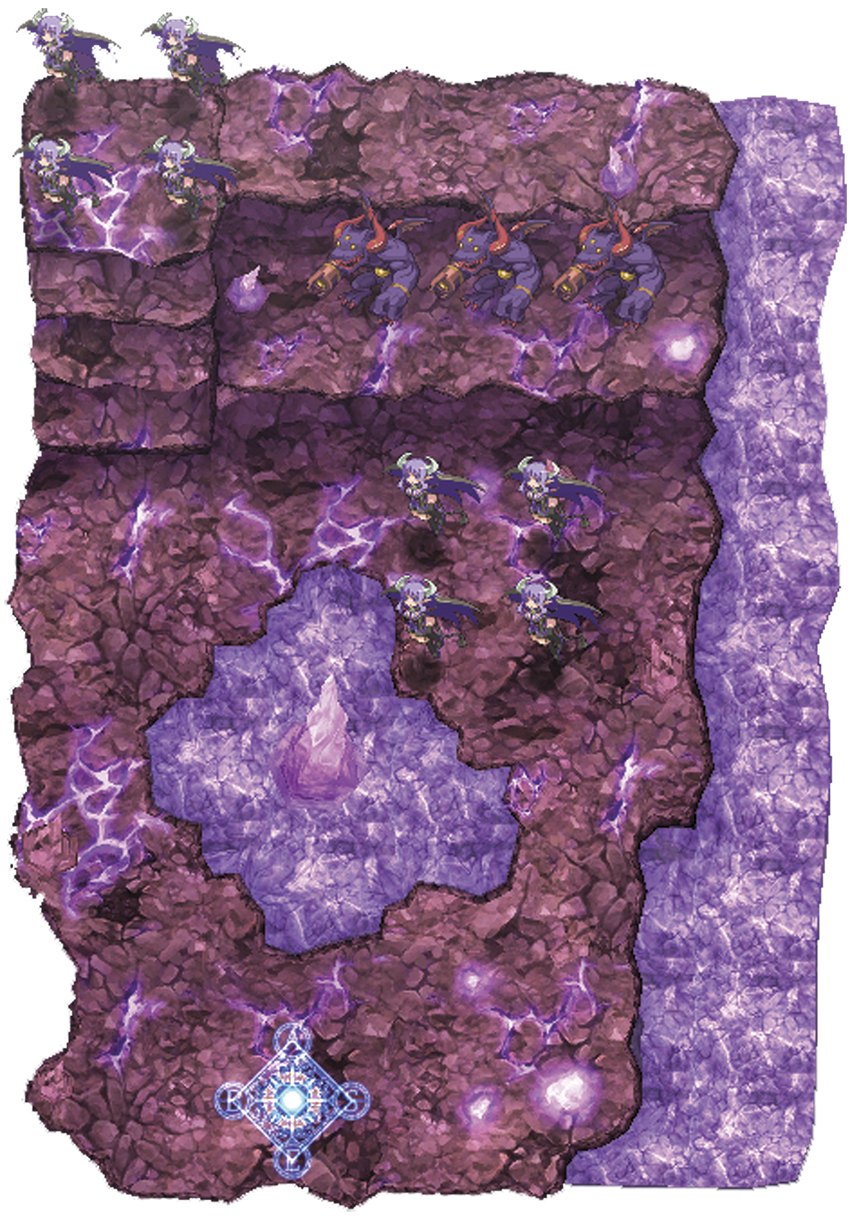
| Class | Lv | Qty | Evility | Weapon | Armor | Skills |
|---|---|---|---|---|---|---|
| Carmilla | 54 | 8 | Punishment | Dark Emblem | Robe of the Magi | Diving Heart, Pink Illusion, Judgment Rendezvous, Fire, Mega Fire, Giga Fire, Heal, Mega Heal, Giga Heal, Charm |
| Verchiel | 60 | 3 | Power Shot | Wyvern Wing | Metal Jacket, Falcon Shoes | Ignition, Bastard Black, Space Galaxy Kick |
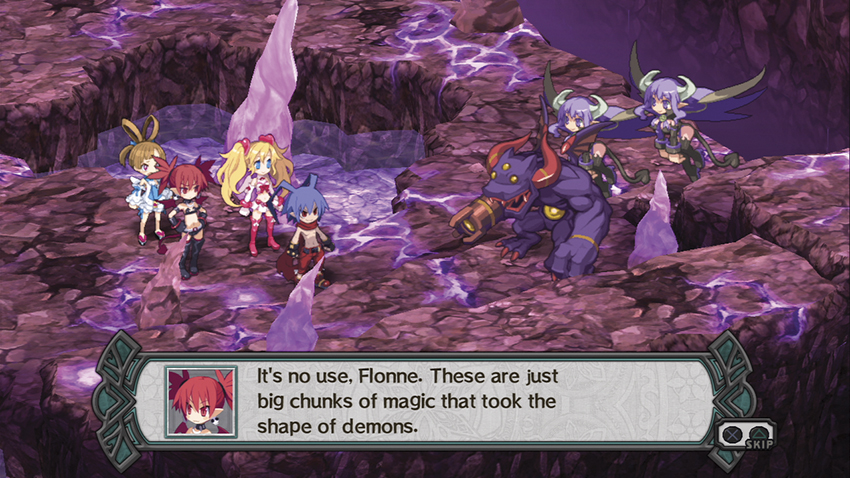
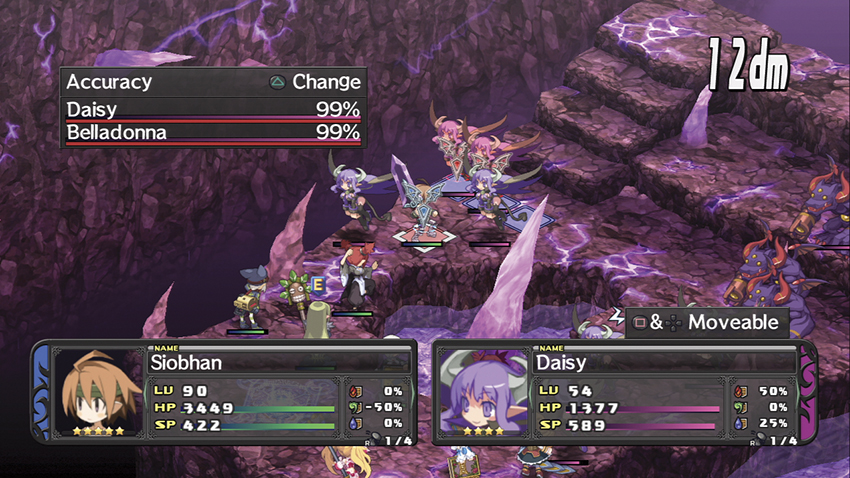
The eight Succubi all have the Punishment Evility, so don’t field male units against them. You should also avoid stationing your characters right next to each other, since the Succubi are just far enough away that you won’t be able to make much of a dent in them before they start throwing Fire spells at your front line. They’re glass cannons once you get hold of them, but they’re still cannons.
Speaking of which, the Rifle Demons all have the Power Shot Evility and will destroy any lightly armored characters they can reach. You’ll want to watch your positioning.
Map Events
- Station Etna next to Sicily.
- Station Etna next to Flonne.
- Station Laharl next to Sicily.
Ruthless Cave
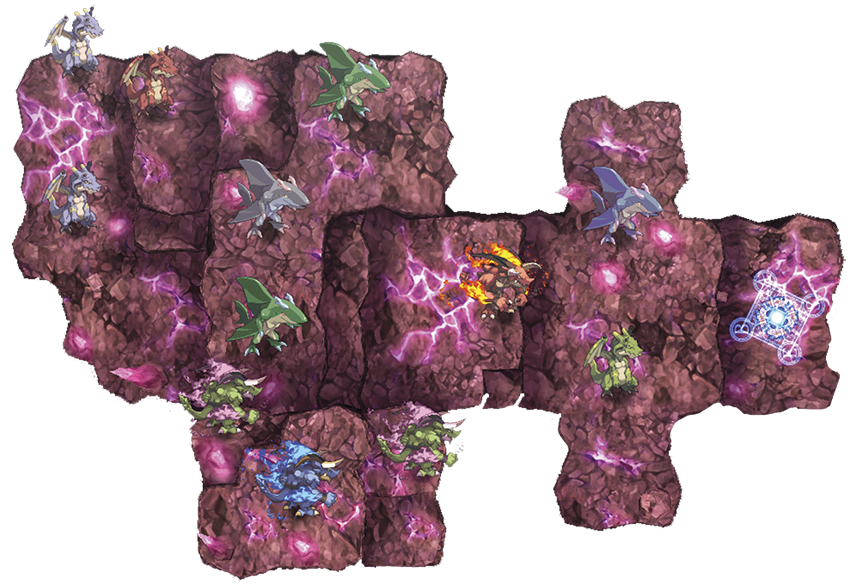
| Class | Lv | Qty | Evility | Weapon | Armor | Skills | Note |
|---|---|---|---|---|---|---|---|
| Nidhogg | 58 | 4 | Green: Wind Dominance, Orange: Wind Depression, Aqua: Air Charge | Demon Claw | Metal Jacket, Falcon Shoes | Dragon Hornet, Way of Dragon, Sky High Dragoon | The foremost Nidhogg isn't wearing Falcon Shoes. |
| Ifrit | 58 | 4 | Red: Fire Dominance, Blue: Heat Depression, Green: Flame Charge | Demon Claw | Metal Jacket, Falcon Shoes | Burning Grapple, Hydro Drake, Fire Moon Drop Shot | The foremost Ifrit isn't wearing Falcon Shoes. |
| Sea Dragon | 58 | 4 | Blue: Water Dominance, Green: Aqua Depression, Green: Cold Charge | Demon Claw | Metal Jacket, Falcon Shoes | Shark Slider, Lorenzini, Shark Whirlpool, Jaws Wave Rider | The foremost Sea Dragon isn't wearing Falcon Shoes. |
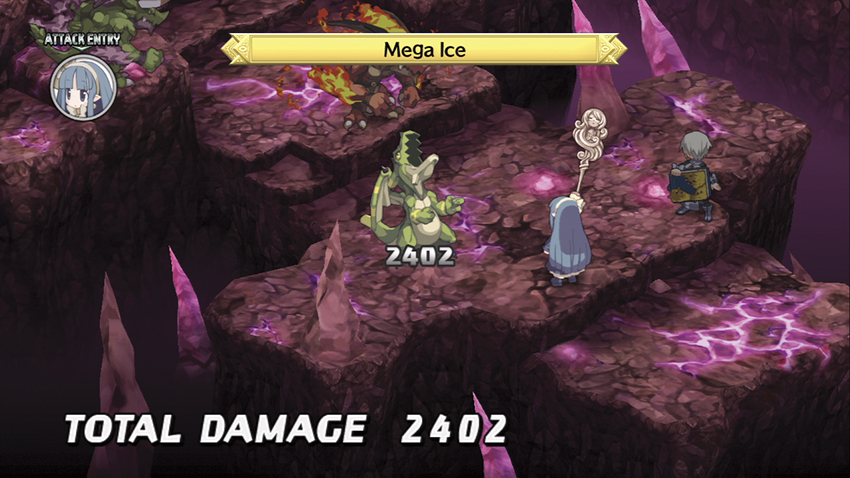
If you’ve got a well-equipped Magic Knight and/or a couple of offensive spellcasters that have been leveling up their spells as you go, this stage should be a cakewalk. The Nidhoggs all have a heavy Ice vulnerability, the Ifrits are weak against Wind attacks, and the Sea Dragons fry up nicely if you hit them with Fire.
Map Events
- Station Laharl next to Etna.
- Station Laharl next to Flonne.
- Make sure Etna’s in play at the start of your second turn.
Netherworld’s Crust
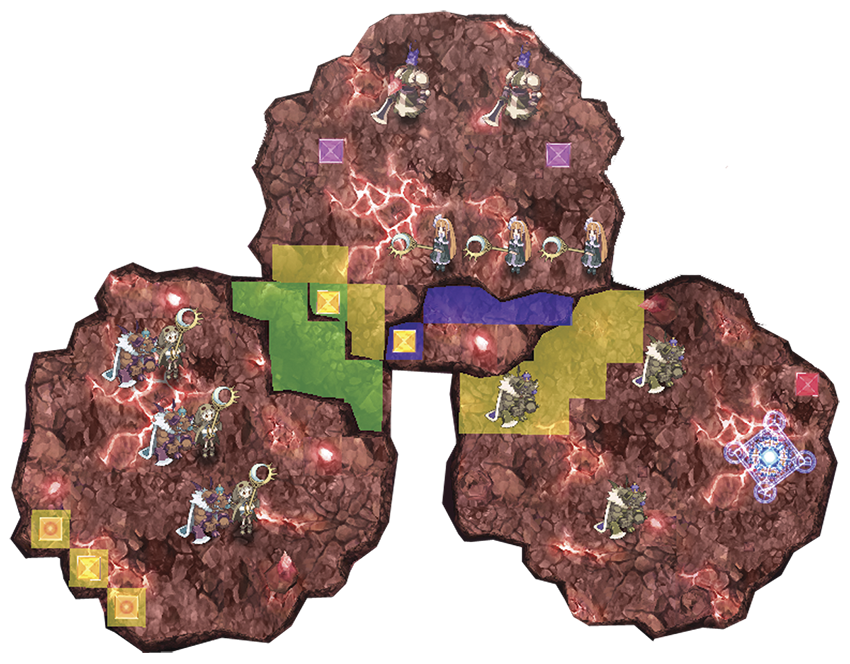
| Class | Lv | Qty | Evility | Weapon | Armor | Skills | Note |
|---|---|---|---|---|---|---|---|
| Humbaba | 58 | 3 | Boar Charge | Pegasus Hoof | Metal Jacket | Darkness Slash, Spinning Wind Blast, Twilight Bomber | - |
| Star Mage | 58 | 3 | Magic Moderation | Eclipse Wand | Robe of the Magi | Star, Mega Star, Giga Star, Omega Star | - |
| Avenger | 60 | 2 | Flames of Revenge | Pegasus Hoof | Metal Jacket | Lightning God Slash, Gigantic, X-Slash | |
| Star Skull | 58 | 3 | Magic Bundle | Eclipse Wand | Robe of the Magi | Star, Mega Star, Giga Star, Omega Star | Mount the Humbabas behind them on their first action. |
| Humbaba | 60 | 3 | Great Wall | Pegasus Hoof | Metal Jacket, Duralumin Shield | Darkness Slash, Spinning Wind Blast, Twilight Bomber | - |
| Geo Symbol | Geo Effect | Destroy | Note |
|---|---|---|---|
| Null #1 | Jumping Power +50% | Clear | - |
| Null #2 | Jumping Power +50% | Clear | - |
| Yellow #1 | No Entry | Yellow Change | - |
| Yellow #2 | No Entry | Yellow Change | - |
| Purple | Jumping Power +50% | Purple Change | - |
| Red | Ally Damage 20% | Red Change | - |
| Null #3 | Jumping Power +50% | Clear | - |
| Purple #2 | Jumping Power +50% | Purple Change | - |
| Yellow #3 | Movement +1 | Yellow Change | - |
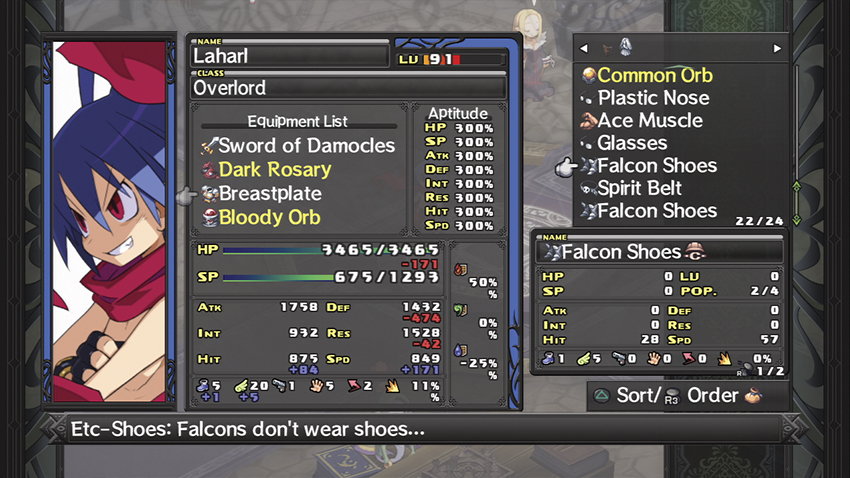
You’ll want to prepare for this stage ahead of time. Acquire and equip items that raise a character’s RES and Jump rating, such as Angel Shoes. If you don’t have the cash or you’re saving up for something, you can farm Robes of the Magi and Falcon Shoes by rerunning Netherworld Maw and Ruthless Cave to steal equipment from the enemies there.
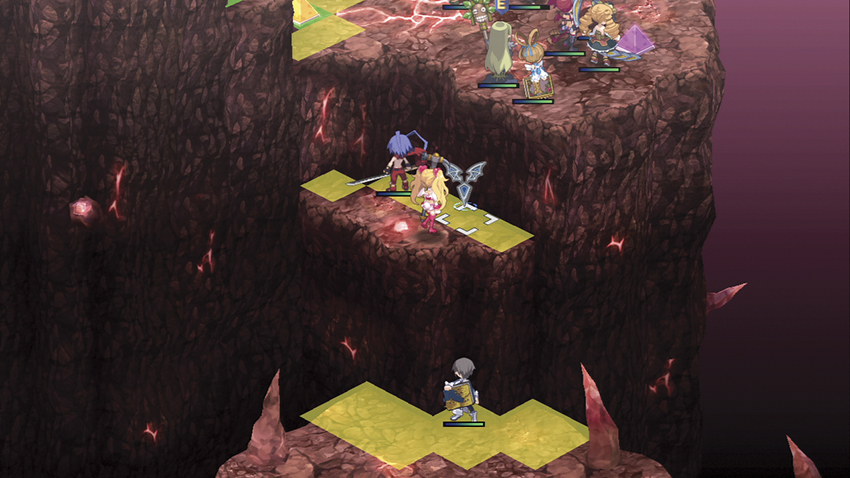
This stage has three separate landings, and each is made accessible by the Jump Height +100% Effect on the Geo Panels at the base of each cliff. The Geo Effect only kicks in for characters who begin their turn on the Geo Panel, however, so you’ll have to go to a Panel and wait for a turn before you can jump up to the next level. Even with a +100% bonus, though, a character will need a Jump stat of 25 or better to climb the first cliff.
Dispatch the trio of Beasts near your starting point, then take a couple of turns to position your active units at the base of the cliff. Send one up to disable the No Entry Symbol, then use two or three others to disable the Star Mages that are waiting above you. If you’ve got anyone within their range on the next enemy turn, they’ll bombard that unit with Mega Star spells and probably kill it. It’s easier if you take them out preemptively, then deal with the two Avengers behind them.
By throwing the two purple Geo Symbols onto the yellow Panels, you add an extra 100% to the Jump bonus from the Geo Panels. This lets you use any characters you want for the rest of the map, but whoever it is should have a high RES score. The three Humbabas on the final platform have the Great Wall Evility, which makes them damage sponges, and while you’re grinding them down, the Star Skulls riding on their backs are trying to disintegrate you. Anyone without decent magic resistance is going to end up sucking dirt.
Map Events
- Deploy Sicily.
- Have Laharl attack any enemy unit.
- Have Flonne on the field at the start of your second turn.
Zygote of Pain
| Class | Lv | Qty | Evility | Weapon | Armor | Skills |
|---|---|---|---|---|---|---|
| Satana | 62 | 7 | Blue: Heat Depression; Red: Fire Dominance | Demon Claw | Happy Cape | Burning Grapple, Hydro Drake, Fire Moon Drop Shot |
| Marid | 60 | 3 | Flame Charge | Wyvern Wing | Nine Tail, Falcon Shoes, Plastic Nose | Burning Grapple, Hydro Drake, Fire Moon Drop Shot |
| Tezcatlipoca | 50 | 4 | Mind Reaper | Madness Emblem | Metal Jacket | Shadow Nail, Circle of Death, Death March, Fire, Mega Fire, Giga Fire, Ice, Mega Ice, Giga Ice, Omega Ice |
| Mrtyu | 60 | 2 | Soul Reaper | Madness Emblem | Metal Jacket | Shadow Nail, Circle of Death, Death March, Fire, Mega Fire, Giga Fire, Ice, Mega Ice, Giga Ice, Omega Ice |
| Wraith | 55 | 2 | Mind Break | Dark Knight Emblem | Happy Cape | Ignis Fatuus, Micro Bomber, Dimension Eater X, Fire, Mega Fire, Giga Fire, Omega Fire |
| Geo Symbol | Geo Effect | Destroy | Note |
|---|---|---|---|
| Purple #1 | No Entry | Purple Change | - |
| Purple #2 | No Lifting | Purple Change | - |
| Null | Mighty Enemy | Clear | - |
| Aqua #1 | Fire Element +50% | Aqua Change | - |
| Aqua #2 | DEF +50% | Aqua Change | - |
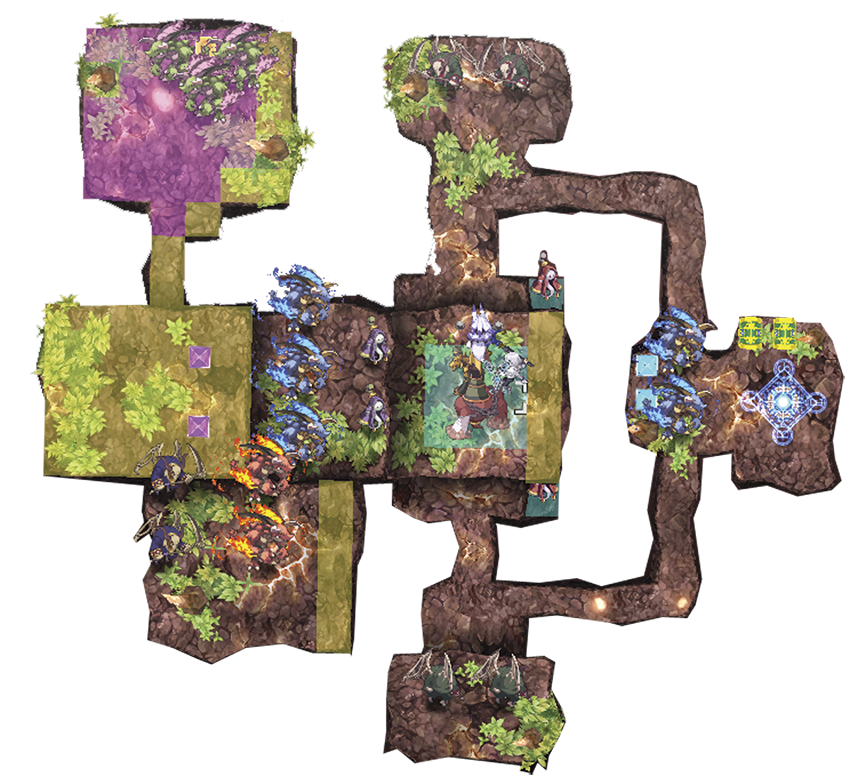
The pain in question is mostly being felt by Grosso, Garungun, Rainier, and Virunga, who have stationed themselves on the platform ahead of you to hold the line. While you’re fighting a couple of Ifrits and Wraiths, they’re in a pitched battle with a massive crowd of monsters.
The good news is that everything they’re fighting is known for its indiscriminate usage of area-of-effect attacks. It is not at all uncommon for the enemy to inflict more casualties on themselves than on the Krichevskoy Group because of the use of skills like Hydro Drake and Giga Ice. The bad news is that due to the sheer number of enemies attacking them, it’s likely that Rainier will drop within the first couple of turns and Virunga won’t be too far behind her. Grosso and Garungun, on the other hand, can take a lot more punishment.
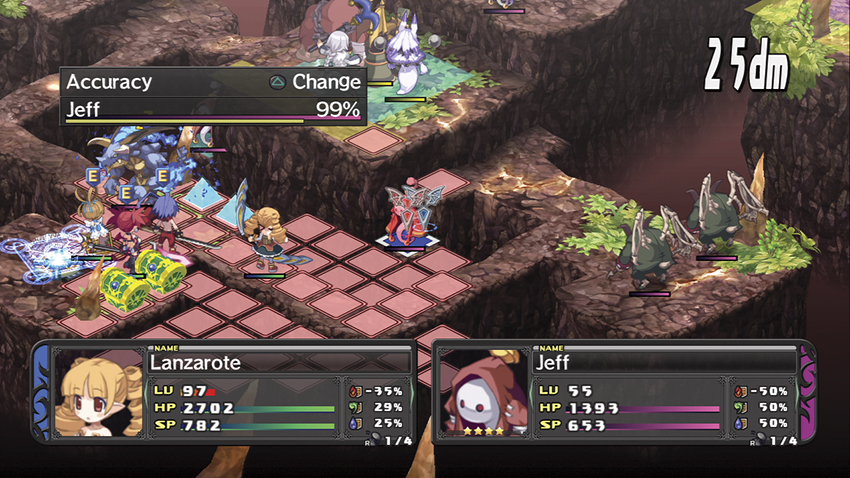
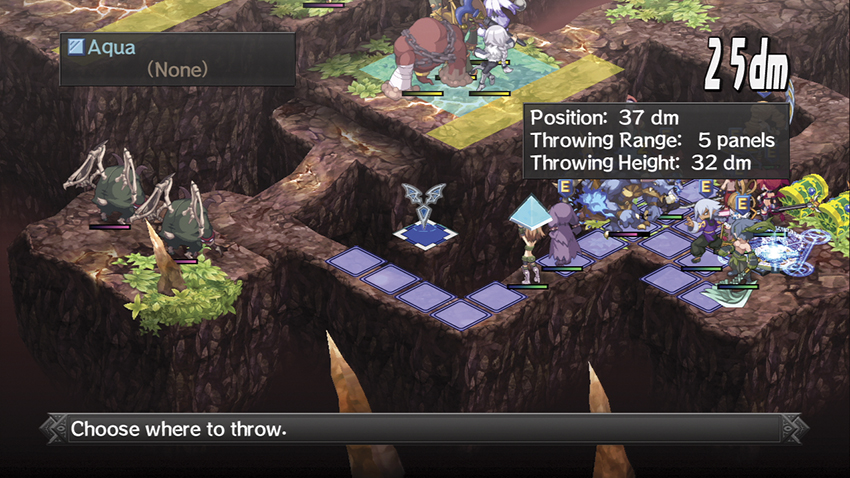
You can support Grosso and friends by quickly dispatching the two Wraiths near your starting point and throwing the two aqua Geo Symbols over to the Panels where they were standing. The DEF +50% bonus doesn’t do a lot of good, since most of the damage they’ll be taking is magical, but the Fire Element +50% Effect gives the NPCs an additional layer of protection against the Ifrits’ attacks. You can further help them out by not opening the two treasure chests by your base panel, as they’re offering the Krichevskoy Group a 10% stat boost through Rainier’s Evility. In fact, if you’ve got a Thief with the Treasure Sensor Evility, you can feed her a couple of kills early on—most likely the two Wraiths by the base panel—to further buff the Krichevskoy Group.
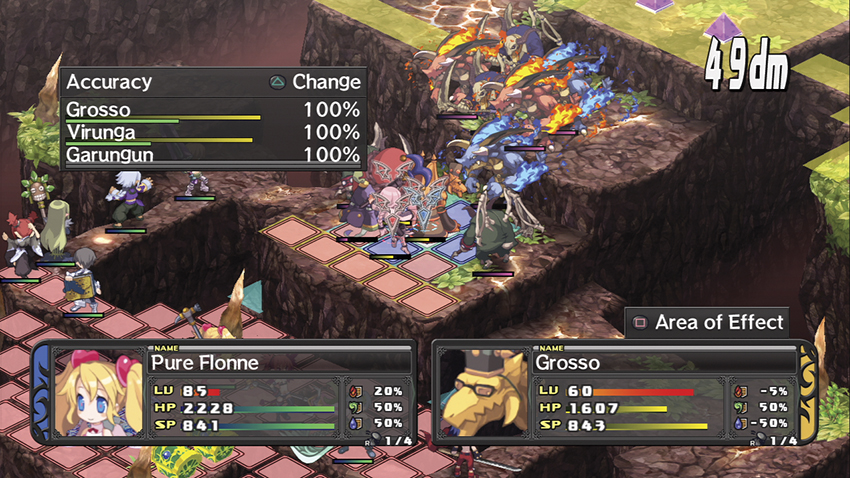
The Krichevskoy Group’s survival doesn’t have any bearing on the rest of the game, either positively or negatively, but the longer the enemies on this map are fighting them, the better off you’ll be. Otherwise you have to deal with a lot of incoming magic damage all at once, which is difficult to survive. By now, your designated healers should have more than enough range on their spells that at least one of them should be able to stand at the edge of the chasm by the base panel and throw Heal spells on the Group. Rainier’s almost impossible to save, but Grosso and Garungun are easier to keep alive.
After you’ve dealt with everything outside the No Entry Panels, use a ranged attack to destroy the two purple Geo Symbols. This lets you reach the last three enemies on the map, but has the unfortunate side effect of flipping the purple Geo Panels over to a Mighty Enemy Effect. At this point, set up a defensive line on the aqua Geo Panels near the surviving members of the Krichevskoy Group and kill the last few Ifrits as they charge out of the Mighty Enemy zone. Be sure to break open those treasure chests at some point, though, as they contain two random items of legendary quality.
The chests, as well as the Krichevskoy Group, are absent if you try to rerun this stage, and the monsters have been rearranged slightly. This makes the stage much more difficult the second time around because without Grosso and his crew there to run interference, you’ll be under heavy assault from the Wraiths as soon as they get a turn. This is another one of those maps where it’s handy to not deploy your entire team on the first turn; you’ll end up taking much less damage if you have one or two characters hang around by the base panel until the monsters above you split up and start running along the side paths.
Map Events
- Station Flonne next to Laharl.
- Station Flonne next to Sicily.
- Station Flonne next to Etna.
Netherworld’s Guts
| Class | Lv | Qty | Evility | Weapon | Armor | Skills |
|---|---|---|---|---|---|---|
| Dark Elder | 50 | 3 | Ominous Dance | Sorcerer Rod | Nine Tail | Star, Mega Star, Enfeeble, Armor Break, Mind Break, Resist Break, Blind, Slow, Poison, Slumber, Stun, Blank Out, Charm |
| Avenger | 63 | 3 | Patience | Demon Claw | Nine Tail, Duralumin Shield | Lightning God Slash, Gigantic, X-Slash |
| Avenger | 65 | 3 | Combat High | Demon Claw | Nine Tail, Duralumin Shield | Lightning God Slash, Gigantic, X-Slash |
| Xenolith | 70 | 1 | The Artifact: Deals damage equal to 20% of max HP to attackers of this unit. | Joyeuse | Angel Shield, Royal Orb, Royal Ring | Dark Phenomenon, Chaos Divider, Blade Rush, Hurricane Slash, Nether Slash, Musou Slash, Dark Night Slash, Star, Mega Star |
| Geo Symbol | Geo Effect | Destroy |
|---|---|---|
| Null #1 | Ally Damage 50% | Clear |
| Null #2 | No Lifting | Clear |
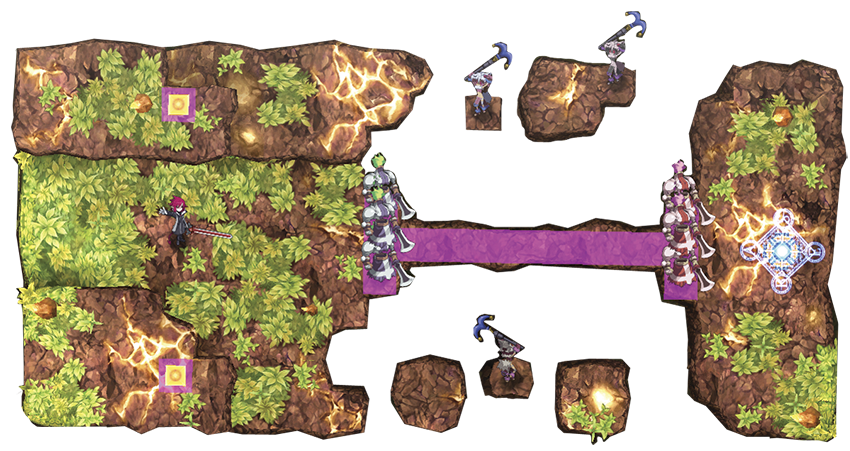
The central path to Xenolith is a death trap. Between the Avengers and their use of the Gigantic skill, the Dark Elders throwing Mega Star spells at you from either side, and the Geo Effects, it’s unlikely that any character can survive the trip across the bridge.
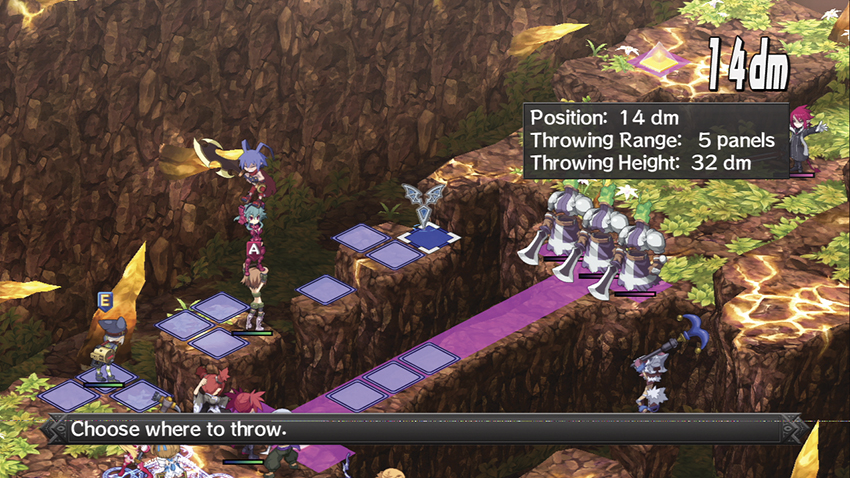
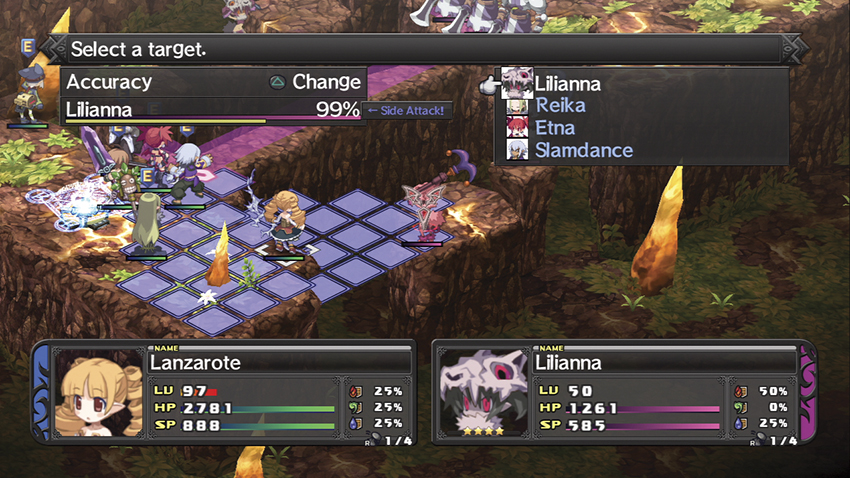
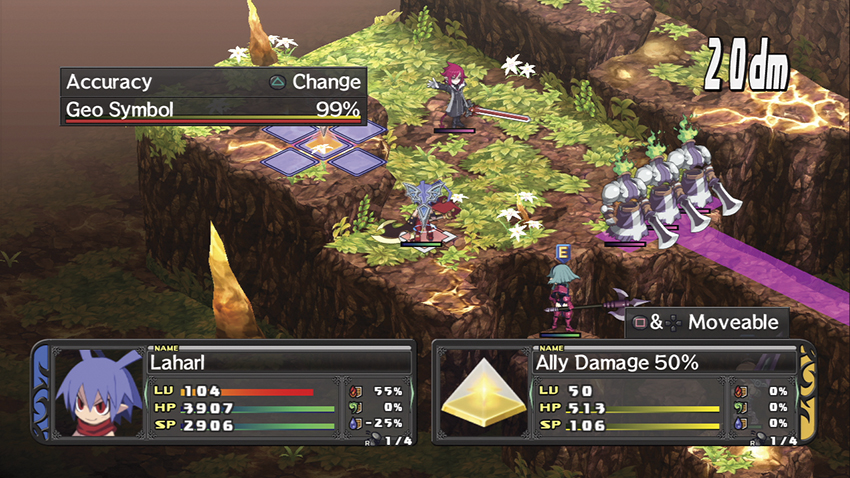
An Archer with the Sniping Evility or Meteor Arrow Kick, or a unit with a Gun who knows Dark Matter Ether can take out the two closest Dark Elders early on. While you leave a few people behind to disable the first rank of Avengers, use four characters to tower-throw someone across the islands and destroy one of the Null Symbols on the far side, near Xenolith. This drops the Geo Panels on the central path and lets you bring your full roster in for a final confrontation. Zap the third Dark Elder on the way there.
Xenolith has a tricky Evility. The Artifact causes any character that attacks him to take 20% of his or her maximum HP in damage immediately after the attack resolves. Interestingly, Etna is immune to this effect and can beat on Xenolith all day with relative impunity. Have her lead the charge.
On future visits, the Avengers and Dark Elders are still here, but Xenolith isn’t.
Map Events
- Attack Xenolith with Laharl.
- Xenolith attacks Laharl.
- Attack Xenolith with Etna.
Final Battle
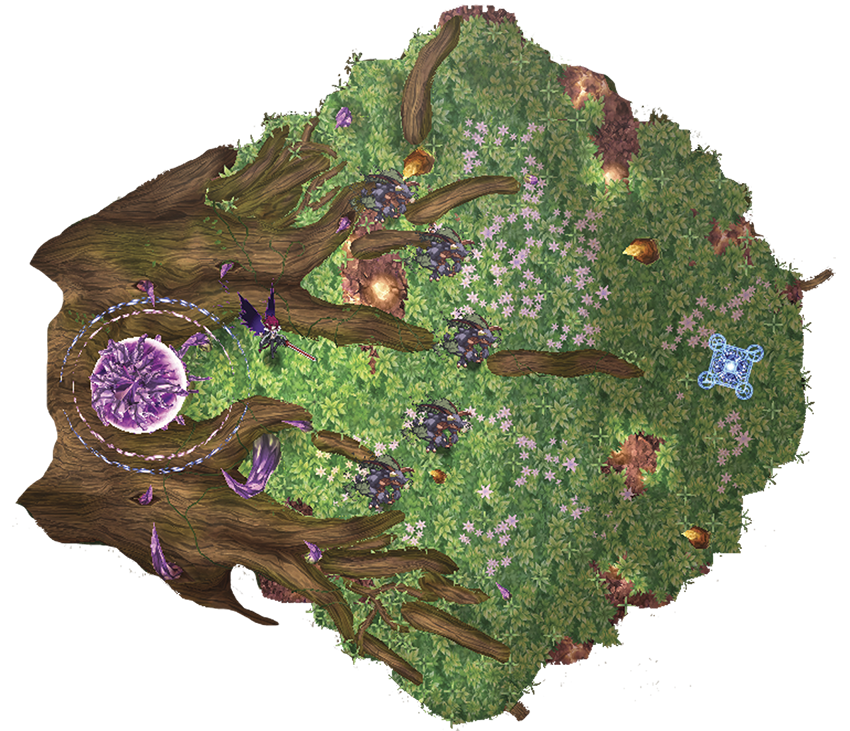
| Class | Lv | Qty | Evility | Weapon | Armor | Skills | Note |
|---|---|---|---|---|---|---|---|
| Flamberg | 65 | 5 | Heat Depression | Spider's Curse | General's Helm, Falcon Shoes | - | - |
| Xenolith (Final) | 80 | 1 | Artifact Gone Wild: for all units within 10 panels, absorb stats by 3% per panel moved closer. | Geo Blade | Angel Shield, Royal Orb, Royal Ring | Dimension Chaos | - |
Before you even start this fight, ensure that your characters are all around level 80, if not higher, and using weapons and armor that you’ve leveled in the Item World. This is yet another stage that represents a sudden, sharp increase in difficulty and there’s no such thing as overkill.
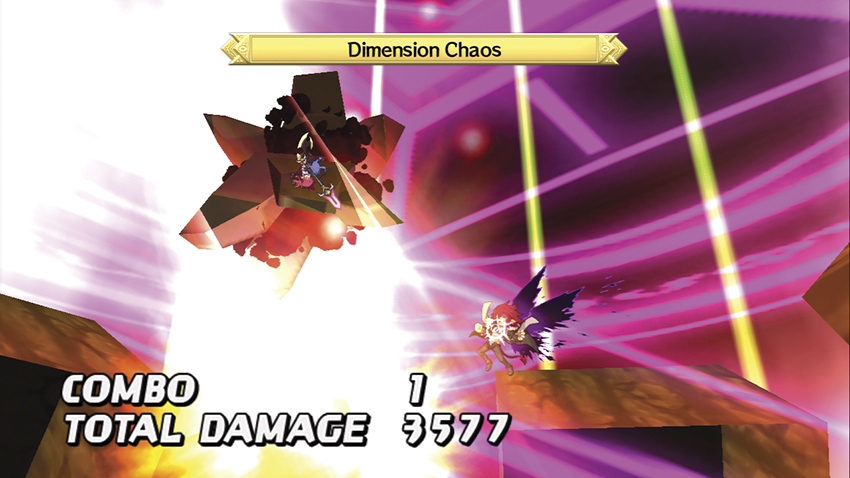
The five Ifrits charge straight at you on their first turn, but they’re there as a distraction from the main event and can be wiped out with Wind spells. The real fight is with Xenolith’s final form, which is a level 80 wrecking machine. He uses only one attack, Dimension Chaos, but it has a wide hit zone and does an immense amount of damage. Yes, Xenolith’s a one-trick pony, but in his defense, it’s a really good trick.
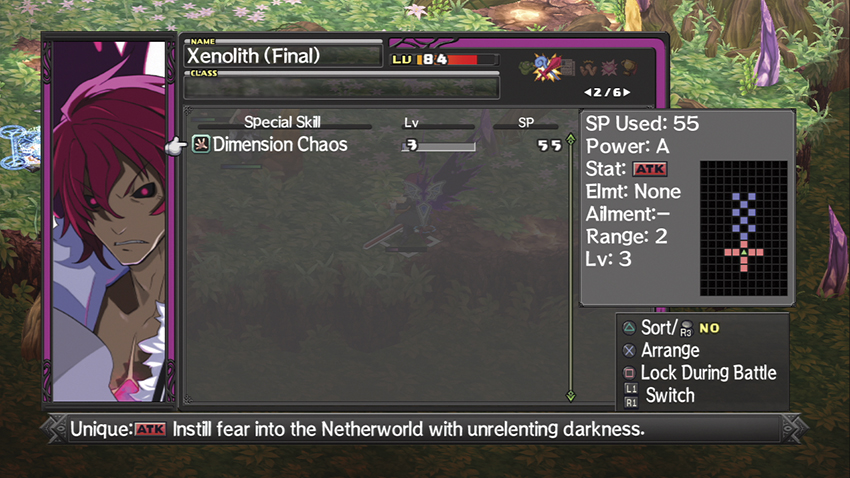
The general policy for boss fights in this game so far has been to group up around a target and level it with a Combo Attack delivered by as many characters as possible. Xenolith’s new Evility, Artifact Gone Wild, gives him a stat boost that’s based upon how many of your characters are near him and how far they’ve had to travel to get there. If you try to combo him to death, he’ll absorb a disappointingly small amount of damage due to his increased DEF and RES from his Evility, then take a few steps away and blow up several units at once with Dimension Slash. Xenolith’s perfectly designed to thwart your usual tactics.
The best way to beat Xenolith, then, is one-on-one. Using Laharl or Etna is the most satisfying in terms of the larger narrative, but if you equip a Lady Samurai with a leveled-up Sword and a couple of pairs of Shoes to boost her movement rate, the Calm Waters or Duelist Evilities make her an excellent choice. If Xenolith has really annoyed you, spend some time in the Item World to upgrade the best Sword, Shoes, and assorted armor you can find, then grind the Lady Samurai up to level 100 or so and set her loose.
Xenolith will keep moving away from you on his turn and firing Dimension Slash from maximum range, so keep after him and make every hit count.
There’s no reason not to have a couple of other characters on the field, even if they’re not actively pursuing Xenolith. An Armor Knight with the Defender Evility can hang out by the base panel and Defend on every turn to absorb the damage from Dimension Slash. You can also use a Healer or Flonne to top off your duelist’s health, but you’ll want to do so from the farthest possible range to avoid triggering Xenolith’s Evility.
You cannot return to this stage after you’ve cleared it.
Map Events
- Laharl attacks Xenolith.
- Etna attacks Xenolith.
- Station Flonne next to Sicily.