
Disgaea D2: A Brighter Darkness Guide Essentials Laharl’s Castle
The Cheat Shop
Coward runs the Cheat Shop out of a stack of crates in the Castle’s courtyard, next to what used to be Flonne’s flower garden. As Coward is happy to tell you, being a demon means both never having to say you’re sorry and being very comfortable with breaking rules. Thus, the Cheat Shop lets you adjust many of the game’s parameters to your liking for free.
There are five tabs at the Cheat Shop. You can scroll through them with the L1 and R1 buttons and activate them at will. Once a given cheat has been unlocked, it can be used or ignored as you see fit; you do not have to pay Coward to activate or deactivate any of the Cheat Shop’s options. One of the ways in which the Cheat Shop is cheating is that it stays in business despite never actually selling any goods or services.
Any cheat that’s listed without a set of unlock conditions is available for your use from the start of the game. In fact, before you enter the first stage in Episode 1, Coward is the only businessman at the Castle who’s actually doing his job. He may be a cheater, but the man has a work ethic.
Obtain Rate
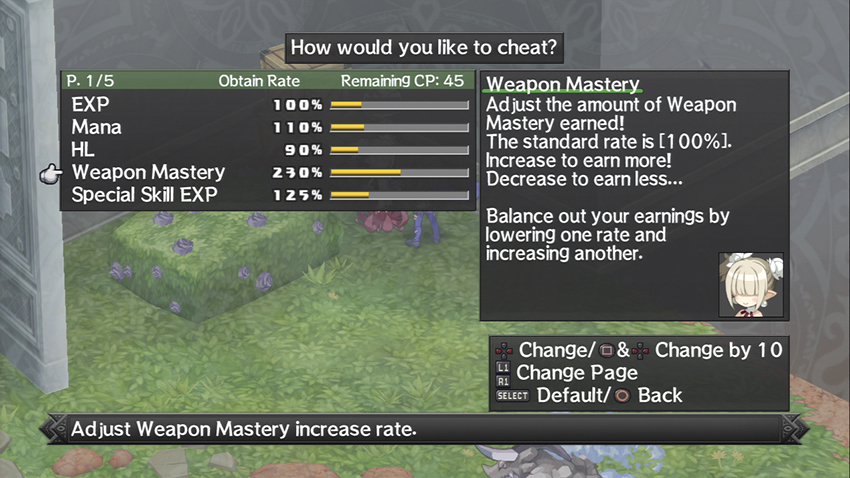
We’ve been talking about this for a few chapters now, and we’re finally here. The Obtain Rate menu consists of five sliders that allow you to adjust the rate at which your characters earn EXP, Mana, HL, Weapon Mastery experience, and Special Skill experience.
At the start of the game, you can only reduce any one of these options by 10% in order to improve another one by a maximum of 5%. Every time you clear an Episode in the main game, these limits improve slightly. After you beat the Final Episode and reach the Post-Game, you’ll be able to set your Obtain Rates to a minimum of 0% and a maximum of 200%.
By clearing stages in the Post-Game, you can earn free “Cheat Points,” or CP, which allow you to add points to a slider without taking them from somewhere else. By the end of the Post-Game, you’ll have 500 free CP to play with and you’ll be able to adjust your Obtain Rate to a maximum of 1,000%.
The best use for the Obtain Rate cheats is situational. When you have a specific goal in mind during the main story, such as gathering Mana or unlocking new Weapon Skills, swing by the Cheat Shop first to give yourself a leg up. Smart use of this feature will save you hours of grinding time.
Of the five sliders on the Obtain Rate menu, HL is the most “expendable.” This strictly affects the money earned by defeating enemies in battle and does not affect the money you get from Bonus rewards, treasure chests, or selling equipment to Rosen Queen. You’ll definitely feel the pinch over time if you leave your HL to 0% for too long, but of the five options here, it’s the easiest to work around.
Enemy Strength
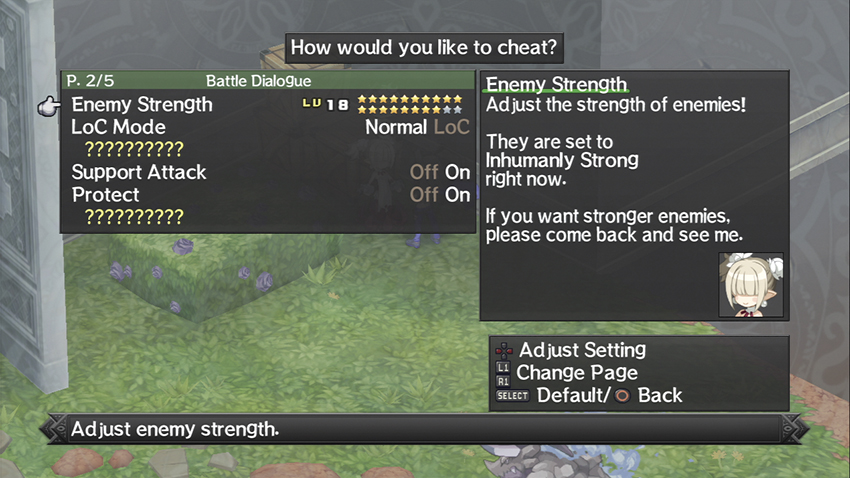
The options on this tab allow you to customize your enemies’ power level, as well as your ability to deal with them.
The first option on the Enemy Strength tab is what it’s named for. You can add stars to the Enemy Strength meter to add a stacking multiplier to the level of every enemy unit you encounter. This applies to every stage in the game, including story missions, the Item World, the Senators in the Dark Assembly, and neutral units such as Geo Symbols.
On your first run through the game, you’ll probably want to leave this alone. The amount by which each star of Enemy Strength increases an enemy’s level is multiplicative, so the higher its level was to start with, the higher its level will be after the Enemy Strength modifier kicks in. It’s very easy to accidentally turn what should be an easy stage into an instant deathtrap.
On the positive side, the Enemy Strength cheat means that a grind will never quite go out of style. Once you find a decent stage where you can settle in and earn a few easy levels, such as Ticket Booth in Episode 4, you can adjust the enemies’ power level on the fly to ensure that fighting them will remain worthwhile.
Note that the Enemy Strength cheat only applies new levels to enemy units and does not do anything else. An enemy unit has and will use any new spells or Skills that were made available by their higher level, but their job rank and equipment do not and will not change regardless of their adjusted strength. Enemy Strength also does not affect a stage’s Bonus Rank.
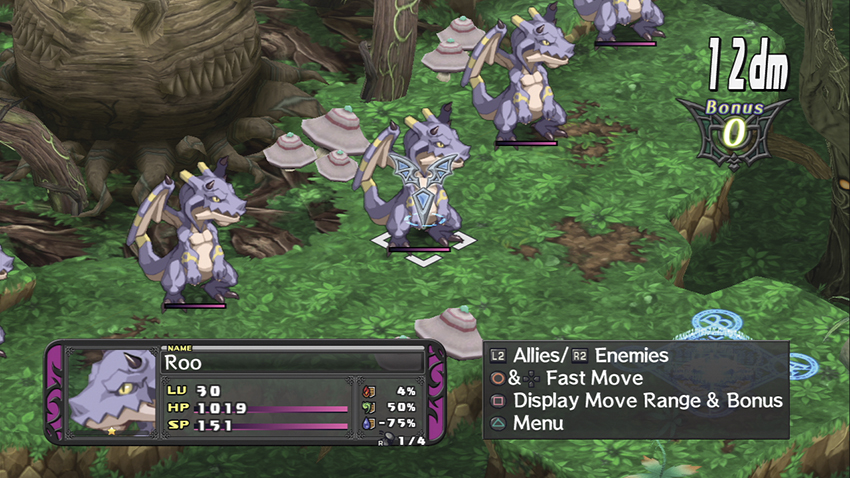
A normal enemy at level 30.
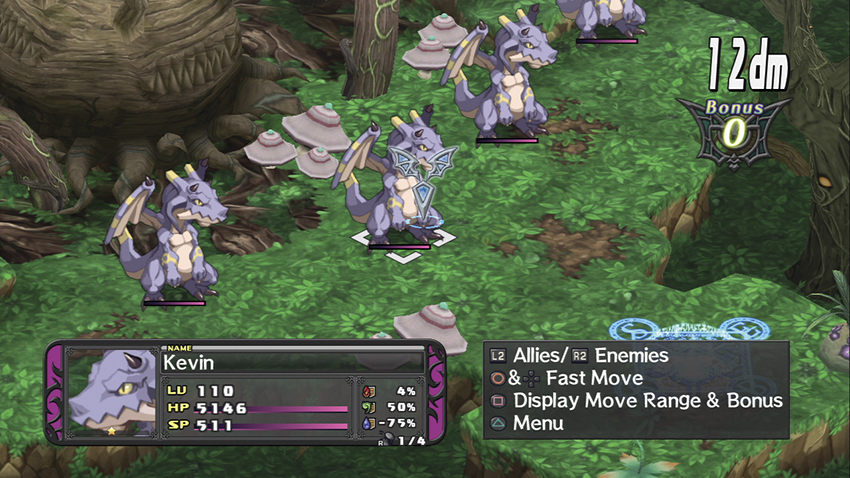
The same enemy with 10 levels of Enemy Strength.
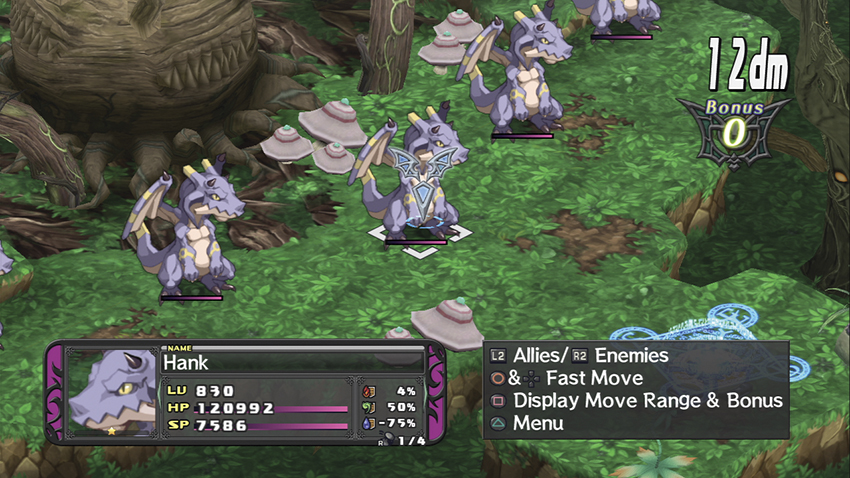
The same enemy in LoC Mode.
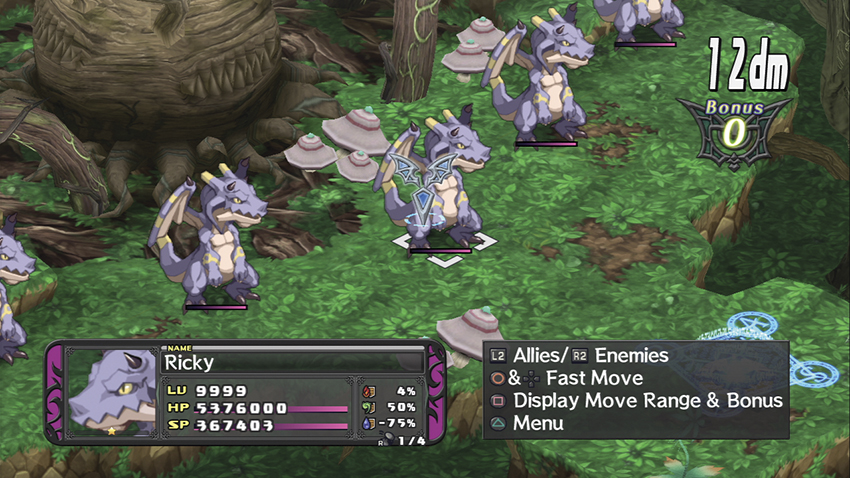
Finally, the same enemy with 20 levels of Enemy Strength in LoC Mode.
LoC Mode
Unlock Conditions: clear the Final Episode and see the true ending.
The acronym stands for Land of Carnage Mode, which you may remember from past Disgaea games. LoC Mode in D2 takes the form of an extra multiplier for the Enemy Strength cheat, which turns up its current value by 100, to a maximum of 2,100.
LoC Mode is, when you first unlock it, a toggle switch for a suicide mission. A big part of getting powerful enough to take on the biggest challenges in the Post-Game is building up your characters to the point where you can actually play with LoC Mode on. Once you can do that, there are a couple of advantages.
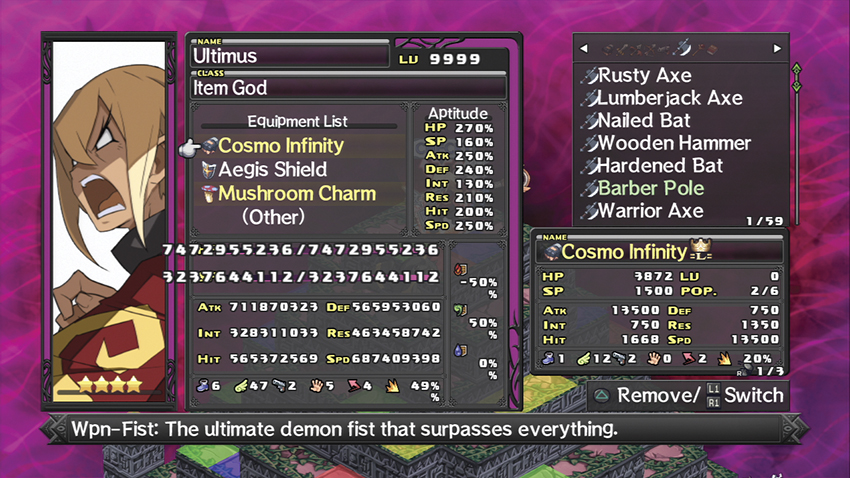
The first and simplest bonus you get in LoC Mode is being able to obtain the best equipment. On the 100th floor of the dungeon inside a legendary item, you’ll encounter an Item God. On LoC Mode, that God is almost certainly level 9,999, but is also equipped with at least one of the best weapons, accessories, and/or pieces of armor in the game.
The second bonus is simpler. In LoC Mode, anytime one of your characters strikes a killing blow against an enemy unit, they’ve got a good chance of permanently absorbing some of the dead enemy’s base stats. The amount drained varies, but tends to be roughly equal to about 0.1% of the victim’s stat pool, or 0.025% if their maximum HP gets drained.
This doesn’t sound like much, and in fact it isn’t much to start with. It adds up fast, however, and more importantly, drained stats persist through Reincarnation. Even better, as your characters approach the highest levels of power, you’ll start regularly fighting opponents that have such inflated statistics that “only” a 0.1% drain can still result in five to eight-digit stat gains. LoC Mode has a high barrier to entry, but once you’re there, the sky’s the limit.
Rasetsu Mode
Unlock Conditions: clear The Outside Ringer in the Post-Game.
Remember everything we said in Chapter 2 about stat and level caps? Forget it. With Rasetsu Mode on, the cap for HP/SP goes up to 400,000,000,000, and the cap for the six primary stats jumps to 999,999,999. This applies to both your characters and enemy units. In Rasetsu Mode, you can also level items up to 999 in the Item World.
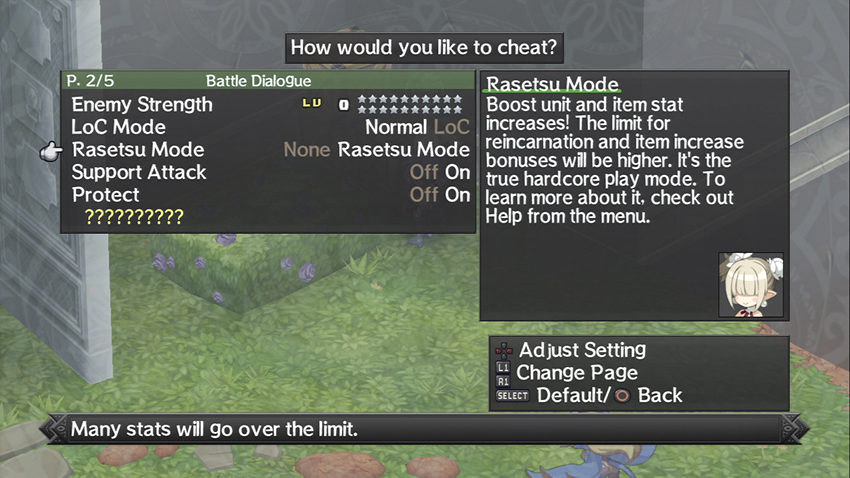
This is ridiculous, but is also necessary. There is a particular boss, an old Disgaea favorite, who only becomes available in Rasetsu Mode, and you’ll need everything you can scrape together to take him out.
Support Attack
With this cheat, your characters will never participate in Team-Up or Cover Attacks. You don’t get anything in exchange, however. This is only useful if you prefer a more old-school approach in which your characters aren’t quite so cooperative.
Protect
Toggle this on to prevent your characters from undertaking Protect Actions. If Protect Actions are doing more harm than good for you, feel free to use this cheat.
Battle Dialogue
Unlock Conditions: go back in time at least once.
Turn this toggle on to prevent any conversations that might occur on the battlefield. These are referred to in the walkthrough as Map Events, and seeing 100 of them unlocks the Battle of Words Trophy. On your second time through the game, you can use this cheat to opt out of them.
Item World
These cheats influence the Item World and have no effect anywhere else. Fittingly, they’re unlocked by visiting the Item World and clearing the random dungeons found there.
Search Route
Unlock Conditions: this is automatically awarded when you return from the Item World in Episode 3.
By default, your path through the Item World is on the Item Route, which is the default setting. With this Search Route cheat, you can switch it over to the Innocent Route, which gives you a chance to run into randomly generated bonus Innocents. There’s also a chance on the Innocent Route for an Innocent to increase in quality when you subdue it, providing a larger bonus than it otherwise would.
Geo Count
Unlock Conditions: Defeat the Item General on the 30th floor of an Item World dungeon.
You can use this cheat to tweak the incidence of Geo Panels and Geo Symbols in the Item World. By default, a few of both will appear on every floor of an Item World’s dungeon, but you can turn it up so that you encounter more of them or turn them off entirely. This is an issue of personal preference and won’t affect your performance or rewards in any real way, aside from making it slightly harder to fill the Bonus Meter.
Adjust Island
Unlock Conditions: Defeat the Item King on the 60th floor of an Item World dungeon.
On the default setting for the Item World, each floor is a small island with a few enemies keeping you away from the Mystery Anchor. This cheat lets you customize the Item World according to your preferences. You can create an Item World where each stage is large but mostly empty, allowing you to move to the Mystery Anchor mostly unimpeded, or turn each floor of the Item World’s dungeon into a floating island the size of a postage stamp that’s crowded with enemy units.
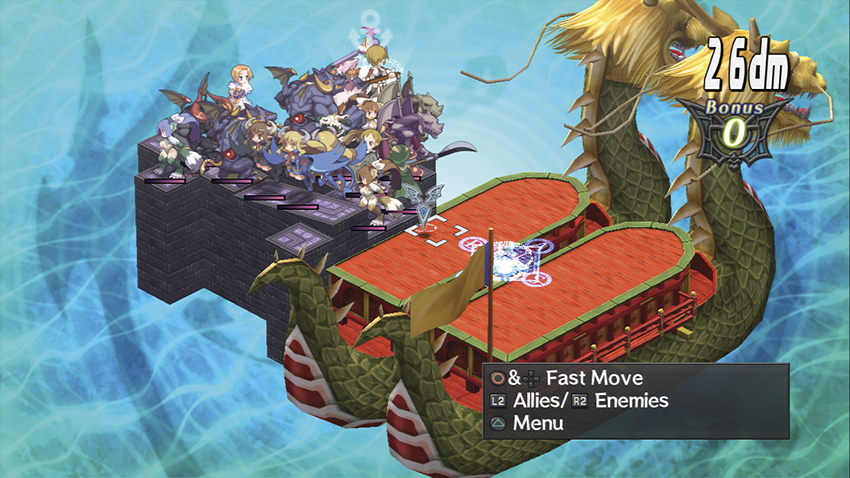
When we say “crowded,” we mean it.
Pirates & Treasure
Unlock Conditions: Defeat the Item God on the 100th floor of an Item World dungeon.
By default, Pirates are reasonably common in the Item World and treasure chests show up every so often as you explore each floor. You can either turn both off completely with this cheat, so neither will ever appear, or crank up the frequency with which they show up. With Pirates & Treasure on High, you’ll see multiple treasure chests on every floor of an Item World dungeon and you’re almost guaranteed to run into a band of Pirates every couple of floors.
Pirates are a group of hostile NPCs that are much tougher than the usual inhabitants of the Item World. Win against them and you can steal their Boat, but don’t be surprised if they’re several times your level.
Prinny
Prinnies toil in silence in the Netherworld and are mostly unappreciated, but turning on these options at the Cheat Shop will give you a little bit of insight into their lives. Specifically, it teaches you how brief they usually are.
Prinny Day Every Day
Unlock Conditions: clear Prinny Land 3.
With this toggle on, you can only deploy Prinnies on every map you enter, just as if you’d recently passed the Prinny Day bill. The Dark Assembly is closed for business due to the holiday and will remain so until you turn the cheat off.
The good news is that you’ll only get items from the Bonus Meter on Prinny Day, rather than HL or EXP, and you’ll have an improved chance of seeing rare and legendary equipment. The bad news is that it’s Prinny Day. You’ll want a full team of Prinnies, including at least one who knows healing magic, if you intend to get any real benefit out of Prinny Day.
Explosion Range
Unlock Conditions: clear Prinny Land X.
Whenever you throw a Prinny, a Bomb, or one of a Thief’s created Barrels with this cheat on, the explosion has double the usual range.
Everyone Is a Bomb
Unlock Conditions: clear Prinny Land X in LoC Mode.
With this cheat on, any unit or object that gets Thrown explodes on contact with the ground, just as Prinnies do. This instantly kills the unit in question and causes an explosion to travel several panels in a straight line away from the point of impact. The damage it does is both significant and irrelevant, because as the cheat’s name implies, everyone is a bomb. The explosion automatically makes them detonate too.
The only characters that are safe from your evil midnight bombing are those who are safely within the boundaries of a No Lifting Geo Effect ... although nothing is keeping you from Throwing something at them. You can Lift and Throw your way through most maps at this point without taking a scratch, although if you’re capable of unlocking this cheat in the first place, you’re probably pretty close to invincible anyway.
Fun
The name of the final tab at the Cheat Shop is clearly meant as irony. This tab on the Cheat Shop’s menu governs four ways in which you can deliberately handicap yourself, and a fifth that’s a slight quality-of-life increase. You know you’re in for good times when Coward himself has no idea what a cheat is supposed to accomplish.
Auto-Heal at Base
Unlock Conditions: clear the Final Episode and see the true ending.
When Auto-Heal is on, your entire roster is automatically revived and healed to full HP and SP upon returning to Laharl’s Castle. This is handy, but keep in mind that Auto-Heal keeps you from making progress toward earning the prizes at the Hospital. You’ll save money, but miss out on some nice gear.
EXP 0
Turn this cheat on to turn off your ability to gain EXP.
Weapon Mastery 0
With this cheat on, your characters cannot gain Weapon Mastery experience.
Special Skill 0
You might get the idea by now. Using Special Skills with this cheat on will not allow you to level them up.
No Cancel
With this cheat on, all decisions in combat are irrevocable. You can no longer cancel out of a planned action with the Circle button.