
Disgaea D2: A Brighter Darkness Guide Walkthrough Episode 7: The Truth About Angels
Episode 7: The Truth About Angels
This Episode’s vaguely hidden treasures can be found in Laharl’s bedroom, in the castle’s library, and on a hedge in the indoor garden. The Cheat Shop’s minimum multiplier has been lowered to 30%, and its maximum has been raised to 135%.
You can now pass the As Overlord, I Accept Any Challenge! Bill in the Dark Assembly for 500 Mana. This unlocks a Detour called Piglet’s Growth.
The Fool’s Ruins
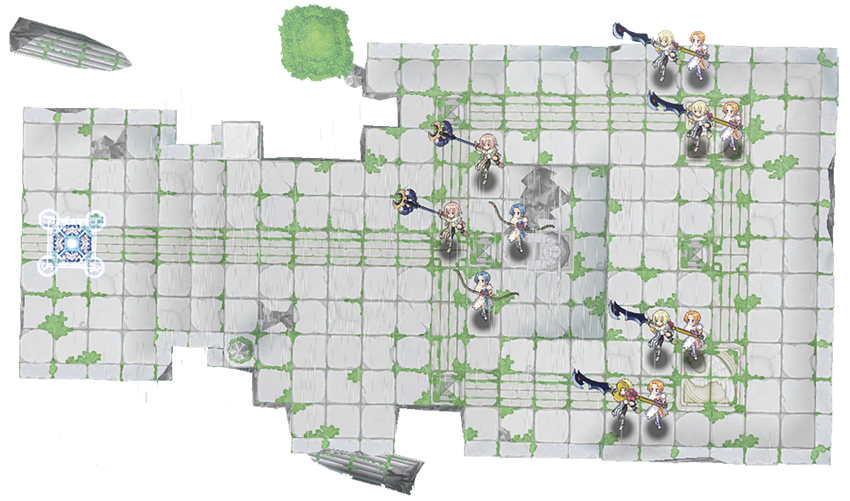
| Class | Lv | Qty | Evility | Weapon | Armor | Skills |
|---|---|---|---|---|---|---|
| Angel Page | 35 | 2 | Angel Majesty | Hungnir | Scalemail | Impaler Drop, Blade Bash, Spear Blow, Heal, Espoir |
| Angel | 35 | 2 | Angel Love | Jadeite Bow | Scalemail | Dark Spica, Bright Canopus, Meteor Arrow Kick, Heal, Espoir |
| Angel Page | 36 | 4 | Angel Song | Man Eater | Scalemail | Blade Rush, Hurricane Slash, Nether Slash, Musou Slash, Heal, Espoir |
| Angel | 36 | 4 | Angel Protection | Pretty Rod | Scalemail | Mega Fire, Giga Fire, Heal, Espoir |
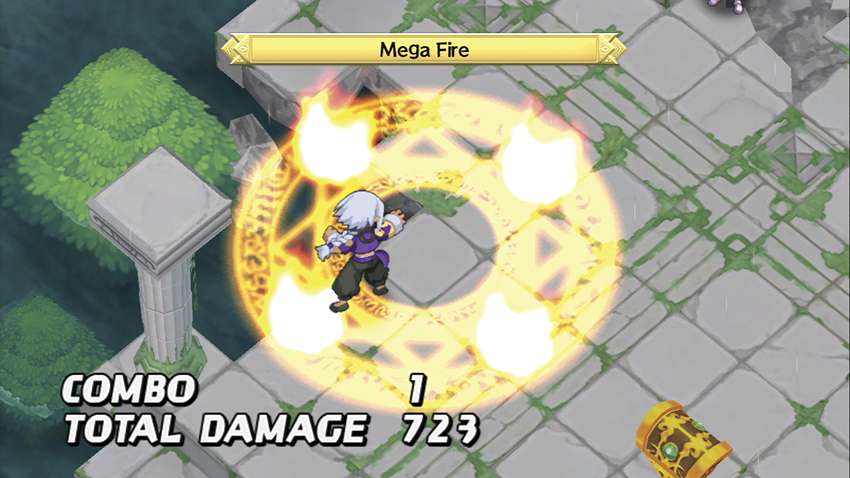
Get used to the idea of fighting angels. It’ll be raining feathers for most of the rest of this Episode.
This stage is an uncomplicated introduction to the concept. Enemy angels rush straight toward you at the start of their turn and group up to take advantage of their Evilities, which buff any units adjacent to them. Male angels buff outgoing damage, while female angels provide defensive bonuses, and those bonuses stack. As a result, they tend to move in tight formations.
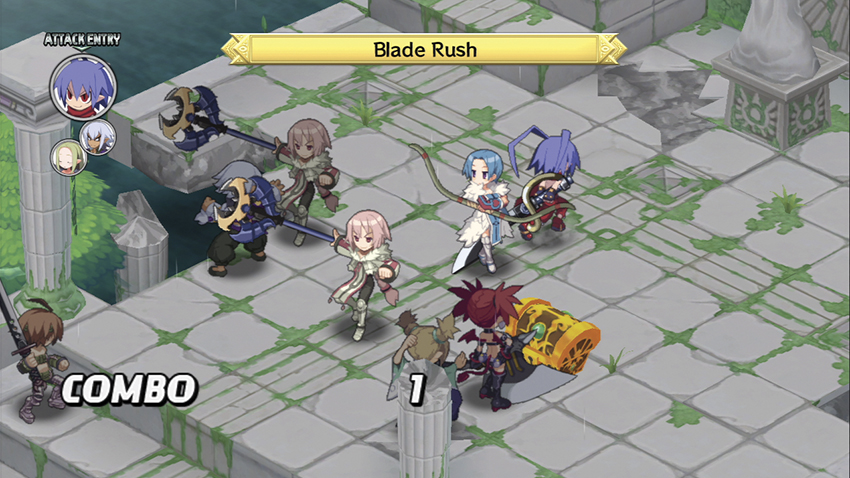
The angels on Fool’s Ruins are a gear check more than anything else. Once you get within range of an angel, there are probably six more right behind it and they’ll all keep attacking the same character until they’re out of actions or the character dies. Here, that means they’ll rain down Spear Blows, Musou Slashes, and Mega Fire on anyone they can reach, and since every single angel knows Heal and Espoir, they’ll proceed to put themselves back together.
It’s easy to see why Laharl hates these guys.
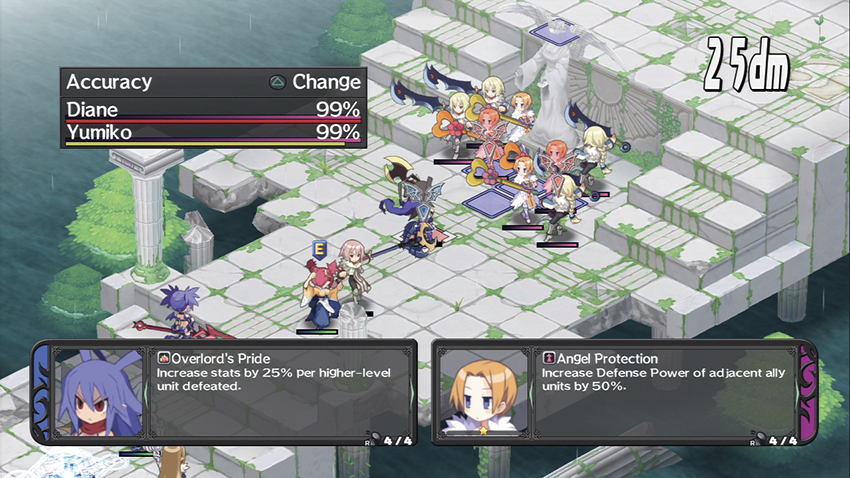
If your characters are around level 40 with decent weapons and armor, you should be able to get through this without too many casualties, but it’ll be a near thing. Use your first turn to cast Magic Wall and Shield spells on whoever you can reach, then burn the angels down one at a time. Like the Exorcists on Concert Stage in Episode 4, you’re better off with guaranteed kills than inflicting area-of-effect damage, as every single angel that dies weakens the whole of the enemy team.
You can use Fist skills like Triple Strike or Beast King offensively on this map to punt an angel out of range of its allies’ Evilities, thus softening it or its buddies up for the rest of your crew to finish the job.
Map Events
- Station Laharl next to Sicily.
- Station Etna next to Flonne.
- Have Laharl attack an enemy unit.
Evolving Scratches
| Class | Lv | Qty | Evility | Weapon | Armor | Skills |
|---|---|---|---|---|---|---|
| Angel Page | 36 | 8 | Angel Majesty | Jadeite Bow | Scalemail, Falcon Shoes | Dark Spica, Bright Canopus, Meteor Arrow Kick, Heal, Espoir |
| Angel Page | 37 | 2 | Angel Leadership | Hungnir | Scalemail, Falcon Shoes | Impaler Drop, Blade Bash, Spear Blow, Heal, Espoir |
| Angel | 36 | 4 | Angel Love | Pretty Rod | Scalemail, Falcon Shoes | Dark Spica, Bright Canopus, Meteor Arrow Kick, Heal, Espoir, Fire, Wind, Ice |
| Angel | 37 | 1 | Angel Group | Jadeite Bow | Scalemail, Falcon Shoes | Impaler Drop, Blade Bash, Spear Blow, Heal, Espoir |
| Geo Symbol | Geo Effect | Destroy |
|---|---|---|
| Red | Recovery 20% | Red Change |
| Green | DEF +50% | Green Change |
| Blue | Ally Boost +50% | Blue Change |
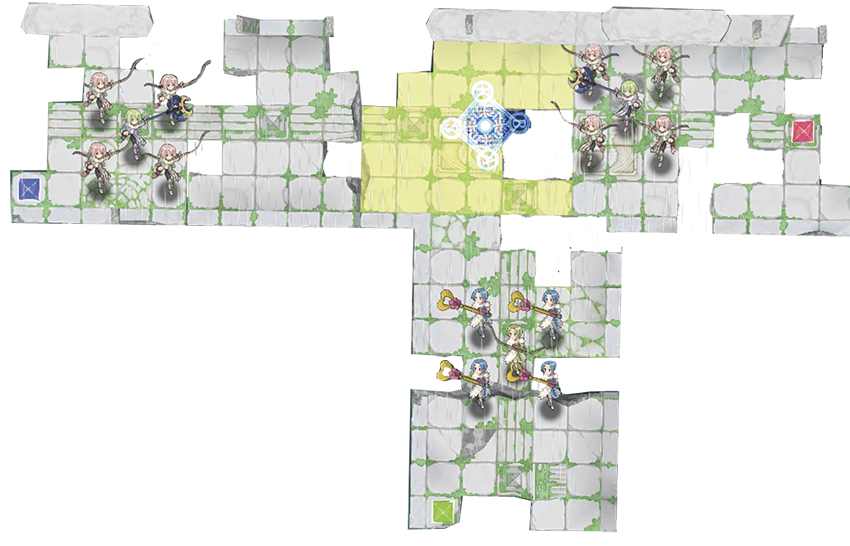
If you barely survived the last stage, this one won’t go any better for you. There are three Geo Symbols on this map that you can theoretically use to even the odds, but it’s difficult to get them back to the yellow Geo Panels by your starting point without getting at least one unit killed. Then again, if you need the buffs from the Geo Symbols to clear the map, you probably don’t have the levels and/or gear to survive the rest of the Episode.
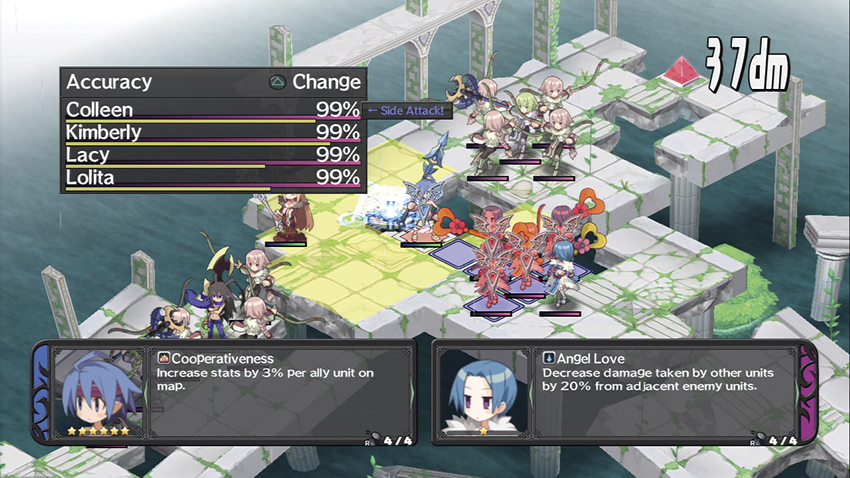
The closest group of angels to the base panel consists of four archers surrounding a Spear-wielder and they’re probably the softest target. Take as many of them out as you can on your first turn, before they can position themselves to take advantage of their Evilities, and use Magic Wall to soften the incoming attacks from the Staff-wielding magic squad.
Fortunately, the third and final group of angels will take a couple of turns to reach you, which should be just enough time to deal with most if not all of the rest of them.
Map Events
- Have Sicily on the field at the start of your second turn.
- Have Etna on the field at the start of your third turn.
Overflowing Mirror
| Class | Lv | Qty | Evility | Weapon | Armor | Skills | |
|---|---|---|---|---|---|---|---|
| Angel Squire | 39 | 8 | Angel Song | Man Eater (x4); Hungnir (x4) | Scalemail | Heal, Mega Heal, Espoir; Impaler Drop, Blade Bash, Spear Blow or Blade Rush, Hurricane Slash, Nether Slash | Red quadrant Angel Squires use Swords; purple quadrant Angel Squires use Spears. |
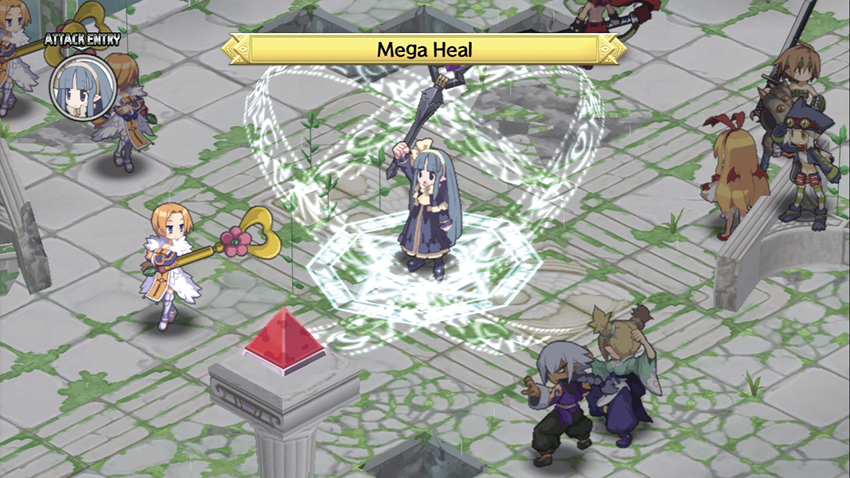
| Angel Cadet | 39 | 8 | Angel Protection | Necromancy (x4); Pretty Rod (x4) | Scalemail | Heal, Mega Heal, Espoir; Mega Star/451 Degrees of Evil, Gone with the Cotton, Sea Horse Change | Blue quadrant Angel Cadets use Staves; aqua quadrant Angel Cadets use Books. |
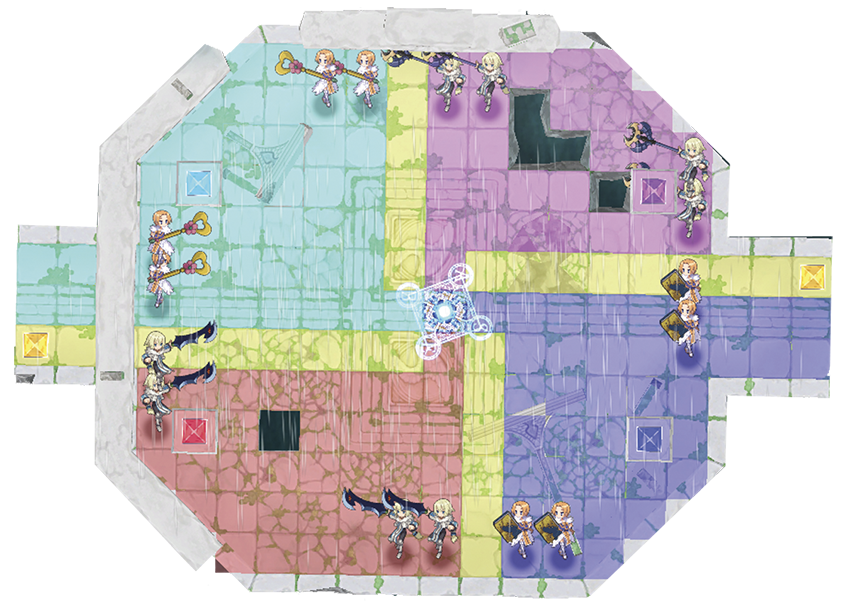
Here’s an interesting map. It’s split into four quadrants by No Entry Panels, and each quadrant contains a quartet of angels that are well-equipped to handle the local Geo Effects. The blue area switches HP/SP; the purple quadrant does not allow you to use attacks with less than a two-square range; the aqua area reverses incoming damage, converting it to healing; and the red zone doesn’t let you hit anyone from any range greater than melee. Furthermore, most of the angels have weapons or spells that let them attack outside their quadrant, where their Geo Effects do not apply.
Of the four groups, the most vulnerable are the angels in the blue area. The HP/SP Switch Geo Effect makes every unit within it extremely fragile, so even weak attacks should eliminate the angels in that area with relative ease. After that, use a character with a Gun or Bow to destroy the blue Geo Symbol and end the HP/SP Switch Effect.
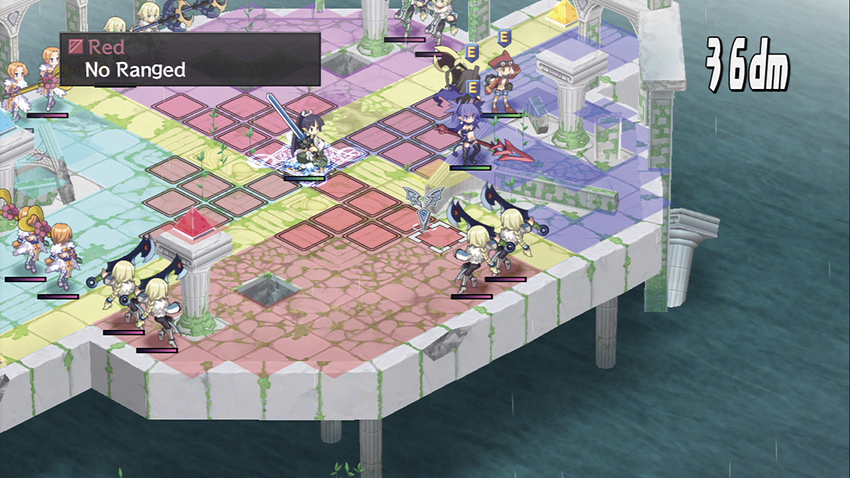
Now you have a beachhead. You’re likely to take some damage from Mega Star spells or a couple of hits from the angels with Spears, but that’s nothing compared to what you could have been exposed to. That gives you some breathing room and lets you deal with each quadrant in turn, throwing spells or ranged skills across the No Entry Panels to kill the angels from positions of relative safety.
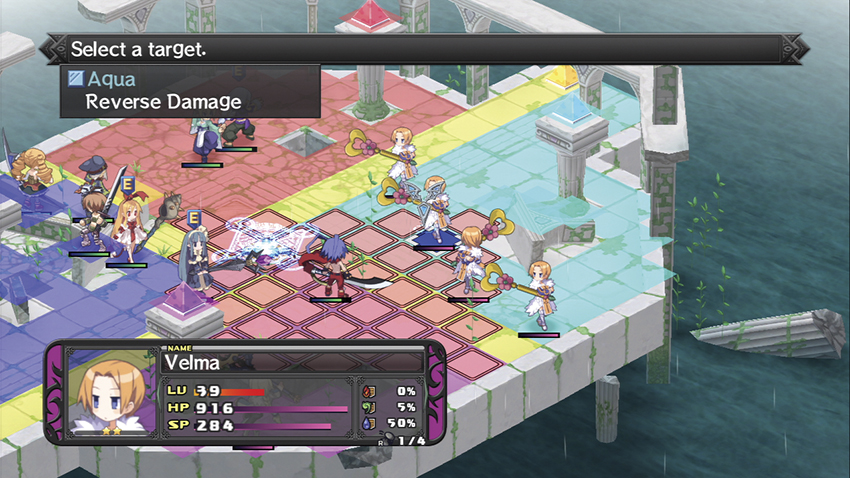
In a pinch, remember that you can use items on enemy units. It’s entirely possible to kill the angels in the aqua quadrant by shoving Yummy Kimchee down their throats.
Map Events
- Station Flonne next to Etna.
- Station Laharl next to Sicily.
- Have Flonne on the field at the start of your third turn.
Fallen Angel Requiem
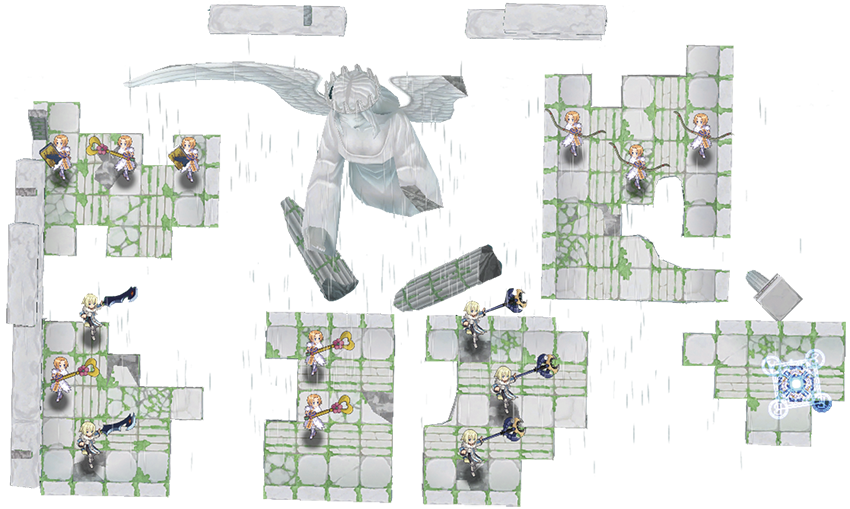
| Island | Class | Lv | Qty | Evility | Weapon | Armor | Skills |
|---|---|---|---|---|---|---|---|
| Island #1 | Angel | 38 | 2 | Angel Protection | Jadeite Bow | Scalemail | Dark Spica, Bright Canopus, Heal, Espoir |
| Island #1 | Angel Cadet | 38 | 1 | Angel Protection | Jadeite Bow | Scalemail | Dark Spica, Bright Canopus, Heal, Espoir |
| Island #2 | Angel Page | 38 | 3 | Angel Song | Hungnir | Scalemail | Impaler Drop, Blade Bash, Heal, Espoir |
| Island #3 | Angel | 40 | 2 | Angel Protection | Pretty Rod | Scalemail | Fire, Heal, Espoir |
| Island #4 | Angel Squire | 40 | 2 | Angel Song | Man Eater | Scalemail | Blade Rush, Hurricane Slash, Heal, Mega Heal, Espoir |
| Island #4 | Angel | 40 | 1 | Angel Protection | Pretty Rod | Scalemail | Ice, Heal, Espoir |
| Island #5 | Angel | 40 | 1 | Angel Protection | Pretty Rod | Scalemail | Wind, Heal, Espoir |
| Island #5 | Angel Cadet | 40 | 2 | Angel Protection | Necromancy | Scalemail | 451 Degrees of Evil, Gone with the Cotton, Sea Horse Charge, Heal, Mega Heal, Espoir |
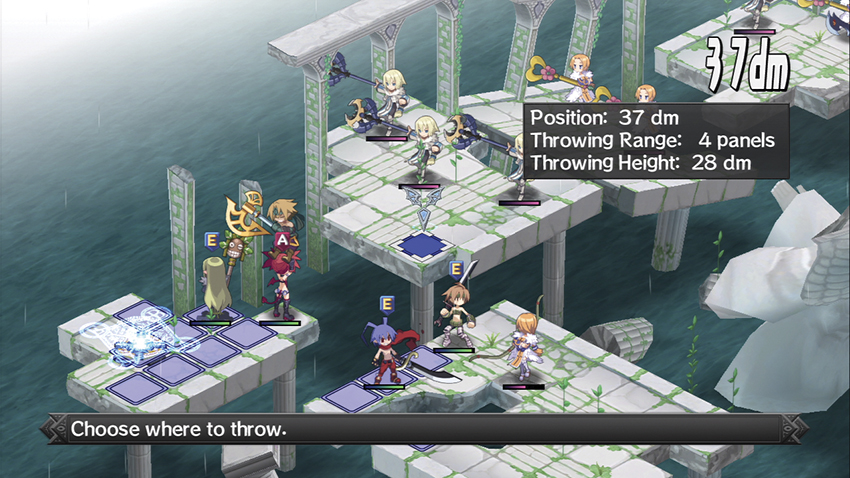
If the last couple of maps have been a straight-up gear check for your roster, this map is a an opportunity to gear check individual characters. The angels on this stage have set up small teams on five separate platforms in the ruins, each of which can be reached only by throwing your characters over the gaps.
You should do your best to throw only characters who have not yet taken an action, thus ensuring that they can take out at least one angel when they land. That still means they’re likely to come under fire from a couple of enemy units when they don’t have your full support crew behind them. This is a great map for self-sufficient characters such as Martial Artists and Fight Mistresses, who don’t have any glaring elemental weak points and get tons of HP as they level. You can also use Sicily, as Li’l Sis Aura lets her laugh off the angels’ Book skills and spells, but she’ll need some decent armor to survive the angels’ Axe attacks.
The strategy, other than that, is straightforward enough: throw your characters from one island to the next, depopulating them as you go, until you run out of angels to punch.
Map Events
- Station Laharl next to Flonne.
- Station Etna next to Sicily.
- Have both Laharl and Sicily participate in the same Team-Up Attack.
Precipitating Hatred
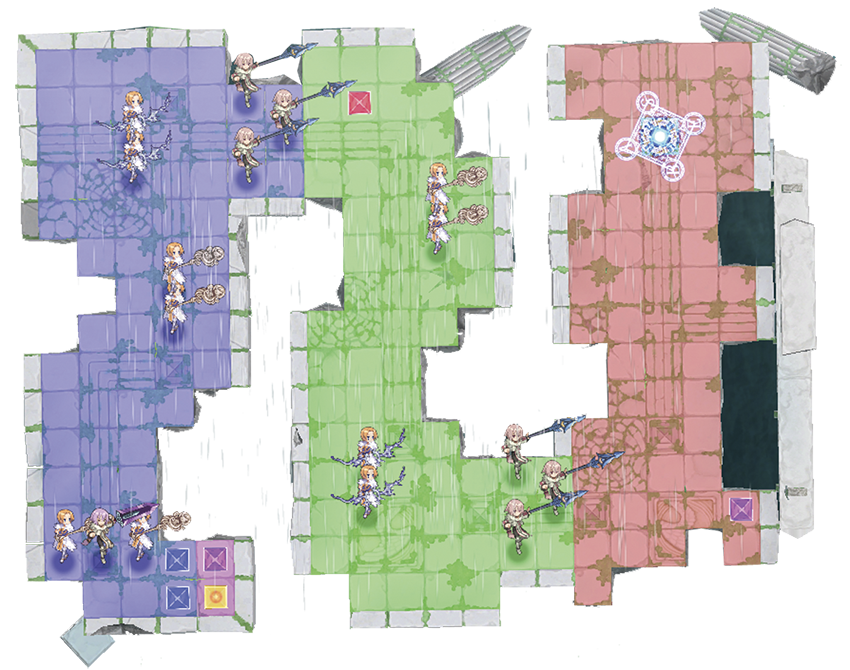
| Class | Lv | Qty | Evility | Weapon | Armor | Skills |
|---|---|---|---|---|---|---|
| Angel Page | 35 | 6 | Angel Majesty | Valkyrie Spear | Breastplate | Impaler Drop, Blade Bash, Heal, Espoir |
| Angel | 38 | 6 | Angel Protection | G.H.O.B.A.G. | Elegant Coat | Mega Fire, Mega Wind, Mega Ice, Heal, Espoir |
| Angel Cadet | 38 | 2 | Angel Protection | The Thornicator | Scalemail | Dark Spica, Bright Canopus, Meteor Arrow Kick, Heal, Mega Heal, Espoir |
| Angel | 38 | 2 | Angel Protection | The Thornicator | Scalemail | Dark Spica, Bright Canopus, Meteor Arrow Kick, Heal, Espoir |
| Angel Knight | 41 | 1 | Angel Majesty | Alberich | Breastplate | Blade Rush, Hurricane Slash, Nether Slash, Heal, Mega Heal, Giga Heal, Espoir |
| Geo Symbol | Geo Effect | Destroy |
|---|---|---|
| Red | Enemy Boost +50% | Red Change |
| Blue #1 | Enemy Boost +50% | Blue Change |
| Blue #2 | No Color Change | Blue Change |
| Purple #1 | Recovery +20% | Purple Change |
| Purple #2 | HP/SP Switch | Purple Change |
| Null | No Color Change | Clear |
Each “tier” of this map hosts a group of angels that’s enjoying the benefit of a powerful Geo Effect. To get through this stage, you need to figure out how to deal with each Geo Effect as you go.
There’s an interesting cheat you can use on your first turn. If you bring a Thief with you who knows the Create Box skill, you can put one down near your base panel to get some elevation. At that point, any character with an attack that can hit up to six panels away—Bow-wielding Archers with the Sniping Evility, a Gun user with Dark Matter Ether, a Witch or Magician with a Staff and an offensive spell at level 4 or higher, etc.—can target and destroy the red Geo Symbol on the adjacent platform. That eliminates the angels’ Enemy Boost +50% effect and replaces it with Recovery +20%. That, in turn, means you can walk to the first set of stairs without getting a couple of characters blown into space dust by angels’ Mega Star spells. (This might still happen, depending on the RES score of whatever characters get within their range, but it’s nearly guaranteed with the Enemy Boost up.)
Once you’ve handled the first wave of angels, you can destroy the purple Geo Symbol to switch the Recovery effect to HP/SP Switch. This is good for a free kill against the next couple of angels, but you shouldn’t let the Effect survive your turn; instead, get someone with a decent AoE attack up to where you can target and destroy the last few Geo Symbols, including the purple one. Overlord’s Wrath and Holy Arrows are both great for this, as is a level 5 or higher offensive spell.
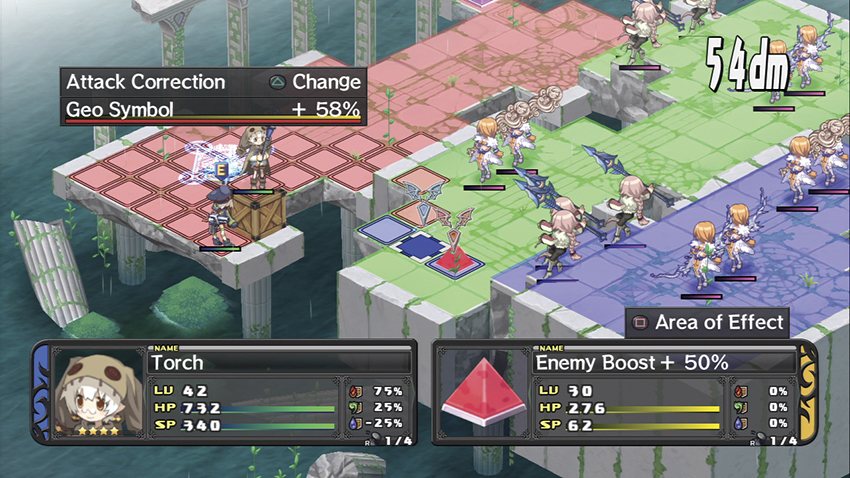
Without the last Enemy Boost effect, the rest of this map is just a straightforward fight to the finish. The last couple of angels have higher levels than the rest, however, so you should take them seriously even when they aren’t being reinforced.
Map Events
- Attack an enemy with Laharl.
- Station Sicily next to Flonne.
- Station Flonne next to Etna.
Phantom’s End
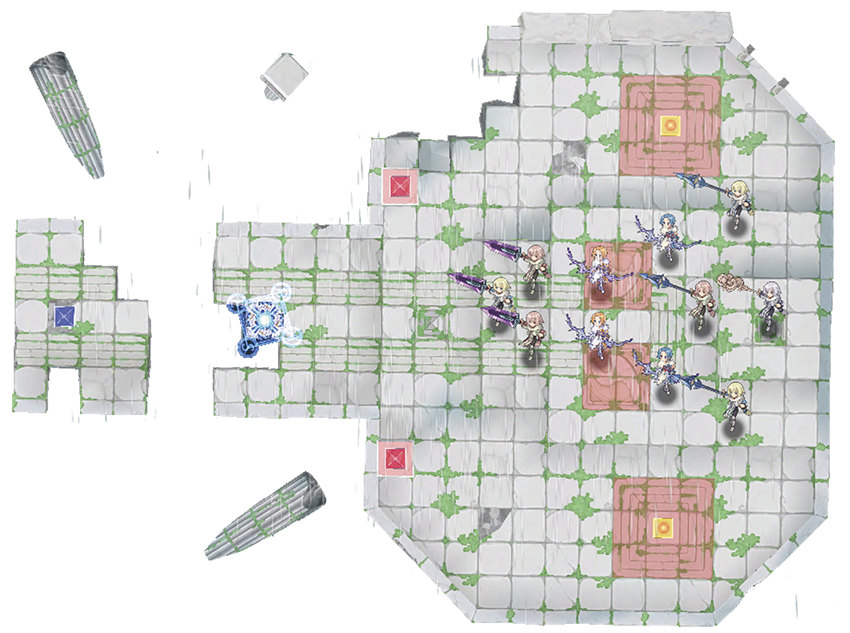
| Class | Lv | Qty | Evility | Weapon | Armor | Skills | Note |
|---|---|---|---|---|---|---|---|
| Angel Page | 41 | 3 | Angel Song (x2), Angel Majesty | Alberich | Breastplate | Blade Rush, Hurricane Slash, Heal, Espoir | - |
| Angel | 41 | 4 | Angel Love (x2), Angel Protection (x2) | The Thornicator | Breastplate | Dark Spica, Bright Canopus, Heal, Espoir | - |
| Angel Squire | 42 | 3 | Angel Song (x2), Angel Majesty | Valkyrie Spear | Breastplate | Impaler Drop, Blade Bash, Heal, Mega Heal, Espoir | - |
| Virunga | 43 | 1 | Limitless Love: increases stats of ally angels by 50%. | G.H.O.B.A.G. | Elegant Coat, Fight Muscle, Feather Token | Angels Unite!, Mega Heal | Absent on a second visit. |
| Geo Symbol | Geo Effect | Destroy | Note |
|---|---|---|---|
| Null #1 | No Lifting | Clear | - |
| Null #2 | Super Encroach | Clear | - |
| Red #1 | Enemy Boost +50% | Red Change | Absent on a second visit. |
| Red #2 | Ally Damage 20% | Red Change | Absent on a second visit. |
| Blue | Ally Boost +50% | Blue Change | - |
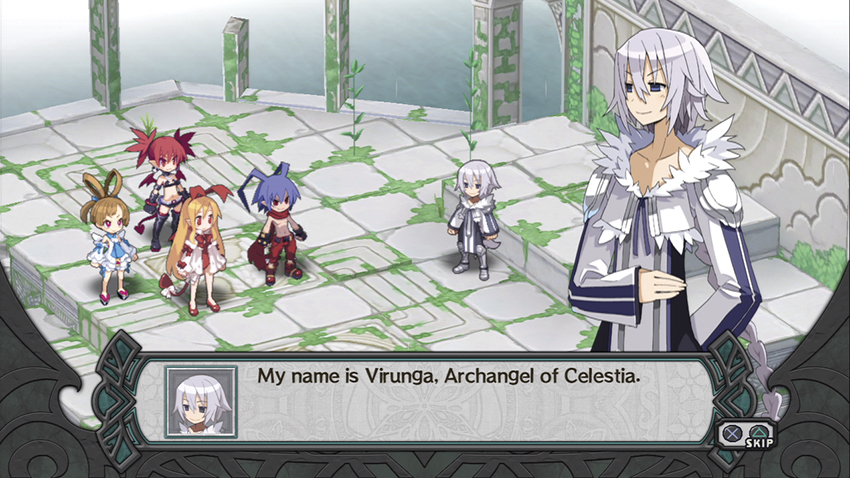
Virunga is providing every angel on this map with a 50% stat boost through Limitless Love, which stacks with the angel’s own Evility. This fight can get bloody, particularly since most of the angels, as usual, rush straight at you on their first turn.
Set up at the bottom of the stairs near the base panel and reinforce your front row with Shield and Magic Wall spells. You can destroy the two closest Geo Symbols by advancing a character with a Gun or Bow to the top of the stairs or by using Create Box to give a spellcaster a boost, which eliminates two of the angels’ advantages right off the bat. That leaves their position surrounded by a slowly spreading sea of red Geo Panels due to the Super Encroach Effect.
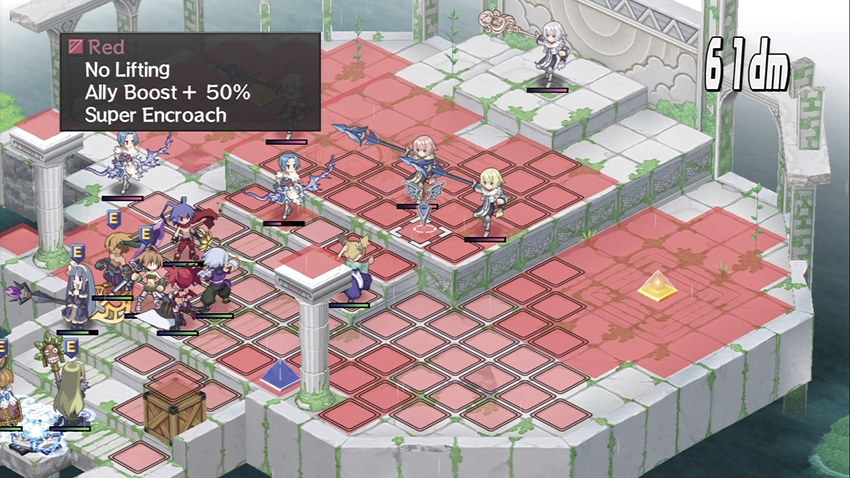
There’s a blue Geo Symbol on the island behind you that will give an Ally Boost +50% Effect if you can get it to those Panels, and it’s worth doing if only to compensate for Virunga’s Evility. You’ll need to toss someone onto that island who’s got a Throw stat of at least 5, such as a Thief or Armor Knight. If you can bring that blue Symbol into play, you’ll be in much better shape to deal with the angels.
Virunga by himself isn’t that big of a deal once you’ve worked your way through his backup. He can inflict surprisingly high damage to a single target with a unique skill called Angels Unite, but if you steal some of his armor or use the Ally Boost to your advantage, he shouldn’t be a problem. Defeating Virunga unlocks the faintly ironic Angel Protector Trophy.
If you visit this stage a second time, Virunga’s gone and he took the red Geo Symbols with him (presumably in a huff), which turns this into a fight against a number of baseline angels. You can still use the Ally Boost +50% Symbol to your advantage, and if you destroy it near the end of the fight, it’ll clear all the Geo Panels off the stage for a huge boost to the Bonus meter.
Map Events
- Virunga attacks one of your units.
- Attack Virunga with Laharl.
- Attack Virunga with Sicily.