
Disgaea D2: A Brighter Darkness Guide Post-Game Bonus Maps Cave of Ordeals
Cave of Ordeals
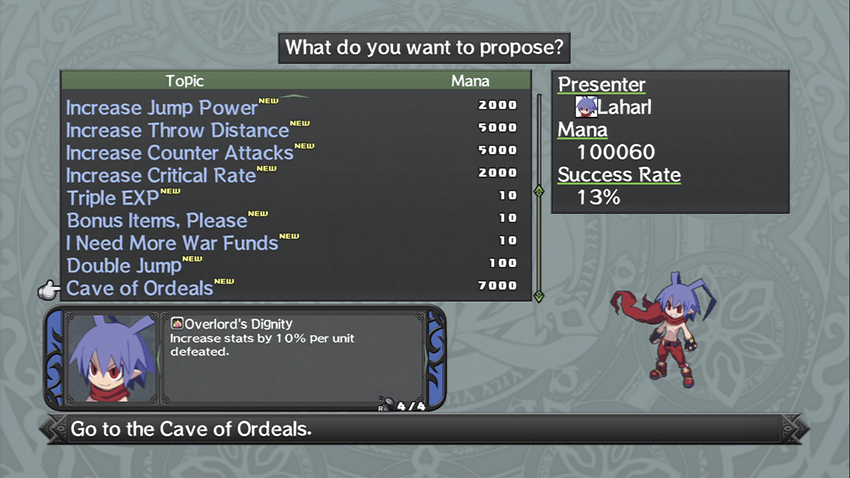
If you were to sit down and somehow grind out 7,000 Mana in Episode 1 without going hopelessly insane, you could unlock the Cave of Ordeals right then. The proposal to open access to the Cave is available from the moment the Dark Assembly opens, but you can’t see that it’s there unless your active character has enough Mana to pay for it.
The Cave of Ordeals is a boldly plotless series of challenges that’s meant to prepare you for much tougher challenges in the Post-Game. It has no Map Events and no associated plot. That said, the reward for clearing all six stages of the Cave of Ordeals is gaining access to the single best grinding spot in the entire game, which makes it an invaluable asset.
Cave of Ordeals 1
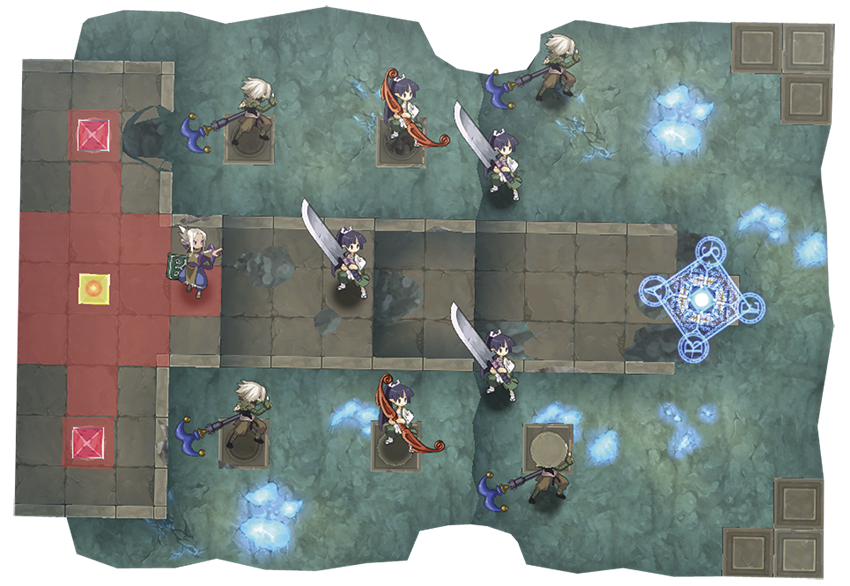
| Class | Lv | Qty | Evility | Weapon | Armor | Skills |
|---|---|---|---|---|---|---|
| Holy Swordswoman | 60 | 3 | Bushido | Chaos Knife | Metal Jacket | Blade Rush, Hurricane Slash, Nether Slash, Musou Slash, Dark Night Slash |
| Holy Swordswoman | 60 | 2 | Bushido | Arjuna Bow | Metal Jacket | Dark Spica, Bright Canopus, Meteor Arrow Kick, Zielregen, Doppelganger |
| Jounin | 60 | 4 | Flame Haze | Sorcerer Rod | Metal Jacket | Giga Ice, Armor Break, Resist Break, Blind, Slow, Poison, Slumber, Stun |
| Onmyo Professor | 60 | 1 | Geo Protect | Mystic Doctrines | Metal Jacket | Geo Change, Bonus Change, Bonus Blast, Geo Blast, Geo Warp, 451 Degrees of Evil, Gone with the Cotton, Sea Horse Charge, Baskervilles, Nether News, Sea Dragon Bang, Star, Mega Star, Giga Star, Omega Star, Heal, Mega Heal |
| Geo Symbol | Geo Effect | Destroy |
|---|---|---|
| Null | Encroach | Clear |
| Red #1 | Ally Damage 20% | Red Change |
| Red #2 | Enemy Boost +50% | Red Change |
The Null Symbol in the back of this map, behind the Onmyo Professor, may concern you at first. Due to the Encroach Geo Effect, the Geo Panels on this stage will spread until the entire floor is covered in them, carrying Enemy Boost +50% and Ally Damage 20% Effects with them as they go. If the room was slowly filling up with molten lava, it would be slightly less painful.
This may tempt you to burn your first actions on getting to that Null Symbol and destroying it before it can endanger you, but that’s a red herring. Everything on this map is a glass cannon and as such, you’ll be taking heavy amounts of incoming damage as soon as the enemy gets to take a turn. The Holy Swordswomen punch well above their weight due to their Bushido Evility, the Onmyo Professor has 20 ranks of Weapon Mastery with that Book he’s holding, and the Jounin shrug off area-of-effect spells and will happily throw every status ailment in the game at you. Between the Professor and the Jounin, in fact, you can confidently expect that your second turn will begin with half of your team Poisoned, Paralyzed, and/or Asleep.
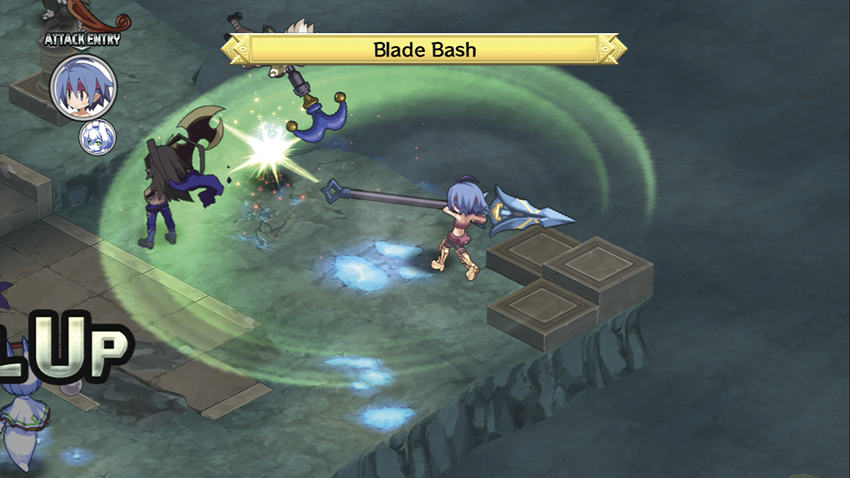
It’s a cliché, but the best defense on this stage is a good offense. The Swordswomen and Jounin share a slight vulnerability to Ice attacks and don’t have a lot of HP individually, so you should be able to take out four to six of them on your first turn, then clean up the rest with relative ease. With enemies that hit this hard, the only real way to survive is to defeat them as quickly as possible, well before the Geo Symbols ever become an issue.
Cave of Ordeals 2
| Class | Lv | Qty | Evility | Weapon | Armor | Skills |
|---|---|---|---|---|---|---|
| Death Mowbuus | 80 | 5 | Boar Charge | Kraken Tentacles | Dragonmail | Darkness Slash, Spinning Wind Blast, Sand Wyrm Impact, Twilight Bomber |
| Dullahan | 80 | 4 | Patience | Kraken Tentacles | Dragonmail | Lightning God Slash, Gigantic, Black Death Circle, X-Slash |
| Hecate | 80 | 5 | Sexy Aura | Goddess Emblem | Dragonmail | Diving Heart, Pink Illusion, Nightmare Carnival, Judgment Rendezvous, Fire, Mega Fire, Giga Fire, Heal, Mega Heal, Giga Heal, Charm |
| Geo Symbol | Geo Effect | Destroy | Note |
|---|---|---|---|
| Null #1 | Enemy Boost +50% | Clear | EXP +50% on a second visit. |
| Null #2 | Enemy Boost +50% | Clear | Mana +50% on a second visit. |
| Null #3 | Enemy Boost +50% | Clear | Hell +50% on a second visit. |
| Blue #1 | Warp | Blue Change | - |
| Blue #2 | ATK +50% | Blue Change | Only present on a second visit. |
| Yellow #1 | Warp | Yellow Change | - |
| Yellow #2 | ATK +50% | Yellow Change | Only present on a second visit. |
| Red #1 | Warp | Red Change | - |
| Red #2 | ATK +50% | Red Change | Only present on a second visit. |
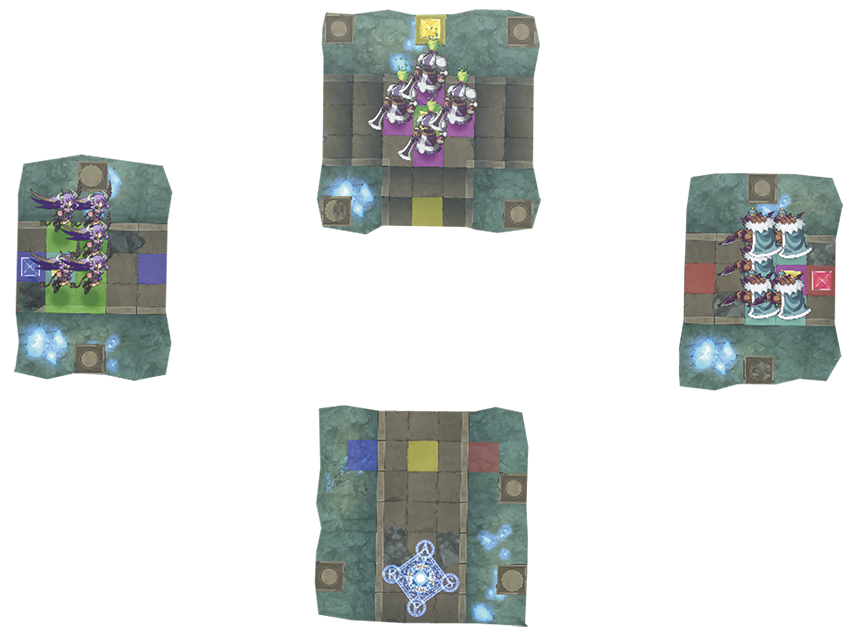
This map is split into four islands. One is yours, and each of the others is held by a pack of monsters. The Mowbuuses all have Boar Charge, which trades accuracy for heavy ATK power; the Dullahans all have Patience, which gives them a stacking ATK boost every time they survive a hit; and the Hecates all have Sexy Aura, so any male unit that enters a panel adjacent to one of them eats a flat 20% reduction to his stats. They all also start the stage standing on Enemy Boost +50% Geo Panels, and are clustered protectively around the Null Symbols that are providing that Geo Effect.
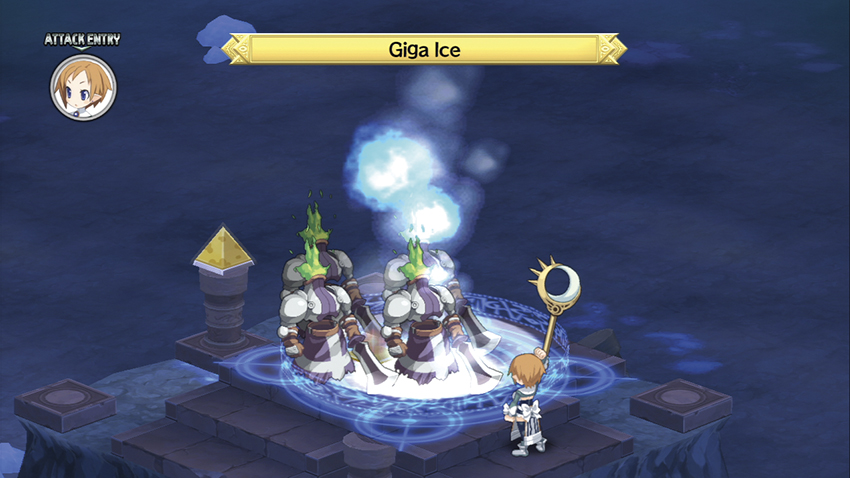
The Warp Panels present your only realistic option for getting between the islands. Thus, whoever you send to each island is going to be on their own for at least two turns, so they need to be able to handle themselves in a fight with several level 80 monsters. A character with a high SPD such as a Fight Mistress can deal with the Mowbuus, since their high evasion chance increases the odds that the Mowbuuses’ Boar Charge-fueled attacks won’t connect; a spellcaster who can target the Dullahans’ Ice weakness but which has the HP and DEF to stand up to a few hits is ideal for handling business on their island, which makes a rank 5 or 6 Magic Knight a good pick; and a female character with a high RES, like Flonne or Sicily, is your best bet against the Hecates.
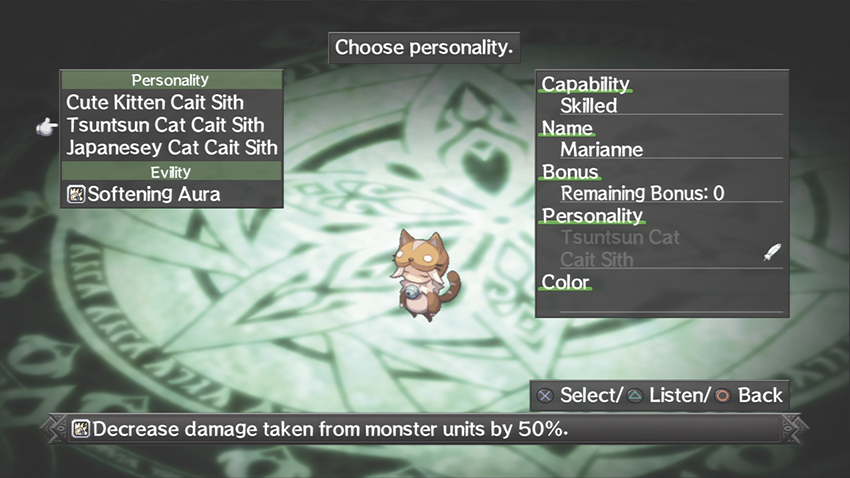
Another option you have, which works for just about any island, is to send in a Slumber Cat with the Softening Aura Evility, which causes the Cat to take half damage from any monster’s attacks. A level 80 or higher Slumber Cat with decent equipment is more than a match for the monsters on any of the islands.
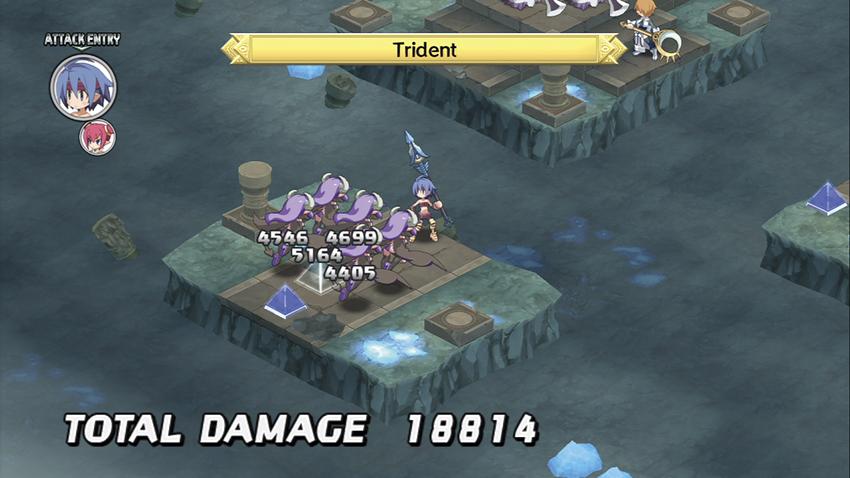
When you’ve figured out who you’re sending, buff them appropriately. The character who’s heading to the Mowbusses’ island should receive Shield and Speed Boost; the character going to the Dullahans’ island could use Magic Boost and Shield; and whoever’s dealing with the Hecates will want Magic Wall and maybe Fire Charge. Their first action should always be to use an area-of-effect attack to destroy the Null Symbol, thereby eliminating the Enemy Boost and removing the monsters’ advantage.
On a second visit to this map after you’ve cleared it, the Enemy Boost +50% Geo Effects switch over to provide EXP +50%, Mana +50%, and Hell +50% Effects. If a character has or can be given an attack that affects five or six panels at once, this stage is a slightly time-consuming but lucrative place to grind levels, cash, or Mana for a single character at a time. You simply Warp to each island, clear it out, then move on. You also gain access to three new Geo Symbols on a second visit, each of which provide ATK +50% and which can be used to provide a character with a buff after he or she has Warped out.
Cave of Ordeals 3
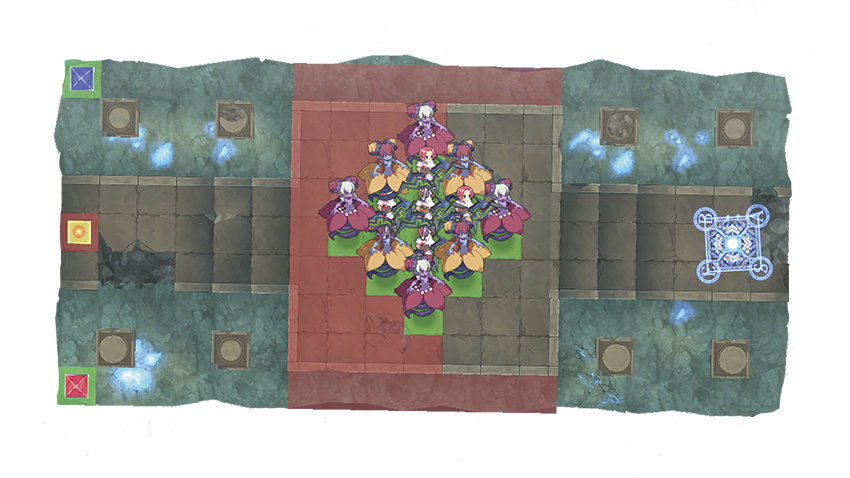
| Class | Lv | Qty | Evility | Weapon | Armor | Skills | |
|---|---|---|---|---|---|---|---|
| Belladonna | 135 | 8 | Shielding Aroma, Sweet Aroma | Goddess Emblem | Dragonmail, Royal Orb | Petal Cutter V, Solar Satellite, Scatter Thorn Shot, Thorn Drill Blast, Moon Spike, Wind, Mega Wind, Giga Wind, Giga Heal, Braveheart, Shield, Magic Boost, Magic Wall | The Belladonnas with red petals have Shielding Aroma; the ones with orange petals have Sweet Aroma. |
| Crusader | 135 | 5 | Angel Protection, Angel Group | Secret Skill Bow | Dragonmail, Lunar Orb | Dark Spica, Bright Canopus, Meteor Arrow Kick, Zielregen, Doppelganger, Heal, Mega Heal, Giga Heal, Espoir | The brunette in the center has Angel Group and has a Royal Orb equipped in addition to the listed gear; the blondes have Angel Protection. |
| Geo Symbol | Geo Effect | Destroy | Note |
|---|---|---|---|
| Red | DEF +50% | Red Change | EXP +50% on a second visit. |
| Null | No Entry | Clear | Mana +50% on a second visit. |
| Blue | DEF +50% | Blue Change | Hell +50% on a second visit. |
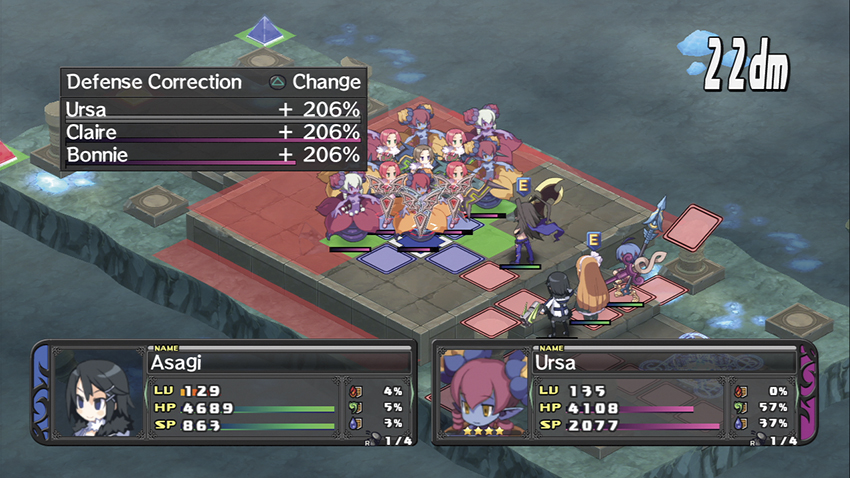
The Crusaders and Belladonnas on this stage are providing each other with a tight-knit web of defensive Evilities, they’re standing on Geo Panels that give them a DEF +100% Effect, they don’t have any glaring elemental weaknesses, and even if they did, both Female Angels and Alraunes have enough native RES that they can shrug off most spells. You also can’t get around the No Entry Geo Panels to destroy the Geo Symbols, even with Tower Throw. In short, this is as close to a perfect defensive phalanx as you can get in Disgaea D2, and it’s just your bad luck that it’s aimed directly at you.
Any of your characters with any degree of vulnerability to Wind attacks, such as the Lady Valkyrie, have no business being on this stage at all. The map is small enough that there’s really no safe place to stand, as at least three Belladonnas always have the range required to peg you with multiple Wind spells at once. Their whole game plan is to soak up whatever you hit them with, then retaliate with Counterattacks and Wind spells until you fall over dead.
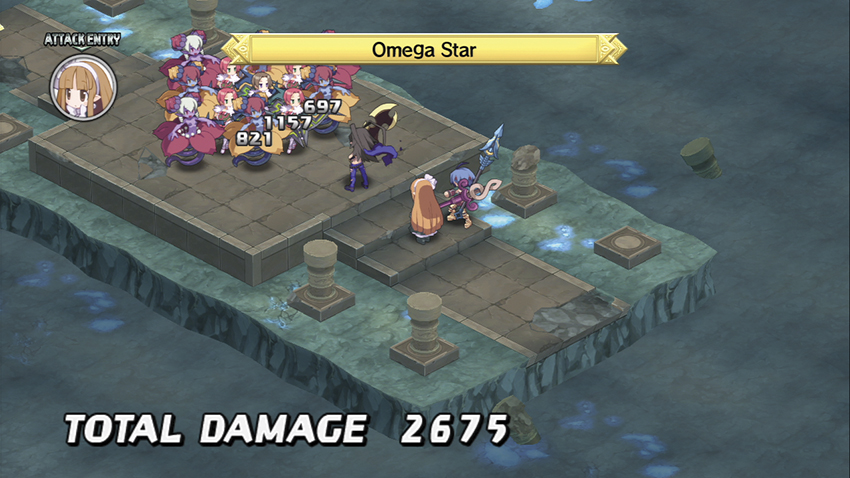
The Geo Panels and proximity-based Evilities play a significant role in their defenses, so you can kill them easily by Lifting and Throwing them back toward your base panel one at a time. Aside from that, there’s not much you can do about the enemy units’ defenses except simply get powerful enough to punch through them. This isn’t so much a stage in its own right as a brick wall.
Cave of Ordeals 4
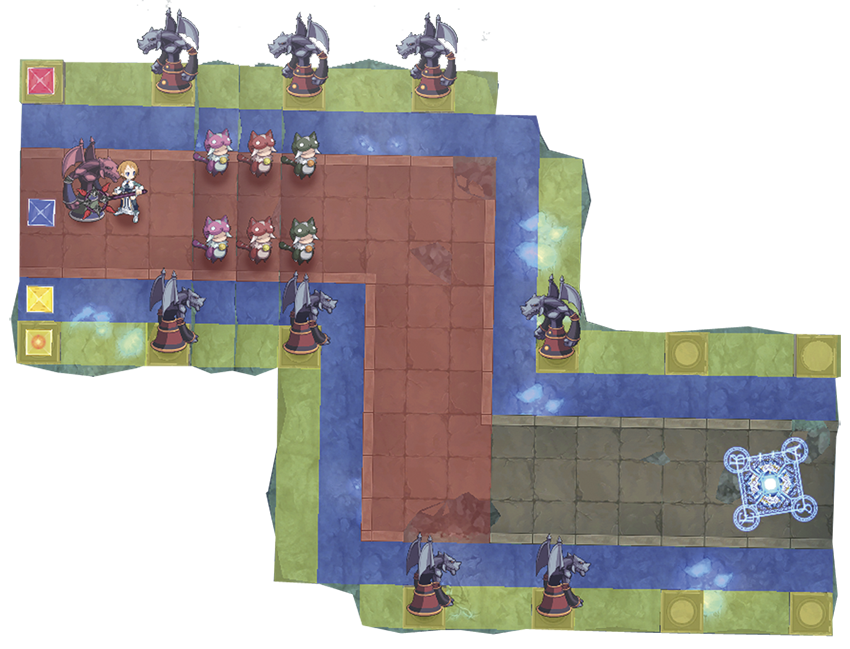
| Class | Lv | Qty | Evility | Weapon | Armor | Skills |
|---|---|---|---|---|---|---|
| Balrog | 170 | 7 | Stone Statue | Phoenix Emblem | Achilles Shield, Ninja Tabi | Flying Press, Boltech Booster, Electric Shot, Galleon Cannon, Granite Checkmate, Wind, Mega Wind, Giga Wind, Omega Wind, Giga Star |
| Grimalkin | 170 | 6 | Green: Weakening Aura, Orange: Softening Aura, Pink: Cute Aura | Hydra Bind | Achilles Shield, Ninja Tabi | Cat Setaria, Burning Hairball, Combo Attack, Blue Sky Surfer, Cat Umbrella Spin |
| Rune Knight | 180 | 1 | Element Force, Attack Weakness | Summon Luminas | Achilles Shield, Feather Token | Fire Charge, Wind Charge, Ice Charge, Anti-Fire, Anti-Wind, Anti-Ice, Fire, Mega Fire, Giga Fire, Omega Fire, Wind, Mega Wind, Giga Wind, Omega Wind, Ice, Mega Ice, Giga Ice, Omega Ice |
| Balrog | 170 | 1 | Turbo Boost, Heart of a Flea | Phoenix Emblem | Achilles Shield | Flying Press, Boltech Booster, Electric Shot, Galleon Cannon, Granite Checkmate, Wind, Mega Wind, Giga Wind, Omega Wind |
| Geo Symbol | Geo Effect | Destroy |
|---|---|---|
| Null | Recovery 20% | Clear |
| Blue | Enemy Boost +50% | Blue Change |
| Red | SP Heal | Red Change |
| Yellow | No Entry | Yellow Change |
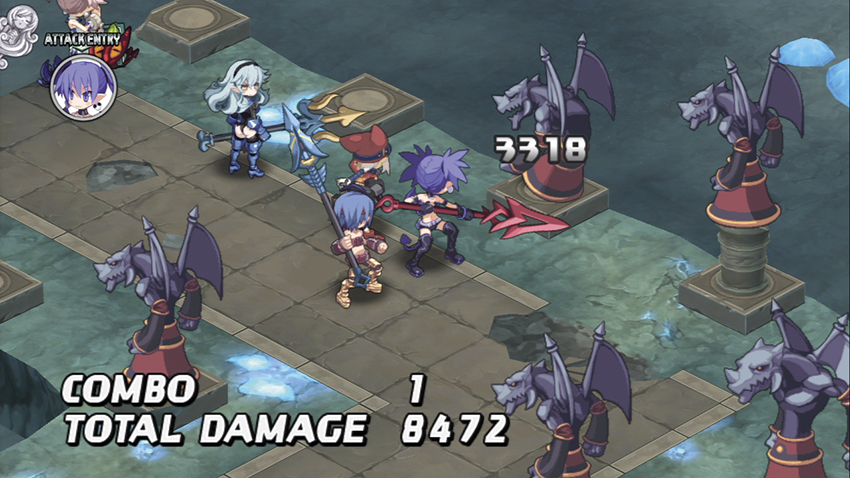
The big problem with this stage is that all of the enemies are either on Enemy Boost +50% Geo Panels that they will not leave of their own volition or they’re hiding behind No Entry Panels. This is a good map for your characters who use Spears, Staves, Bows, Guns, and spells, since the No Entry Geo Panels make it difficult to use short-range attacks, and you’ll want to leave people with a Wind vulnerability at home.
The Balrogs that line the path are standing on Geo Panels that offer Recovery 20% and SP Heal, and are shielded by a one-square-wide barricade made out of No Entry Panels. Combined with their Stone Statue Evility, the Balrogs are very difficult to kill and will happily snipe at you with Wind spells all day. At this level, their Monster Mastery means their spells have enough range to reach almost all the way across the map.
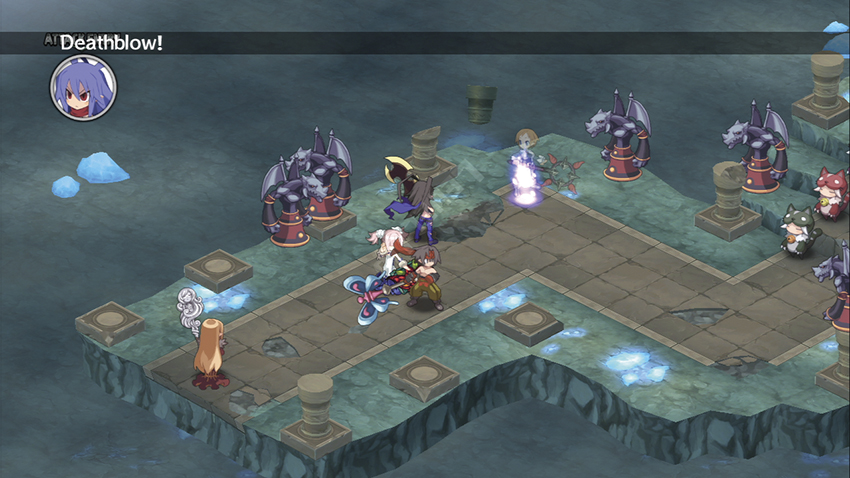
The Rune Knight at the end of the path will hop on her Balrog buddy on the first enemy turn. That Balrog is carrying a second Evility, Heart of a Flea, which makes any successful attack against him a one-hit kill, but his first Evility means he’s the functional equivalent of a rocket sled. On that turn, he’ll carry the Rune Knight all the way across the map so that she can use her own combination of Evilities to blast your characters to bits with her elemental attacks. Cut her mount out from under her, then Lift and Throw her off the Enemy Boost +50% Geo Panels for an easy win.
The last real complication at that point is the Grimalkins, who won’t jump into the fight until you get close. Try to have most of the Balrogs and the Rune Knight down by then, and if possible, Throw somebody into position to destroy the Enemy Boost +50% Geo Symbol. Without that, the Grimalkins are just tough, as opposed to devastating.
Cave of Ordeals 5
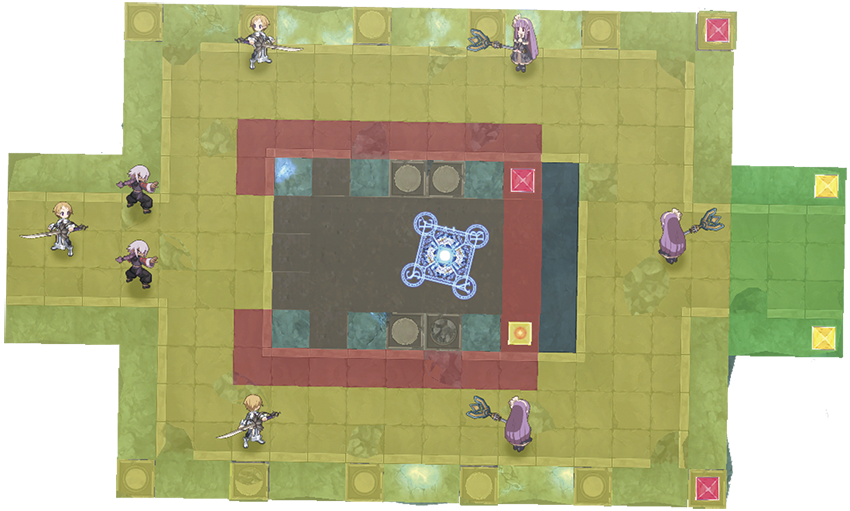
| Class | Lv | Qty | Evility | Weapon | Armor | Skills |
|---|---|---|---|---|---|---|
| Mega Knight | 230 | 3 | Spirit Protection | Mistilteinn | Achilles Shield, Lunar Orb | Fire Charge, Wind Charge, Ice Charge, Anti-Fire, Anti-Wind, Anti-Ice, Blade Rush, Hurricane Slash, Nether Slash, Musou Slash, Fire, Mega Fire, Giga Fire, Wind, Mega Wind, Giga Wind, Ice, Mega Ice, Giga Ice, Omega Ice |
| Prism Mage | 230 | 3 | Magic Creation | Rune Staff | Achilles Shield, Falcon Shoes, Falcon Shoes | Omega Ice, Star, Mega Star, Giga Star, Omega Star |
| Viper Fighter | 230 | 2 | Forced Counter | Devil Hand Wraps | Dragonmail | Triple Strike, Double Shadow, Side Out, Beast King |
| Geo Symbol | Geo Effect | Destroy |
|---|---|---|
| Yellow #1 | Recovery 20% | Yellow Change |
| Yellow #2 | Recovery 20% | Yellow Change |
| Null | Absolute Area | Clear |
| Red #1 | Ally Damage 20% | Red Change |
| Red #2 | DEF +50% | Red Change |
| Red #3 | Ally Damage 20% | Red Change |
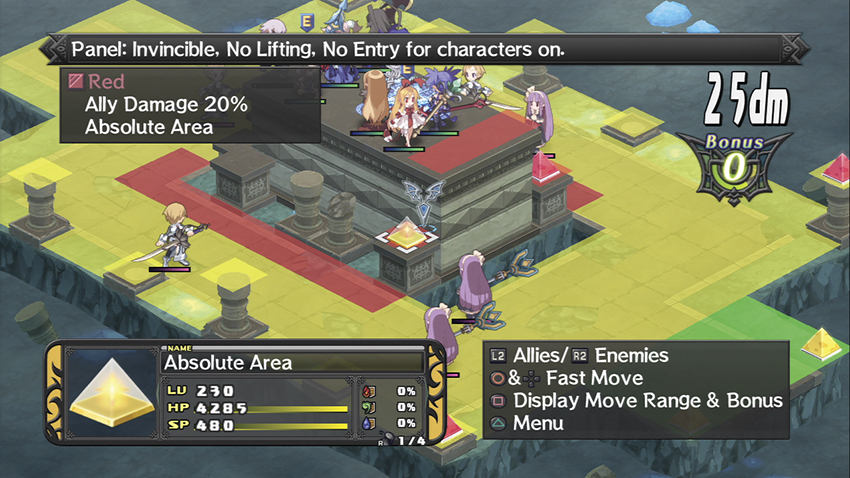
The Null Symbol near your base panel is generating an Absolute Area Geo Effect. Because of how the rest of the stage is arranged, this is one of the few absolutely indestructible Geo Symbols in the game; you can’t set off a convenient Geo Chain to deal with it or throw another Geo Symbol into its square, so it’s just there for the duration. You’ll have to work around it.
The two Viper Fighters will hop onto the sarcophagus in the center of the room with you as soon as they can, and both have the Forced Counter Evility. If they end up hitting one of your own Martial Artists or Fight Mistresses, a chain of Counterattacks will begin that only ends when somebody dies.
Meanwhile, the Mega Knights will attempt to lower your elemental resistances so that they and the Prism Mages can blow you up from the ground level. The Mages all have a Weapon Mastery of 20 with those Staves they’re waving around, so the range on their spells is frankly ridiculous, and their double set of Falcon Shoes gives them a higher Move stat than Mages usually have.
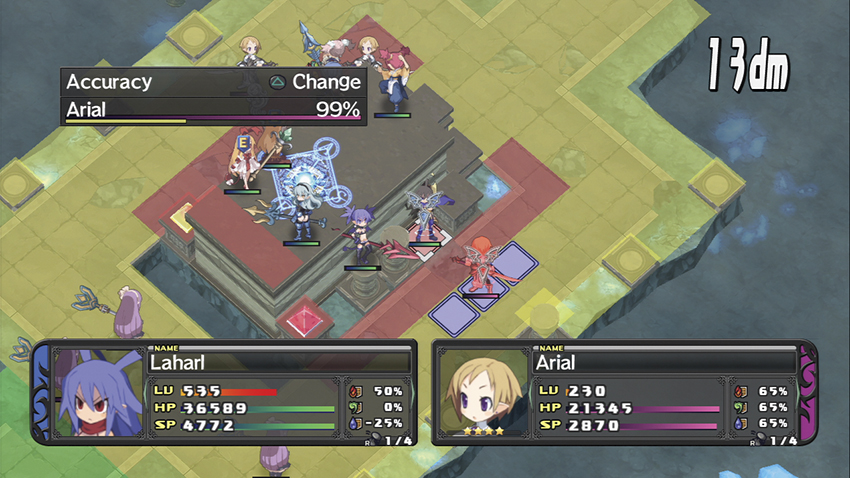
The Ally Damage 20% Geo Effect that’s covering most of the floor makes it painful to chase down any of the Mages or Knights at ground level, but you can hop onto the empty panels on either side of the sarcophagus and return fire from there. Between the Mages’ and Knights’ naturally high RES and the Knights’ Spirit Protection Evilities, elemental magic is close to useless against them. An Archer or Gunner can really shine here, or you can use long-range Weapon Skills like Trident or Musou Slash.
Whatever you end up doing, once you’ve defeated most of the enemy units, the survivors will withdraw to the green Geo Panels on the edge of the map. Once the Recovery 40% Geo Effect has restored some of their health, they’ll come back out and start running in circles around the room, bombarding you with Star spells while keeping the sarcophagus between you and them. At this point, you can send a couple of your more mobile characters down to ground level with a healer in tow to chase the surviving enemies down, or simply bide your time and wait for the chance to shoot the survivors from a position of relative safety.
Cave of Ordeals 6
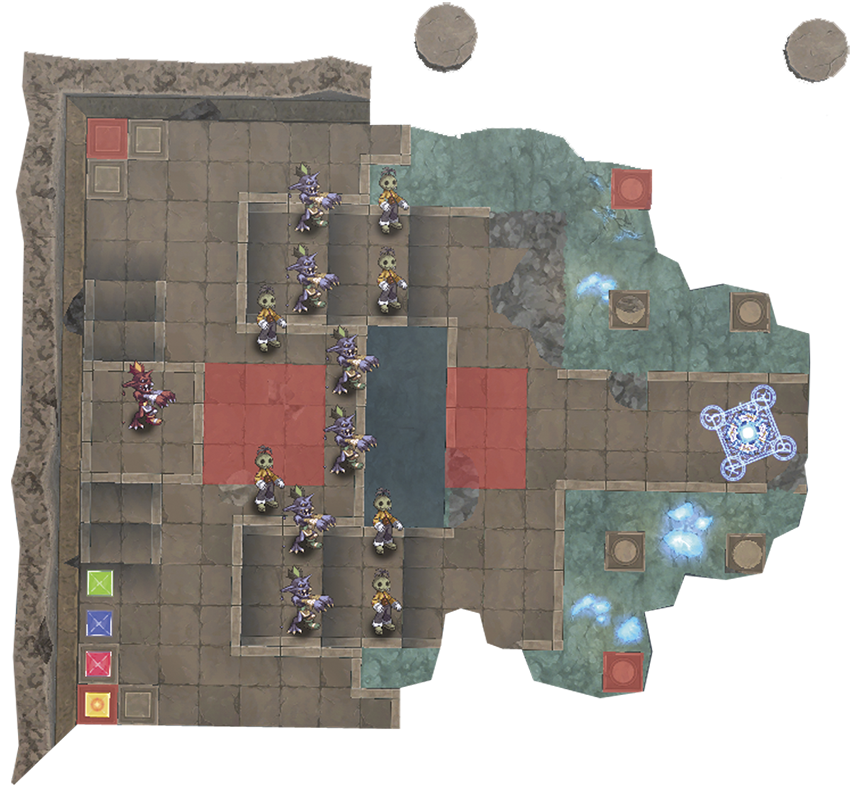
| Class | Lv | Qty | Evility | Weapon | Armor | Skills |
|---|---|---|---|---|---|---|
| Scarecrow | 280 | 6 | Bad Trip | Dragon Tail | Orichalcum Armor, Orichalcum Armor | Jack Knife Jr., Daniel Jacks, Jack the Ripper, Jackpot 4 U, Jumpin' Jack, Target Lock |
| Wight | 280 | 6 | Predation | Dragon Tail | Orichalcum Armor, Orichalcum Armor | Poison Bite, Rotten Headbutt, Zombie Tornado, Zombeam, DIEmension Slash |
| Zombie King | 300 | 1 | Corpse Cannibal | Dragon Tail | Orichalcum Armor, Orichalcum Armor, Exodus | Poison Bite, Rotten Headbutt, Zombie Tornado, Zombeam, DIEmension Slash |
Second Visit
| Class | Lv | Qty | Evility | Weapon | Armor | Skills |
|---|---|---|---|---|---|---|
| Rahab | 300 | 15 | Cold Charge | Dragon Tail | Orichalcum Armor | Shark Slider, Lorenzini, Shark Whirlpool, Sea Dome Tragedy, Jaws Wave Rider |
| Geo Symbol | Geo Effect | Destroy |
|---|---|---|
| Null | Super Encroach | Clear |
| Red | Clone | Red Change |
| Blue | No Lifting | Blue Change |
| Green | Ally Lonely | Green Change |
Second Visit
| Geo Symbol | Geo Effect | Destroy |
|---|---|---|
| Red | EXP +50% | Red Change |
| Green | EXP +50% | Green Change |
| Blue | Mana +50% | Blue Change |
| Yellow | Mana +50% | Yellow Change |
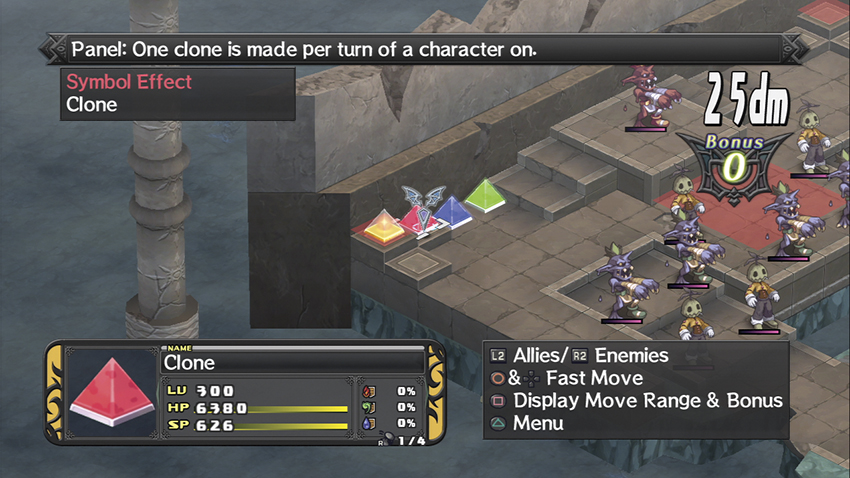
The row of Geo Symbols against the back wall is a bit like a lit fuse. On the first enemy turn, the Super Encroach Effect causes the red Geo Panel underneath the Null Symbol to expand outward and hit the green Geo Symbol. Now the red Panels cause Clone, which means a randomly chosen enemy unit will get duplicated at the end of the enemy turn.
One turn after that, the Panels expand again and they acquire a No Lifting Geo Effect. Finally, they hit the green Geo Symbol, which causes half the map to get an Ally Lonely Effect. At that point, you’re going to have a very hard time even deploying characters, let alone winning the fight.
Before you start this fight, do a little preparation. Equip a single character that has a high native DEF with equipment that enhances his or her Move stat. A Warrior or Lady Valkyrie will do the trick, using a Nine Tail and a couple of pairs of Angel’s Shoes.
Once the fight starts, buff that character with Move! and throw him or her in the general direction of the Geo Symbols. While the rest of your units run interference, keep that character on a drive toward the Geo Symbols so that you can destroy at least one of them before the fourth enemy turn.
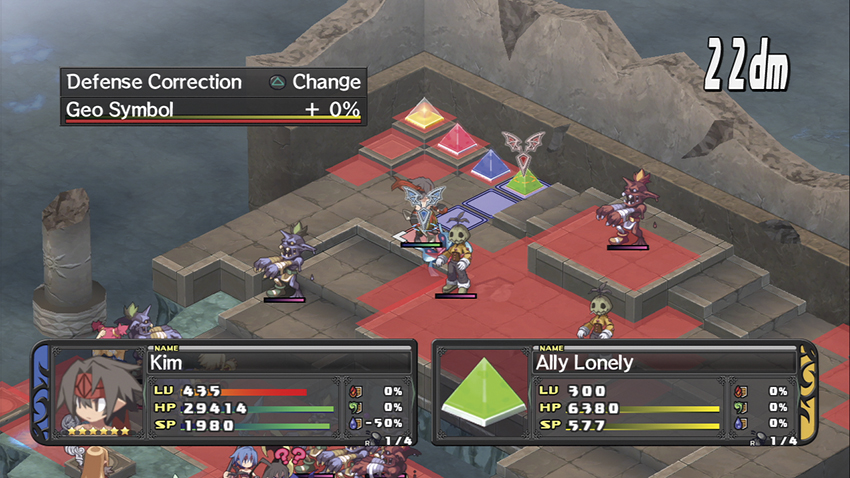
If you’re feeling good about your chances, destroy the Lonely Ally Geo Symbol first and leave the rest alone. The Cloned monsters make a decent source of extra EXP and you can swipe their Orichalcum Armors. You’ll most likely want to deal with the Scarecrows as fast as possible, though, as Bad Trip is a headache. The Zombie King at the back of the map is considerably more powerful than the other monsters, however, and the Clone Geo Effect does work on him.
Beating the Cave of Ordeals unlocks the Ordeal or No Deal Trophy.
Cave of Ordeals 6: Second Visit
This is your reward for clearing the Cave of Ordeals: the single best grind spot in the game.
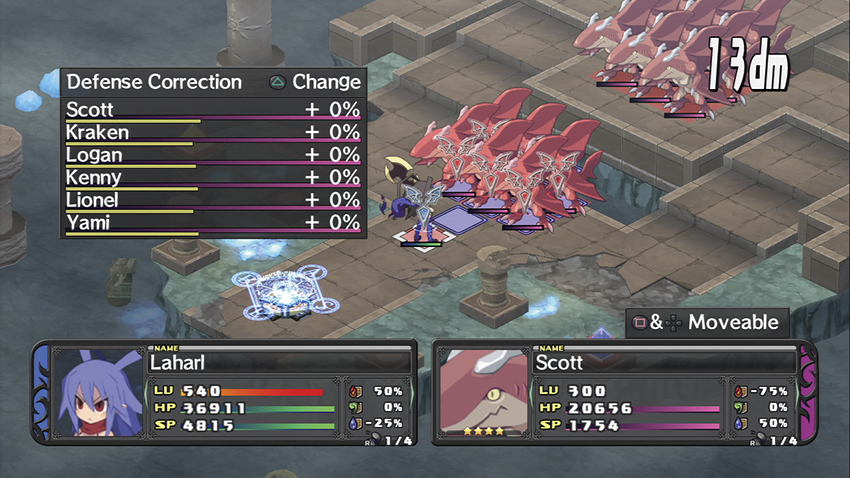
The 15 Rahabs in front of you are level 300, which you should be able to handle if you made it here in the first place, and all of them begin the map standing on Geo Panels that confer EXP +100% and Mana +100% multipliers.
The Rahabs can and will jump off those Panels as soon as they’re within range of your characters, but that gives you a full turn in which you can blow up the six Rahabs directly in front of the base panel. Fire-based spells and Skills will be the most efficient way to do this, but anything will do the trick. The Rahabs will retaliate with their typical Ice-based Skills, but they’re there to get pummeled, and on some level I think they know that.
If you adjust the Enemy Strength and Obtain Rate in the Cheat Shop, you can keep coming back to Cave of Ordeals 6 for the rest of the game to gather easy EXP and Mana. You can easily farm these poor Rahabs all the way to level 9,999.