Prima Games eGuides
primagames.com Browse Redeem a code Help
Splatoon eGuide
Sign in My Guides

Sign in or create an account

We'll email you a link. No password needed, and if you don't have an account yet, the link makes one.

By creating an account or signing in, you agree to our Terms of Service and Privacy Policy.

Have a password?

Had an account on the old eGuides site, or a code from a printed guide? Help and troubleshooting

Sign in with a password

By signing in, you agree to our Terms of Service and Privacy Policy.

Check your email

A sign-in link is on its way. It works once and expires in 15 minutes. Open it and you're in, with an account if you didn't already have one.

Contents

  • Welcome to Inkopolis
    • Introduction
    • Getting Started
    • Inkopolis Plaza: Points of Interest
    • amiibo Support
  • Octo Valley
    • Introduction
    • Equipment
    • Octo Valley Features
    • The Octarians
  • Zone 1
    • Introduction
    • Stage 01: Octotrooper Hideout
    • Stage 02: Lair of the Octoballs
    • Stage 03 : Rise of the Octocopters
    • Boss Battle: The Mighty Octostomp
  • Zone 3
    • Introduction
    • Stage 10: Inkrail Skyscape
    • Stage 11: Inkvisible Avenues
    • Stage 12: Flooder Junkyard
    • Stage 13: Shifting Splatforms
    • Stage 14: Octoling Assault
    • Stage 15: Undeniable Flying Object
    • Boss Battle: The Rampaging Octowhirl
  • Zone 4
    • Introduction
    • Stage 16: Propeller-Lift Fortress
    • Stage 17: Octosniper Ramparts
    • Stage 18: Spinning Spreaders
    • Stage 19: Tumbling Splatforms
    • Stage 20: Octoling Uprising
    • Stage 21: Unwelcome Flying Object
    • Boss Battle: The Ravenous Octomaw
  • Zone 5
    • Introduction
    • Stage 22: Splat-Switch Revolution
    • Stage 23: Spongy Observatory
    • Stage 24: Pinwheel Power Plant
    • Stage 25: Far-Flung Flooders
    • Stage 26: Octoling Onslaught
    • Stage 27: Unavoidable Flying Object
    • Boss Battle: Enter the Octobot King
  • Ink Battles
    • Introduction
    • Getting Started
    • Game Modes
    • Splatfest
    • Plaza Activities
    • Judd: Vibe Rank Bonus
    • Spyke: Orders and Sub Abilities
  • Blackbelly Skatepark
    • Overview
    • Turf War
    • Splat Zones
  • Zone 2
    • Introduction
    • Stage 04: Gusher Gauntlet
    • Stage 05: Floating Sponge Garden
    • Stage 06 : Propeller Lift Playground
    • Stage 07: Spreader Splatfest
    • Stage 08 : Octoling Invasion
    • Stage 09: Unidentified Flying Object
    • Boss Battle: The Dreaded Octonozzle
  • Weapons & Gear
    • Weapons
    • amiibo Weapons
    • Sub Weapons
    • Specials
    • Abilities
    • Gear
    • Tester Loadouts
  • Arowana Mall
    • Overview
    • Turf War
    • Splat Zones
  • Walleye Warehouse
    • Overview
    • Turf War
    • Splat Zones
  • Saltspray Rig
    • Overview
    • Turf War
    • Splat Zones
  • Urchin Underpass
    • Overview
    • Turf War
    • Splat Zones
  • Art
    • Art
  • NEW CONTENT
    • Port Mackerel
      • Overview
      • Turf War
      • Splat Zones

Splatoon Guide › Walleye Warehouse

Turf War

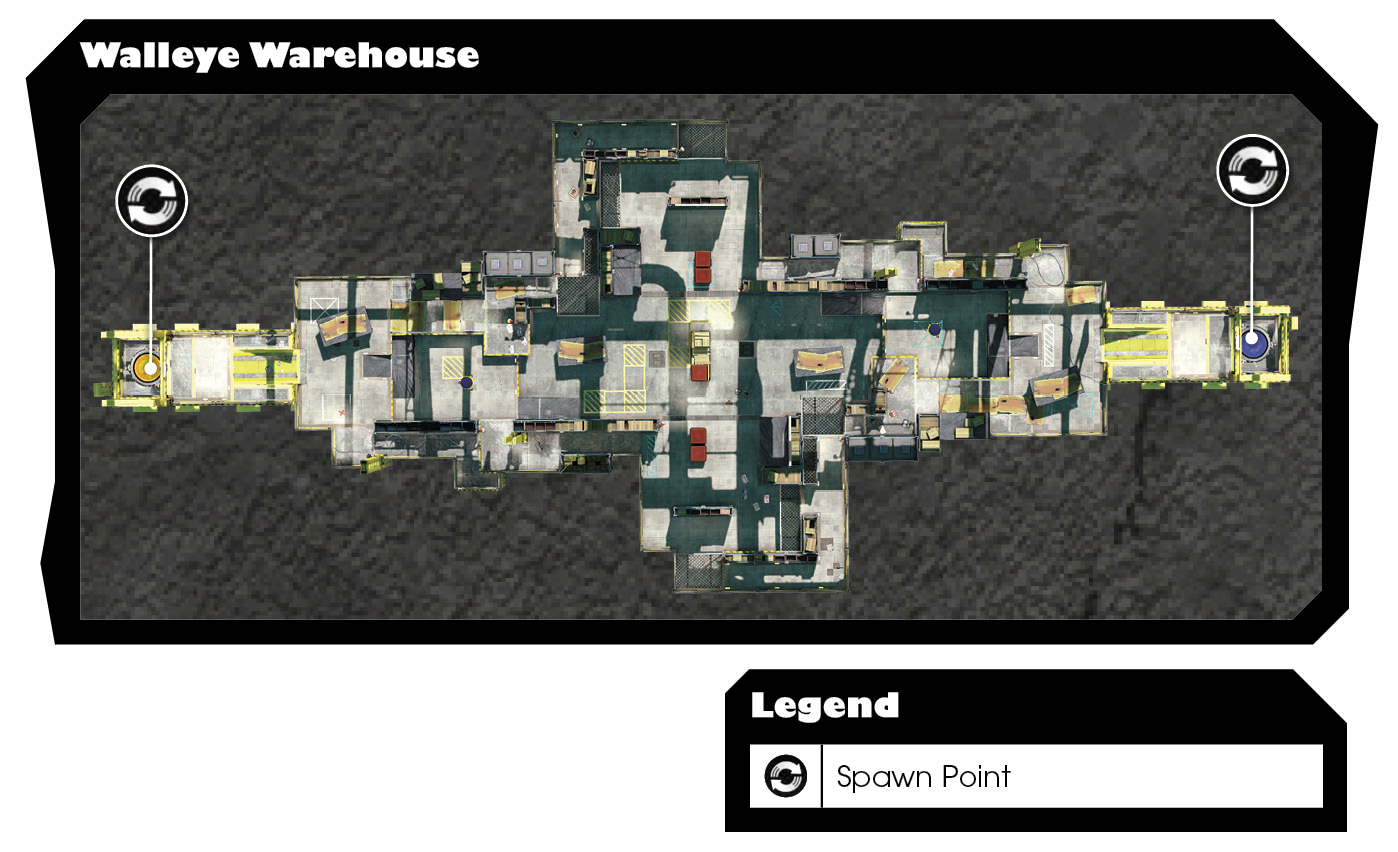
In Turf War, before making a push for the center, be sure to thoroughly ink your team’s side of the stage. This means inking the area around your team’s spawn point as well as the perimeter paths. The elevated path to the left of your spawn point is particularly important. Since this area is rarely accessed by the enemy, you’ll probably only need to make one pass here. This path also offers the safest access to the center of the stage. Instead of getting bogged down in the center, look for opportunities to flank your opponents, particularly by pressuring their perimeter hallway and central ramps. As the match approaches its final seconds, use specials like Inkzooka and Inkstrike to expand your ink coverage on the opposing team’s side of the stage.
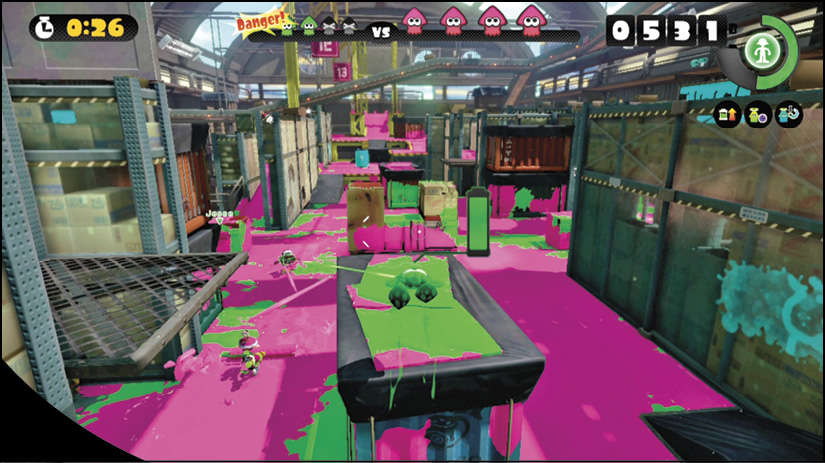
The shipping containers are covered with black tarps and can’t absorb ink, but you can ink the sheets of plywood on top of a few shipping containers. Not only does this give your team some extra ink coverage, but it also allows you to quickly swim across the tops of these containers without being noticed. Or simply hide in your ink atop these shipping containers and ambush your opponents. The two shipping containers in the middle serve as excellent sniper perches.
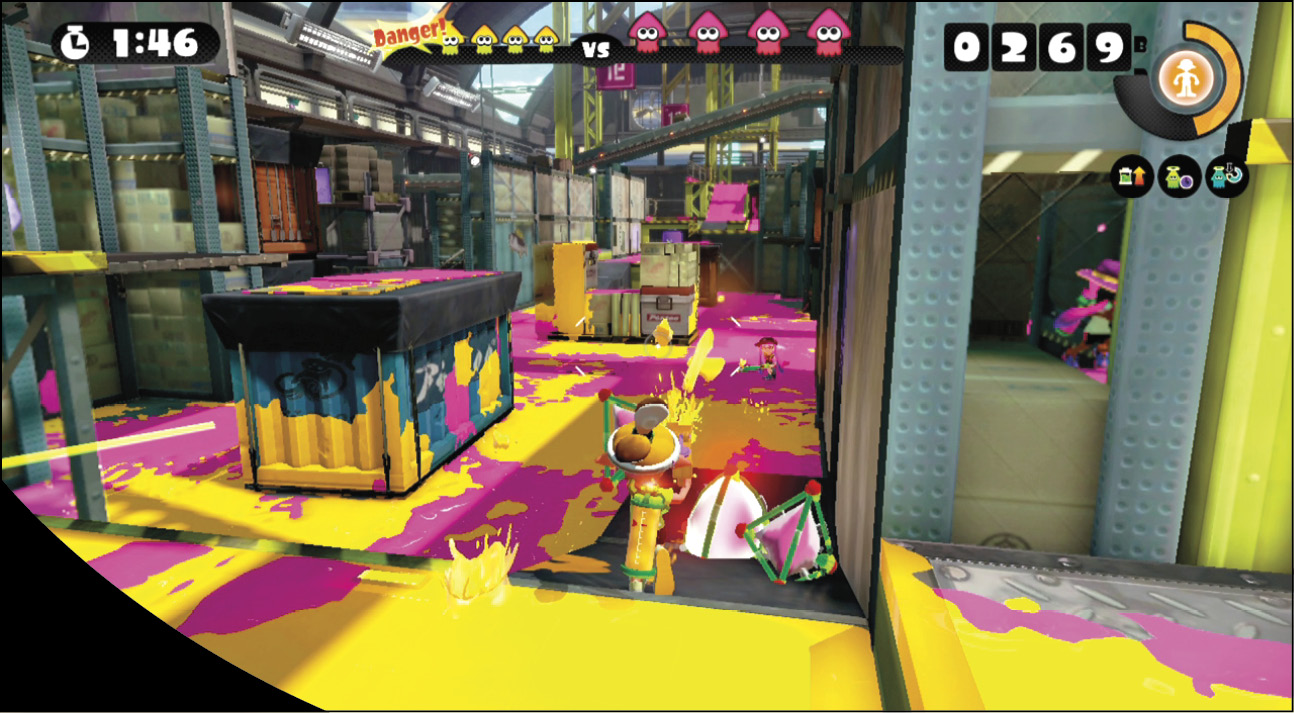
There are four ramps on this stage covered with black tarps—one near each spawn point and two near the center. As a result, you can’t ink these ramps. So when swimming in squid form, it’s best to avoid these areas. These can also be good spots to ambush your opponents—with no ink at their feet, they won’t be able to swim away. Avoid getting bogged down at these chokepoints as there’s never a shortage of incoming ink or Splat Bombs.

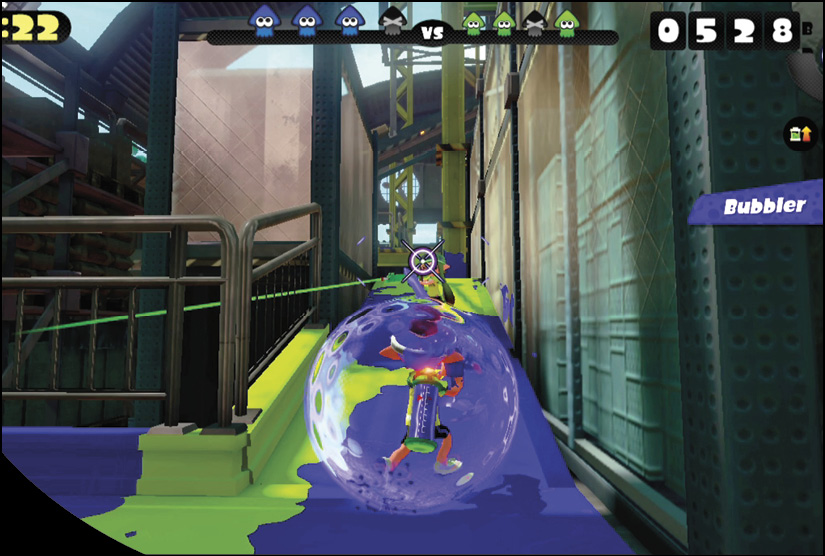
Don’t be afraid to make pushes into enemy territory. This perimeter corridor offers a great path for pushing behind your opponents and inking territory near their spawn point. But don’t expect them to give up this corridor without a fight. Activate Bubbler or Kraken before making your advance and attack aggressively. Alternatively, use charge weapons and Seekers to help secure this narrow hall.
Keep reading with a free account

The first 3 sections of Splatoon are open to everyone. An account opens the rest of it, and every other guide in the archive. It's free, and there's nothing to buy.

Bought guides on the old Prima Games site? Your account and every guide you own moved here, so there's nothing to buy again. Sign in.

Create a free account Or browse our free guides

PreviousOverview NextSplat Zones