
Octo Valley Features
Your journey through Octo Valley takes you to some interesting (and treacherous) locales. Before setting off to find the Great Zapfish, take some time to become familiar with some of the key features you’ll interact with during your adventure.
Lair Entrance
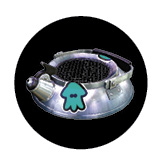
Before you can enter an Octarian lair, you must first locate and reveal its entrance. These invisible entrances are scattered across each zone. Splat them repeatedly with ink until they become visible, then stand on top of them and press the ZL button to enter the lair.
Power Eggs
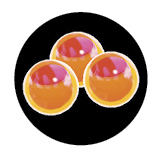
Power Eggs are the currency in Octo Valley, allowing you to purchase upgrades for your weapons and equipment. These are often found in orange crates and balloons, but can also be found scattered across Octarian lairs. You can collect Power Eggs by touching them or splatting them with ink. So if a Power Egg appears to be out of reach, try to find a way to hit it with ink.
Crates
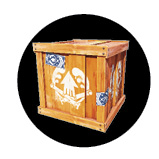
Crates are found in every Octarian lair, but pay special attention to orange crates—these contain Power Eggs, Sunken Scrolls, armor, or specials. Simply shoot crates to smash them, then grab whatever is inside. Before destroying a crate, make sure you don’t need to use it for concealment—they’re handy for hiding behind.
Balloons
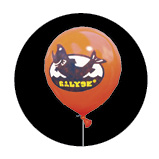
These orange balloons are a common sight throughout Octo Valley. Splat them with ink to make them pop. Balloons are always filled with Power Eggs. Popping a balloon automatically retrieves all the Power Eggs inside it.
Launchpads
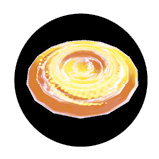
Most Octarian lairs consist of multiple platforms. Launchpads are used to access distant platforms. Simply stand on a launchpad and press the ZL button to perform a Super Jump to the next platform. But before using a launchpad, make sure you’ve thoroughly explored the current platform. Launchpads are a one-way trip—there’s no way to jump back.
Checkpoints
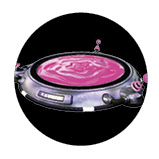
Walk across checkpoints to save your progress while advancing through Octarian lairs. You’ll usually hit these checkpoints automatically after using a launchpad. In the event that you’re splatted or fall off a ledge, you’ll resume your progress from the most recent checkpoint. Each checkpoint you activate gives you one more life.
Sunken Scrolls
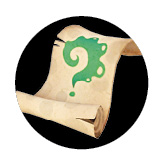
There is one Sunken Scroll hidden within each Octarian lair, usually contained within an orange crate. But they can also be retrieved at the end of boss battles. These scrolls reveal a variety of story information and are collected in your research notes. Sunken Scrolls retrieved from bosses contain blueprints Sheldon can use to manufacture new weapons for ink battles.
Zapfish
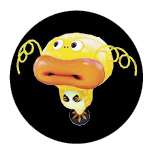
Before you can fight the boss of each zone, you must first collect a certain number of Zapfish. There is one Zapfish located at the end of every lair. Each Zapfish is protected by a barrier. Repeatedly shoot the barrier until it pops, then grab the Zapfish to complete the level.
Balloon Fish
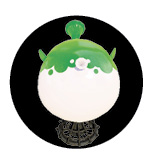
These large, white balloons are found attached to vertical and horizontal surfaces. When targeted with your ink, these balloons expand before exploding, spreading your ink over a massive area. Target Balloon Fish when confronting multiple enemies—if you time it just right, one exploding Balloon Fish can take them all out. Balloon Fish are also an excellent way to spread ink, allowing you to rapidly swim across the freshly inked surfaces.
Keys and Vaults
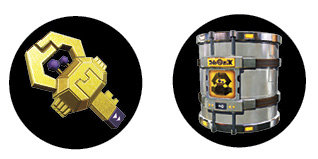
Some Octarian lairs feature vaults that must be opened with a key. Keys are usually hidden within orange crates, but can sometimes be carried by enemies. Once you’ve found a key, use it to unlock a vault—simply touch the vault to open it. Vaults usually cover launchpads and other key features required to progress through a lair.
Boss Kettle
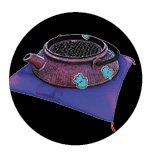
When you’ve collected the requisite number of Zapfish, the zone’s Boss Kettle opens up, allowing you to fight a boss. These purple kettles are usually located near the center of a zone and remain closed. But once opened, step on top and press the ZL button to begin a boss battle.
Area Gate
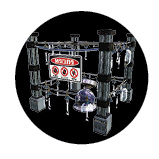
Each zone is blocked by one of these area gates. These gates prevent you from accessing neighboring zones. However, once a zone’s boss has been defeated, the area gate is destroyed. Beyond the area gate you can find a path leading to the next zone.
Gusher
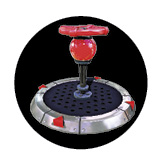
When targeted with your ink, these valves burst open, emitting a tall geyser of ink. Stand on top of a Gusher before shooting it to ride the geyser like an elevator. Or if you prefer, you can swim up an active Gusher to reach the top. Gushers give you access to high platforms and other areas that would otherwise be impossible to reach. The geyser of ink can also serve as a solid pillar to hide behind—active Gushers block all incoming enemy ink.
Sponge
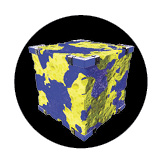
As these small yellow, cube-shaped sponges absorb your ink, they expand, becoming huge blocks you can swim or walk across. However, when hit with enemy ink, sponges shrink in size. If you’re on top of a sponge when it shrinks, you could potentially fall—stay near the center of a sponge to mitigate the chances of falling off. Cross sponges quickly when possible and deal with threats before they can shrink the sponge beneath your feet.
Propeller Lift
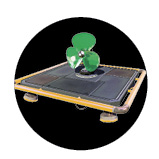
Propeller Lifts are small platforms capable of horizontal or vertical movement. To activate a Propeller Lift, hop aboard and target the green propeller. Continually shoot the propeller to make the platform travel in its predetermined direction. If you stop shooting the propeller, the platform will slowly return to its original location. While moving along a Propeller Lift, you become a much harder target for enemies to hit.
Spreader
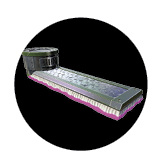
These large arm-like devices are used to spread enemy ink over large horizontal and vertical surfaces. Instead of trying to avoid the ink spread by these devices, simply advance across the Spreader itself. The top of a Spreader can be coated in your ink, allowing you to swim across the top of it.
Ink Cannon
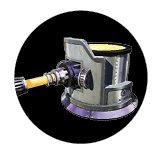
Step behind the controls of one of these turrets and fire ink-filled missiles at distant opponents and surfaces. Upon impact, these missiles explode, spreading your ink over a wide area. But the missiles travel slowly and have a tendency to lose altitude over distance. So when engaging targets at long range, aim high to compensate for the missile’s drop.
Inkrail
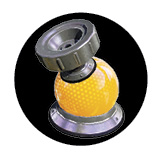
Target these nodes with your ink to create an Inkrail. Like launchpads, Inkrails are often used to access distant platforms. Once an Inkrail has been activated, approach it and press the ZL button to swim along it. Inkrails allow you to travel at high speeds. While speeding along an Inkrail, jump to launch your squid high into the air. But watch out for incoming enemy ink—if you’re hit while traversing an Inkrail, you’ll fall.
Splat Switch
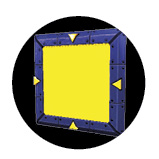
Spread ink across these panels to trigger the transformation of a platform. If you can’t find where to go next, look for a splat switch. Chances are you’ll need to activate one of these switches to alter the platform in a way that allows you to access new areas. Once a transformation has been completed, it cannot be undone.
Pinwheel
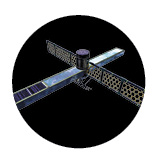
These windmill-like devices are attached to both vertical and horizontal surfaces, making advances a bit tricky. Two of the pinwheel’s arms are made out of boxy pieces of metal while the other two arms consist of nets. These arms are designed to knock you off platforms. For best results, ride along the tops of the metal arms. Otherwise, you must swim through the netted arms while jumping over the metal arms.