
Skylanders® SuperChargers Guide The Adventure The Bandit Train
Chapter 45: Highway Robbery
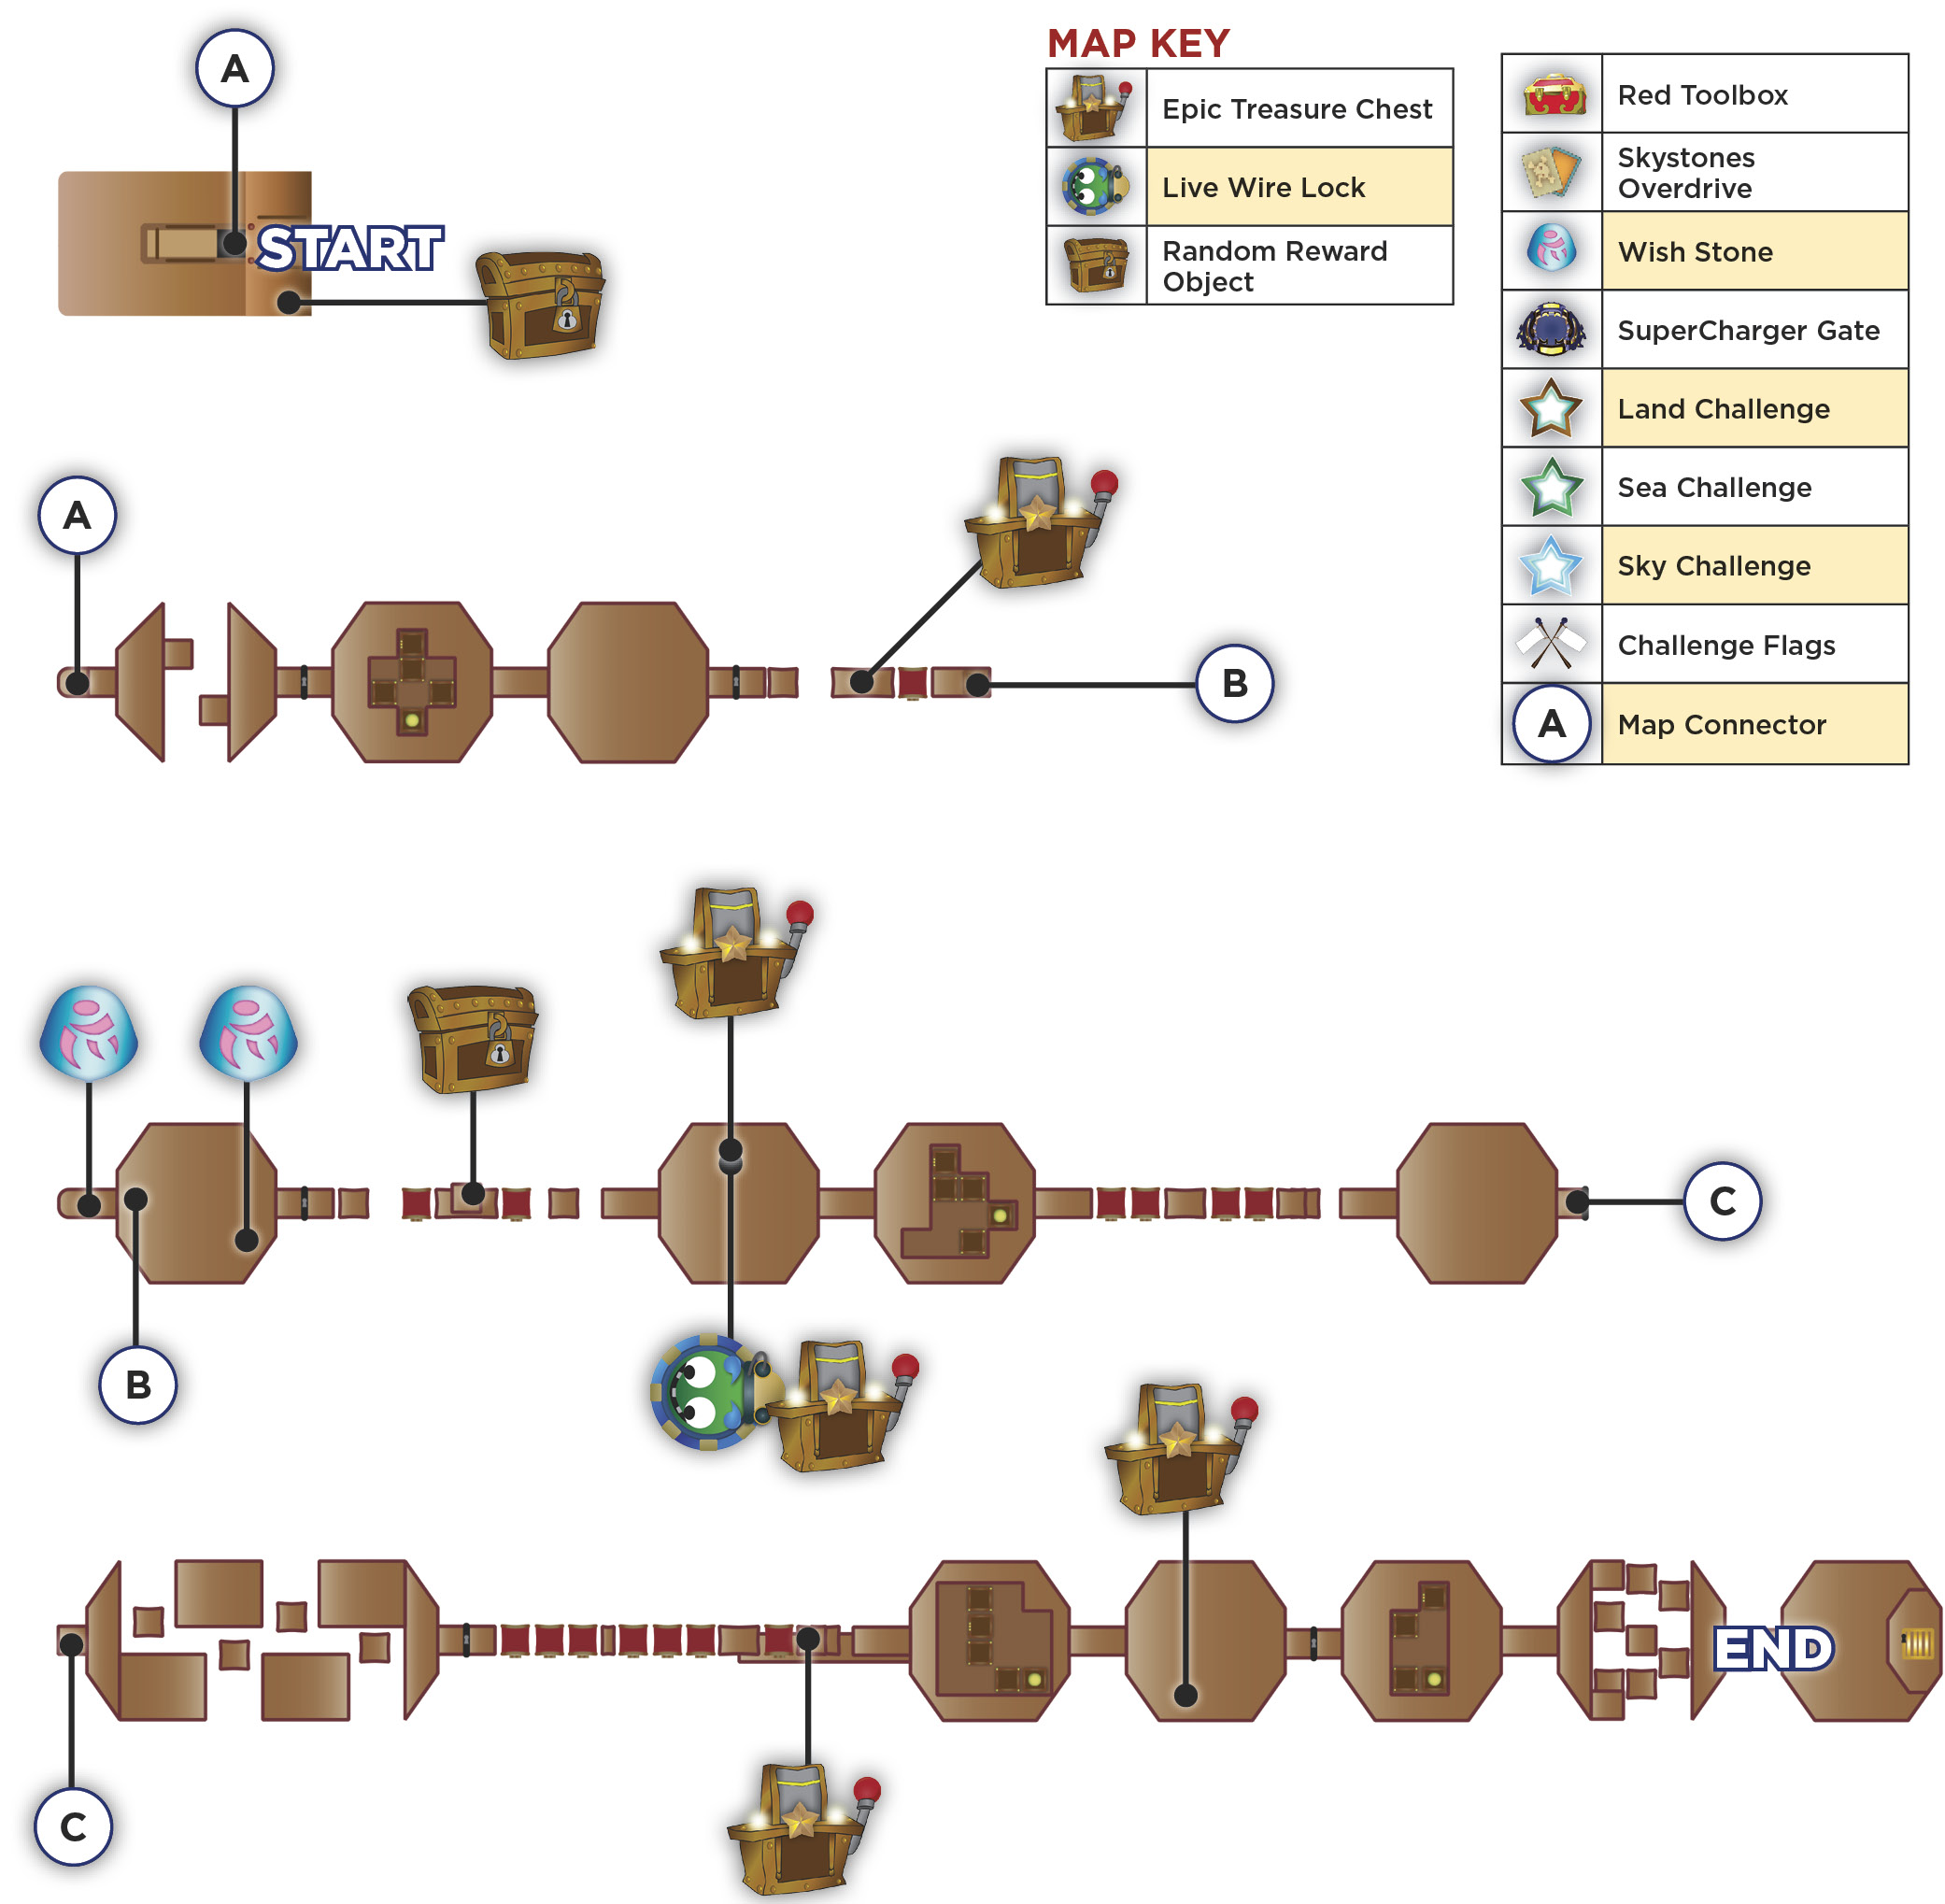
Talk to Flynn when you set down and look on the left side of the outer ledge. There is a Random Reward Object there, ready to take. Get it and use the door to go inside the train.
Jump across the moving platforms in the next room, and collect a Key as you go. Take this to the door on the far side of the chamber.
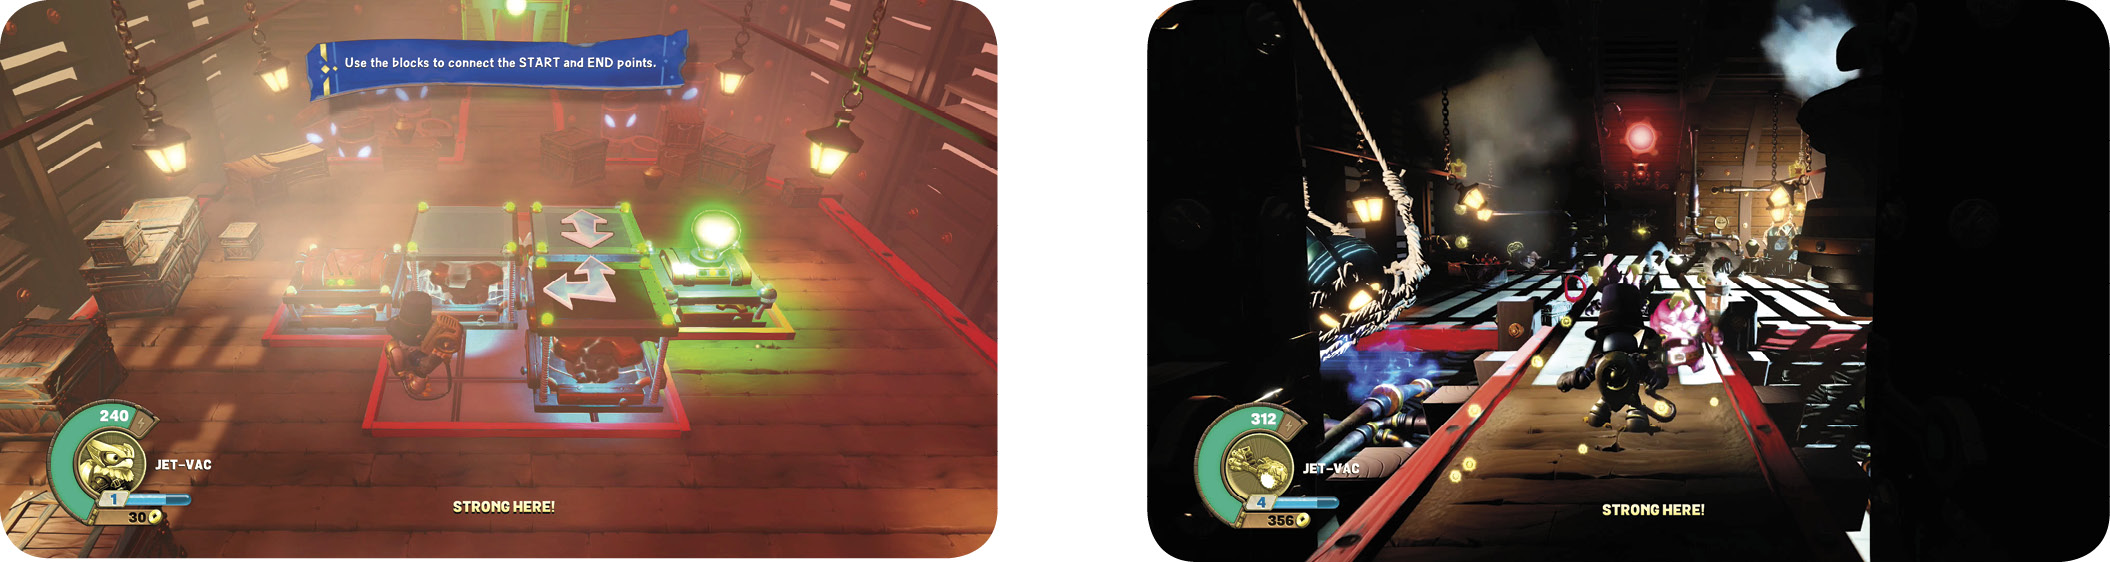
There is a small puzzle in the adjoining chamber. You have to connect a battery and an engine. There are three blocks in this one, and one of them isn’t movable. Push one of the mobile blocks to the right and then down. Move the second one to the right, and settle it across from the immovable block. This is what the final puzzle should look like.
A battle breaks out in the third room. Pirate Henchmen attack in a couple of waves. Break the boxes in the room during the fighting, and use ranged attacks if you need to gain an advantage against these slow opponents. Search well for treasure when you’re done. Take the Key that appears over to unlock the next door, and exit the room.
Jump across a few narrow platforms and bounce off of a jumper at the end of the path to get on top of the train. The roof to the left has an Epic Treasure Chest. Get that loot and drop down the entrance on the right side of the train to advance.
You land in a dark room. Pirate Henchmen are resting here and you must defeat them. Claim the Key for the far door.
For maximum experience and goodies, walk back a few feet to grab the Wish Stone that’s here, and then attack the Pirates before they’re ready to counterattack. Stay close to the light so that you can see your targets, and dodge when the Bomb Brawler throws anything your way.
Another Wish Stone is in the boxes on the right side of the room. Be sure to take that before you leave.
There is a side-scrolling room coming up. This is one of the most dangerous rooms in the game because another Pirate ship is bombarding the place while you go through it. Their double cannonball shots are hard to avoid unless you’re already moving. Don’t jump to dodge them; just keep running and stay running.
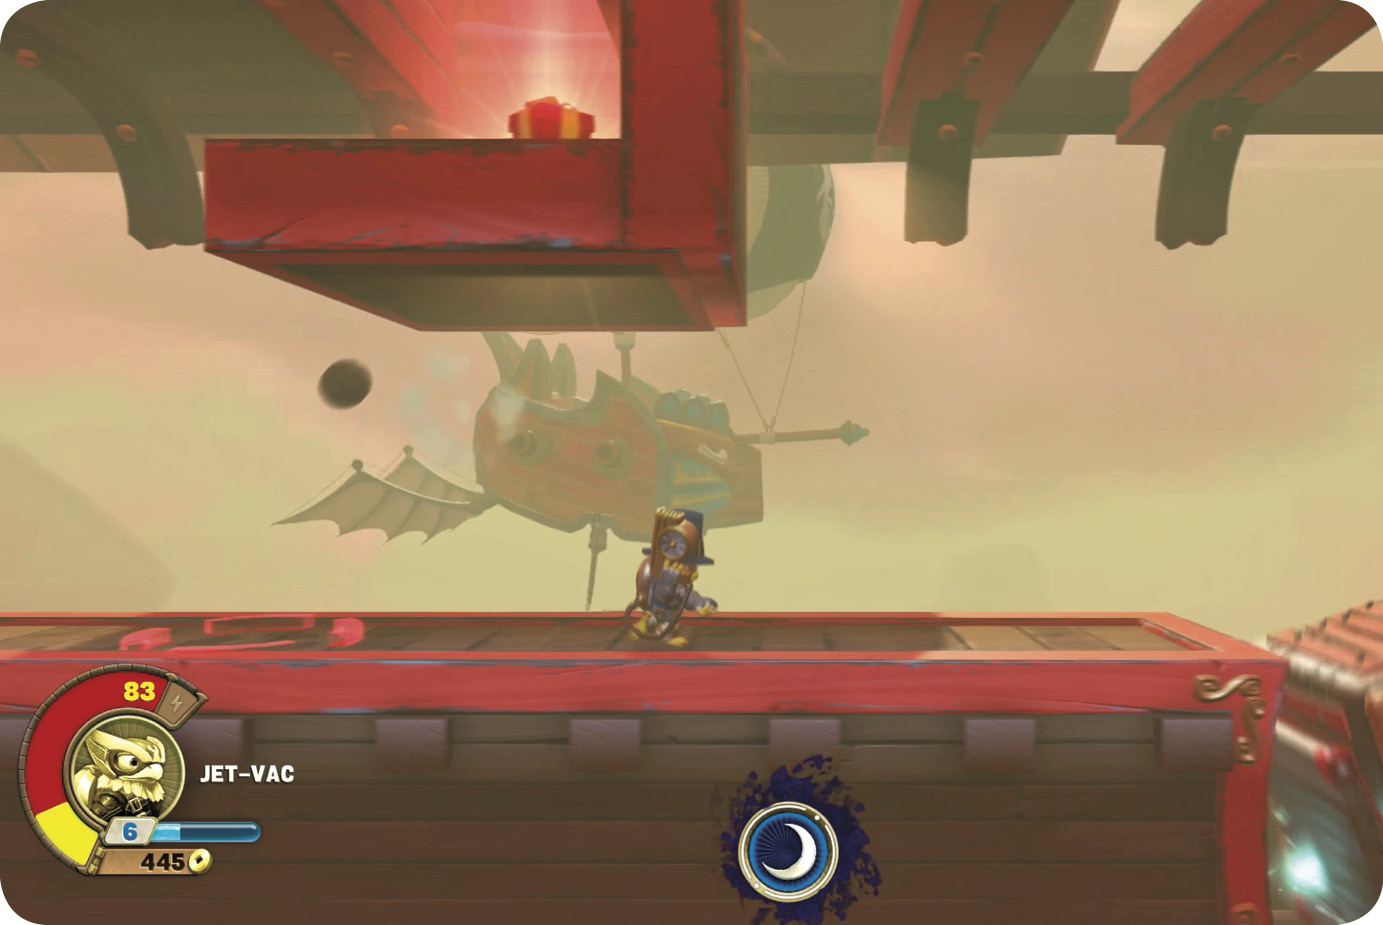
One of the rotating blocks has a jumper on it. Wait for that to come up on top while dodging the cannonballs, and use the jumper to get to the top of the car. Jump between the slats to the left and drop down where you see a red glow. Take the Random Reward Object there, and hop back to the floor of the car.
Make your way to the right to get out of this crazy place and hope that the next area is a bit safer!
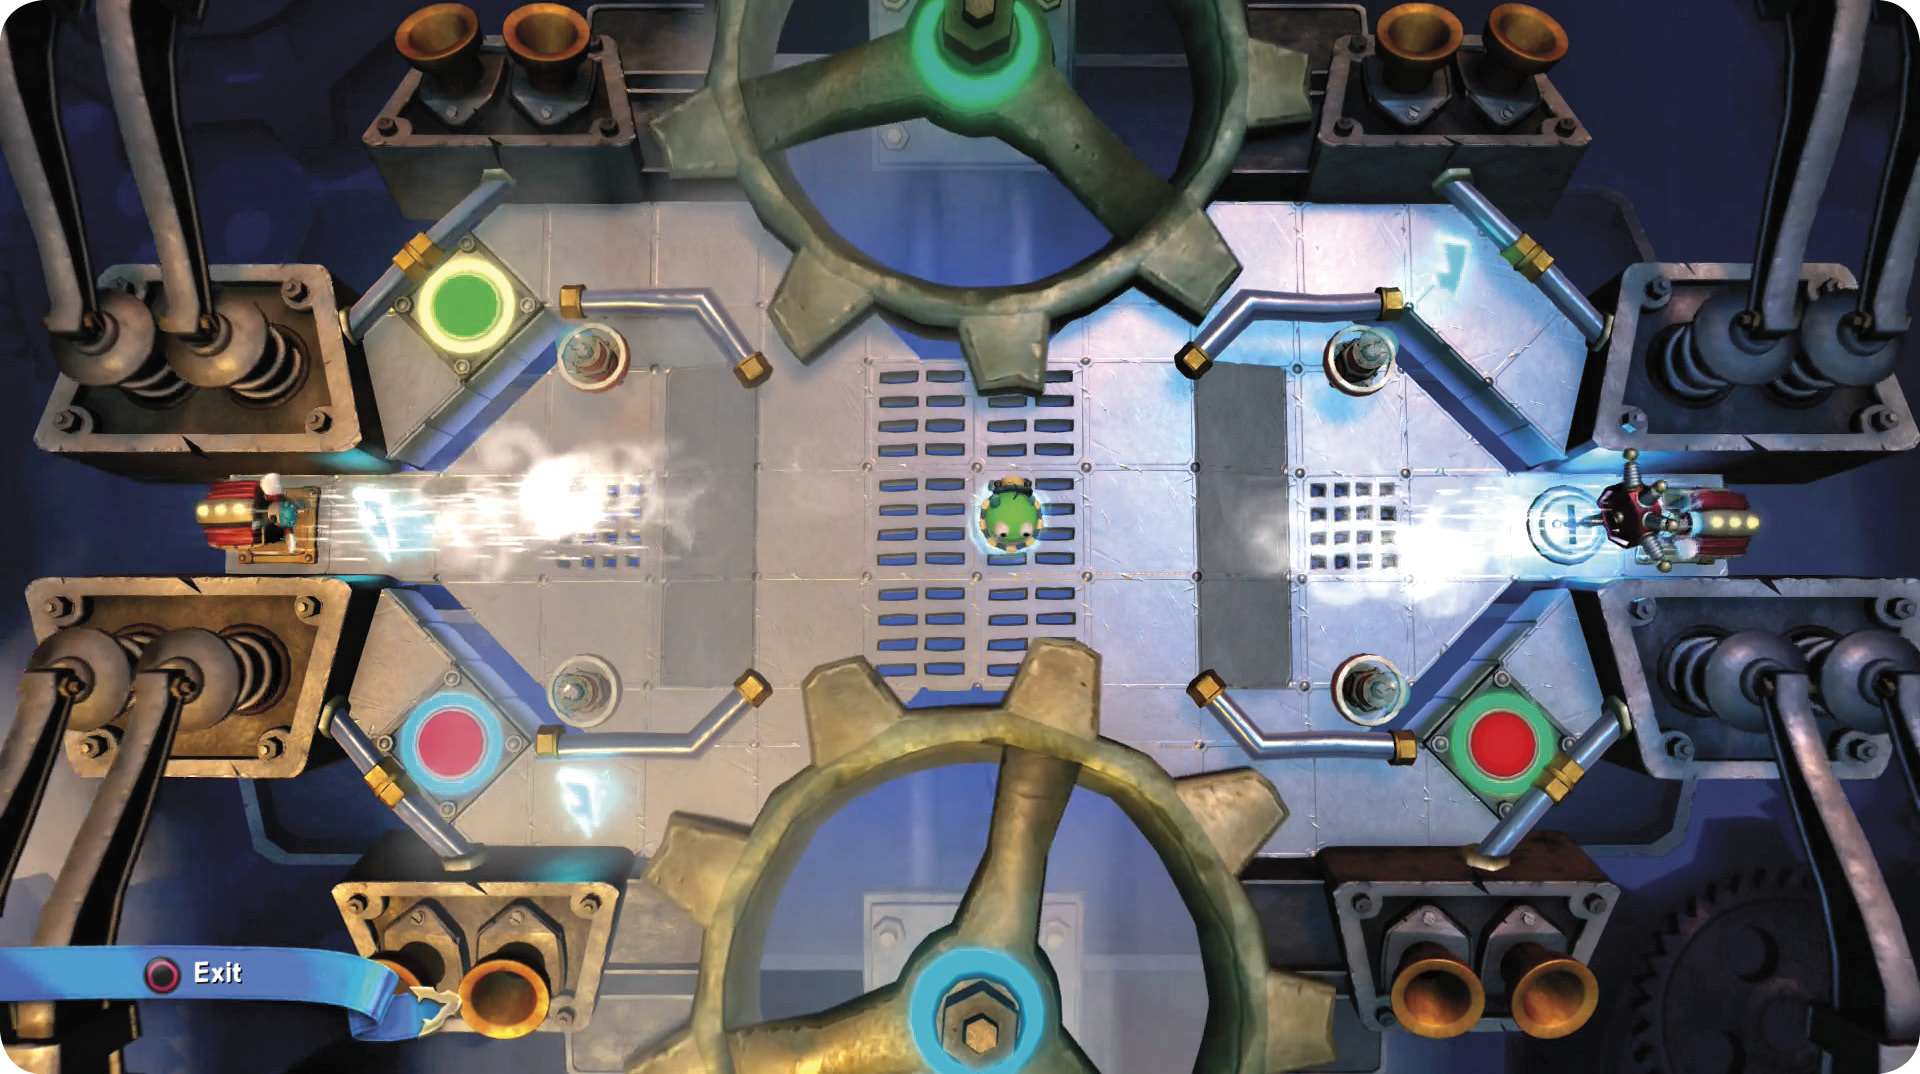
As it turns out, it mostly is. The Pirates are planning to smoke you out, but there is time to explore. Open the Live Wire Lock on the left to claim an Epic Treasure Chest. Hide in the teeth of the cog above your gremlin and let it take you right for the first Spark. Use the lower Cog to reach the second Spark and also two buttons. Press those, in turn, to be able to manipulate the cog. Once that’s done, press the button in the upper-left to turn off the fans that prevent you from getting the third Spark and leaving the challenge.
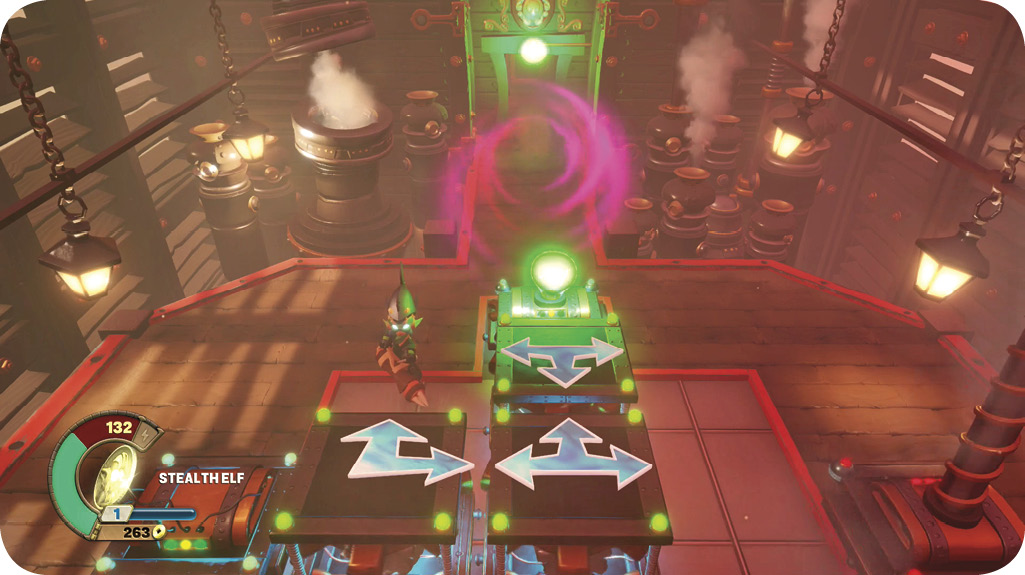
Try to ignore the smoke when you leave that room; the next car is cloudy, but you only have a small puzzle to finish there. We’ll show you a picture of the completed puzzle, and here’s how you get there.
We’ll name the blocks 1, 2, and 3 (from left to right).
Push block 1 down
Push block 3 down
Push block 2 right, down, and then left
Push block 1 up
Push block 3 up and then left
Push block 1 down
(On Beginner difficulty there is only one moving block.)
Leave the puzzle car, and hold onto your socks. The next side scrolling area has rotating blocks, moving platforms, more cannonballs to dodge, and smoke. It’s kind of hard the first time you cross it. Bring a Skylander with a dash or charging attack (anything that lets you move quickly to try and avoid the blasted cannonballs).
This is all about timing. Back away from the rotating platforms if you have to wait for them to get into position. Holding your ground just gets you wasted.
Go onto the room on the right and fight for your next Key. It’s held by a Rumble Brawl, but he has Grinnades to assist in the skirmish. Take his Key by force and unlock the door at the end of the corridor. You’re getting close now.
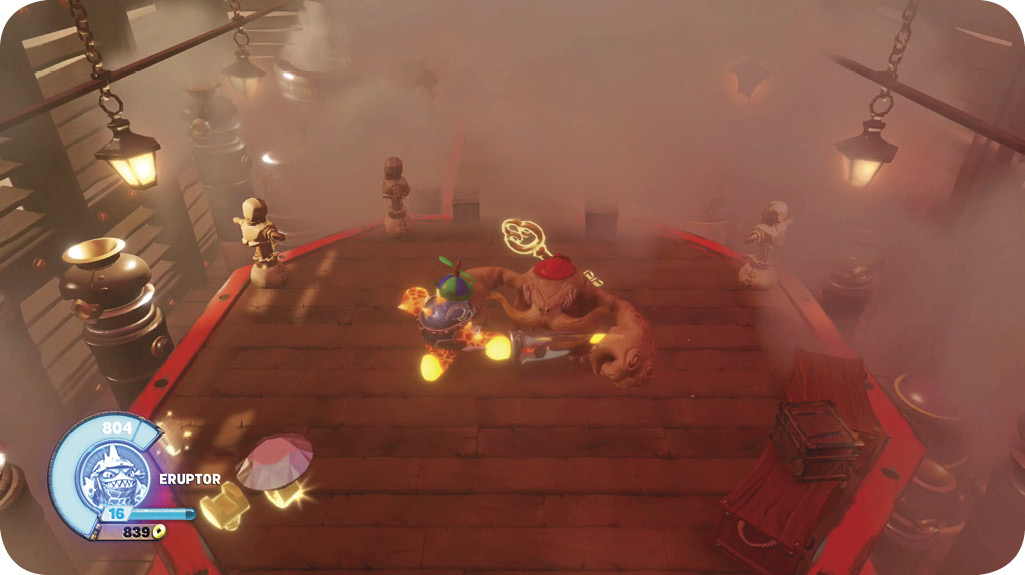
The next room is long but easy. Jump between the platforms, collect the Key from one of the random destructible objects, and watch out for small explosives that were left behind on the platforms if you go looking for treasure.
Unlock the far door and run through another side scrolling room next. This one has much better visibility, so it’s not as nasty as the last one. Keep moving and dash if you have abilities to improve your speed. When you get close to the end, slow down and look for a few items of treasure that are underneath your floating platforms. That’s a clue that there is a ledge to catch you when you fall. Jump down there and look for an Epic Treasure Chest. Use a bouncer to get back to the upper level when you’re done.
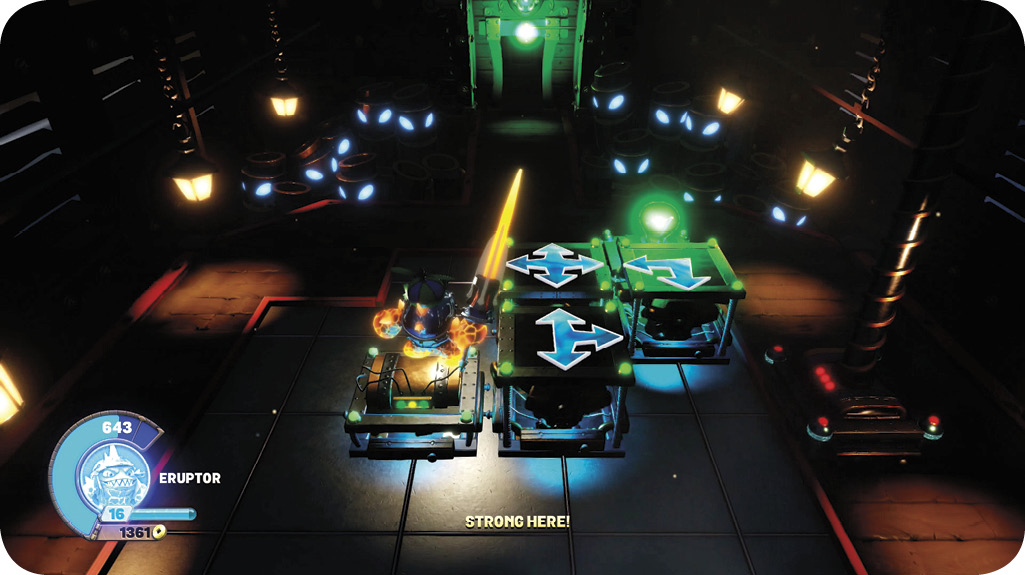
Afterward, you reach another dark room with a puzzle. Look at the completed version of it to get a feel for what you’re trying to do here. You need to get the three blocks to activate the engine in the upper-right. Here’s how you do that:
We’ll name the blocks from the top down this time: block 1, block 2, and block 3.
Push block 1 to the right; it’ll be touching the engine already, so it’s done!
Push block 3 to the right
Push block 2 up and then to the right
Push block 3 up and then left
Fight another Rumble Brawl and his cohorts in the next room. The Rumble Brawl has the key, so there’s no avoiding this confrontation. Watch out for the huge splash damage from the Grinnades there; they pack a brutal punch, and it’s hard to see them coming in the darkness. Ranged weaponry is very useful, so watch out melee folks! To access the nearby Epic Treasure Chest you must defeat all enemies to open the Battle Gate.
Leave the room and solve another puzzle in the next one. From left to right, we’ll name these block 1 and block 2.
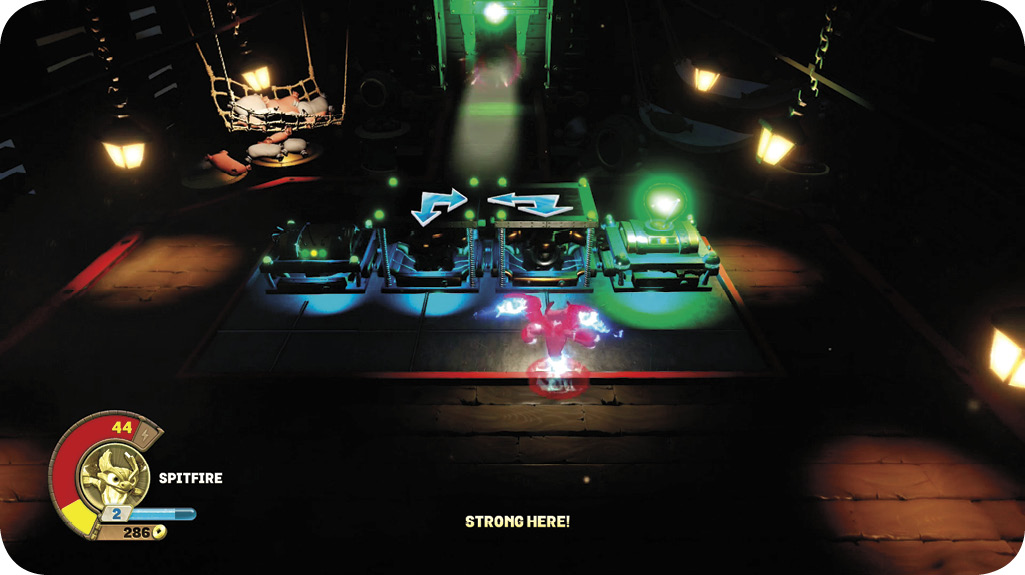
Push block 2 left, up, right, and then down
Push block 1 right and then up
Push block 2 up
(On Beginner difficulty, the puzzle is more simple.)
Cross the penultimate room of the train by walking carefully across moving platforms, in the dark. Try to avoid ranged fire from the other side of the area, but concentrate most on your footing to keep from falling off of the platforms.
Take out the lonely couple of Pirates before you leave. It’s time to face their boss!
Defeat Blubberbeard
Blubberbeard is in the last room on the train. He’s well-armed and has a horde of friends. In the first few waves, you face Pirate Henchmen, Bomb Brawlers, and some Rumble Brawlers. Run constantly to stay ahead of the Grinnades that are a big part of the threat throughout this encounter. The more mobile your Skylander is, the easier this boss fight becomes.
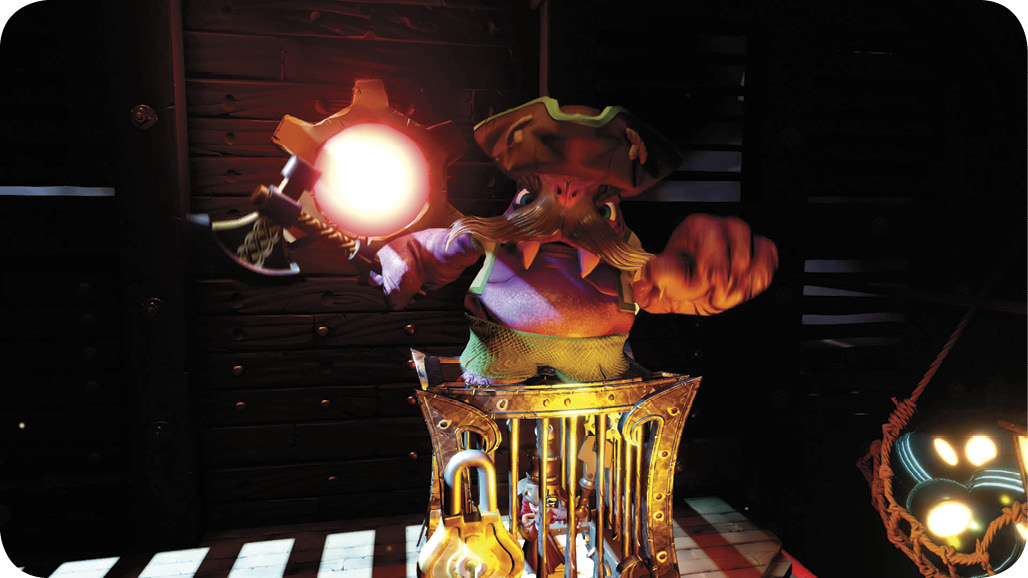
Blubberbeard himself swings a large axe and relies on a titanic amount of health to survive. His damage output and ability to come after you aren’t that impressive; it’s just that he attacks once you’ve been weakened by his allies, and there aren’t many ways to heal in this fight unless you level up.
Once Blubberbeard descends into the fray, expect the number of Grinnades to increase considerably. This is why you need so much mobility here. Otherwise, you constantly take damage from the explosions. Another way to survive is to use abilities that blow up around you to detonate the Grinnades safely.
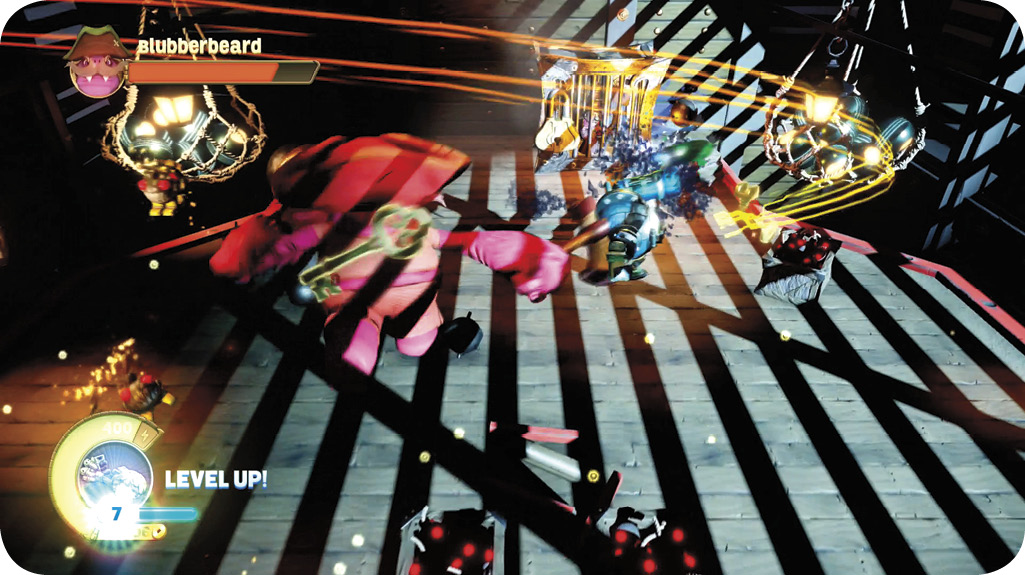
You can lay into Blubberbeard in relative safety once his reserves of Grinnades are expended. Wait for him to swing his axe, and then close for multiple free hits of your own. Repeat this until he falls. Another job well done!