
LEGO Jurassic World Guide Handheld Walkthrough: Movie 3
Level 22: Lab Interior

| Icons | Characters |
|---|---|
|
Paul Kirby |

|
Amanda Kirby |

|
Billy Brennan |
|
Udesky |

|
Alan Grant (Isla Sorna) |
| Icons | Unlocks |
|---|---|

|
Ankylosaurus |
Gold Brick Challenges
| Name | Mode | Notes |
|---|---|---|
| Level Complete | Any | Complete the level. |
| True Survivor | Any | Collect 33,500 studs. |
| Fossil Piece A | Free Play | Collect the first Ankylosaurus fossil piece. |
| Fossil Piece B | Any | Collect the second Ankylosaurus fossil piece. |
| Amber Brick | Free Play | Collect the Amber Brick. |
Advance through the Lab

As your team continues looking for Eric, they must search the laboratory. Start by using Alan to cut through the vines on the vending machine. Switch to Amanda and use her scream to shatter the glass and release an object.

Switch to Udesky and use the object to track through the room to find a pile of bricks. Assemble them into some gears with a crank. Turn the crank to open the door and enter the laboratory. Be ready to fight off some Compys that attack once the door is opened.

Advance down the hallway to the right and then descend the stairs to the first lab room’s main floor. Use Paul to fix the blue robotic arm at the back of the room. It lifts part of a walkway. Switch to Billy and climb back up the stairs, fighting Compys as you go. Follow the walkway to the back and then use the parasail to glide across to the walkway on the right.

Push a crate along checkered tiles until it gets stuck. Then switch to Paul on the floor of the lab. Use his grappling hook to grab onto the crate and pull it down. It breaks into a pile of bricks on the floor. Use these bricks to repair a green robot arm. After it closes a batch of dino eggs in an incubator, jump onto the incubator and bounce to the walkway on the right.

Drop to the ground floor of the second lab and turn the red wheel next to the tank of water. Use Alan’s raptor claw to cut away vines covering some broken pipes. Switch to Paul and repair the pipes. As the pressure builds, it blows off a red wheel.

Pick up the wheel and carry it to the back of the room. Put it into the slot in front of another tank of water. Turn the wheel to build pressure and break a third tank. This releases a skeleton. Take control of Alan and assemble the skeleton into a ladder that can be used to get out of this lab.

After climbing the ladder, continue to the right until a raptor is hiding behind some tanks. Switch to Billy and use his camera to stun the raptor. Now your group can get past it and complete the level.
Challenges
Amber Brick


In the room with the two robotic arms, move to the far left on the ground floor. Fire an electric rifle at the blue target to open the door. Enter the room with a character capable of going into dark places and retrieve the Amber Brick that unlocks the Ankylosaurus.
Fossil Piece A

Near the level’s end, find an access panel. Switch to a character with InGen access to use the panel. Repeat the onscreen code. Next, complete the puzzle. The fossil piece is in a tank of water. Use the switches on the floor to transfer the fossil to the broken tank. If you number the switches from one to four starting on the left, jump on the switches in this order: three, one, two.
Fossil Piece B
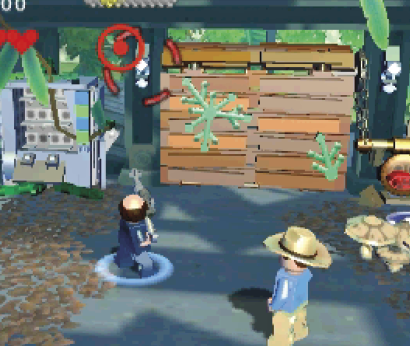
Several surveillance cameras are scattered throughout the lab complex. Use Udesky’s rifle to shoot them. Once they are all destroyed, this fossil piece is awarded. The first two cameras are in the room where you start. The third is above the door where you get the Amber Brick. The fourth is near the access panel you use to get Fossil Piece A. The final two cameras are tough to get. From the access panel, move along the catwalk to the left. Switch to a female character and jump onto the duct work on the left. Follow it to a hidden walkway above the egg hatchery room. From this walkway, shoot the last two cameras.