
LEGO Jurassic World Guide Console Walkthrough: Movie 2
Level 06: Isla Sorna
Four years after the events on Isla Nublar, Dr. Ian Malcolm is summoned to meet with John Hammond once again. Malcolm learns that the Jurassic Park dinosaurs were originally bred and raised on a different island: Isla Sorna, ominously known as “Site B.” Unfortunately, a powerful hurricane tore open many of its containment facilities, and the site was evacuated. The surviving creatures now roam free on the deserted island.


Other news: John Hammond has lost control of his company, InGen, to a greedy nephew named Peter Ludlow. Hammond doesn’t trust Ludlow’s intentions and wants Malcolm to join a research team that includes Malcolm’s paleontologist girlfriend, Sarah Harding, who is already on Isla Sorna. The goal: study, photograph, and fully document the existence of dinosaurs in their natural habitat, and then help Hammond rally public support to stop Ludlow’s schemes.
| True Survivor Stud Requirement |
|---|
| 75,000 studs |
Eddie’s Workshop
Ian Malcolm meets up with the research team’s equipment specialist and engineer, Eddie Carr. Eddie’s workshop crew is getting the vehicles ready for transport to Isla Sorna. During this mission you also meet the other team member, a photographer named Nick Van Owen.

| Icon | Story Characters | Abilities |
|---|---|---|

|
Ian Malcolm (Isla Sorna) | Illuminate (Flare), Academic Panels |
|
Eddie Carr | Repair, Sharpshoot, Tracker |

|
Nick Van Owen | Photography, Crowbar, Bolt Cutters |
Prep the Trucks
Paint the Truck Green
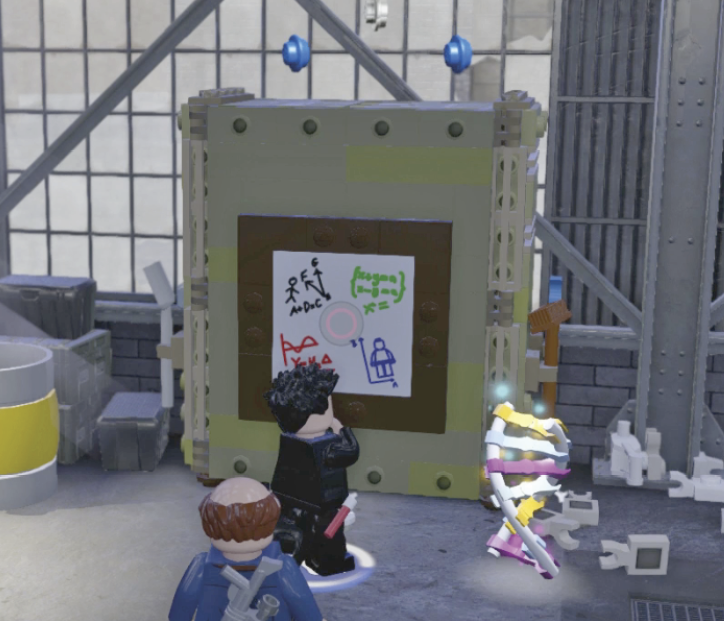
Three safari-type trucks are being outfitted for the trip to Isla Sorna; their icons appear onscreen. You must help get all three ready. Send Ian Malcolm to the schematic drawings on the board in the back-left corner of the workshop. Press your Activate button and watch the order in which the four drawings light up. Then select each of the drawings in that same order. When you do it correctly, the cabinet bursts open and spills out build-it parts. Use the parts to finish the paint sprayer pump.
Approach the paint mixer. Its center tank is the current spray color, which is red. Rotate the two mixing wheels (at the dino icons on the floor) so that one wheel has its blue mixer in front and the other has yellow. This blue/yellow color combo makes the paint in the center spray tank green. Hop onto the spray pump to shoot green paint to the sprayer. The car painter finishes the job. One truck icon is checked off onscreen.

Get Tires on the Truck
Another truck nearby needs two new tires. Tag to Eddie Carr and use his rifle to shoot the two bull’s-eye targets on the shelf hanging on the back wall. Two big truck-sized tires with green rims drop to the floor.
MINIKIT: Wheel Up the LiftAfter Eddie shoots the truck tires to the floor, roll one of them into the wheel crank on the workshop’s left side. Turn the red crank handle to raise the lift platform. A nice Minikit is on it! After you nab the kit, roll the tire to the truck that needs wheels. 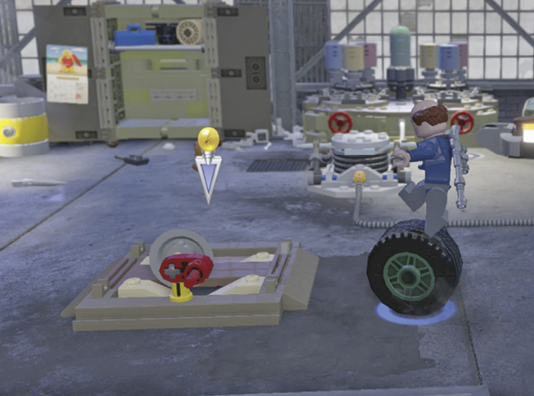
|
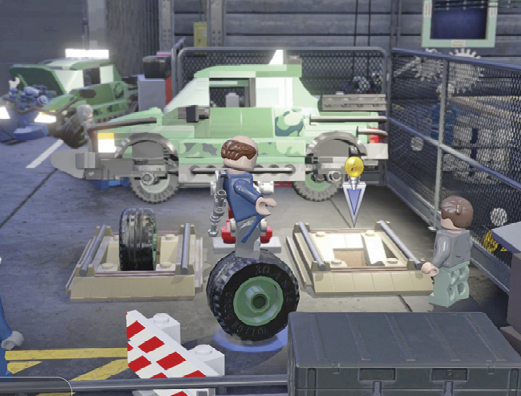
Hop onto one of the green-rimmed tires to roll it. First, use it to get a Minikit! (Check the Minikit box.) Then steer it to one of the two wheel slots on the floor in front of the jacked-up truck. Go back and do the same with the other green-rimmed truck tire, rolling it into the second wheel slot. The tire fitters, finish the job. Two trucks fixed, one to go!
Repair the Truck’s Engine
Send Eddie to the truck with its hood up near the big exit door in the back. Step to the engine and use Eddie’s wrench to fix it. This triggers a quick cutscene: Nick Van Owen, the team’s field photographer, arrives and meets Ian. Nick is now a playable character.

Lower the “High Hide”
Tag to Nick Van Owen and use his Crowbar ability to open the red gate to the right. Enter the shop’s next area where Joe the Mechanic can’t get a big engine down a floor track. Send Nick to the fenced enclosure in the back and use his Bolt Cutter ability to snip through the chains locking the gate. To time your snip properly, press the Use button when the arrow is in the light-colored middle range of the onscreen meter.
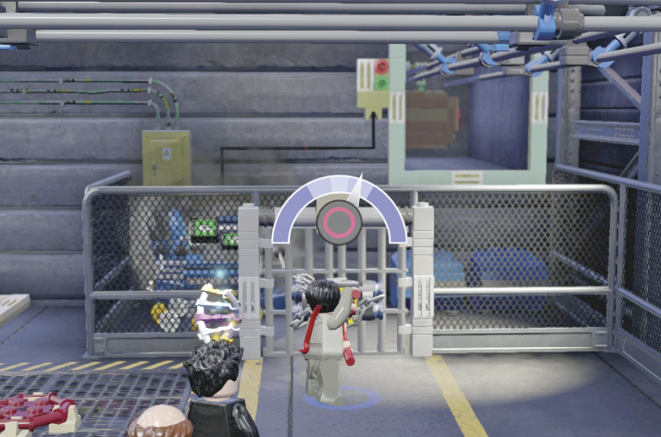
Tag to Eddie and use his wrench to fix the smoking machine in the enclosure’s left corner. This activates the overhead conveyor system and three big crates roll out. Each has a bull’s-eye on it. Shoot all three targets with Eddie’s rifle to spill build-it pieces onto the floor.

Assemble the pieces into a turn switch. Walk into the green side of the switch lever to turn it, which moves the engine down the floor track. When it reaches the end, it engages with the gear assembly and lowers what Eddie calls a “high hide” platform to the floor. Hop aboard and use the control panel to raise the lift to the upper floor.

MINIKIT: Cut Open the ClosetJust to the right of the “high hide” lift on the upper floor is a chain-locked utility closet. Use Nick’s bolt cutters to open the door; then grab the Minikit inside. 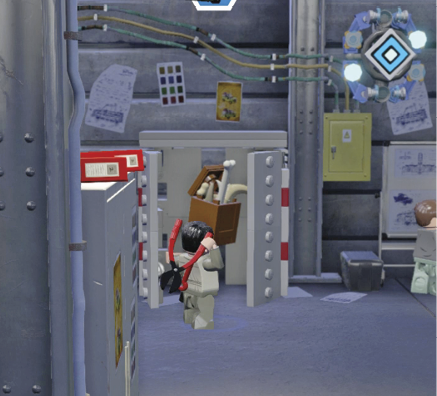
|
Top Off the Mobile Lab

Use Nick’s crowbar to open the next red gate and descend the stairs to the main floor. Workers are putting the finishing touches on the big 10-wheeler Mobile Lab that will serve as headquarters for the team on Isla Sorna. The front section is missing a roof, though. Smash the three brown crates in the front-right corner of the shop to dump out their build-it pieces. Then assemble a staircase leading up to a broken control console.

Send Eddie up the stairs to fix the console. Then use the console to take control of the crane above it. Use your left stick to swing the crane toward you, moving it over the Mobile Lab’s roof. When it picks up the roof, swing it back over the green bus-like vehicle to secure it.


This triggers a cinematic sequence: Ian Malcolm’s daughter Kelly arrives and admires the Mobile Lab. Then, cut to the deck of the transport ship as it approaches Isla Sorna!
Finding Sarah
On Isla Sorna, Ian Malcolm, Nick Van Owen, and Eddie Carr hunt through the jungle for Sarah Harding. Eddie unveils a tracker designed to detect the location sensor he built into Dr. Harding’s phone.
| Icon | Story Characters | Abilities |
|---|---|---|

|
Ian Malcolm (Isla Sorna) | Illuminate (Flare), Academic Panels |
|
Eddie Carr | Repair, Sharpshoot, Tracker |

|
Nick Van Owen | Photography, Crowbar, Bolt Cutters |
Climb the Rock Terraces

Tag to Nick Van Owen and move across the river. Fight off the annoying little Compys and use Nick’s crowbar on the marked rock formation to clear the cave opening. Tag to Ian Malcolm and use his Flare ability to enter the dark cave. Use the big spotted mushroom to bounce to the upper terrace.
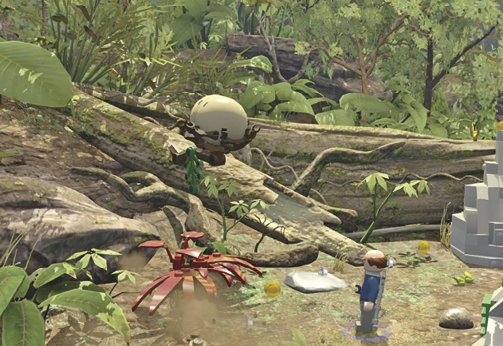
MINIKIT: Cracking EggsThree big dinosaur eggs sit in nests up in trees. (You can see two of them in the mission’s opening shot; we circled them for you.) Eddie can shoot them and grab a Minikit wherever the third one breaks. The first egg is above the first clearing to the left. The second one is next to the bull’s-eye target after you walk up the huge fallen tree trunk. The third egg is at the far-left end of the final clearing where you spot the Stegosaurus herd. 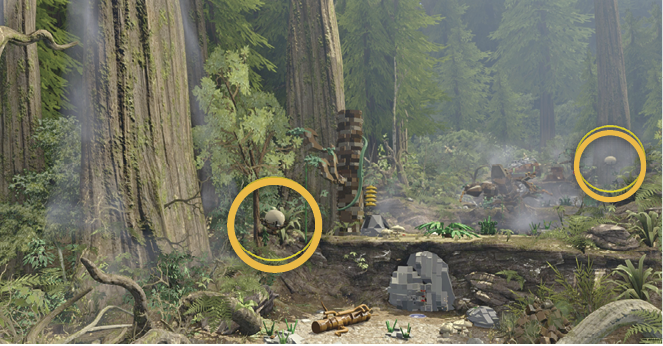
|
Smash the gray LEGO tech to the left and assemble the build-it pieces. The object drops onto a branch that lowers a vine to the guys below who both climb up automatically.


Proceed to the big tree trunk extending from the next cliff. Jump and grab one of the two vines hanging from it; one of the other guys automatically jumps to grab the second vine, and the two of you pull the trunk to the ground. Tag to the third guy and run up the trunk to the next terrace. Then kick down the ladder on the cliff’s edge so the others can climb up.

Look out! A small cave to the left is home to a Compy family. The little biters just keep coming out of the cave until you smash a nearby gray rock into build-it pieces, and then use them to block off the cave mouth.
Tag to Eddie and shoot the bull’s-eye target up on the cliff to knock down a tree into more build-it pieces. Assemble them into a really elaborate chopping device. Jump on its platform three times to chop through the branches blocking a small cave. Walk Eddie (who has the Tracker ability) into the cave to pick up the tracking item inside.

Follow the blue tracks until Eddie unearths some build-it pieces. Assemble them into a bounce platform. Use it to jump up and grab the bar above it. Tag to a second character and repeat: It takes two guys to pull down the tree trunk section. Use it to hop up onto the next terrace.

Moving across the terrace triggers a scene: A magnificent Stegosaurus herd emerges from the forest into a clearing on the other side of a great fallen tree. Walk Nick to the big gray rock pile and break it apart with his crowbar to form a jumping platform. Hop Nick onto the log and use the series of three marked spots to take photos of the herd. A new face appears in the third photo!
Stegosaurus Herd
Say hello to Dr. Sarah Harding, but don’t take too long. An angry Stegosaurus swings its tail, trying to drive you away from its young offspring. Nick and Sarah are trapped in the clearing!

| Icon | Story Characters | Abilities |
|---|---|---|

|
Sarah Harding | Droppings Rummage, Dino Heal, Agile, Photography |

|
Nick Van Owen | Photography, Crowbar, Bolt Cutters |
Stun the Stegosaurus
To survive the Stegosaurus attacks in this mission, you must make the same maneuver three separate times. As the session starts, run either character to the right, avoiding the beast’s attacks, to the pile of brown build-it pieces at the edge of the clearing (next to the very large baby toys). Quickly assemble them into a box; then press Use to crawl inside. (If the Stegosaurus manages to smash the box before you get inside, you’ll have to reassemble the pieces and try again.)

Wait until the Stegosaurus lumbers over, turns around, and whips its tail directly into the box. The tail spikes pierce the wood and get stuck as you crawl out. Hurry to the photo spot marked near the dinosaur’s head. Use it to take a photo and stun the creature with the flash.

Now run across the clearing and wait until the beast’s tail-slam attacks knock another log to pieces. Assemble those pieces into another box and repeat the previous steps to stun the Stegosaurus with another flash.

AMBER BRICK: Tail-Smashing Boulders

To earn this Amber Brick, you must trick the Stegosaurus into smashing three large objects in the clearing: two gray boulders and the big log at the far right. Tag to Sarah Harding and jump atop one of the objects. Wait until the Stegosaurus directs his tail-slam attack at Sarah’s position, and then jump off the boulder or log just as the seismic mini-wave shatters it. You earn the brick when all three large objects are shattered. This unlocks the Stegasaurus. |

Run around the clearing, avoiding attacks until the third log chunk falls into pieces near where Ian Malcolm and Eddie Carr are perched on the fallen tree. Again, go assemble the build-it pieces into a box, crawl inside, wait for the tail to get stuck, and take a last photo from the marked photo spot. This triggers a scene-ending cinematic: You see the foursome back at camp, surprised to discover a stowaway in the Mobile Lab. Then they spot incoming InGen helicopters. Looks like Ludlow’s expedition has arrived!

Hub Transit 6
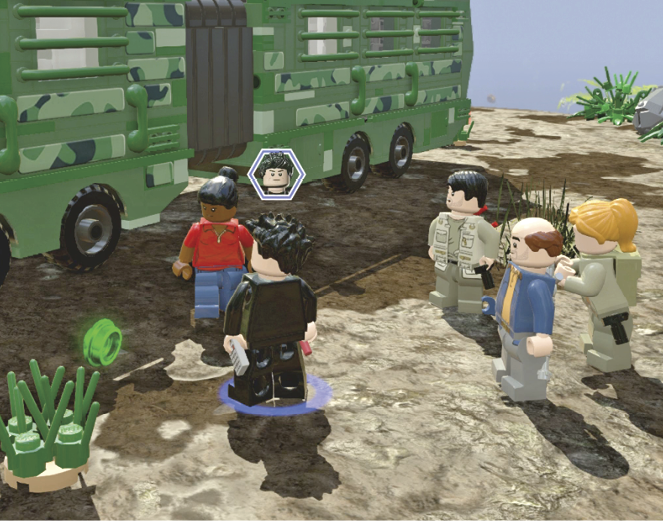
The team, including the newly discovered stowaway, Kelly Malcolm, gathers outside the Mobile Lab. Time to go check out what those InGen helicopters brought to the island.
| Icon | Story Characters | Abilities |
|---|---|---|

|
Sarah Harding | Droppings Rummage, Dino Heal, Agile, Photography |

|
Nick Van Owen | Photography, Crowbar, Bolt Cutters |

|
Ian Malcolm (Isla Sorna) | Illuminate (Flare), Academic Panels |

|
Eddie Carr | Repair, Sharpshoot, Tracker |

|
Kelly Malcolm | Agile, Scream |
Cross River and Ravine
Follow the blue studs down the path until you reach the waterfall and river. Turn left to find handhold blocks on the cliff wall. Tag to Nick Van Owen and jump up from block to block to the top. Use Nick’s crowbar to pry part of the boulder over the ledge.

Tag to Eddie Carr and assemble the build-it pieces into hopping stones. Use them to hop across the river. Proceed to the deep ravine. Then use Eddie’s rifle to shoot the bull’s-eye target on the high tree branch on the other side. This drops a green swinging vine within reach.

Tag to Sarah Harding and use the vine to swing across the gap. Continue to the big droppings pile and rummage in it to retrieve build-it pieces. Use them to assemble a bounce pad; then use it to bounce up the rock wall. Move forward to trigger the next scene.
