LEGO Jurassic World Guide Console Walkthrough: Movie 4
Level 19: Under Attack
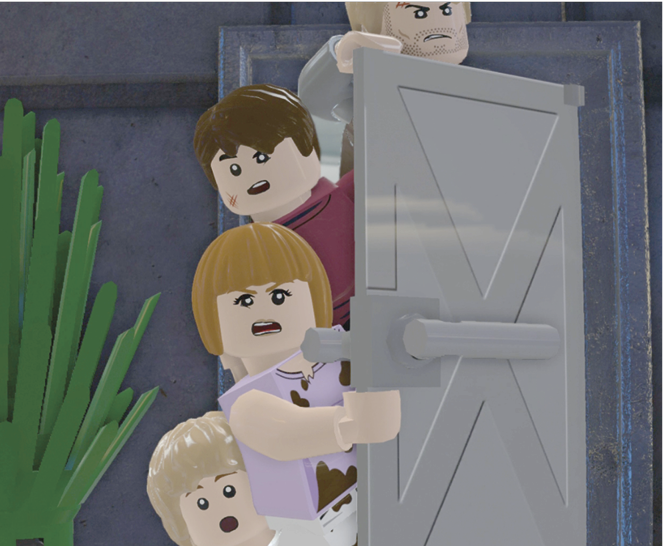
Back at park control, Hoskins suggests deploying Owen’s trained raptors to hunt down the Indominus Rex, but Simon Masrani decides to take matters into his own incapable hands. Unfortunately, this crack marksmen misfires and pokes a hole in the aviary. The results are not pretty.


| True Survivor Stud Requirement |
|---|
| 74,000 studs |
Main Street
Now the tourists at Jurassic World get the unexpected pleasure of observing Pteranodons and Dimorphodons, up close and personal! The new attractions arrive at the park village just as Gray and Zach Mitchell enter and find Zara.


| Icon | Story Characters | Abilities |
|---|---|---|
 |
Gray Mitchell | Bone-Build, Small Access, Photography |
 |
Zach Mitchell | Repair, Illumination (Torch) |
 |
Zara | Agile, Scream |
 |
Owen Grady | Climb, Rope/Vine Cutter, Droppings Rummage, Dino Heal, Camouflage |
 |
Claire Dearing | Jurassic World Access, Scanner, Agile |
Chase Off Pteranodons

Tag to Zara and use her Scream ability to shatter the glass of the Music Store. Tag to Zach and smash the album display shelf directly opposite the doorway to reveal a smoking blue generator. Use Zach’s wrench to repair the generator and activate the sound system. The loud music drives off the Pteranodon harassing the hot dog vendor.
As the dinosaur flies off, it knocks over a streetlight that falls into water gushing from a nearby fire hydrant. This creates an electrified barrier for Zara, Zach, and Gray. The camera pans to the opposite end of the street where Claire Dearing, Owen Grady, and a well-armed ACU security team arrive. A pair of Pteranodons that refuse to move blocks the route to the right.

Tag to Claire and use her scanner at the sensor panel (circled in our shot) just left of the 3D Theater’s front doors. This closes the security shutter over the Sushi Shop next door. The shutter also sheds some broken pieces; use these to build handholds for a climbing wall. Tag to Owen and climb the wall to the roof.

Go left and kick the Coffee Shop sign to drop a cable. Tag back to Claire, climb the cable to the roof, and head rightward to use the Jurassic Park access panel. Enter the three-button code to activate the rooftop T. rex hologram projector and scare off the Pteranodons.

Now the camera automatically pans back down the street and you tag to Gray Mitchell. A Pteranodon knocks a pile of bones into the street. Use Gray’s Bone-Build ability to assemble them into a bounce pad. Tag to Zara and use the pad to bounce up to a set of twirl poles. Use them to swing over the electrified water hazard.
On the other side, smash all three of the blue/white barriers; then assemble the pieces into a footbridge over the hazard. Tag to Gray and use the photo spot to snap a flash photograph of the red Pteranodon attacking the tourist. The flash drives it away. Note that the beast has a gold key in its claw.

AMBER BRICK: Slide-In Clothes ShopAfter Zara uses the twirl poles to get past the electrified water, use her Agile ability to slide under the Clothes Shop entrance’s slide bar and snag the Amber Brick inside.  |
The stunned red Pteranodon flies erratically down the street and crashes through a barrier, dropping the gold key. Tag to Claire Dearing, head to the right, and fight through the Dimorphodons to pick up the gold key on the street. Use the key to unlock the front door of the Arcade.

Inside, send Claire to the left and then over the pink/blue agility bar. Pump up the generator fuse box to send a power surge to the car ride. The car careens down the street and scares away the Pteranodon hunkering in the fountain pool. That’s the last of the pesky flyers! But one more obstacle remains.

Put Out the Fire

Tag to Zara and go to the fountain. Turn the red crank wheel to increase the water pressure and blast a stream of water through the debris clogging the flow. Hop into the pool and use the fallen debris pieces to assemble a push switch. Then push the green side of the switch in a circle until the water stream hits the fire and extinguishes it.

This triggers a series of cutscenes. The boys finally reunite with their Aunt Claire, who learns that Hoskins is planning to unleash his experimental raptor team to hunt the Indominus Rex. Owen Grady arrives in time to take control of his trainees.

The Alpha


Owen, Barry, the raptor quartet, and an InGen security team roll through the jungle. Here the story gets an unexpected twist. Owen’s raptors indeed track down the Indominus Rex. But when they find the great white monster, Owen suddenly realizes where the Rex gets its intelligence.
| Icon | Story Characters | Abilities |
|---|---|---|
 |
Owen Grady | Climb, Rope/Vine Cutter, Droppings Rummage, Dino Heal, Camouflage |
 |
Barry | Electric Charge, Tracker, Grapple |
Rescue the InGen Security Team
The battle doesn’t last long. Within seconds, the four members of the InGen mercenary team get scattered and put in jeopardy. Their icons appear at the top of the screen. Your first task is to rescue all four. As you save each one, each gets checked off.
Save the First Mercenary
Tag to Barry and pick up the nearby tracking item. Follow the blue tracks until you unearth the build-it pieces. Assemble them into a jump pole; then use the boost pad that appears. (You may have to fight off a Compy pack first.) Tag to Owen and jump to get boosted atop the burning military vehicle.

Hop across the two poles to the tree platform; then use the green vine to swing across to another tree platform. Knock down the ladder, and then use Owen’s knife to cut through the vine that snags the first InGen soldier by the foot, and his ATV as well. Both drop to the ground. The mercenary runs off safely, but the ATV shatters into pieces.
Save the Second Mercenary
Just up ahead, one of Owen’s raptors, Echo, has the second mercenary trapped atop a big log. Assemble the broken ATV pieces into a rocket and jump on its bounce pad three times to launch it at Echo. The raptor runs off and the mercenary escapes. Two down, two more to go!

Save the Third Mercenary
Continue on to the right, fight through the Troodon pack, and try to help the mercenary trapped under rocks. As you do, another one of Owen’s raptors, Charlie, pounces in an ambush. Follow the onscreen button prompts to fight him off. Then pull out the trapped soldier.

Save the Fourth Mercenary
Use the nearby hopping LEGO pieces to build an extension to the log and climb it to the next terrace. Have Owen rummage in the big droppings pile to retrieve build-it pieces, and then assemble them into a ladder. Tag to Barry, climb the ladder, and use his grappling hook to tear open a hole in the huge tree trunk blocking the path. This triggers the appearance of another raptor, Delta.

Tag to Owen and use his Camouflage ability to sneak through the hole in the trunk past Delta. On the other side, smash all three of the brown mounds and assemble the pieces into a strange, spring-loaded battering ram that knocks Delta off the log and lets Barry hustle through the hole.

MINIKIT: Droppings RummageAfter Owen sneaks through the tree trunk past Delta, rummage in the big droppings pile just across the next clearing. Owen extracts pieces that you can assemble into a Minikit.  |
Tag to Barry and pull the crates off the high wall with his grappling hook. Assemble the broken pieces into a yellow bounce pad and hop up to the next level. Move forward to trigger a quick scene: The fourth mercenary is in a faceoff with the remaining raptor, Blue, claiming, “I’ve got sixty-five million years of smarts over you.” But the new alpha sneaks in behind the soldier. Now you’ve really got your rescue work cut out for you.

Tag to Owen and activate his Camouflage ability. Sneak over to the hopping blue LEGO pieces next to the security team’s truck. Deactivate stealth and assemble the pieces into an engine component with an electric target on it. Tag over to Barry and shoot the target with his electric rifle to jumpstart it. The truck roars to life, knocks away Blue, and dumps a load of build-it pieces from its rear door. Now you have just one lizard left.

Assemble the pieces into a huge peppershaker on a Buddy Boost. Step Barry onto the boost pad first. Tag to Owen, approach Barry, and jump to get boosted up onto the Buddy Boost and fling the pepper at the Indominus Rex. Its sneezing fit frees the mercenary from its mouth, and the man finally runs off, safe. But the four raptors regroup as Owen and Barry speed away on an ATV.


Raptor Pursuit
Claire Dearing sits at the wheel of a brawny service truck called a Mobile Veterinary Unit, or MVU. Her nephews Zach and Gray sit in the back, ready to leave the island, finally. But when raptor thugs try to hitch a ride, the chase is on.


| Icon | Story Characters | Abilities |
|---|---|---|
 |
Claire Dearing | Drive MVU |
 |
Zach Mitchell | Electric Rifle |
 |
Gray Mitchell | Electric Rifle |
 |
Owen Grady | Drive ATV |
 |
Barry | Electric Rifle |
Shoot the Raptors: MVU
This fast-moving mission has several distinct sections, but all have the same basic objective: Zap the pursuing raptors with electric stun rifles. In the first part of the chase, you can tag between Zach and Gray and shoot at raptors from the back of the truck. Just move the targeting reticle over a raptor and press Attack to shoot.
Each dinosaur has a half-circle health bar over its head. As the bar drops low, the meter turns red. When you drain the bar, the raptor stops pursuing and doesn’t reappear until later in the chase.

MVU Phase 1
Two raptors give chase at first. At several points, one or the other will suddenly leap into the back of the truck and attack Gray or Zach. Just tap the button prompts shown onscreen to fend off the beast, and then start shooting at the runners behind the truck again. The raptor you kick out of the truck disappears briefly but rejoins the chase a few seconds later.

Knocking out both raptors triggers an event: The truck drops off a low jump, bouncing Gray off his feet as Zach grabs his brother’s hand. Tap the button prompted onscreen to pull Gray back into the trunk. Then start shooting again, as two more Velociraptors take up the pursuit!

MVU Phase 2
Here you repeat the first phase of the chase, shooting at the two raptors or fending them off if they jump into the truck. Zapping both pursuers triggers another event: A raptor latches onto the truck door. Again follow the onscreen button prompts to knock the door open. The cagy raptor swings on top of the truck…then reaches in from above to knock away both of your stun rifles! This triggers the next phase of the chase.
Shoot the Raptors: ATV
Now your control and camera view switches to Owen and Barry on their ATV as they swing in behind the MVU truck. You start out controlling Barry who fires his own electric stun rifle as Owen drives. Your task is to zap Delta, the raptor that’s on the roof of the truck up ahead.
Targeting is tough because Claire swerves hard from side to side. Also note that the raptor tosses objects at you that cause damage (by reducing your stud total) if they hit you. You can tag to Owen if you want to steer the ATV and avoid the projectiles, but Barry won’t shoot while you drive.

When you finally KO Delta, another raptor leaps aboard the MVU truck and clings to the side. Claire crashes into the forest to the right, but soon manages to wrestle the truck back under control. As this happens, the camera swings over to a side view of the action. (Check out the next Minikit section!)
MINIKIT: Home StretchLater in the chase, shortly after the camera swings out to a side view of the vehicles, toggle your control to Owen (the ATV driver) and push the stick away from you, steering to the far side of the road. A Minikit sits along the far edge. Don’t dally—you reach the kit not long after the camera shifts.  |
When the MVU comes back into view, you see that the Mitchell boys are falling out of the truck, barely hanging on. A raptor chases directly behind them. Zap that raptor! One raptor pursues the ATV as well, and you can shoot it from time to time to knock it back. When Barry finally nails the raptor chasing the MVU, you get one more challenge.
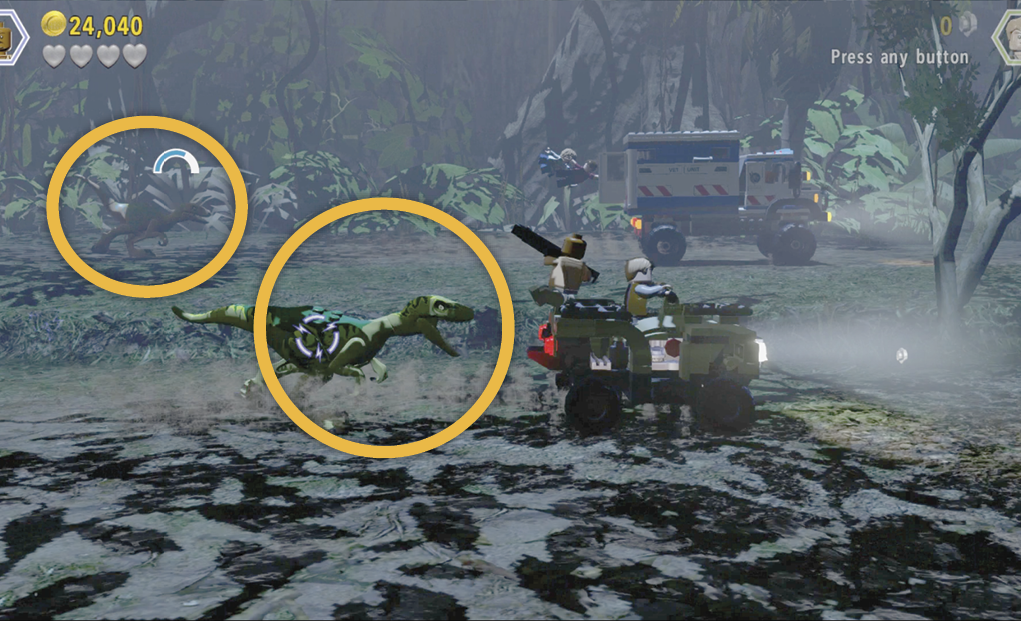
Now a Velociraptor leaps onto the MVU’s windshield, blocking Claire’s view of the road. Your ATV zooms ahead of the truck and Barry shoots looking backward now. Keep shooting until you finally knock off that last raptor. Aiming is difficult because Claire can’t see so she keeps ramming your ATV!

When you finally shoot the raptor off the windshield, watch as the boys foil its desperate attempt to hang onto the truck. Then watch the cinematic of the crazy scene back at Jurassic World headquarters!


Hub Transit 19
Owen Grady, the Mitchell brothers, and Claire Dearing have finally made it safely back to the Jurassic World main street village. Their goal is to reach safety inside the Innovation Center.

| Icon | Story Characters | Abilities |
|---|---|---|
 |
Gray Mitchell | Bone-Build, Small Access, Photography |
 |
Zach Mitchell | Repair, Illumination (Torch) |
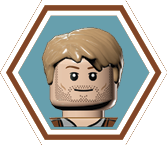 |
Owen Grady | Climb, Rope/Vine Cutter, Droppings Rummage, Dino Heal, Camouflage |
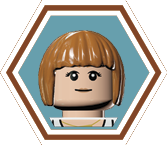 |
Claire Dearing | Jurassic World Access, Scanner, Agile |
Get Inside the Innovation Center
Follow the light blue studs down the main street to the front entrance of the Innovation Center. Tag to Claire and step to the sparkling sensor spot to the right of the doors. Use Claire’s scanner to reveal the climbing handholds on the wall. Tag to Owen and climb to the roof.

On the roof, go left to the dino statue and push it off the checkered slide track so it shatters into bone pieces. Tag to Gray Mitchell and assemble the broken pieces into a bone ladder. Tag to Claire and climb the ladder to the roof.

Head rightward to find and use the Jurassic World access panel. Note the three-button code that appears onscreen and enter it on your controller. This unlocks the Innovation Center’s front doors. Hop down and enter the building to trigger the opening cinematic for the final Story level.