
LEGO Jurassic World Guide Console Walkthrough: Movie 2
Level 09: Comms Center
Sarah Harding and the Malcolms enter the outer yard of the Operations Building. The place seems deserted at first. But as they explore further, the horrible truth becomes clear: The compound is overrun with raptors!


| True Survivor Stud Requirement |
|---|
| 60,000 studs |
Compound
The threesome hopes that Nick Van Owen made it to the communications center before them. Where is it, though? You’ll need to do some exploring. Of course, getting across the compound yard to the Radio Tower will be no picnic. raptors abound!


| Icon | Story Characters | Abilities |
|---|---|---|
 |
Sarah Harding | Droppings Rummage, Dino Heal, Agile, Photography |
 |
Ian Malcolm (Isla Sorna) | Illuminate (Flare), Academic Panels |
 |
Kelly Malcolm | Agile, Scream |
Access the Garage
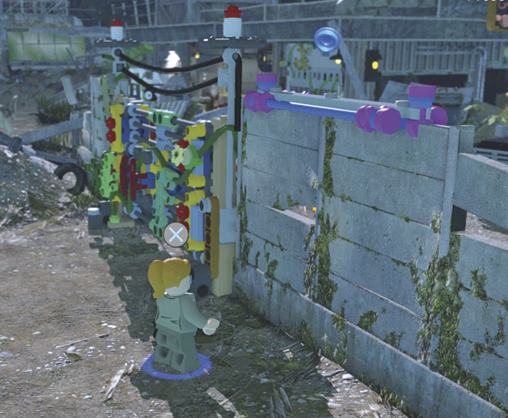
First, get the Minikit where you start. (See our Minikit directions.) Then tag to Sarah Harding and smash the equipment just to the right of the colorful gate into build-it pieces. Assemble them into a swing bar on the wooden fence; then send Sarah over the top.
MINIKIT: Barrel Kit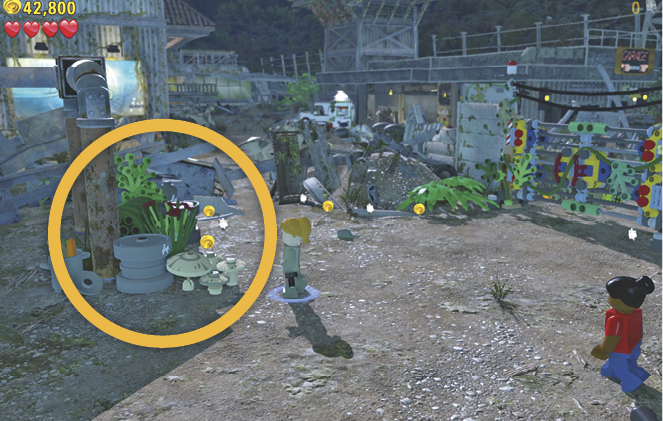 From where you start the level, go left and smash the stuff (circled) tucked against the support pillar. Assemble the build-it pieces into a Minikit. |
MINIKIT: Dino Crossing Signs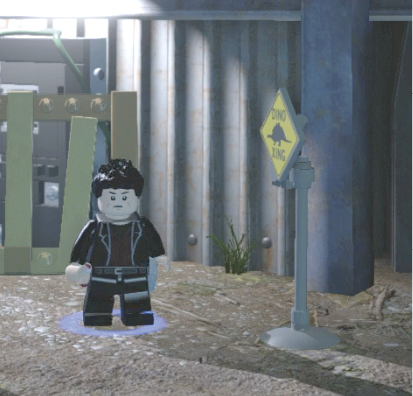 The compound holds three piles of hopping build-it pieces that you can assemble into Dino Crossing signs. Assemble all three to earn a Minikit. The first sign is in the yard outside the garage. The second sign is in the garage yard in front of the hoisted car. And the third sign is near the Radio Tower entrance and becomes available after you crash the white truck. |
Move past the truck and nab the blue stud to trigger a raptor attack. Fight off the monster by pressing the buttons indicated onscreen. Rummage in the nearby droppings pile to find the red pulley hook and attach it to the front of the truck. Pull the hook until Sarah attaches it to the gate. Then use the pulley to yank open the gate.

Tag to Ian Malcolm and approach the garage door. Fight off the Compsognathus swarm that attacks; then use Ian’s flare to enter the darkened garage. Find the power generator and use the primer pump to charge it. Exit the garage under the hoist that raises the car.

Activate the Gas Pump
Try to use the gas pump in the next yard. This triggers another raptor attack; press the button prompts shown to fight it off. The pump needs power routed to it. Tag to Kelly Malcolm and use her Scream ability to shatter the glass door into the workroom.

Enter and clear out the Compys that infest the room. Then smash the worktables and use the build-it pieces to repair the power generator. Use the primer pump to charge it. This sends a surge of power out to the gas pump. Now go out and use the gas pump again. Pull the hose all the way to the white truck in the yard to fill it with gas.

Get in the white truck to trigger a quick, crazy scene: A raptor leaps onto the vehicle, trying to eat the driver. The car crashes into the Radio Tower building. This shakes off the raptor. Smash the wooden pallets leaning against the door to the Radio Tower. The door automatically opens. Before you head inside, be sure to grab the Minikit in the nearby dark alcove.


MINIKIT: Gas Pump YardAfter you power up the gasoline pump, fill the white truck with gas, and then crash the vehicle. You reveal a dark alcove. Send Ian Malcolm in with his flare to nab the Minikit. 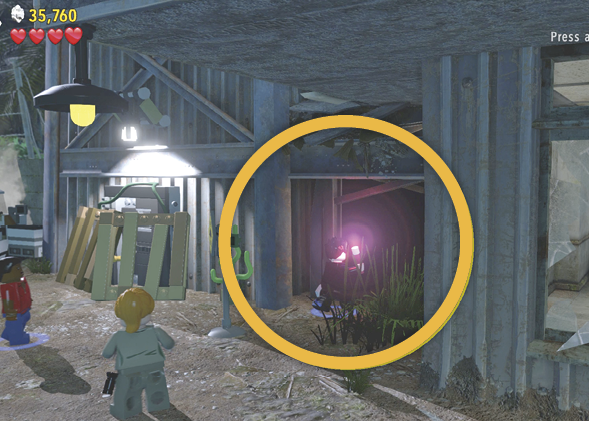 |
Radio Tower
Well, you got inside. But a relentless raptor bangs on the tower behind you. Ian Malcolm holds the door against the beast for now. Sarah and Kelly must find a safe way up the tower interior.

| Icon | Story Characters | Abilities |
|---|---|---|
 |
Sarah Harding | Droppings Rummage, Dino Heal, Agile, Photography |
 |
Kelly Malcolm | Agile, Scream |
Climb the Tower
That nearby locked cabinet needs a key, which you can find next to the hard-hat skeleton across the room. But when you approach, a raptor bursts from the wall! Tag to Sarah Harding and take a flash photo from the dino icon to stun the raptor and drive it away. Then smash the skeleton and pick up the key.

Use the key to open the cabinet. Tag to Kelly and use her Scream ability to break the glass door. Assemble the build-it pieces that fall into two “acrobat walls” running up the tall alcove space. Send either character (both are Agile enough) bouncing upward from wall to wall, working your way to the second-level walkway.

Follow the walkway to the dino icon and press your Activate button to kick down a catwalk plank. Walk to the end of the plank; then leap across to grab the chain. Hang on the chain as it pulls down the other half of the catwalk. Keep hanging but tag to your other character who can walk across the catwalk to the other side.

Smash the piping and boards on the back wall to trigger a raptor ambush. Press the buttons indicated onscreen to fight off the attacker. Then use the build-it pieces to assemble a ladder for the other character to climb.

Tag to Kelly and step onto the blue/white “buddy boost” pad. Tag to Sarah, step to Kelly, and jump to get boosted up to the grab bar. It breaks and Sarah falls back down! But that’s okay—use the broken bar pieces to rebuild the missing part of the nearby pole. Climb the pole to the top and jump over to the yellow/red hang bar.
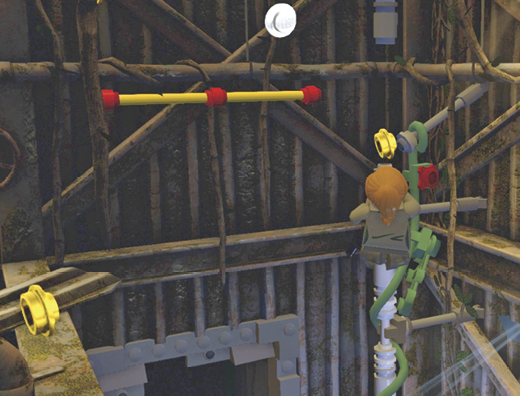
Slide left and hop over to the third-level walkway. When you approach the narrow green ledge, another raptor bursts through the air vent! Step back onto the dino icon on the platform and use Sarah’s camera to snap flash photos and drive off the raptor.
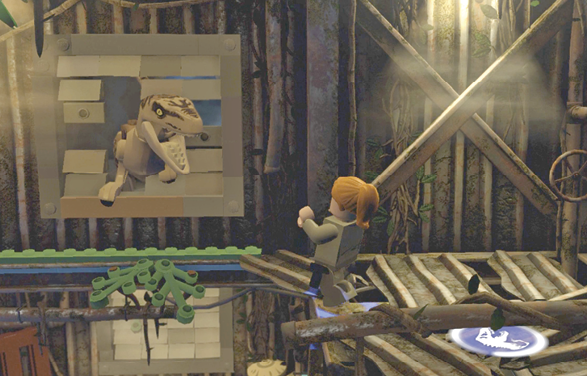
Move along the narrow green ledge to the next platform and smash the LEGO water tanks and pipes. Assemble the pieces into a bounce pad and use it to hop to the fourth-level walkway. When you arrive, another raptor ambushes you. Fight it off as usual!

Lower the Lift to Ian Malcolm
Use the nearby twirl poles to swing over and land on the acrobat wall. Hop upward from wall to wall to reach the fifth-level walkway. Tag to Kelly, approach the cabinet, and scream to smash its glass door. Use the build-it pieces to repair the nearby lift platform.

Tag to Sarah and follow the walkway to the lift. En route, one last raptor bursts from an air vent like a nightmare. Use Sarah’s photography skill to snap a picture and scare away the stunned creature. Use the build-it pieces near the air vent to assemble the lift control button. Finally, use the button to lower the lift platform and trigger Ian’s escape.

Rooftops


Ian, Kelly, and Sarah emerge from the Radio Tower onto its roof and spot Nick Van Owen over by the helipad, signaling with a lantern! Escape from deadly Isla Sorna is at hand. But the courtyard below is teeming with toothy raptors! How can you reach Nick?
| Icon | Story Characters | Abilities |
|---|---|---|
 |
Sarah Harding | Droppings Rummage, Dino Heal, Agile, Photography |
 |
Ian Malcolm (Isla Sorna) | Illuminate (Flare), Academic Panels |
 |
Kelly Malcolm | Agile, Scream |
Cross the Rooftops
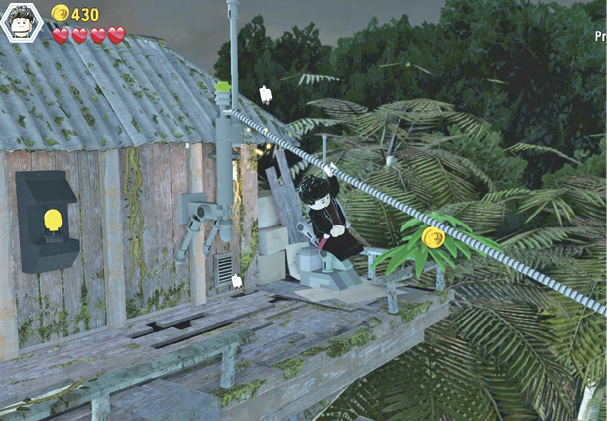
Move to the right and jump to grab the power cable. Your character automatically zip-lines down the cable to the lower rooftops. (The others automatically follow.)
MINIKIT: Moss Covered KitAfter you slide down the zipline cable to the lower rooftop, destroy the moss-covered fan housing in the back-right corner (circled) and assemble the build-it pieces into a Minikit. 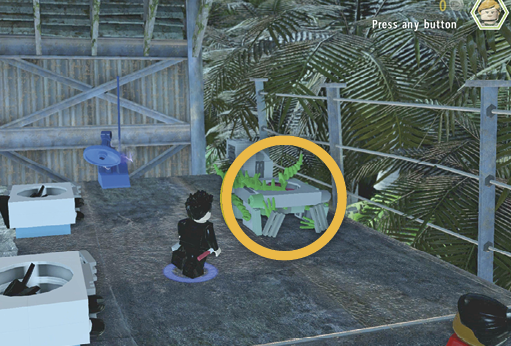 |
Head to the left and smash the rooftop fan housing that’s overgrown with weeds. Use the build-it pieces to assemble a small platform atop a light pole in the yard. As you finish, a helicopter drops in and lands on the helipad, waiting for you! Carefully hop across a series of five small platforms while ravenous raptors circle in the courtyard below.

Zip to the Helipad

When you reach the balcony, head left down the walkway. (If you head directly toward the helipad, a raptor cuts off your approach.) Smash your way around the left side of the building and climb the ladder. At the top, a raptor leaps onto the roof. Tap the button shown to tear off some of the red tile roofing: The dinosaur slides partway down. Repeat two more times to send the beast tumbling off the roof.


Climb to the rooftop, smash the array in the front corner, and pick up the red crank switch that drops to the roof. Step onto the dino icon and turn the switch to lower the antenna. Use the bounce pad created from the antenna dish to hop and grab the cable. Your character automatically zip-lines down to the far platform near Nick and the helipad.
Go to the stairs and climb to the helipad to trigger the level-ending cinematic: Nick, Ian, Kelly, and Sarah fly safely across the island as disappointed raptors watch them go. From the air, the crew spots a peculiar sight: Surviving members of the InGen expedition have what looks like a tranquilized T. rex in a cage.


Hub Transit 9
This hub transit section is as brief as they come. Simply walk any character toward the helicopter door to trigger the opening scenes of the next level in San Diego.
