
LEGO Jurassic World Guide Console Walkthrough: Movie 3
Level 15: The Bird Cage
Somebody hungry followed your crew, but the guys manage to nail the doors shut before the Spinosaurus can crash the house party. In the commotion, Alan discovers Billy’s little secret: the raptor eggs he poached from the nests earlier.


| True Survivor Stud Requirement |
|---|
| 84,000 studs |
Pteranodon Nests
You start at the top of the structure, which turns out to be quite large. It quickly becomes clear that this is an aviary—or, as Alan Grant calls it, a “bird cage.” As Eric Kirby soon finds out, the “birds” living here are very, very big.


| Icon | Story Characters | Abilities |
|---|---|---|
 |
Alan Grant (Isla Sorna) | Dig, Rope/Vine Cutter, Bone-Build |
 |
Paul Kirby | Repair, Grapple |
 |
Amanda Kirby | Scream, Agile |
 |
Billy Brennan | Climb, Photography, Glide |
Get Across the First Gap
Tag to Alan Grant and cut through the vines at the end of the walkway. (Note the Amber Brick floating directly above. We’ll snag it shortly.) Explore the dead-end to the left to find a pair of blue studs; then head rightward until you reach the gap in the walkway. Tag to Billy Brennan and make a jumping deployment of your parachute to glide across the gap.
Smash the crates and objects on the far side and assemble the build-it pieces. Walk across this new bridge.

Get Across the Second Gap
Tag to Amanda Kirby and use the glowing jump circle to hop to the twirl pole. Flip from pole to pole until you reach the far side of the big gap. Smash up the “no gears” sign on the back wall and reassemble it into a push switch. Push the green side of the switch until the mechanism pulls down the wall frame, dropping it over the gap.

Get Across the Third Gap

Continue to the right and start smashing everything along the walkway. This triggers a quick cutscene: Your noise irritates a Pteranodon on its nest, and it drops down to complain, blocking the path ahead. Tag to Alan Grant and keep smashing stuff until you reveal the rope winch. Step into the dino icon and slice the rope to drop the crate on the Pteranodon; it flies away.
Tag to Paul Kirby and use his grappling hook to pull down the Pteranodon’s nest, spilling bone pieces on the walkway. Tag back to Alan Grant to assemble the pieces into a bone bridge over the next gap.
Get to the Upper Level Walkway
While proceeding down the walkway, you see a climbing wall for Billy. But another Pteranodon lands on the walkway and blocks the way up. Smash all the red/white InGen equipment and assemble the build-it pieces into a rocket and a bounce pad. Jump on the pad three times to launch the rocket and drive off the pesky Pteranodon.

Now tag to Billy Brennan and scale the climbing wall to the walkway roof. Use his parachute to glide to the right across the gap to the checkerboard slide track on the upper walkway. Push the box of equipment off the track so it shatters on the ground. Assemble the pieces into a bounce pad, tag to Alan Grant, and bounce onto the upper walkway.

AMBER BRICK: Glide/Climb Back to the Start Once you get Billy on the walkway roof, run him back toward the start. Glide over the first big gap (a tricky maneuver); then use the climbing wall to reach the roof section with the Amber Block. |

Use Dr. Grant’s Raptor claw to cut through the vines blocking the passage and continue along the walkway. When you reach the next curved platform, smash everything and assemble the pieces into a springboard.
MINIKIT: Smash Up the Dead End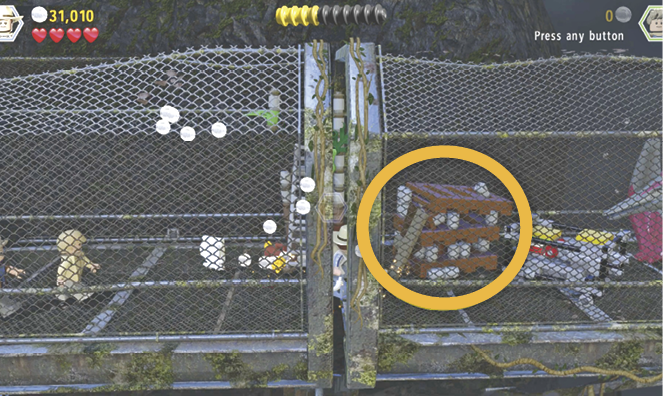 Before Billy uses the springboard, continue down the walkway to the right, smashing everything in your way. Keep up the destruction all the way to the Pteranodon blocking the way. The second to last item before you reach the flying dino—a stack of brown pallets with white eggs (circled in our shot)—holds a Minikit. |
Tag to Billy Brennan, step into the dino icon at the springboard, and press Use to trigger a quick scene: Billy takes the plunge! Use the left stick to steer Billy along the flight path marked by circles of studs.

MINIKIT: Flight PathAs Billy glides through the circles of studs during the flight sequence, he runs right through a Minikit in the middle of the seventh circle on the glide path.  |

Gliding through the ninth circle brings you to the Pteranodon nest where Eric is trapped. Steer straight at the nest to trigger the mission-ending cutscene: The entire crew except Billy ends up in the water, not far from the boat. Meanwhile, Billy leads the birds on a wild goose chase.


Spinosaurus Showdown
The Kirby family and Alan Grant are finally aboard the boat as a storm moves in. Something else moves in too. An old friend is angry that they didn’t say goodbye. Guess who?


| Icon | Story Characters | Abilities |
|---|---|---|
 |
Alan Grant (Isla Sorna) | Dig, Rope/Vine Cutter, Bone-Build |
 |
Paul Kirby | Repair, Grapple |
 |
Amanda Kirby | Scream, Agile |
 |
Eric Kirby | T-Rex Scent, Camouflage, Droppings Rummage, Small Access |
Stun the Spinosaurus

Alan, Amanda, and Eric make it back to shore, but Paul Kirby is caught out in the water. He manages to crawl aboard some floating debris. Note the floating barrels near the Spinosaurus. Those are explosive canisters. Also note the three hearts at the top of the screen, indicating the big dinosaur’s health level.
Turn left and smash the equipment near the water. Assemble the resulting build-it pieces into a pair of flare launchers. Tag to Eric Kirby and toss a jar of T. rex scent at the Compsognathus pack nearby. Tag to Alan Grant and dig up the loose sand where the Compys were lurking to unearth boxes of flares. Assemble the pieces onto the flare launcher. Now you have ammo!

MINIKIT: Shoot the BuoysHop in a flare launcher and shoot the four yellow-lit buoys (circled in our shot) floating in the water. 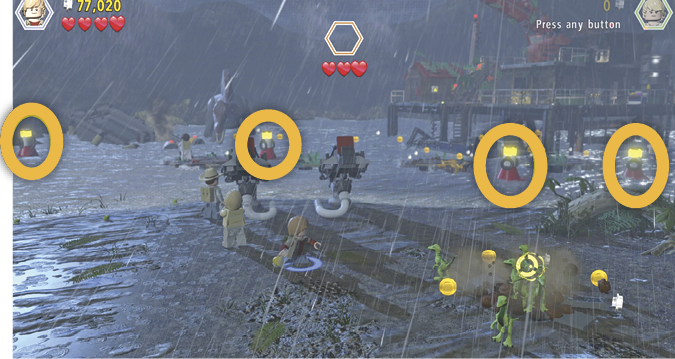 |
Hop into the launcher’s seat and target the oil barrels floating in the water. (Each barrel has a small red light glowing on it.) The gun’s aiming reticle auto-locks when it finds a target. Blowing up the barrels stuns the monster and it loses one heart from its health. The creature also moves to the right, closer to the pier.

Release More Oil Barrels
Now tag to Paul Kirby on his platform. Jump across the platforms to the right until Paul reaches the pier. Climb the ladder to the upper platform and use Paul’s grappling hook to release the rack of oil barrels there. They roll into the water right next to the Spinosaurus!

Tag back to any of your other characters and man the flare launcher again. Target and shoot the barrels just released, floating near the Spinosaurus. The detonation knocks another heart off of its health. Tag to Paul Kirby again.
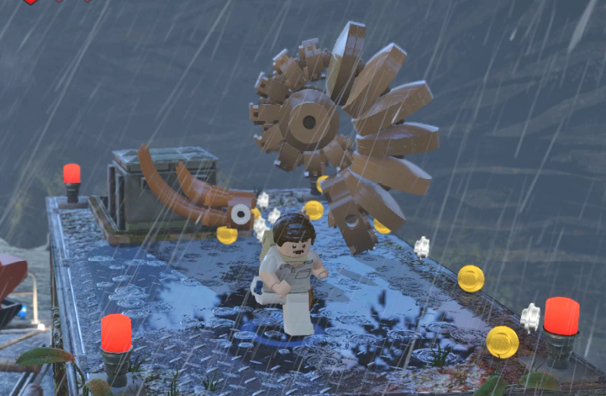

Use the build-it pieces near him on the pier to assemble a bounce pad and bounce to the crane on the next level. Get in the crane operator’s seat and use the left stick to move the crane to the right over the shed. It automatically picks up the rack of three oil barrels. Move the crane back left until it stops swinging sideways and extends the barrel rack over the Spinosaurus.
Shoot Again
Tag to any other character and hop in the flare launcher again. Shoot the barrel rack hanging from the crane. This triggers the movie-ending cinematic. Enjoy!


Hub Transit 15
Simply hop into the nearby helicopter.
