
LEGO Jurassic World Guide Console Walkthrough: Movie 1
Level 01: Prologue
The story in LEGO Jurassic World is divided into four movies. Each movie corresponds to one of the great Jurassic Park movies, numbered in the order of their release: Jurassic Park (1993), The Lost World: Jurassic Park (1997), Jurassic Park III (2001), and the spectacular new Jurassic World (2015).
Time to get started. As scenes from the theme park roll in the background, select New Game from the opening menu and choose a Save Game slot. The story soon begins with a bang.


| True Survivor Stud Requirement |
|---|
| 45,000 studs |
Raptor Transfer
A forklift carrying a dinosaur cage crashes through the jungle into a clearing as Robert Muldoon, Jophery Brown, and an anxious crew of park workers watches the delivery. Your task: Get the ravenous raptor from the cage into its enclosure.


| Icon | Story Characters | Abilities |
|---|---|---|

|
Robert Muldoon | Tracker, Sharpshoot, InGen Access |

|
Jophery Brown | Electric Charge |
Fire Up the New Generator
The handler reports that you can’t reach the raptor pen on the upper level until the new generator gets unpacked and built. Head over to the crate marked with electrical bolts and “unpack” it by smashing it to pieces; the Mr. DNA double-helix hint marker appears. Then stand amongst the hopping “build-it” pieces and hold down the Build button until your character finishes constructing the new generator.
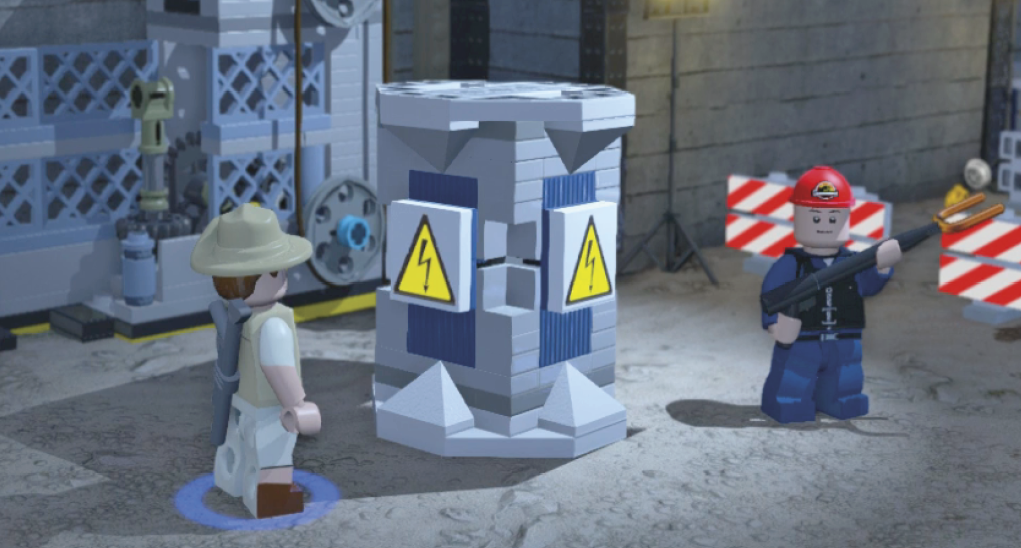
Now the handler explains that you must kick-start the newly built generator with a stun-rod. “Tag” (change characters) to Jophery Brown and walk onto the dino icon in front of the generator. Hold down your Use button so Jophery jams the electric prod into the charging slot. Keep holding the button until the circle fills around the onscreen button icon. A ladder to the upper level drops to the ground.

Repair the Cage Track
Climb the ladder. On the upper level, you learn that somebody tore up the cage track. Tag to Robert Muldoon and approach the square black tile on the ground next to the double-helix marker. This tile is a “tracking item.” Press the Use button to pick up the tile and activate Muldoon’s tracker ability.
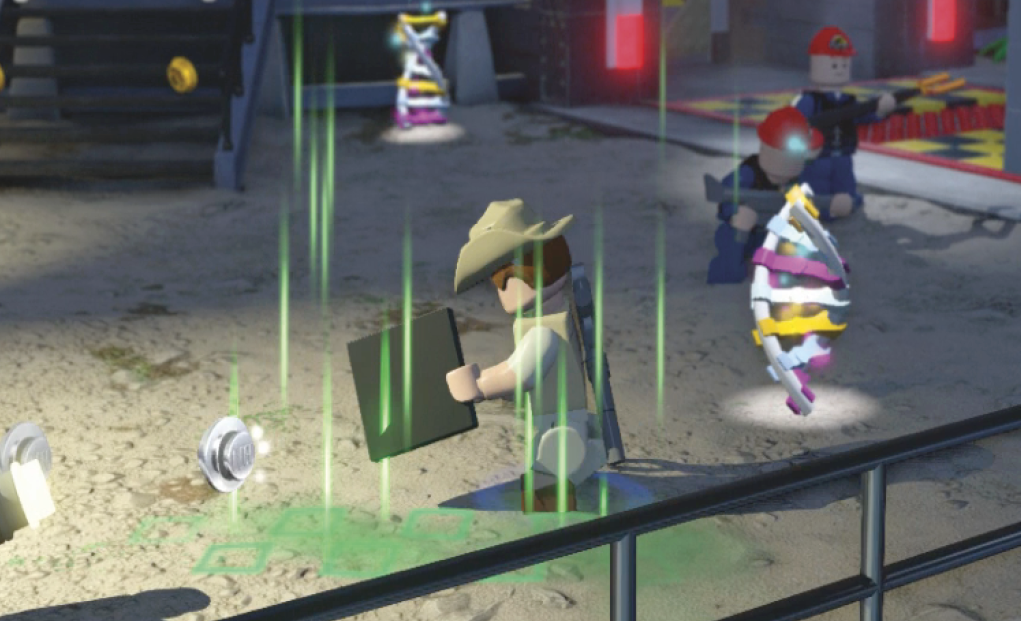
Follow the glowing blue tracks on the ground until Muldoon unearths a pile of build-it pieces: black and yellow tiles, part of the cage track. Hold down your Build button until Muldoon tosses all of the tiles onto the track.
This only fixes part of the cage track. Hold down your Aim button to bring up the white targeting reticle for Muldoon’s rifle. Still holding the button, use the left stick to move the reticle directly over the red/yellow target on the left spotlight (circled in our shot) above the raptor crate. Release the Aim button to fire the rifle.
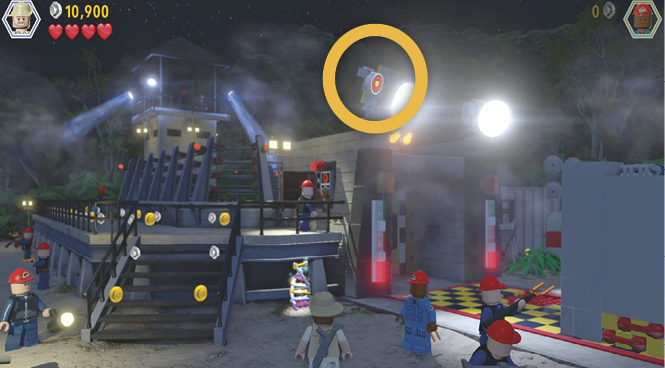
This shot detaches the spotlight, which falls to the ground and shatters into a pile of hopping build-it pieces: more track tiles! Toss them onto the cage track to finish the repair. Note that you can shoot out the other spotlight too and earn a Minikit. See the Minikit section that follows.
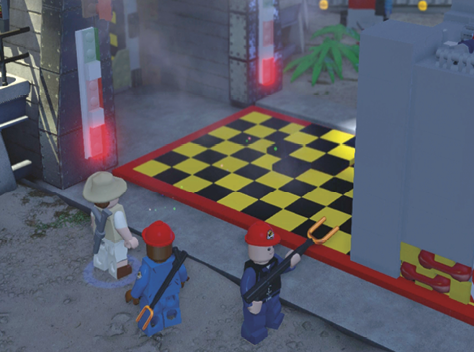
MINIKIT: Shoot the Right Spotlight TwiceUse Robert Muldoon’s rifle to shoot out the right-side spotlight above the cage track. You have to shoot it twice! The first time the light just spins around. The second shot knocks it down and a Minikit drops to the ground. Go pick it up! 
|
MINIKIT: Shoot the Warning LightsUse Robert Muldoon’s rifle to shoot out the four red warning lights that flash along the left side on the enclosure’s security fence. Three are circled in our screenshot; another is just around the corner. When you nail all four, you earn a Minikit! 
|
MINIKIT: Charge Up the LightsSend Jophery Brown to turn on all three lighting stands around the raptor pen. At each light generator, step Jophery onto the dino icon on the ground and then hold down your Activate button. Jophery jams his stun-rod into the charging slot to charge the lights. After you charge the third lighting stand (in any order), you automatically get the Minikit. 
|
Release the Raptor Into the Enclosure

Wait until the loading team moves into position around the cage. Then walk Muldoon to the cage’s end to push it toward the enclosure gate. Keep pushing until the cage locks into place. Now the handler reports that the cage ladder is jammed!
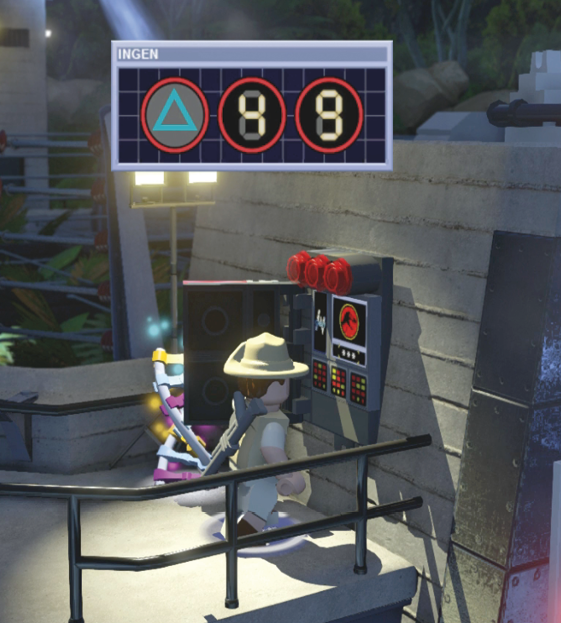
Walk Muldoon (who has the InGen Access ability) upstairs onto the dino icon and activate the InGen security panel. When the InGen data window opens above the panel, watch carefully as a three-button code cycles across it. Press those buttons in the order they appear to enter the code and release the red/yellow cage ladder.
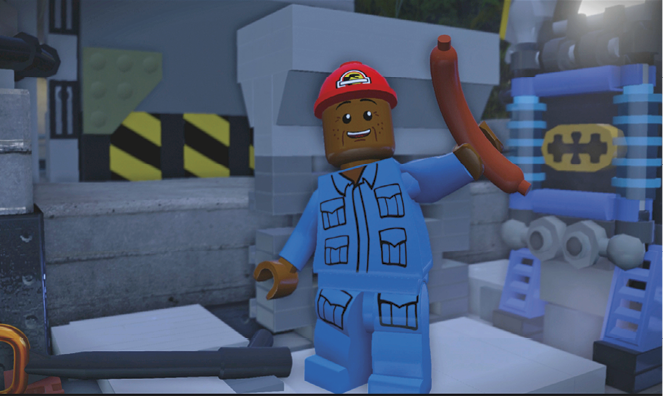
Tag to Jophery and climb the ladder. Use his stun-rod to charge the gate-raising electrical panel and trigger the scene-ending cinematic.
The Dig Site

Here the scene switches to a bustling archaeological dig site in the badlands of Montana. A pair of scientists, Dr. Alan Grant and Dr. Ellie Sattler, look for Velociraptor bones in the dry sandy washes and gullies. Grant is a paleontologist (a scientist who studies dinosaur fossils) and Sattler is a paleobotonist (a scientist who studies plant fossils).

| Icon | Story Characters | Abilities |
|---|---|---|

|
Alan Grant | Excavate, Rope/Vine Cutter, Bone-Build |

|
Ellie Sattler | Droppings Rummage, Dino Heal, Plant Grow, Agile |
Assemble the Raptor Skeletons
First Skeleton
Three icons appear across the top of your screen. These represent the three raptor skeletons you must find and assemble to move the story forward. First, send Dr. Grant downhill to the right, where a site digger is working. Step onto the mound of studs and use Grant’s Dig ability to dig up a pile of raptor bones. Then use Grant’s Bone-Build ability to assemble the bouncing bones into a complete raptor skeleton. Note that the first raptor icon is checked at the top of the screen.
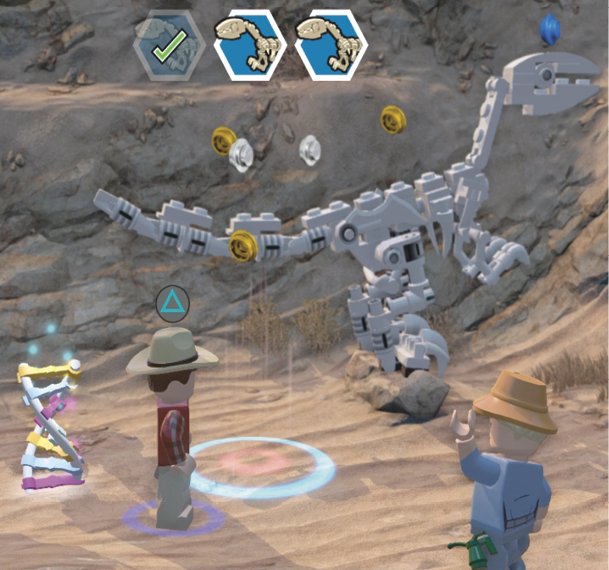
Now tag to Dr. Ellie Sattler and guide her into the jump spot (the glowing circles). Use Ellie’s Agile ability to leap onto the skeleton’s tail. (Be patient—it may take a few tries.) Walk her slowly up the skeleton’s spine to its skull, and then leap across to the rock ledge. Smash the LEGO crate of stuff and use the build-it pieces to assemble a ladder that drops down to Dr. Grant. Now he can climb up and rejoin Dr. Sattler.

Second Skeleton
Hop off the ledge to the right where a worker tries to dig another raptor skeleton from the cliff wall. Before you approach him, smash the LEGO sand pile near the front of the area; then assemble the pieces into a lovely sandcastle. (This is the first of four castles you can build to earn a Minikit.)
MINIKIT: Build SandcastlesFour piles of sand in the dig site can be smashed into build-it pieces and then reassembled into sandcastles. When all four castles are built, you earn a Minikit. One sand pile is near the skeleton that you jackhammer from the cliff. The second is on the rock ledge above the Road Sweeper. The third is in the ravine where you fix the seismic thumper. The last one is near the dig site trailer in the upper camp. 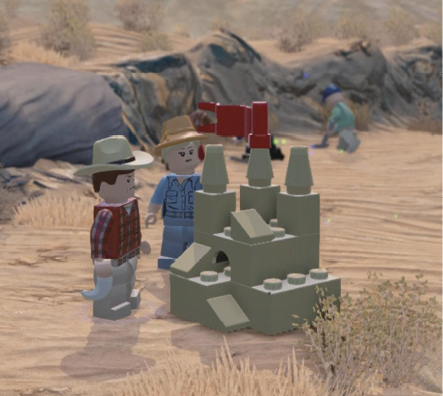
|
Go smash the worktable next to the digger. Build the broken pieces into a jackhammer that the digger uses to finish “excavating” the raptor bones. Oops! Use Grant’s Bone-Build ability to assemble the bone pile into a skeleton. Two checked off, one more to go!

MINIKIT: Skull Hop to CaveEllie Sattler can hop onto the second raptor skeleton’s tail, walk to its head, and then jump across into the high rock cave to nab the Minikit inside. 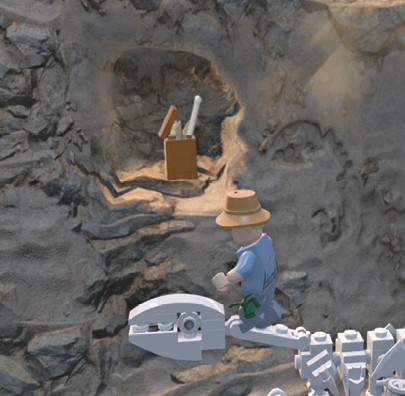
|
Third Skeleton
Move back left to where you started the level. Continue past the worker who’s trying to untangle a pulley rope. (You’ll help him shortly.) Proceed into the clearing where a dig team is working. Smash the two big crates and the blue wheelbarrow; then assemble the build-it pieces into a nifty Road Sweeper. Hop onto the vehicle and drive over the dirt mound where the dig team was initially working; this creates a loose pile of dirt. (Note that you can also drive the Road Sweeper over three smaller mounds in the clearing to sweep up some valuable blue studs.)
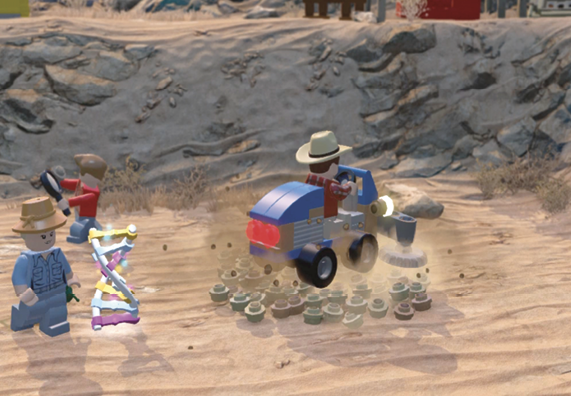
Now walk Dr. Grant onto the loose dirt pile, unearth the raptor bones, and assemble the third raptor skeleton. When finished, Grant also snags a razor-sharp claw from the skeleton’s middle toe. This unlocks Grant’s raptor Claw, a super-handy tool that will prove very valuable.

Before heading back to help the guy trying to untie the rope knot, tag to Ellie and hop onto the newly-built raptor skeleton. Leap across to the ledge, smash the crate there, and assemble the build-it pieces into a ladder for Dr. Grant. Then work your way around the ledge smashing stuff, including a sand pile that you can rebuild into your second sandcastle (2 of 4).

Build the Thumper

Walk back to the worker at the pulley rope. Tag to Dr. Grant and step into the dino icon. Tap the button indicated to wield the raptor Claw and start slicing the rope. Keep tapping until the meter fills to finish the job. The attached equipment crates fall and form two platforms. Use the platforms to hop to the next plateau.
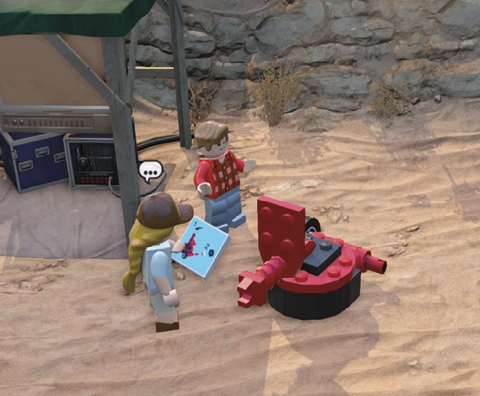
Follow the path leading right until you reach the site workers trying to put together a seismic “thumper”—a two-wheel vehicle that thumps the ground to create sound waves. These waves travel through dirt and bounce off of underground objects (like dinosaur bones), creating images so you can see what’s buried. Unfortunately, the thumper is missing a wheel and handlebars. Those two items now appear as icons at the top of the screen.
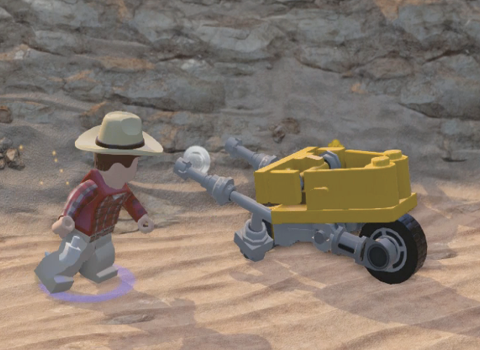
Continue rightward into the ravine. First, smash the sand pile and build your third sandcastle (3 of 4). Next, destroy the yellow wheelbarrow. Pick up its wheel, bring it back to the thumper, and install it on the vehicle. (This puts a checkmark on the wheel icon.) Head right again and approach the dense LEGO foliage. Grant’s basic melee attack now uses the raptor Claw to slice through the vines. Grab the black handlebar stashed behind them.

When you install the wheel and handlebar on the thumper, the vehicle is ready to bounce! Mount the thumper and start bouncing across the ravine. Steer over the three cracked ground sections to smash them up. Thumping the third cracked section (in any order) reveals a buried dinosaur skeleton. It also triggers the arrival of a helicopter delivering a white-bearded passenger.


Reach the Dig Site Trailer

The copter arrival causes an accident—a supply truck loaded with gear and bone crates backs halfway off the cliff above Dr. Grant and Dr. Sattler. Walk Ellie Sattler into the jump circle and leap to the truck; she pulls off its tailgate and its load clatters to the ground. Tag to Grant and assemble the build-it pieces into a bounce pad. Use the pad to bounce to the upper camp.
MINIKIT: Slash the VinesUse Grant’s raptor Claw to slash through the vines behind the blue tent in the dig site’s upper camp (left of the trailer) to find another Minikit. 
|


Smash the sand pile in front of the trailer and build the final sandcastle (4 of 4). Then follow the trail of studs to the trailer. Inside, Dr. Grant and Sattler meet Mr. John Hammond…and a very old mosquito frozen in amber.

The Prologue ends with the scientists traveling via Hammond’s helicopter to Isla Nublar, a tropical island off the coast of Central America. En route they meet Don Gennaro, a lawyer, and an eccentric “chaos” mathematician named Ian Malcolm.
Hub Transit
To continue the story, you must navigate across the Isla Nublar hub, traveling from the copter pad through several gates to the Jurassic Park Visitor Center. Get ready to be amazed en route.

| Icon | Story Characters | Abilities |
|---|---|---|

|
Alan Grant | Excavate, Rope/Vine Cutter, Bone-Build |

|
Ellie Sattler | Droppings Rummage, Dino Heal, Plant Grow, Agile |

|
John Hammond | InGen Access, Walking Stick |

|
Ian Malcolm | None |

|
Donald Gennaro | None |
Get to the Visitor Center

From the helicopter landing pad, head up the steps past the Jurassic Park sign to the two trucks and hop into one of them. (It doesn’t matter who you control; the other characters all follow and jump aboard the trucks too.) Drive down the road, following the light blue stud route markers to the gate, which is stuck closed.

Hop out of the truck and tag to Dr. Alan Grant. Head to the gate’s right side and smash the tropical LEGO plant next to the InGen control panel. Now Grant can dig into the dirt to uncover some missing pieces of the panel. Put them in place on the panel and then tag to John Hammond. Use the InGen control panel—a three-button code flashes onscreen. Enter the code on your controller to open the gate. Return to the truck and drive through.

Passing through the first gate triggers a spectacular cutscene. Watch as Hammond’s stunned guests finally see what Jurassic Park is all about. When the scene ends, hop back in a truck and follow the light blue stud route to a second gate. This one’s stuck shut too! It needs its gear assembly rebuilt.

Hop out and tag to Dr. Ellie Sattler. Jump onto the platform directly to the gate’s left. Smash open the crate nearest the gate to unload the gear assembly’s build-it pieces. Then use them to build the left half of the assembly above the gate.

Tag to Alan Grant and step into the dino icon at the rope to the gate’s right. Slice through the rope to drop the large crate. Tag back to Ellie and jump atop the crate; then use the jump spot to leap across onto the InGen cargo container. Smash apart the equipment crate (nearest the gate) atop the container and assemble the build-it parts to complete the right half of the gate’s gear assembly. The gates swing open!

Hop back in a truck and drive through the newly opened gates. Follow the light blue stud route to the front entrance of the Jurassic Park Visitor Center. Exit the truck and climb the stairs to the entrance. This triggers a scene: John Hammond gives his guests a tour of the most advanced amusement park ever seen, and then Mr. DNA explains how these dinosaur “attractions” have come to exist.

