
LEGO Jurassic World Guide Console Walkthrough: Movie 2
Level 10: San Diego
Doctors Ian Malcolm and Sara Harding arrive at the crowded San Diego waterfront. Peter Ludlow is there with a media circus, plugging his shameless new venture: “Jurassic Park: San Diego.” But when theS.S. Venturearrives with the park’s main attraction, the debut makes more of a splash than he bargained for.


| True Survivor Stud Requirement |
|---|
| 60,000 studs |
The Docks
After the InGen ship plows into the jetty, chaos reigns! Sirens are screaming. People need help. And that big broken ship needs some serious investigating.


| Icon | Story Characters | Abilities |
|---|---|---|
 |
Sarah Harding (San Diego) | Droppings Rummage, Dino Heal, Agile, Photography |
 |
Ian Malcolm (San Diego) | Illuminate (Flare), Academic Panels |
Rescue People
Move down the dock to the reporter trapped under debris and pull him out. The debris collapses into build-it pieces. Use the pieces to build up the dock piling just off the pier. Then hop across the series of pilings and buoys to get past the torn gap in the dock.

MINIKIT: Rescue Three People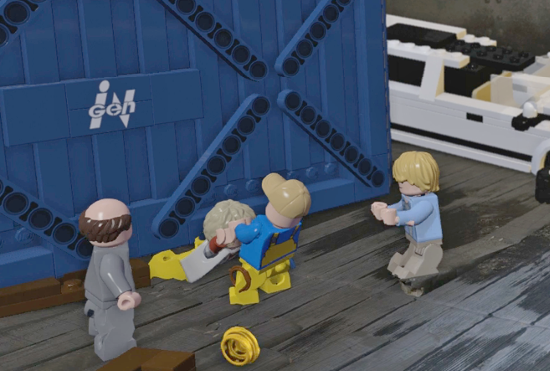 You earn a Minikit if you rescue the three folks pinned by the wreckage of theS.S. Venture’s collision with the dock. First, pull the reporter out from the debris at the start. Second, use the crane to lift the shipping container off the dockworker. Finally, when you reach the guard reaching for the button above the boost pad, jump off the boat and follow the dock to the left to find an InGen guard trapped under a semi-truck. Pull him out! |
Once past the gap, head toward the crane ahead. A dockworker is trapped under a big shipping container. Smash the white InGen crate to the left of the small crane and pick up the red crank switch. Hop onto the crane platform and install the switch on the control mechanism. Turn the switch to swing the crate around and drop it.

Hop off the crane platform and use the build-it pieces to assemble a bridge into the large gash torn in the ship’s hull. Tag to Ian Malcolm, cross the bridge, and use Ian’s flare to enter the darkened hold. Climb the ladder to the ship’s main deck.
Smash open the white/brown InGen crate next to the big deck crane. Assemble the build-it pieces into a ladder and climb up; then jump into the crane control compartment. Use the left stick to swing the crane hook over and down onto the blue shipping container. Then lift it off the pinned dockworker. Watch as something big and powerful rocks the ship’s containment hold, forcing the crane to drop the container.

Hop off the crane platform and descend to the dock again. Go left and use the container floating in the water to hop across the next gap in the dock. Fight off the blue-uniformed InGen guards posted there. Tag to Sarah and use the glowing jump spot to grab the anchor and pull it down. (Here you can try the jumping puzzle to reach a Minikit.)
MINIKIT: Jumping to the SternNear the leftmost end of the dock, you can leap out to a dock piling. From there, hop across a series of four more pilings to reach the narrow pink ledge on the ship’s outer hull.  Slide left along the ledge, hop across the three handholds to another ledge, and slide over to the Minikit. Then reverse the process all the way back to the dock!  |
Get to the Ship’s Cargo Hold
Climb the anchor chain and knock out the InGen guards. Smash open the big white/brown InGen crate and assemble the build-it pieces into a bounce platform. Use it to bounce up to the security door leading into the ship’s helm. Turn the red crank wheel to open the door.

Deal with the InGen guards, tag to Ian Malcolm, and approach the “academic panel” on the back wall. Activate it and watch the order the four sections light up. Then select the sections in that same order to solve the puzzle. Use the build-it pieces that spill out to make a gear assembly that opens the door. Go on through!
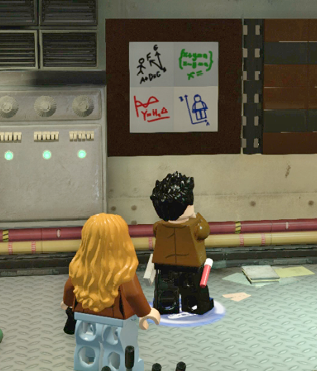
Tag to Sarah Harding; then head downstairs and smash the crate full of agility pole pieces. Assemble the pole and use it to swing into the cage. Move left to another agility pole and swing back out of the cage. Go right and push the big crate down the checkered slide path to let Ian get through.

Proceed to the left and be ready for a wild fight! Many InGen guards rush to attack you from multiple directions. Knock out all of them. Then continue left to find the InGen guard calling for help.
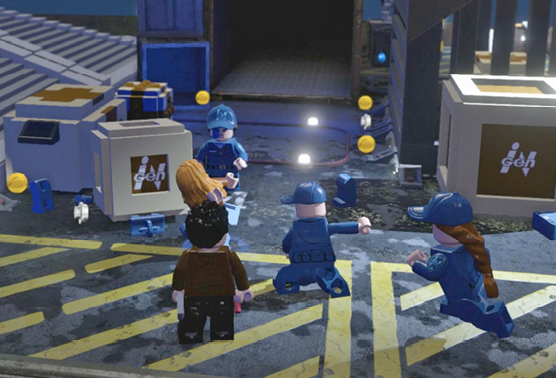
AMBER BRICK: Dark ContainerAfter the big fight with InGen goons, send Ian Malcolm with his flare into the dark container from which a number of guards emerged during the battle. Inside, find the Amber Brick at the far end. This unlocks the majestic Brachiosaurus.  |
Walk one character onto the blue/white “buddy-boost” pad and press the Use button to get into the boosting position. Tag to the other character, approach the booster, and press the Jump button to get heaved onto the higher deck. This triggers a cinematic: The T. rex escapes!


Jaws on LandWhen Steven Spielberg took on the direction of Jurassic Park, as he puts it, “I was really just trying to make a good sequel to Jaws, on land.” As the T. rex escapes at the docks, you see a familiar-looking fishing boat out in the water. 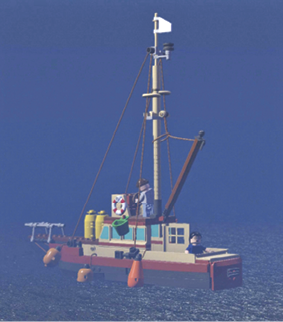 Fans of Jaws will recognize it as the Orca, the vessel of the shark hunter Quint in the movie. They will also recognize Sheriff Brody’s famous line as he first spots the great white shark: “We’re gonna need a bigger boat.”  |
San Diego Streets


Sarah and Ian know what the T. rex is searching for. The only way to get the big, angry dinosaur back into the ship’s containment hold is to lure it there with its baby. So they put the T. rex youngster in Ian’s red convertible to draw its parent’s attention. The chase is on!
| Icon | Story Characters | Abilities |
|---|---|---|
 |
Sarah Harding | Throw Drumsticks |
 |
Ian Malcolm | Drive |
Drive…or Throw Drumsticks
As in previous chases, you can use the left stick to steer side to side, picking up studs plus a pair of Minikits on the route. But in this chase, you can also tap your Change Character button to switch to Sarah Harding.

As Sarah, use your left stick to move the aiming reticle, and press the Attack button to toss a nice, meaty drumstick at the target! If you want to steer the car again, just tap Change Character to switch back to Ian Malcolm, the driver.

MINIKIT: Feed Mommy Three DrumsticksDuring the chase, you can character-switch to Sarah who has a bucket of drumsticks that she can throw. When the T. rex roars, his mouth opens and you see a red target appear inside. If Sarah can toss three drumsticks into the red target, you earn a Minikit!  |
MINIKIT: Shatter the PaneRight after an oil tanker cuts off the T. rex and explodes in a huge fireball, your car swerves down another street and the camera shifts to a view from behind the vehicle. Watch for workers wheeling a large pane of glass across the street up ahead. Smash right through it to pick up a Minikit! 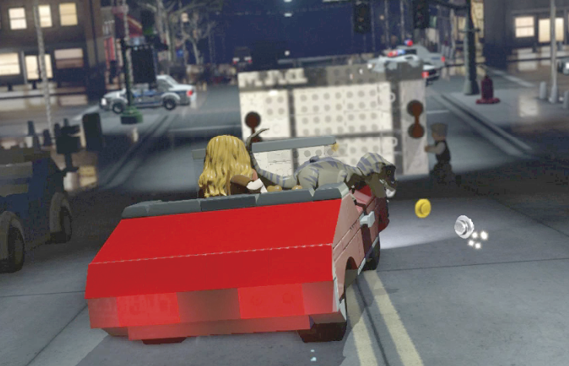  |
MINIKIT: Hit the Truck RampNot far down the road from where the pane of glass crosses the street is a car carrier truck with its ramp lowered in back. Drive up the ramp to collect another Minikit! 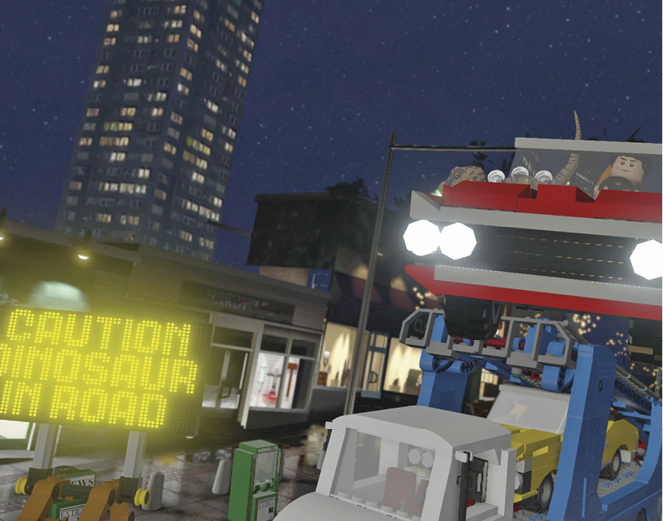 |

Eventually you return to the waterfront district and the chase ends. Watch the heartwarming, movie-ending cinematic!


Hub Transit 10
Here’s another very short transition in the Isla Sorna hub. Simply walk along the pier to the right into the marker next to the boat and press the button indicated onscreen to trigger the opening cutscene of the next movie.
