
LEGO Jurassic World Guide Console Walkthrough: Movie 3
Level 11: Landing Site
Two years later, back in Montana, Dr. Alan Grant works his new Fort Peck Lake dig site. The excavation team, led by his associate Billy Brennan, has uncovered exciting new fossil records about Velociraptors. But money for Grant’s project is running out, so he meets with a wealthy couple, Paul and Amanda Kirby.


The Kirbys are interested in an aerial tour of Isla Sorna—the famous “Site B” dinosaur island you explored in Movie 2. Dr. Grant is reluctant at first. But when the couple offers generous funding for his research, he can’t say no. Soon Grant finds himself on a Beechcraft plane heading toward the dinosaur capital of the world. With him are the Kirbys, Billy, and three sketchy mercenaries named Cooper, Nash, and Udesky.

| True Survivor Stud Requirement |
|---|
| 51,000 studs |
The Landing Strip
The “tourists” surprise Dr. Grant and Billy Brennan by actually landing the Beechcraft on Isla Sorna! Amanda Kirby keeps blaring out “Eric!” and “Ben!” on a megaphone that’s sure to attract unwanted attention. You can also hear the three mercenaries chattering loudly out in the jungle.


| Icon | Story Characters | Abilities |
|---|---|---|
 |
Alan Grant (Isla Sorna) | Dig, Rope/Vine Cutter, Bone-Build |
 |
Paul Kirby | Repair, Grapple |
 |
Billy Brennan | Climb |
Get Up the Cliff
Tag to Paul Kirby and walk to the right. Just past the first building you see a sparkling orange loop (a “grapple point”) on the back wall. Fight off the Compsognathus pair as you approach. Then use Paul’s special ability to attach his grappling hook to the loop. Pull down the vines to reveal a climbing wall—a wall with a bunch of small LEGO handholds.

Tag to Billy Brennan, climb the wall, and hop over onto the decrepit equipment shed. Move rightward and climb sideways on the next wall to reach the high ledge at far right. Continue to the right, ride down the short mudslide, then punch the striped support on the power pole to knock over the pole. Note that the fallen pole has an orange grapple point on top.

MINIKIT: Cut & ClimbAt the landing strip’s far-right end, Alan Grant can cut the rope on the pulley to release a green vine. Climb the vine to nab the Minikit at the top. 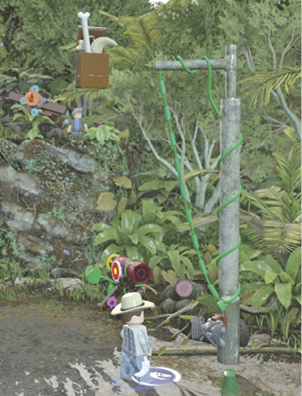 |
Reach Amanda Kirby

Tag to Paul Kirby and use his grapple hook to hang a rope from the power pole. Tag to Alan Grant and climb the rope. At the top, swing leftward to the loose earth and dig up a pile of bone build-it pieces. Use Grant’s Bone-Build ability to assemble a bridge across to the shed’s rooftop.

Tag to Paul Kirby and use his Repair ability to fix the lift generator. Then turn the red crank switch that raises the blue lift platform at left. Tag to Grant, jump to the blue platform, and then jump across to the next shed rooftop.
Climb uphill to the tangle of vines wrapped around a tree and cut them loose. Tag to Paul Kirby and grapple the orange loop atop the pole to attach a rope. Use the rope to swing Paul across the gap onto the roof of the landing strip’s main building.

Now use Paul’s grapple hook to pull over the scaffolding at the back of the rooftop. Use the broken pieces to assemble a nice staircase on the checkerboard slide path. You can’t push it yet! Tag to Alan Grant and cut the vines wrapped around the crate to the left of the staircase, smashing the crate too. Then push the staircase all the way to the left and climb to Amanda.
This triggers a wild and wooly mission-ending sequence: As a very, very loud dinosaur howls from the jungle, the crew rushes back into the Beechcraft airplane and tries to take off. But poor Cooper gets used as anti-aircraft fire by a towering Spinosaurus, and the plane crashes into the trees. Then the massive dinosaur shakes out the fuselage and gives chase to the fleeing survivors!


Spinosaurus Escape
By now, you should be used to getting chased by hungry monsters. Run screaming! And keep a sharp eye out for blue studs and collectibles as you sprint in terror.

| Icon | Story Characters | Abilities |
|---|---|---|
 |
Alan Grant (Isla Sorna) | N/A |
 |
Billy Brennan | N/A |
Run and Scoop Studs!

As in all previous chases, you can steer your running character from side to side. Guide him along each row of silver studs and hop when you hit the gold stud. This propels you over an upcoming log, and also lets you snag a blue stud floating above the log. (Note: One of the logs has a Minikit floating above it instead.)
MINIKIT: Right Side Kit Not long after the chase starts, you reach a Minikit on the far-right side of the path, just past a log near the grass edge. Note: If you start out running down the far-left side to target the first bone pile (see the next section) it’s very hard to swing over to the right in time to hit this Minikit. But if you start out running on the right side, chances are good that the Spinosaurus will smash the bone pile on the left for you! |
MINIKIT: Smash the Bone Piles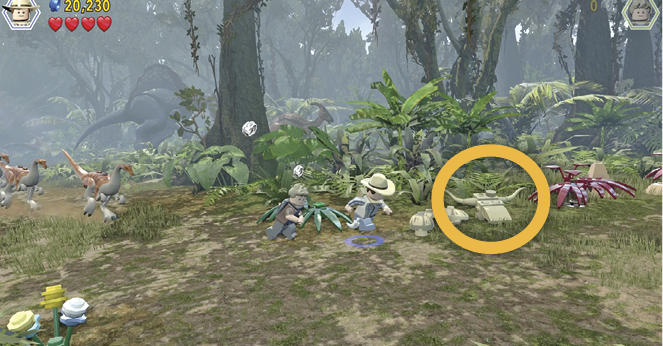 Several piles of bones are stacked along the route. If you smash three of the piles, you earn a Minikit. The first one is near the start of the chase, on the left side of the path. After that, steer to the far right edge of the path to smash another bone pile just before you reach the arch. One appears just after the arch when the camera view swings to the side. Steer to the far side (away from the camera) of the route and run through the horned skull. |
MINIKIT: Side View Ramp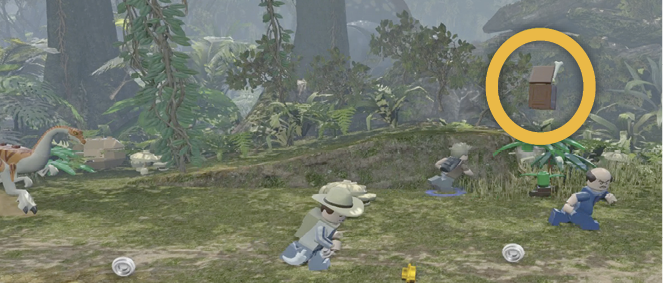 Shortly after ducking underneath the arch and the camera view swings to the side, look for a low ramp over on the far side of the path (away from the camera). Steer your character up the ramp to run through a Minikit. |
The chase finally ends when the Spinosaurus slams into a tree and gets trapped by heavy branches. You can bet the monster won’t stay restrained for long, so enjoy your respite while you can.

Hub Transit 11

As the trapped Spinosaurus roars angrily just down the path, do the smart thing. Move away from it, toward the camera!
| Icon | Story Characters | Abilities |
|---|---|---|
 |
Alan Grant (Isla Sorna) | Dig, Rope/Vine Cutter, Bone-Build |
 |
Paul Kirby | Repair, Grapple |
 |
Amanda Kirby | Scream, Agile |
 |
Billy Brennan | Climb |
 |
Udesky | Sharpshoot (Rifle), Tracker |
Cross the Stream

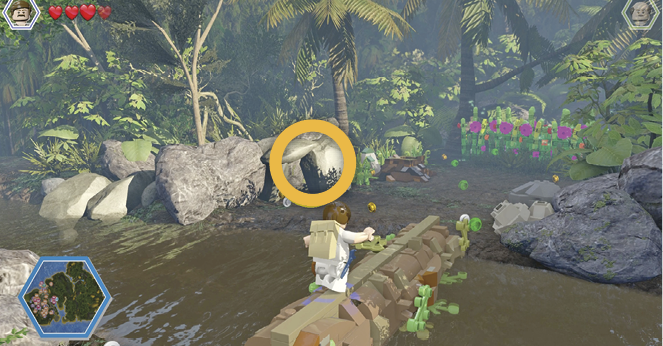
Tag to Paul Kirby and follow the blue studs down the path to the stream. A small cave on the right near the water is home to a Compsognathus family. Smash the LEGO rocks next to the cave; then reassemble the build-it pieces to seal off the opening. If you don’t, the little biters just keep coming.
Now you can sling Paul’s hook at the orange grapple loop high on the tree across the stream. Pull it down for use as a bridge. Cross the bridge and tag to Alan Grant. Another Compy nest (circled in our shot) is a nuisance, so smash the rocks to its right and use the build-it pieces to seal the cave. Then use Alan’s Raptor claw to cut through the wall of vines blocking the passage. Continue to trigger the cutscene for the next level.