LEGO Jurassic World Guide Console Walkthrough: Movie 4
Level 18: Out of Bounds
Zach and Gray warily enter the abandoned facility. Looks pretty creepy. Zach fashions a makeshift torch to light the dark garage.


| True Survivor Stud Requirement |
|---|
| 60,000 studs |
Parking Garage
The first thing you see is a Compsognathus pack tending to an injured pack member. When they hear the Mitchell boys approach, the creatures skulk away, abandoning the poor little fellow.


| Icon | Story Characters | Abilities |
|---|---|---|
 |
Gray Mitchell | Bone-Build, Small Access, Photography |
 |
Zach Mitchell | Repair, Illumination (Torch) |
Heal the Compsognathus
Find the Chocolate Bar

Move toward the camera and then head left to see the sick dinosaur. Tag to Zach Mitchell and smash the big potted plant near the green tube on the wall to reveal the boost pad. Use the pad to assume the boost position; then tag to Gray Mitchell and approach Zach. Jump to get boosted onto the top shelf. Crawl into the nearby small-access duct to emerge on a nearby shelf where a Dino Bar is glowing. Pick it up, hop down, and feed it to the Compy.
Find the Ice Pop
Tag to Zach, head to the left, and fix the smoking blue generator to raise the door. Use Zach’s torch to enter the dark room that’s revealed, and then use the pump switch in the back-right corner. This fires up the generator and turns on the lights, but a gap in the wiring cuts off power to the locked freezer in the back-left corner.
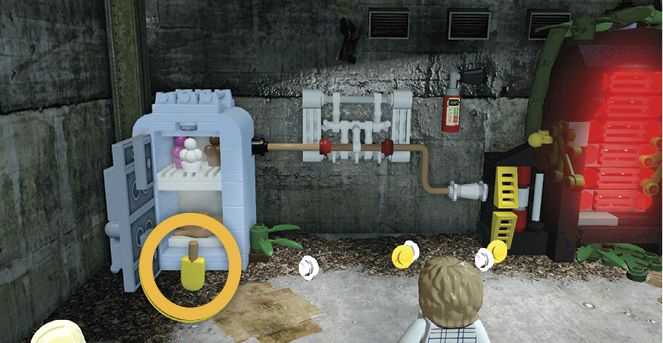
Tag to Gray and smash the table and skeleton into a pile of bone pieces. Assemble them to fix the wiring. When the freezer pops open, grab the ice pop that falls out. Feed it to the Compy. Two ingredients down, one to go!
Find the Meat
Smash the white-topped cooler directly behind the Compy to find the meat. Pick it up and serve it to the Compy to heal him! The little fellow is very grateful. He also becomes a playable character.

Fix the Park Truck
Tag to the Compy and enter the green “Compy Tube” next to the boost pad. Follow it all the way to the end. You emerge in a repair bay. Smash the black/yellow striped lock to raise the forklift, which dumps a crate over the fence. Tag to Zach, assemble the crate pieces into a bounce pad, and use it to hop over the fence. You see a truck with a few missing pieces.

Find Some Gas

Smash the stack of tires and other stuff blocking the dark passage on the back wall of the lower level. Enter using Zach’s torch for illumination and nab the fuel can in the alcove. Use it to fill the truck with gas.
Find a Car Battery


Climb the ramp to the second level and use Zach’s wrench to repair the blue power box next to the Compy Tube. Tag to the Compy and follow the tube outside. Exit and find another Compy Tube nearby to the left. Follow that short tube to the end, pressing the button that opens the door below.
Tag to Gray and enter the outer yard. Fight off the hostile Compy swarm; then smash up the blue/white crates at the back wall. Use Gray’s Bone-Build ability to assemble the bone pieces into the hammer device that bashes open the nearby truck’s hood. Pick up the battery and install it on the truck inside the repair bay.
Find a Red Alloy Tire

Now tag to the Compy. Inside the repair bay, climb the ramp and go left, smashing the cart that blocks the second Compy Tube. Enter and follow the tube to the end, pushing the button to knock down tires. Tag to Zach or Gray and hop onto the leftmost tire (with smaller one with the red alloy wheel). Roll the tire to the truck and kick it on to complete the automotive repair.
This triggers the mission-ending cinematic: Claire Dearing and Owen Grady discover evidence of the boys’ encounter with Indominus Rex and follow the tracks to the parking garage. Then they have a Rex encounter of their own.

Indominus Escape

The Indominus Rex has Owen and Claire trapped in the old Jurassic Park structure. They descend a ladder into a big underground storage area.

| Icon | Story Characters | Abilities |
|---|---|---|
 |
Owen Grady | Climb, Rope/Vine Cutter, Droppings Rummage, Dino Heal, Camouflage |
 |
Claire Dearing | Jurassic World Access, Scanner, Agile |
Find a Way into the Center Area

Before doing anything else, check out the following two Minikit sections. You can collect two kits right off the bat! Then move Owen Grady toward the camera until you reach the wall of vines and slice through it.
MINIKIT: Behind the Entry LadderAs the level begins, walk just to the right of the ladder. Your character disappears into what looks like a dark space behind the ladder. Guess what? It isn’t! Move around until you nab an unseen Minikit. 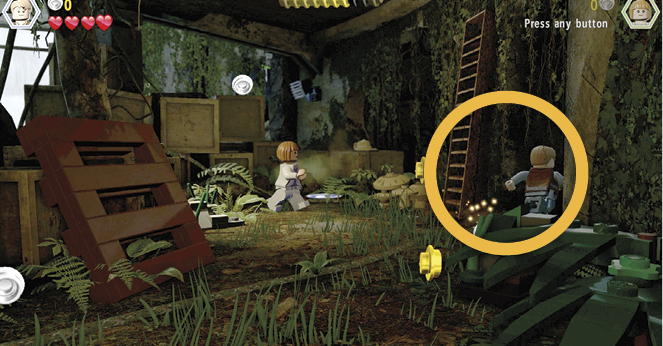 |
MINIKIT: Beside the Entry LadderAs the level begins, walk away from the camera to find a small droppings pile amongst the crates. Use Owen to dig out the build-it pieces of a Minikit. Assemble them, grab the kit, and move on!  |
Smash the three InGen crates and assemble the pieces into a pair of grab bars on the tall scaffolding. Tag to Claire Dearing and try to high-jump up the bars to trigger an Indominus breakthrough that shatters the scaffold! Assemble the scaffold’s broken pieces into a massive chainsaw; then jump on its pull-switch to activate the tool and cut through the heavy vines.

Get to the Upper Walkway

Cross the enclosure to the crate stuck in a patch of dry brown vines—a sensor array hangs above it. Tag to Claire and use her scanner to trigger a sprinkler system that waters the vines, turning them green and soft. Now Owen can cut through the vines with his knife. The crate falls and breaks into build-it pieces. Assemble them into a narrow wooden beam.
MINIKIT: Corner Rope Cut Once you get across the beam, send Owen to the rope winch in the left corner of the new area, next to a big droppings pile. Cut the rope to drop a pallet of Minikit pieces; then assemble them to get the kit. |
Use Owen’s rummage ability in the big droppings pile to pull out some pink/blue build-it pieces. Assemble them into an acrobat wall. Tag to Claire and use her Agile ability to swing off the twirl pole; then bound off the acrobat wall to the upper walkway.
Below, Owen automatically steps onto the lift. Have Claire turn the red crank switch to raise the lift. The moment the lift reaches the top, quickly tag to Owen and quickly jump to grab the climbing wall handholds. Traverse the wall to the next platform and push the crate off the checkered slide track. Tag to Claire, build the broken pieces into a ladder, and climb back up to the platform. This triggers a brief appearance by the Indominus Rex.

Have Claire hop over the blue/pink acrobat bar into the back room; then use the glowing jump circle to grab the pull switch. Tag to Owen and walk through the newly opened passage to trigger another Indominus appearance. Activate Owen’s Camouflage ability to sneak past the monster. Deactivate stealth and smash the nearby containers of pesticide. Reassemble the pieces into a crazy spray-can contraption; then hop onto its bounce pad to drive away the Indominus.

The beast’s abrupt exit knocks down more pink/blue build-it pieces. Assemble them into an acrobat slide bar. Tag to Claire and make a running slide (pressing Jump as you get close) under the bar. Smash all the stuff in the room and build a jack to lift the slide bar for Owen. Tag to Owen and cut the green vine rope to knock over the pillar. Walk across the fallen pillar and hop across the green-topped poles to trigger the level-ending cutscene: Owen plays a scent trick to throw off the Indominus Rex, and then Claire calls for a full deployment of the park’s security force.


Hub Transit 18
Gray and Zach Mitchell have almost made it out of the wild valley and back into the Jurassic World village. Just two more gates stand in their way.

| Icon | Story Characters | Abilities |
|---|---|---|
 |
Gray Mitchell | Bone-Build, Small Access, Photography |
 |
Zach Mitchell | Repair, Illumination (Torch) |
Reach the Main Gate
The wooden gate up ahead is locked. Tag to Gray and use the small-access hatch on the rock wall to the right. You emerge on a ledge above. Smash the brown rocks and grab the key. Hop down and use the key to open the gate. Follow the blue stud route down the road to the main gate to the village.


Unlock the Gate
The gate actuators are out of commission, and the workers ask for help. Tag to Zach and walk along the wall to the right until the boost pad pops up. Step on and use it to boost Gray onto the ledge.
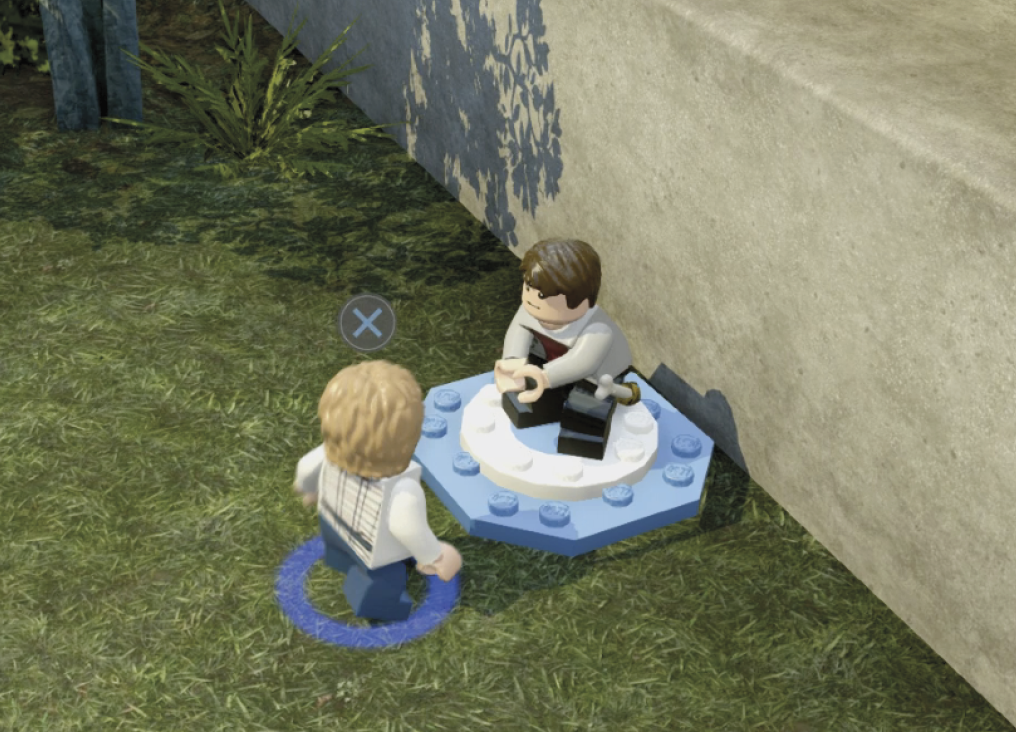
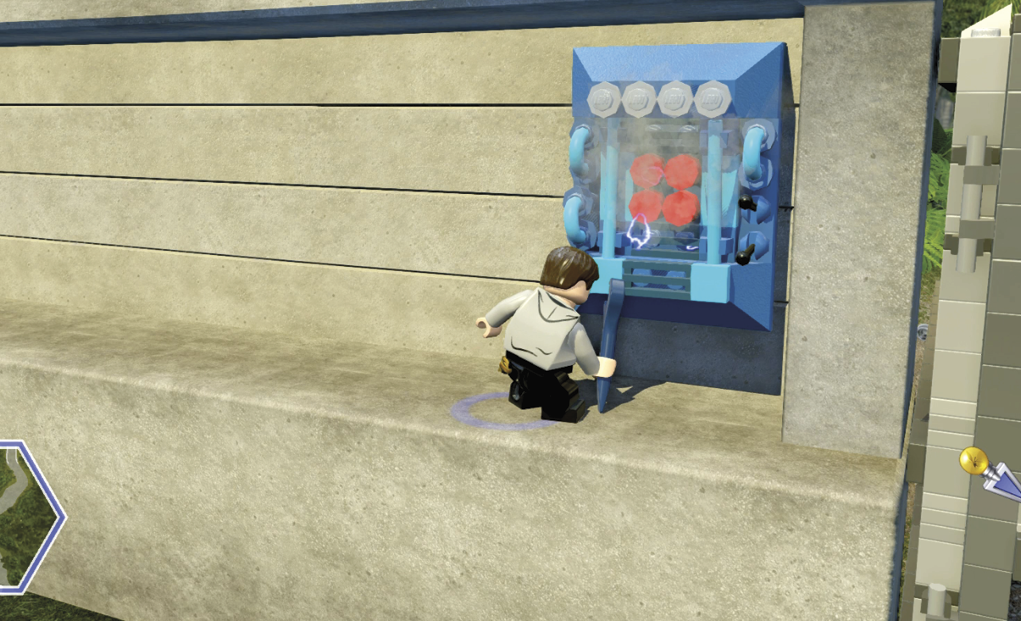
Smash the first two wall panels and assemble the pieces into a ladder. Tag down to Zach and climb the ladder. Then use Zach’s wrench to repair the smoking actuator panel. The gate opens automatically. Proceed through the open gate to trigger the opening cinematic of the next level.