
LEGO Jurassic World Guide Console Walkthrough: Movie 2
Level 07: InGen Arrival
It soon becomes clear that Ludlow has sent this expedition to capture wild dinosaurs and bring them back to the mainland! Nick Van Owen and Sarah Harding slip into the InGen camp to spy on the operation.

| True Survivor Stud Requirement |
|---|
| 64,000 studs |
Camp Sabotage
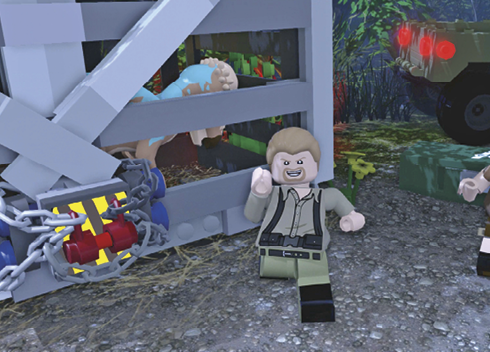
Nick Van Owen and Sarah Harding slide down to the InGen camp perimeter. As it turns out, the mercenary hunters are not very friendly. Your tasks: sabotage Ludlow’s scheme and free the dino captives!
| Icon | Story Characters | Abilities |
|---|---|---|
 |
Sarah Harding | Droppings Rummage, Dino Heal, Agile, Photography |
 |
Nick Van Owen | Photography, Crowbar, Bolt Cutters |
Heal the Pachycephalosaurus
Move into the camp and KO the InGen goons who try to stop you. Use Nick’s bolt cutters to open the cage holding the sedated Pachycephalosaurus—the pachy staggers out and drops right to the ground! Send Sarah to rummage in the droppings pile inside the cage to find out what three ingredients you need to heal the dinosaur: a banana, a mushroom, and an ice cream cone.

MINIKIT: Atop the Pachy CageTag to Sarah Harding. Jump from the bed of the disabled truck onto the cage that held the woozy Pachycephalosaurus. Assemble the build-it pieces atop the cage into a Minikit. 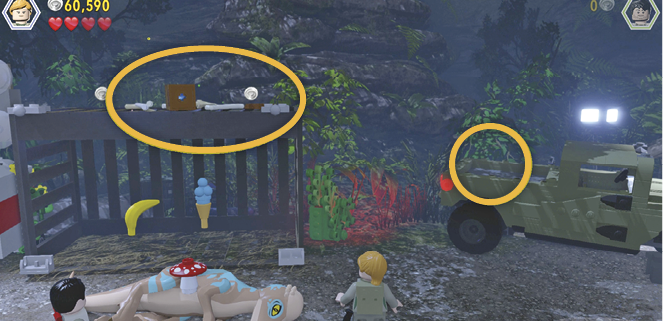 |
Find a Cone

This triggers a response from the main camp up the hill. Fend off the InGen attackers; then head rightward through the gate into the camp, knocking out more mercenary goons who attack as you go. Send Sarah to rummage through the droppings pile just inside the gate to find an ice cream cone. Take it back and feed it to the poor Pachy. One item down, two to go!
Find a Mushroom

Head back up to the main camp. Punch out the hunters hanging around the big pot of stew cooking over the campfire. Smash the nearby equipment rack to create a pile of build-it pieces. Assemble them into a rotary device; then turn its crank switch to spill the stew pot’s contents. Grab the mushroom that falls out and feed it to the Pachycephalosaurus. Two items down, one to go!
Find a Banana

Go back uphill into the main camp. Use Nick’s crowbar to open the locked gray crate in the camp’s back-right corner. Pick up the banana that falls out and feed it to the Pachycephalosaurus. This revives the hardheaded but grateful beast and makes him a playable character.
Access the Upper Camp

Tag to the Pachycephalosaurus and head into the main camp. Use the Pachy’s Charge ability to head-bash the attacking InGen goons and clear the area. Then charge the explosive equipment crate (the one with orange, glowing cracks) to blow open a passage.

This alerts another wave of goons. Knock them out and send the Pachy ahead to charge through a cracked section of LEGO rocks. Now tag to Sarah Harding and assemble the shattered build-it pieces into a set of stair-like platforms. Hop up the stairs into InGen’s upper camp area.
Free the Caged Dinos!
Knock out yet another InGen posse that comes to fight. Move Sarah into the glowing jump spot by the big cage to the right; then hop up to grab the pull bar. This opens the cage and frees the Stegosaurus inside, making him a playable character. More camp hunters rush over to attack. Tag to the Stegosaurus to fight them off!

MINIKIT: Droppings KitAfter you free the Stegosaurus from its cage and fight off the goons, tag to Sarah Harding and enter the cage. Rummage in the big droppings pile to discover a Minikit. 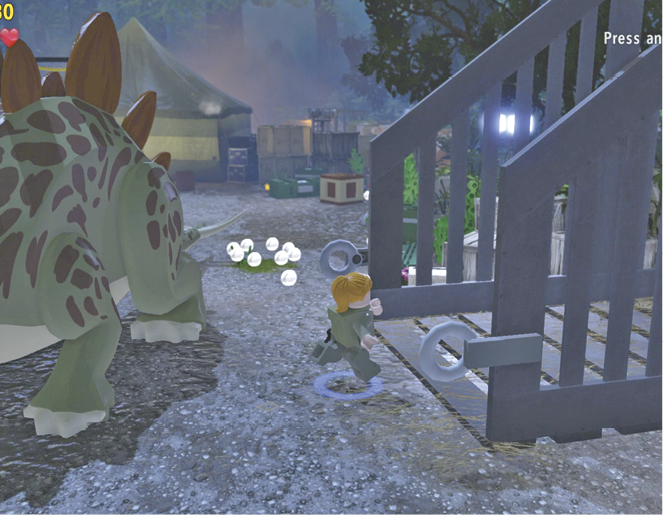 |
Walk the Stegosaurus across the upper camp to the cracked door of the smaller cage. Use the Stego’s tail-slam attack to smash open the cage, releasing the baby Stegosaurus inside. Note that you can hear Peter Ludlow inside the nearby tent, discussing his disgusting plans for a dinosaur theme park. The baby romps around, making glowing orange cracks in the camp generators on either side of Ludlow’s tent.
Send Sarah inside the smaller cage to rummage in the baby’s droppings and find a key. Then use the key in the lock of the big cage on the left. This releases a magnificent pair of Triceratops. Fight off one last wave of camp guards; then tag to either one of the Triceratops. Use the Triceratops Charge ability to smash both of the cracked generators.
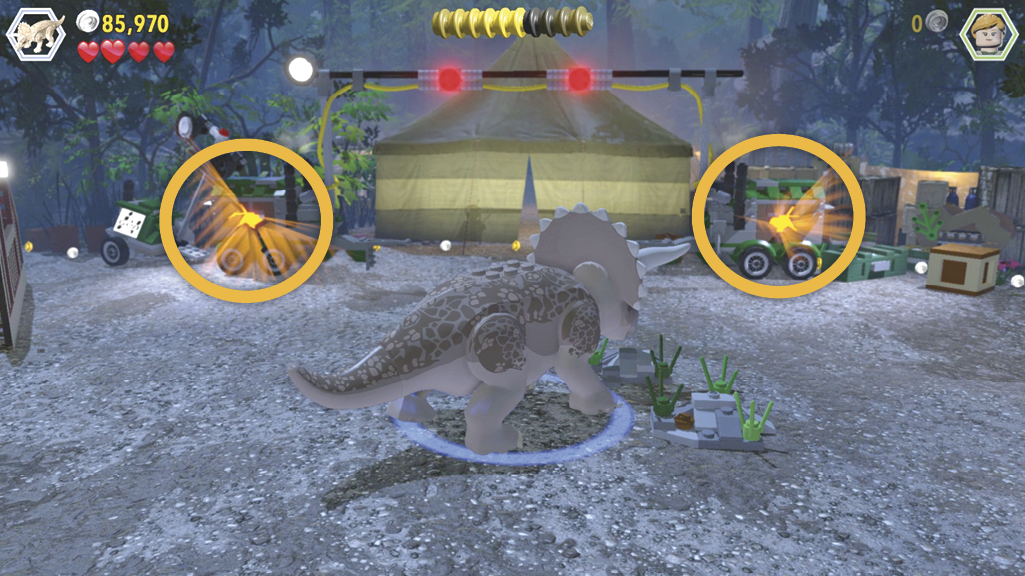
Tag to Sarah Harding and use the build-it pieces on both sides to assemble a pair of flashing light devices. This triggers the mission-ending cinematic: The Triceratops gets the “green light” to make a visit to Peter Ludlow. As the camp personnel scatter, Nick and Sarah discover a baby T. rex with a broken leg!

Mobile Lab

Back at the team’s camp, Eddie Carr puts Kelly Malcolm on his “high hide” platform just as Nick and Sarah rush into the Mobile Lab with the baby T. rex to fix his leg. Soon mommy arrives to take baby home. By way of thanks, she pushes the Mobile Lab over a cliff!

| Icon | Story Characters | Abilities |
|---|---|---|
 |
Sarah Harding | N/A |
 |
Nick Van Owen | N/A |
 |
Ian Malcolm (Isla Sorna) | N/A |
 |
Eddie Carr | Repair, Sharpshoot, Tracker |
 |
Kelly Malcolm | N/A |
Climb to Safety
Sarah, Nick, and Ian Malcolm cling to a cable that drops through the middle of the Mobile Lab’s back section, which hangs down the cliff face. You control Ian, who is the furthest up the cable.
Push the left stick forward to climb, but be ready to quickly push the stick sideways to dodge falling debris. (Falling stuff knocks you down the rope if it hits you.) You can also swing sideways to collect the strands of falling studs, but be ready to swing over to the opposite side right after the last stud (usually a blue one) to avoid any debris that might follow.

MINIKIT: Catch a Falling Kit The moment the climbing starts, swing Ian Malcolm over to the left side as a line of studs falls. The last item after the studs is a Minikit! |

When you get close to the lab’s back door, the scene automatically switches to Eddie above. You see the front half of the Mobile Lab suddenly tilt upward! When the view returns to Ian, water is pouring down the lab chassis. Hit the tag button to switch to Eddie.
Stabilize the Mobile Lab

Pick up the tracking item underneath the bus; then follow the blue tracks until Eddie unearths a pile of build-it pieces. Assemble them to add a pulley hook to the back of the lab. Walk to the front of the truck and use the pulley, tapping the Use button until Eddie hooks the rope onto the Mobile Lab.
Hop into the truck. Eddie automatically starts accelerating in reverse. Use the left stick to “steer,” keeping the truck icon centered in the purple part of the onscreen meter. When the Mobile Lab is pulled far enough to drop down, Eddie jumps out of the truck. Tag back to Ian Malcolm!

AMBER BRICK: Behind the Lab WheelUse Eddie to hop up the handhold blocks on the side of the Mobile Lab. When you get to the window, hop inside to grab the Amber Brick atop the vehicle. This unlocks the Apatosaurus. 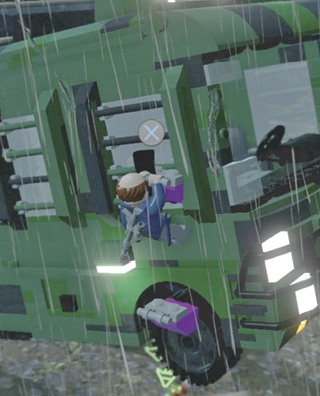 |
Climb Again!

Tag back to Ian Malcolm! Repeat the climbing sequence with Ian, swinging left or right to avoid falling debris. When the lab slides back and tilts up again, tag back to Eddie.
Pull Again!

Fight off an attack of the Compsognathus pack. Then use Eddie’s wrench to repair the broken pulley on the front of the truck. (Uh oh. Hear that roar?) Hop inside and drive backwards, keeping the truck icon centered in the meter again.
When the Mobile Lab is stabilized again, tag back down to Ian one more time. Climb a few more feet to trigger the movie-ending cutscene: Momma T. rex returns to finish the job on the Mobile Lab, but this time she has daddy with her! When the crew finally climbs up the cable, they discover that InGen’s expedition is now in the same boat. Peter Ludlow points out a communications center in the old Operations Building where they can call for airlift off the island.


Hub Transit 7
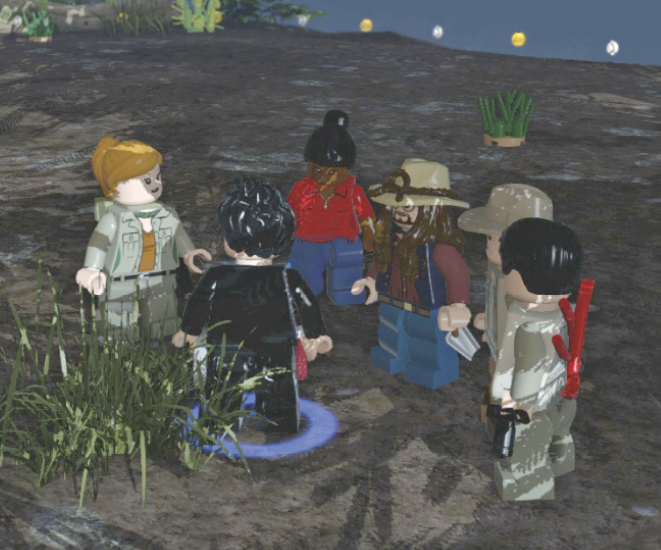
Good job! Another level complete! You’re making good progress. But it’s a long hike across the monster-infested island to reach the Operations Building. Some InGen folks with useful skills have joined you now.
| Icon | Story Characters | Abilities |
|---|---|---|
 |
Sarah Harding | Droppings Rummage, Dino Heal, Agile, Photography |
 |
Nick Van Owen | Photography, Crowbar, Bolt Cutters |
 |
Ian Malcolm (Isla Sorna) | Illuminate (Flare), Academic Panels |
 |
Kelly Malcolm | Agile, Scream |
 |
Roland Tembo | Sharpshoot, Tracker |
 |
Robert Burke | Dig, Bone-Build |
Heal the Triceratops
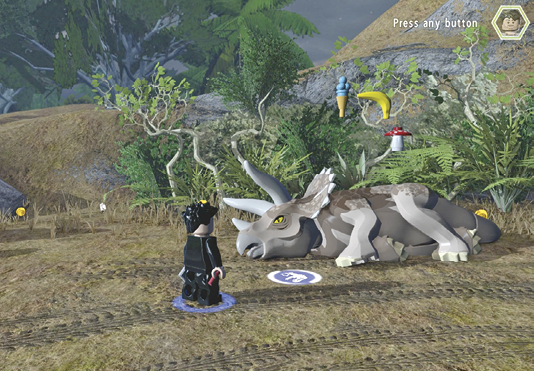
This starts out as the same route you followed in the last hub transition. Follow the blue studs to the river and hop across on the jump pads. Proceed to the deep crevasse and swing across on the green vine. Continue to the bounce pad and jump up the terrace. Follow the blue studs all the way to the sick Triceratops. Switch to Sarah Harding and rummage the nearby droppings to see what ingredients you need to heal the dino.
Find the Banana

Sarah's rummaging uncovers a tracking item. Tag to Roland Tembo (who has the Tracker ability), pick up the item, and follow the blue tracks until Roland unearths the banana. Pick up the banana and feed it to the sick Triceratops.
Find the Ice Cream
Tag to Nick Van Owen and head left along the rock wall. Use Nick’s crowbar on the rocks to clear the cave mouth. Then tag to Ian Malcolm, enter the cave using your flare, and nab the ice cream cone. Return to the Triceratops and feed him the cone.

Find the Mushroom

Find the LEGO skeleton to the left of the cave where you found the ice cream cone. Smash the skeleton into build-it bones; then tag to Dr. Robert Burke, a paleontologist with the Bone-Build ability. Assemble the bones into a Buddy Boost, tag to Sarah, and step aboard. Tag to anyone else to jump and fling Sarah onto the terrace above. Smash the mushroom patch and pick up the remaining mushroom. Then take it to the Triceratops to complete the healing.
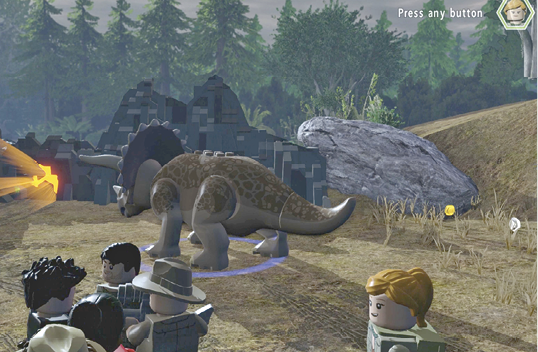
The Triceratops is now a playable character. Tag to the creature and use his Charge ability to smash through the cracked rock wall glowing orange up ahead.
HEAL DINO: TriceratopsHealing the Triceratops during this hub transition completes one of the Heal Dino collectible activities and earns you a Gold Brick. |

Tag to Nick and follow the blue stud trail to the rock pile against the fallen tree. Use Nick’s crowbar on the rocks to create a jump platform and hop over the tree. Move across the camp past the cooking campfire to the marker that triggers the openinig cutscene of the next level.