
LEGO Jurassic World Guide Console Walkthrough: Movie 1
Level 04: Restoring Power
It’s been a long night for Timmy, Lex, and Dr. Grant. As morning light breaks, they’re still a mile from the Visitor Center, trudging along a grassy valley.


| True Survivor Stud Requirement |
|---|
| 42,000 studs |
Gallimimus Chase
Suddenly, a large flock of ostrich-like dinosaurs called Gallimimus comes galloping at Dr. Grant and the kids. As Grant points out, they’re acting as if something is chasing them. Run!

| Icon | Story Characters | Abilities |
|---|---|---|
 |
Alan Grant | N/A |
 |
Lex Murphy | N/A |
 |
Timmy Murphy | N/A |
Run!
This chase is similar to the T. rex chase earlier in that you can simply let your character run without touching the controller and you’ll still finish the sequence. However, like the T. rex chase, if you steer your runner down the lines of studs that appear, you can pocket a lot of change. Try to avoid the running dinosaurs that pass you. If you collide, your runner stumbles briefly.
MINIKIT: Smash Three Signposts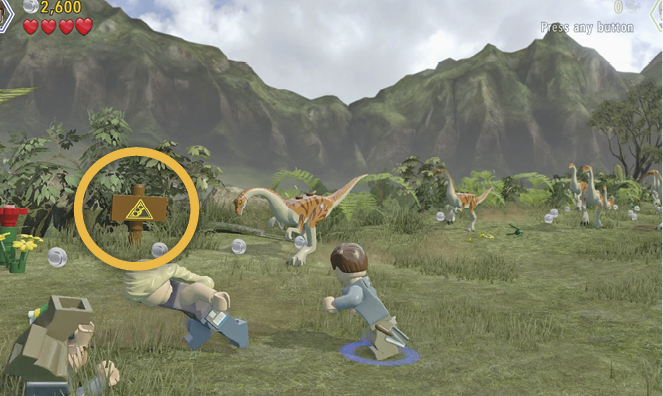 Five wooden signposts line the chase route. If you smash through three of them with a character you contorl, you earn a Minikit. The first one is at the far right not long after the chase starts. The second sign is to the far left just before you drop down the rocky hill. The third is on the far-right side soon after, so veer across the path quickly! The fourth signpost is back over on the far-left side, just as the camera starts swinging to a side view. The fifth signpost is on the far side, opposite the camera, when the chase is in full side view. |
MINIKIT: Running Log JumpAs you flee the Gallimimus flock, a number of logs are strewn across the route. Hovering above each log is a blue stud—except for the fifth log in the chase. A Minikit floats above that one. Don’t miss it! 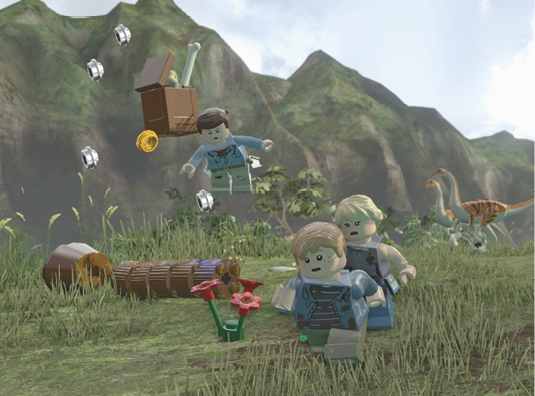 |
Jump!
The chase takes you past a series of fallen logs scattered along the route. Every log except one has a single floating blue stud centered above it. (The fifth log has a Minikit instead.) If you time your leap over the log just right, you can snag the stud. A line of gold/silver studs leads directly to each log. Scoop them all up!

When the chase ends, your threesome finds out why the Gallimimus are running.

Maintenance Shed


Ray Arnold hasn’t reported back to the emergency bunker, and the power is still out. As Ellie Sattler and Robert Muldoon head to the maintenance shed to investigate, John Hammond and Ian Malcolm pull out the building’s blueprint to give directions via Ellie’s radio headset.
| Icon | Story Characters | Abilities |
|---|---|---|
 |
Ellie Sattler | Droppings Rummage, Dino Heal, Plant Grow, Agile |
 |
Robert Muldoon | Tracker, Sharpshoot, InGen Access |
Open the Security Gate
Tag to Dr. Sattler, who carries a flashlight, and use her as your primary character while moving through the dark areas until Muldoon’s skills are needed. Go downstairs and turn right to acquire an Amber Brick (see sidebar); then head left until you reach the open gate in the chain-link barrier.
Amber Brick: Odd Droppings Just down the first staircase and to the right in the maintenance shed, find a pile of dinosaur droppings. Have Ellie go elbow-deep to pull out an Amber Brick. This brick gives you access to Velociraptor DNA. |
MINIKIT: Shoot the High Steam Pipes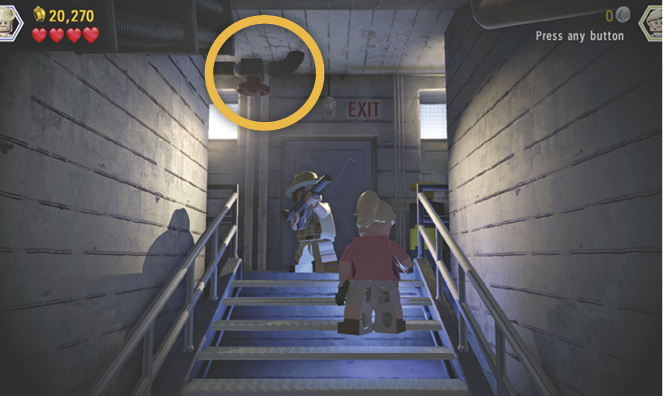 Shoot four steam pipes with red valve wheels up on the ceiling to earn a Minikit. One is directly above you when you start the level (seen in the screenshot). The second red valve is at the bottom of the entry stairs and to the right, above the droppings pile where you find the Amber Brick. The third valve is on the ceiling just outside the opening in the chain-link fence where you enter to find the tracking item. The fourth red valve is in the lower corridor, above the alcove to the left where you find the second droppings pile. |

Tag to Muldoon, enter the back room, and smash the barrel to reveal a tracking item: a pair of glasses. Pick them up and follow the blue glowing trail until Muldoon digs in a pile of trash to find a key. Exit the back room and use the key to open the heavy security gate.

When you enter the next room, a big floor gap halts your progress. Malcolm tells you to follow the large bundle of cable and pipes above you. Use Muldoon’s rifle to shoot the bull’s-eye near the big blue ceiling pipe. When the pipe falls, use the build-it pieces to construct a ramp up the pipe, and then use it as a bridge across the gap.
Get Past the Steam Valves
Now a series of valves venting hot steam blocks your progress down the walkway. Wait until the first valve stops shaking, then hustle past. Tag to Ellie, veer left, and jump to grab the red and yellow bar. Hanging on the bar pulls down the yellow pipe above, disconnecting the steam from the second valve. As Ellie hangs from the bar, tag to Muldoon and walk to the red valve wheel on the right. Turn the wheel to cut off steam to the valves in the area. Continue along the walkway to the next steam valve and use Muldoon’s rifle on the bull’s-eye target to disable it.

Fire Up the Generators

Proceed down the corridor to the pink/blue bar hung above the chain-link barrier. Tag to Ellie and jump to the bar; then flip over into the generator room.

Inside, go to the glowing jump point and leap up to pull down the bar. The generator switch panel slides open. Assemble the build-it pieces into a primer handle; then use it to pump up the charge.

When the power comes back on, Ellie and Muldoon find Ray Arnold. They also discover why Arnold didn’t finish his task.

The Raptor Pack

Ellie Sattler and Robert Muldoon must traverse the muddy jungle path from the maintenance shed back to the emergency bunker with a pack of hungry raptors on their trail!
| Icon | Story Characters | Abilities |
|---|---|---|
 |
Ellie Sattler | Droppings Rummage, Dino Heal, Plant Grow, Agile |
 |
Robert Muldoon | Tracker, Sharpshoot, InGen Access |
Ascend the Cliff

Tag to Muldoon and move down the path, hopping the fallen tree to reach the low cliff. Smash the LEGO plant in the corner to reveal a tracking item: a flower bud. Pick it up and follow the blue trail to the plant root. Tag to Ellie and water the root to grow a huge flowering vine.
MINIKIT: Shoot Four NestsShoot the four egg-filled bird nests up high along the route to earn a Minikit. The first one is above the log across the path near the start. The second is up in a tree near where the first raptor leaps out and attacks on the path. The third is above the big droppings pile. The fourth is just across the bridge from the droppings pile, up high to the right. 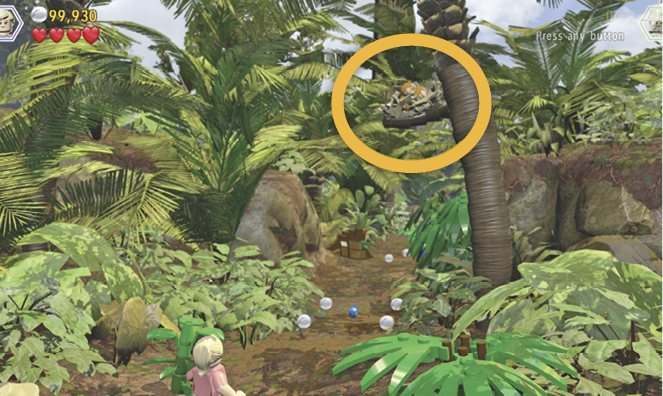 |
Move Ellie into the glowing jump point. Then use the blue pistils extending from the flowers as twirl poles, swing-jumping from pole to pole to reach the top of the cliff. Smash the LEGO plant at the cliff’s edge and water the root to grow another huge plant with wide flower platforms that Muldoon can hop up.

Fight Off the Raptors!

Climb the path to the left and shoot the bull’s-eye target on the tree to release a green vine. Hop to the vine and use it to swing-jump across the gap. Continue along the muddy path until a raptor attacks. Rapidly tap the buttons indicated onscreen to fight off the beast!

Tag to Ellie and continue up the path to the large droppings pile. Rummage in the pile to extract wood and vine build-it pieces; then assemble those into a footbridge across the next gap. Walk across and continue onward. Be ready! When you reach the blue stud in the path, another raptor attacks. Fend it off the same way you did the first one.
Move the Boulders
Proceed to the LEGO plants and smash them to reveal the boulders blocking the path. Assemble the build-it pieces into a big lever. Use the glowing jump point to hop onto the red spot on the platform. The platform lowers and the lever pries the boulders loose.

Slide down the slope after the boulders. Tag to Muldoon, pick up the tracking item (a raptor Claw), and follow the blue glowing trail until another raptor attacks. Again, rapidly tap the buttons indicated to fight off the dinosaur. This time, watch carefully when the raptor retreats! It disappears into the bushes, but you can see them rustling as it scurries around. Note what bush moves last before the rustling stops.
Rock the Raptor Pack

Your next task is to nail the raptor three times with a thrown rock. Pick up one of the rocks on the ground, hold down the Aim button, and move the targeting reticle over the last bush that moved when the raptor was rustling around. You have three choices, each marked by a red targeting reticle.
If you throw at the wrong bush, the raptor leaps out of hiding and attacks! Fight it off by tapping the buttons indicated. But if you throw at the correct bush, you nail the raptor! The beast pops up, stunned, with stars swirling around its head.
Once hit by a rock, the raptor rustles back and forth through the bushes to another hiding spot. Watch carefully again to identify the bush that moves last. Then throw another rock at that bush. Once you nail the raptor three times, you trigger the level-ending cinematic: Ellie has time to escape while Muldoon covers her retreat by holding off the pack.


Hub Transit 4

Now we switch back to Dr. Grant, Timmy, and Lex Murphy as they make the last part of their long trek to the Visitor Center.
| Icon | Story Characters | Abilities |
|---|---|---|
 |
Alan Grant | Excavate, Rope/Vine Cutter, Bone-Build |
 |
Lex Murphy | Scream, Hacker, Agile, Baseball Sharpshoot |
 |
Timmy Murphy | Bone-Build, Night Vision Goggles, Small Access |
Open the Hut Door

Tag to Lex Murphy and follow the path to the hut. Toss Lex’s baseball at the bull’s-eye target to knock the basket out of the tree. Pick up the red crank handle that falls, and attach it to the switch mechanism next to the hut’s left door. Then turn the switch to open the door.
Open the Gate
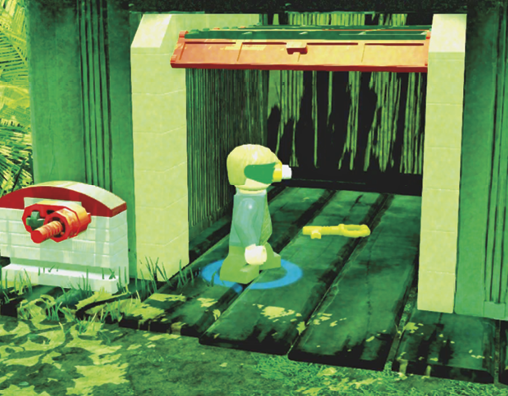
Tag to Timmy Murphy and enter the hut. He automatically pulls on his Night Vision Goggles to see. Pick up the key on the floor and exit. Then use the key to unlock the security gate leading to the Visitor Center grounds. At last! Go through the gate to trigger the opening scene of the story’s next level.