LEGO Jurassic World Guide Console Walkthrough: Movie 4
Level 17: Gyrosphere Valley
Yes, it opens with another wild bonus chase sequence! Only this time, you get to roll along in a Gyrosphere.


| True Survivor Stud Requirement |
|---|
| 50,000 studs |
Gyrosphere Escape
Again, as in the other “escapes” in this game, the Indominus Rex will not catch you. But two Minikits and a slew of studs line the escape route. So steer your sphere carefully.


| Icon | Story Characters | Abilities |
|---|---|---|

|
Gray Mitchell | N/A |

|
Zach Mitchell | N/A |
Roll Away! Roll Away!

You know the escape drill by now. Roll down the rows of gold/silver studs and hit your Jump button to nab blue studs floating up high. You can also roll through an Amber Brick and earn a Minikit.
MINIKIT: Smash the Signs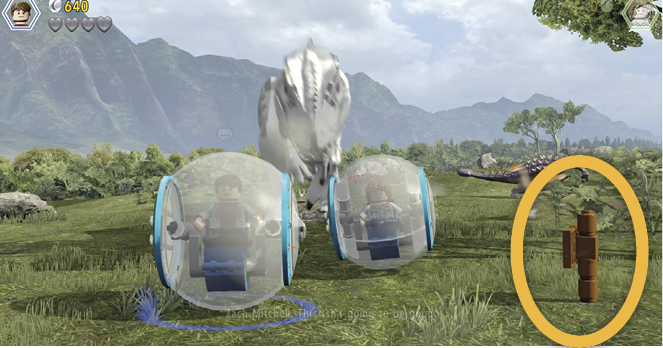
Three wooden warning signs are posted along the route. Smash all three to earn a Minikit. The first one is on the far right side (seen in our first screenshot), appearing immediately after the camera view swings over to directly in front. The second one is on the far left side of the path in the forested area that you reach shortly after Indominus completely shatters a section of tram tracks (and almost nails the train too). 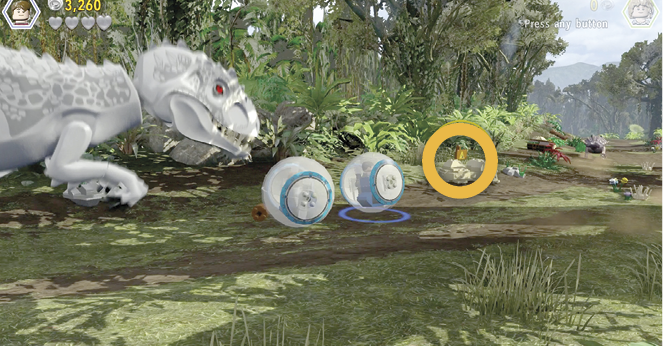
The third warning sign (shown in our second screenshot) is near the end of the chase, just as the camera view is swinging in behind the spheres. Look for it over on the opposite edge of the path (on the left from the boys’ point of view). |
AMBER BRICK: Look On the LeftAt one point, Indominus Rex veers uphill onto a higher but still parallel path, and the camera view of your fleeing Gyrospheres swings to the side. After a few seconds, the monster veers back toward the boys and the camera swings almost behind the spheres. Steer your Gyrosphere as far to the opposite side of the path (to the boys’ left) as possible and jump on raised ground to roll through an Amber Brick. Acquiring it unlocks the heavily armored Ankylosaurus. |


Down the home stretch the brothers roll with a bony crew of Ankylosauruses. When you finish the escape, watch as Gray loses his sphere and the lead club-tail decides it’s time to stop running.
Gyrosphere Attack


Now the Indominus Rex faces off with an angry alpha Ankylosaurus. The armor-backed creature is tough, but it’s going to need some help from the Mitchell boys to survive against the hybrid Indominus.
| Icon | Story Characters | Abilities |
|---|---|---|
|
Gray Mitchell | Bone-Build, Small Access, Photography |

|
Zach Mitchell | N/A |
Help the Ankylosaurus, Pt. 1
Run Gray across the clearing and smash the three blue sections of the wrecked vehicle. When all three are destroyed, the build-it pieces start hopping and you can assemble a gyro-roll pad with a vine attached to the nearby beehive. Tag to Zach and drive his sphere onto the pad. Then push the left stick forward to accelerate, pulling the beehive until it releases like a slingshot.

The bees distract the Indominus, letting its armored foe roll over and get on its feet. Tag to the Ankylosaurus and follow the onscreen button prompts to body slam the Indominus into the big LEGO tree. The tree falls and a chunk shatters into build-it pieces.

Help the Ankylosaurus, Pt. 2
Tag to Gray Mitchell and assemble the build-it pieces into a ramp leading to the next level. Climb the ramp and watch for a small swarm of Compys! Smash the red/green plants to clear the way to a small-access hatch. Climb inside to emerge on the platform above.
Swing across two green vines and land on the big branch. Step onto the photo spot icon and use Gray’s camera to take a flash photo that distracts the Indominus, again letting the Ankylosaurus back on its feet. Tag to the Ankylosaurus and follow the button prompts to get in some good hits. The irritated Indominus punches over another tree, knocking it to pieces.

Help the Ankylosaurus, Pt. 3
You automatically tag back to Gray. Assemble the pieces into a wheeled bridge that rolls into place over the ravine with the stream. Run across the bridge and smash everything on the next plateau. Assemble the blue LEGO build-it pieces that slide down the hill into a gyro-launch pad. Assemble the bone pieces next to the tree into a bounce pad.

Hop Gray onto the bone bounce pad and use the grab blocks to swing onto the tree platform. Then jump up to grab the zip-line and slide across the river over the battling dinosaurs. Drop to the lower level and smash the brown/white crate; then assemble the pieces into an egg shooter. This distracts the Indominus again.

Tag to the Ankylosaurus and hit the buttons as prompted. The fight moves upstream, but not before the Indominus tail-whips the nearby abandoned car into a scrap heap.
Help the Ankylosaurus, Pt. 4
Jump down another level, fight off the Compy trio, and then assemble the two LEGO build-it piles. One pile becomes a ladder back to the upper level—you’ll use it shortly—and the bone pieces turn into a lever. Jump on the raised end of the lever to roll away the nearby boulder and reveal another gyro-launch pad.

Whew! Now you’ve set everything up for the Gyrosphere and you can finally tag back to Zach Mitchell. Roll across the wheeled bridge and downhill to the first gyro-launch pad. This propels you up into a big hollow log over the river. Roll through the log and onto the second gyro-launch pad. This flings the sphere into the big gray obstruction on the next level, shattering it and clearing the way to the dinosaurs. Uh oh…the Indominus Rex has the poor Ankylosaurus by the tail!
Climb Gray up the ladder and send him near the dinosaurs to smash the two skeletons; then reassemble the bone pieces into an awesome crane claw. Tag to Zach and roll the Gyrosphere onto the gyro-roll pad next to the orange crane tower. Use the left stick to move the crane claw over the park truck. The claw automatically grabs the vehicle.

Then swing the vehicle over the Indominus Rex to trigger the level-ending cinematic: The monster tries to snack on the sphere as the boys escape. Meanwhile, back at park control, the team marvels at the creature’s intelligence and ingenuity. But then Claire Dearing learns that her nephews are out in the valley!

Hub Transit 17
After their narrow escape, the Mitchell brothers slog down an old Isla Nublar road looking for some way to contact their aunt. The route leads to some of the original Jurassic Park facilities, long abandoned.

| Icon | Story Characters | Abilities |
|---|---|---|

|
Gray Mitchell | Bone-Build, Small Access, Photography |

|
Zach Mitchell | Repair |
Find the Parking Garage
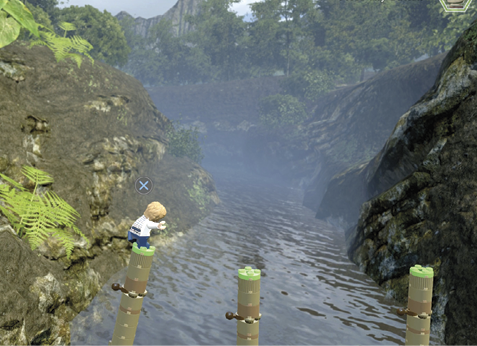
Tag to Zach Mitchell and use the blue/white boost pad that appears just down the path on the left. Tag to Gray and jump to get boosted up the rock wall. Hop across the river using the three posts. Jump down the wall and smash the logs. Assemble the build-it pieces into a narrow footbridge for Zach to cross the river too.
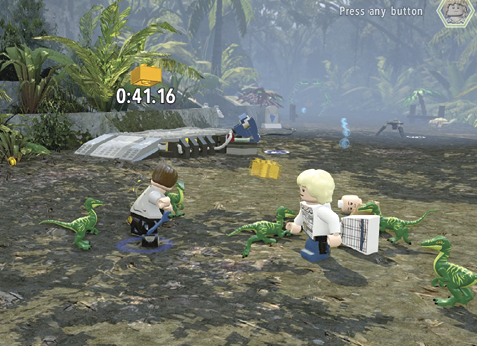
When you reach the gate, use Zach’s Repair ability to fix the blue gate control mechanism on the left. When the gate opens, continue down the path. A lone Compsognathus on the path attacks as you pass. If you fight back and knock him out, a Compy ambush is triggered! This is a timed fight where a Gold Brick is earned if you can KO 12 Compys within the 45-second time limit. (The Gold Brick floats on the road as a ghost item until you win; then it activates and you can pick it up.)
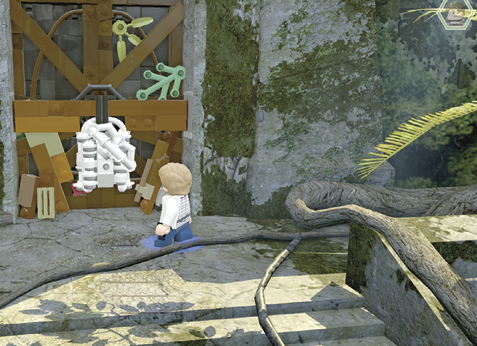
Follow the blue stud path up the front steps of the overgrown parking and maintenance facility for the old Jurassic Park Visitor Center. Tag to Gray and smash the bone pile in front of the door. Then use the bone pieces to assemble an unlocking mechanism that automatically opens the entry door. Step inside to trigger the opening cinematic of the next level.