
Nintendo Playing with Power Guide The Legend of Zelda The Underworld
Labyrinth 3: Manji
It’s Time for the Real Fight
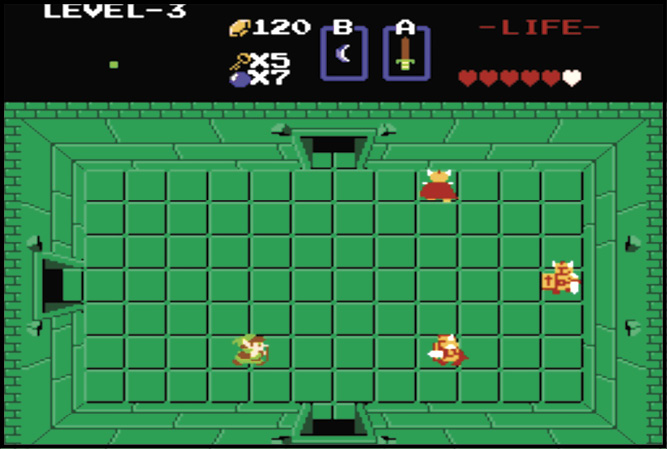
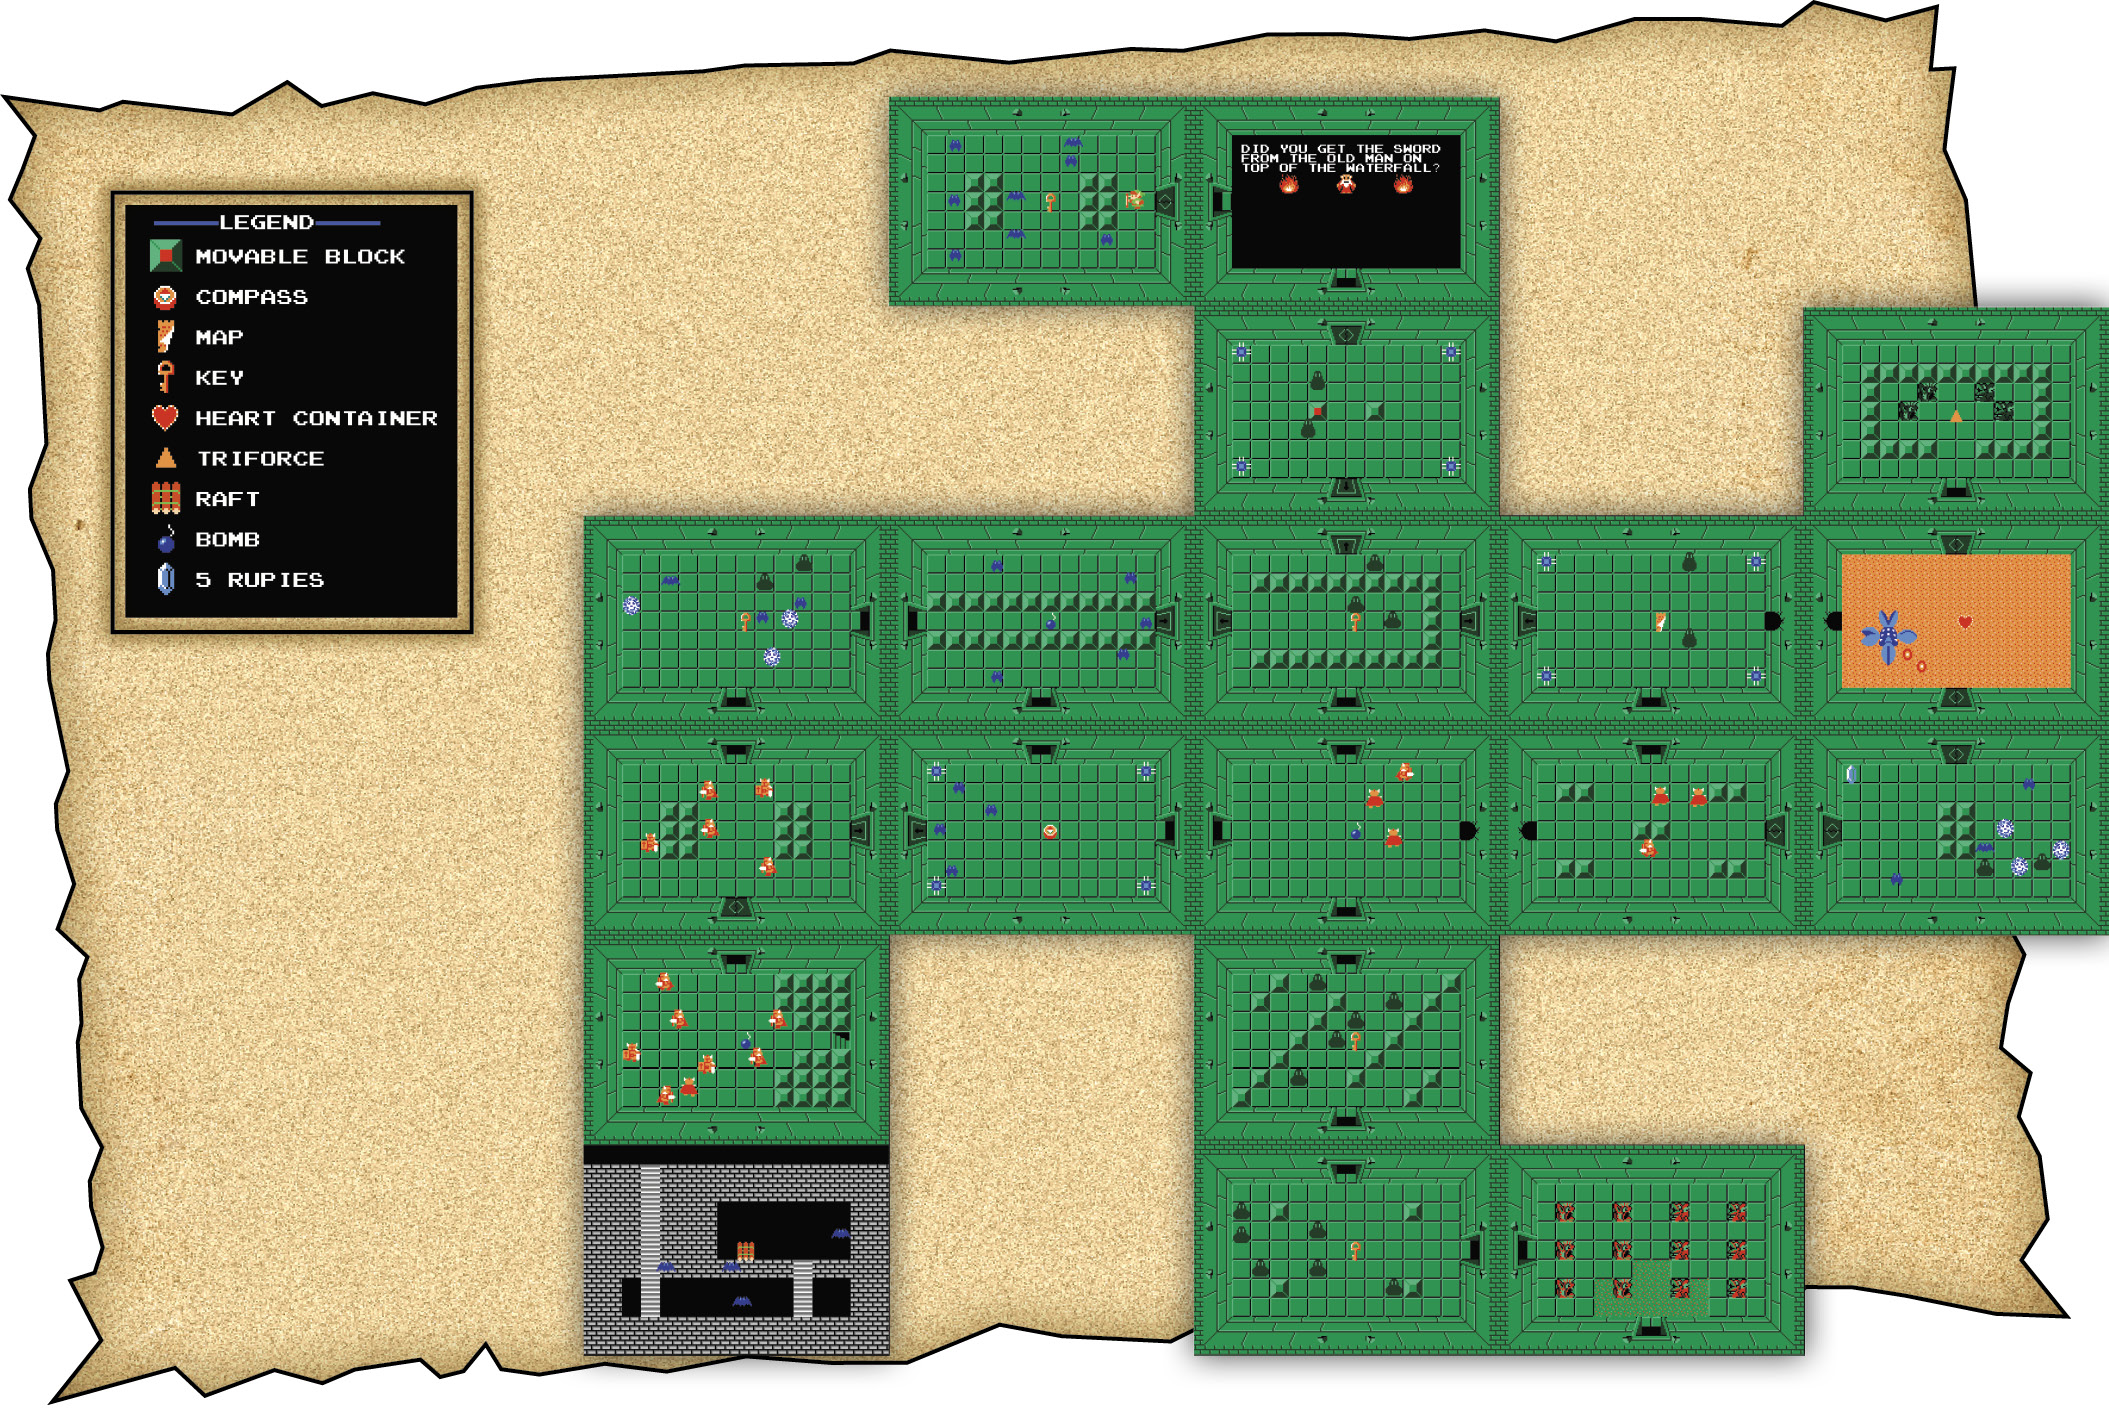
Level 3 is a real challenge, especially in comparison to the two previous levels. For starters, you encounter one of the most difficult enemies in the game here: the Darknut. Darknuts block your attacks if you attack them from the front, and they hit like trucks.
On top of Darknuts, you also have to battle Manhandla in order to reach the Triforce piece. This enemy is no slouch, so expect a tough battle if you want to complete this labyrinth!
Get a Map and a Compass
Find the Map to this labyrinth in the top room of the second-to-the-right row; the Compass is in the first room in the second-to-the-left row.


Trapped! Defeat the Enemies to Proceed!
Several of the rooms in this labyrinth lock down as soon as you enter them. The only way out? Defeating all the enemies in the room. Once the enemies are cleared out, the doors spring back open and you’re free to leave. When the shutters close, don’t panic. Keep a cool head and carefully take out each enemy, and you’ll be just fine.

Get the Raft!
The Raft is the treasure of Level 3. The treasure room concealing it is in the basement of the far-bottom-left corner of the Map. The entrance to the treasure room is visible, so you can go in with no problem. There are, however, a great number of Darknuts. The secret is to run into the treasure room as quickly as possible without fighting the Darknuts. Once the Raft is yours, race back out of the room, avoiding every Darknut along the way.

Battling the Dastardly Darknuts
A forward attack is totally ineffective against the Darknuts. For this reason, you must attack them either from the side or from behind. As soon as a Darknut senses your attack, he turns and faces you, so be ready to escape from him fast! It will be easier later if you blow up a few Darknuts now. Throw Bombs at Darknuts that are gathered close together.

Don’t Get Caught by the Bubbles
Touching the Bubbles does no damage to Link; however, it does steal his ability to draw his Sword for a while, so be on alert! Dodge the Bubbles as much as you can, although doing so is not always possible, because other enemies demand your attention as well. It’s wise to switch to ranged weapons, such as the Boomerang or Bow, before you enter a room where Bubbles are waiting. That way, you can continue your attack against your enemies even without the Sword.

Attacking Your Enemies from Cover
When there are obstacles in the room, use them to fight even more fiercely. Link’s Sword can’t reach through the side or bottom, but it can reach up through obstacles above. This allows you to take advantage of the obstacles. To attack your enemies without worrying about taking damage, hide under the obstacle and thrust your Sword upward swiftly as soon as an enemy crosses your path. This is an especially effective technique against enemies that don’t use ranged weapons.
Take Your Time and Investigate
Before you fully advance into the next room as the screen changes, wait in the doorway and investigate the room. From this position, your enemies can’t attack you. Take your time to come up with a good countermeasure as you confirm what kinds of enemies are in the room and whether traps await you. This way you won’t be attacked as soon as you enter a room. You should know, however, that this method won’t work in rooms where the doors close as Link enters.
Proper Boomerang Usage
What would you do if Rupees or Hearts appeared in the middle of battle? It’s too difficult and dangerous to reach them with all those enemies around, right? In this kind of situation, the Boomerang really shines.
Did you know that you can pick up Rupees or Hearts by throwing the Boomerang at them? That’s right! The Boomerang allows you to pick up items while facing down foes. It’s a sophisticated technique, but it’s certainly helpful to know. Rupees and Hearts don’t stay long, so grab them before they disappear. The Boomerang can do just that!

Make Sure to Meet the Old Man
Our old friend is in the room at the top of the middle row of this labyrinth. He asks whether Link got a Sword from someone somewhere. This is very important, because you won’t find the White Sword unless you listen to his message. Once you meet him, get out of Level 3 and get the White Sword right away. It’s much easier to clear Level 3 with it.
Defeat the Zol with a Single Strike
You come face-to-face with an enemy named Zol in Level 3. If you cut a Zol with a Regular Sword, it becomes two Gels, effectively doubling your number of enemies. Take care not to hit a Zol while it’s near a wall. If a Zol splits near a wall, it can cause one of the Gels to bounce off the wall toward you to hit you. Your best bet is to fight a Zol in the center of a room, or with your back to a wall. However, you can beat a Zol with a single swing of the White Sword—another reason why you should get the White Sword immediately.
