
Chapter 2: Path to the Mountain
Wildwoods’ Edge
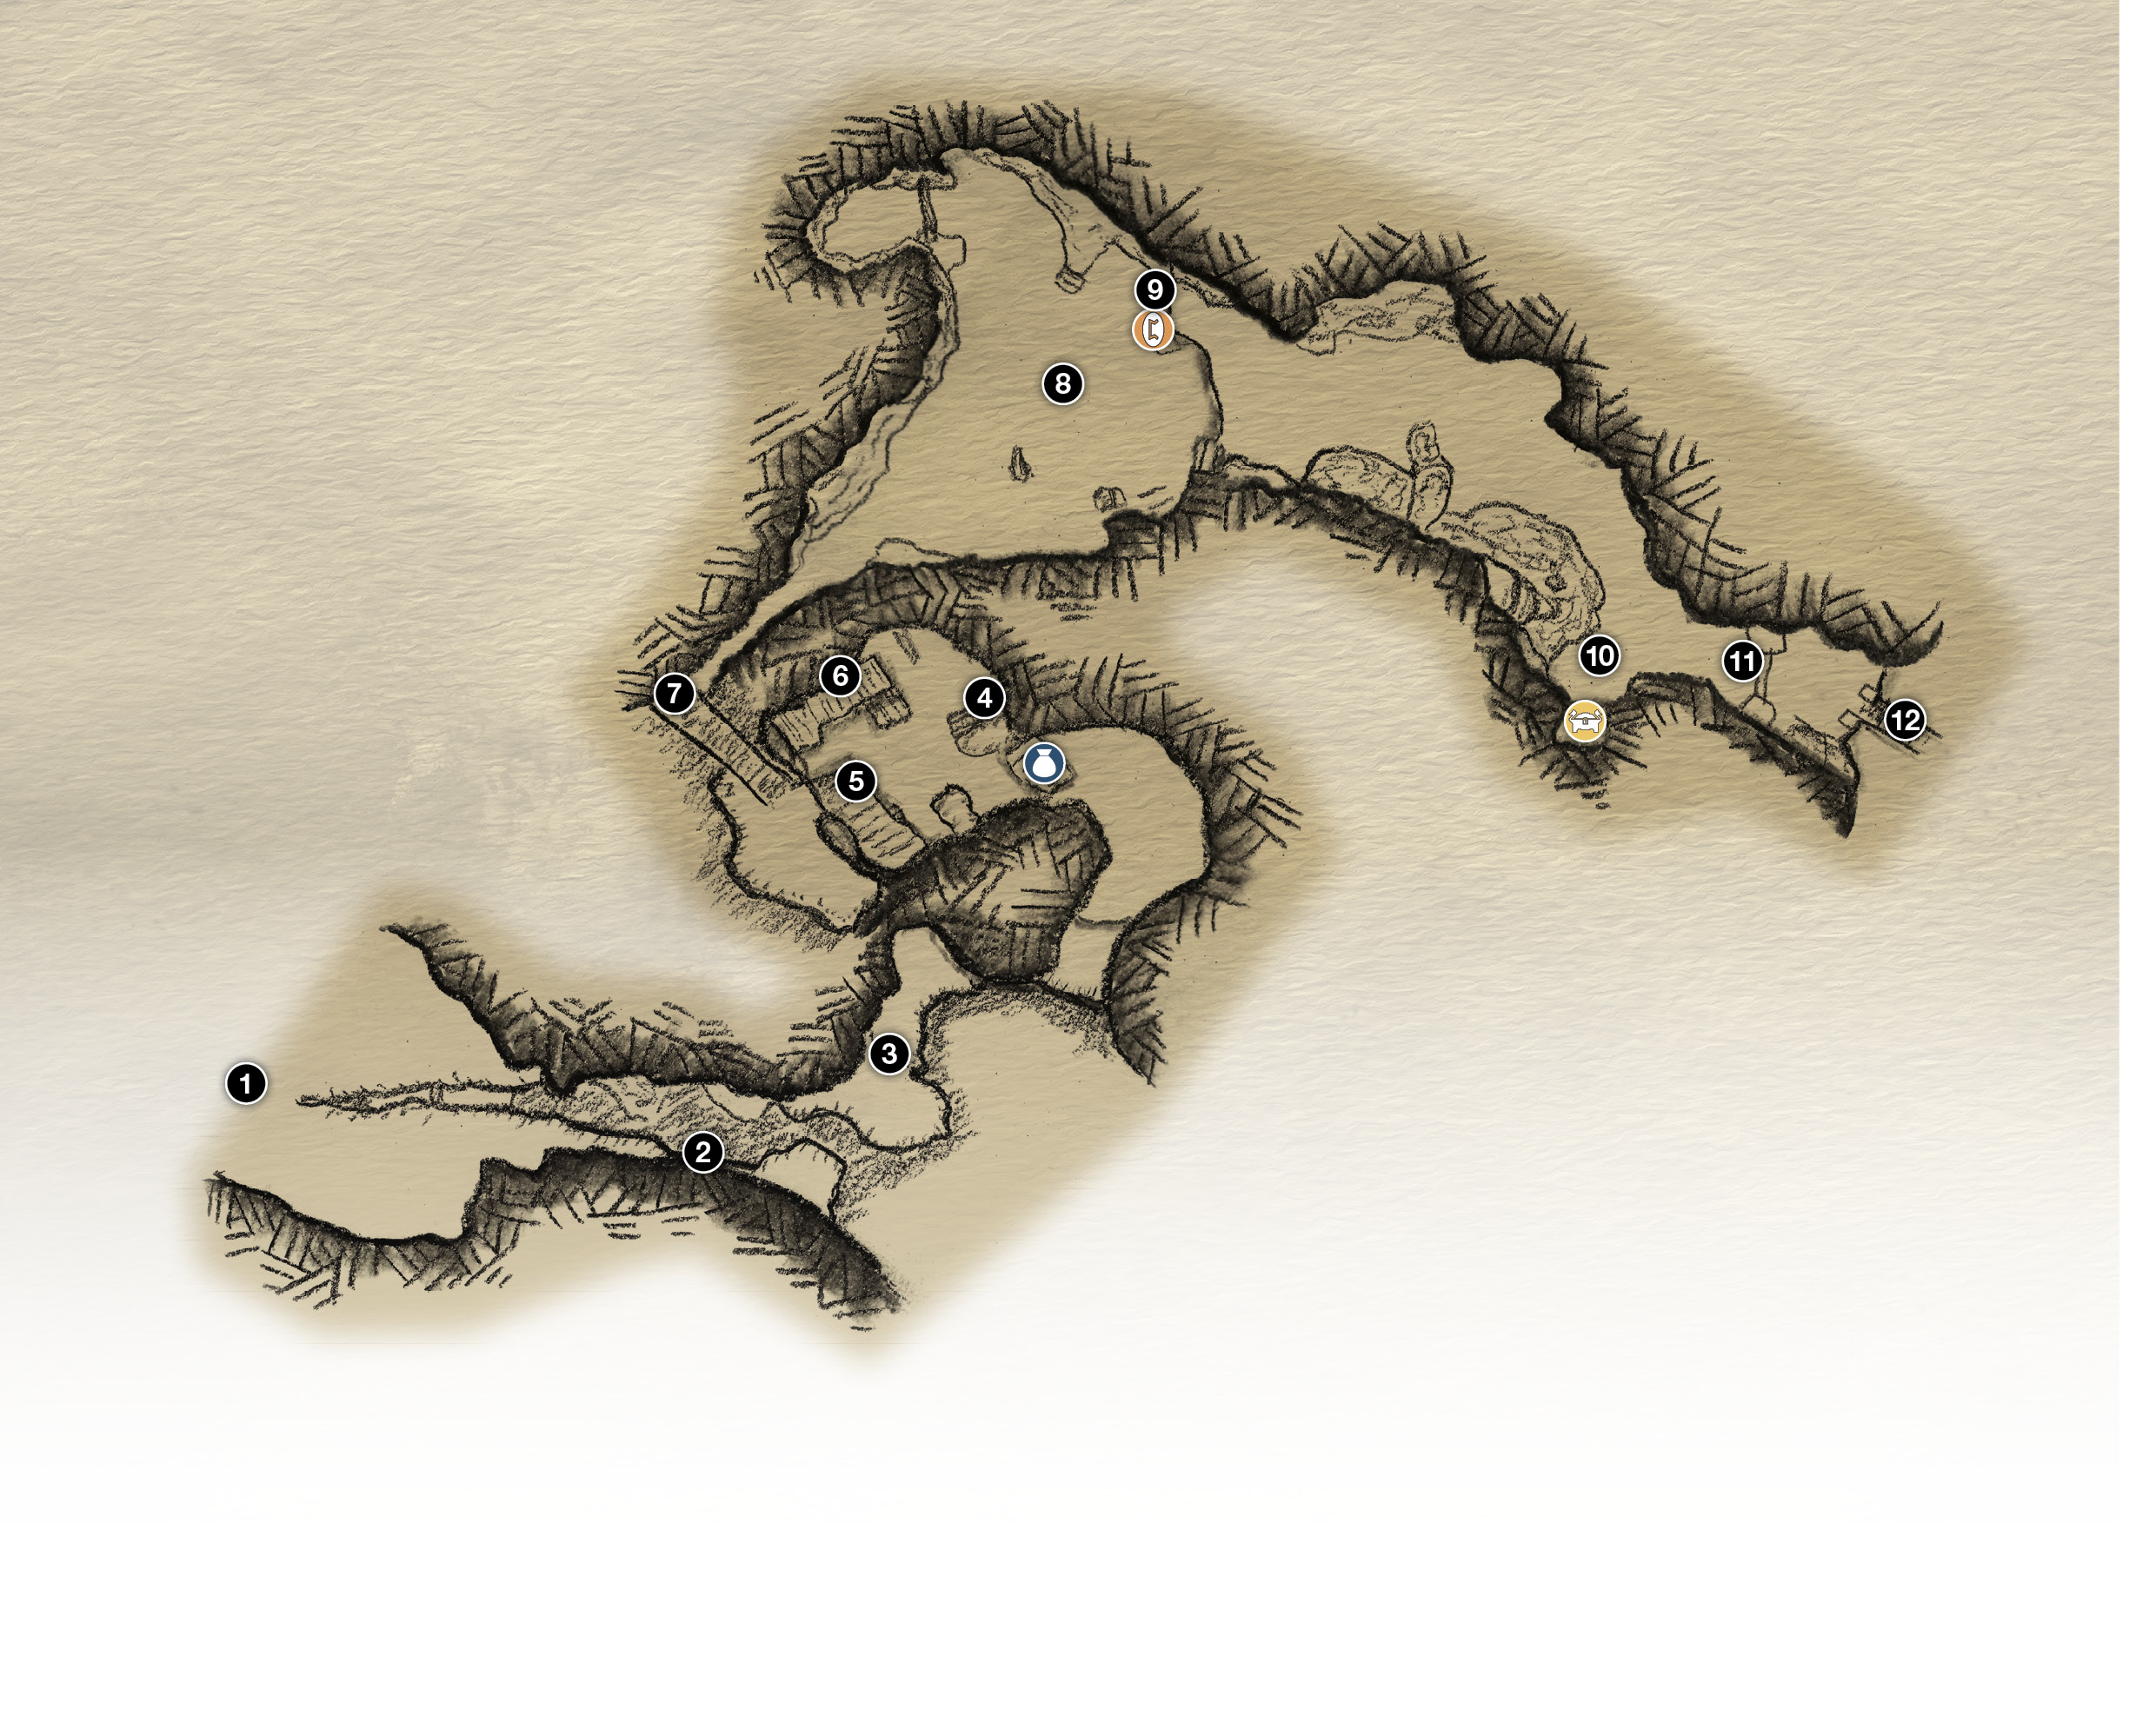
1. Start
2. Narrow ledge
3. Rock climb
4. Crank-wheel
5. Climb chain
6. Rock climb
7. Cave entrance
8. Clearing (Draugr squad!)
9. Climb wall
10. Legendary Chest
11. Fallen rock
12. Bridge collapse
 Chest
Chest
 Legendary Chest
 Lore
Lore
Midgard’s highest peak looms in the distance, majestic and ominous. Kratos and Atreus must now leave Wildwoods to reach their destination. The path ahead leads into a new region, the River Pass, where ancient ruins and roving bandits make navigation difficult and treacherous.
Journey Objectives
- Journey to the Mountain
- Continue Toward the Mountain
- Escape the Ruins
- Fight off the Reavers
- Throw Your Axe at the Trees
- Proceed Through the Gate to the Mountain
- Hunt with Atreus
- Find Atreus
- Follow the Witch
- Collect the White-Petaled Flower
- Return to Atreus
- Return to the Witch
- Get to the Boat
- Boat Toward Daylight
- Investigate the Glowing Statue
- Dock at the Bridge
- Investigate the Temple and Bridge
- Talk to Brok
- Make Your Way to the Tower
- Pass Through the Tower and Caves
- Continue Toward the Mountain New Enemies
- Draugr (Projectile)
- Heavy Draugr
- Revenant (Poison)
- Reaver
- Shadow
- Hel-Reaver
- Nightmare
- Poison Wolf
- Ogre
OBJECTIVE: Journey to the Mountain
Traverse the Canyon
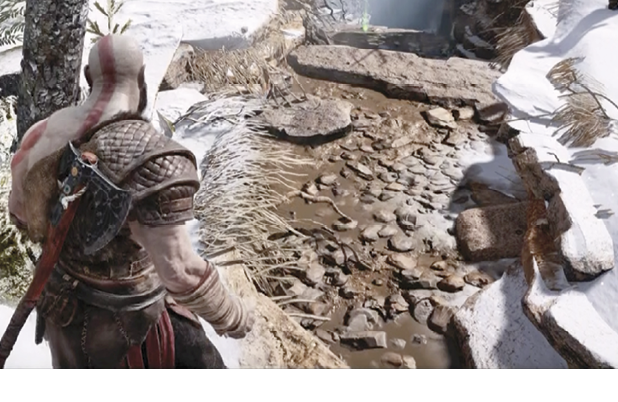
From the start (1), hop down the cleft into the canyon torn open by the titanic battle with The Stranger and slide along the narrow ledge (2). (Atreus automatically hops onto Kratos’ back for most climbing or other traversal maneuvers.) Hop across the gap and climb the tall cliff at the yellow markings (3). Push the left stick in the direction you want to climb. If Kratos reaches an unclimbable area, he stops—don’t worry, you can’t fall off!
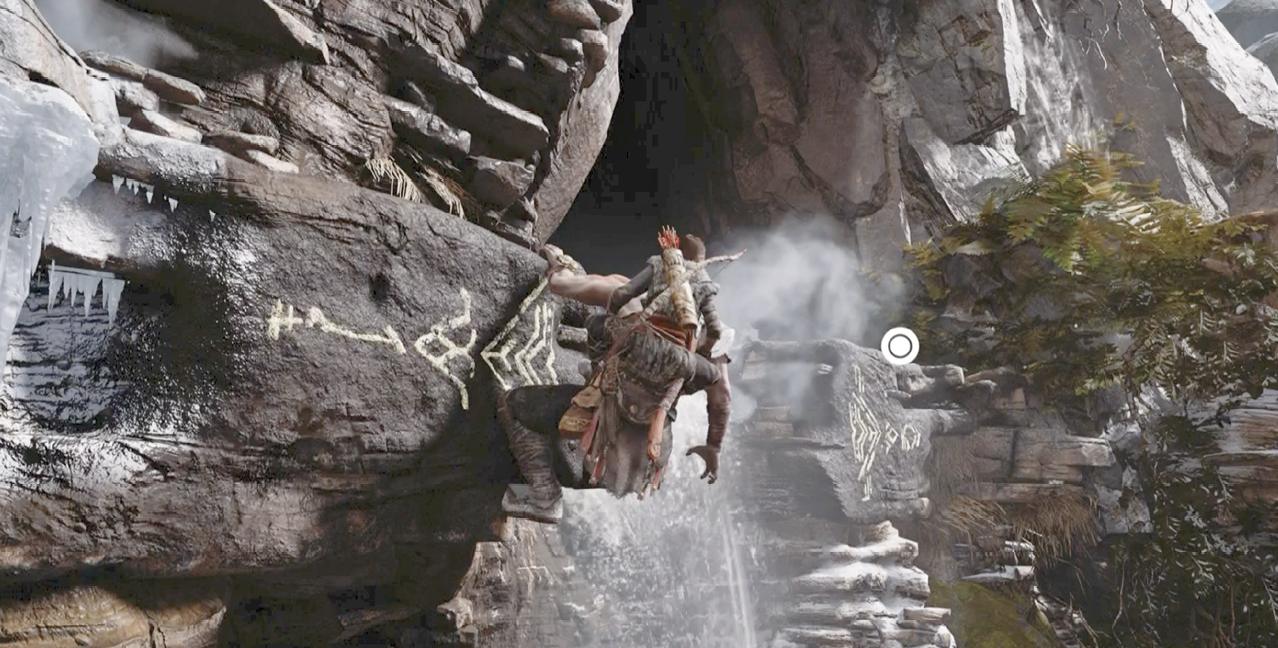
The climbing route curves around a rock corner to the first waterfall, where Kratos stops but reaches out with his right hand. This indicates that he can make a jump to the next handhold. Move your view until you see the Circle icon appear on-screen, then press that button on your controller to hop across the falls; Kratos automatically grabs the cliff on the far side. Climb up onto the ledge above and follow the tunnel to a cavern with several rickety wooden platforms.
Climb the Platforms
Boost Atreus up the platform at which he’s pointing; he hustles over to the gap left by a raised drawbridge. Approach the nearby crank-wheel (4) and press Circle to grab it, then pull back on your left controller stick to rotate the crank. This lowers the drawbridge for Atreus. He runs across the lowered bridge.
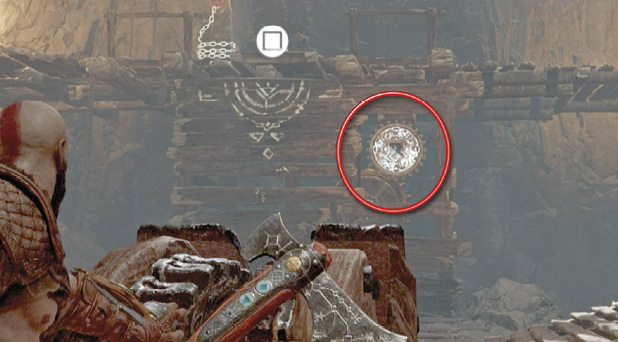
Don’t press Circle to release the crank-wheel yet—if you do, the drawbridge rises back up. Instead, before you let go of the crank, use L2 to aim, then toss Leviathan at the gearwheel (circled in our shot) on the platform under the bridge. This freezes the gear so the bridge stays down. Now you can let go of the crank-wheel and approach the platform.
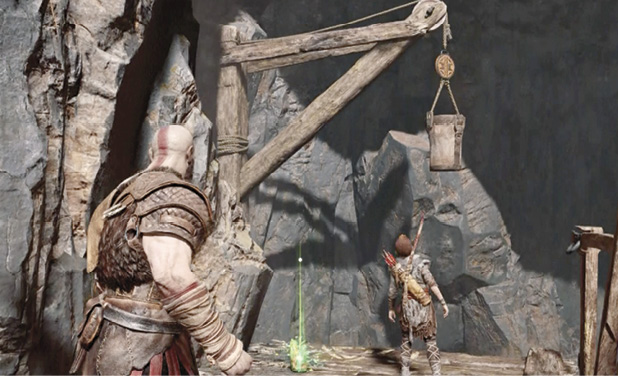
Press Square to command Atreus to toss down the climbing chain (5) for Kratos. Climb up the chain, turn left, and hop across the rock ledge to reach a chest on the far platform. Then return and walk across the drawbridge. (Look for another Hacksilver bucket hanging above you. Follow the cliff face to the yellow marker (6) and start climbing. You must make several jumps as you climb the walls, so keep an eye out for the Circle icon; when you see it, press that button to jump.
When you drop onto the first rock platform, you can let down another chain that connects you to the lower wooden platform where you started, if you want. Then climb the next seam (marked in yellow) to emerge from the cavern onto a high promontory. This triggers a scene: Atreus and Kratos survey the valley below, where they can clearly see the protection stave around their woods.
Get Past Wildwoods’ Edge
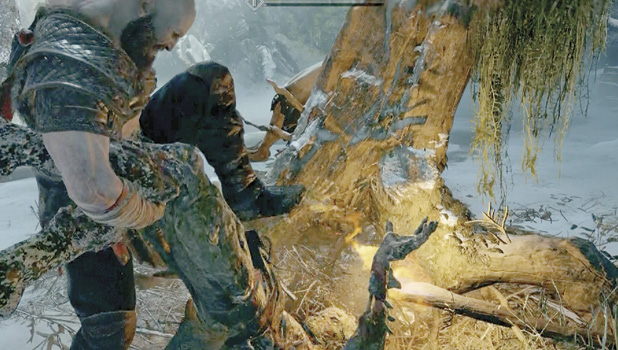
Climb the nearby wooden platform and follow the walkway up to the cave opening (7), where you squeeze through a narrow passage. This emerges into an open area, Wildwoods’ Edge (8). A Draugr squad lurks up ahead, so nail them from afar with a few axe tosses, then rush in bare-handed to stun. (Kratos’ stun grab stomp is beautifully gruesome.) Keep Atreus active, showering the Draugr targets with arrows.
After you decimate the first group, a new type of Draugr appears, tossing fiery projectiles. Note the flashing purple threat indicator that appears on-screen, pointing out the direction each incoming projectile comes from.
Close the space on this Draugr quickly, rolling sideways to avoid its fireballs as you rush in. A couple of quick punches kills the foe easily.
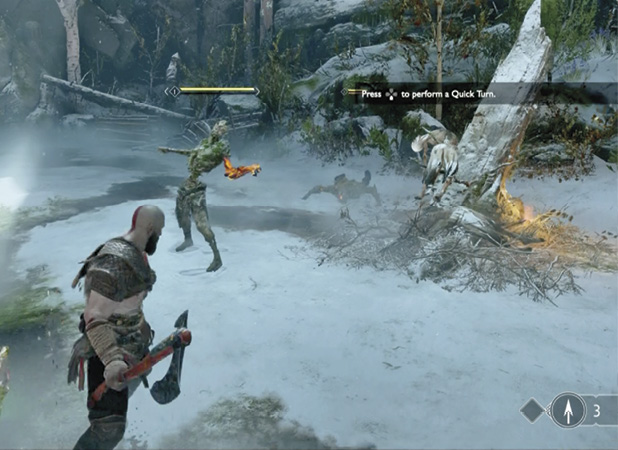
Note that the mix of ranged fire-tossers and melee sword-swingers forces you to stay wary and keep scanning the area as you fight. You can’t lock in on a single foe when other Draugr across the clearing are pitching fiery fastballs at you. Here’s where Atreus can really help Kratos. His arrows interrupt a Draugr in the midst of conjuring up its fire projectile, and thus prevent the toss.
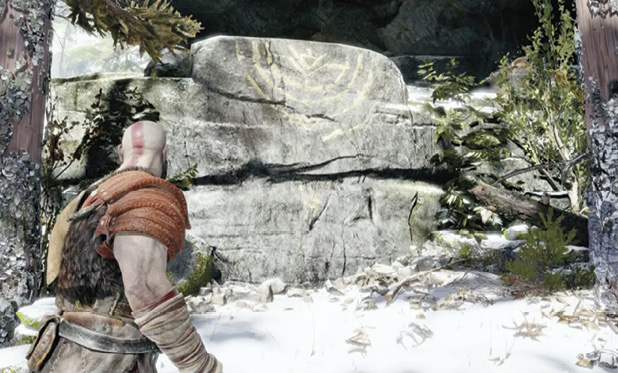
Once the clearing’s floor is free of Draugr, one last fireball-tosser appears up on a ledge where you can’t reach. Give the enemy a taste of its own medicine by nailing it with a couple of Leviathan tosses. Then scour the clearing for pickups and exit by climbing the low yellow-marked wall (9) next to a message formed by blue runes.
OBJECTIVE: Continue Toward the Mountain
Find the Legendary Chest
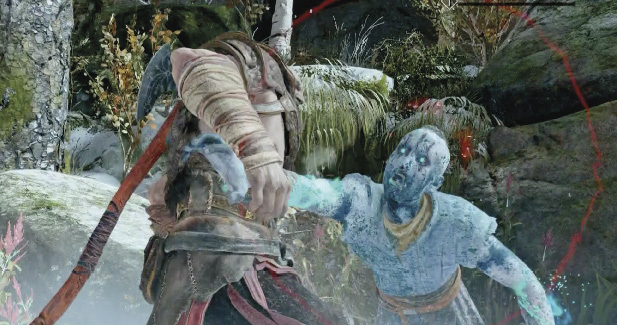
Proceed along the path until a Hel-Reaver attacks. This bluish foe doesn’t have the ice armor that the Hel-Reaver Lord did in your first encounter with this type, so you can use your axe against it. The Hel-Reaver’s frosty sword inflicts slow status, so block its swings, then knock it into the air using a heavy attack with Leviathan. String together more heavy attacks to “juggle” the foe.
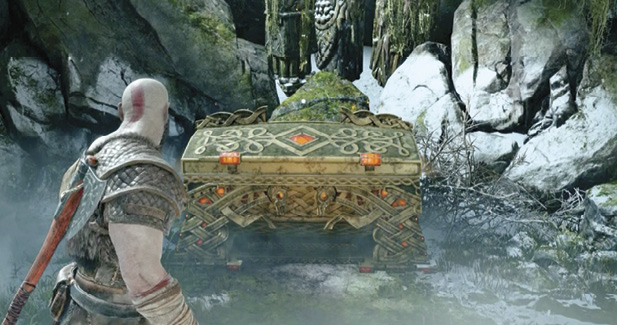
After the Hel-Reaver falls, continue down the ravine to find a gleaming Legendary Chest tucked into a grotto on the right side (10). Open it to acquire your first Runic Gem and a short tutorial on how to install it into Leviathan. When slotted into your weapon, this gem imbues the axe with a special Light Runic Attack called Hel’s Touch. You’ll find more Runic Gems on your sojourn, giving you the ability to customize your weapon.
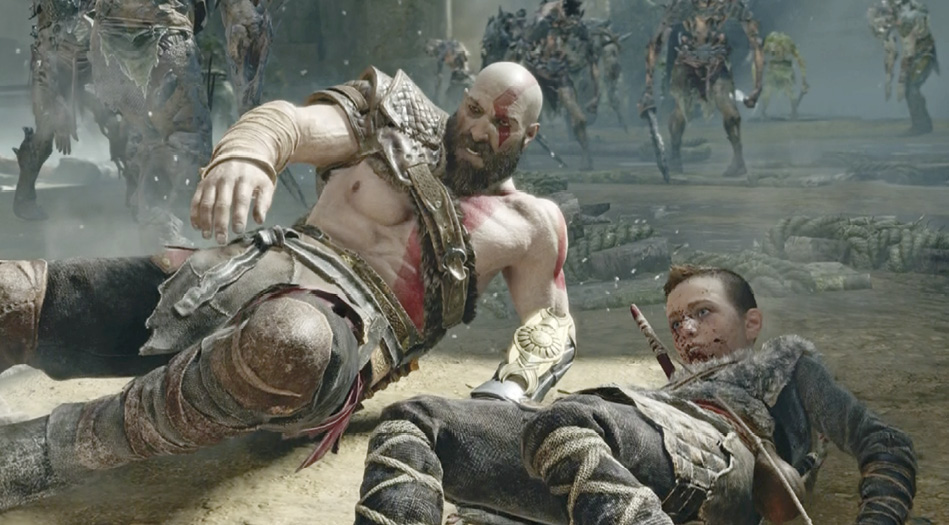
Continue down the ravine to the fallen rock pillar (11) and lift it to trigger a cut scene: an excited Atreus dashes across a rickety wooden suspension bridge (12). One of its struts collapses, and the boy manages to hang on. But when Kratos creeps forward to rescue him, both father and son plunge into the canyon below.
JÖtnar Ruins
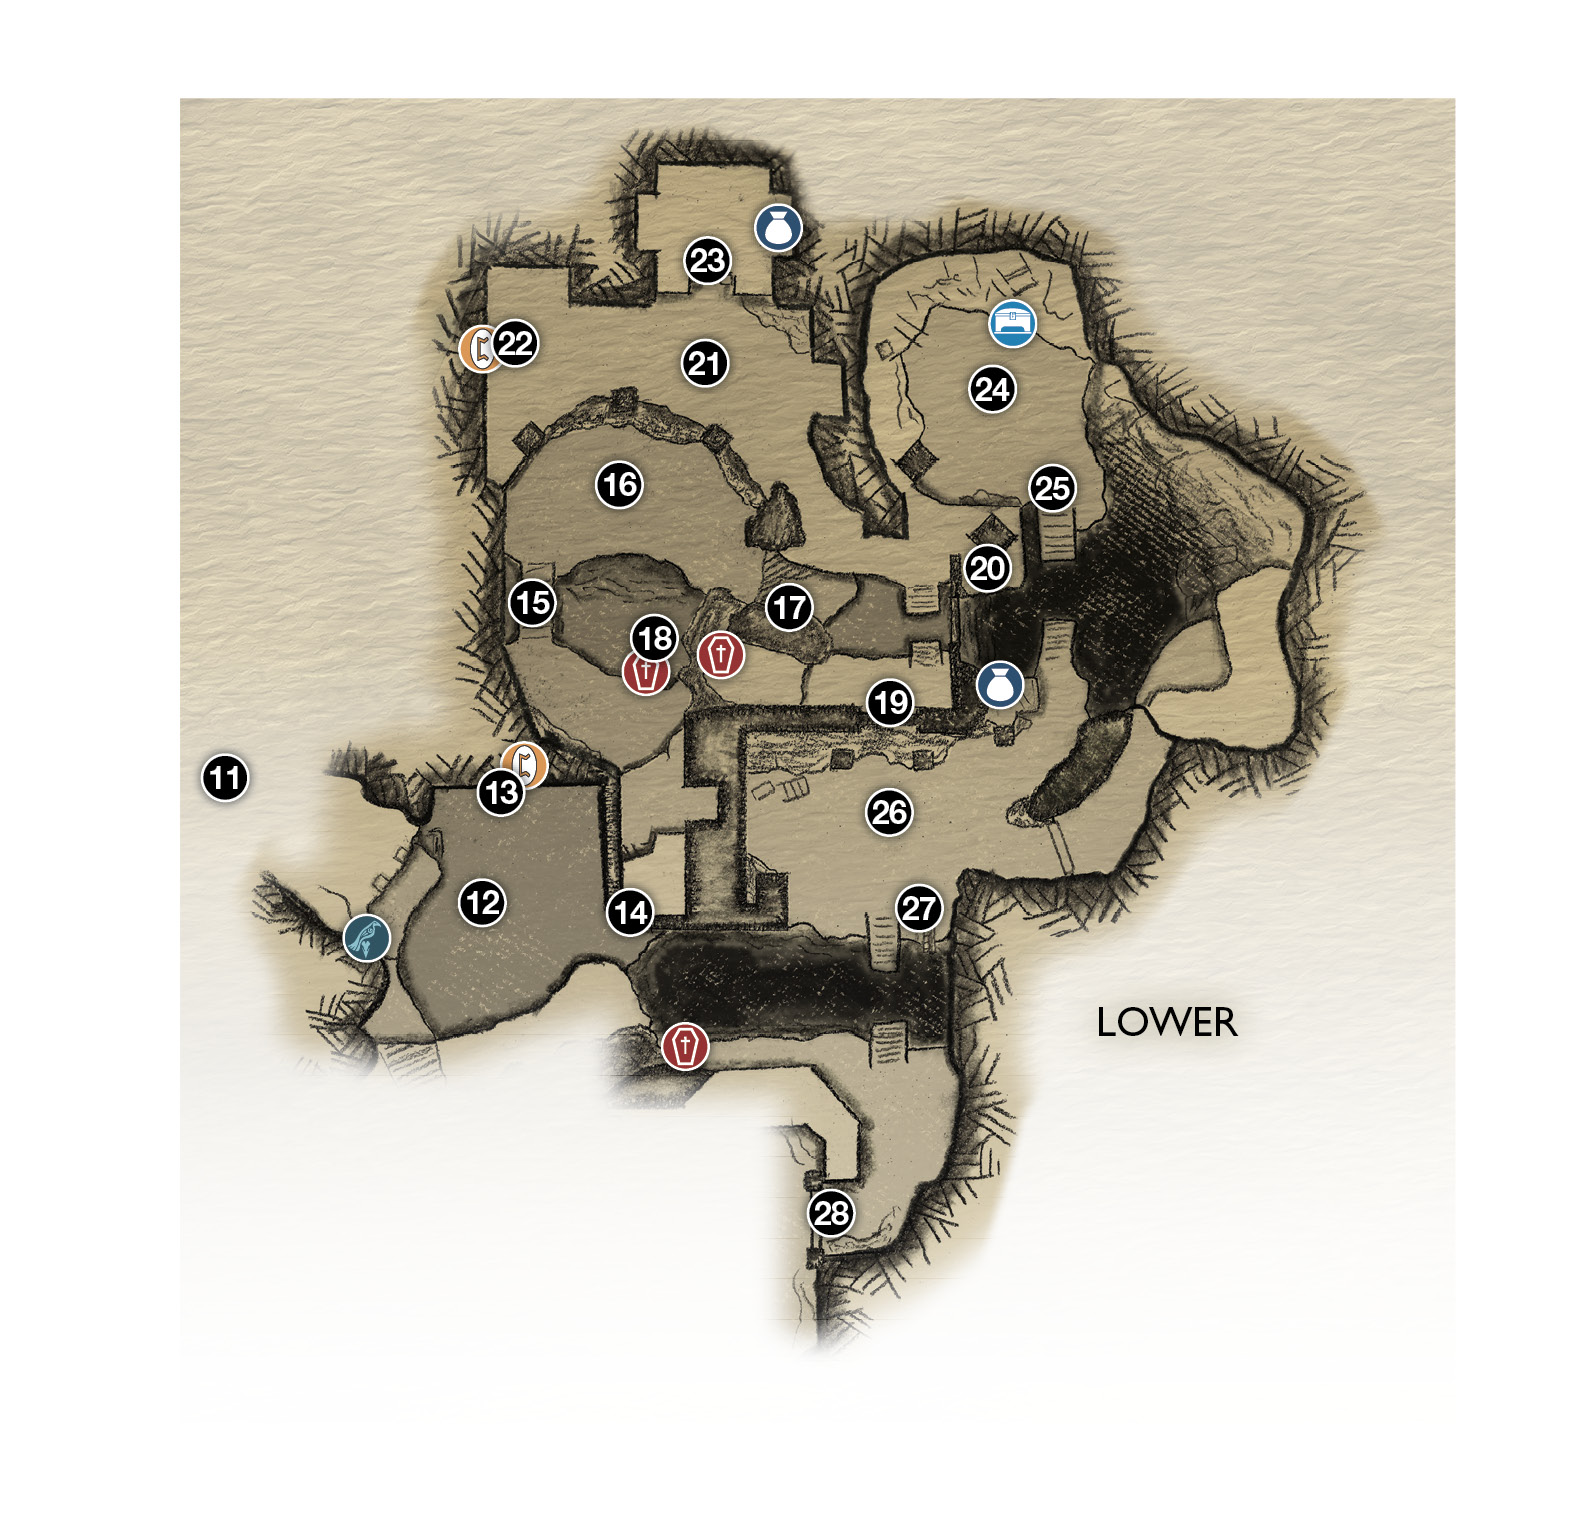
11. Lift fallen rock
12. Bridge collapse
13. Marketplace Lore Marker
14. Climb (after wall collapse)
15. Bridge
16. Revenant fight!
17. Climb wall
18. Coffin in lower tunnel
19. Window view of exit bridge
20. Overview of drawbridge
21. Great hall
22. Jötnar Shrine (Hrungnir)
23. Rune pickup
24. Courtyard (Nornir Chest)
25. Drawbridge
26. View of runic seal
27. Bridge crank-wheel
28. Corpse-filled gateway
Chest
 Coffin
 Lore
Lore
 Nornir Chest
 Raven
Raven
Survive the Arena
Kratos and Atreus land in the midst of numerous Draugr that appear at first to be frozen in place. Some are indeed petrified like statues and can be shattered with a single blow. But others suddenly animate and attack! Some of these Draugr are Level 2 enemies, so they’re tougher than ones you’ve faced earlier.
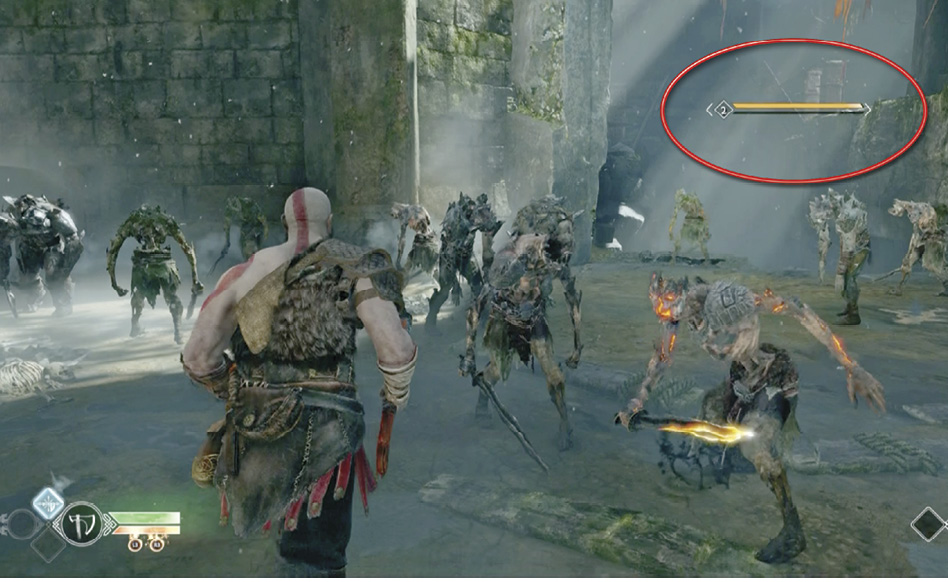
Block and parry their vicious sword strikes, and use Hel’s Touch, your new Light Runic Attack to knock back foes when you’re swarmed. Perhaps most important of all: keep Atreus active with his arrows! He can take a lot of pressure off you in tense situations. Try to save your Spartan Rage if you can. You’ll really need it in a few minutes.
As you clear out the enemy wave, a pair of Projectile Draugr start tossing fireballs from a high ledge.
The only way to reach them is with Leviathan tosses; target them carefully, but be ready to dodge their shots. You can nail the glowing Raven directly above them as well. (See our note on “The Eyes of Odin.”)
Defeat the Heavy Draugr!
After you break the Draugr wave, scour the yard for pickups, then approach the tall pillar marked with blue runes (13). Press Square to direct Atreus to read it: this yard was once a “trade grounds” for Giants and gods called the Jötnar Marketplace. This reading triggers a quick scene: just down the yard, a larger, more powerful type of Draugr suddenly bursts through the wall!
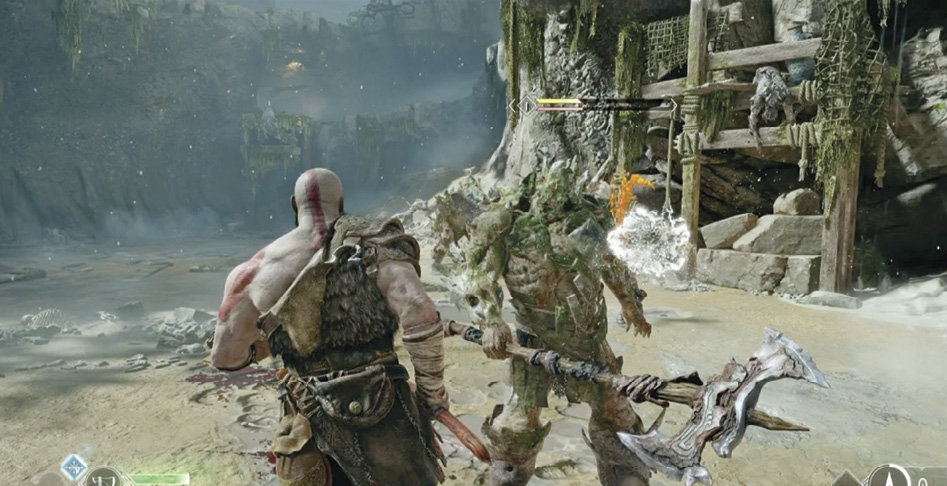
This heavy soldier is a Level 1 foe, but don’t be fooled: it has a double health bar and swings a huge battle axe with considerably more power than Draugr regulars. Evade its swing, then dash in to pummel it as you simultaneously fire Atreus’ arrows for the stun. Kratos’ stun grab may not kill this Heavy Draugr, but it inflicts heavy damage. Note that if the Heavy misses his big overhead swing, his axe gets stuck in the ground for a moment, giving you an opening for a quick counterattack.
Soon other Draugr, including more Heavies, emerge to support the first soldier. This is a good time to unleash your Spartan Rage if it’s available. When Kratos is enraged, target the toughest guys first. Punch out any Heavy Draugr in the yard, then mop up lesser Draugr if you still have rage left. Once the area is finally cleared, Atreus points out a new opening up where the first Heavy Draugr burst through the wall (14).
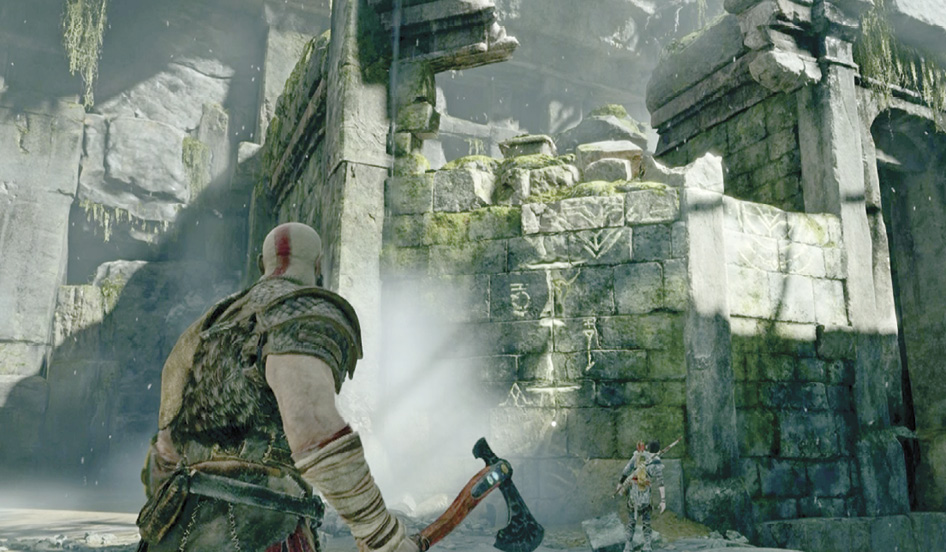
Climb the wall at the yellow markings, sliding rightward to reach the top. As you climb, you hear a spine-chilling chant. Enter the structure and hop down to the floor level. Before you cross the bridge (15), smash through rotting boards against both side walls to reveal a pair of small alcoves with hefty Hacksilver pickups sitting next to fallen soldiers.
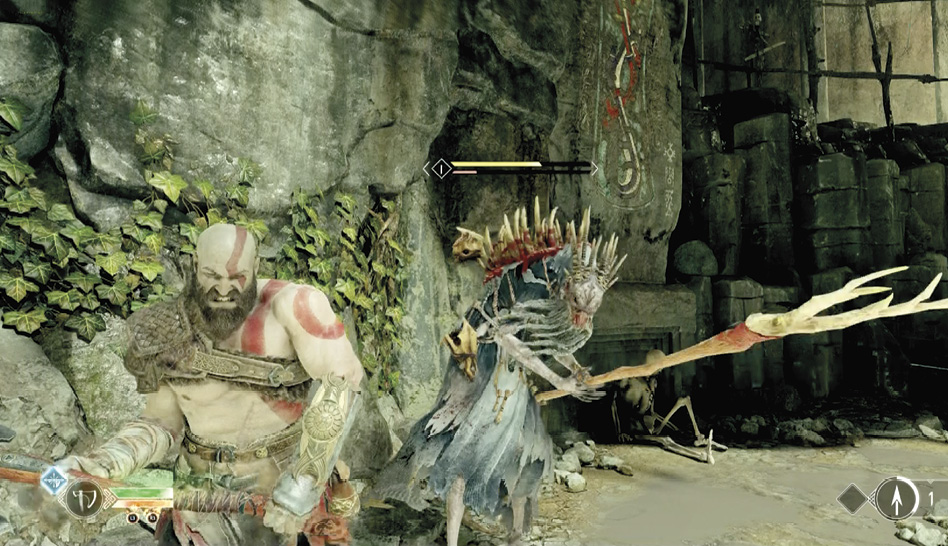
Proceed across the crumbling bridge (15) into an open room (16) to face a Revenant—a poison-spewing Seiðr Revenant, swathed in a protective shroud that lets her disappear instantly to avoid Kratos’ attacks. Be ready to block or dodge sideways when the Revenant rakes her staff on the ground, sending a fissure at you.
The secret is to tag the Revenant with Atreus’ arrows right away. A few arrow strikes can disable her shroud, leaving the creature rooted in the real world for a few seconds. Quick! Rush in to stun her with bare-handed attacks. If Kratos can execute a stun grab on a Revenant, it’s usually finished. Be sure to avoid stepping on any pools of poison she might have tossed; they puddle on the ground for a while, sapping your health if touched.
Optional: Defeat the Level 3 Heavy!
After you defeat the Revenant, exit the far doorway and leap across the gap (17) to grab the yellow-marked struts on the opposite wall. You can climb up or down—climb down first. In the ravine below, another Heavy Draugr guards a glowing coffin (18). This Heavy is a Level 3 enemy, very powerful, and the space is very tight in the narrow ravine.
Defeat the foe, loot the coffin, then return to the wall struts and climb all the way up to the top level. Here you can press Square—Atreus points through a broken window (19) at your next goal: the exit bridge at the top of the ruins.
Find the Jötnar Shrine
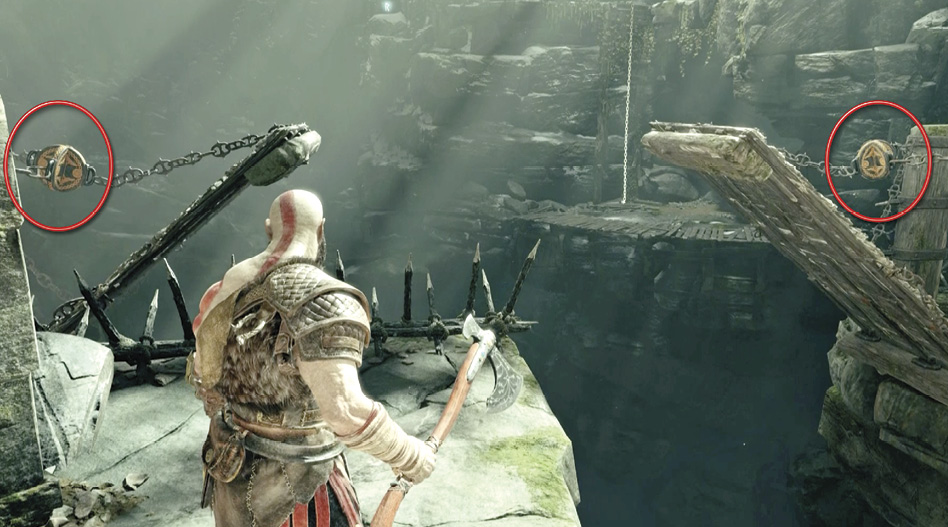
Turn right and find another coffin to loot, then return and hop across the broken gap in the walkway. Careful! There’s a Draugr waiting just around the corner to the right. Kill it, then step out onto the ledge (20) to see the two raised sections of a drawbridge. Toss Leviathan at the two discs (circled in our shot) attached to the chains holding up the bridge halves, This drops the bridge into place for a later crossing.
Go back inside and follow the passage that leads into a great hall (21), where another squad of Level 2 Draugr wield swords in one hand and fling fireballs with the other. Clear the hall and pick up the scroll on the floor near the entranceway. Then go open the Jötnar Shrine (22) at the far end of the hall.
Climb up the nearby yellow-marked wall (23) to an area with a chest and a valuable alternating Runestone. The stone’s glow alternates between green (health), orange (rage), and white (XP)—pick it up when it turns the color you need most. Then head back down the main passage and turn left into the open courtyard (24) with the Nornir Chest.
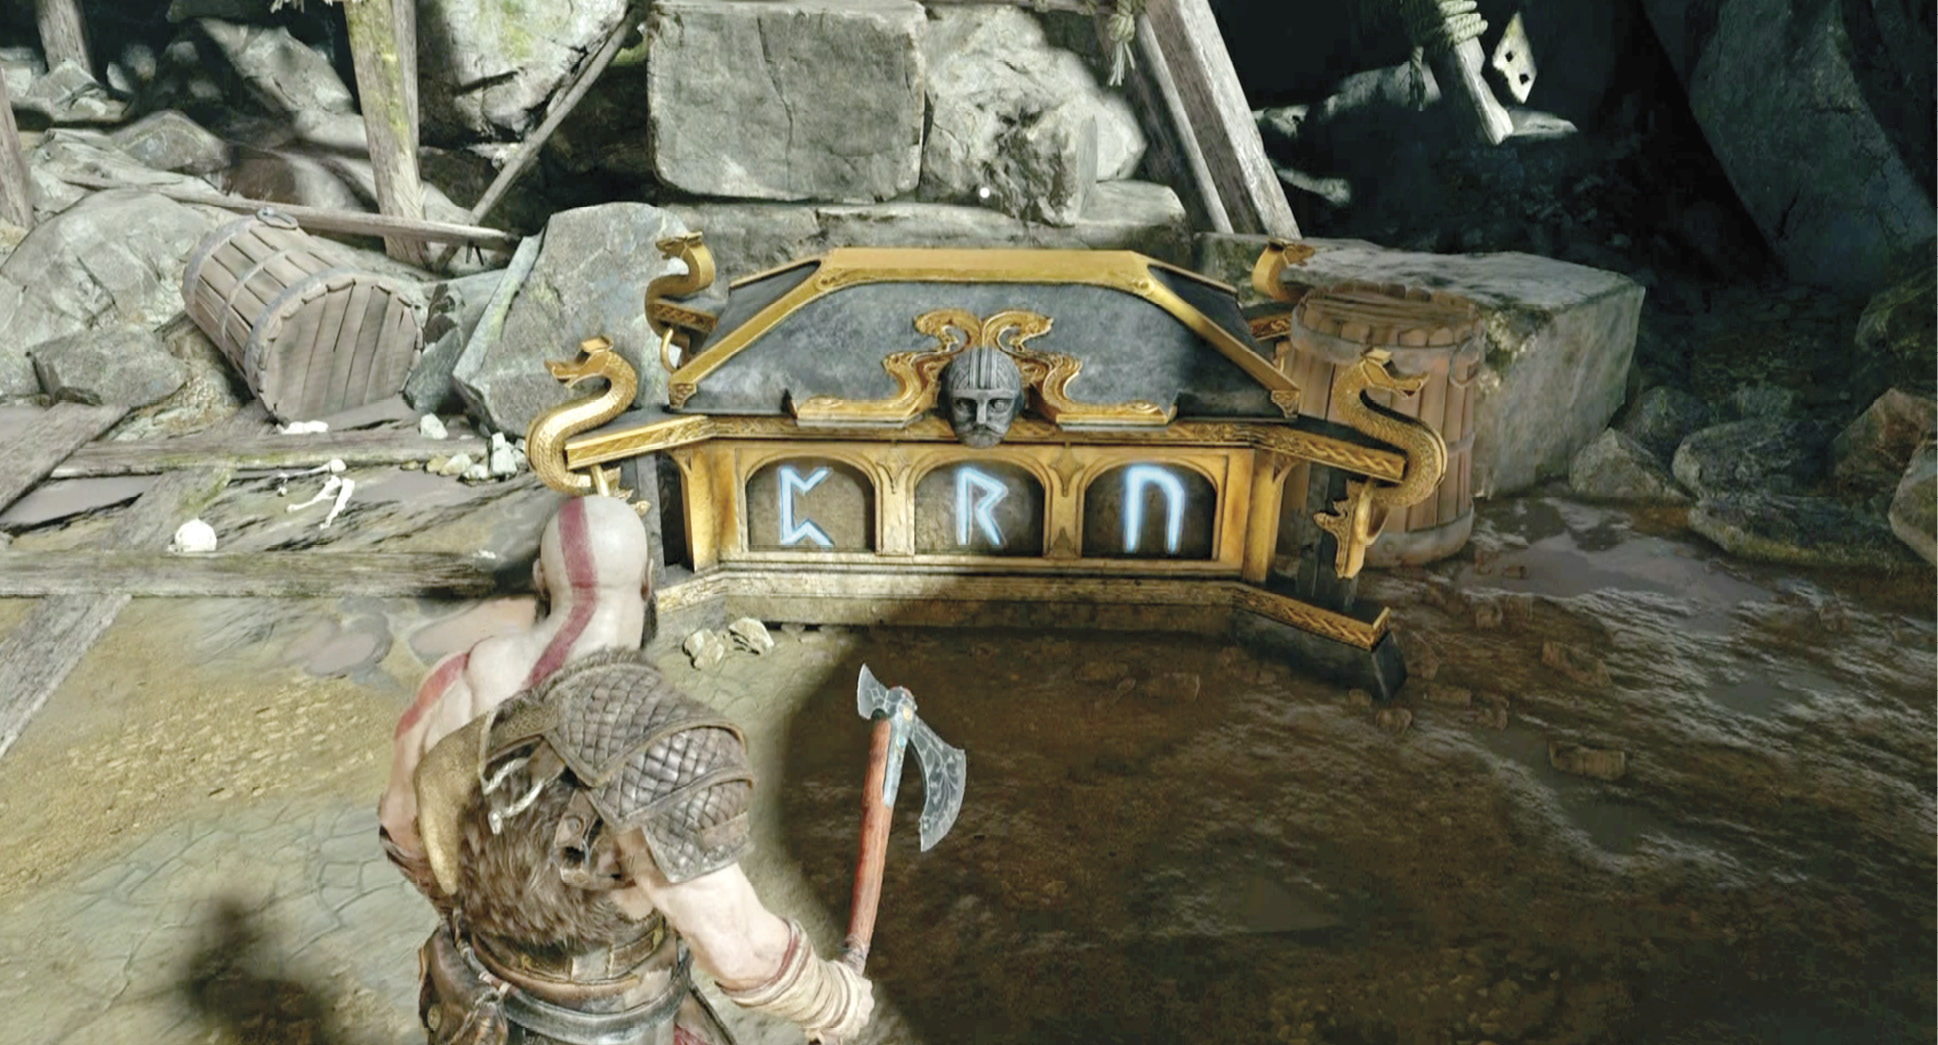
Unseal the Nornir Chest
The runic seals for this Nornir Chest are the kind you simply shatter with an axe toss to unseal. One rune-seal stone is easy to spot just above the Nornir Chest and slightly to the right.
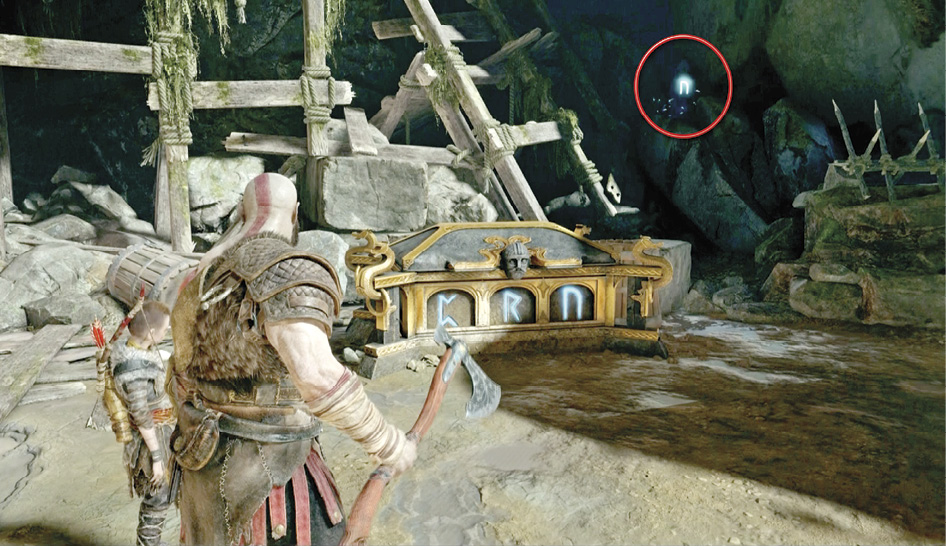
Walk to the front edge of the drawbridge (25) (the one you lowered earlier) to spot another rune glowing on a high ledge across the canyon. Throw Levithan to break the stone.
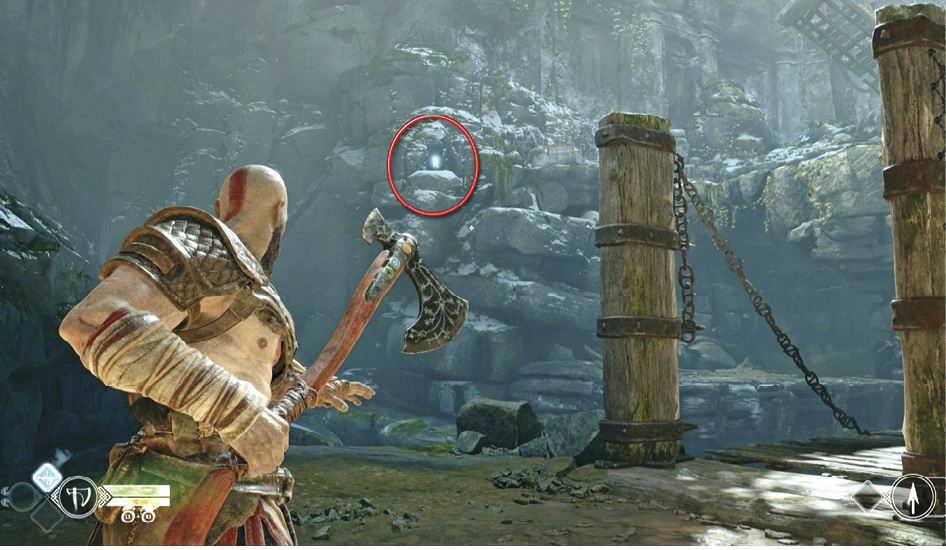
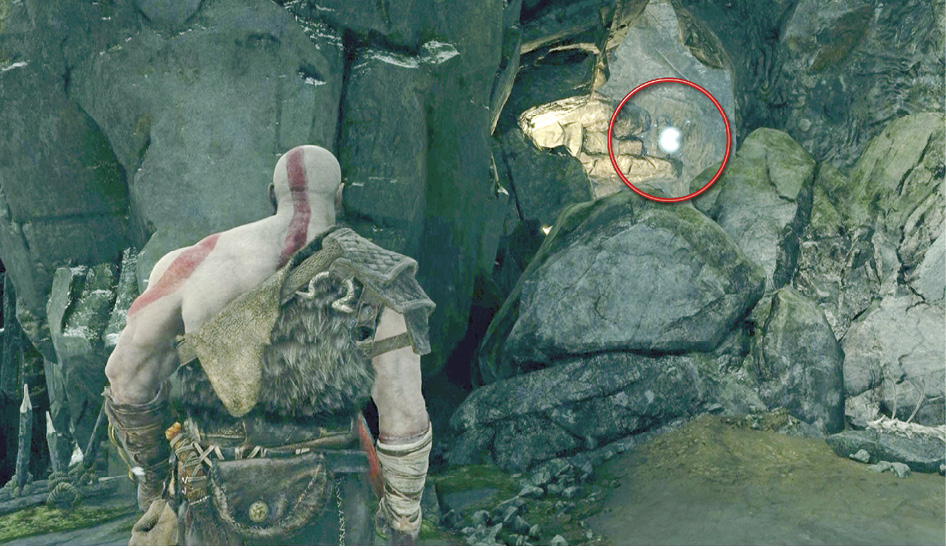
Cross the drawbridge and punch into the chest on a raised platform to the right. Then turn around , spot the third rune-seal stone through a hole in the opposite rock wall, and nail it with your axe. Once all three seals are broken, return to the now-unlocked Nornir Chest and retrieve the item inside: another valuable Iðunn Apple.
Get Across the Next Drawbridge
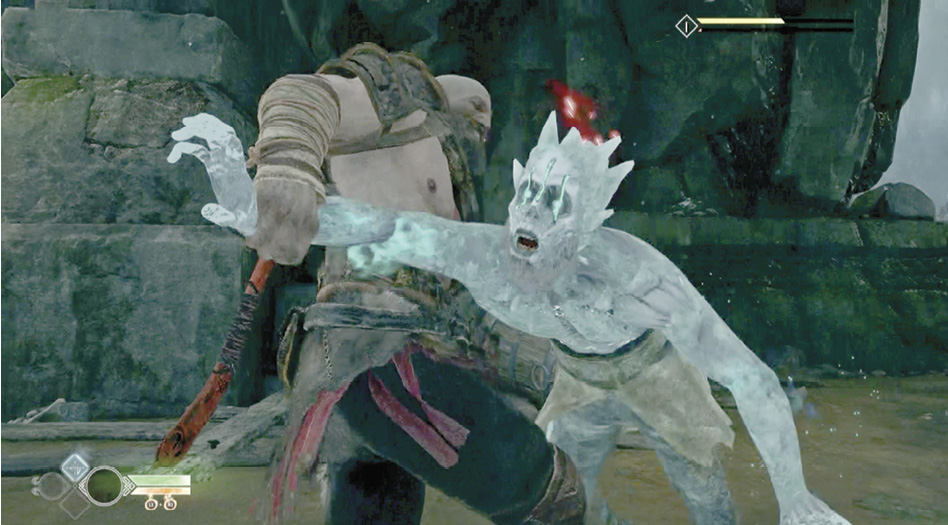
Continue into the next yard (26) to face another Hel-Reaver Lord. Remember, this foe has ice armor that blocks your axe, so switch to bare-handed attacks as you pepper it with Atreus’ arrows. Once it’s stunned, stomp its head into slush with a stun grab.
Next comes the tough pairing of a Revenant with a two-handed Heavy Draugr. As before, use Atreus’ arrows to briefly disable the Revenant’s shroud, then hammer her with Leviathan or your fists while she’s vulnerable. But note that Heavy Draugr can incapacitate Atreus, forcing you to hustle over and revive the boy. (To revive Atreus: stand next to him and press Square until he recovers.) Later in the fight, be ready, as another Heavy Draugr plus a pair of Projectile Draugr join in to complicate matters.
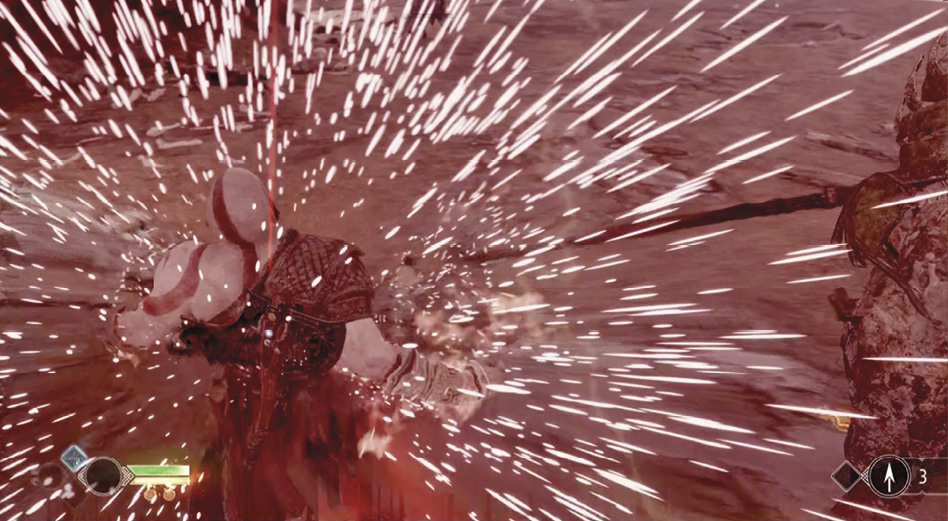
This is a very good place to activate your Spartan Rage, if it’s available. If not, the best tactic is to rely on quick strikes in short combos, then roll away to reassess. Keep Atreus firing at the Revenant as much as possible until you finally manage to take her out, then turn your full attention to the Draugr.
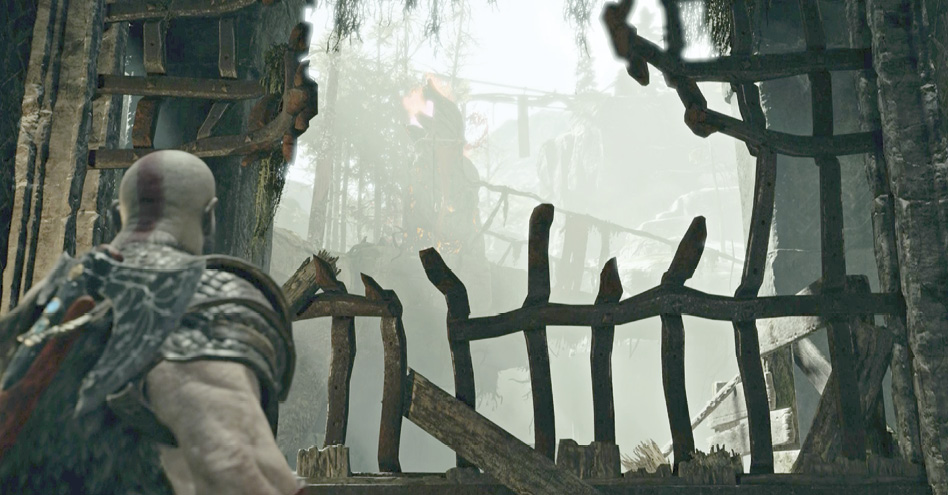
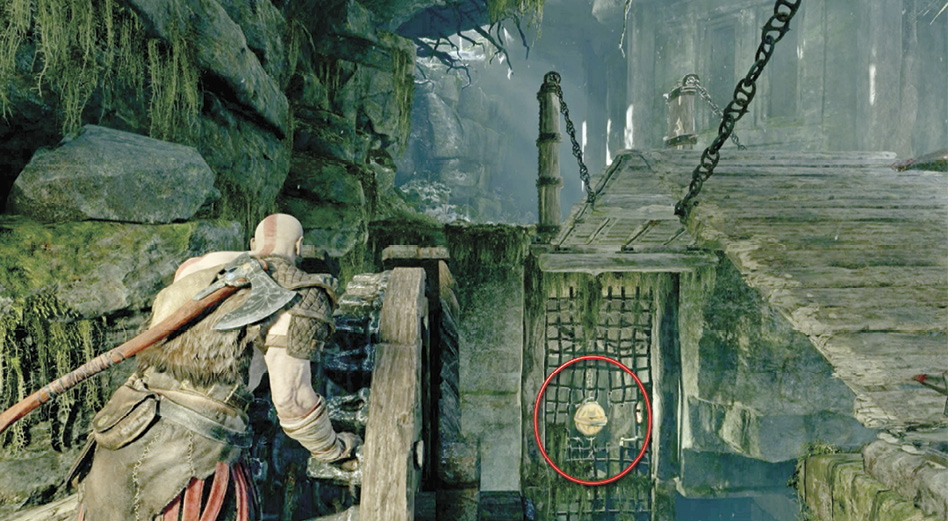
After you clear the area and scour for pickups, approach the bridge crank-wheel (27) and grab it. Give it small cranks until the disc reaches the torn gap in the grate across the canyon (see our screenshot). Then hold L2 to aim your axe at the disc and toss it. Breaking the crank-chain this way drops the drawbridge. Now you can let go of the crank-wheel and head across the bridge.
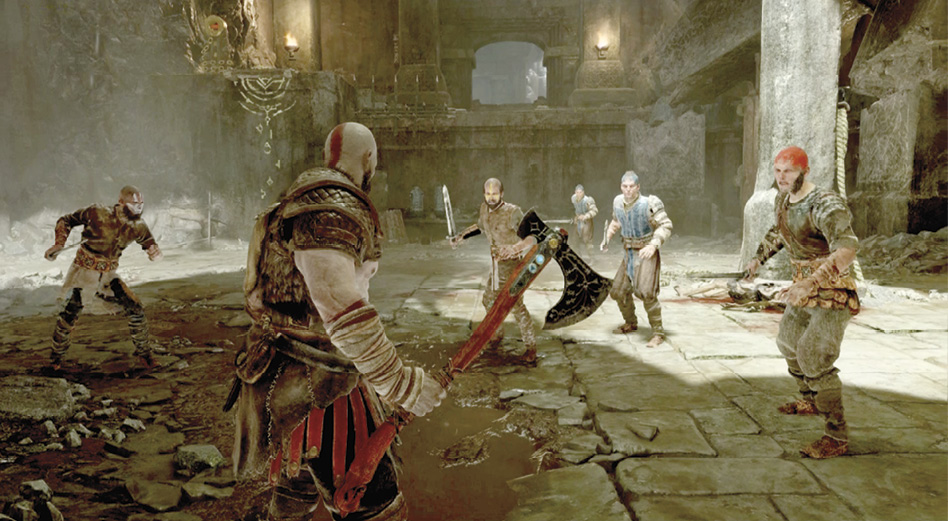
Once you cross the drawbridge (27), take an immediate right and follow the mossy green path to find a coffin to loot. Then return to the main path and follow Atreus to a closed gate (28) piled high with corpses. That doesn’t seem like a good sign. Open the gate to trigger a scene: a band of Reavers, hungry for meat, surrounds Kratos and Atreus.
JÖtnar Ruins
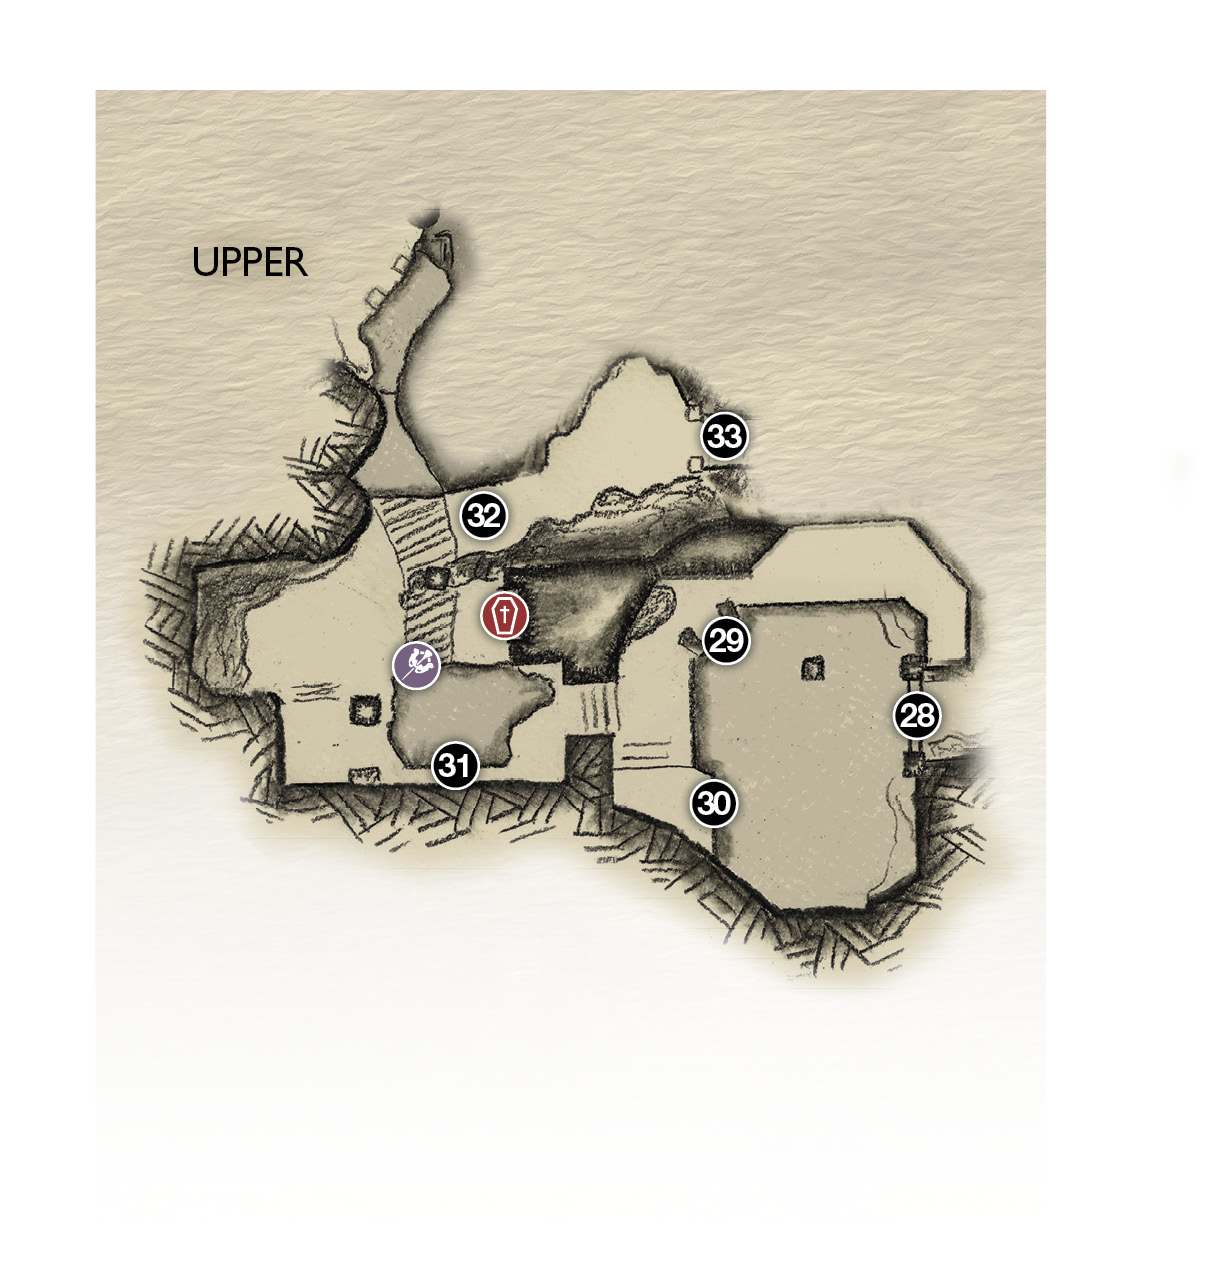
28. Corpse-filled gateway
29. Boost Atreus
30. Climb chain (after Atreus boost)
31. Narrow ledge
32. Bridge path
33. Bridge entry
 artifact
Coffin
OBJECTIVE: Fight Off the Reavers
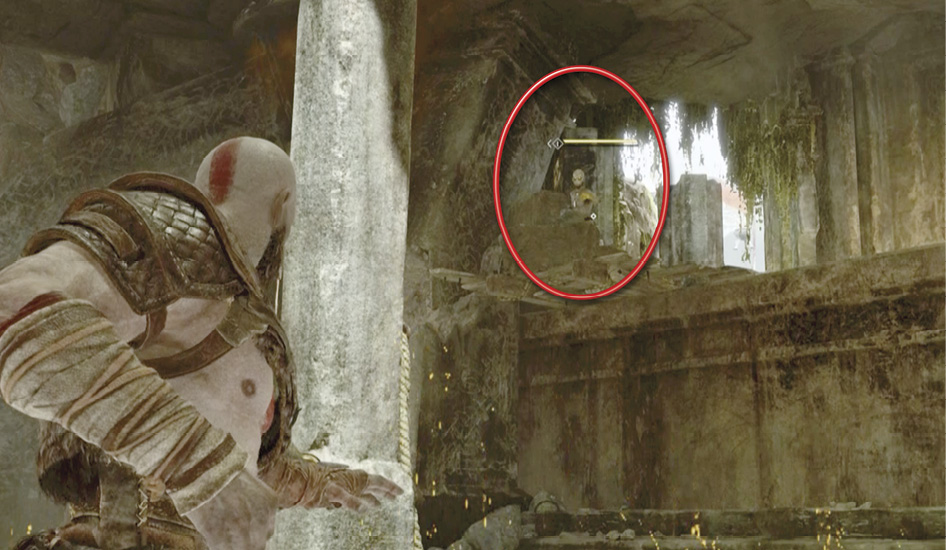
Kratos fights this battle alone. The Reavers swarm in close, so start with a nice Runic Attack to send them all flying. Then use your axe to quickly clear the hall of swordsmen. Next, toss Leviathan at the Shadows tossing Seiðr magic from the upper level, including one hidden behind wooden crates (circled in our shot).
When the last bomb-tosser falls, a quick cut scene plays: other Reavers leap from the balconies and drop onto both Kratos and Atreus. When control returns, hop across the gap in the hall to pull the slain Reaver off Atreus. This event rattles the boy, who struggles to deal with his first human kill.
Afterward, fight off the Hel-Walker squad that appears, including another ice-armored Hel-Reaver Lord with immunity to your frosty axe. Hit the Lord bare-handed, then switch to Leviathan to cut down the standard Hel-Reavers. When the room is cleared, you return to your previous objective: escape the ruins.
Escape the Jötnar Ruins
Head over to the yellow-marked raised platform in the corner (29), the one with a fallen chunk of pillar at the top. Here, Kratos can boost Atreus to the upper level. Now the boy can lower the chain in the other corner (30), but he’s still disoriented by the previous incident, so you must press Square several times to keep him on task.
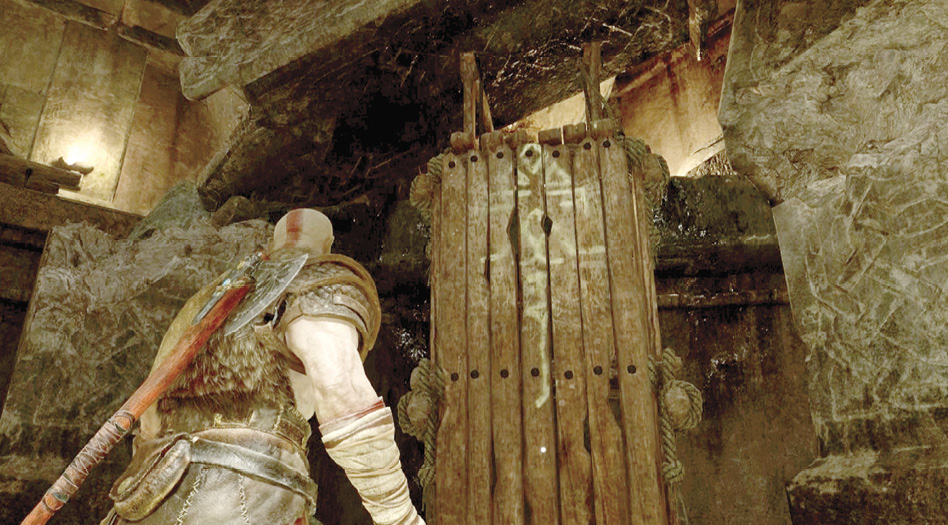
When Atreus finally lowers the chain, climb up to join him. Slide along the narrow ledge (31) to finally complete your objective to escape the ruins. Climb down the nearby chain and move past the cooking fire, then continue along the rocky ledge until you find a corpse and Mask, one of the “Masquerade” set of collectible Artifacts.
Climb back up the chain and find the Coffin up the stairs on a platform to the right. Then continue out onto the bridge path (32). Follow Atreus as he rushes ahead to the bridge (33).
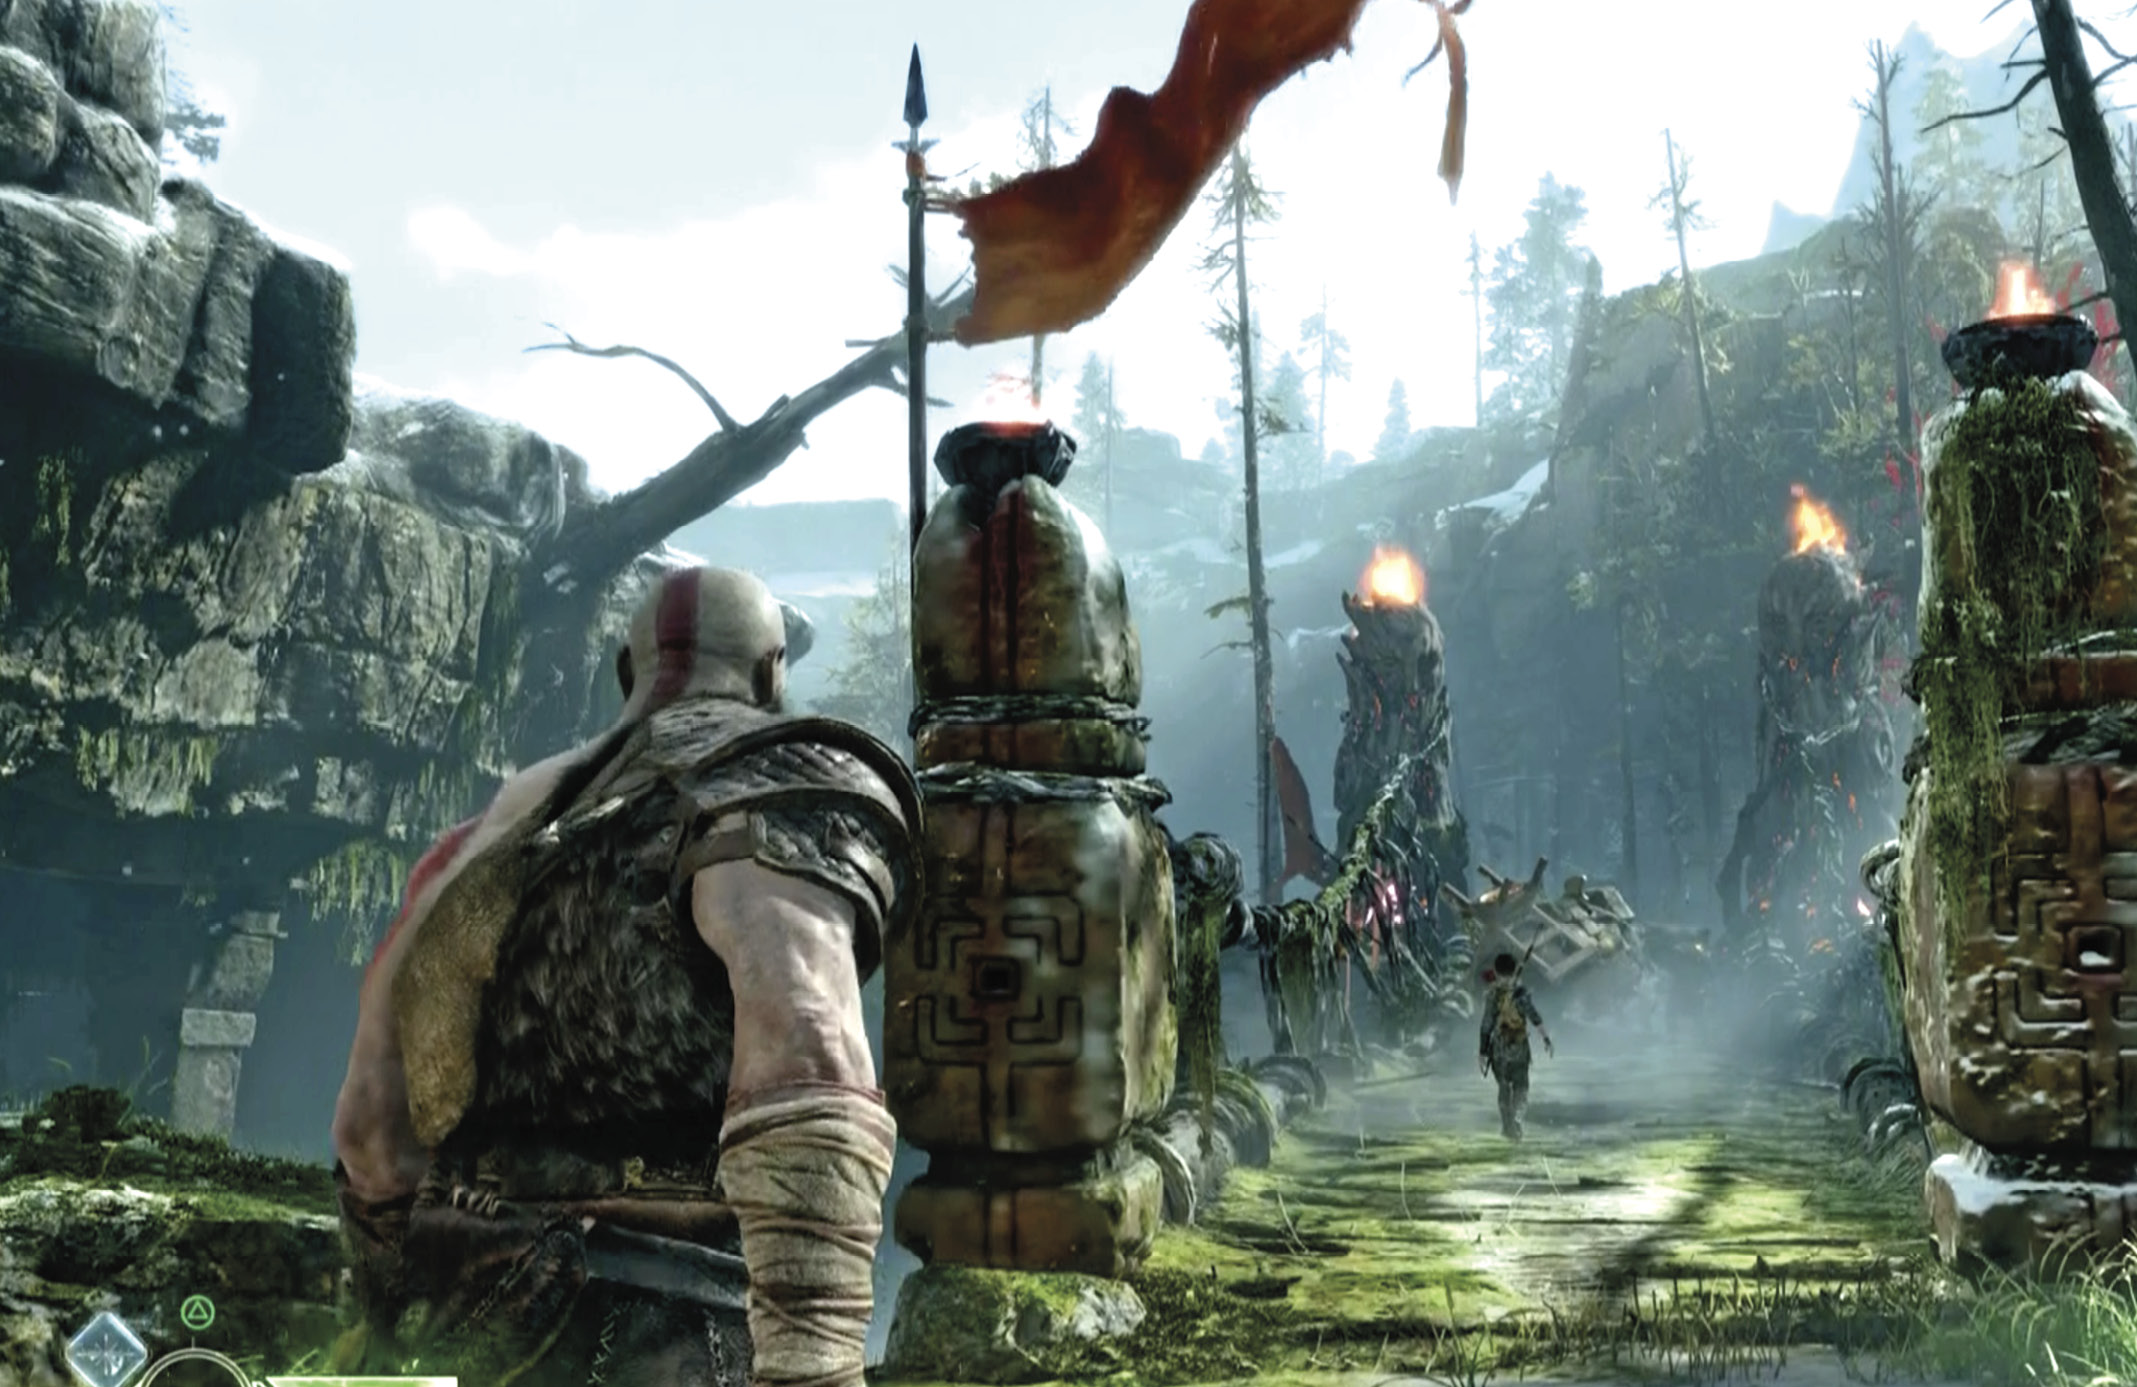
JÖtnar Ruins
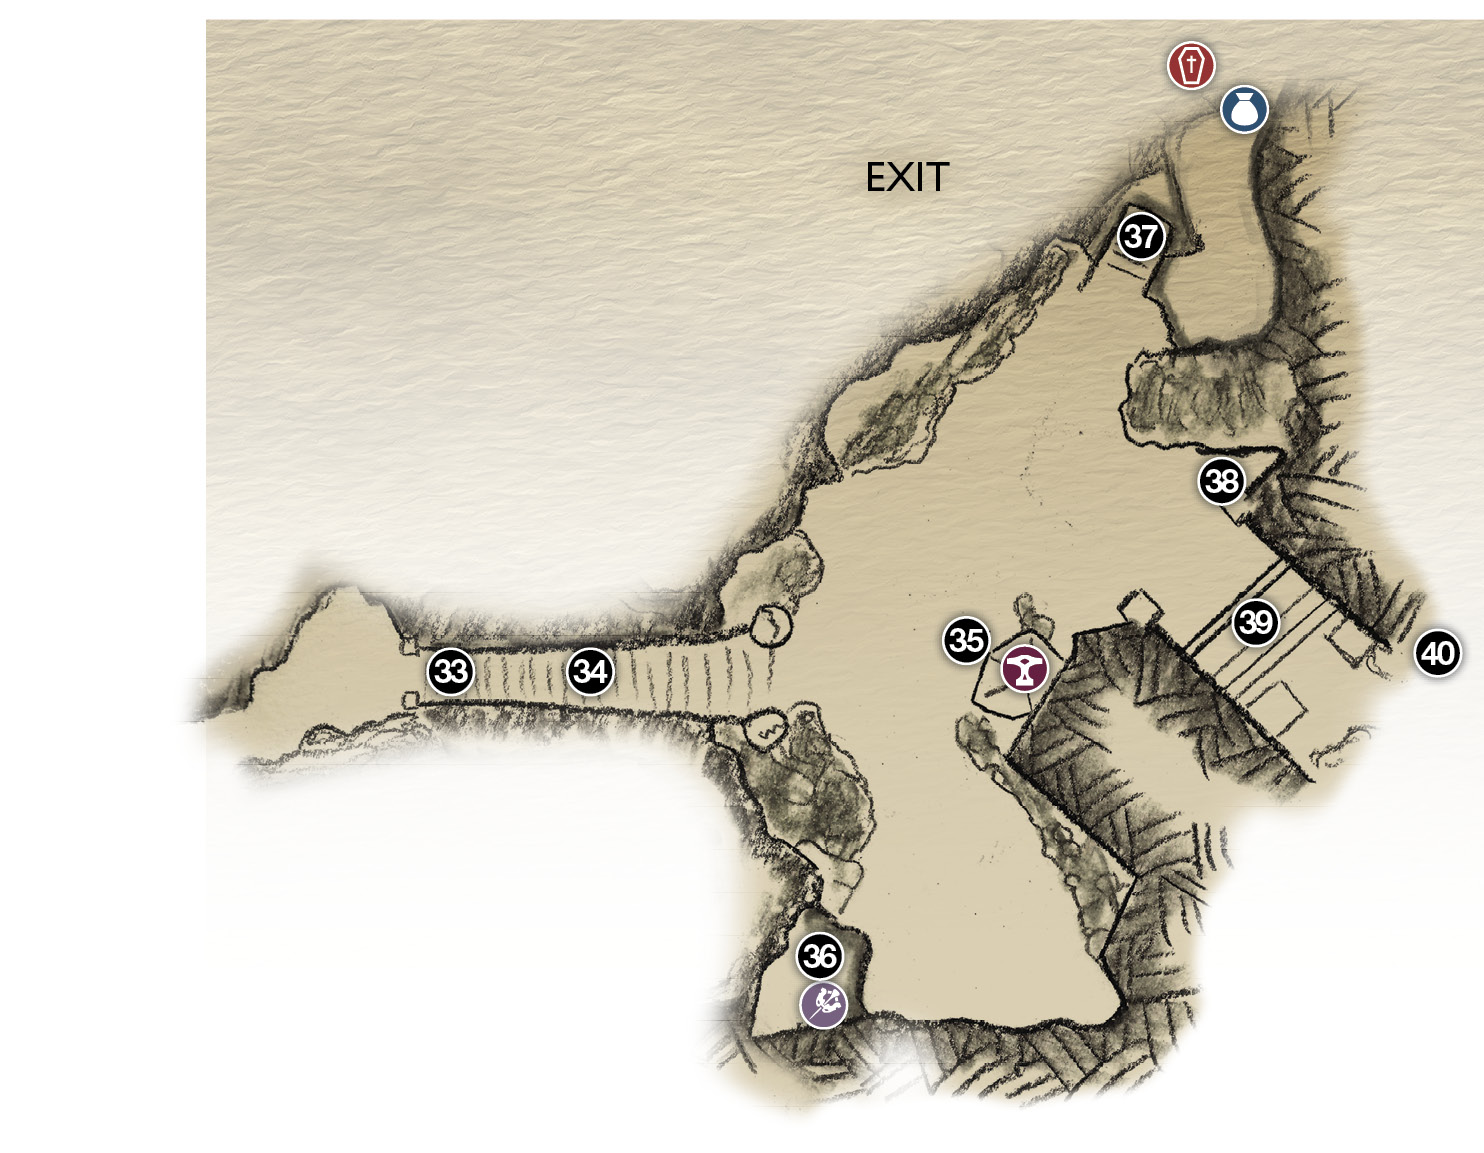
33. Bridge entry
34. Meet Brok
35. Brok’s shop
36. Rock shelf (Artifact)
37. Drawbridge half
38. Gate crank-chain
39. Gate
40. Low tunnel
artifact
Chest
Coffin
 Shop
Shop
OBJECTIVE: Throw Your Axe at the Trees
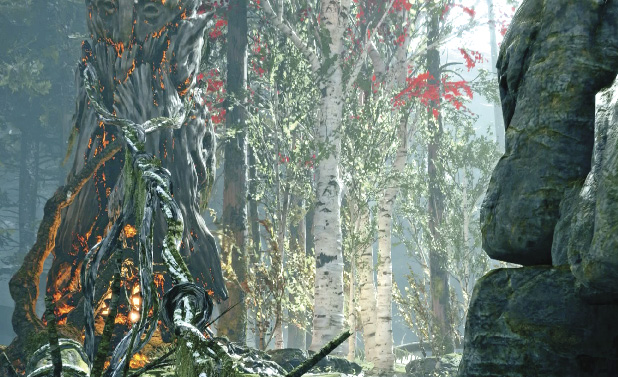
Move onto the bridge to trigger a scene: Kratos and Atreus meet Brok, a Dwarf craftsman and blacksmith whose Beast of Burden refuses to cross the bridge (34). Atreus senses that the animal is afraid of something ahead and asks Kratos to toss his axe at the trees with white trunks. Toss Leviathan at the trees across the bridge on the right side (see our screenshot) to chase off whatever creature has spooked Brok’s animal, triggering another scene.
Upgrade Leviathan
As the party moves across the bridge, Brok recognizes Leviathan as his handiwork. He produces the brand as proof and offers to enhance the axe for Kratos, who agrees. They walk to Brok’s shop (35), and the Dwarf produces a Frozen Flame, the resource needed for axe enhancement.
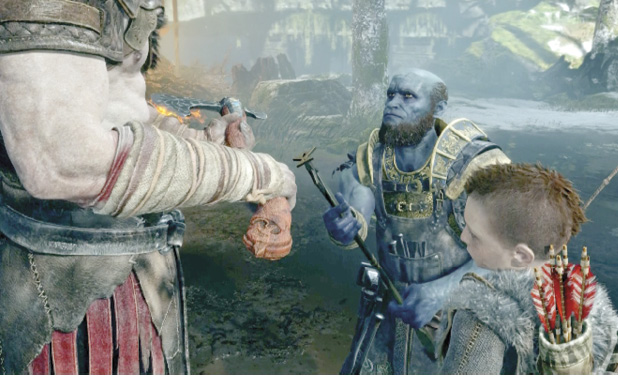
Here you get a tutorial on using Dwarven Shops. Simply follow the onscreen instructions. You have the Resources Required (1/1 Frozen Flame) for the Axe Upgrade II. Hold down Square when prompted until the upgrade bar fills up, completing Leviathan’s upgrade.
Upgrade the Talon Bow
After the tutorial, open the Upgrade Menu then select Talon Bow. If you’ve been carefully scouring areas for pickups and looting all chests and coffins, you should have enough Hacksilver and Soft Svartalfheim Steel to buy the Talon Bow Upgrade II as well. (If not, you will have plenty of opportunities to do so later.) Hold down Square until the upgrade bar fills up, completing the upgrade.
Here you might also want to use new recipes available in the Craft Menu to have Brok craft new armor, if you have the Hacksilver available. Kratos, in particular, could benefit from better chest armor. When you finally back completely out of the Brok’s Shop menu, the “creature in the trees” suddenly emerges to fight. Before you engage, however, open your Skills Menu and check out all the new Skills available when you upgraded your weapons.
Defeat the Draugr Intruders
Time to test out your upgrades. A nasty Heavy Draugr swinging its two-handed battle axe suddenly attacks, and it’s backed up by a team of Projectile Draugr flinging fireballs from across the clearing. A good tactic here is to dodge your way toward the ranged Draugr, which are easy to take out with a few hits of your newly upgraded Leviathan. Once you terminate the pesky fire-tossers, turn your full attention to the Heavy Draugr.
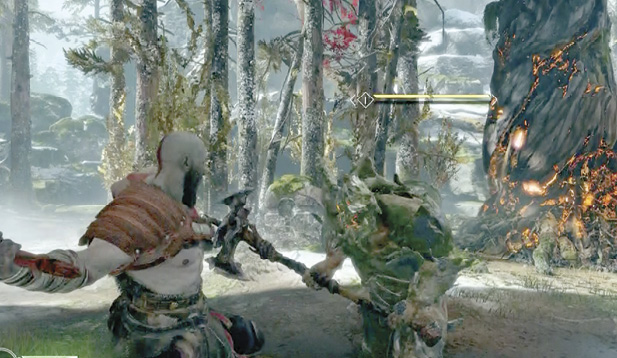
OBJECTIVE: Proceed Through the Gate to the Mountain
After you wipe all Draugr from the clearing, head to the right of Brok’s shop to find a drop-off onto a small plateau (36) here you find another Mask Artifact.
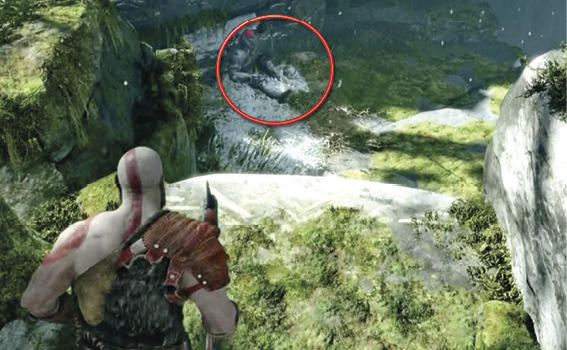
Next, approach the raised drawbridge (37) and sling your axe into the disc to break the chains and drop the bridge. Hop down to find a chest, then climb down the chain next to it to loot a Coffin and find a Rage pickup..
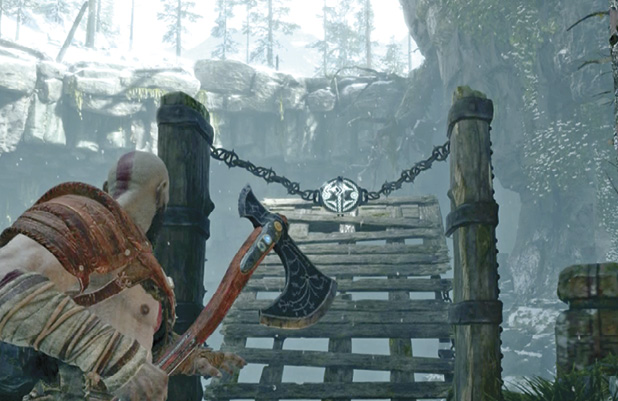
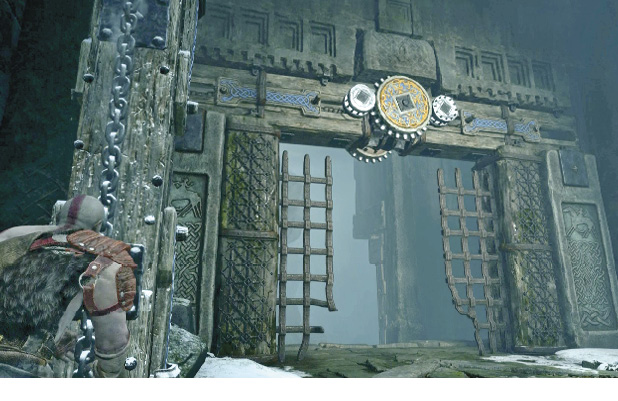
Climb back up and pull the crank-chain (38) to open the gate (39) that leads to the Mountain. When the gate is fully open, aim and toss Leviathan at the center gearwheel above the gate to freeze it. Release the crank-chain, go through the gate, and then recall the axe. Proceed through the low, skeleton-filled tunnel (40) to the next area.
Spike Trap Cavern
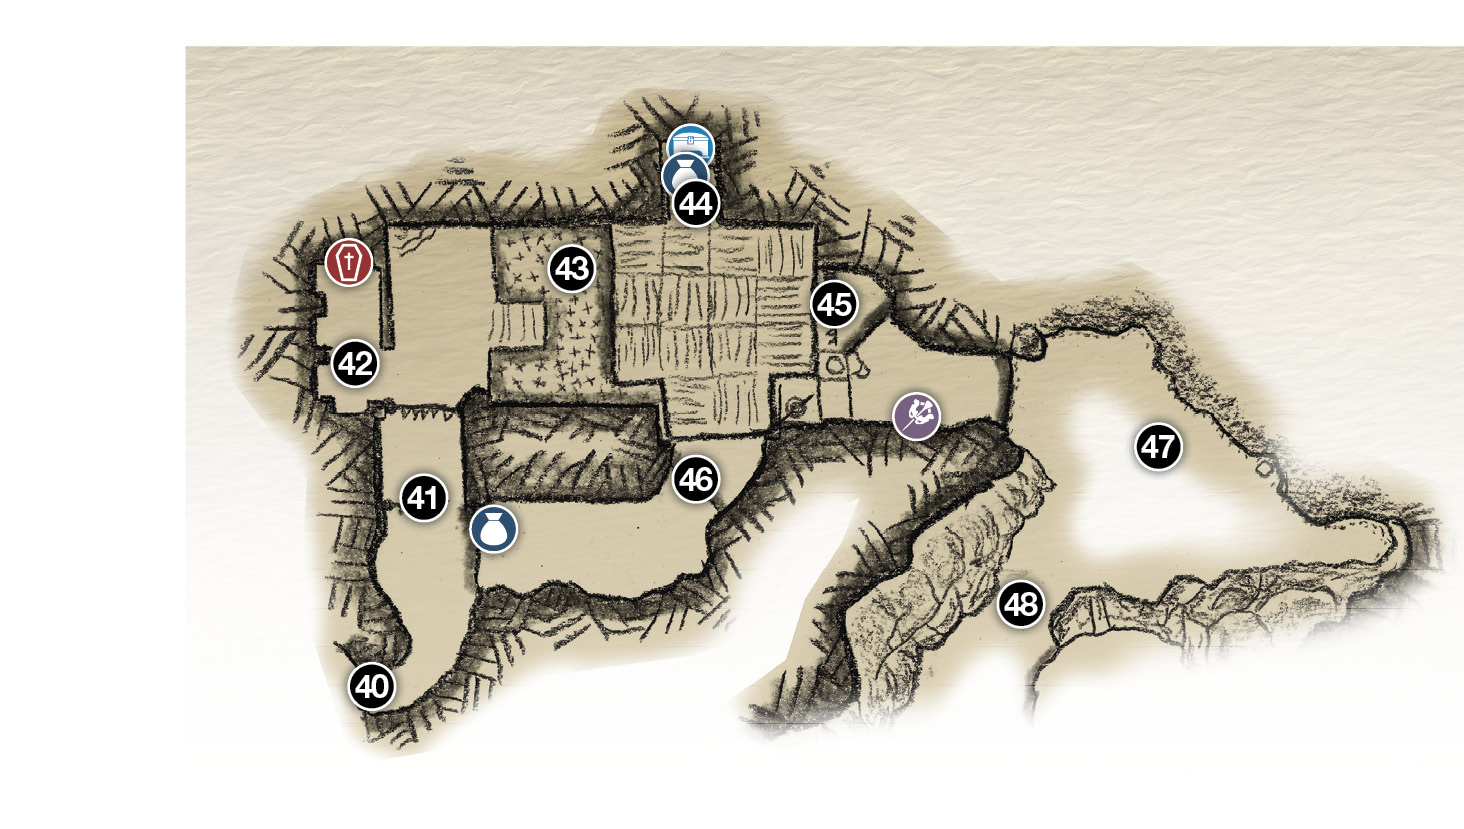
40. Low tunnel
41. Spiked door
42. Hidden alcove (coffin)
43. Spinner-crank
44. Chest (lower level); Nornir Chest (upper level)
45. Spiked door
46. Tunnel
47. Mountain vista
48. Path to door puzzle
 Artifact
Chest
Coffin
Nornir Chest
OBJECTIVE: Continue to the Mountain
Raise the Spiked Ceiling
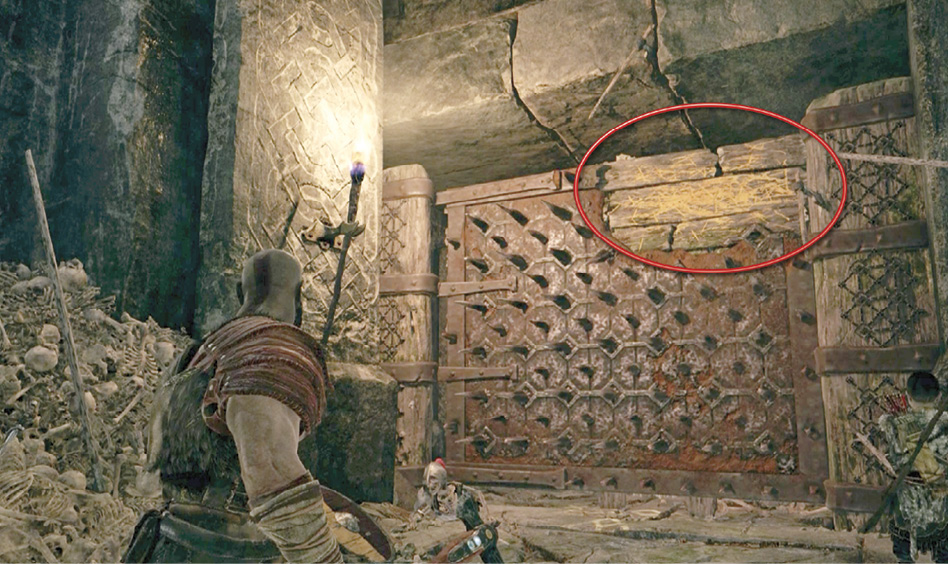
You emerge from the tunnel (40) into a cavern entrance blocked by a spiked door (41). Toss your axe at the door’s upper right corner where the wood is exposed to knock the door open. Repeat at the next spiked door; this time you have to toss the axe at the exposed spot twice before the door opens. Before you move on, toss Leviathan at that door once more (42) to knock it back again, revealing a hidden alcove with a coffin inside.
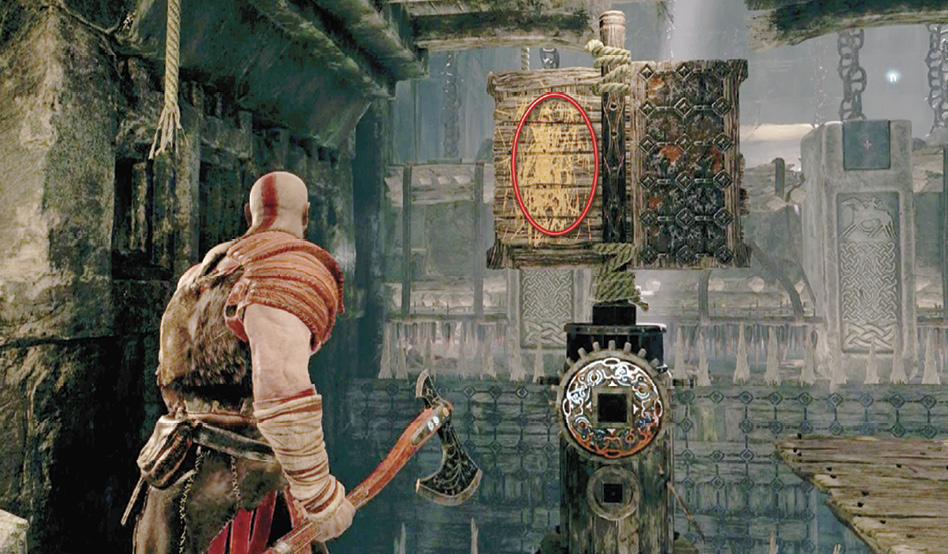
This cavern features a spiked ceiling trap that can be raised by a spinner-crank (43). Make a heavy axe toss at the spinner’s scarred, bare-wood panel to rotate the crank; you must hit the panel, recall the axe immediately, then hit the panel with a second heavy toss. (If you don’t hit the panel again right away, the crank just spins back down.) When the spiked ceiling is fully raised and the spinner doesn’t turn anymore, quickly recall the axe and immediately fling it at the spinner’s gearwheel to freeze it, which keeps the ceiling raised.
Now you can jump across to the main floor under the spikes where several sword-wielding Projectile Draugr emerge. Don’t recall Leviathan, or else the ceiling will start to lower! Instead, fight bare-handed until you clear the area, including Draugr that emerge over on the first platform where Atreus waits. Be ready for the late appearance of a powerful Heavy Draugr swinging its big two-handed axe. When this last foe falls, face the wooden barrier to see the Nornir Chest above it, then break the barrier to reveal an alcove (44) with a chest.
Approach the spiked wall at the back of the chamber (45) and get ready to move fast. Recall Leviathan to your hand—this unfreezes the spinner-crank and the spiked ceiling above you starts to lower, so hurry through the next steps. Immediately fling the axe at the bare wood on the spiked wall’s upper right corner. Quickly recall the axe, toss again at the bare spot, recall again, and toss a third time. (You must recall and toss the axe three times to fully open the spiked door, so hurry!) Once the door is open, hustle in to avoid being impaled by the ceiling spikes.
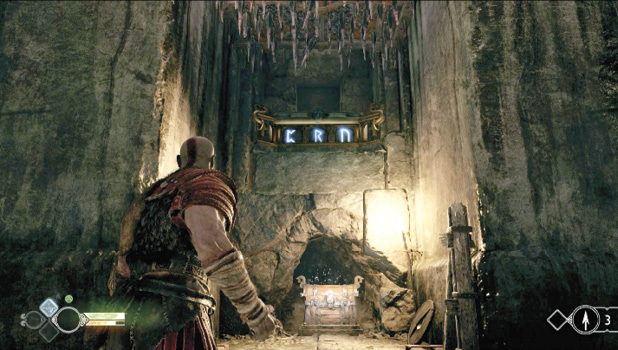
Climb up the yellow-marked wall to see daylight ahead. Don’t miss the Mask Artifact on the ground next to the corpse against the wall.
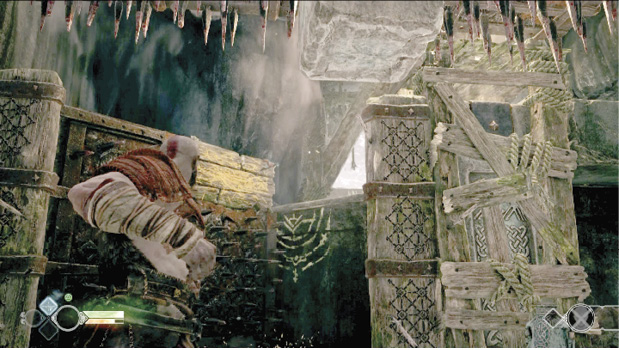
Unlock the Nornir Chest
Turn right and hop across the gap onto the top of the spiked ceiling. Spot the Nornir Chest over in the alcove (44). Turn around and look up to find one runic seal on a high ledge in the back corner of the chamber. Smash it with an axe toss!
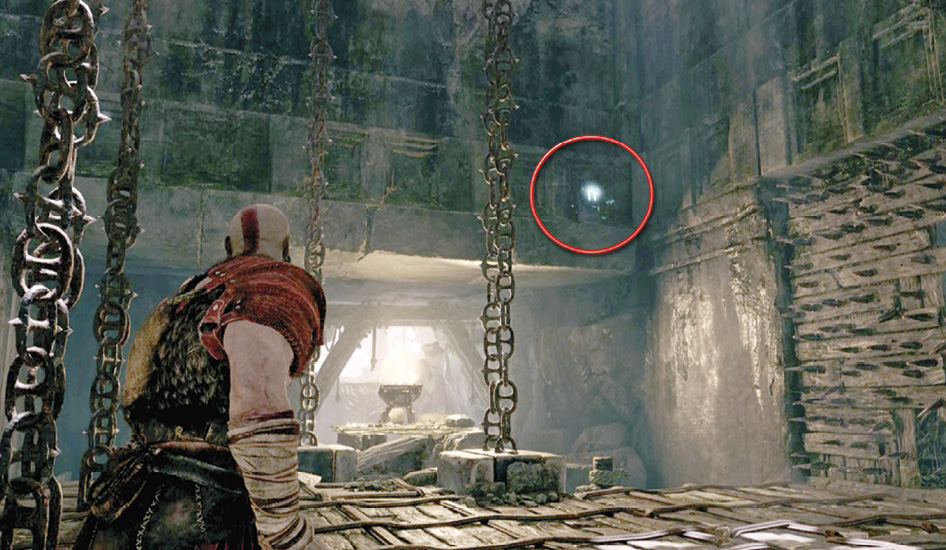
Approach the hole torn in the wall and step into the tunnel beyond (46). Another runic seal can be found glowing in a small cave on the left side of the tunnel. Sling Leviathan at it. Continue to the drop-off at the end of the tunnel to find a chest to loot.
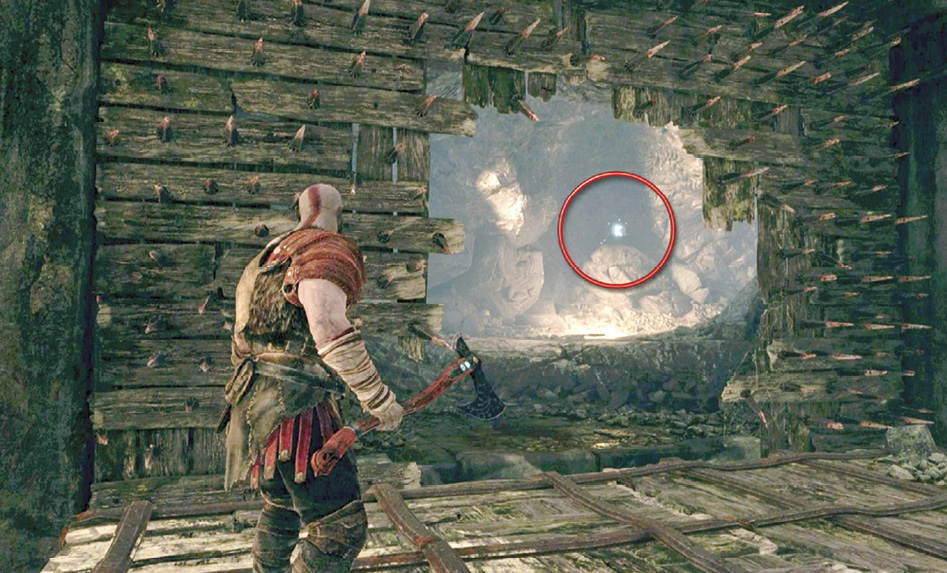
Turn around and go back through the hole onto the top of the ceiling. Veer left to face the spinner-crank below (43). Make a heavy axe throw at the spinner’s bare wood panel and immediately recall it. This raises the ceiling slab you’re standing on just enough for you to glimpse the blue sparkle of another runic seal on the platform (circled in our screenshot) directly above the spinner. The runic seal is tucked behind a box so you can’t see it clearly, but you can nail it right through the box with a light axe toss if you’re quick enough. This may take a few tries, but you’ll get it eventually.
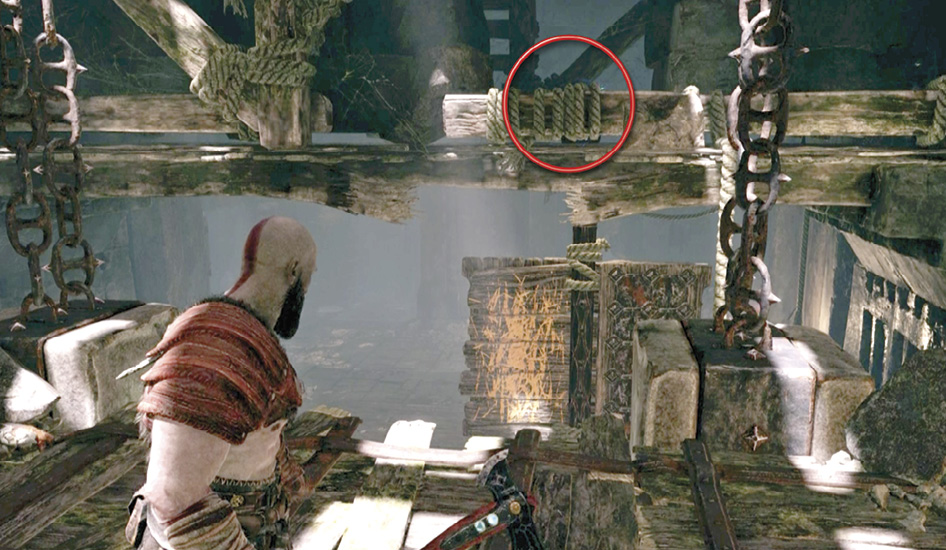
Now that all three magic seals are broken, open the Nornir Chest and retrieve the valuable item inside: a Horn of Blood Mead. Collecting three of these horns will increase your maximum Rage. Then exit the cavern at last, boosting Atreus up the low wall to another majestic view of the Mountain ahead (47).
The River Pass
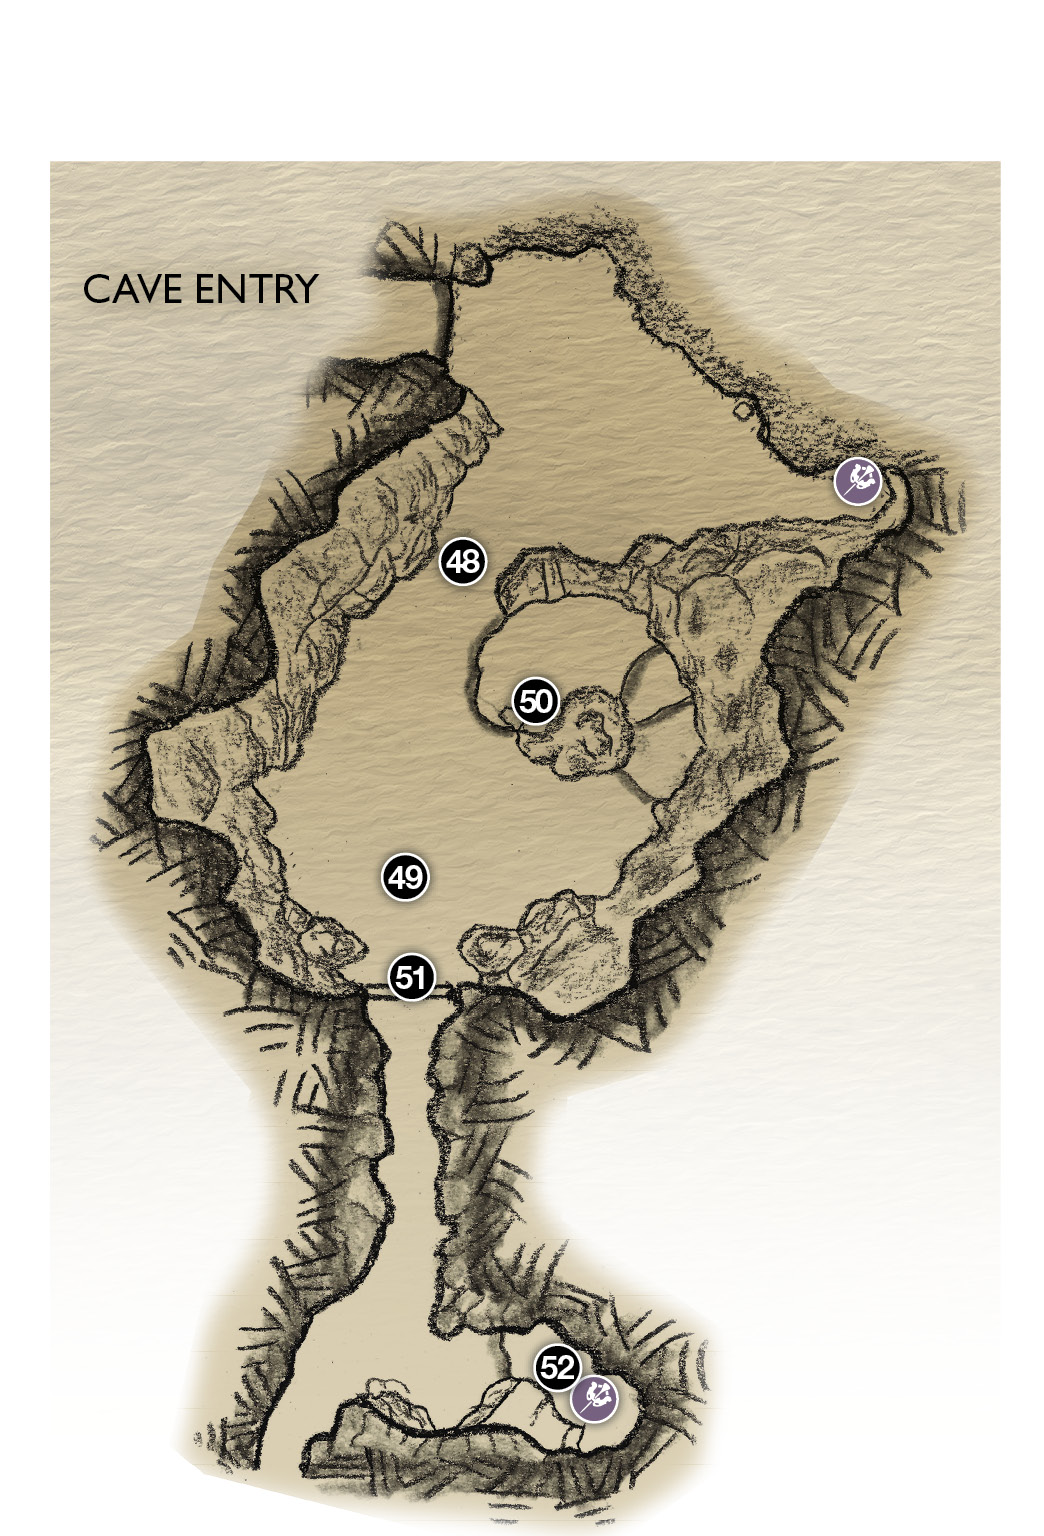
48. Path to door puzzle
49. Sand bowl
50. Door switch
51. Circular door
52. Pool (Hacksilver)
Artifact
Solve the Door Puzzle
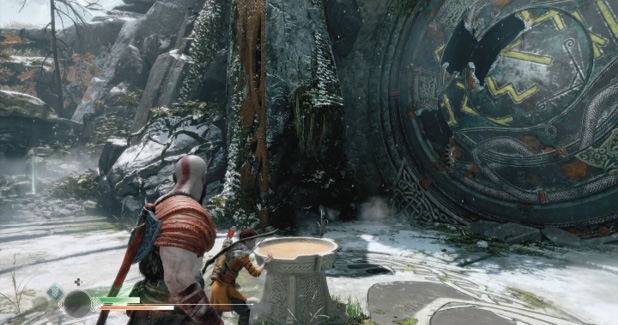
As Atreus runs ahead down the path (48), veer leftward past the pillar to find another collectible mask near the cliff’s edge. Continue down the path toward the big circular door flanked by two towering statues. Approach the sand bowl (49) in front of the door and press Square to speak with Atreus, who reads the rune puzzle.
Climb the nearby yellow-marked wall and the series of ledges to the switch mechanism at the top, overlooking the door. Yank the switch to activate the door, which starts rotating.
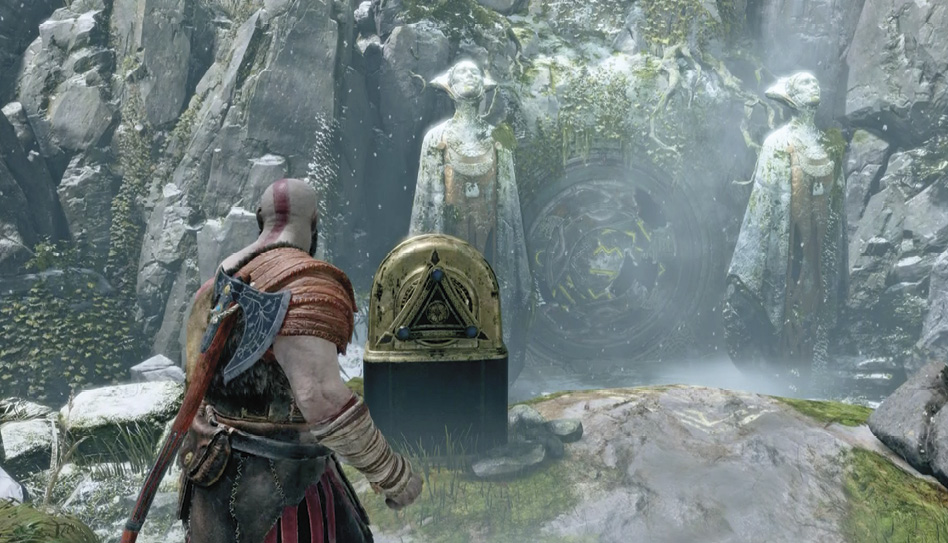
The rotating door is constructed of three concentric rings—inner, middle, and outer. Each ring has a gear underneath that rotates it. You can see the turning gears appear in the gaps as the rings rotate. The trick to opening the door is to align all three rings so they form a rune phrase. Here’s how:
- Toss Leviathan at the outermost gear when it appears. If you hit it, the gear freezes and the outer ring stops rotating.
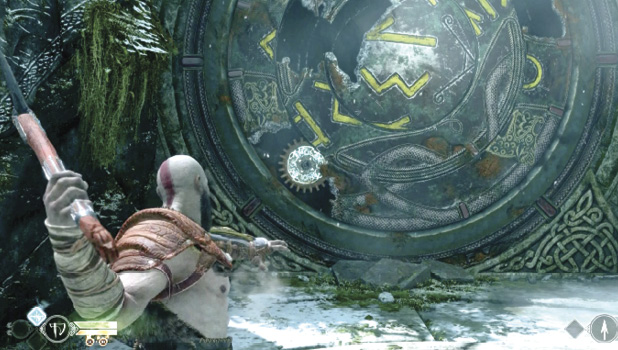
- Wait until the rune fragment etched on the middle ring rotates to match up with the rune fragment on the frozen outer ring, then quickly recall Leviathan. If you time it right, the rune lights up as the outer and middle rings lock together and start rotating.
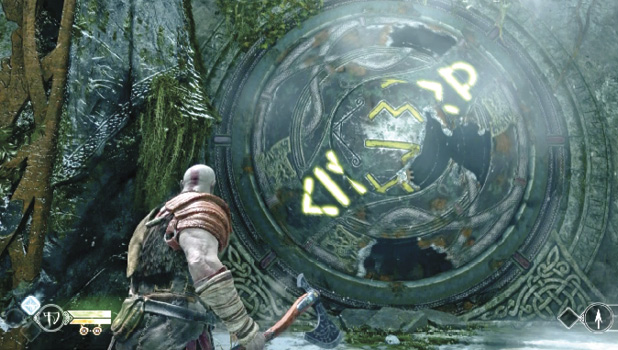
- Toss Leviathan at the gear beneath the innermost ring when it appears. If you hit it, the gear freezes and the inner ring stops rotating.
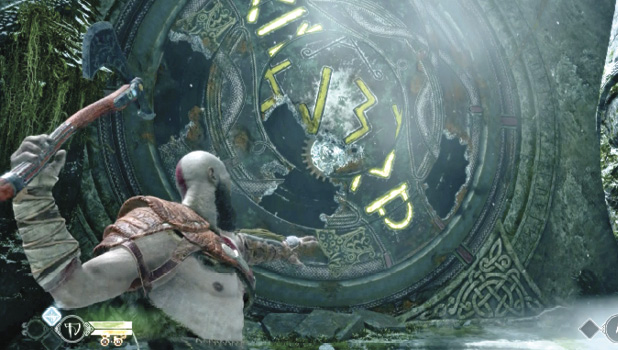
- Wait until the rune fragment on the unmoving inner ring matches up with the runes on the locked rotating rings, then recall your axe. Again, if you time it right, the rune brightly flashes as all three rings lock together; they stop rotating when the rune message is aligned horizontally.
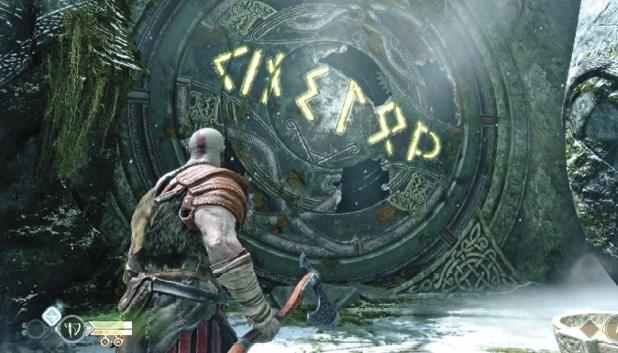
Once the puzzle is solved, press Square. Atreus reads the runes and traces them in the sand bowl. After a few seconds, the great door rolls sideways, opening the passage into the Mountain.
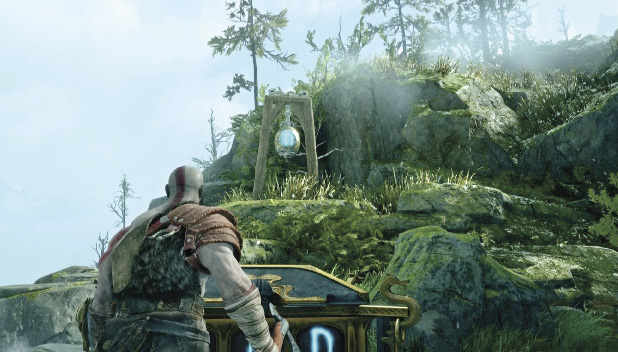
Enter and veer left when the path splits; climb up the low wall to find a water pool (52) with a large stash of Hacksilver. Then backtrack and continue down the tunnel, following Atreus as he leads you to a spot where he points out a high opening to daylight (53). Knock down the Hacksilver bucket hanging from the ceiling here.
River Basin
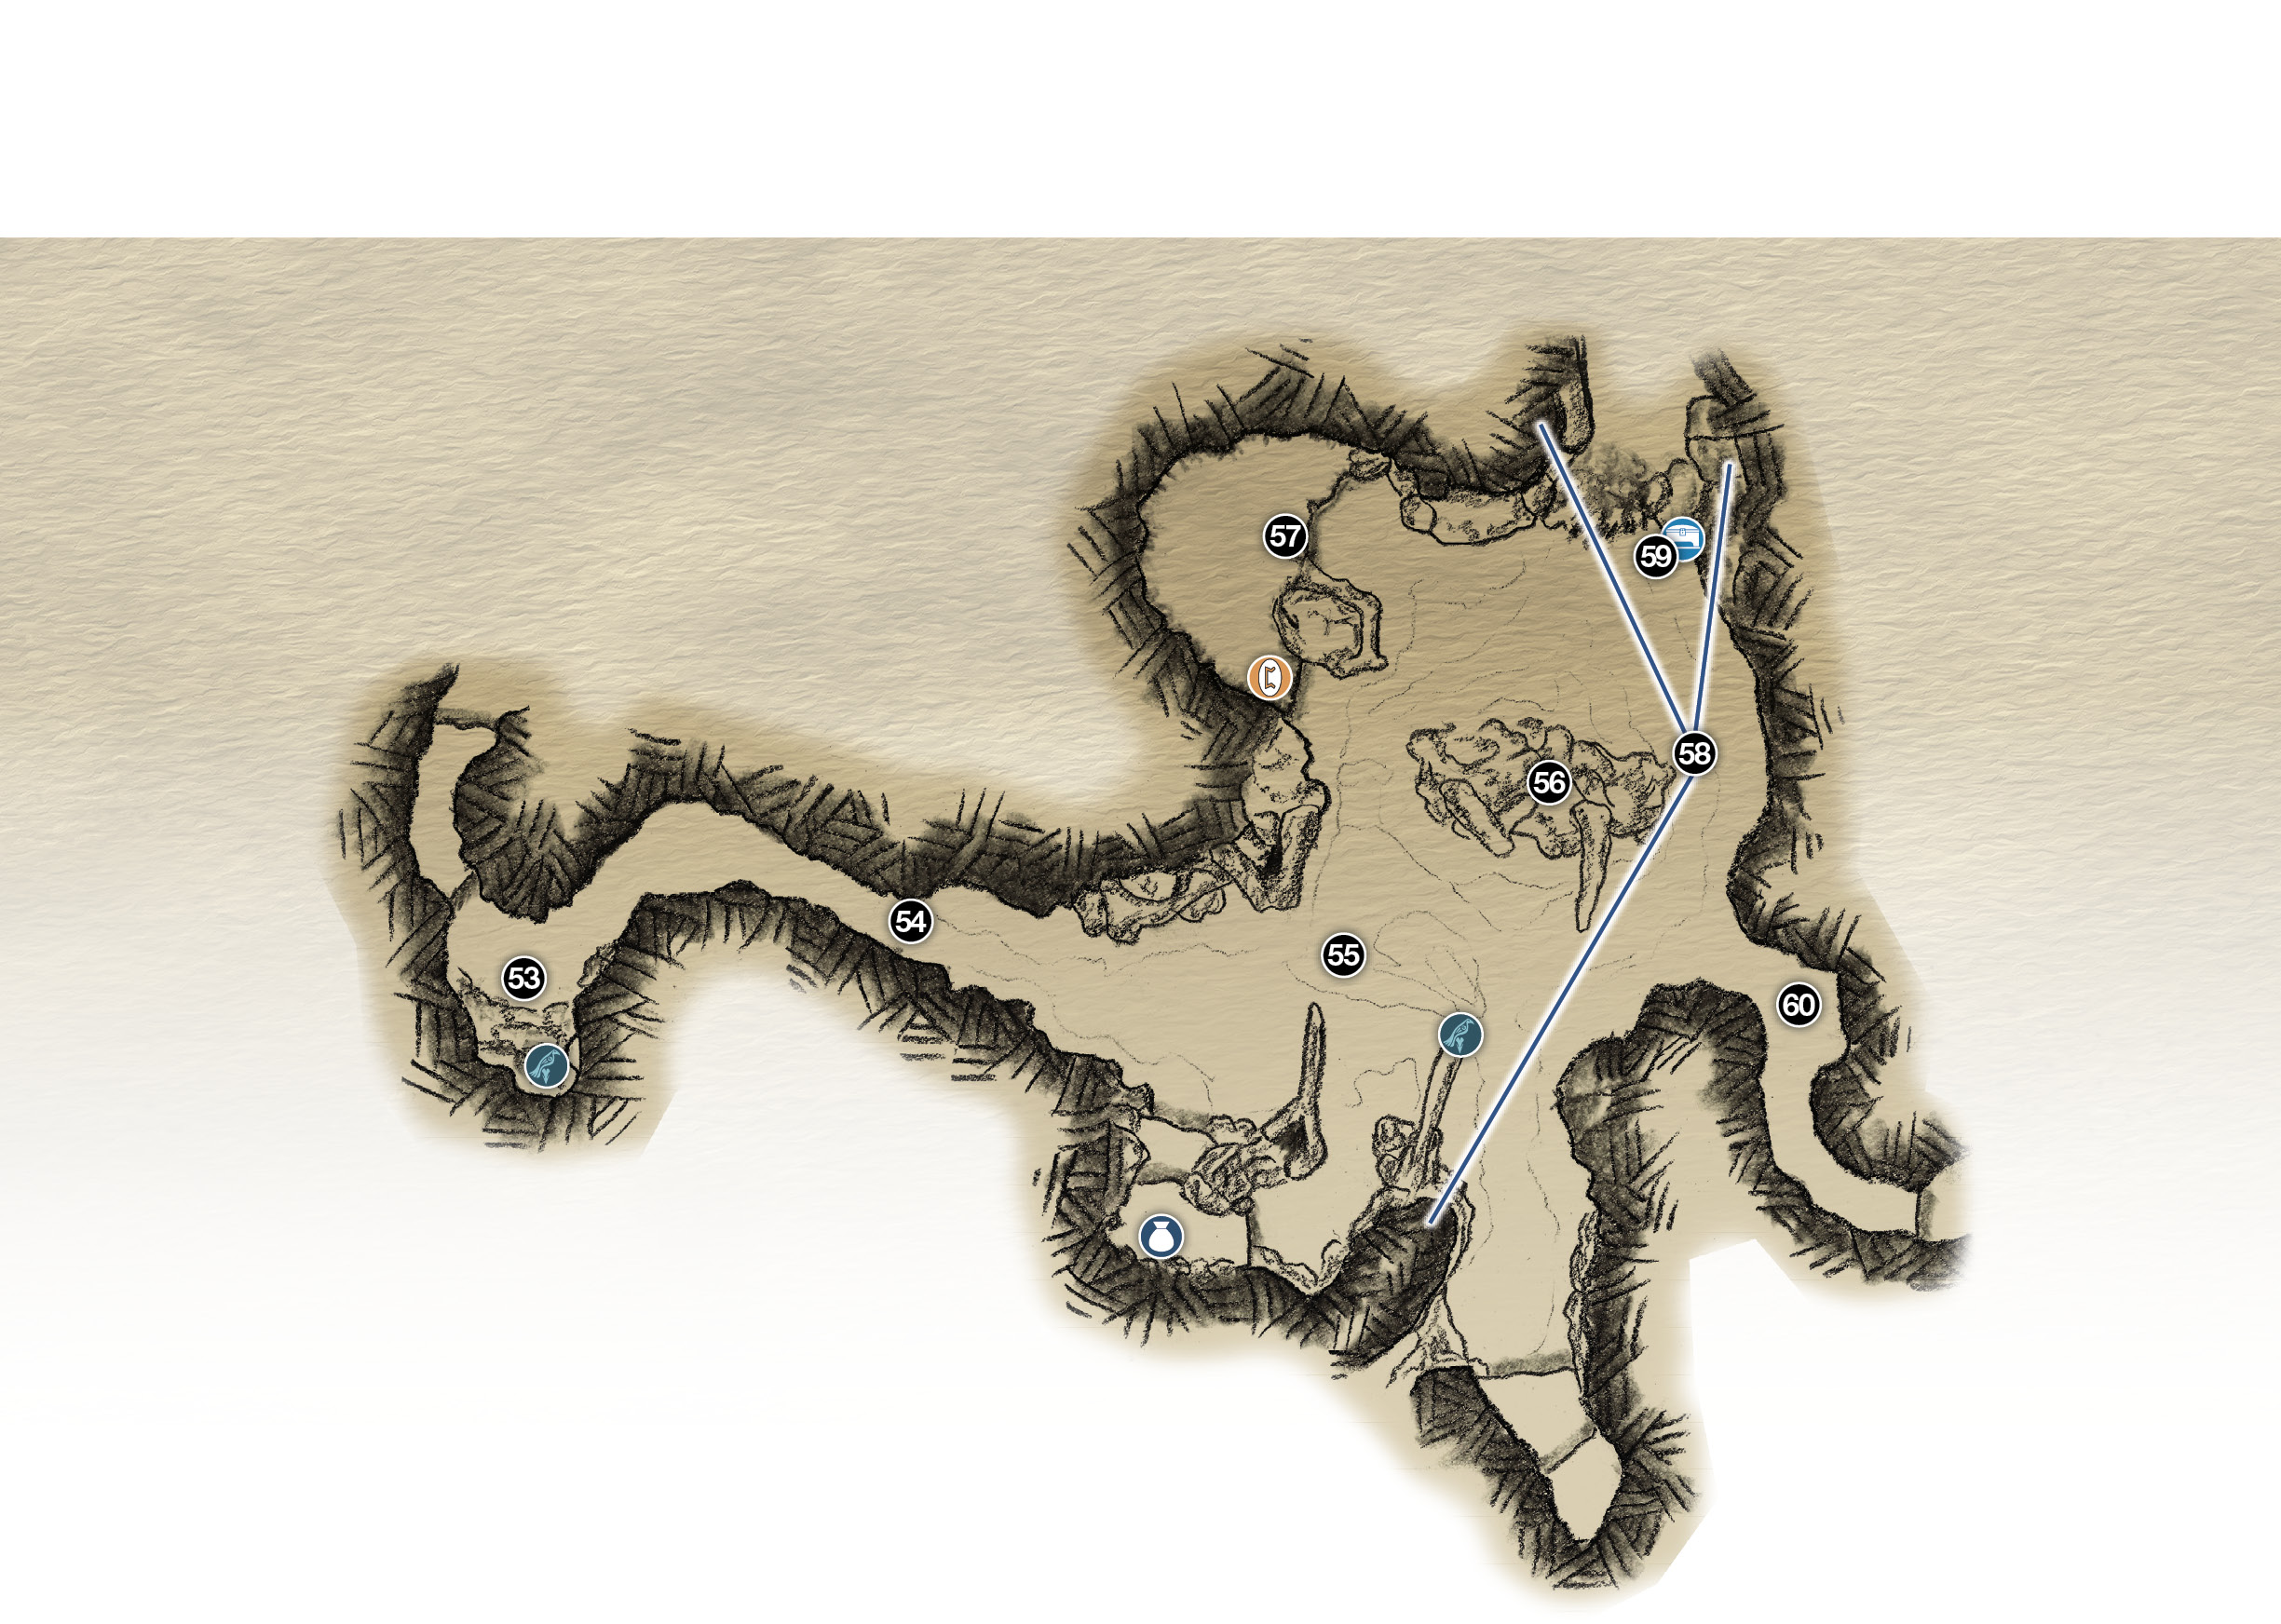
53. High cave opening
54. Boar tracks
55. Lava Troll fight!
56. Rock formation (use as cover)
57. Wood tower (boost Atreus)
58. Target rune bells from here
59. Nornir Chest
60. Tunnel to next area
Chest
Lore
 RAVEN
RAVEN
Nornir Chest
OBJECTIVE: Hunt with Atreus
Near the tunnel exit, a short scene is triggered: Kratos finds markings that Atreus recognizes as wild boar tracks (54). Follow Atreus as he hops down into a watery basin. Be ready for a nasty fight—another big Troll (55) patrols the swamp!
Read the Lore Marker
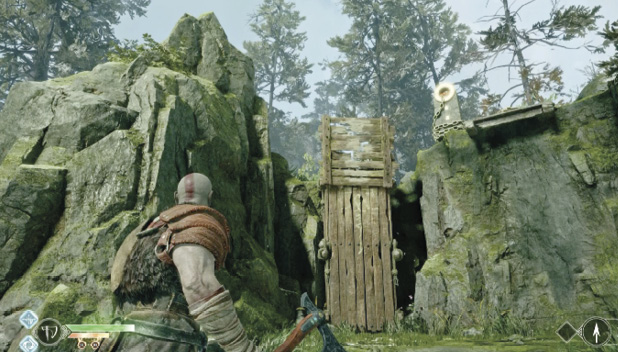
Once all foes are defeated, scour the swamp for pickups. Next, find the wooden tower (57), toss Leviathan through the wooden barrier at the top, and then boost Atreus up the tower. After he lowers the chain, climb up and follow the short path to the tall Lore Marker covered in blue runes. Press Square to have Atreus read the runes; he enters the Lore in his journal, which you can open and read.
Unlock the Nornir Chest
Now you can work to unlock the Nornir Chest (58). This is a tricky task. You must toss Leviathan at the runes etched on three bells mounted around the basin. When you hit a rune bell, its rune darkens, deactivating its magic seal on the chest. When all three runes are dark at the same time, the Nornir Chest unlocks.
Unfortunately, each individual rune stays dark for only a few seconds after being struck, then re-illuminates unless all three runes are dark at the same time.
This means that from the moment your axe strikes the first rune bell, you have only seconds to strike the other two bells. You must recall Leviathan immediately after each strike, then pivot quickly and target the next bell. Again, if you can hit all three bells within several seconds, the Nornir Chest is unlocked.
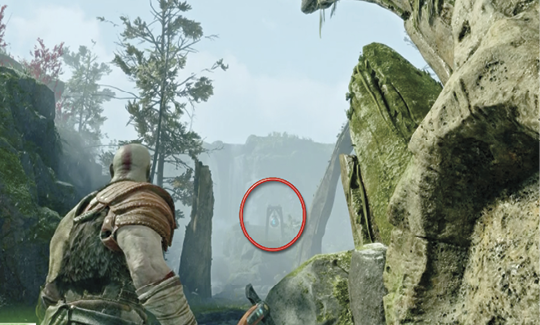
Check out our map and stand on the spot (58) where you can see all three bells. Your best bet is to throw at the farthest one on the opposite side of the basin first (see our shot), since it’s the hardest to target. Aim high, because at that distance the axe flies in an arc that curves downward. Try a few practice throws until you pinpoint the exact spot where you must aim to strike the bell.
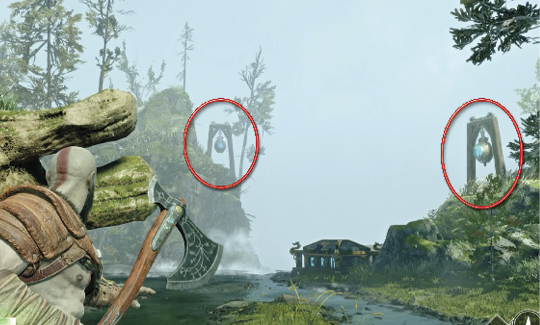
Once you’ve mastered targeting the farthest bell, swivel to practice targeting the other two bells, one on either side of the Nornir Chest. When you have your throwing arcs figured out, turn back to the far bell. Hit it, then recall the axe as you’re pivoting to target the next bell. Repeat this method to target the third bell. It’s not easy, but with a little practice, you’ll get it.
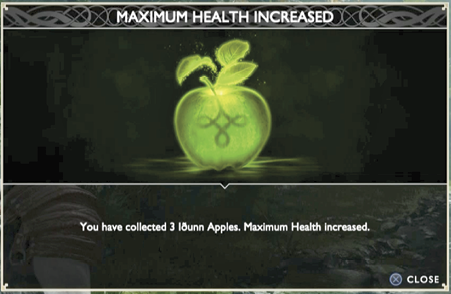
Once the magic seals are broken, open the Nornir Chest (59) to loot the valuable item inside: another Iðunn Apple. If you’re following our walkthrough, this is your third such apple, which gives you a Maximum Health increase! Exit the basin via the tunnel (60) with a torch at its entrance.
The Abandoned Camp
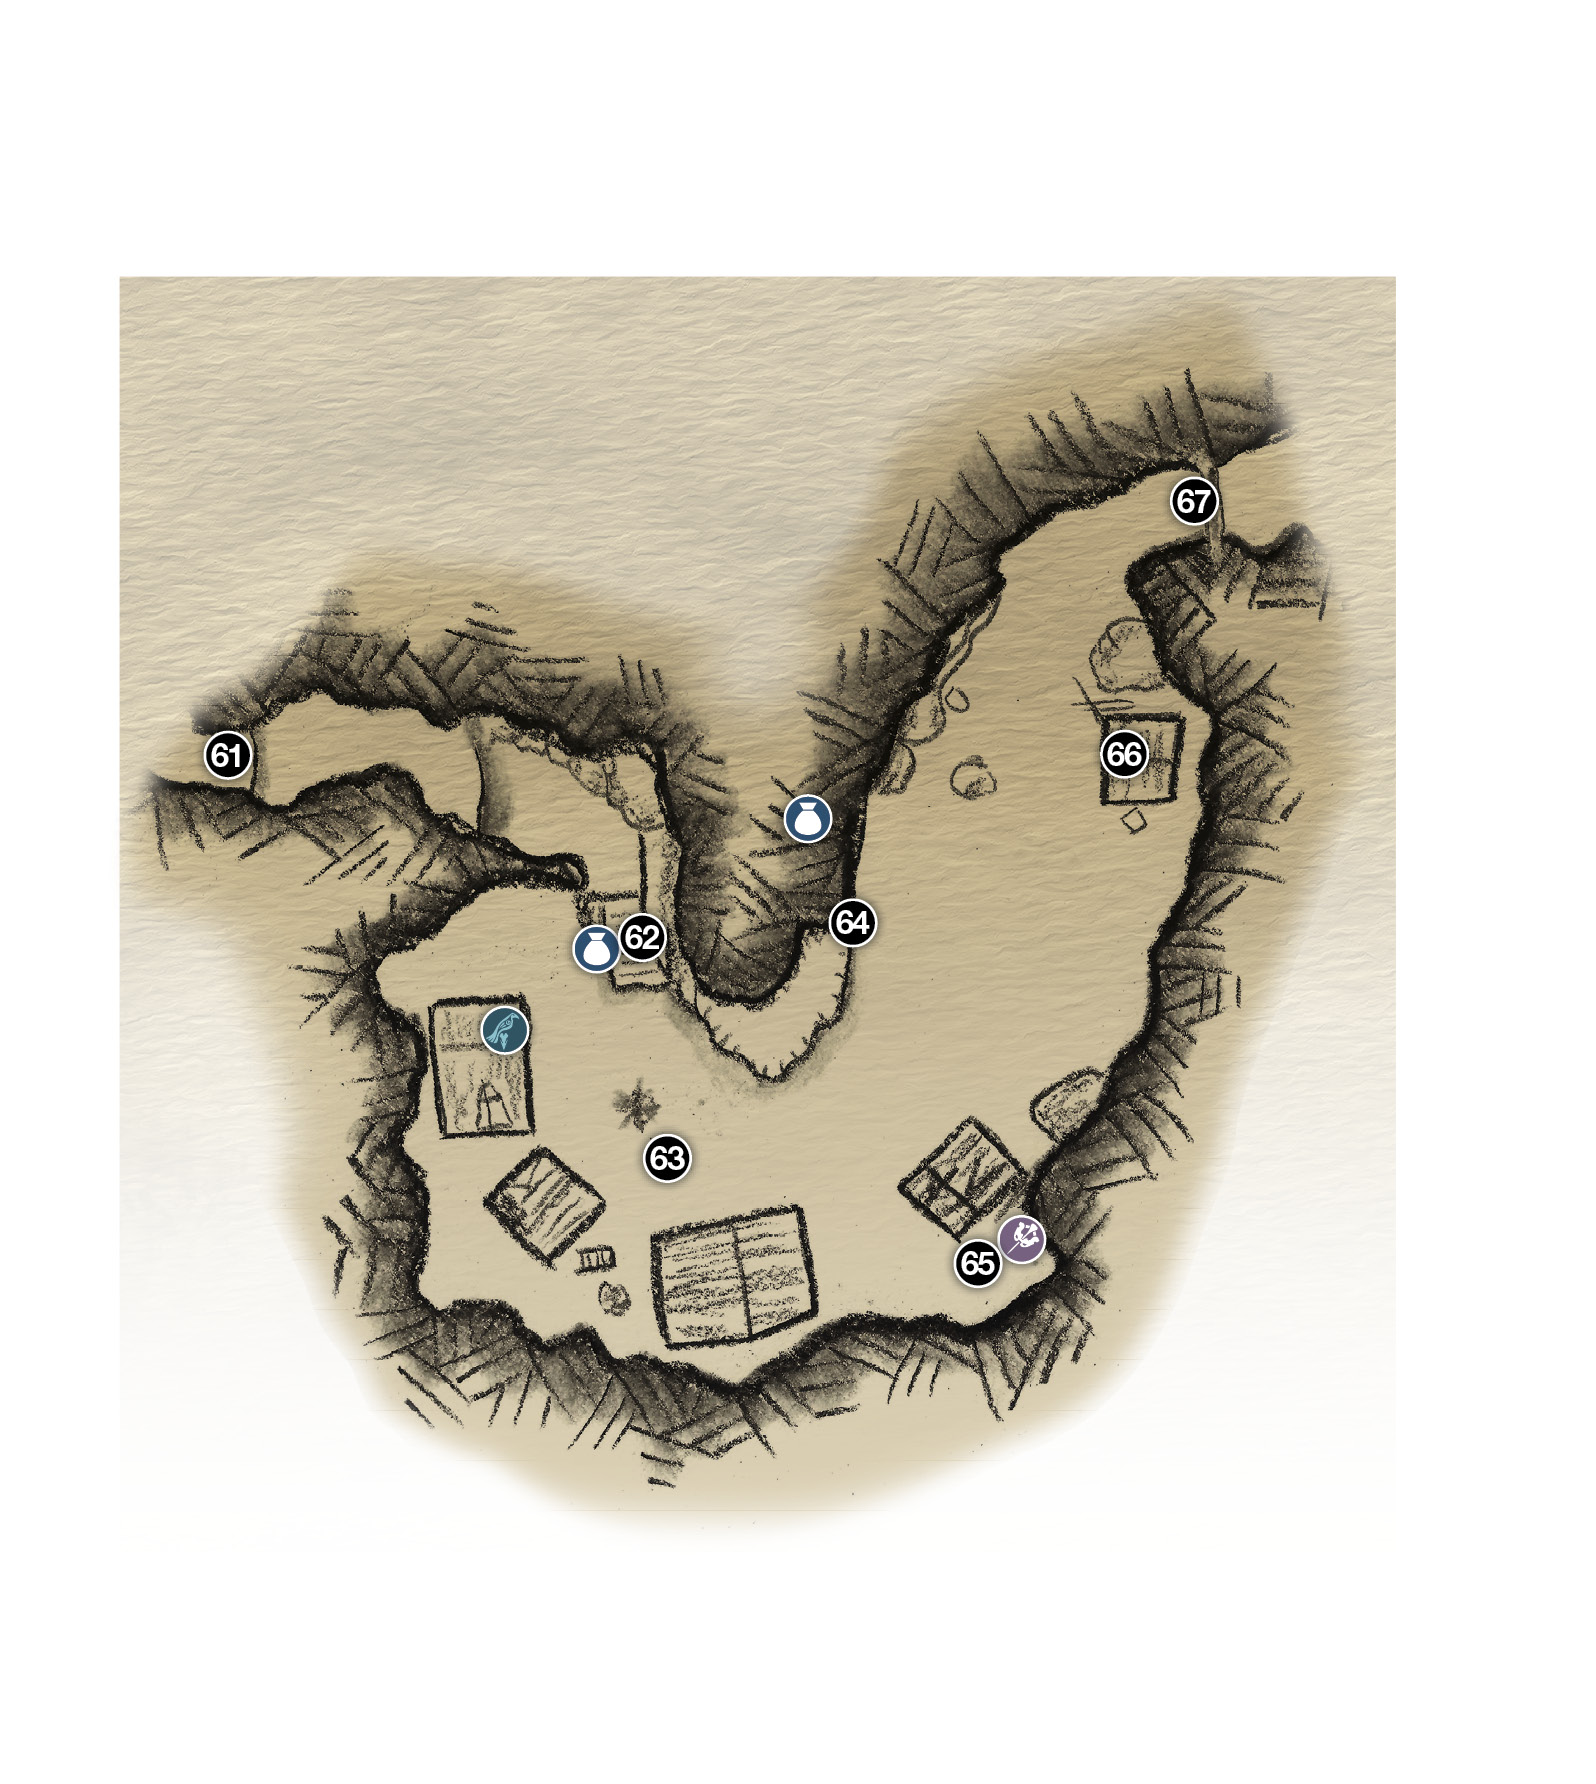
60. Tunnel
61. Wild boar (first shot)
62. Wooden platform
63. Raven (on roof)
64. Climb to ledge
65. Mask Artifact
66. Hut (Hel-Reaver inside!)
67. Lift rock
Artifact
Chest
 Raven
Raven
Hunt the Wild Boar
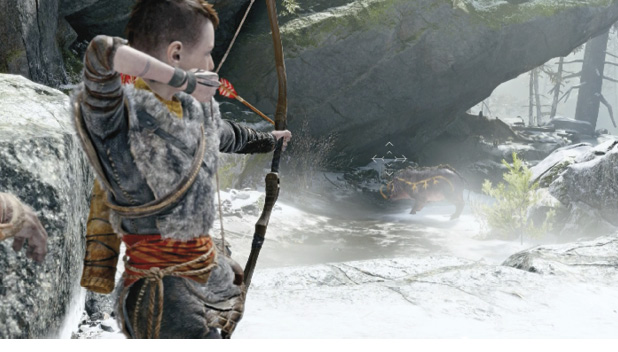
As you follow the tunnel to a drop-off, Kratos says, “Boy, I hear your animal ahead.” At the drop-off, press Circle to trigger a scene: after jumping down, Atreus spots the wild boar and sets up to shoot (61). Aim until the targeting reticle turns all red, then fire. The arrow bounces harmlessly off the creature’s flank! Follow Atreus down to a wooden platform (62) overlooking an abandoned village (63) strewn with corpses.
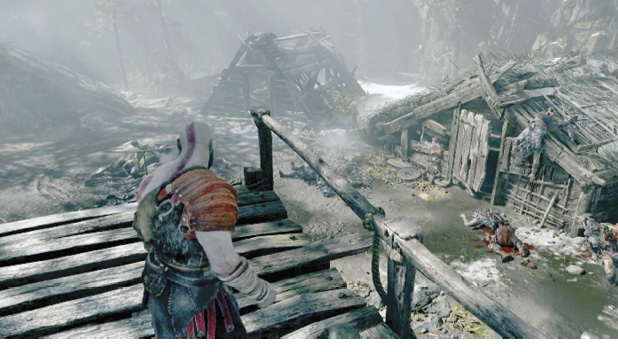
Explore the Abandoned Village
Take some time to check out the village. Break into several huts to find Hacksilver stashes, plus another stash in a bucket hanging from a tree (it falls onto a ledge above).
You also find one chest directly underneath the platform (62), a Raven collectible (63) on a hut roof, and another chest plus the Hacksilver that fell from the bucket if you climb up the yellow-marked ledge (64) around the corner from the wooden platform.
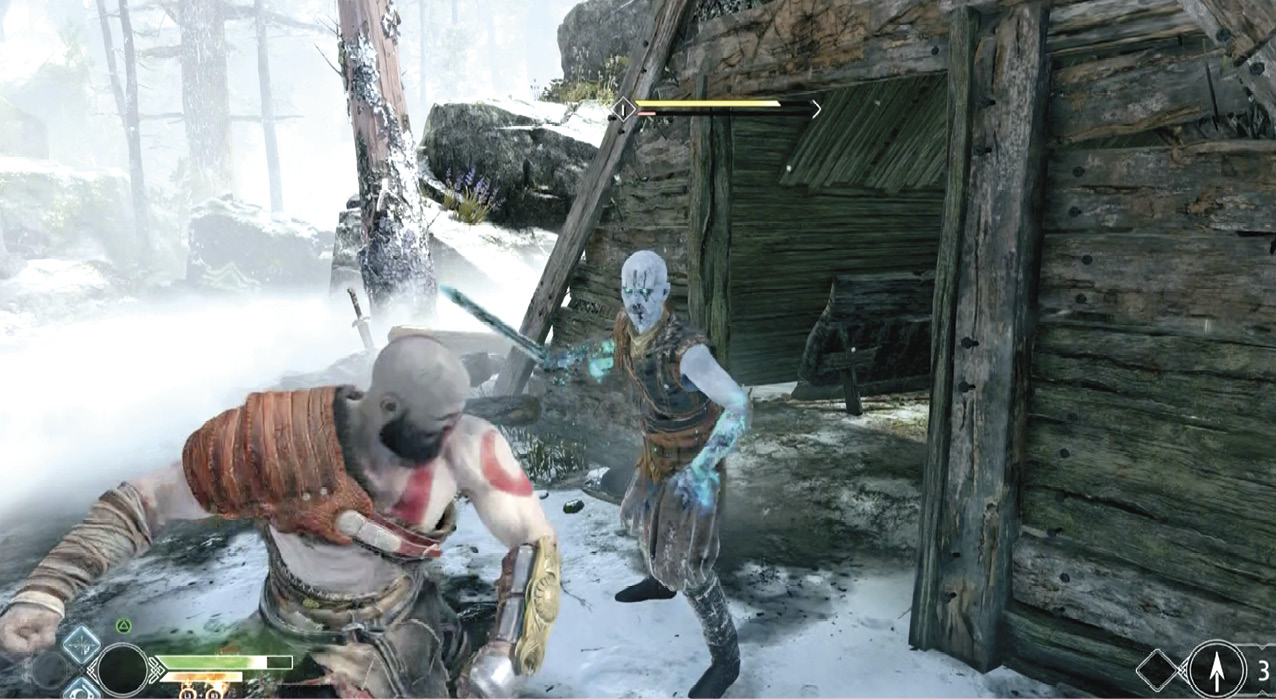
Next, find the Mask Artifact (65) behind the hut with the smoldering roof. Then approach the last hut (66) in the village, where a Hel-Reaver swordsman suddenly bursts through the entrance. Remember that all Hel-Walkers have some resistance to Leviathan’s Frost damage, so attack him bare-handed for best results.
A good heavy-attack kick can send Hel-Reavers flying. After the foe is defeated, follow Atreus to the fallen rock pillar (67) and lift it.
River Pass
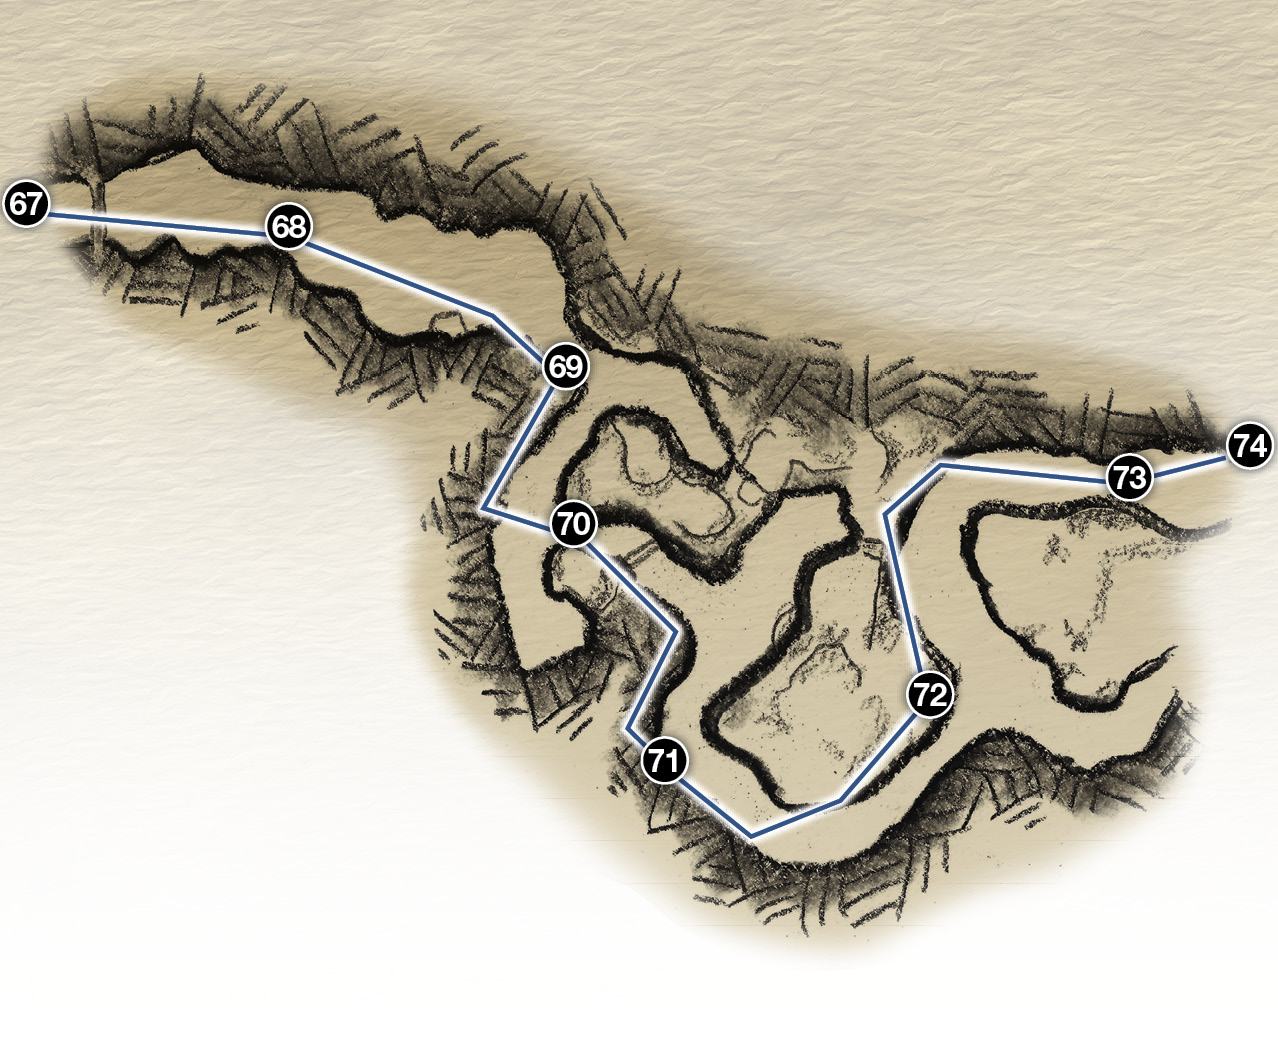
67. Lift rock
68. Shoot wild boar
69. Fog area begins
70. Jump over log
71. Enter tunnel
72. Exit tunnel
73. Jump over log
74. Sideways slide through gap
OBJECTIVE: Find Atreus
Chase Down the Wild Boar
Lifting the big rock triggers a scene: Atreus finds the wild boar and automatically sets up to shoot it (68). The stricken animal flees, and Atreus takes up the chase! Follow him down through the narrow cleft in the rocks (69) into the foggy maze.
Refer to our overhead map. Turn right just after the cleft (69), then take the first left through the ravine and hop over the log (70). Take the next right turn and duck into the tunnel entrance (71) marked by a torch. When you emerge from the tunnel’s far exit (72), turn left and follow the passage that leads to another fallen log (73).
As you approach the log, you hear a woman’s voice cry, “What did you do?” Vault over the log to trigger a scene: Kratos squeezes through a narrow passage (74) and comes upon Atreus and a strange woman bent over the stricken boar.
The creature, it turns out, is her friend!
She tells Kratos that Atreus’ arrow cut a tideway inside the creature, so he must find both ends and hold them tightly. When control returns, press and hold L2 as prompted. Then, while still holding L2, press and hold R2 as well. After a few seconds, the woman asks Kratos to carry the boar to her house, and she dispels a magical barrier.
Witch’s House
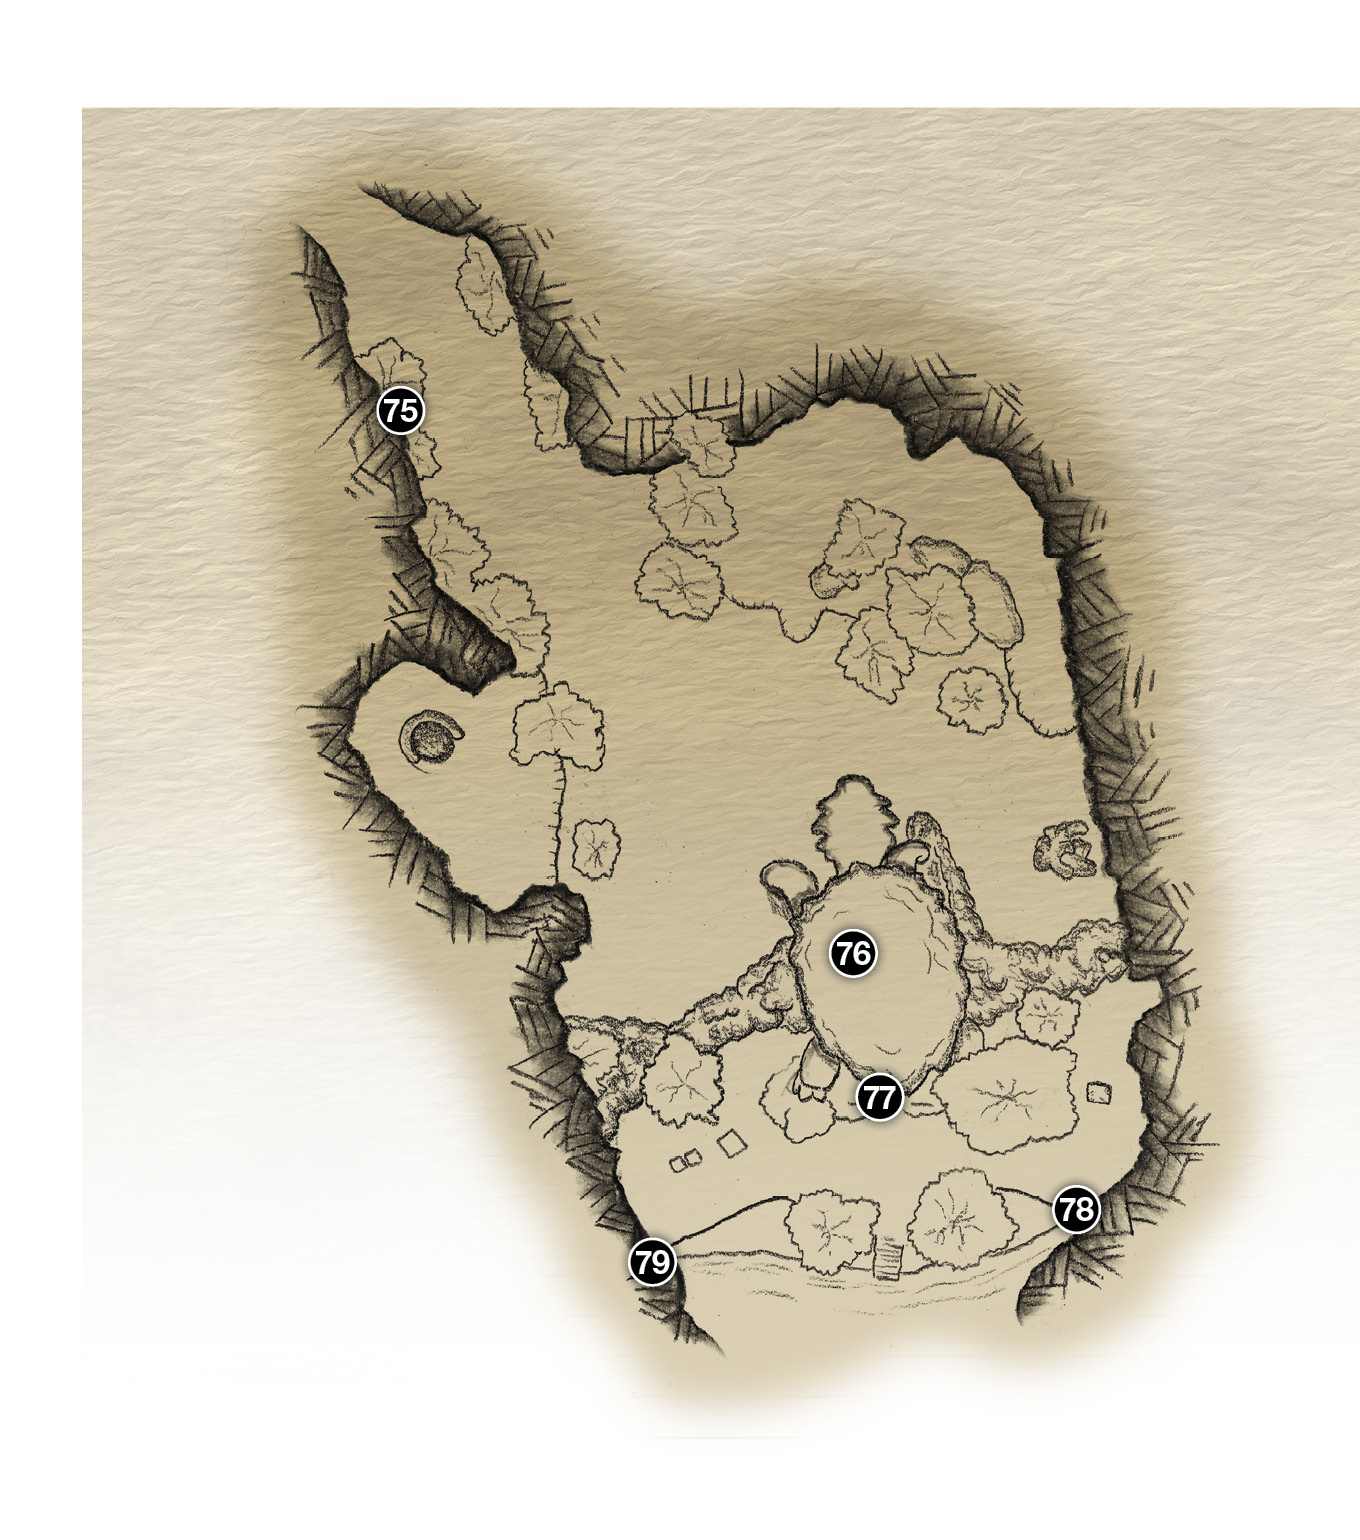
75. Enter Sanctuary Grove
76. Tortoise’s head
77. Stave on witch’s floor
78. White-petaled flowers
79. Atreus in garden
OBJECTIVE: Follow the Witch
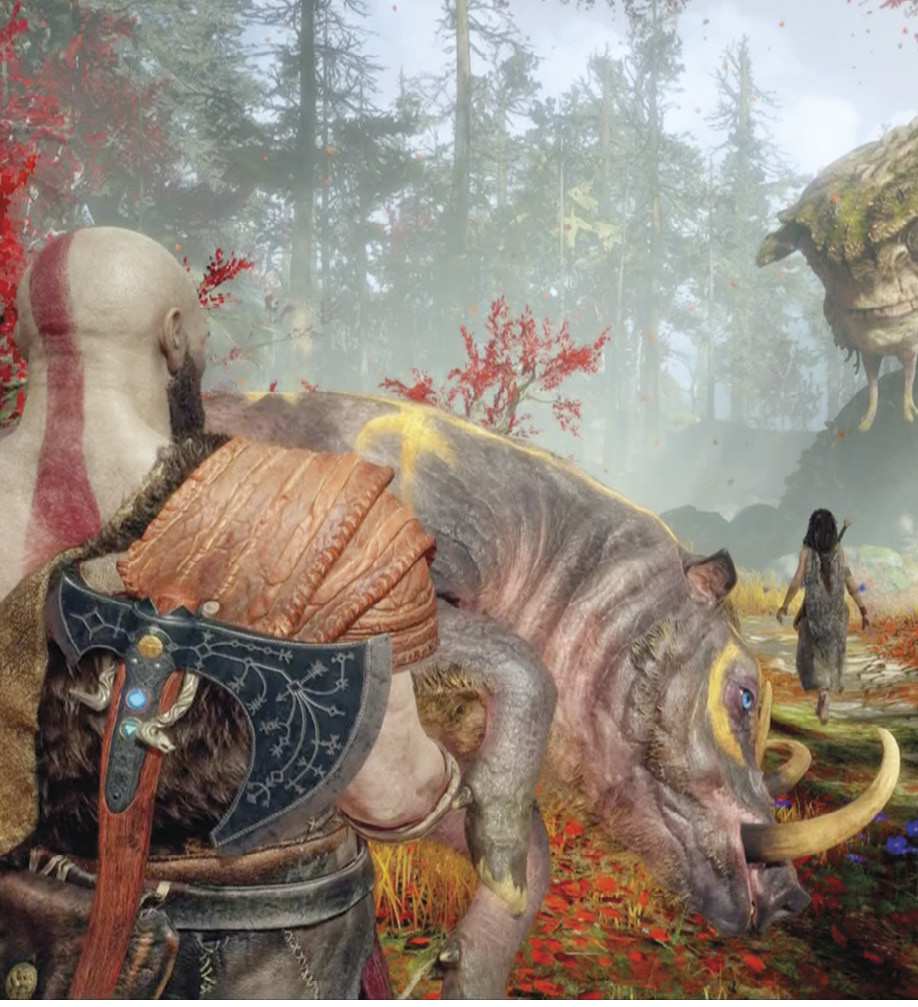
Once Kratos hefts up the boar, simply follow the Witch through the gap (75) into a new area called Sanctuary Grove. She leads you down the path to her house, which sits beneath a massive protector. Proceed under the tortoise’s head (76) to the front entry. Then carry the boar into the house to the stave etched on the floor (77).
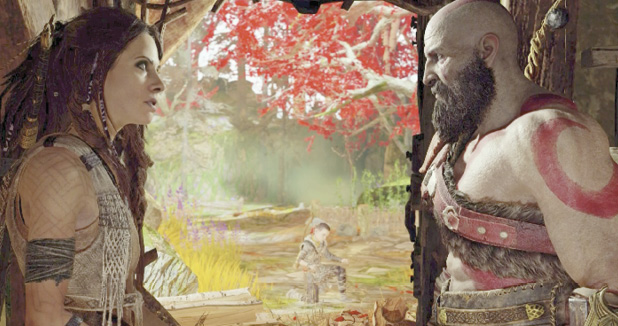
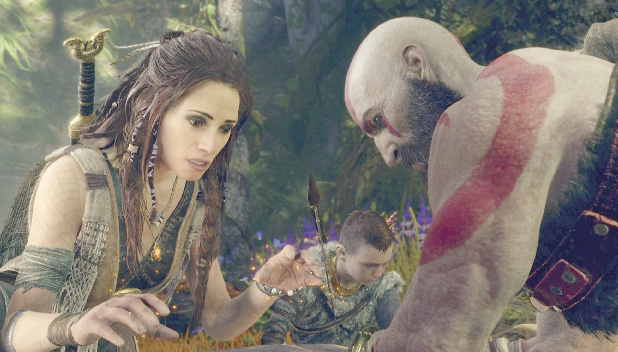
This triggers another scene: the woman prepares a healing potion, but she needs two more ingredients. First, she sends Atreus out to pull a cluster of fresh red root behind the house.
Then, after issuing a warning to Kratos about the gods of these realms, she sends him out to gather Lamb’s Cress, a white-petaled flower in her garden.
OBJECTIVE: Collect the White-Petaled Flower
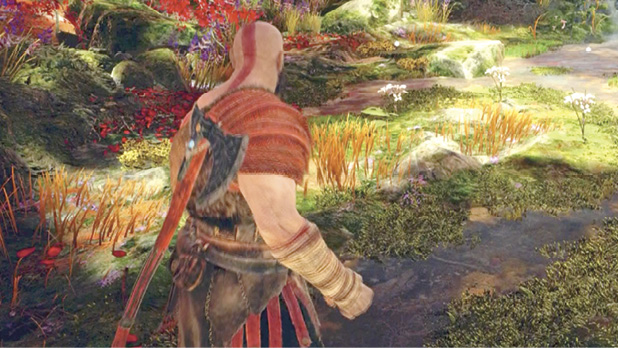
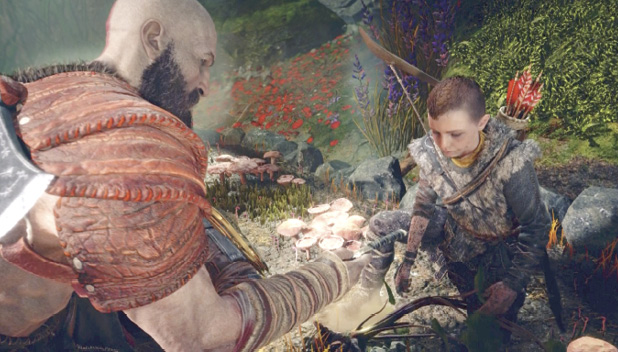
Go to the front door, open it, and head outside. Turn left and enter the side garden (78) to find several clusters of white flowers. Approach a cluster and press Circle to pluck it out.
OBJECTIVE: Return to Atreus
Walk around to the opposite side of the house and find Atreus struggling to pull a root in the back corner of the garden (79). Approach him and press Circle to trigger a short scene: Kratos returns an item that Atreus uses to slice the fresh red root.
OBJECTIVE: Return to the Witch
Go back to the door, open it, and re-enter the house. This triggers a scene: after receiving the potion ingredients, the Witch shows her gratitude by marking Kratos and Atreus with protection staves to keep them hidden from “those who might make your journey difficult.” Then she shows them to a secret underground passage that leads safely out of the woods.
Witch’s Cave
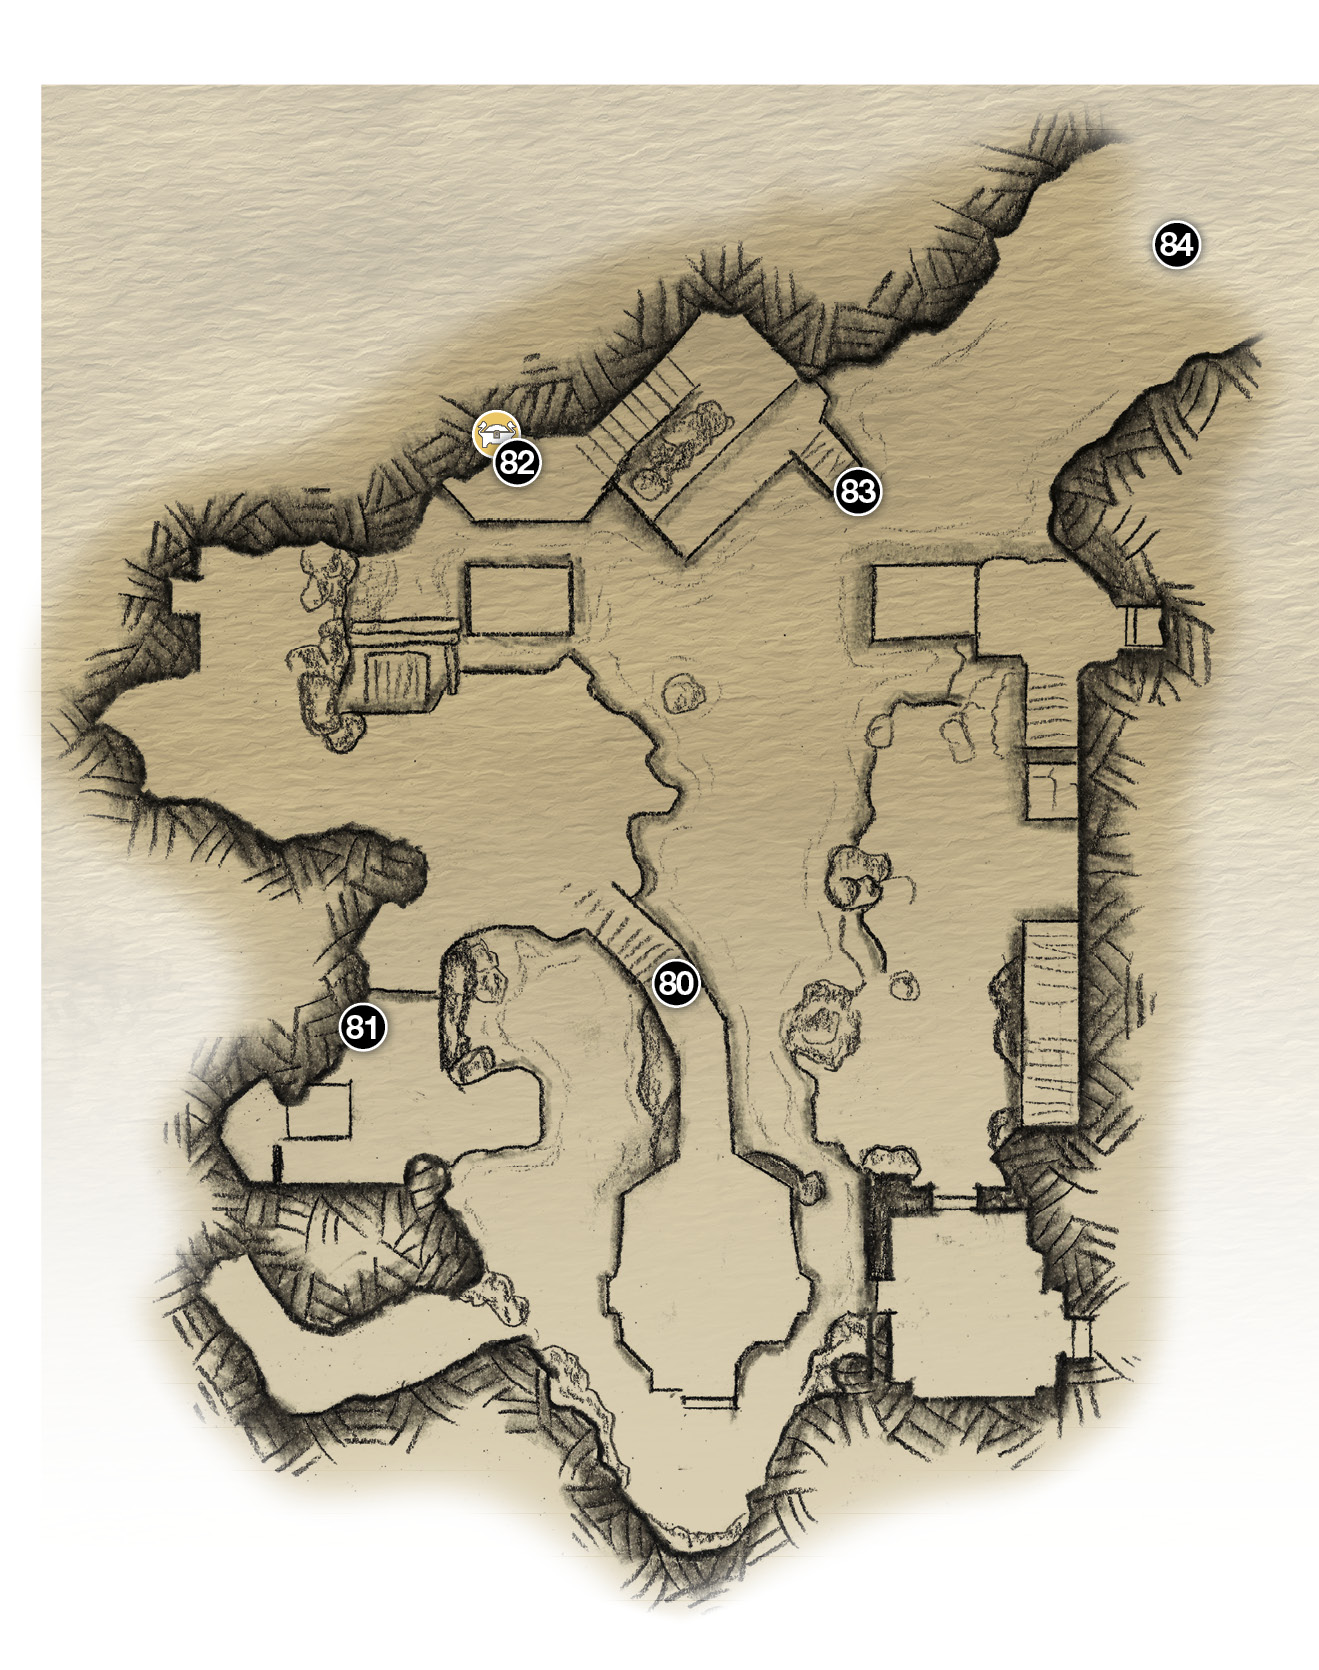
80. Walkway
81. XP pickup
82. Legendary Chest
83. Boat
84. Waterway to lake
Legendary Chest
OBJECTIVE: Get to the Boat
Defeat the Nightmares
You emerge from the house into Witch’s Cave. Head down the curving wooden walkway (80). Exploration can lead to several items, including high-hanging buckets of Hacksilver and a valuable XP pickup (81) on the ground down a side passage. But be ready for a new enemy: a swarm of annoying Nightmares, small flying nuisances that spit painful globs of poison. Watch out for a Draugr that may stumble into the action from a back cave as well.
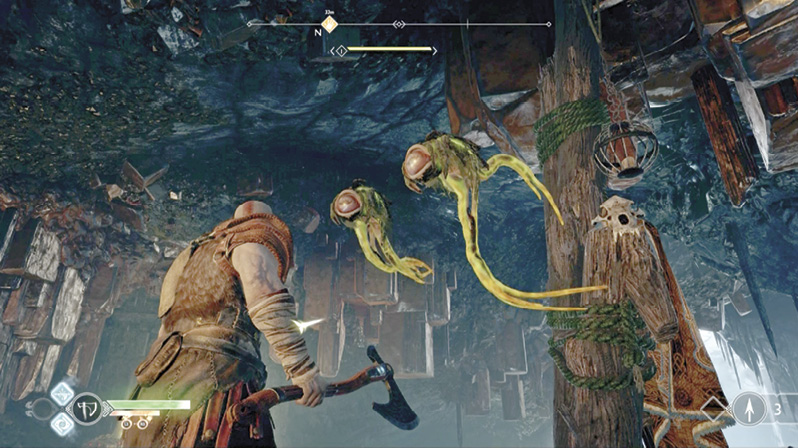
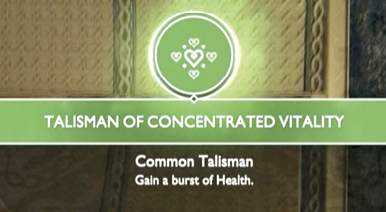
When the upper area of the cave is cleared, hop across the platforms to the far side, where a gleaming Legendary Chest (82) is ripe for looting. Grab the valuable item inside, a Talisman that you can (and should) equip immediately in your armor.
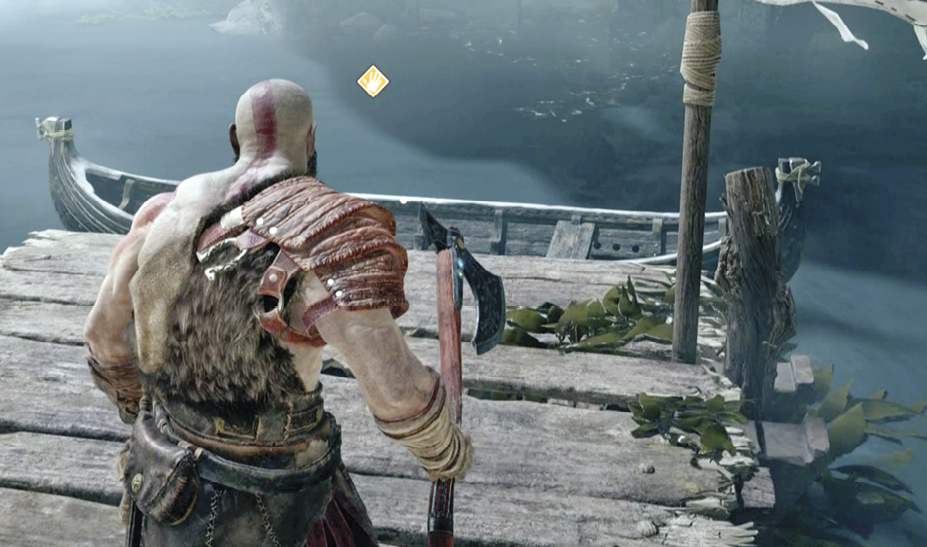
Then proceed down to the pier below. Hop into the boat (83) docked there to push off from the pier.
OBJECTIVE: Boat Toward Daylight
Follow the waterway out of the cavernous passage into the Lake of Nine. Atreus points out the towering statue of Thor. If you veer left and row along the shore, you can get a closer look at the “wall” that appears to be made of scales. Then paddle toward the center of the lake until Atreus points out the glowing statue ahead.
OBJECTIVE: Investigate the Glowing Statue
Row toward the glowing statue, swing around in front of it, and paddle up close. When the Square prompt appears, press that controller button to have Atreus read the runes etched on the statue.
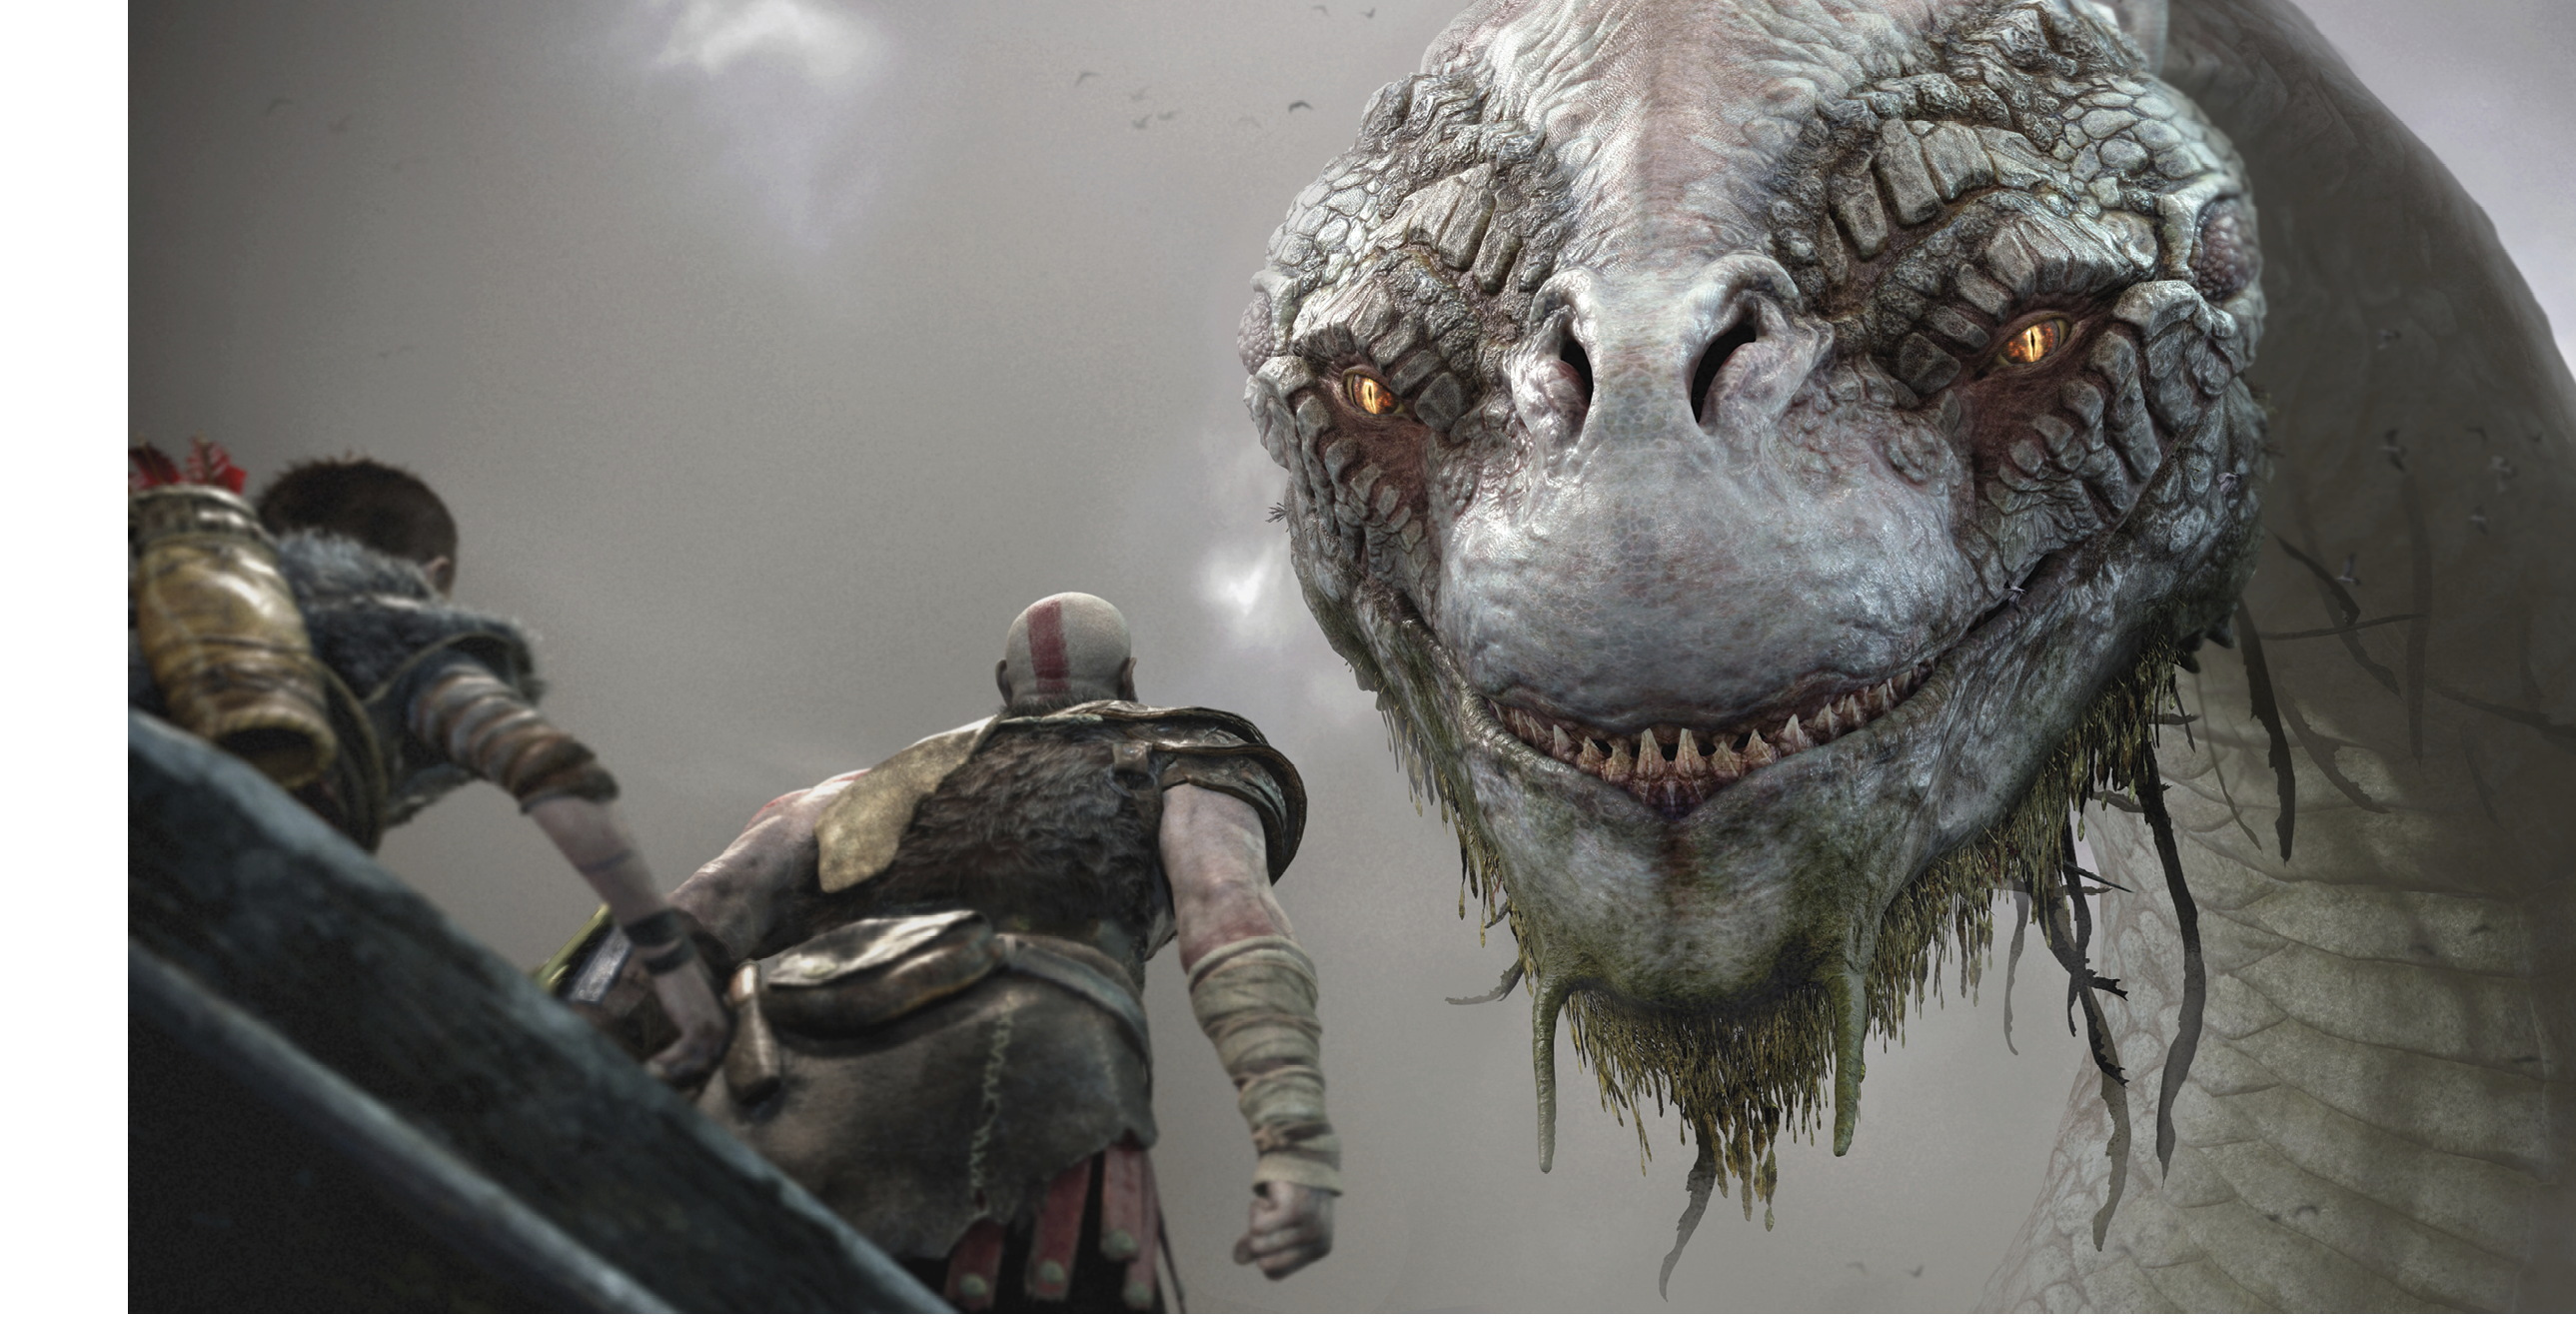
This triggers a mind-blowing scene: when Kratos follows the runes’ directions, the World Serpent appears. After the encounter, the lake’s water level drops considerably, with startling new features revealed both in the lake and around its shore.
Lake of Nine
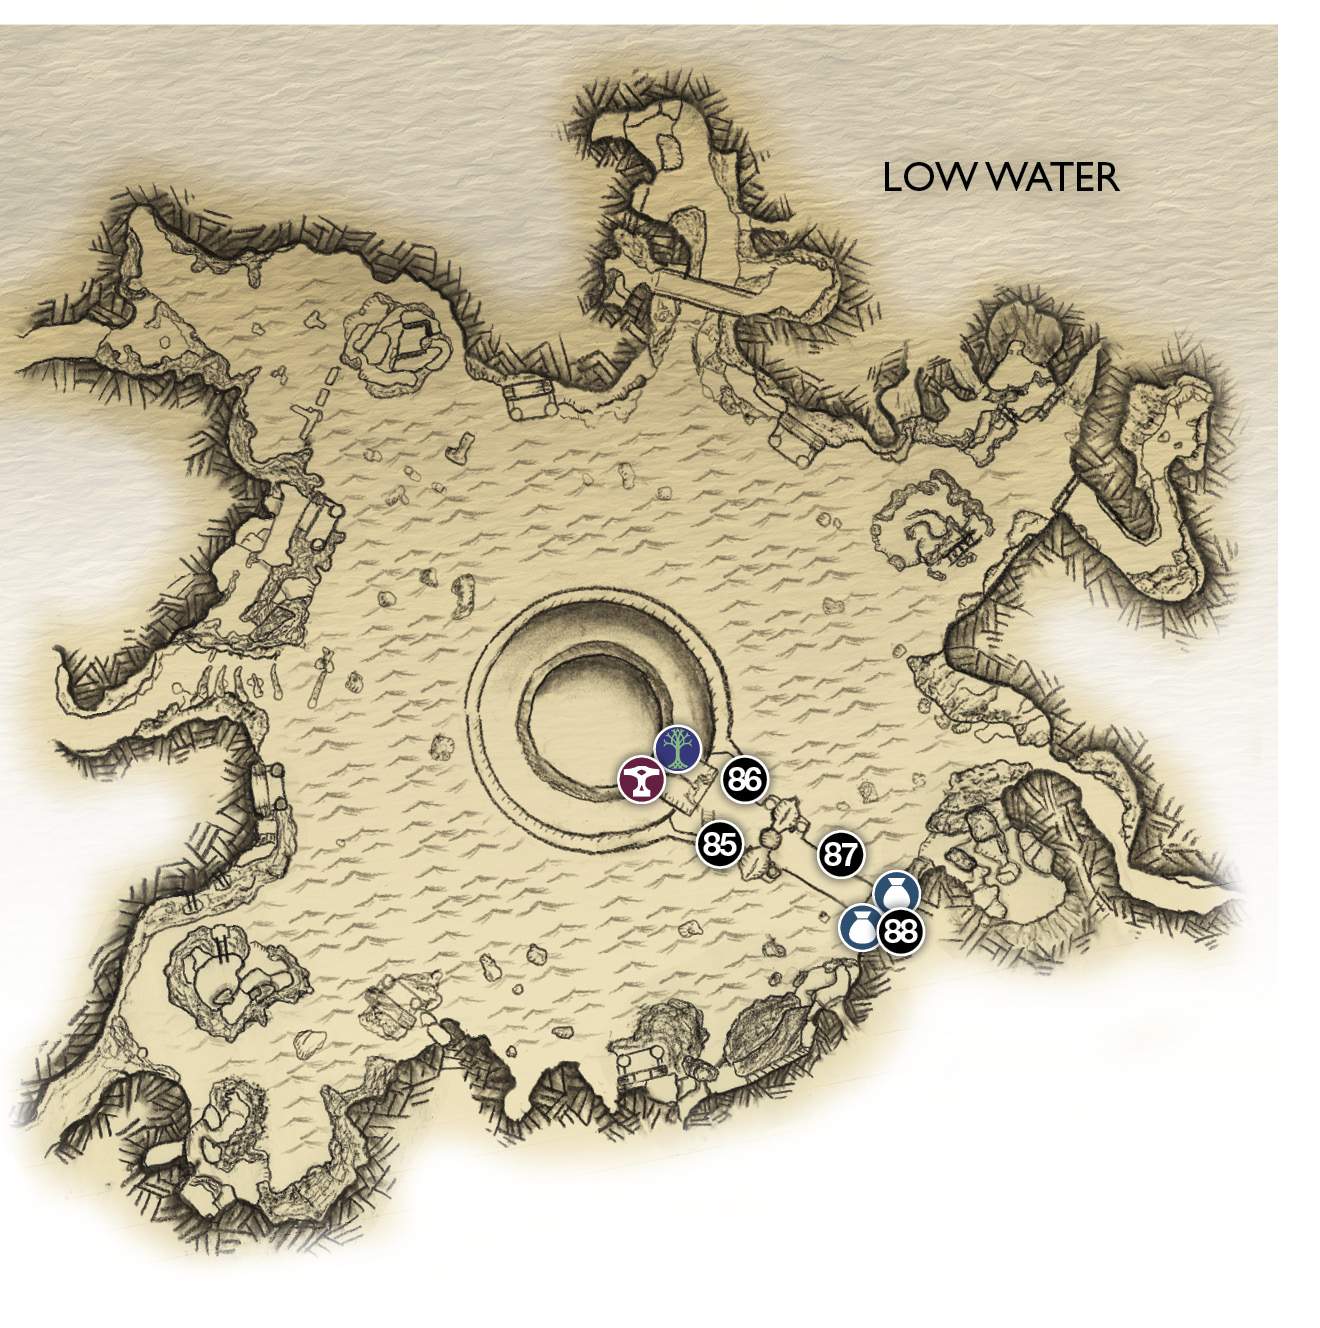
85. Boat dock
86. Temple entrance (Brok’s shop just inside)
87. Bridge to Vanaheim Tower
88. Tower entrance
Chest
 Mystic Gateway
Shop
OBJECTIVE: Dock at the Bridge
Not far away, a golden temple sits atop a great bridge that connects to a tower on the lake shore. Paddle toward the bridge and dock the boat at the white flag (85). Kratos and Atreus automatically step onto the dock.
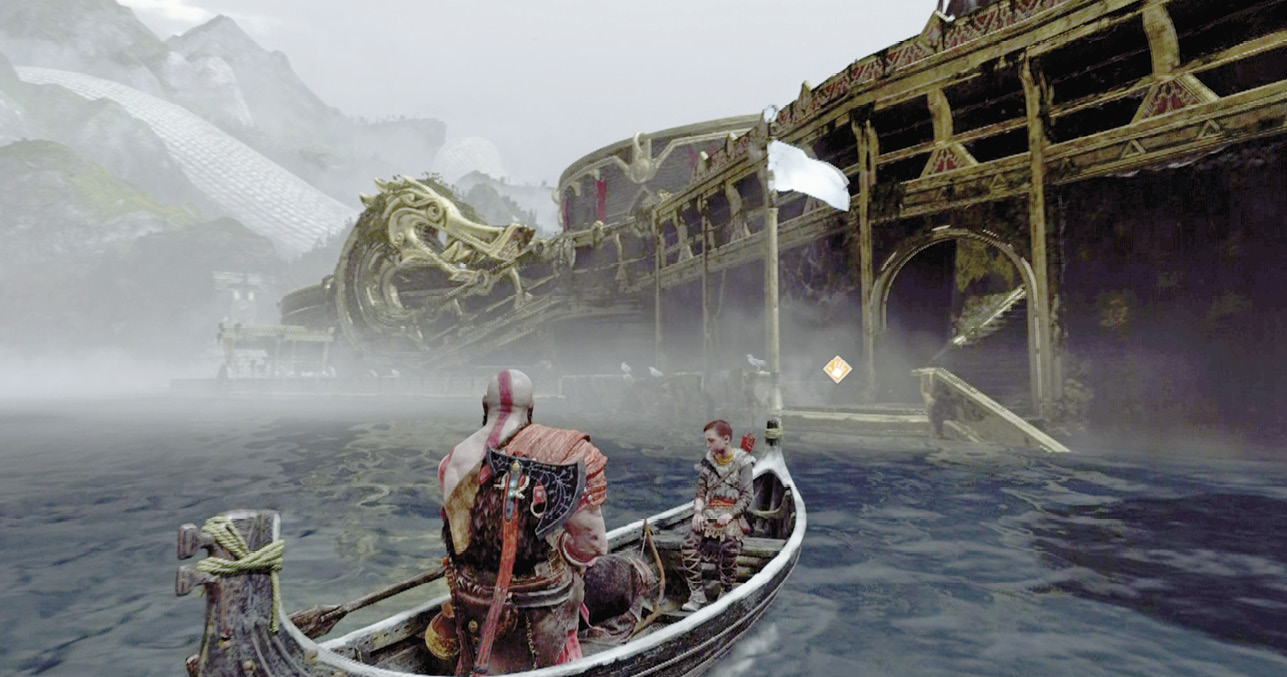
OBJECTIVE: Investigate the Temple and Bridge
Start climbing the stairs leading up from the dock. Near the top, a scene is triggered: Brok pushes open the temple doors and beckons Kratos and Atreus inside to see his new shop.
OBJECTIVE: Talk to Brok
Follow Brok to his shop and talk to him. He tosses a glowing bluish stone to Kratos called the Key of Yggdrasil. The Dwarf points out a glowing pile of rocks across the room and explains that the key transforms it into a magic door to the branches of the World Tree that he calls “a shortcut between the realms.”
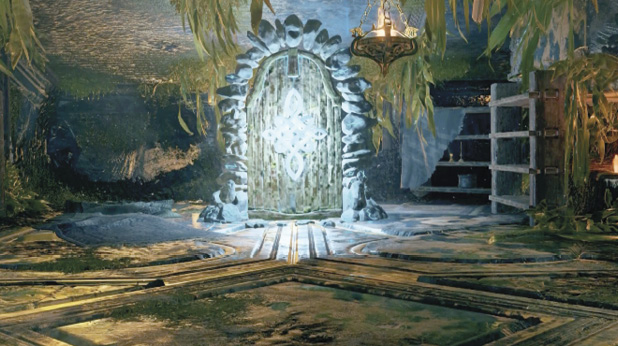
You’ll find a number of glowing rock piles out in the realms like this one. You can use the Key of Yggdrasil to transform each one into a Mystic Gateway that lets you teleport back to this gateway in the temple near Brok’s Shop. This is a “fast” mechanism that eventually lets you jump quickly from region to region. But for now, it’s just a one-way trip from other gateways back to Brok’s Shop.
OBJECTIVE: Make Your Way to the Tower
Access Brok’s Shop and upgrade your gear, then do the same in your Skills Menu. Exit the Temple via the doors you entered and move across the bridge toward the tower on the shore. About halfway across, a squad of Reaver swordsmen attacks. These are Seiðr-enhanced versions of the human Reavers you faced earlier. They fight in a similar manner with a few differences: first, their sword strikes can inflict poison as well as damage. Second, when a Reaver is badly hurt, he can raise his arms and regenerate full health. And third, when Reavers die, they detonate in a deadly, poisonous explosion. Roll away quickly!
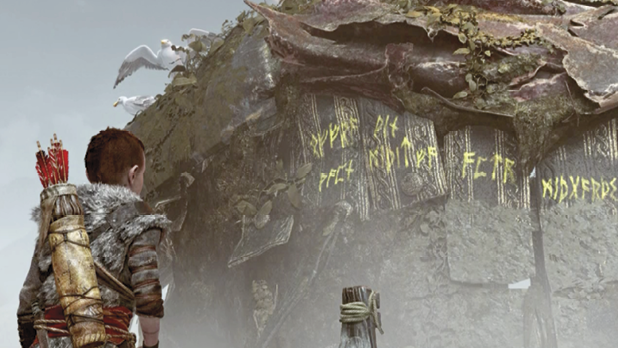
Dispatch Reavers with Atreus’ increasingly effective help. Continue on to the tower door. Before you enter, loot the chests on either side of the doorway. You can also ask Atreus to read the runes on the two braziers (large bowls that can be lit as torches) on either side, but the boy replies that he’s unfamiliar with the writing and needs a cipher to translate it.
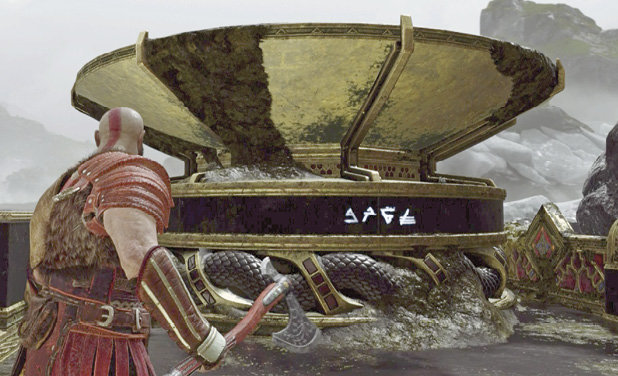
OBJECTIVE: Pass Through the Tower and Caves
Find the Jötnar Shrine
As you open the door, a strange creature leaps up, then burrows right into the floor. This is a Tatzelwurm, but it’s just a preview—you’ll run into more later.
Then two more Reavers advance, brandishing swords. Parry their swings and remember that dying Reavers explode in a poisonous mess, so roll away fast when you see them slump forward and glow bright yellow. But if a Reaver raises his arms, hit him fast to interdict his regeneration.
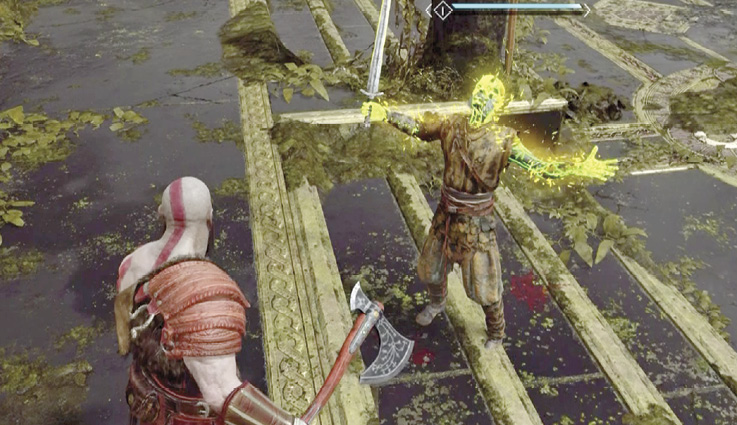
After the fight, you can try having Atreus read the runes on the wall panels, but as with the braziers outside, he needs a cipher first. Then smash through the crude wooden barrier (89) into a small side hall, where you can find and open another Jötnar Shrine.
Vanaheim Tower and Caves
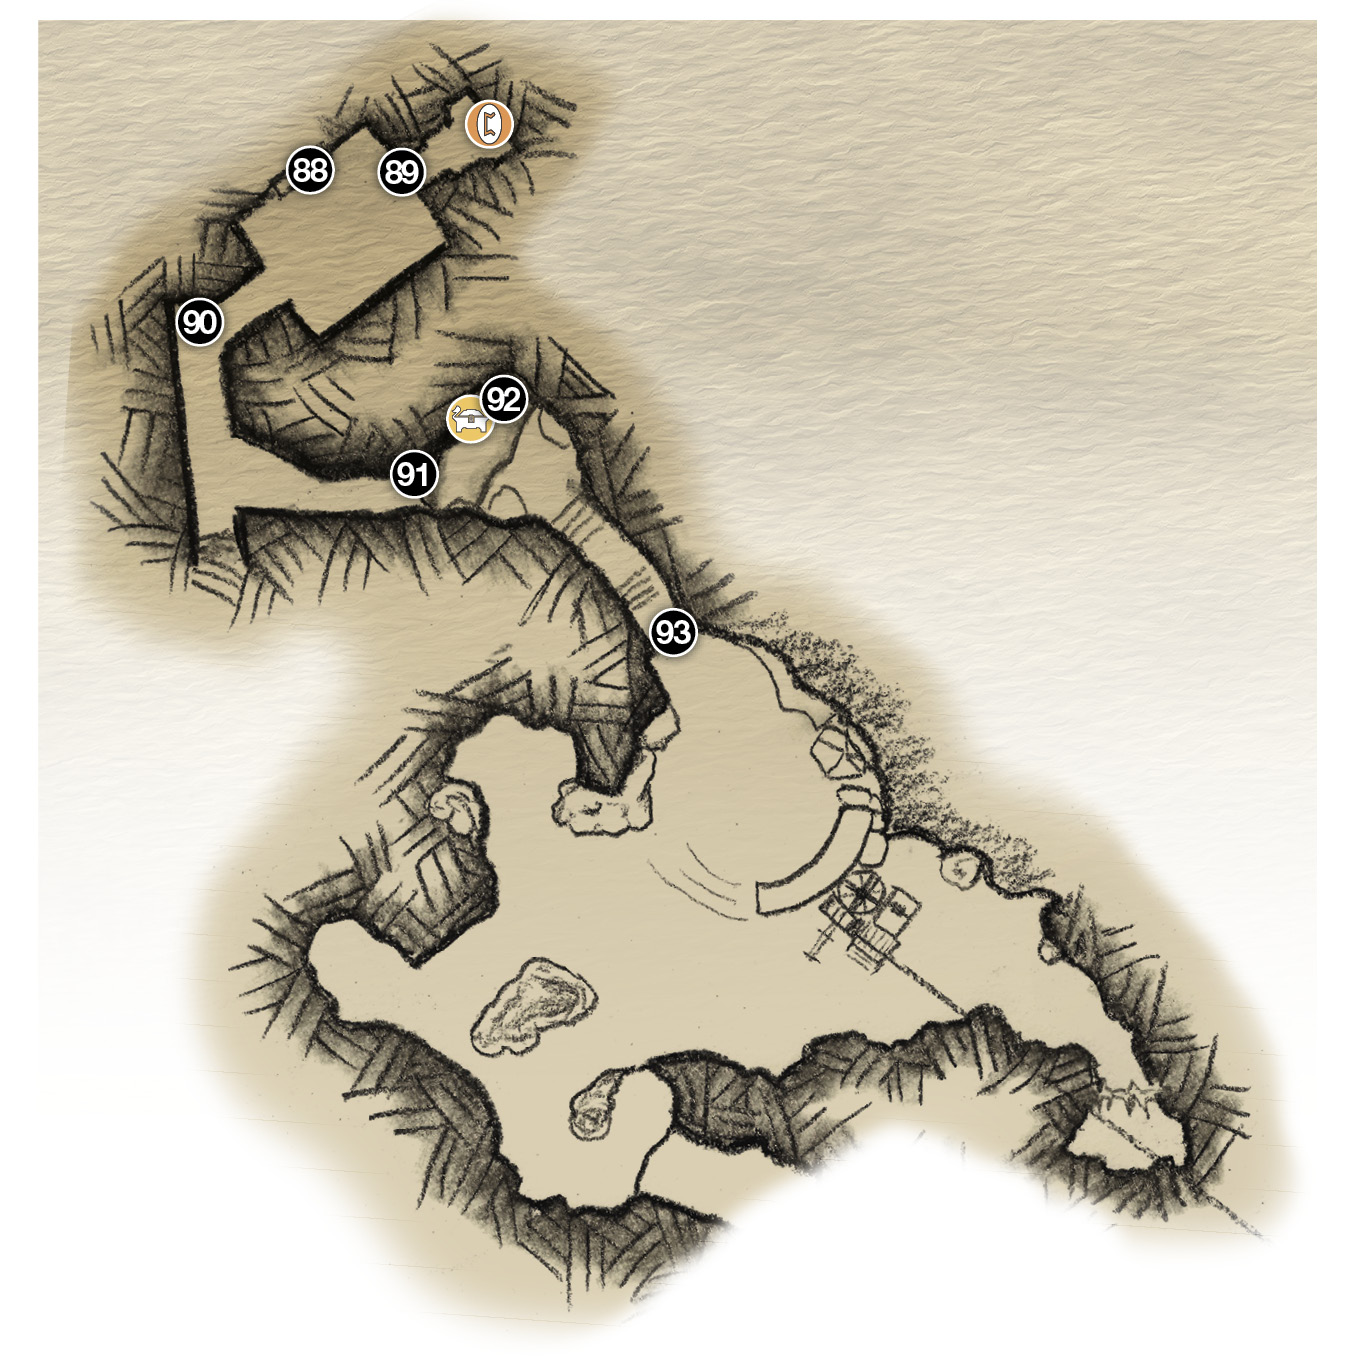
88. Tower entrance
89. Barrier to Jötnar Shrine
90. Scorn Pole
91. Drop-off
92. Scorn Pole
93. Doors to exterior
Legendary Chest
Lore
Get Past the Cave’s Scorn Poles
Cross the main entry hall to the opposite side exit, where you encounter a poisonous cloud filling the corridor. The cloud emanates from a bit of Seiðr magic called a Scorn Pole (90). Fortunately, it’s easy to deactivate—simply toss Leviathan at the pole to freeze it.
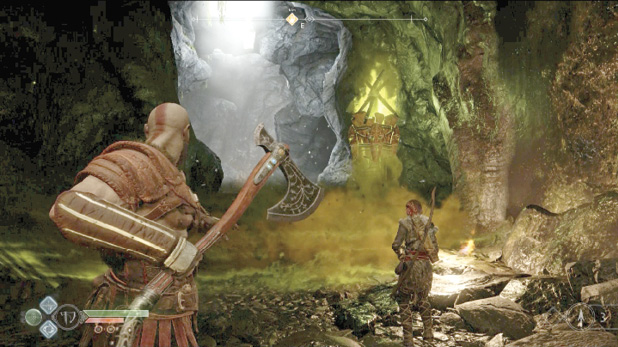
Now you can walk safely through the shimmering field that marks where the poison spreads when the Scorn Pole is active. Grab the Hacksilver pickup in the dead-end ahead, then continue down the corridor. Another active pole is just around the corner, so once you step outside the first pole’s perimeter, recall Leviathan and toss it at the second pole.
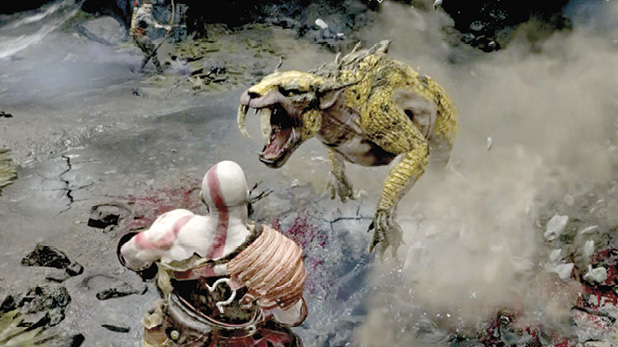
Walk past the second pole’s poison field and proceed to the drop-off (91). Look upward to see a hanging bucket; sling your axe into the disc above to drop it. Then hop down, gather the Hacksilver drop, and toss Leviathan into the next Scorn Pole (92). This unleashes a lunging Tatzelwurm from the tower. Stun the beast with bare-handed attacks, then terminate the threat with a stun grab. Don’t recall Leviathan while you fight, or you may end up engulfed by the scorn pole’s poison!
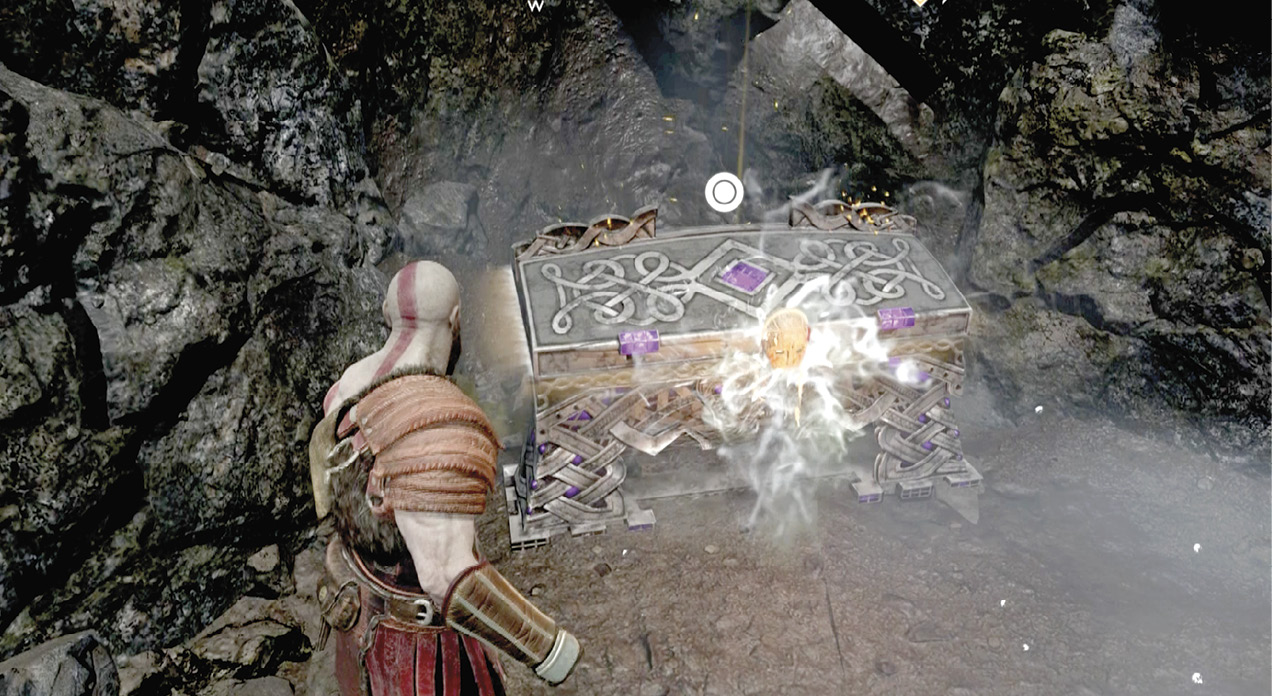
Open the silver Legendary Chest next to the wooden tower to find the first fragment of the Muspelheim Language Cipher. (This discovery unlocks the Muspelheim Favor “The Realm of Fire.” Check out the “Realm Unlocks” section in the Favors chapter for full coverage.) You can also bust up a barrier in front of the nearby Lore Marker, but you can’t activate the marker yet. Don’t worry, though—you’ll be back through these caves later with the equipment you need.
Meet Sindri
Climb the wooden tower and traverse the rocks to the right until you can jump down onto the upper ledge. Climb the stairs to the big doors (93) and open them to trigger a scene: Kratos and Atreus meet Sindri, another Dwarf craftsman and brother of Brok. Kratos hands over Leviathan for improvements; Sindri applies a special “Mark of the Dwarves” that increases your Runic stat. Atreus notes a nearby cable car, currently inoperable, that Sindri calls the “Sky Mover.”
Route to Mountain’s Base
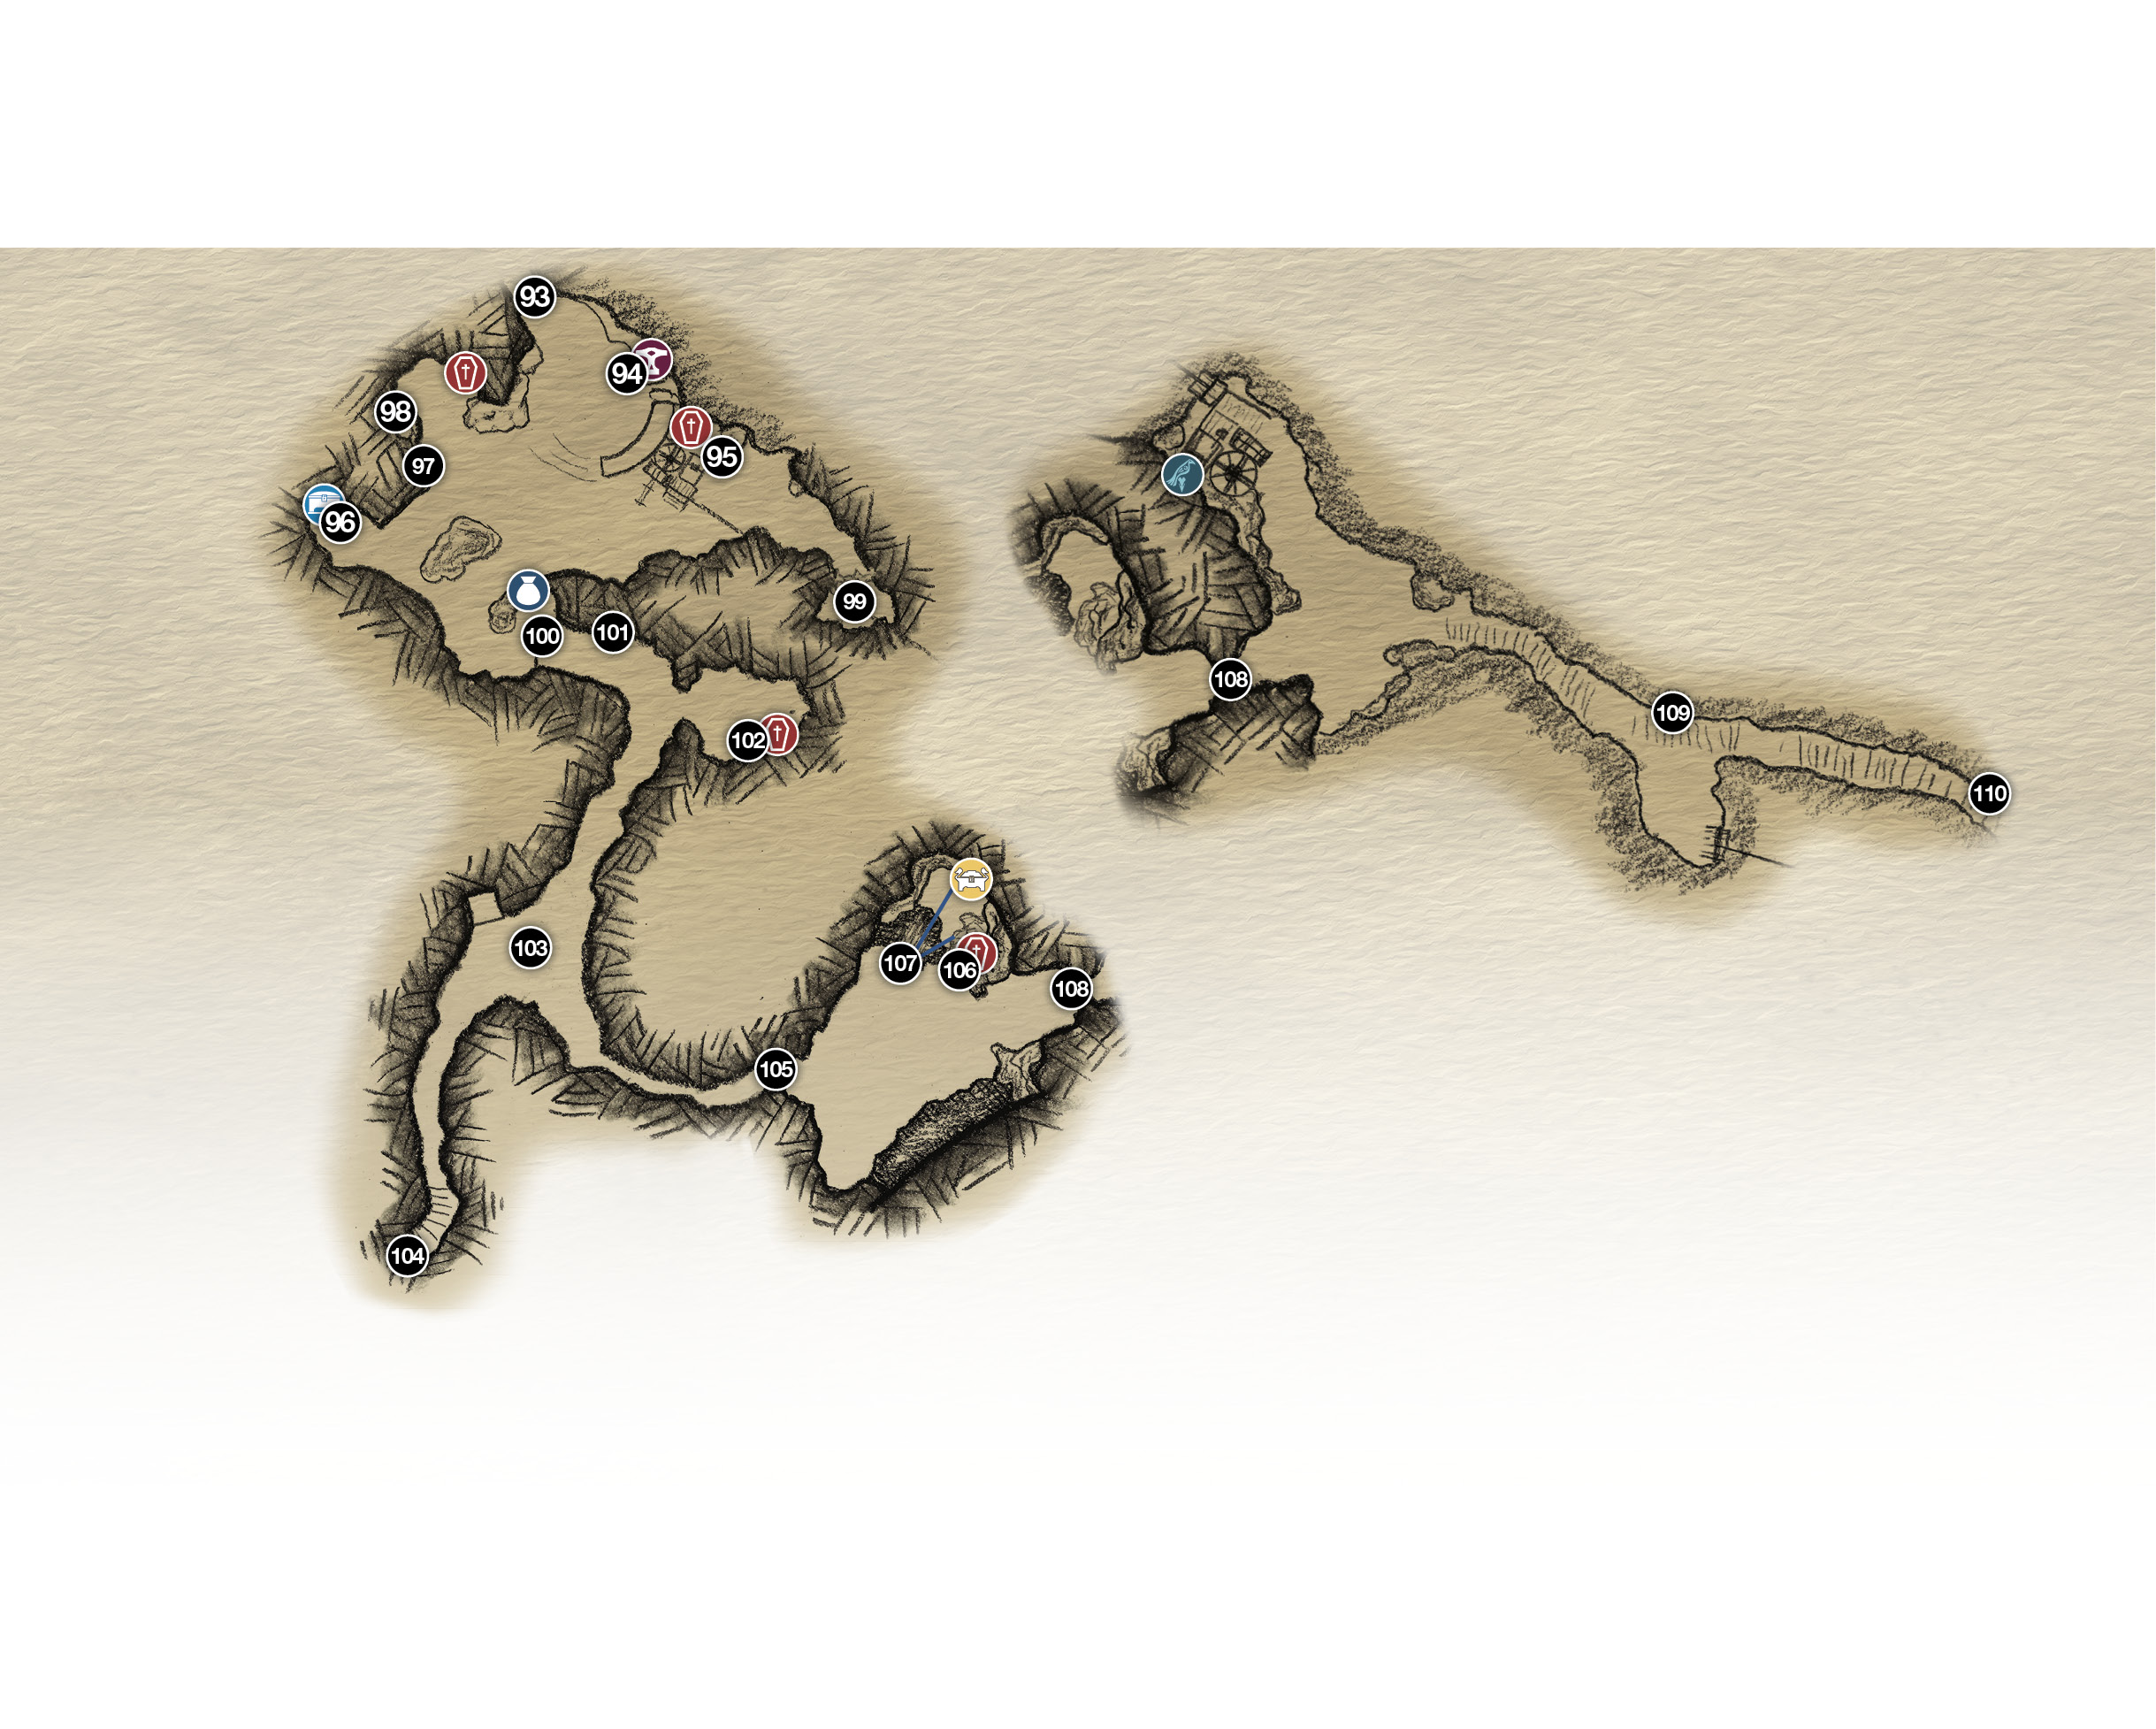
93. Doors to exterior
97. Sindri’s shop
95. Sky Mover (coffin)
96. Nornir Chest
97-98. Spinner (runic seal)
99. Inaccessible items/areas
100. Climb wall
101. Scorn pole
102. Glade (coffin)
103. Clearing (Revenant fight!)
104. Door (locked)
105. Climb cliff
106. Firepot (coffin)
107. Hit two firepots (Legendary Chest)
108. Exit doors (Ogre battle!)
109. Stairs to Mountain entry
110. Black Breath
Chest
Coffin
Legendary Chest
Lore
Nornir Chest
Raven
Shop
OBJECTIVE: Continue Toward the Mountain
Before you continue your Mountain approach, linger at Sindri’s Shop (94) a few minutes and spend some of that Hacksilver you’ve collected. Have Sindri upgrade current equipment or craft new wrist/waist armor using recipes you’ve acquired. You might be able to afford a better outfit for Atreus as well—we like the Basic Sharpshooter Garb for the faster arrow recharge.
After you exit the Craft Menu, spend some XP on new and/or improved Skills. If you’ve picked up a Talisman along the way, be sure to equip it too, from within your Armor Menu. Then press Triangle to talk to Sindri. He has several things to say, so wait for the Triangle icon to reappear a couple of times then press again.
Clear the Area
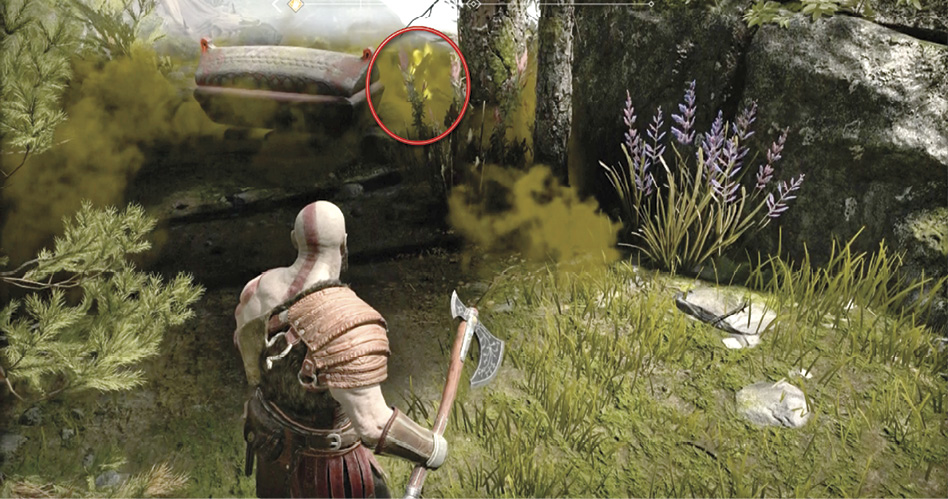
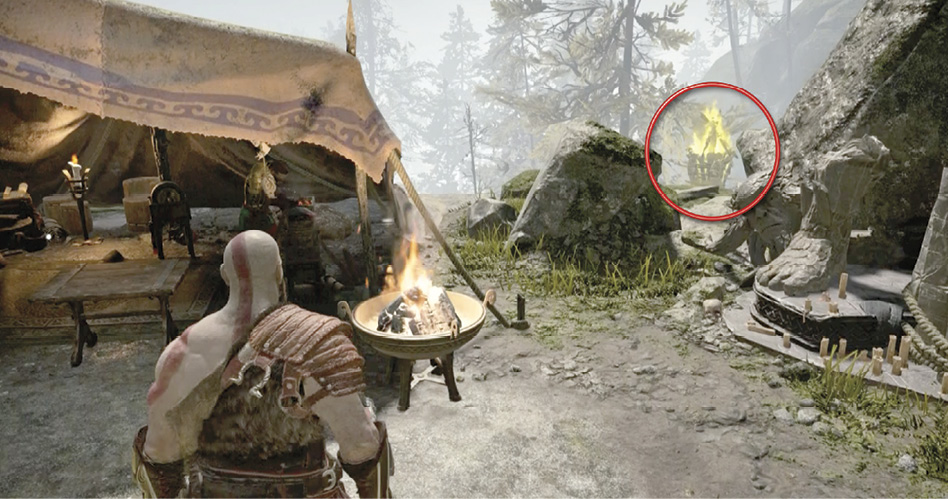
From Sindri’s Shop (94), step out of the circular stone courtyard into the grass to trigger attacks from a large Shadow squad, plus a burrowing Tatzelwurm. Several of the Shadows toss projectiles from high ledges that you can’t climb, so pick them off with Leviathan throws. After you clear the area, go back down to Sindri’s Shop and toss your axe through the rocks to freeze the Scorn Pole (circled in our shot). Open the coffin when the poison dissipates.
Unlock the Nornir Chest
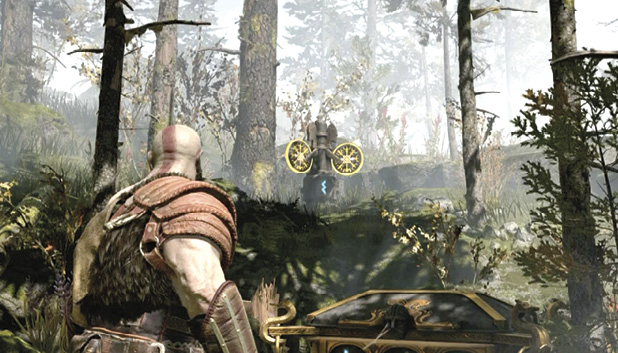
Head up the path from the courtyard to find the Nornir Chest (96). To unlock it, you must knock three spinning mechanisms to the correct rune settings:
- The first spinner is above and left of the Nornir Chest. Facing the chest (96), toss Leviathan once at the spinner’s right disc panel to rotate it to the setting shown in our shot.
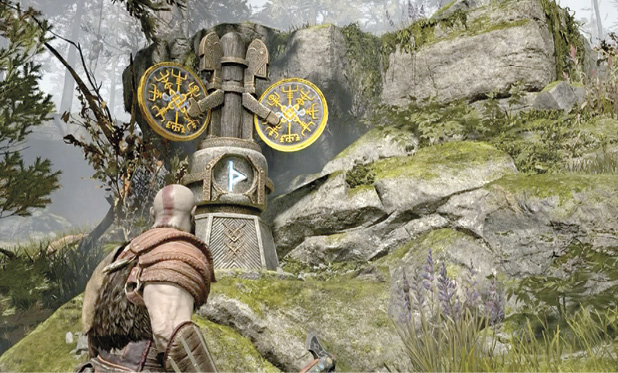
- Another spinner (97) is easily found back down at the bottom of the path. Toss Leviathan once at its right disc panel to spin it to the setting shown.
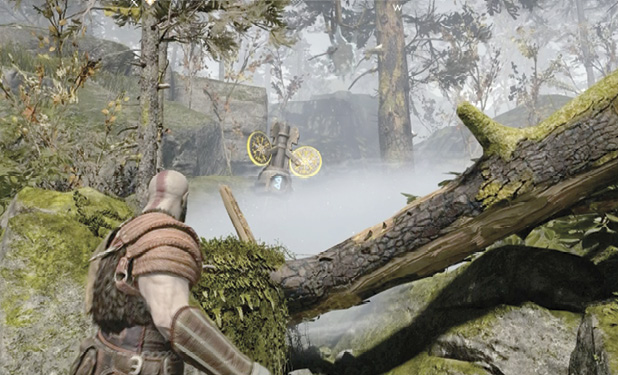
- The remaining spinner (98) is hidden in a poison cloud emitted by a Scorn Pole. To see what rune is showing, toss Leviathan at the Scorn Pole to freeze it, dissipating the cloud. Toss at the spinner’s left disc panel once to get the setting shown.
- Return to the unlocked Nornir Chest and grab the loot inside: another Horn of Blood Mead. You only need one more to boost your Maximum Rage.
Climb to the Foot of the Mountain
Head back downhill, but veer rightward along the beaten path to find the yellow-marked cliff wall (100). Loot the chest just to the left on the terrace, and then climb the wall. Freeze the next Scorn Pole (101) to flush out a Revenant who hisses something and runs away. Continue up the trail, recalling Leviathan once you clear the poison field.
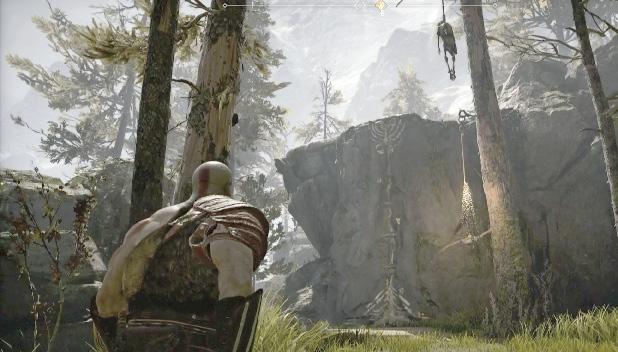
Turn left under the fallen tree to freeze one Scorn Pole and enter a glade with yet another Scorn Pole (102). Freeze the second pole to gain access to a coffin; note the sparkling green light covered in Brambles above it. (You can’t deal with green lights nor Brambles yet.) Open the coffin then step back and recall Leviathan. Turn and refreeze the first Scorn Pole then exit the glade, recalling your axe only when you’ve stepped outside the shimmering perimeter of the poison field.
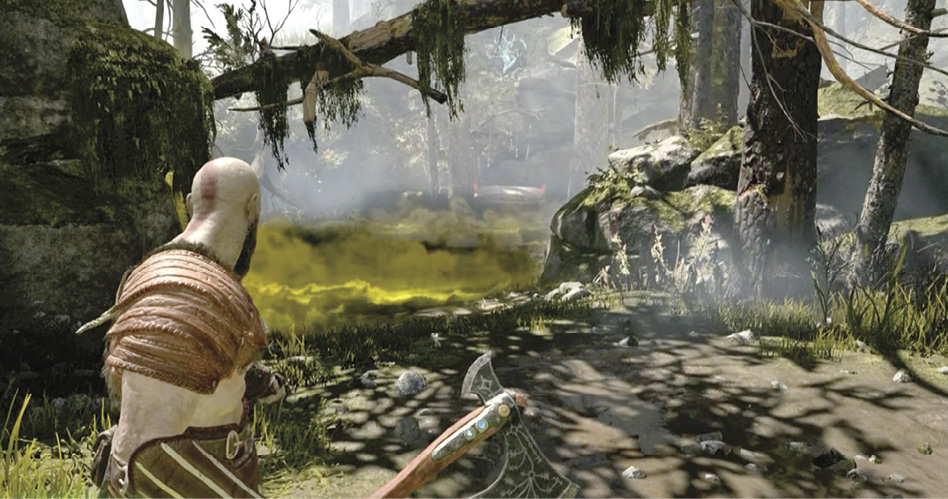
Fight Past the Revenant
Start working up the main path leading through a short tunnel into a clearing (103), where freezing its Scorn Pole reveals a tough Level 2 Revenant! Defeat the creature, using Atreus’ arrows to disable its shroud, then get Kratos in close to stun it.
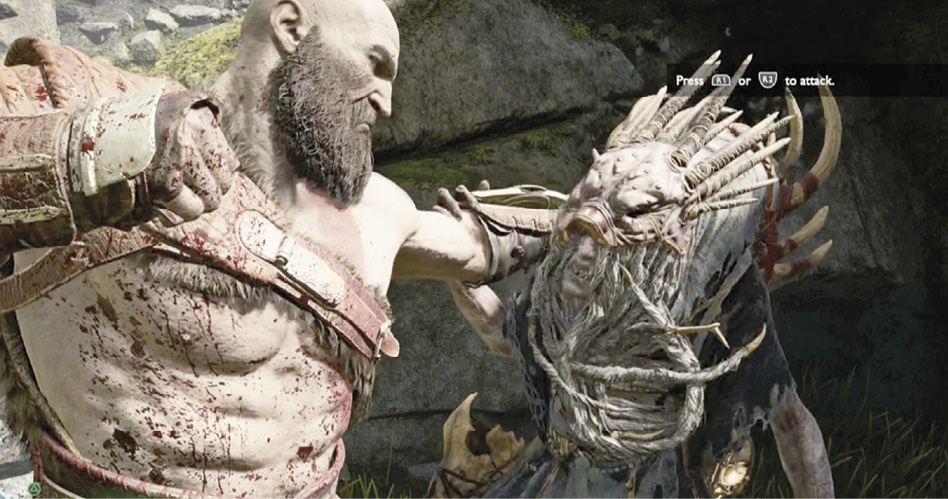
After you defeat the Revenant, check out the rightmost tunnel exit from the clearing—it leads up a staircase to a hefty Hacksilver pickup and another magically sealed chisel door (104) that you cannot yet open.
Head back downstairs to the clearing and go through the other tunnel exit to freeze another Scorn Pole (hanging up high near the ceiling). Climb the tall cliff (105) to a wide plaza under a structure built into the cliff walls ahead. At the top, get ready to face a Level 2 Reaver with a deadly pair of Poison Wolf pets. A good tactic here is to lure the foes near an explosive red firepot then toss Leviathan at the pot. Note that the explosion also destroys any nearby objects or rock piles.
After the fight, nail the firepot near the leftmost pillar (106) at the bottom of the ramp leading up to the big doors. This blasts a path to a coffin you can loot.
Next, walk around the crater to the left to a spot (107) where you can see another firepot behind the rocks, plus a couple more Scorn Poles. Toss the axe at that firepot to blow open a path to the Scorn Poles. Destroy another firepot (circled) next to the left Scorn Pole as well to destroy the pole. Then freeze the Scorn Pole on the right. Now you can reach the Legendary Chest. Grab the valuable item inside.
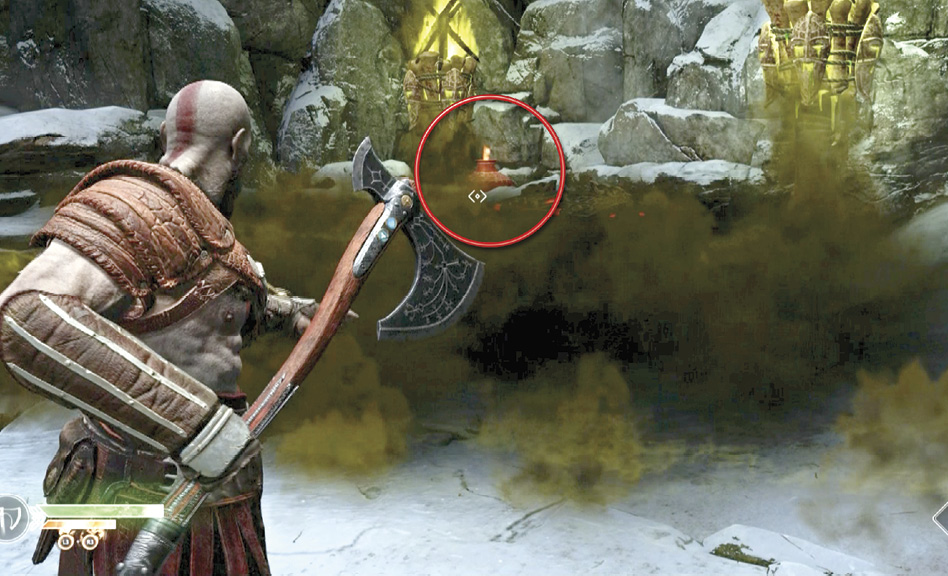
Proceed up the ramp to the big doors (108). A fallen chunk of pillar blocks the doorway, so try to lift it out of the way. This triggers a frightening scene: a massive Ogre bursts through the doors! Kratos and Atreus double-team the monster and manage to knock it out briefly. But then a large squad of Reavers appears…just as the huge beast revives.
Ascend the Mountain Pass
After you defeat the Ogre and Reavers and loot the area, open the big doors to step into the Mountain’s Base area. Nearby you find another coffin covered in Brambles, but you can’t cut through them yet. Follow Atreus up the snowy stairs (109) past a wooden platform (where another Bramble-wrapped coffin sits), until you reach a black fog that blocks the way (110).
This triggers a scene: the Witch appears, explaining that the fog is the “Black Breath,” an evil magic that can only be dispelled by something called the Light of Alfheim. Then she offers to help you find this light in “a realm beyond your own.”