Game Mechanics
Getting Around
The Circle button (in the default control scheme) is used whenever Kratos must interact with the environment. Hold Circle as you approach a hole in the ground or a small obstacle to automatically jump or hurdle it. The button can also be pressed next to the obstacle for the same result.
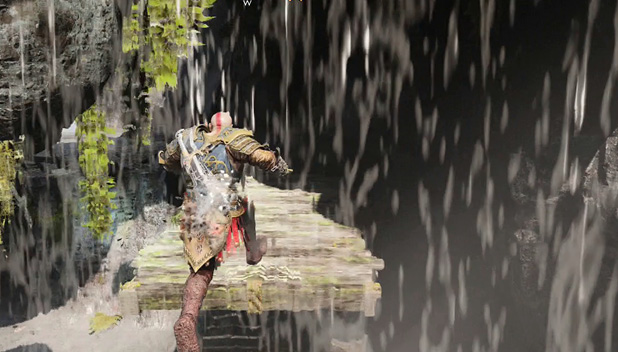
A Circle button appears next to a climbable surface when the ability is available. Push the left stick toward the icon, and press the button to ascend, descend, or shimmy across the terrain. You may need to look around a bit to find the next foothold. The icon also appears on the ground when you’re able to dismount.
The Witch’s Compass
Exiting the Witch’s house for the first time adds the Witch’s Compass to your screen display. The red marker on the compass indicates the direction and displays the distance in meters to the next objective.
Leviathan Axe
The Leviathan Axe is good for more than combat. By holding L2, you can aim the axe. Press R1 for a quick axe toss. Use R2 for a harder throw that hits with Frost, capable of freezing the enemy. Attack a frozen foe low on health for a chance to shatter it. This is only possible on smaller enemies that are not Hel-Walkers wearing ice armor.
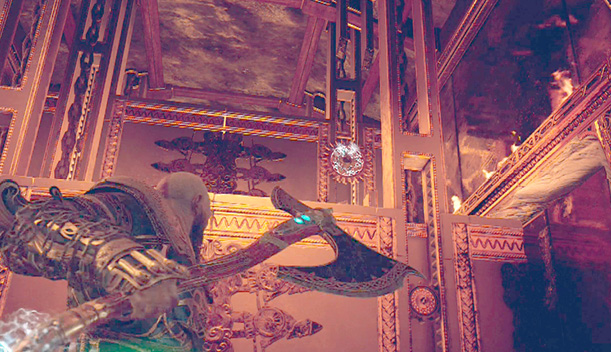
Look for scratch marks on wooden gates and boards, indicating the object can be moved with an axe toss. This is often necessary to solve a puzzle or find hidden treasure. Throw the axe at hanging Hacksilver containers, Odin’s Ravens, and other puzzles such as those involved with unlocking Nornir Chests and gates. Located at many puzzles in the game, a gearwheel can be hit with an axe throw to freeze the contraption in place.
Scorn Poles
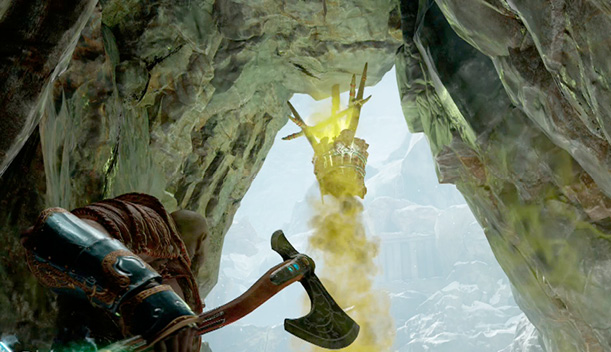
When you encounter a poisonous cloud, look around for a Scorn Pole. Walking into the green cloud causes damage to Kratos, but it can be removed by hitting the pole with Leviathan. This freezes the poison and stops it from spewing into the area. Recall the axe, and the poison starts right back up. Be sure you’re in a safe zone before getting your weapon back.
Explosive Red Jars
Beware of red jars that sit and hang around the environment. Hit one with fire or any attack, and it explodes, causing Burn damage to anyone caught in the blast. These jars are often found near, or hanging above, rocks that can be cleared with the explosion.
Detonate the jar from a safe distance, and then move in to collect the loot or run through the new opening. These explosives are also found next to Scorn Poles, allowing you to remove the Seiðr magic completely.
Light Arrows and Crystals
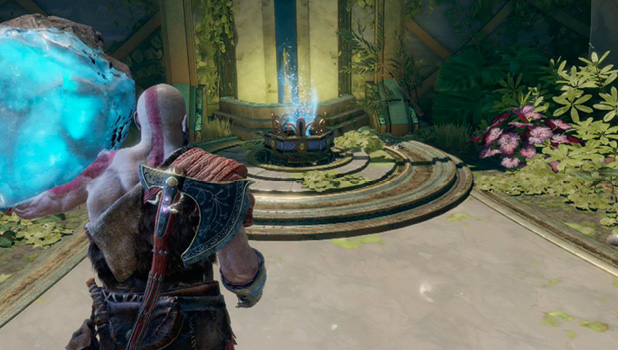
During the Journey, Kratos and Atreus search the Ringed Temple in Alfheim for the light. Once found, it’s applied to Atreus’ bow. This allows him to use light to power crystals, as well as Weaken enemies. Whenever you see a crystal in a torch holder, shoot it with one of Atreus’ Light Arrows to illuminate the area. Do the same to crystals in larger stands to activate light bridges or other mechanisms. Sometimes a crystal must be carried to another location, which Kratos is always happy to do. Place the crystal into a base before hitting it with a Light Arrow. Shooting a crystal that is already lit causes an explosion of light, dealing a significant amount of Stun damage.
Shock Arrows and Shatter Crystals
At the top of the Mountain, Kratos and Atreus are introduced to Shatter Crystals and, soon after, Shock Arrows. The combination of the crystal and electricity causes a big explosion. Shatter Crystals are found near red sap barriers or inside Yggdrasil tree roots. Grab a Shatter Crystal from the root and throw it at or near red sap. Aim at the Shatter Crystal and fire a Shock Arrow its way. This detonates the crystal, destroying any nearby roots. This method is used to remove barriers and solve puzzles.
Thamur’s Chisel
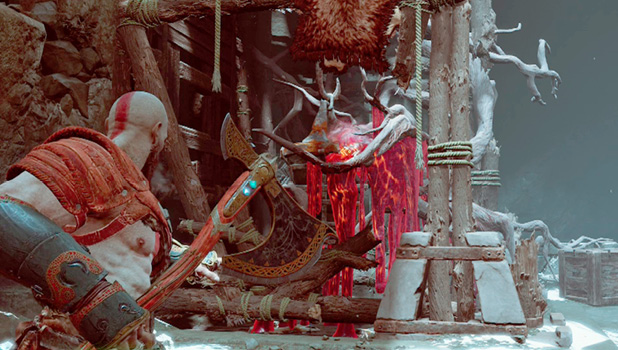
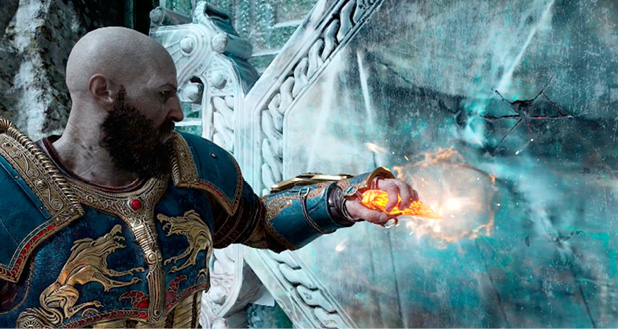
Kratos collects a piece of Thamur’s Chisel during the Journey. It has a particular use for the father and son’s adventure, but it also unlocks the magically sealed doors throughout Midgard and Alfheim. Interact with the door to begin the Chisel minigame.
Use the left stick to move the Chisel around the surface and find the binding point; the controller rumbles and the flame grows when you’re close to the point. Fine-tune the location until you see a bright white glow at the contact point. Press R2 to strike and break the binding. While some doors open with one point broken, others require more.
Hel’s Bramble
Midway through the Journey, Kratos is forced to dig his Blades of Chaos out of storage. The weapon has a wide attack radius and inflicts Burn on susceptible foes. It also burns away Hel’s Bramble, which is found throughout Midgard and Helheim. The Bramble typically blocks you from loot, but it can also hold things up. When on the ground, you must hit it three times to set it ablaze and remove the substance. When destroying Hel’s Bramble above by aiming, you must hit the Brambles twice.
The Winds of Hel
After defeating the Helheim Bridge Keeper, be on the lookout for ball-shaped devices that glow green—devices you see in a number of places along the Journey. These are wind traps, for a special kind of wind. The trap glows brightly when it holds the Winds of Hel. Otherwise, it sits empty waiting for the winds to be deposited inside.
Aim the Blades of Chaos at the Winds of Hel, and fire to grab ahold of the energy. Next, aim at an empty trap and hit it to transfer the energy into the new location. The Winds of Hel are unstable, so your Blades can retain the green energy for only 10 seconds before it automatically zaps back into the wind trap from which you extracted it. The moment you capture the winds with your blade, a “Winds of Hel Energy” timer appears on the left side of the screen, counting down the seconds from 10.0.
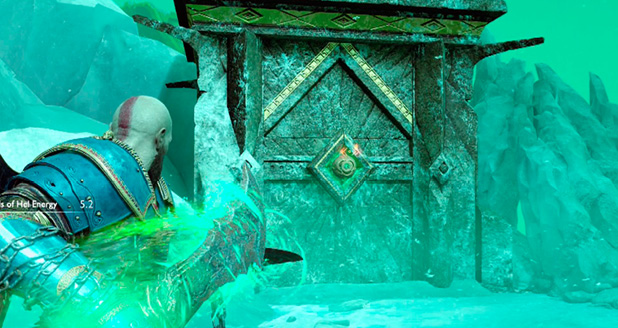
This energy is used to power doors around Midgard and Helheim, revealing valuable loot.
Sometimes it’s necessary to transfer the energy between a number of traps before reaching the final destination.
Look and Listen for Hints
Whenever you’re unsure where to go, look around for the mysterious yellow markers painted on walls, cliffs, or other surfaces. These usually indicate the critical path forward.
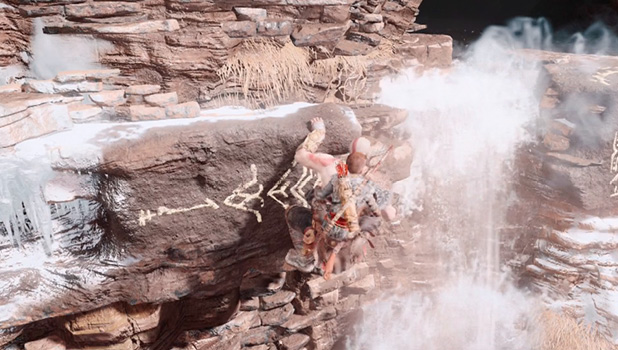
Pay attention to Atreus as you navigate through the world, especially confusing spaces. He points at key features and makes comments that help you determine your next step. Mimir adds his advice as well once he joins the crew.
Further Exploration
As the aforementioned abilities are gained during the Journey, you can return to previously visited locations in order to gather more treasure. Always be on the lookout for Hel’s Bramble, Winds of Hel traps, light crystals, and red sap. Remember where you see these obstructions, and return with the necessary tools to find valuable loot.
Dwarven Shops
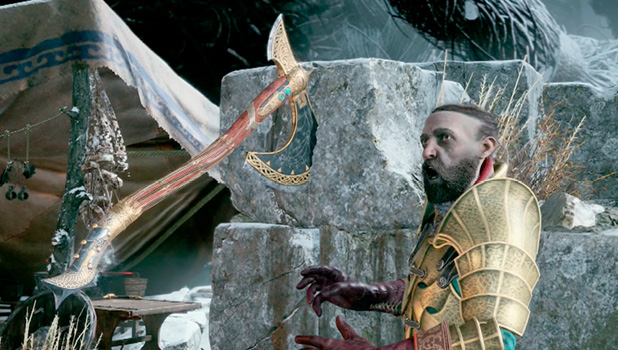
Almost everywhere you go, you manage to run into one of the Huldra Brothers, Brok or Sindri. They have the ability to craft armor from recipes that are unlocked along the way. Certain items are also available for purchase, while some items you no longer require can be sold for Hacksilver. Once unlocked at the shops, a Resurrection Stone can be purchased, though you can only hold one at a time. New items are constantly being added as you progress through the Journey, complete objectives, and find recipes. Return to the Dwarves often to accrue better gear. Numerous resources found throughout the environment are required to craft and upgrade equipment, so loot every container you find.
Lost Items
Items left behind on the battlefield appear at Huldra shops under the Lost Items Tab. Hold Square to claim all lost items. Items that may be lost on the battlefield include the following:
| Item Lost | Location | Miniboss/Boss |
|---|---|---|
|
Ivaldi’s Anvil |
River Pass |
Brenna Dauði |
|
Frozen Flame |
||
|
Wrath of the Wolf |
Svartálj |
|
|
Symbol of Survival |
Svartálj |
|
|
Fragmented Heart of Alfheim |
||
|
River of Knives |
The Mountain |
Járn Fótr |
|
Frozen Flame |
The Mountain |
Járn Fótr |
|
Frost Sigil of Defense |
Thamur’s Corpse |
Ice Ancient |
|
Boar Stampede |
Thamur’s Corpse |
Stonebeard King |
|
Leiptr Alloy |
Thamur’s Corpse |
Magni and Modi |
|
Frozen Flame |
Thamur’s Corpse |
Magni and Modi |
|
Chaos Flame |
Helheim |
Máttugr Helson |
|
Tartarus Rage |
Týr’s Vault |
Grendel of the Ashes/Grendel of the Frost |
|
Chaos Flame |
Týr’s Vault |
Grendel of the Ashes/Grendel of the Frost |
|
Frost Sigil of Focus |
The Mountain (return) |
Frost Ancient |
|
Chaos Flame |
Helheim (escape) |
Hel-Traveler |
|
Deadly War Handles |
Helheim |
Hel-Traveler |
|
Wrath of Artemis |
Realm Between Realms |
Dauði Munr |
|
Nemean Crush |
Lake of Nine (Helheim Tower beach) |
Death Eater |
|
Fire Sigil of Focus |
Fire Ancient |
|
|
Seiðr Sigil of Protection |
Soul Devourer |
|
|
Fire Sigil of Might |
Lava Ancient |
|
|
Vivarium Key Orb |
Dauði Hamarr |
|
|
Horn of Heimdall |
Dauði Hamarr |
|
|
Fire Sigil of Protection |
Soul Eater |
|
|
Aegir’s Protection |
Elite Repopulation |
|
|
Seiðr Sigil of Toughness |
Fáfnir’s Storeroom |
Forest Ancient |
|
Shattered Gauntlet of Ages |
||
|
Deadly Grips of Vitality |
Konùnsgard Stronghold |
Hel-Traveler |
|
Seiðr Sigil of Runic |
Konùnsgard Stronghold |
Soul Devourer |
|
Feathers of the Fallen Servant |
Thamur’s Corpse |
Valkyrie Gunnr |
|
Asgardian Steel |
Thamur’s Corpse |
Valkyrie Gunnr |
|
Heart of Vanaheim |
Valkyrie Geirdriful |
|
|
Asgardian Steel |
Valkyrie Geirdriful |
|
|
Valkyrie’s Might |
The Mountain |
Valkyrie Eir |
|
Eye of the Winged Chosen |
The Mountain |
Valkyrie Eir |
|
Asgardian Steel |
The Mountain |
Valkyrie Eir |
|
Talisman of the Realms |
Witch’s Cave |
Valkyrie Kara |
|
Heart of Midgard |
Witch’s Cave |
Valkyrie Kara |
|
Asgardian Steel |
Witch’s Cave |
Valkyrie Kara |
|
Grips of the Valkyrie |
Helheim |
Valkyrie Rota |
|
Asgard’s Shard of Existence |
Helheim |
Valkyrie Rota |
|
Asgardian Steel |
Helheim |
Valkyrie Rota |
|
Perfect Asgardian Steel |
Helheim |
Valkyrie Rota |
|
Waist Guard of the Valkyrie |
Valkyrie Olrun |
|
|
Ivaldi’s Corrupted Mind |
Valkyrie Olrun |
|
|
Asgardian Steel |
Valkyrie Olrun |
|
|
Perfect Asgardian Steel |
Valkyrie Olrun |
|
|
Gauntlets of the Valkyrie |
Valkyrie Göndul |
|
|
Leviathan’s Eye |
Valkyrie Göndul |
|
|
Asgardian Steel |
Valkyrie Göndul |
|
|
Perfect Asgardian Steel |
Valkyrie Göndul |
|
|
Chaos Flame |
Valkyrie Göndul |
|
|
Wing of the Fallen |
Valkyrie Hildr |
|
|
Aesirbane |
Valkyrie Hildr |
|
|
Cuirass of the Valkyrie |
Valkyrie Hildr |
|
|
Heart of the Valkyrie |
Valkyrie Hildr |
|
|
Asgardian Steel |
Valkyrie Hildr |
|
|
Perfect Asgardian Steel |
Valkyrie Hildr |
|
|
Retribution |
Council of Valkyries |
Valkyrie Queen Sigrun |
|
Njörd’s Temporal Stone |
Council of Valkyries |
Valkyrie Queen Sigrun |
|
Asgardian Steel x12 |
Council of Valkyries |
Valkyrie Queen Sigrun |
|
Perfect Asgardian Steel x6 |
Council of Valkyries |
Valkyrie Queen Sigrun |
 furr
furr furr
furrRealm Travel Room
After arriving at an impasse while attempting to reach the Mountain, you’re introduced to the Realm Travel Room inside Týr’s Temple. With the required travel rune, you can use the table in the middle of the room to travel to four other realms.
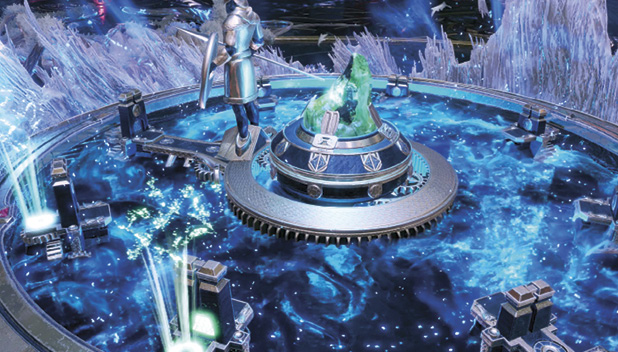
Realms Available for Travel
| Realm | When First Available |
|---|---|
|
During the Journey: “A Realm Beyond” |
|
|
Helheim |
During the Journey: “The Sickness” |
|
Complete Favor: “Realm of Fire” |
|
|
Complete Favor: “Realm of Fog” |
Mystic Gateways
After you meet up with Brok at Týr’s Temple, Mystic Gateways become available to allow you to quickly return to Brok’s shop. Later in the game, Brok improves the travel system so that you can travel between any two gateways. Note that you must discover the gateway before it can be used.
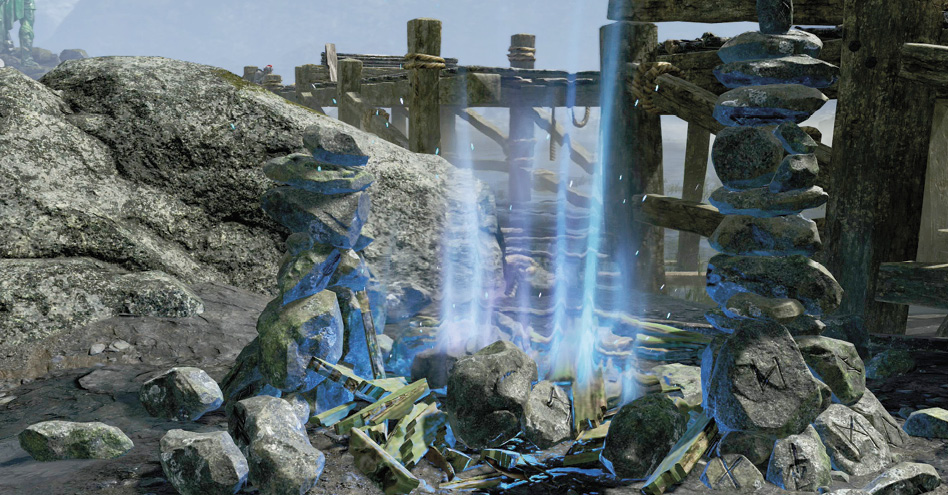
Approach a Mystic Gateway and press the Circle button to bring up a map with all available gateways listed. You can only select Brok’s shop in the temple prior to Brok’s upgrade to the system; otherwise, select the desired destination. This takes you into the Yggdrasil tree. You can walk around the path, or stand and wait while listening to the banter. Once the destination loads, a bright door appears ahead. Interacting with it sends you to the Mystic Gateway at the new location. Note that you can only use gateways in the realm you’re currently in; you cannot travel between realms using the gateways.
A Mystic Gateway is available on the lower level of every Hidden Chamber, next to the elevator. If you unlock and enter one of these chambers, but don’t plan on fighting the Valkyrie or Realm Tear, you should at least discover the gateway. This provides an easier return point when you’re ready to take on the challenges. An additional perk to using a Mystic Gateway is that interacting with one restores Kratos to full health.
Kratos’ Health
The Norse lands are dangerous, with deadly traps and brutal enemies. Keep an eye on Kratos’ health, represented by the green bar near the bottom of the screen. As Kratos takes damage, this meter depletes until he’s defeated.
Loot Iðunn Apples from Nornir Chests; your maximum health increases with every three apples collected. There are nine Iðunn Apples in all, for a total of three upgrades.
Resurrection Stones
Resurrection Stones allow Atreus to revive Kratos when he falls in battle, but only one can be carried at any given time. They can be purchased and sold at Brok’s and Sindri’s shops. There are three types, which revive Kratos to different levels of health and rage. To use a Resurrection Stone, press Square when prompted after Kratos goes down. There’s limited time to perform the action, so be ready. It’s not necessary to use up your Resurrection Stone, so decide whether the death is worth the price of the item.
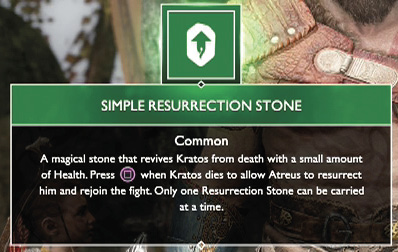
| Resurrection Stone | Purchase Cost (HS) | Sell Price (HS) | Description | Availability |
|---|---|---|---|---|
|
Simple Resurrection Stone |
2500 |
500 |
Revives Kratos with a medium amount of health. |
Reach Brok’s shop at Lake of Nine for the first time. |
|
Superior Resurrection Stone |
5000 |
1000 |
Revives Kratos with a large amount of health. |
Reach the Mountain Summit for the first time. |
|
Berserker’s Resurrection Stone |
10,000 |
1500 |
Revives Kratos with full rage and a small amount of health. |
Retrieve the Blades of Chaos. |
Spartan Rage
The orange bar below the health meter indicates Kratos’ Spartan Rage. As Kratos takes damage, the meter builds. Once it’s full, click L3 + R3 to activate Spartan Rage. In this state, Kratos’ attack power is increased with unique melee attacks. See “Using Spartan Rage” later in this chapter for more information.
Collect Horns of Blood Mead from Nornir Chests to increase maximum rage. Three horns provide a boost to rage, with a total of nine horns for three upgrades in all. These three upgrades add a second segment to the rage bar. You can unleash Spartan Rage as soon as the left segment is full, or wait for a longer period of rage.
Earning XP
XP is earned by killing enemies, completing objectives, and discovering Lore and valuable items. Use XP to purchase Skills for the axe, Blades, shield, and bow. It can also be used to upgrade Runic Attacks and Summons. The three weapons must be upgraded to gain access to all Skills. Refer to the Equipment chapter for more information on all available Skills and attacks.
Runestones
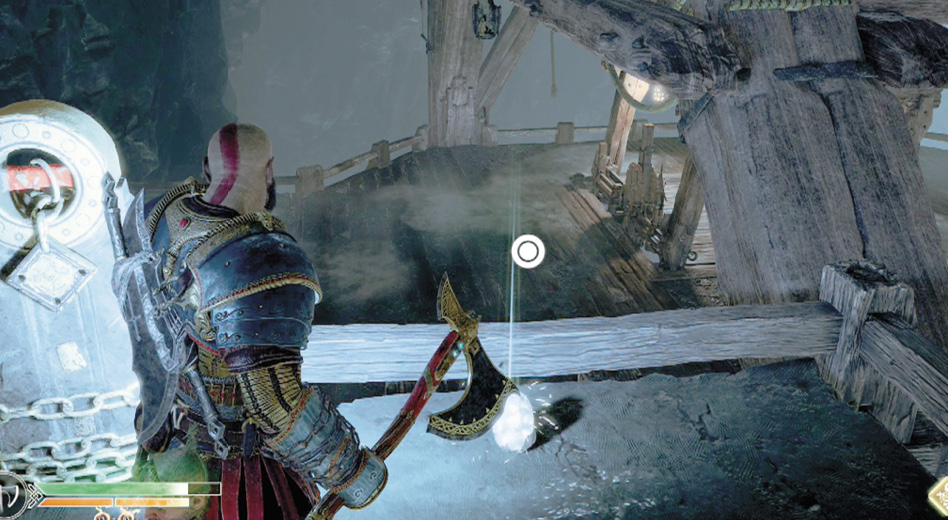
Look out for Runestones found lying around the environment and dropped by enemies. Green stones (health stones) replenish Kratos’ health, orange stones add rage, while white stones grant a small amount of XP. A special Runestone cycles through all three colors; wait for the desired bonus before picking it up. Note that Kratos stomps a Runestone in order to gain the effect, which staggers weaker enemies who stand nearby.
Valuable Loot
A plethora of items is available from containers found throughout the Norse lands. In addition to items found lying on the ground, valuable loot is also discovered inside common chests, coffins, Legendary Chests, Cipher Chests, and Nornir Chests Interact with each one to gather the contents.
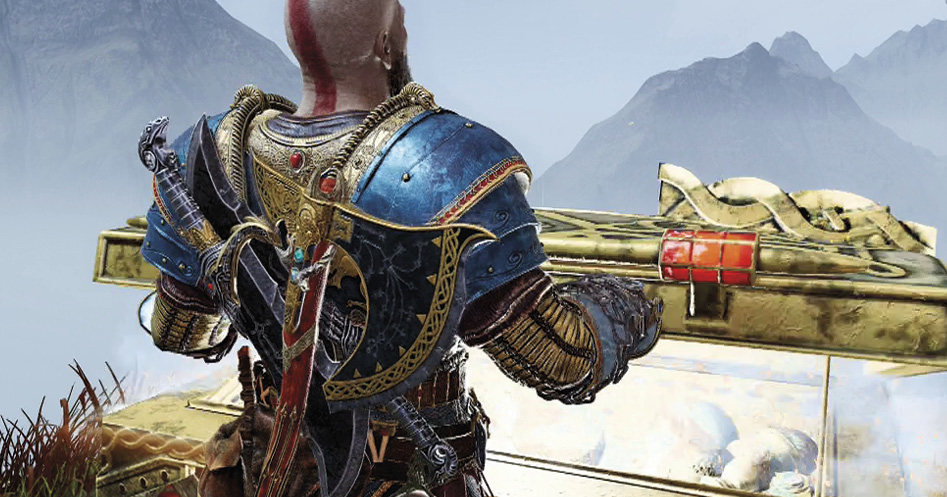
| Container | Contents |
|---|---|
|
Urn, Corpse, Bucket |
Hacksilver |
|
Chest |
Hacksilver |
|
Coffin |
Resources and/or armor |
|
Legendary Chest |
Unique Talisman, Unique Enchantment, or Runic Attack |
|
Cipher Chest |
Muspelheim Language Cipher or Niflheim Language Cipher (random Enchantment under certain circumstances) |
|
Nornir Chest |
Iðunn Apple or Horn of Blood Mead (random Enchantment under certain circumstances) |
Unlock Nornir Chests
Every Nornir Chest is sealed by three runes. You must find and deactivate all three runes in order to loot the chest. Somewhere, typically in the immediate area, the same three runes are found on either breakable objects or bells. If the former, break the seals that protect the runes; time isn’t an issue. These runes are usually found out of reach of melee attacks, requiring an axe throw to get them.
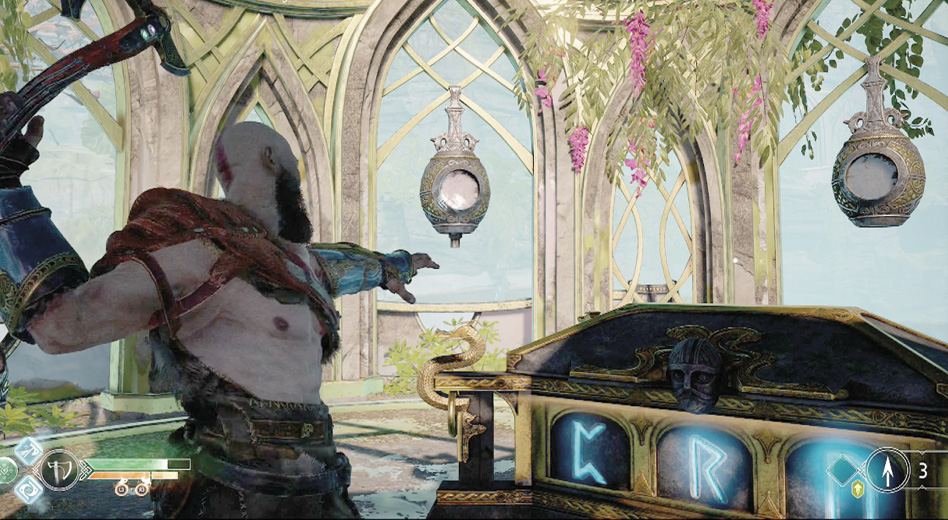
When the runes are on bells, you must ring all three within a short time limit. Each bell resets with its own timer, lighting back up to signify it’s once again activated.
Once all three runes are deactivated, signified by going dark on the chest, the Iðunn Apple or Horn of Blood Mead can be collected. If you’ve collected all nine apples or horns, a random Enchantment is given instead. A total of 21 Nornir Chests can be found throughout the realms of Midgard, Alfheim, and Helheim—11 can hold Iðunn Apples and 10 have Horns of Blood Mead. Nornir Chests are also found in Niflheim, but they always provide an Epic Niflheim Enchantment.
There are a variety of setups for these Nornir Chests, and they’re all covered in the appropriate chapter. If found during the Journey, refer to TheJourney chapter for solutions. Nornir Chests found during Favors or around the Lake of Nine are covered within the Favors or Lake Exploration chapter, respectively.
Resources
Hacksilver is the most common resource in the game. You earn it for most everything you do in the game and can find it throughout the environment. It’s required for most purchases at the shops. There are many more resources required for crafting/upgrading equipment and upgrading Kratos. It’s well worth the time to search every nook and cranny and complete extracurricular activities; the best gear requires a whole lot of resources. All of the available resources are listed at the end of the Equipment chapter, along with how to obtain each one.
Yggdrasil’s Dew
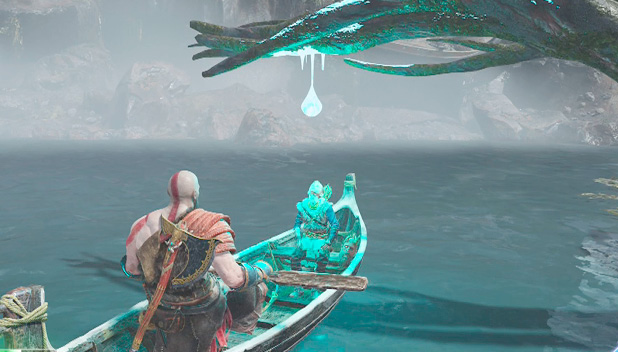
Yggdrasil’s Dew is a powerful Epic Resource that permanently boosts one of Kratos’ Stats by 2. White bulbs hang from trees around the perimeter of Lake of Nine, and along the inlet that flows into Lake of Light in Alfheim. After the boat slows under the white bulb, Atreus plucks the resource, which automatically provides the Stat boost.
Hanging Resources
Keep an eye out for buckets and tendril joints hanging from ceilings. Toss Leviathan at the breakable disc or tendril connection to send the Hacksilver crashing down, where it can be collected off the ground.
Power Level
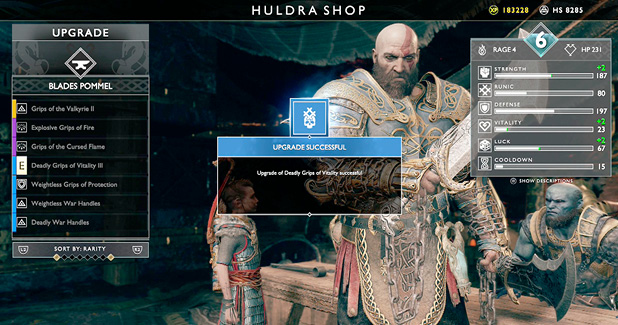
Kratos’ Power Level is the sum value of all equipped items, weighted differently by slot and tier. For the most part, the biggest factors throughout the game are armor pieces and, later, Enchantments. The full list is as follows:
- Chest Armor
- Wrist Armor
- Waist Armor
- Axe Upgrade
- Blade Upgrade
- Axe Pommel
- Blade Pommel
- Talismans
- Enchantments
It is of vital importance to increase Kratos’ Power Level as frequently as possible because it’s the single greatest factor in determining your general effectiveness in combat against any enemy.
Early on, because Kratos doesn’t have access to Blade Pommel/Upgrades, or many Enchantment slots, armor makes up a good 85 percent of the Power Level. This is why, for example, equipping all Level 1 or 2 armor places Kratos almost exactly at a Power Level of 1 or 2.
As the game progresses and new slots or enchantment options become available, it will become increasingly more difficult to reach the next Power Level. Early on, for example, you may only need a few pieces of armor to reach Power Level 2 or 3 . However reaching level 6, for example, requires numerous enchantments, pommels, and Blade and Axe upgrades, in addition to your armor.
The highest achievable level is Power Level 8, but there’s buffer room based on Enchantment slots/endgame item selection that can potentially put players to about Power Level 8.5.
Enemy Power Level
Paralleling Kratos, every enemy has their own Power Level displayed just to the left of their health bar. Kratos can usually handle enemies that are within 1-2 levels of his own with relative ease. However, enemies that are 3 levels above Kratos (indicated by a purple health bar) will be considerably more difficult. Enemies that are greater than 3 levels above Kratos (indicated by both a Skull icon and purple health bar) should be considered extremely dangerous.
We recommend avoiding or retreating from enemies with a Skull if possible, and returning later with more powerful gear.
Enemies with a higher Power Level than Kratos are harder to stagger, launch, and Stun.
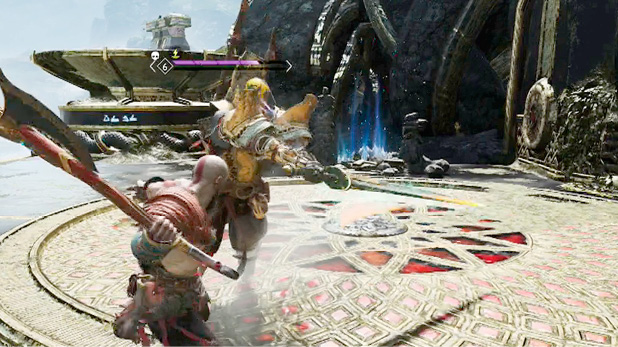
The color of the enemy’s health bar shows a quick indication of how that enemy compares to Kratos.
Colors
| Enemy Health Bar Color | Power Level Relation |
|---|---|
|
Light Green |
Kratos > Enemy by 2+ |
|
Dark Green |
Kratos > Enemy by 1 |
|
Yellow |
Kratos = Enemy |
|
Orange |
Kratos < Enemy by 1 |
|
Purple |
Kratos < Enemy by 2 |
|
Skull |
Kratos < Enemy by 3+ (Enemies like this should be avoided or approached with extreme caution.) |
What Is Affected by Power Level
Rage Damage: Kratos’ rage damage is based on his Power Level versus the enemy, and not affected by armor.
Enemy Resilience to Interruptions: The difference in Kratos’ and the enemy’s Power Level affects whether or not an enemy will play certain reactions, or absorb reactions entirely.
Frost/Burn/Weaken/Shock/Stun Status Damage: Base status damage increases or decreases primarily based on Power Level, but Enchantments and Skill tree purchases are factored in as well. For example, the amount of Frost damage applied during Permafrost will change based on your Power Level vs. the enemy.
Enemy Attack Potency As It Relates to Block/Block Break/Unblockable: Enemy attacks range from completely blockable, to block break (yellow flash), to unblockable (red flash) based on their Power Level. The attack itself has an initial potency value associated with it; Power Level increases or decreases the value. For example, an enemy attack that’s normally blockable when equal to Kratos’ level may become a block break when the enemy is one level above, and unblockable when two levels above.
Atreus’ Damage: Enemies with higher Power Levels may take less damage from Atreus’ Runic Summons and arrows.
Combat
Movement
Quick Dodge: Pressing X with any directional input causes Kratos to sidestep in the desired direction. This can be used during and immediately after most attacks to cancel the attack animation and keep Kratos moving around the arena to avoid incoming attacks. Quick dodge also has a large window where Kratos is completely invincible to enemy attacks. To achieve this, perform a quick dodge immediately before an enemy attack lands (timing can be strict depending on which enemy is encountered).
Dodge Roll: Double-tap the X button with any directional input. This is your basic defensive maneuver and Kratos’ main tool for controlling space. It covers greater distance than the quick dodge, but lacks the invincibility and has longer recovery. Follow-up attacks can be buffered while rolling so that they occur immediately after the roll is complete. Use this with evade Skills to close a gap faster or put more distance between Kratos and an enemy.
Targeting
Tap R3 to focus on your current target. This keeps Kratos looking at the selected target, indicated by the diamond icon. Use the right stick to change your current target.
Block Break and Unblockable Attacks
A red or yellow flash when an enemy attacks indicates that it cannot be readily blocked. Attempt to block these moves, and Kratos can become staggered. A yellow flash (block break) can only be parried with a just-time block. The attack will break through normal blocks but will not deal damage. A red flash indicates an attack which cannot be parried or blocked. The attack will break through and do damage. Kratos should evade an attack that flashes red. This is scaled based on Power Level.
An enemy attack that flashes red when Kratos is equal in Power Level may become a yellow flash when Kratos is above the enemy in Power Level.
Use the Environment
Look for ledges where you can knock weaker enemies to their doom. The Spartan Kick (R2 when bare-handed) is great for sending a foe over the side. Note that you cannot knock a stunned enemy over the edge, or a foe that Atreus is currently grappling with.
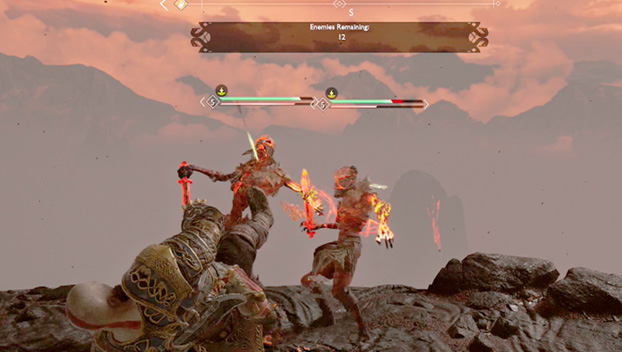
Pin Enemies to Walls
Use a heavy axe throw on an enemy standing or flying near a wall to pin it against the wall. This only works against smaller foes. Get in the habit of using this Skill early on in the game in order to achieve the “Against the Wall” Labor. It becomes tougher to perform against higher-level enemies. This only works on airborne enemies on the Give Me God of War difficulty.
Executioner’s Cleave
With the Executioner’s Cleave Skill, hold R2 to perform a brutal finishing attack on an enemy. The maneuver takes time to perform, so only use when safe to do so. A final enemy being held by Atreus or stunned is the best candidate. The “Reaper” Labor rewards XP after certain numbers of enemies are hit with this Skill. However, this attack doesn’t have to be a finisher. It is the largest non-rage/non-runic source of damage to a single enemy, and is very useful during battle.
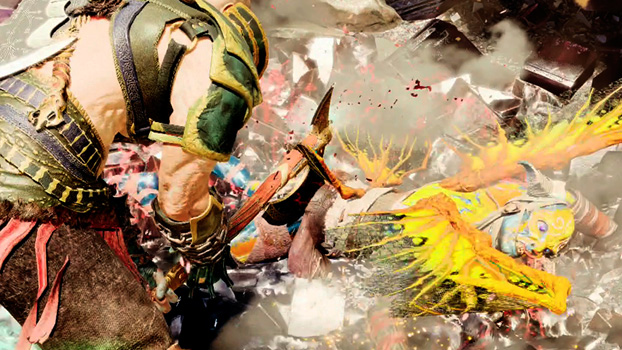
Shatter Enemies
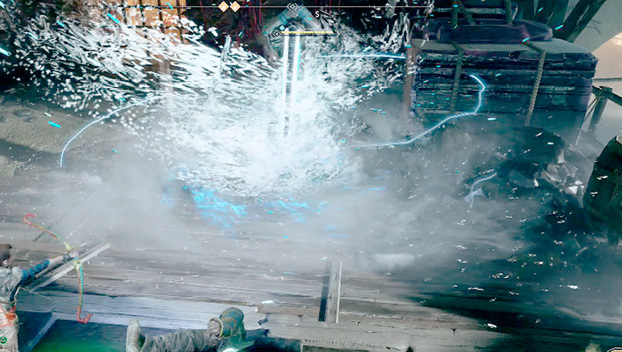
Freeze enemies by throwing your axe at them with R2, then attack them when frozen. This freezes their Stun bars as well. Frozen enemies can be hit with a heavy attack (i.e. kicked) into other enemies to apply Frost damage, into a wall for big damage, or off a ledge for a quick kill.This only works on enemies that can be shattered. Typically this refers to foes smaller than a Wulver, but not Hel-Walkers with ice armor. Shatter enemies to earn the “Shatterer” Labor.
Momentum
The Permafrost and Immolation Skills for the Leviathan Axe and Blades of Chaos, respectively, provide a boost to attacks once “momentum” is achieved. Kratos builds momentum by landing continuous attacks on enemies without being interrupted. It’s lost once Kratos is hit or after not attacking for a short time. This applies to any axe/Blades hit, so momentum can be gained/sustained even from special attacks or Skills. Momentum also affects Frost/Burn damage as well as increases all regular damage by a small percentage.
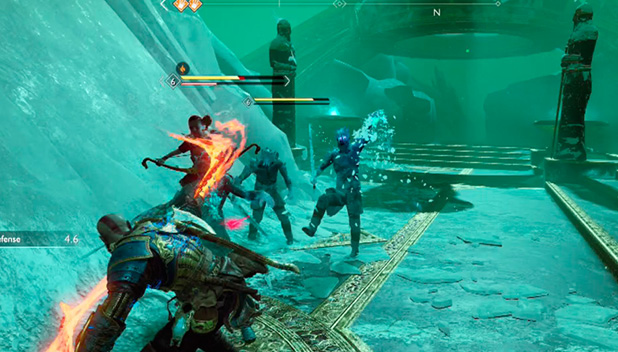
A high-momentum bonus with the axe means Frost damage stacks on the enemy, ultimately slowing it and making combat much more manageable. This is a vital tactic against larger and quick-moving enemies (e.g., Wulver, Ogre). Momentum is also affected by the Runic Stat, since Frost damage is influenced by Runic. A combination of Runic- and Strength-boosting equipment is one of the best ways to take full advantage of the momentum system.
Stats and Gear Specialization
| Stat | Description |
|---|---|
|
Strength |
Influences all sources of physical damage output (melee and ranged). |
|
Runic |
Influences weapon Runic Attack and Frost/Burn damage. |
|
Defense |
Reduces all damage taken. |
|
Vitality |
Influences maximum health and reduces Kratos’ reactions to enemy attacks. |
|
Luck |
Increases Perk (Talismans and Enchantments) activation chance. Increases XP and Hacksilver gains. |
|
Cooldown |
Reduces recharge time of Runic Attacks, Runic Summons, and Talisman Abilities. |
Stats govern how a player should equip Kratos (Atreus has no Stats and is only affected by Cooldown Stats for his Runic Summons). Depending on the area or encounter you find yourself in, properly equip yourself in order to survive the dangers of the world. Ideally, you should choose gear that complements your style of play, or that counters a specific enemy type. If you’re an offensive player, equip and upgrade gear that boosts Strength and provides offensive bonuses. Talismans and pommels are vital sources of utility and should be explored in order to customize gear to fit your chosen playstyle. A few examples of specialized loadouts:
“Berserker”
- Strength Armor Set (Power Level 1, 3, and 5)
- Axe w/ Blessing of Frost
- Blades w/ Rampage of the Furies and Hyperion Slam
- Talisman—Talisman of Eternal Fury
- Axe Pommel—Deadly Grip of Fury
- Atreus w/ Fighter Tunic, Upgraded Light Arrows, Runic Summon—Wrath of the Wolf
The glass cannon build. Provides pure damage at the cost of defense and survivability. Talisman and pommel combination ensures rage is gained quickly and can be sustained for an extended period of time, so long as there are enemies around to kill.
“Juggernaut”
- Tough Armor Set (Tiers 2, 4, and 6)
- Axe w/ Charge of the White Bear, Breath of Thamur
- Blades w/ Nemean Crush, Gift of Apollo
- Talisman—Horn of Heimdall
- Axe Pommel—Light Grip of Protection
- Atreus w/ Runic Vestment, Upgraded Shock Arrows, Runic Summon—Storm of the Elks
Excellent defensive capabilities combined with survivability and area of effect (AoE). Damage output suffers, but at the higher tiers this build allows you to block just about any attack effectively while at the same time building energy for the Talisman’s active ability.
“Devastator”
- Runeweaver Armor Set (Tiers 2, 4, and 6)
- Axe w/ Njörd’s Tempest, Mists of Helheim (focus on keeping momentum)
- Blades w/ Blast of Hephaestus, Prometheus Flame
- Talisman—Talisman of Unbound Potential
- Axe Pommel—Ymir’s Breath
- Atreus w/ Sharpshooter Garb, Upgraded Shock Arrows, Runic Summon—Boar Stampede
Provides impressive damage per second, area of effect, and Frost damage debuff utility. With short cooldown specials used in conjunction with the Talisman’s active ability and the pommel to assist in keeping Frost damage building, this build can tear through the toughest encounters with relative ease.
Vulnerable Enemy States
Kratos and Atreus can force enemies into various states during combat that can turn the tides of battle or be capitalized on for maximum damage. Most of these are only applicable to smaller enemies like Draugr, Hel-Walkers, and Dark Elves.
Stun: An enemy’s Stun meter can be filled with any attack (axe, Blades, bare-handed, Atreus’ arrows, Runic Attacks, shield hits, friendly fire).
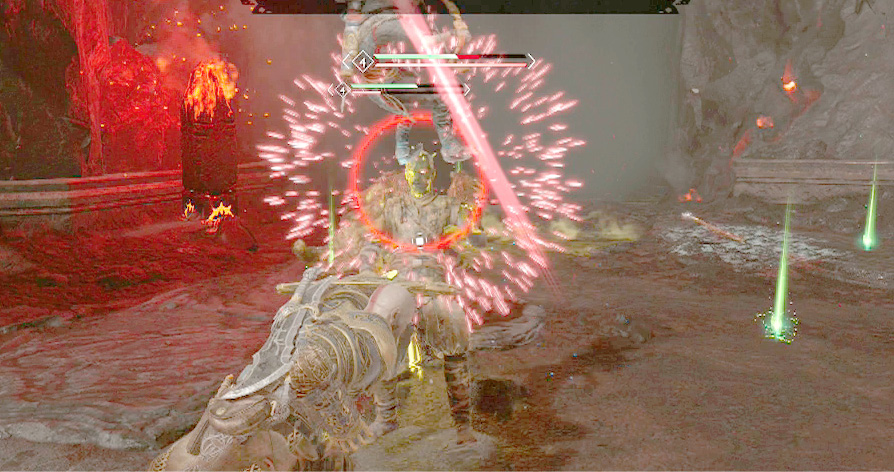
Once the meter is filled completely, an enemy enters a Weakened state and can be interacted with by approaching and pressing R3. The amount of Stun applied on an attack varies, but using bare-handed attacks and Atreus’ arrows are the simplest options to fill an enemy’s Stun meter. Large amounts of Stun can be applied to enemies that are prone; airborne; wall-stunned; wall-bounced; or receiving attacks from behind, Runic Attacks, or any attack that causes a “fly-back” (i.e., the final R1 attack in a basic combo).
Spin: A well-placed light axe throw to an enemy’s head can cause the foe to spin around, exposing its back to Kratos. This can be done to smaller common enemies such as Draugr, Hel-Walkers, and Dark Elves—even if they’re at a higher Power Level than Kratos. Specials such as Hel’s Touch can also place enemies in a spin state.
Trip: Aiming a light axe throw at an enemy’s legs can trip it and leave it in a prone state. Similar to the spin state, this can only be done to smaller bipeds. This is less effective if the enemy is at a higher Power Level. It’s a great tool to use against blocking or shielded enemies.
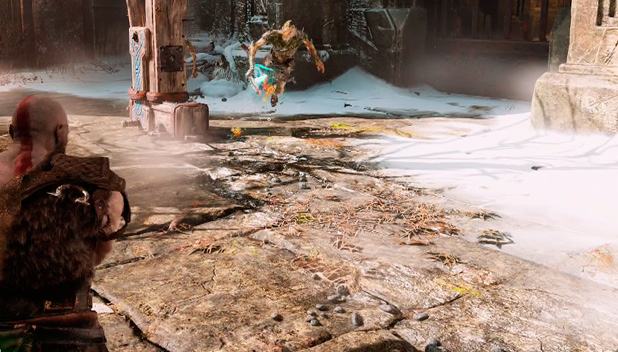
Wall Stun: Staggering an enemy into a wall places it in a wall Stun. During this state the enemy takes increased damage, and each hit doubles the Stun amount. The basic R1 combo for each weapon, light shield-parry attacks, and Spartan Kicks (R2 while bare-handed) are easy ways to force enemies into this state. Larger enemies such as the Heavy Draugr can only be wall-stunned for a brief moment.
Wall Bounce: Any attack that makes an enemy fly back will cause a wall bounce if the enemy is knocked into a wall. This places the enemy in a rag-doll state and leaves it prone on the ground for a brief moment. It also applies an incredible amount of Stun, filling about 85 percent of the Stun meter. The final R1 attack of the axe and bare-handed basic combos, light shield-parry attacks, and Njörd’s Tempest special are simple ways to cause a wall bounce.
Ground Bounce and OTG (Off the Ground): An airborne enemy can be bounced off the ground, becoming airborne again, if you launch it with an R2 heavy axe attack and smash it back down with a second R2 input. This can also be done with the Blades by launching an enemy and using the “blade toss” (L2 + R1) while the enemy is airborne. An enemy can also be lifted off the ground by certain attacks. Down an enemy and use Frost Rush with the axe (sprint + R1), or Rising Fury with the Blades. This lifts the enemy off the ground from a prone state and makes it airborne.
While subtle, these methods can be used to extend combos and pack on tons of damage.
Enemy Debuffs
Frost: Axe attacks that deal Frost damage build and fill an enemy’s Frost meter. Once the meter is filled, an enemy becomes frosted over, causing all movements to slow and making them more susceptible to hit reactions. Enemies will not evade or block while in this state. Additionally, some attacks, like the axe throw and a few Runic Attacks, can completely freeze an enemy. In this state, it’s defenseless and can be shattered after a few attacks or if knocked back into a wall. Hel-Walkers wearing ice armor are immune to Frost damage.
Burn: Blade attacks that deal Burn damage build and fill an enemy’s Burn meter. Once the meter is filled, an enemy is set ablaze, taking damage over time. It also will periodically burst, causing a reaction on the enemy that interrupts its attacks. Draugr are resistant to Burn damage.
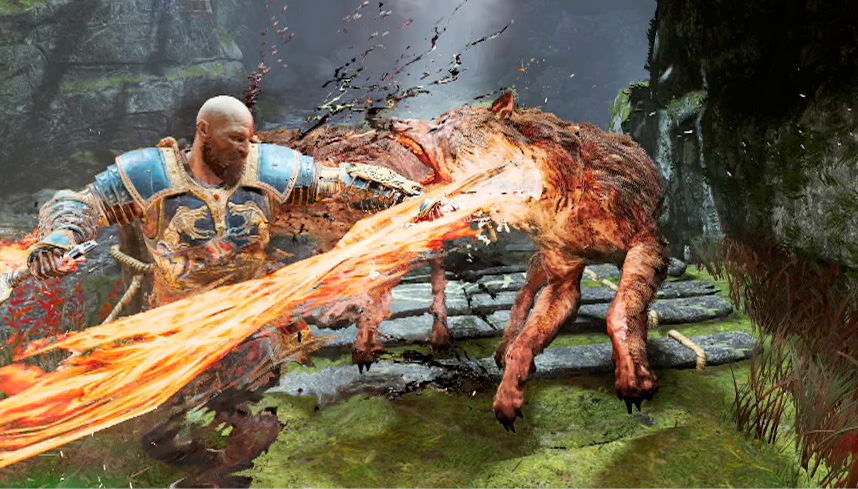
Weaken: Atreus’ Light Arrows can cause an enemy to become Weakened. Once an enemy is Weakened, it takes increased damage and reactions (staggered easier, launched easier, etc.) and deals less damage for the duration of the debuff. This is an invaluable tool at higher-level/endgame-level encounters. Strengthened this ability by upgrading the Light Arrow portion of Atreus’ Skill tree.
Shock: Atreus’ Shock Arrows can briefly paralyze an enemy. After the Shock meter is filled, an enemy freezes in place and sends out bolts of “chain lightning,” which can arc to other enemies in a small radius. Additionally, if a smaller enemy is struck with a Shock Arrow while airborne, it becomes suspended in the air for a brief duration. This allows Kratos to string together unique aerial combos for massive damage. Gain and strengthen these abilities by upgrading the Shock Arrow portion of Atreus’ Skill tree.
Enemy Repopulation
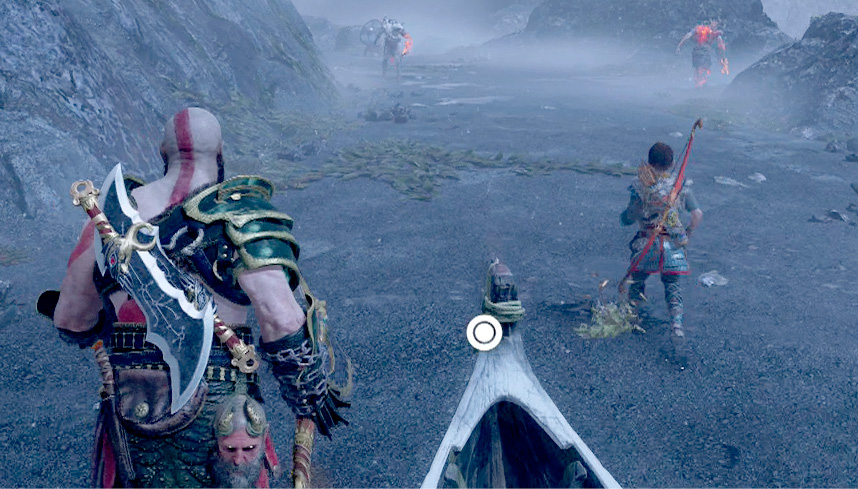
Enemies repopulate many areas of Midgard, as well as Alfheim and Helheim, once the area has been completed. Not all fight spaces repopulate, only a select few. Repopulation occurs once the particular level has been completed and returned to after a certain amount of time (30+ minutes minimum). Areas continue to repopulate at certain intervals when the player returns to them. Use this repopulation to grind for resources and complete Labors.
| Location | Enemy Repopulation |
|---|---|
|
River Pass |
Draugr, Revenants, Nightmares, Reavers, Wolves, Soul Devourer |
|
Dark Elves, Draugr |
|
|
The Mountain |
|
|
Northern Dock (Thamur’s Corpse) |
|
|
Helheim |
Hel-Reaver, Hel-Broods, Ice Nightmares |
|
Mason’s Channel |
Tatzelwurms |
|
Draugr, Nightmares, Revenants |
|
|
Nightmares, Tatzelwurms, Dark Elves |
|
|
Fáfnir’s Storeroom |
|
|
Reavers, Revenants |
|
|
Konùnsgard Stronghold |
Reavers, Tatzelwurms |
|
Fáfnir Dragon Area (north of Alfheim Tower beach) |
Viken, Reavers |
|
Dark Elves |
|
|
Revenants |
|
|
Hel-Reavers |
|
|
Nightmares |
|
|
Stone Falls |
Tatzelwurms |
Elite Enemies
Elite enemies are tougher versions of the standard foes, indicated by a streaky purple glow in their eyes. Mostly seen in Realm Tears, Muspelheim, Niflheim, and the highest difficulty, they may also be found in tougher areas. Not only do these enemies tend to be tougher and faster than usual, they also react differently. For example, while standard Draugr can be tripped and launched, elite Dragur cannot very easily have this done to them.
In the highest difficulty, enemies can turn elite, based on specific rules. This forces you to deal with enemies quickly to keep this from happening.
Elite Enemy Attributes
- Harder to fly-back and ring out with rage
- Highly resistant to Atreus’ Stun from Light Arrows
- Take less damage from Atreus’ arrows
- Deliver much more status damage
- Behavior adjustment specific to type of enemy
- Cannot be rung out from basic attacks
- Cannot be frozen for long
- General increase in resistance to reactions
Elite Enemy Attributes on Give Me God of War Difficulty
- All above elite attributes
- Very aggressive
Elite Enemy Attributes for Those That Have Turned (Give Me God of War Difficulty)
- Power Level enhanced
- Enhanced damage and defense that represents Power Level increase
- Take less damage from rage attacks
Rules for Turning Elite
- Enemies already spawned as elite do not turn again
- Most enemies can turn elite at 80 percent health and below (can be interrupted)
- Weaker foes, such as Wolves, Tatzelwurms, and ranged enemies, can turn elite instantly one at a time (cannot be interrupted)
- Reaver Seiðr explosions turn nearby enemies elite
- Some Ogres and Valkyries turn elite automatically at low health (cannot be interrupted)
- Nightmares, Trolls, and Ancients do not turn elite
Resistance and Impact
Resistance is a secret Stat that enemies possess. It determines how resistant they are to reaction. Large enemies, enemies with higher Power Levels than Kratos, and elite enemies usually have higher Resistance. Atreus grappling an enemy lowers its Resistance.
Impact is a secret Stat that controls whether or not Kratos breaks through an enemy’s Resistance to make it react. Certain attacks, such as many purchased Skills and finishing attacks, have higher Impact.
- The Frost and Weaken debuffs on enemies lower their Resistance
- Gifts of Strength in certain Perks increase Kratos’ Impact
- Permafrost and Immolation increase Kratos’ Impact when active
- By stacking Kratos’ Impact and lowering the Resistance of enemies, many large foes can be interrupted easily
Using Atreus
At first, Atreus is simply a companion, but it doesn’t take long for him to join his father in battle with his Talon Bow. When you press the Square button, Atreus fires arrows at your current target. Hold L2 and press Square to instruct him to fire at a specific enemy. Repeated arrow shots can Stun lesser enemies, letting Kratos rush in to finish them off with his fearsome Stun grab attack.
Against tougher foes like minibosses, Atreus’ arrow strikes have less physical effect. However, they distract the monster, pulling its attention away from Kratos.
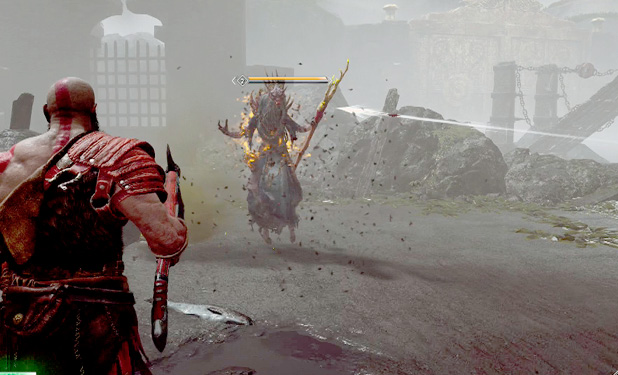
This gives you a chance to escape a tight spot, find and consume a health item, or launch a combo or heavy attack unmolested by your distracted foe. Arrow hits also register on the enemy’s Stun meter.
Atreus starts with a max of three arrows in his quiver. The current number of arrows available is displayed in the lower-right corner of the screen. The moment you shoot an arrow, the arrow meter begins to “recharge.” Each time the meter fills up, your arrow count increases by one; this recharging repeats until you hit your current maximum number of arrows.
Note that if you empty your quiver—that is, let your arrow count drop all the way to zero—Atreus cannot fire again until the arrow count returns to one. Whenever Atreus cannot shoot arrows, the background of the Archer icon next to the diamond is red.
During the Journey, Atreus gains the ability to fire Light and Shock Arrows. In addition to stunning the enemy, Light Arrows Weaken, while Shock Arrows hit with the Shock status effect. These effects can be improved by purchasing Skills for the Talon Bow. Toggle between Light and Shock Arrows instantly by using the up/down arrows on your controller’s D-pad. Note that the arrow icon in the lower-right corner displays which type of arrow is currently equipped.
After exiting Brok’s shop at Týr’s Temple for the first time, Atreus’ confidence in combat increases and his advanced combat Skills kick in. At that point, he attacks enemies when he sees an opening. Upgrade these Skills at the Skills Tab.
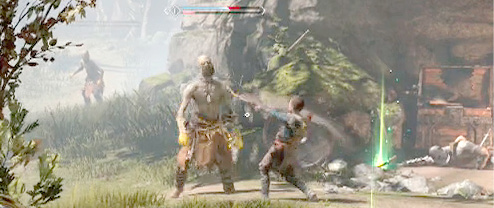
Atreus can be knocked unconscious, requiring Kratos to come to his aid. Press Square when near Atreus to get him back in the fight. If ignored long enough, Atreus comes to automatically.
Atreus Combat Moves
Atreus has various moves that he can automatically perform to aid Kratos in combat. While these may seem random, they can be used regularly if the conditions are met to trigger them. Most of these only apply to Draugr, Hel-Walkers, and Dark Elves.
- Grapple: Staggering an enemy with attacks while Atreus is behind it causes him to mount the enemy, leaving it temporarily defenseless. Pressing Square while an enemy is grappled causes Atreus to leap off and fire whichever arrow type is currently equipped. If an enemy is launched while being grappled, Atreus flips with it and then kicks it down, causing a ground bounce (requires the Acrobatics Skill). If an enemy is knocked back while being grappled, Atreus holds on to the enemy and then kicks it away. This can be useful for knocking enemies into pits. Even better, if near a wall, Atreus kicks the enemy into the wall, briefly pinning it in place (requires the Acrobatics Skill).
- Grappling can be difficult to sync with enemies at a higher level, since most basic attacks don’t stagger them.
- Bow Sweep: Blocking or parrying an enemy’s attack while Atreus is close by causes him to run over and sweep the enemy off its feet with his bow. This deals a moderate amount of Stun.
- Overhead Smash: After Kratos trips an enemy with a light axe throw, if Atreus is nearby, he runs over and delivers a follow-up overhead attack that deals a moderate amount of Stun.
- Shoulder Charge: If Kratos is attacked from an unseen enemy (out of the player’s view), Atreus rushes to intercept or follow up with a shoulder charge that deals a large amount of Stun.
- Bow Launcher: Knock an enemy away (any attack that causes a fly-back) in Atreus’ direction, and he launches it back up in the air, allowing Kratos to follow up and continue the combo.
- Wall-Stun Follow-up: If an enemy is wall-stunned near Atreus, he can attempt to keep it in that state with follow-up arrow attacks.
- Ogre Grapple: If Atreus gets behind an attacking Ogre, he climbs up and mounts it. This momentarily enrages the foe, causing it to slam the ground and deal damage to any enemies nearby.
Atreus’ Defensive Moves
Atreus also possesses a few defensive moves that assist Kratos in battle.
- Dropkick: If Atreus is being attacked, he can interrupt the attack with a dropkick that deals a moderate amount of Stun and briefly staggers the enemy. Following that up with an axe-throw trip or headshot is a good way to focus on multiple enemies during an encounter.
- Bow Melee and Arrow Juggle: If an enemy gets too close to Atreus, he can hit it away with a melee combo, dealing damage and Stun. If Atreus launches the foe, he can follow up with a flashy air-juggle arrow combo.
- Quick Evade: Atreus can perform a quick side roll while firing an arrow if an enemy attempts to attack him.
Using Spartan Rage
Spartan Rage is a berserker-type fury that can be activated when your on-screen rage meter (the orange-filled bar underneath your health bar) is completely full. If Spartan Rage is available, you see an on-screen notification with the simple activation instructions: L3 + R3.
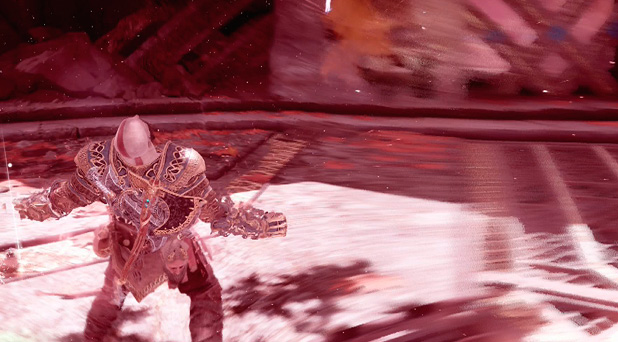
When enraged, Kratos becomes invulnerable and gains considerable strength and speed for the full duration of the state. Early on, his attacks are limited to bare-handed moves, but they’re quite powerful and deadly. Later in the game, you can acquire Skills that expand your repertoire of Spartan Rage attacks Spartan Rage also clears all Status Effects.
Once Spartan Rage is triggered, the rage meter (the orange bar) starts dropping; Kratos’ fury ends when the meter is fully drained. If you finish off all your foes before the meter is drained, you can click L3 + R3 to toggle off Spartan Rage. This way you can avoid having to refill the bar from scratch. There’s a small penalty for toggling off, however.
The rage meter gets refilled in small bursts whenever Kratos inflicts or takes damage. Bigger surges of replenishment come from grabbing rage pickups, the glowing orange items dropped by certain slain foes or, in some instances, found on the ground.
Save Rage Mode for when health is low. Every hit in Rage Mode restores a small amount of health. A Stun grab pauses the Rage Mode meter, so use whenever available to conserve the rage. Note that Ancients are impervious to attack; this includes Rage Mode attacks. Your flurry of punches quickly fills the Ancient’s Stun meter, though, allowing you to inflict massive damage with a Stun grab.
A good tactic is to also use Spartan Rage to herd enemies together before blasting them all away with a heavy attack. This is especially effective for ringing out enemies where possible. You can also use powerful attacks while in Spartan Rage to hit enemies into each other for maximum Stun and damage output.