Prima Games eGuides
primagames.com Browse Redeem a code Help
Dragon Age: Origins - Awakening eGuide
Sign in My Guides

Sign in or create an account

We'll email you a link. No password needed, and if you don't have an account yet, the link makes one.

By creating an account or signing in, you agree to our Terms of Service and Privacy Policy.

Have a password?

Had an account on the old eGuides site, or a code from a printed guide? Help and troubleshooting

Sign in with a password

By signing in, you agree to our Terms of Service and Privacy Policy.

Check your email

A sign-in link is on its way. It works once and expires in 15 minutes. Open it and you're in, with an account if you didn't already have one.

Contents

  • Maps
    • World Map
      • World Map
    • Main Quest Walkthrough Maps
      • Assault on Vigil's Keep
      • Keep Interior
      • Throne Room
      • Vigil's Keep Courtyard
      • The Crown and Lion
      • The Blackmarsh
      • The Blackmarsh Undying
      • Shadowy Crypt
      • Baroness's Manor
      • Return to the Blackmarsh
      • Wending Wood
      • Silverite Mine
      • Knotwood Hills
      • Kal'Hirol
      • Main Hall
      • Trade Quarter
      • Lower Reaches
      • Siege of Vigil's Keep
      • Siege of Amaranthine
      • Dragonbone Wastes
      • Drake's Fall
      • The Nest
    • Side Quest Walkthrough Maps
      • The Blackmarsh
      • City of Amaranthine
      • Smuggler's Cove
      • Law and Order
      • Smuggler's Run
      • Smuggler's Cove (Alternate)
      • Vigil's Keep Throne Room
      • Knotwood Hills/Kal'Hirol
      • Vigil's Keep
      • It Comes From Beneath
      • Sealing the Great Barrier Doors
      • Wending Wood
  • Essentials
    • The Basics
      • How to Use This Guide
      • Key Terms
      • Experience and Leveling
      • Your Health
      • Races and Classes
      • Skills, Talents, and Specialties
      • Items
      • Combat
      • The Map
      • The Codex
      • Character Generation
    • The Classes
      • Introduction
      • Leveling
      • Skills
      • The Warrior
      • The Mage
      • The Rogue
    • The Party
      • Party Basics
      • Combat Roles
      • Configurations and Engagement
      • Tactics
    • Companions
      • Understanding Companions
      • Anders
      • Justice
      • Nathaniel Howe
      • Oghren
      • Sigrun
      • Velanna
      • Mhairi
    • Supporting Cast
      • Supporting Cast
    • Equipment
      • Equipment
      • Weapon and Armor Materials
      • Vendor Shopping
      • Weapons
      • Armor
      • Accessories
      • Runes
      • Crafting
      • Usable Items
      • Gifts
    • Bestiary
      • Monster Abilities
      • Monster List
  • Walkthrough
    • Walkthrough
      • How to Use the Walkthrough
      • Essential Locations
    • Assault on Vigil's Keep
      • Exterior
      • Interior
      • Throne Room
      • Courtyard
    • Shadows of Blackmarsh
      • Amaranthine
      • The Crown and Lion
      • The Blackmarsh
      • The Blackmarsh Undying
      • Shadowy Crypt
      • Baroness's Manor
      • Return to the Blackmarsh
    • The Righteous Path
      • Amaranthine
      • Wending Wood
      • Trapped by the Architect
      • Silverite Mine
    • Last of the Legion
      • Amaranthine
      • Knotwood Hills
      • Kal'Hirol
      • Main Hall
      • Trade Quarter
      • Lower Reaches
    • Siege of Vigil's Keep
      • Going to War
      • Siege of Vigil's Keep
      • Siege of Amaranthine
    • Lair of the Mother
      • Dragonbone Wastes
      • Drake's Fall
      • The Nest
    • Side Quests
      • The Blackmarsh
      • City of Amaranthine
      • Companions
      • Knotwood Hills and Kal'Hirol
      • Vigil's Keep
      • The Wending Wood
      • Random Encounters
    • Achievements
      • Achievements and Trophies

Dragon Age: Origins — Awakening Guide › Walkthrough › Siege of Vigil's Keep

Going to War

Note

After you complete the three main quests and speak with Varel, you will go to war against the invading darkspawn armies. Your party will head to Amaranthine where the battle is already underway. After combat at Amaranthine's main gate ends, you will be given a choice: save Amaranthine or save Vigil's Keep. You can only choose one; the other will be destroyed.

Spoiler Alert

When you return to Vigil's Keep throne room after completing the three major quests - "Shadows of the Blackmarsh," "The Righteous Path," and 'Last of the Legion" - Senschal Varel will have one final quest for you. Speak to him when you are fully geared and have spent most of your money upgrading runes, bulking up your store of potions, and swapping inventory equipment until your four main characters have the best of the best.

News reaches you that a darkspawn army advances on the city of Amaranthine. It will take too long to mobiize the keep's forces to stop an attack, so you volunteer your party to intercept. Choose your party wisely. depending on your forthcoming actions, these may be the final party members for the rest of the game.
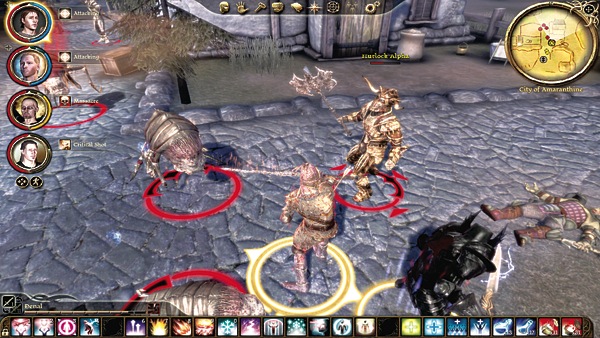
Go straight to Amaranthine, where the battle has already begun. Darkspawn swarm the city, and you enter combat as soon as you arrive at the front gate. Fight through the genlocks, hurlocks, and childers to save the citizens at the gate. If your party starts to get flanked, retreat to your starting location where you can only be attacked head on.
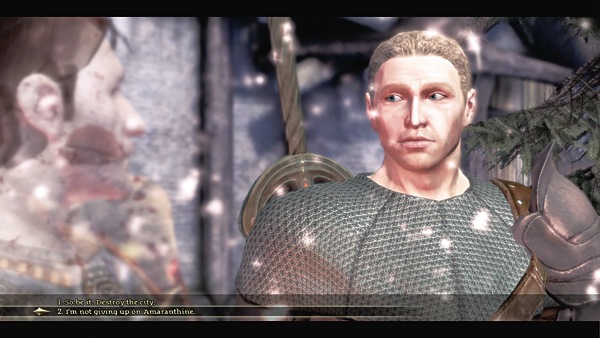
Once the first combat ends, Constable Aidan approaches and explains that the city may be lost. Darkspawn somehow poured into the city during the night and ravaged the population. The city guard is in disarray and under constant attack.

Before you can make a decision, a messenger from the Architect arrives and informs you that the Mother's army moves on Vigil's Keep. While you're occupied here, the Mother wants Vigil's Keep destroyed.

You now have a choice: save Amaranthine or save Vigil's Keep. You cannot save both. Despite the current state of affairs in Amaranthine, it can be saved with some hard work, or you can give the command to burn the city to the ground and race back to Vigil's Keep to support your fellow grey Wardens. If you choose to save Vigil's Keep, read the next section. If you choose to save Amaranthine, skip the next section and read the following section.

Keep reading with a free account

The first 3 sections of Dragon Age: Origins - Awakening are open to everyone. An account opens the rest of it, and every other guide in the archive. It's free, and there's nothing to buy.

Bought guides on the old Prima Games site? Your account and every guide you own moved here, so there's nothing to buy again. Sign in.

Create a free account Or browse our free guides

PreviousLower Reaches NextSiege of Vigil's Keep