
Dragon Age: Origins — Awakening Guide Essentials The Classes
The Warrior
The Warrior
You are sword and shield, retribution and resilience, the cornerstone of a party’s defenses. A warrior charges into the heat of battle to engage the enemy first, simultaneously damaging foes while protecting fellow party members from harm. When danger surrounds you, a warrior heeds the call to battle despite cut, gash, or threat of an early grave. Without a warrior, the party cannot survive long against sterner threats.
To deal with darkspawn and other deadly perils, the warrior has access to better weapons and armor than the mage or the rogue. You may be fortunate enough to find these fine weapons and pieces of armor in shops, or you may discover them as loot hidden in dungeon treasure chests; regardless, the warrior has the best selection of combat goods. The warrior uses them well in battle too. Whether in hand-to-hand melee or at longer bow range, the enemy cannot escape the warrior’s severe punishment. Swords slice through mail, while arrows plunge into flesh.
As part of their natural training and skill sets, warriors have a strong understanding of battle tactics and strategy. You will have a wide array of talents to deal massive combat damage to single targets and groups of foes. A warrior’s talents are broken down by how you plan to use your weapons. If you plan to use gear in both hands, a warrior can pursue Dual Weapons or Weapon and Shield. Alternately, the warrior can concentrate on larger Two-Handed Weapons to savage an opponent, or learn the ways of Archery to harass enemies at range. Some of the warrior’s general talents increase health and stamina, reduce armor penalties, draw hostilities away from allies, grant damage bonuses, improve critical hit percentages, and make you the meanest combatant on the battlefield.
Warrior specializations crank up your battle effectiveness. As a Berserker, a warrior’s rage fuels his strikes, adding damage to the blows at the expense of other qualities such as stamina. A Templar, on the other hand, hunts enemy mages and beats them down with mana drains and more damage. A Champion inspires those around him with party-influencing abilities. A Reaver revels in the dark side as he sucks life back into himself from the pain of others. A Spirit Warrior attunes himself to the Fade, gaining magic resistance, increased spirit damage, and bonuses to movement and attack speeds. Finally, a Guardian is all about protecting the party by tossing up group buffs or conjuring a field that pulls enemies back toward the warrior.
If you like to jump straight into battle and be the first to draw blood, the warrior class is for you. Superb weapons and armor are at your disposal, and melee damage comes as naturally to you as forging to a blacksmith. You will be the toughest party member, and you may have to save those less armored than yourself from time to time, but it’s all part of the responsibility of the hero with the biggest muscles.
Strengths and Weaknesses

The strength of a warrior is in his arms and armor. A warrior can deal major damage to adversaries, especially in melee where he can land pounding blows and critical strikes with excellent hand-to-hand weapons. Return blows from enemies will either glance off a warrior’s superior armor or the warrior’s defenses will limit the extent of the damage. The warrior’s natural bonuses aid in the cause too. His +4 strength bonus augments your most important attribute, and a +3 bonus to constitution raises health and makes you that much more difficult to kill.
The warrior may be a wrecking ball in combat, but he does have limitations. Most importantly, a warrior needs to close on his target to be at his best. Where a mage can hurl spells from the back, or a rogue can hide and surprise with a backstab, most warriors must get close to his enemy at some point to do maximum damage. It's possible to deal some damage with a good ranged weapon, but the majority of warrior talents trigger off hand-to-hand combat. While you close on the enemy, it's likely you'll take some ranged attack and may take heaps of damage from magic attacks, which warriors will be vulnerable to early on. Your armor may reduce damage, but the damage will come, and most warriors do not have healing to regain health. Stock up on healing potions and stay near your party healer in case your health suddenly drops.
If you like a brash, in-your-face play style and really love to hack and slash monsters, the warrior's advantages far outweigh his disadvantages. Nothing beats a 10-on-1 battle where the warrior walks away with just a scratch and the enemies... well, they just don't walk away at all.
Attributes

Strength increases your damage and affects your accuracy with melee attacks, making it the warrior’s number-one attribute. As you might expect, it’s reflected in the warrior class bonus with a +4 strength. Many talents will require high strength scores, and more powerful weapons and armor require a higher strength stat. When you level up, you may consider spending two points on strength for every one point you spend somewhere else, especially early in your warrior career to unlock talents quicker (you may even decide to put all three points per level in strength to unlock talents earlier).
Next, a warrior should stock up on constitution, particularly if you plan to specialize as a Guardian. You can always use more health, which constitution directly increases, and constitution also boosts resilience to keep you fighting on the battlefield longer. The warrior’s starting bonus of +3 constitution gives you a good jump, and you should consider throwing points to constitution if you don’t have any other attribute you want to improve immediately.
Dexterity can do a lot for a warrior. It affects your chance to hit, increases your chance to dodge enemy blows, and augments damage from piercing weapons. Archery and dual weapon–specced warriors should load up on dexterity, even forgoing strength early if you need to unlock certain ranged or dual-weapon talents. The warrior’s +3 dexterity bonus pushes you to above-average dexterity from the start, and you should continue spending points if you plan on a healthy balance of offense and defense.
At first glance, you might dismiss willpower as a stat for mages. But read the fine print. Willpower increases stamina, so if your warrior loves to perform daring maneuvers that drain a lot of stamina (and who doesn’t) you’ll have to throw points to this attribute once in a while. At lower levels, you won’t have the extra points to boost willpower, but when you hit the teens, start looking to expand your stamina pool.
Magic shouldn’t be a priority at all; however, it does increase the effect of potions and salves, and because most warriors rely on potions to buff health in a fight, magic is not entirely useless.
Cunning can be neglected, unless you plan to be an inexorable master of Coercion. However, if you’re not overly concerned with playing the role of the nice guy, your alter- native to Coercion is being able to intimidate those same NPCs, made possible by your superior score.
If maximizing your warrior stats appeals to you, choose a dwarf or human. A dwarven warrior gives you a starting 15 strength, 14 dexterity, and 15 constitution. For a more well- rounded approach, try the human warrior with 15 strength, 14 dexterity, and 13 constitution (with a couple of points spread to magic and cunning). The elven warrior isn’t as solid out of the gates as his natural race bonus applies to willpower and magic, so an elf’s main warrior attributes aren’t as high at the start.
Warrior Starting Attributes
| Attribute | Human | Elf | Dwarf |
|---|---|---|---|
| Strength | 15 | 14 | 15 |
| Dexterity | 14 | 13 | 14 |
| Willpower | 10 | 12 | 10 |
| Magic | 11 | 12 | 10 |
| Cunning | 11 | 10 | 10 |
| Constitution | 13 | 13 | 15 |
When entering Awakening with a new character, you begin with 62 points to add to your attributes. If you want a powerful and damaging warrior, apply the majority of points to strength. If you want a more defensive juggernaut, spread out your points between strength, dexterity, and constitution. In most cases, though, it’s probably best to stick with the standard warrior advice—strength first, then constitution, with dexterity for dual weapons and a little willpower for extra stamina.
Skills

All warriors need to pick up the Combat Training skill as soon as they can. Combat Training opens up the higher tier weapon talents, which you can’t live without. Spend your first skill points here to max it out. Other skills can be helpful, such as Trap-Making if you want to add a little AoE damage to your repertoire; however, they aren’t essential like Combat Training.
After you finish off your Combat Training, think about Coercion. It’s an incredibly useful skill in dialogue; it gives you story options that you won’t get access to otherwise. Cunning opens up the Coercion skills, and more cunning will increase your Persuade skill, but in most situations you can use your Intimidate skill in lieu of Persuade. Intimidate works off your strength stat, which fits perfectly with a warrior.
Survival can be a good skill to have because the more you advance it, the better chance you have to detect creatures on your mini-map before they surprise you. You can save yourself from more than a few ambushes with this skill. Don’t forget about the bonus to nature resistance too.
If you aren’t directly playing your warrior companions (see the Companions chapter for more details) and want one of them to run around on their own, Combat Tactics might be a good investment too. The more tactic slots you open, the more you can shape how your companions behave in battle. Inevitably, even if you plan on controlling your warrior during fights, there will be moments when you don’t program your warrior’s every move (or something more important is going on) and tactics come into play. One or two points should be good, or max it out if you want the character to go on autopilot.
Talents

Warriors will shine in combat, amid talons scraping at flesh and blood spurting in faces. Like the other classes, the warrior offers more than a single way to play. You can choose the tank role, focusing on defense and holding your team together, or the melee DPS role, concentrating on pounding out as much damage as your two hands can manage. If you want to affect combat from the perimeter, the ranged fighter can be a gem; he may not have the same firepower as a mage, but a warrior archer has many tools and the tough skin to back them up.
All warriors should familiarize themselves with the cooldown component of each talent. The worst situation is to have plenty of stamina and no available talents to use. Branch out into different chains to avoid the cooldown problem. For example, if you develop the Weapon and Shield school primarily for defense, having a talent or two in Two-Handed can help with extra damage and keeping your options open. Your talents drain stamina from your pool. Watch how much stamina you’re using in a fight and act accordingly. If you run short without a healer’s Restoration spell to replenish you, it could cost your party a victory. Gauge what you have to do to help the team. There’s little sense running off a series of moves that drains three quarters of your stamina on the first opponent when there are three more to go.
Warrior Weapon Sets
Take advantage of your warrior’s second set of weapons. Gear your first equipment set for your primary focus, and your secondary set as backup. For example, arm yourself with an excellent two-handed weapon if your focus is in the Two-Handed school, and a crossbow in the second set for a little ranged damage. If you want to broaden your fighting style, pair your main style with one other style. Use a few Archery talents paired with any of the other schools and you have a well- prepared warrior ready for ranged and melee combat. Use Dual Weapons with Weapon and Shield when you want to shift focus from defending and attacking to becoming a whirlwind of attacks. Use Two-Handed with Dual Weapons when you want to go from that whirlwind of attacks to being able to take on giant foes.
Remember, though, as you level up, you’ll gain access to specializations, so you’ll want to spend points in those talent chains too. Usually by level 18, you’d have enough talent points to max out your Warrior talent school, all but one weapon-type talent chain, and all but one in a specialization talent chain. Also remember that the secondary set of weapons (and accompanying talents for them) are meant to be a backup, so avoid splitting your talent points evenly between both styles or you’ll be decent at both but excel at neither.
Warrior School

You have three choices: one for basic defense, one for basic offense, and a new chain with a little bit of everything. The chain that starts with Powerful leans toward defense (though both chains give you offensive and defensive options). Powerful adds extra health and reduces fatigue, which means all of your abilities cost less. Even if you don’t want to spec in the Warrior school at all, think about spending an extra point in Powerful because it’s a great early ability. The sustained ability Threaten is a must for tanks who get into the thick of things and need to keep threat on themselves. Bravery is all-around good, with its bonuses to damage, resistances, and critical hit chance. Death Blow restores stamina for each foe a warrior fells in battle.
The Precise Striking chain centers around increasing your attacking skills. You sacrifice attack speed with Precise Striking, but you gain a bonus to your attack chance and critical hit chance. Taunt works as another excellent threat-magnet for tanks who want to suck in everything around them. It can also work with an off-tank to help them control enemies when they need to play the tank role. Disengage reduces threat and allows the warrior to shed enemies when the pressure gets too great; this is another excellent ability for off-tanks who only want to hold a foe for a little while. Perfect Striking gains you a massive attack bonus for a short time.
The new Second Wind chain starts off with a fantastic talent that refills your stamina pool to full upon activation. Peon’s Plight hits the enemy hard: lesser foes die outright, elites take a double critical hit, and even bosses take a critical hit. Grievous Insult is like a super Taunt: it draws all enemies immediately toward the warrior. For Massacre, the warriors spins in an arc of death, killing lesser foes, dealing a critical hit to elite enemies and normal damage to bosses.
Warrior School - Chain 1
| Name | Prerequisite | Description | Cost (mana/stamina) | Upkeep (mana/stamina) | Fatigue (% mana/stamina) | Ranged | Cooldown (sec.) | Area of Effect Radius (ft.) |
|---|---|---|---|---|---|---|---|---|
| Powerful | Strength 10 | Through training and hard work, the warrior has gained greater health and reduced the fatigue penalty for wearing armor. | 0 | 0 | 0 | No | 0 | 0 |
| Threaten | Strength 14, Level 4 | The warrior adopts a challenging posture that increases enemy hostility with each melee attack, drawing them away from other allies while this mode is active. | 0 | 35 | 2 | No | 15 | 0 |
| Bravery | Strength 20, Level 8 | The warrior’s unwavering courage grants bonuses to damage, physical resistance, and mental resistance, as well as a bonus to critical chance that increases proportionally to the number of enemies above two that the warrior is engaging. | 0 | 0 | 0 | No | 0 | 0 |
| Death Blow | Strength 25, Level 12 | Each time the warrior fells an enemy, the end of the battle seems closer at hand, restor- ing a portion of the warrior’s stamina. | 0 | 0 | 0 | No | 0 | 0 |
Warrior School - Chain 2
| Name | Prerequisite | Description | Cost (mana/stamina) | Upkeep (mana/stamina) | Fatigue (% mana/stamina) | Ranged | Cooldown (sec.) | Area of Effect Radius (ft.) |
|---|---|---|---|---|---|---|---|---|
| Precise Striking | Dexterity 10 | The warrior tries to make each attack count, sacrificing attack speed for a bonus to attack as well as an increased chance to score critical hits for as long as this mode is active. | 0 | 40 | 5 | No | 15 | 0 |
| Taunt | Strength 14, Level 4 | A mocking bellow catches the attention of nearby foes, increasing their hostility toward the warrior. Frightening Appearance increases the effect. | 40 | 0 | 0 | No | 20 | 10 |
| Disengage | Dexterity 18, Level 8 | A relaxed position makes the warrior seem less threatening, reducing the hostility of nearby enemies, who may seek other targets instead. | 10 | 0 | 0 | No | 10 | 10 |
| Perfect Striking | Strength 22, Level 12 | The warrior focuses on precision, gaining a massive attack bonus for a moderate time. | 60 | 0 | 0 | No | 30 | 0 |
Warrior School - Chain 3
| Name | Prerequisite | Description | Cost (mana/stamina) | Upkeep (mana/stamina) | Fatigue (% mana/stamina) | Ranged | Cooldown (sec.) | Area of Effect Radius (ft.) |
|---|---|---|---|---|---|---|---|---|
| Second Wind | Level 20, Strength 34 | Long years of training grant access to deep reserves of vigor, instantly restoring nearly all of the warrior’s stamina. | 0 | 0 | 0 | No | 120 | 0 |
| Peon’s Plight | Level 22, Strength 41 | The warrior lashes out with a powerful blow intended to eliminate the weakest opposi- tion. A successful attack automatically kills a target of normal or lesser rank, inflicts a double critical hit against an elite target, or inflicts a regular critical hit against a boss. | 60 | 0 | 0 | No | 45 | 0 |
| Grievous Insult | Level 25, Strength 45 | A vile epithet attracts the ire of all enemies nearby, drawing them away from their cur- rent targets and toward the warrior. | 80 | 0 | 0 | No | 60 | 10 |
| Massacre | Level 27, Strength 54 | The warrior spins in an arc of death, automatically killing nearby enemies of lower or lesser rank and scoring a critical hit against any elite target, but inflicting normal damage against a boss. | 100 | 0 | 0 | No | 60 | 7.5 |
Dual Weapon School

For those warriors who prefer dexterity, Dual Weapons gives you more offense without relying on strength. You deal damage with two weapons simulta- neously; alas, the drawback is that your defense suffers. The focus of your passive abilities is on your second hand: you want to deal as close to normal damage as possible and score close to the same number of critical hits as your main hand.
You gain a bonus to attack and defense with Dual-Weapon Finesse. Dual-Weapon Expert gives a bonus to critical chance and lets you cause bleeding lacerations on your opponent, inflicting damage over time. You may wield full-sized weapons in your off-hand while reducing the stamina cost of all dual weapon talents with Dual-Weapon Mastery.
Increase your attack damage with Dual Striking in the second chain. Score a two-hit combo with a possibility of stunning your opponent and scoring a critical hit with Riposte. Cripple gives you a chance to score a critical hit and inflict your opponent with penalties to movement speed, attack, and defense. Punisher is a three-hit combo that can score a critical hit, knock an opponent down, and cause penalties to movement and attack speed.
Dual-Weapon Sweep deals significant damage with each sweep. Flurry is a three-hit combo, while Momentum increases your attack speed with every hit. Whirlwind is a flurry of constant attacks: the signature of a Dual Weapon expert.
This talent chain can also be a deadly combination with the Warrior talent school. Draw enemies in and knock them down, stun them, cause damage over time, and inflict penalties to movement speed, attack, and defense. Powerful and Bravery give you bonuses to attack, defense, and resistances while Death Blow restores stamina with each kill, making you a whirlwind of death…if you don’t get hammered by arrows or spells from opponents.
The new Twin Strikes chain scores two automatic critical hits on a target. Find Vitals increases melee chance by 10 and critical damage by 20. Low Blow combos with Twin Strikes and leaves opponents unable to move for a short duration. Unending Flurry acts just as you would expect it to: repeated attacks strike the target over and over until you miss or run out of mana.
Dual Weapon School - Chain 1
| Name | Prerequisite | Description | Cost (mana/stamina) | Upkeep (mana/stamina) | Fatigue (% mana/stamina) | Ranged | Cooldown (sec.) | Area of Effect Radius (ft.) |
|---|---|---|---|---|---|---|---|---|
| Dual Striking | Dexterity 12 | When in this mode, the character strikes with both weapons simultaneously. Attacks cause more damage, but the character cannot inflict regular critical hits or backstabs. | 0 | 50 | 5 | No | 10 | 0 |
| Riposte | Dexterity 16 | The character strikes at a target once, dealing normal damage, as well as stunning the opponent unless it passes a physical resistance check. The character then strikes with the other weapon, generating a critical hit if the target was stunned. | 40 | 0 | 0 | No | 20 | 0 |
| Cripple | Dexterity 22 | The character strikes low at a target, gaining a momentary attack bonus and hitting critically if the attack connects, while crippling the target with penalties to movement speed, attack, and defense unless it passes a physical resistance check. | 35 | 0 | 0 | No | 30 | 0 |
| Punisher | Dexterity 28 | The character makes three blows against a target, dealing normal damage for the first two strikes and generating a critical hit for the final blow, if it connects. The target may also suffer penalties to attack and defense, or be knocked to the ground. | 50 | 0 | 0 | No | 40 | 0 |
Dual Weapon School - Chain 2
| Name | Prerequisite | Description | Cost (mana/stamina) | Upkeep (mana/stamina) | Fatigue (% mana/stamina) | Ranged | Cooldown (sec.) | Area of Effect Radius (ft.) |
|---|---|---|---|---|---|---|---|---|
| Dual-Weapon Sweep | Dexterity 12 | The character sweeps both weapons in a broad forward arc, striking nearby enemies with one or both weapons and inflicting significantly more damage than normal. | 20 | 0 | 0 | No | 15 | 2 |
| Flurry | Dexterity 18 | The character lashes out with a flurry of three blows, dealing normal combat damage with each hit. | 40 | 0 | 0 | No | 20 | 0 |
| Momentum | Dexterity 24 | The character has learned to carry one attack through to the next, increasing attack speed substantially. This mode consumes stamina quickly, however. | 0 | 60 | 5 | No | 30 | 0 |
| Whirlwind | Dexterity 30 | The character flies into a whirling dance of death, striking out at surrounding enemies with both weapons. Each hit deals normal combat damage. | 40 | 0 | 0 | No | 40 | 2 |
Dual Weapon School - Chain 3
| Name | Prerequisite | Description | Cost (mana/stamina) | Upkeep (mana/stamina) | Fatigue (% mana/stamina) | Ranged | Cooldown (sec.) | Area of Effect Radius (ft.) |
|---|---|---|---|---|---|---|---|---|
| Dual-Weapon Training | Dexterity 12 | The character has become more proficient fighting with two weapons, and now deals closer to normal damage bonus with the off-hand weapon. | 0 | 0 | 0 | No | 0 | 0 |
| Dual-Weapon Finesse | Dexterity 16 | The character is extremely skilled at wielding a weapon in each hand, gaining bonuses to attack and defense. | 0 | 0 | 0 | No | 0 | 0 |
| Dual-Weapon Expert | Dexterity 26 | The character has significant experience with two-weapon fighting, gaining a bonus to critical chance, as well as a possibility with each hit to inflict bleeding lacerations that continue to damage a target for a time. | 0 | 0 | 0 | No | 0 | 0 |
| Dual-Weapon Mastery | Dexterity 36 | Only a chosen few truly master the complicated art of fighting with two weapons. The character is now among that elite company, able to wield full-sized weapons in both hands. Stamina costs for all dual-weapon talents are also reduced. | 0 | 0 | 0 | No | 0 | 0 |
Dual Weapon School - Chain 4
| Name | Prerequisite | Description | Cost (mana/stamina) | Upkeep (mana/stamina) | Fatigue (% mana/stamina) | Ranged | Cooldown (sec.) | Area of Effect Radius (ft.) |
|---|---|---|---|---|---|---|---|---|
| Twin Strikes | Level 20, Dexterity 34 | Two devastating strikes in rapid succession each inflict an automatic critical hit. Find Vitals adds additional damage to each hit. If the target is affected by Low Blow, it cannot move for a short time. | 50 | 0 | 0 | No | 30 | 0 |
| Find Vitals | Dexterity 40 | The character is a force of nature when wielding two weapons, gaining permanent bonuses to melee critical chance and critical damage. Twin Strikes now inflicts additional bleeding damage (melee critical chance +10, critical damage +20). | Passive | 0 | 0 | No | 0 | 0 |
| Low Blow | Dexterity 46 | The character strikes at the legs of surrounding enemies, imposing penalties to movement speed and attack speed for a short time. If an opponent is already bleeding from Twin Strikes, it slips and falls to the ground as well. | 50 | 0 | 0 | No | 30 | 2.5 |
| Unending Flurry | Dexterity 50 | The character singles out an enemy for death, stabbing it quickly and repeatedly, consuming a small amount of stamina with each hit. The assault continues until the target dies or flees, or until the character misses or runs out of stamina. If the target is bleeding from Twin Strikes, each swing becomes a critical hit. If the target is slowed by Low Blow, the character cannot miss. | 40 | 0 | 0 | No | 60 | 0 |
Archery School

Another school for warriors who build up dexterity, Archery gives ample special effects for a ranged combat enthusiast. Melee Archer lets you fire while being attacked (eliminating some of the pain of being an archer). Master Archer gives you bonuses to activated abilities and eliminates the penalty to attack speed when wearing heavy armor. Aim reduces attack speed but gives bonuses to attack, damage, armor penetration, and critical chance. Defensive Fire gives you a boost to defense but slows your attack speed.
In the second chain, Pinning Shot is a necessity because it impales the victim’s leg and either pins it in place or slows its movement speed. Crippling Shot deals normal damage to an enemy and gives it penalties to attack and defense, and Critical Shot delivers maximum damage upon impact. The deadly Arrow of Slaying usually scores a critical hit, often dropping weakened enemies.
Rapid Shot increases attack speed, but you lose the ability to score critical hits. Shattering Shot deals normal damage and opens up an enemy’s armor. If a warrior finds open armor, its wearer will be in sore shape. Suppressing Fire is like Rapid Shot, but its foes now take penalties to their attack rating. Scattershot stuns a foe and then shatters, dealing damage to other enemies around it.
When you have room to breathe, Pinning Shot and Crippling Shot turn enemies into sitting ducks for mage attacks, deadly rogues, or more of your carefully aimed arrows. Shattering Shot is excellent against heavily armed foes. Rapid Shot, Suppressing Fire, and Scattershot hack away at the collective hit points of enemy ranks.
Don’t think an archer just scores a hit or two before having to engage an opponent in melee. You can kill a couple enemies in a few hits while pinning others in place and continuing to fire while other attackers swarm you. This turns you into a deadly sniper that enemies need to deal with or suffer the conse- quences. If the enemy swarms you, switch to Defensive Fire while you have the passive ability Melee Archer. You can fire off arrows while being attacked and still have decent defense.
The new Accuracy chain gives bonuses to your attack and damage scores, as well as ranged critical chance. Arrow Time slows down enemies around the archer, while the phenomenal Burst Shot scores an automatic triple critical hit against a single target and then shatters to deal AoE damage to all other targets around it. Rain of Arrows blankets an area with damage, harming foes and friends alike in the large radius.
Archery School - Chain 1
| Name | Prerequisite | Description | Cost (mana/stamina) | Upkeep (mana/stamina) | Fatigue (% mana/stamina) | Ranged | Cooldown (sec.) | Area of Effect Radius (ft.) |
|---|---|---|---|---|---|---|---|---|
| Melee Archer | Dexterity 12 | Experience fighting in tight quarters has taught the archer to fire without interruption, even when being attacked. | 0 | 0 | 0 | No | 0 | 0 |
| Aim | Dexterity 16 | The archer carefully places each shot for maximum effect while in this mode. This decreases rate of fire but grants bonuses to attack, damage, armor penetration, and critical chance. Master Archer further increases these bonuses. | 0 | 35 | 5 | No | 10 | 0 |
| Defensive Fire | Dexterity 22 | While active, the archer changes stance, receiving a bonus to defense but slowing the rate of fire. With the Master Archer talent, the defense bonus increases. | 0 | 40 | 5 | No | 15 | 0 |
| Master Archer | Dexterity 28 | Deadly with both bows and crossbows, master archers receive additional benefits when using Aim, Defensive Fire, Crippling Shot, Critical Shot, Arrow of Slaying, Rapid Shot, and Shattering Shot. This talent also eliminates the penalty to attack speed when wearing heavy armor, although massive armor still carries the penalty. | 0 | 0 | 0 | No | 0 | 0 |
Archery School - Chain 2
| Name | Prerequisite | Description | Cost (mana/stamina) | Upkeep (mana/stamina) | Fatigue (% mana/stamina) | Ranged | Cooldown (sec.) | Area of Effect Radius (ft.) |
|---|---|---|---|---|---|---|---|---|
| Pinning Shot | Dexterity 12 | A shot to the target’s legs disables the foe, pinning the target in place unless it passes a physical resistance check, and slowing movement speed otherwise. | 20 | 0 | 0 | Yes | 15 | 0 |
| Crippling Shot | Dexterity 16 | A carefully aimed shot hampers the target’s ability to fight by reducing attack and defense if it hits, although the shot inflicts only normal damage. The Master Archer talent adds an attack bonus while firing the Crippling Shot. | 25 | 0 | 0 | Yes | 10 | 0 |
| Critical Shot | Dexterity 21 | Finding a chink in the target’s defenses, the archer fires an arrow that, if aimed correctly, automatically scores a critical hit and gains a bonus to armor penetration. The Master Archer talent increases the armor penetration bonus. | 40 | 0 | 0 | Yes | 10 | 0 |
| Arrow of Slaying | Dexterity 30 | The archer generates an automatic critical hit if this shot finds its target, although high level targets may be able to ignore the effect. The archer suffers reduced stamina regeneration for a time. Master Archer adds an extra attack bonus. | 80 | 0 | 0 | Yes | 60 | 0 |
Archery School - Chain 3
| Name | Prerequisite | Description | Cost (mana/stamina) | Upkeep (mana/stamina) | Fatigue (% mana/stamina) | Ranged | Cooldown (sec.) | Area of Effect Radius (ft.) |
|---|---|---|---|---|---|---|---|---|
| Rapid Shot | Dexterity 12 | Speed wins out over power while this mode is active, as the archer fires more rapidly but without any chance of inflicting regular critical hits. Master Archer increases the rate of fire further still. | 0 | 35 | 5 | No | 30 | 0 |
| Shattering Shot | Dexterity 16 | The archer fires a shot designed to open up a weak spot in the target’s armor. The shot deals normal damage if it hits and imposes an armor penalty on the target. Master Archer increases the target’s armor penalty. | 25 | 0 | 0 | Yes | 15 | 0 |
| Suppressing Fire | Dexterity 24 | When this mode is active, the archer’s shots hamper foes. Each arrow deals regular damage and also encumbers the target with a temporary penalty to attack. This penalty can be applied multiple times. | 0 | 60 | 5 | No | 10 | 0 |
| Scattershot | Dexterity 27 | The archer fires a single arrow that automatically hits, stunning the target and dealing normal damage. The arrow then shatters, hitting all nearby enemies with the same effect. | 50 | 0 | 0 | Yes | 40 | 0 |
Archery School - Chain 4
| Name | Prerequisite | Description | Cost (mana/stamina) | Upkeep (mana/stamina) | Fatigue (% mana/stamina) | Ranged | Cooldown (sec.) | Area of Effect Radius (ft.) |
|---|---|---|---|---|---|---|---|---|
| Accuracy | Level 20, Dexterity 34 | For as long as this mode is active, the archer’s mind is clear of everything except the next shot’s trajectory, gaining bonuses to attack, damage, ranged critical chance, and ranged critical damage, all dependent on the archer’s dexterity attribute. | 0 | 60 | 0 | No | 10 | 0 |
| Arrow Time | Dexterity 38 | Intense focus slows the archer’s perception of time, effectively reducing the movement speed of enemies who come near for as long as this mode is active, excepting those of elite rank or higher. This deep concentration drains stamina constantly. | 0 | 40 | 10 | No | 10 | 0 |
| Burst Shot | Dexterity 44 | The archer looses a special shaft that scores an automatic triple critical hit against the targeted enemy, then shatters, inflicting half the effect on those unfortunate enough to be in the vicinity. Friendly fire possible. | 60 | 0 | 0 | Yes | 60 | 3 |
| Rain of Arrows | Dexterity 52 | The archer’s bow points to the sky, firing multiple projectiles which then rain down over time in the targeted area. Friendly fire possible. | 80 | 0 | 0 | Yes | 60 | 0 |
Weapon and Shield School
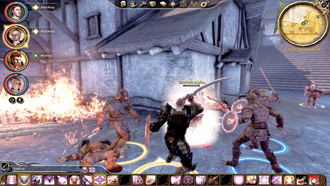
Your standard warrior tank usually dips into the Weapon and Shield school a lot. In the offensive chain, Shield Bash deals normal damage and has a chance to knock an enemy down. Shield Pummel is a two-hit combo that can stun an enemy. Overpower is a three-hit shield combo that might deal a critical hit with the third strike. Assault is a four-hit combo that diminishes in power with each strike. Use any of these with Shield Defense, Shield Wall, or Shield Cover to get in some good, solid hits while bolstering your defenses. Use any of these with Threaten or Taunt in the Warrior talent school to pull enemies in and knock them back on their collective back sides.
Shield Wall or Shield Defense used with Taunt or Threaten from the Warrior talent school makes a great combination because you lure enemies in and beef up your defenses while resisting knockdown effects and shrugging off missiles. The Shield Block passive ability eliminates your enemies’ flanking advantage on your shield side, while the Shield Tactics passive ability eliminates your enemies’ flanking advantage altogether. This comes in very handy because hordes of enemies swarm your characters in many battles. When they flank you, they score bonuses to attacks and critical hits. Shield Cover and Shield Defense help you shrug off missile attacks. This is very useful, for example, when hurlocks are swarming you while genlock archers are slamming you with arrows.
The many passive abilities in this talent chain give bonuses to the sustained and activated abilities, so they get stronger the more you progress in Weapon and Shield training. Now, if only there were 300 more of these guys in your army at the end of the game...
The new Juggernaut chain allows a tank to run through enemies and knock them aside, which aids in reaching surrounded allies and generally knocking enemies about. Carapace protects the warrior by reducing damage based off the warrior’s constitution score; the fourth talent in the chain, Bulwark of the Ages, improves Carapace and makes the tank completely invulnerable for the first half of the Carapace effect. Air of Insolence radiates continuous energy that draws enemies toward the warrior.
Weapons and Shield School - Chain 1
| Name | Prerequisite | Description | Cost (mana/stamina) | Upkeep (mana/stamina) | Fatigue (% mana/stamina) | Ranged | Cooldown (sec.) | Area of Effect Radius (ft.) |
|---|---|---|---|---|---|---|---|---|
| Shield Bash | Strength 11 | The character shield-bashes a target, dealing normal damage as well as knocking the target off its feet unless it passes a physical resistance check. Shield Mastery doubles the strength bonus for this attack. | 25 | 0 | 0 | No | 20 | 0 |
| Shield Pummel | Strength 15 | The character follows up an attack with two hits from the shield, dealing normal damage with each attack. If the target fails a physical resistance check, it is stunned. Shield Mastery doubles the character’s strength bonus for each strike. | 30 | 0 | 0 | No | 20 | 0 |
| Overpower | Strength 25 | The character lashes out with the shield three times. The first two hits inflict normal damage. The last strike is a critical hit if it connects, knocking the target down unless it passes a physical resistance check. Shield Mastery increases the damage. | 30 | 0 | 0 | No | 20 | 0 |
| Assault | Strength 32 | The character quickly strikes a target four times, but dealing reduced damage with each hit. If the character has Shield Mastery, the damage from each hit increases. | 40 | 0 | 0 | No | 20 | 0 |
Weapons and Shield School - Chain 2
| Name | Prerequisite | Description | Cost (mana/stamina) | Upkeep (mana/stamina) | Fatigue (% mana/stamina) | Ranged | Cooldown (sec.) | Area of Effect Radius (ft.) |
|---|---|---|---|---|---|---|---|---|
| Shield Block | Dexterity 10 | Practice fighting with a shield improves the character’s guard. Enemies can no longer flank the character on the shield-carrying side. | 0 | 0 | 0 | No | 0 | 0 |
| Shield Cover | Dexterity 16 | While in this mode, the warrior’s shield provides a greater chance of deflecting missile attacks. Shield Mastery increases this bonus further. | 0 | 20 | 5 | No | 15 | 0 |
| Shield Tactics | Dexterity 20 | The character is proficient enough with a shield to defend from all angles, so that attackers no longer benefit from flanking strikes. | 0 | 0 | 0 | No | 0 | 0 |
| Shield Mastery | Dexterity 26 | The character has mastered the use of the shield for both offense and defense, and receives additional benefits when using Shield Bash, Shield Pummel, Assault, Overpower, Shield Defense, Shield Wall, and Shield Cover. | 0 | 0 | 0 | No | 0 | 0 |
Weapons and Shield School - Chain 3
| Name | Prerequisite | Description | Cost (mana/stamina) | Upkeep (mana/stamina) | Fatigue (% mana/stamina) | Ranged | Cooldown (sec.) | Area of Effect Radius (ft.) |
|---|---|---|---|---|---|---|---|---|
| Shield Defense | Strength 11 | While this mode is active, the character drops into a defensive stance that favors the shield, gaining a bonus to defense and an increased chance to shrug off missile attacks, but taking a penalty to attack. With Shield Balance, the attack penalty is reduced. With Shield Expertise, the defense bonus increases. With Shield Mastery, the defense bonus increases further. | 0 | 35 | 5 | No | 5 | 0 |
| Shield Balance | Strength 14 | The character has learned to compensate for the weight of a shield in combat and no longer suffers an attack penalty while using Shield Defense. | 0 | 0 | 0 | No | 0 | 0 |
| Shield Wall | Strength 20 | In this mode, the character’s shield becomes nearly a fortress, adding a significant bonus to armor and a greater likelihood of shrugging off missile attacks, but at the cost of reduced damage. Shield Expertise makes the character immune to direct knockdown attacks while in this mode, and Shield Mastery gives a bonus to defense. | 0 | 55 | 5 | No | 15 | 0 |
| Shield Expertise | Strength 26 | The character’s experience using a shield in combat has made certain abilities more efficient, increasing the defense bonus for Shield Defense and making the character immune to direct knockdown attacks while using Shield Wall. | 0 | 0 | 0 | No | 0 | 0 |
Weapons and Shield School - Chain 4
| Name | Prerequisite | Description | Cost (mana/stamina) | Upkeep (mana/stamina) | Fatigue (% mana/stamina) | Ranged | Cooldown (sec.) | Area of Effect Radius (ft.) |
|---|---|---|---|---|---|---|---|---|
| Juggernaut | Level 20, Strength 26 | A powerful physique allows the character to knock aside any enemies who are in the way while this mode is active and the character is moving. Each knockback drains a small amount of stamina. | 0 | 60 | 10 | No | 10 | 0 |
| Carapace | Strength 32 | No attack gets past this shield completely. For a moderate duration, all damage is reduced by an amount proportional to the character’s constitution modifier. Bulwark of the Ages improves the protection, making the character completely immune to damage for the first half of this effect. | 40 | 0 | 0 | No | 60 | 0 |
| Air of Insolence | Strength 36 | While this mode is active, the character adopts an intimidating posture that continuously draws the attention of nearby enemies, consuming stamina constantly. | 0 | 100 | 10 | No | 10 | 0 |
| Bulwark of the Ages | Strength 40 | The warrior is one with the shield. This talent improves the effect of Carapace, now making the character completely immune to damage for the first half of that effect. | 0 | 0 | 0 | No | 0 | 0 |
Two-Handed School
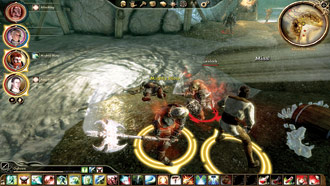
In this talent school, you get to deal massive damage, but you’re slower moving and you don’t have as much in the way of defense. The Stunning Blows passive ability adds a chance to stun your target each time you strike. Shattering Blows gives you attack bonuses against golems and other heavily armored foes. Destroyer means that every attack you deal has a chance to sunder an opponent’s armor. Two-Handed Strength reduces your attack and defense penalty in Powerful Swings.
Indomitable gives you a bonus to attack while making you immune to stun or knockdown effects. If you’re in a swarm of larger enemies, use Indomitable to protect against getting stunned or knocked down, but careful with this because it uses a nice chunk of your stamina. The Powerful Swings sustained ability gives you a nice bonus to damage but reduces your attack and defense.
Pommel Strike knocks an opponent to the ground. Critical Strike is a massive hit that scores a critical hit and sometimes kills a foe outright. Sunder Arms targets an enemy’s weapon, giving a penalty to attack, while Sunder Armor targets the armor, giving a penalty to armor and dealing normal damage to the unlucky victim. Mighty Blow can deal a critical hit and reduce the opponent’s movement, and Two-Handed Sweep hits enemies in a wide arc, dealing normal damage and knocking them down.
The new Sweeping Strike chain begins with a talent that knocks a group of enemies to the ground (if they fail a physical resistance check), critically hits the primary target and distributes normal damage to the rest. The sustained talent Two-Handed Impact sends out shockwaves that deal damage to other enemies around your primary target. Onslaught advances the warrior several steps, sweeping the weapon in huge arcs that deal damage to multiple foes. Reaving Storm sends the warrior on a furious assault against multiple foes as he or she slashes continuously at all surrounding enemies.
Two-Handed School - Chain 1
| Name | Prerequisite | Description | Cost (mana/stamina) | Upkeep (mana/stamina) | Fatigue (% mana/stamina) | Ranged | Cooldown (sec.) | Area of Effect Radius (ft.) |
|---|---|---|---|---|---|---|---|---|
| Blow | Strength 15 | The character puts extra weight and effort behind a single strike, gaining a bonus to attack. If it hits, the blow deals critical damage and imposes a penalty to movement speed unless the target passes a physical resistance check. | 40 | 0 | 0 | No | 20 | 0 |
| Powerful Swings | Strength 21 | While in this mode, the character puts extra muscle behind each swing, gaining a bonus to damage but suffering penalties to attack and defense. Two-Handed Strength reduces the penalties to attack and defense. | 0 | 30 | 5 | No | 10 | 0 |
| Two-Handed Strength | Strength 28 | The character has learned to wield two-handed weapons more effectively, reducing the penalties to attack and defense from Powerful Swings. | 0 | 0 | 0 | No | 0 | 0 |
| Two-Handed Sweep | Strength 36, Level 10 | The character swings a two-handed weapon through enemies in a vicious arc, dealing normal damage to those it hits and knocking them down unless they pass a physical resistance check. | 40 | 0 | 0 | No | 20 | 3 |
Two-Handed School - Chain 2
| Name | Prerequisite | Description | Cost (mana/stamina) | Upkeep (mana/stamina) | Fatigue (% mana/stamina) | Ranged | Cooldown (sec.) | Area of Effect Radius (ft.) |
|---|---|---|---|---|---|---|---|---|
| Pommel Strike | Strength 12 | Instead of going for the fatal attack an enemy expects, the player strikes out with a weapon’s blunt end, knocking the opponent to the ground unless it passes a physical resistance check. | 20 | 0 | 0 | No | 10 | 0 |
| Indomitable | Strength 20 | Through sheer force of will, the character remains in control on the battlefield, gaining a slight increase to attack damage while being immune to stun or knock down effects for the duration of this mode. | 0 | 60 | 5 | No | 30 | 0 |
| Stunning Blows | Strength 28 | The character’s fondness for massive two-handed weapons means that each attack offers a chance to stun the opponent due to the sheer weight behind the blow. | 0 | 0 | 0 | No | 0 | 0 |
| Critical Strike | Strength 34 | The character makes a single massive swing at the target, gaining a bonus to attack. If the strike connects, it is an automatic critical hit, possibly killing the opponent outright if its health is low enough. | 40 | 0 | 0 | No | 60 | 0 |
Two-Handed School - Chain 3
| Name | Prerequisite | Description | Cost (mana/stamina) | Upkeep (mana/stamina) | Fatigue (% mana/stamina) | Ranged | Cooldown (sec.) | Area of Effect Radius (ft.) |
|---|---|---|---|---|---|---|---|---|
| Sunder Arms | Strength 18 | The character attempts to hinder a target’s ability to fight back, rather than going directly for a killing blow. Unless the target passes a physical resistance check, it suffers a penalty to attack for a short time. | 25 | 0 | 0 | No | 10 | 0 |
| Shattering Blows | Strength 23 | The character is as adept at destruction as at death and gains a large damage bonus against golems and other constructs. | 0 | 0 | 0 | No | 0 | 0 |
| Sunder Armor | Strength 28, Level 10 | The character aims a destructive blow at the target’s armor or natural defenses. The attack deals normal damage, but also damages the armor unless the target passes a physical resistance check. | 40 | 0 | 0 | No | 20 | 0 |
| Destroyer | Strength 40, Level 14 | Few can stand against the savage blows of a destroyer. Every attack sunders the target’s armor, reducing its effectiveness for a short time. The effects of multiple blows are not cumulative. | 0 | 0 | 0 | No | 0 | 0 |
Two-Handed School - Chain 4
| Name | Prerequisite | Description | Cost (mana/stamina) | Upkeep (mana/stamina) | Fatigue (% mana/stamina) | Ranged | Cooldown (sec.) | Area of Effect Radius (ft.) |
|---|---|---|---|---|---|---|---|---|
| Sweeping Strike | Level 20, Strength 30 | A massive swing plows through a cone of enemies, inflicting a critical hit against the primary target and normal damage against others in the cone. Affected enemies are also knocked to the ground unless they pass a physical resistance check. | 30 | 0 | 0 | Yes | 10 | 60 |
| Two-Handed Impact | Strength 38 | While in this mode, each blow from the character’s heavy two-hander generates a small shockwave that damages other enemies near the target. This mode drains stamina constantly. | 0 | 40 | 10 | No | 10 | 0 |
| Onslaught | Strength 44 | The character advances several times, sweeping the weapon in huge arcs that hit multiple enemies. | 50 | 0 | 0 | No | 30 | 2.5 |
| Reaving Storm | Strength 50 | While this mode is active, the character turns continuously to attack surrounding enemies, slashing in wild arcs but spending stamina with each hit. This mode can only be activated during combat. | 0 | 0 | 10 | No | 30 | 0 |
Power of Blood School (downloadable content only)
Power of Blood School - Chain 1
| Name | Prerequisite | Description | Cost (mana/stamina) | Upkeep (mana/stamina) | Fatigue (% mana/stamina) | Ranged | Cooldown (sec.) | Area of Effect Radius (ft.) |
|---|---|---|---|---|---|---|---|---|
| Blood Thirst | None | The warrior’s own tainted blood spills in sacrifice, increasing movement speed, attack speed, and critical hit chance. For as long as the mode is active, however, the warrior suffers greater damage and continuously diminishing health. | 30 | 30 | 5 | No | 5 | 0 |
| Blood Fury | None | The warrior sprays tainted blood in order to knock back nearby enemies, which they may resist by passing a physical resistance check. The gush of blood, however, results in a loss of personal health. | 30 Stam. & 40 Health | 0 | 0 | No | 10 | 5 |
Specializations

Each class can learn three out of the six possible specializations throughout the course of the game. Your first specialization can be learned at level 7; your second at level 14; and your third at level 22. Specializations are difficult to achieve, but very rewarding if you gain one. In Awakening , all specializations are learned via Manuals. As long as the specific abilities fit with your play style and character breakdown, a specialization is generally worth spending points in over regular talents. Definitely experiment with specializations. A tank could, for example, specialize in Templar to take out spellcasters even if he can’t get to them directly. However, here are some suggested play style fits for the six specializations:
Berserker
Primary: DPS (max out damage at the expense of stamina)
Secondary : Knockout punch (use Final Blow to finish off a foe but exhausts you in a long fight)
| Name | Prerequisite | Description | Cost (mana/stamina) | Upkeep (mana/stamina) | Fatigue (% mana/stamina) | Ranged | Cooldown (sec.) | Area of Effect Radius (ft.) |
|---|---|---|---|---|---|---|---|---|
| Berserk | 7 | The stench of blood and death drives the Berserker into a willing fury, providing a bonus to damage. Rages incur a penalty to stamina regeneration, however, which Constraint reduces. Resilience adds a bonus to health regeneration in this mode. | 0 | 20 | 5 | No | 30 | 0 |
| Resilience | 8 | Rages no longer wear so heavily on the Berserker’s body. The stamina regeneration penalty applied by Berserk is reduced, and the Berserker gains a bonus to nature resistance. | 0 | 0 | 0 | No | 0 | 0 |
| Constraint | 10 | The Berserker has learned to retain control during rages, reducing Berserk’s penalty to stamina regeneration. | 0 | 0 | 0 | No | 0 | 0 |
| Final Blow | 12 | All the Berserker’s stamina goes into a single swing. If the blow connects, the attack inflicts extra damage proportional to the amount of stamina lost. | 5 | 0 | 0 | No | 60 | 0 |
Champion
Primary: Party buffer (increase attack and defense bonuses for everyone)
Secondary: Enemy control (use Superiority to knock enemy groups off their feet)
| Name | Prerequisite | Description | Cost (mana/stamina) | Upkeep (mana/stamina) | Fatigue (% mana/stamina) | Ranged | Cooldown (sec.) | Area of Effect Radius (ft.) |
|---|---|---|---|---|---|---|---|---|
| War Cry | 7 | The Champion lets out a fearsome cry that gives nearby enemies a penalty to attack. With Superiority, nearby enemies are also knocked down unless they pass a physical resistance check. | 25 | 0 | 0 | No | 20 | 10 |
| Rally | 12 | The Champion’s presence inspires nearby allies, giving them bonuses to attack and defense while this mode is active. When coupled with Motivate, the attack bonus increases. | 0 | 50 | 5 | No | 30 | 10 |
| Motivate | 14 | The Champion inspires allies to attack with renewed vigor. The Rally talent now increases attack, in addition to its defense bonus. | 40 | 30 | 0 | No | 0 | 0 |
| Superiority | 16 | The Champion is so fearsome that War Cry now knocks nearby opponents off their feet unless they pass a physical resistance check. | 60 | 0 | 0 | No | 0 | 0 |
Reaver
Primary: AoE DPS (radiate spirit damage and fear)
Secondary: Health resilient (absorb health from nearby corpses)
| Name | Prerequisite | Description | Cost (mana/stamina) | Upkeep (mana/stamina) | Fatigue (% mana/stamina) | Ranged | Cooldown (sec.) | Area of Effect Radius (ft.) |
|---|---|---|---|---|---|---|---|---|
| Devour | 7 | The Reaver revels in death, absorbing the lingering energy of all nearby corpses, each of which partially restores the Reaver’s own health. | 25 | 0 | 0 | No | 30 | 5 |
| Frightening Appearance | 12 | This talent focuses the Reaver’s unsettling countenance into a weapon, making a target cower in fear unless it passes a mental resistance check. Frightening Appearance also increases the effectiveness of Taunt and Threaten. | 25 | 0 | 0 | No | 20 | 0 |
| Aura of Pain | 14 | Radiating an aura of psychic pain, the Reaver takes constant spirit damage while this mode is active, as do all enemies nearby. | 0 | 60 | 5 | No | 45 | 4 |
| Blood Frenzy | 16 | Driven by pain, the Reaver gains larger bonuses to damage whenever health decreases. Because this mode also incurs a penalty to health regeneration, the Reaver flirts with death the longer the frenzy persists. | 0 | 60 | 5 | No | 60 | 0 |
Templar
Primary: Mage killer (pound enemy mages with abilities)
Secondary: Dispel magic (clean area of spell effects)
| Name | Prerequisite | Description | Cost (mana/stamina) | Upkeep (mana/stamina) | Fatigue (% mana/stamina) | Ranged | Cooldown (sec.) | Area of Effect Radius (ft.) |
|---|---|---|---|---|---|---|---|---|
| Righteous Strike | 7 | Templars are enforcers specifically chosen to control mages and slay abominations. Each of the Templar’s melee hits against an enemy spellcaster drains its mana. | 0 | 0 | 0 | No | 0 | 0 |
| Cleanse Area | 9 | The Templar purges the area of magic, removing all dispellable effects from those nearby. Friendly fire possible. | 40 | 0 | 0 | No | 30 | 10 |
| Mental Fortress | 12 | The Templar has learned to focus on duty, gaining a large bonus to mental resistance. | 0 | 0 | 0 | No | 0 | 0 |
| Holy Smite | 15 | The Templar strikes out with righteous fire, inflicting spirit damage on the target and other nearby enemies. If the target is a spellcaster, it must pass a mental resistance check or else loses mana and takes additional spirit damage proportional to the mana lost. All affected enemies are stunned or knocked back unless they pass physical resistance checks. | 75 | 0 | 0 | Yes | 40 | 5 |
Spirit Warrior
Primary: Anti-magic (resist spells to augment defense)
Secondary: Fade killer (slay enemies from the Fade easier)
| Name | Prerequisite | Description | Cost (mana/stamina) | Upkeep (mana/stamina) | Fatigue (% mana/stamina) | Ranged | Cooldown (sec.) | Area of Effect Radius (ft.) |
|---|---|---|---|---|---|---|---|---|
| Beyond the Veil | 20 | The warrior dons a cloak of mystical energies from the Fade in order to evade a substantial proportion of physical attacks, although the mode drains stamina constantly. If the warrior has Soulbrand, this mode also adds a moderate chance of resisting hostile spells, and the warrior’s attacks all deal spirit damage, bypassing enemy armor. If the warrior has Blessing of the Fade, the chance of resisting hostile spells increases further and the warrior gains bonuses to movement speed and attack speed. | 0 | 80 | 10 | No | 10 | 0 |
| Soulbrand | 22 | The warrior has gained a deeper connection to the spirit world. While Beyond the Veil is active, the warrior gains a moderate chance of resisting hostile spells, and attacks now deal spirit damage, bypassing enemy armor (magic resistance +5, spirit damage +5%). | Passive | 0 | 0 | No | 0 | 0 |
| Fade Burst | 25 | The warrior bursts with energies drawn from the other side of the Veil, dealing spirit damage to all enemies nearby, particularly harming creatures from the Fade. The amount of damage depends on the warrior’s willpower attribute. Friendly fire possible. | 80 | 0 | 0 | No | 30 | 7.5 |
| Blessing of the Fade | 28 | The warrior is able to draw strength from the benevolent spirits of the Fade. While Beyond the Veil is active, the warrior’s chance of resisting hostile spells increases further and the warrior gains bonuses to movement speed and attack speed (magic resistance +5, spirit damage +5%). | Passive | 0 | 0 | No | 0 | 0 |
Guardian
Primary: Damage shield (defend the whole party at once)
Secondary: Defense aura (pull enemies back to warrior)
| Name | Prerequisite | Description | Cost (mana/stamina) | Upkeep (mana/stamina) | Fatigue (% mana/stamina) | Ranged | Cooldown (sec.) | Area of Effect Radius (ft.) |
|---|---|---|---|---|---|---|---|---|
| Guardian’s Shield | 20 | The Guardian, dedicated to protecting allies, builds a shield around a party member that absorbs an amount of damage based on the Guardian’s constitution attribute. Master Guardian increases the strength of the shield. | 40 | 0 | 0 | No | 30 | 0 |
| Fortifying Presence | 22 | The Guardian sheathes the entire party in mystical protection, granting each member a temporary bonus to armor, with strength and duration both dependent on the Guardian’s constitution attribute. Master Guardian increases the armor bonus. | 50 | 0 | 0 | No | 10 | 0 |
| Master Guardian | 25 | The Guardian has committed to life as a true defender. Guardian’s Shield now absorbs more damage, and Fortifying Presence now provides a greater armor bonus. | 0 | 0 | 0 | No | 0 | 0 |
| Aura of the Stalwart Defender | 28 | While this mode is active, the Guardian makes a personal sacrifice in order to preserve allies, creating a field that pulls a foe back toward the Guardian if it tries to leave the field unless the enemy passes a physical resistance check. This mode can only be activated during combat. | 0 | 100 | 10 | No | 10 | 0 |
Gear

Warriors get the cream of the crop when it comes to weapons and armor. With so many choices, you really need to decide what talents you’ll be concentrating on to pick the best equipment. You don’t, for instance, want an awesome two-handed sword if you’re training in Weapon and Shields. Any weapon that grants you strength (or dexterity for warriors in Archery and Dual Weapon) should be considered.
Bonuses to damage, attack, and criticals can be great too. If you want more defense, bulk up your armor rating, but it’s always a fine line between great armor rating and too much fatigue. Armor doesn’t do a lot of good if you can’t use any of your talents. You can always look for armor with a bonus to armor rating (no fatigue penalty), or even armor that grants constitution bonus or healing bonus.
There’s more warrior gear than you could ever hope to equip in a single play through. The general rule of thumb is to wait for loot that serves as an upgrade and snatch it up. If you have extra coin to buy a nice gear upgrade, feel free to spend away, though most of the low-level equipment will be easily replaced by future loot, and the high-level equipment is very expensive (generally bought before a run at the Mother).
Party Responsibilities
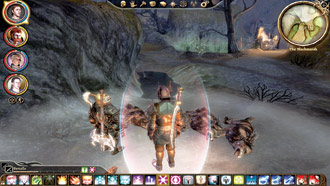
Are you the party’s tank or a damage-dealer? If you’re the tank, your primary responsibility is holding threat and making sure that none of your companions die. That generally means stocking up on defensive talents and gear. If you’re melee or ranged DPS, you can concentrate on offense and how much damage you can deal to enemy combatants.
All non-tank warriors need to be aware of threat and avoid pulling too much at once. Learn to time your attacks so you don’t create too much threat on yourself, yet deal significant damage to the enemy.
If your warrior is the main PC, the other three companions should fill in talents around you for a well-balanced party. If you’re building up a companion warrior, look to fill in where the party is lacking. Not dealing enough damage? Rank up the offense. Tank having trouble holding all the enemies? Invest in some off-tank talents, such as Taunt, to grab enemies when needed. In the final party configuration, your PC should play whatever role you have the most fun with while the other three companions add the components necessary to maximize your combat efficiency.
The warrior ranks highest of the three classes in access to weapons and armor. Your talents and gear allow you to defen- sively tank for the group, deal huge amounts of single-target damage, and chip in with AoE every once and a while. There’s no tougher adventurer in the land, so if you want to get right in the face of a raging hurlock or slash through spider ichor, step into the boots of a warrior.
Role Models
With the game’s best weapon talent trees, you can create dozens of warriors who each wield something a little different in combat. Don’t feel constrained to play according to the following warrior models to the letter; take bits and pieces that appeal to your play style and add your own spin. However, these are basic models for a tank, melee DPS warrior, or ranged DPS warrior. Each shows you how to choose your talents up to level 30, what talent chains are effective, how specializations fit in, and sample combat strategies for that model.
Tank Warrior Model
| Level | Talent |
|---|---|
| 0 | Shield Bash |
| 1 | Powerful, Shield Defense |
| 2 | Shield Balance |
| 3 | Shield Wall |
| 4 | Threaten |
| 5 | Shield Block |
| 6 | Shield Cover |
| 7 | War Cry (Champion)— First Specialization Available at This Level |
| 8 | Bravery |
| 9 | Shield Tactics |
| 10 | Shield Pummel |
| 11 | Overpower |
| 12 | Shield Mastery |
| 13 | Death Blow |
| 14 | Rally (Champion)— Second Specialization Available at This Level |
| 15 | Motivate (Champion) |
| 16 | Superiority (Champion) |
| 17 | Shield Expertise |
| 18 | Assault |
| 19 | Pinning Shot |
| 20 | Second Wind |
| 21 | Juggernaut |
| 22 | Guardian’s Shield (Guardian)— Third Specialization Available at This Level |
| 23 | Fortifying Presence (Guardian) |
| 24 | Carapace |
| 25 | Master Guardian (Guardian) |
| 26 | Air of Insolence |
| 27 | Bulwark of the Ages |
| 28 | Aura of the Stalwart Defender (Guardian) |
| 29 | Beyond the Veil (Spirit Warrior) |
| 30 | Soulbrand (Spirit Warrior) |
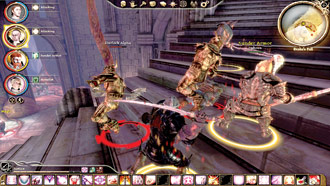
Overview: A tank protects his companions and deals significant damage to boot. He generally concentrates in the Warrior school and the Weapon and Shield school.
Leveling: Sink the majority of your points into strength and dexterity, increasing constitution whenever you have some free points, and spend your skill points on Combat Training, Vitality, and probably Clarity (or spread out points to other skills like Coercion and Survival).
Pick up Powerful and Shield Defense, then Shield Balance and Shield Wall. Next is an automatic choice: Threaten. You now have the core of your tanking defense ready to go. Shield Defense is a great all-purpose protection stance; Shield Wall defends even better, but at the cost of reduced damage, which may not matter much if you have enough damage-dealers in the party.
Shield Balance reduces the penalty to battle with a shield in your off-hand—another crucial talent for a Weapon and Shield warrior. Threaten should stay on in almost any fight to draw most of the threat to you.
Add Shield Block and Shield Cover to the mix. You could go with more offense here, but in this model we’re concen- trating on building the best defensive juggernaut we can to hold the line for your party. Stick with defense first, offense second. You need 16 dexterity to pick up Shield Cover.
You want the Champion specialization if at all possible. You can gain the Champion specialization by completing the “Arl of Redcliffe” and “Urn of Sacred Ashes” quests and freeing Arl Eamon from his illness in Dragon Age: Origins; in Awakening, it’s even easier—you begin with it when making a new character. The first Champion talent, War Cry, hits all nearby enemies with an attack penalty, and it really shines when you add Superiority.
Invest in Bravery. It gives bonuses to damage, physical resistance, mental resistance, and critical chance. In other words, it helps all facets of combat. Continue to add points to dexterity and strength as you level so you’re prepared to meet the prerequisites of more advanced talents.
With 20 dexterity, you can add Shield Tactics. This may be the most important talent a good tank needs, because it prevents enemies from scoring flanking bonuses against your warrior. No matter where your tank stands now, which is usually in the middle of an enemy swarm, it’s just like he’s facing the enemy head on.
Next switch to offense: pick up Shield Pummel, then purchase Overpower. Shield Pummel is a two-hit combo that can stun an opponent; Overpower is a three-hit combo that can knock a target down. Your strength and dexterity scores need to be in the mid-20s to open up your new talents.
Another milestone comes with Shield Mastery. The majority of your offensive and defensive abilities gain bonuses with Shield Mastery. You cap out the Warrior school when you gain Death Blow. Now, whenever your warrior slays an enemy, stamina gets restored. With enough killing, you can continuously operate your talents.
Next, study all the rest of your Champion talents. Rally and Motivate enhance the entire party’s offense and defense, but Superiority is the coup de grace. Now when you trigger War Cry, it has a chance to knock down all enemies around you and give you a great advantage in battle.
Fill out the rest of your Weapon and Shield chains. If you lean toward defense, learn Shield Expertise first; if you lean toward offense, get the four-hit combo Assault (requires 32 strength).
Your final point could be spent on almost anything. We’ll add a ranged component with Pinning Shot. If you can’t reach them on foot, pull out the bow and give them a reason to come to you.
Once you hit level 20, invest in the new Warrior talent Second Wind. It’s one of the best in the game, instantly refilling your stamina pool upon activation. It gives you that many more abilities to use during a long fight.
When you reach level 21, pick up the first of the new Weapon and Shield talents: Juggernaut.
At level 22, grab the next available Guardian talent: Guardian’s Shield will give you another buff to keep your whole group safe. It works off your constitution score; if you find yourself using it often, crank up your constitution as you level.
At level 23, chose the next Guardian talent, Fortifying Presence, then move on to Master Guardian at level 25, and fill out your Guardian specialization at level 28 with Aura of the Stalwart Defender. You’ll be a mountain of defense by this point.
You’ll follow at level 24 with Carapace and level 26 with Air of Insolence to bolster personal defense and increase your threat ability, respectively. Level 27 finishes off the new Weapon and Shield talents with Bulwark of the Ages.
Near the end of your leveling, you can branch out into whatever you feel like. For this build, we’ll pick up a third specialization: Spirit Warrior. More defense for a tank doesn’t hurt, so at level 29 we gain Beyond the Veil and start building up our magic resistance with Soulbrand at level 30.
Talent Choices: A tank concentrates on the defensive gems in the Warrior school, such as Powerful, Threaten, and Bravery. Other than that, a tank maxes out the Weapon and Shield school to take advantage of all its defensive components, with a little offense thrown in for good measure. No matter the enemy configuration, your tank should have an answer for it.
Specialization: The Champion’s War Cry hampers enemy at- tacks. Rally and Motivate increase offense and defense for your party. Superiority knocks enemies off their feet if they fail a physical resistance check. At higher levels, Guardian and Spirit Warrior supplement your defensive prowess.
Battle Tactics: Meet the enemy head on and intercept any attack on your companions. Unless you have Shield Tactics, you don’t want to let yourself get surrounded where you fall prey to flanking bonuses. Instead, choose a tactical location that shields you from some enemy attacks while protecting your party’s flanks. Use Threaten or Taunt to pull the threat toward you and away from companions.
Study your situation and choose the correct defense accordingly. For strict defense, go with Shield Wall, which boosts armor and prevents you from getting knocked down (a huge headache for your party if you don’t have an off-tank ready to jump in). If you want more offense, go with the standard Shield Defense instead. If you’re unsure on how the battle will go, always opt for more defense.
Once your defensive position is secure, think about dealing damage back to the monsters nearest you (or any ones who seem like they want to break free of your grasp). You can use Overpower and Assault to inflict serious harm. Save Shield Bash and Shield Pummel when you want to stun or knock down a target, especially if your health is low or an enemy is on another companion.
Melee DPS Warrior Model
| Level | Talent |
|---|---|
| 0 | Dual-Weapon Sweep |
| 1 | Pommel Strike, Powerful |
| 2 | Mighty Blow |
| 3 | Indomitable |
| 4 | Stunning Blows |
| 5 | Powerful Swings |
| 6 | Critical Strike |
| 7 | Beserk (Beserker)— First Specialization Available at This Level |
| 8 | Resilience (Beserker) |
| 9 | Two-Handed Strength |
| 10 | Constraint (Beserker) |
| 11 | Two-Handed Sweep |
| 12 | Final Blow (Beserker) |
| 13 | Sunder Arms |
| 14 | Shattering Blows— Second Specialization Available at This Level |
| 15 | Sunder Armor |
| 16 | Destroyer |
| 17 | Precise Striking |
| 18 | Taunt |
| 19 | Disengage |
| 20 | Second Wind |
| 21 | Sweeping Strike |
| 22 | Peon's Plight— Third Specialization Available at This Level |
| 23 | Beyond the Veil (Spirit Warrior) |
| 24 | Soul Brand (Spirit Warrior) |
| 25 | Two-Handed Impact |
| 26 | Onslaught |
| 27 | Grievous Insult |
| 28 | Fade Burst (Spirit Warrior) |
| 29 | Massacre |
| 30 | Reaving Storm |

Overview: Concentrate on dealing combat damage as quickly as you can without pulling too much threat.
Leveling: Because most of what a melee DPSer loves to do is deal hand-to-hand damage, you only have to worry about strength. Spend the majority of your points on strength, and skill points go to Combat Training, Clarity and prorably Poison-Making.
Select Pommel Strike and Powerful with your first two talent points. Pommel Strike gives you a knockdown attack, and Powerful enhances your health and reduces fatigue; these are useful defensive abilities, but the offense will come in bunches soon.
Mighty Blow begins a run to some major offense. It gives a bonus to attack and, if the blow connects, scores a critical hit on the target. Indomitable serves as a stepping stone talent to reach the better offensive top-tier talents; you may use Indomitable against creatures such as golems who you know will knock you down, but otherwise all your efforts go toward offense and you can leave it off.
Make sure you have 28 strength and Expert Combat Training to select Stunning Blows. It’s a passive talent that can make a world of difference: all your blows have a chance to stun the enemy. Powerful Swings increases your damage; however, it gives a penalty to attack and defense until you gain Two-Handed Strength.
If you’ve maxed out your strength and skills properly, you can pick up Critical Strike. Critical Strike promises an automatic critical hit and massive damage to a single target. Use it in any one-on-one fight or when you have lots of stamina in a longer fight.
Dip into the Berserker specialization. Berserk increases damage for each of your strokes, though your stamina will suffer a bit. Resilience helps offset Berserk’s stamina penalty, as does Constraint. Speaking of offsetting penalties, Two-Handed Strength minimizes the penalties from Powerful Swings.
Two-Handed Sweep gives you an option against multiple foes. You deal normal damage, but can knock them off their feet. Berserker’s Final Blow hits an opponent with a massive blow inflicting damage proportional to all of your stamina (which is expended in the process).
Next, invest in the Sunder chain: Sunder Arms, Shattering Blows, Sunder Armor, and Destroyer (requires 30 strength). If you like, feel free to buy part of this chain earlier for extra damage penetration, but you will lose out on some AoE and suffer penalties while using talents such as Powerful Swings. The chain can dramatically alter a battle against heavily armored foes, or massive foes such as golems.
Pick up the offensive Warrior chain: Precise Striking, Taunt, and Disengage. Taunt lets you off-tank if necessary, while Disengage is a nice option to reduce threat and shed enemies if the onslaught becomes too much.
At level 20, Pick up the essential Second Wind, first of the new Warrior talents, which fills your stamina pool back to full upon activation.
Follow up at level 22 with the second Warrior talent, Peon’s Plight, which is an excellent single-target attack that can slay lesser foes instantly.
You might not think it’s an ideal fit at level 23, but invest in the Spirit Warrior specialization. You’re not as interested in the defensive qualities for your melee DPSer, though it certainly doesn’t hurt, but at level 24 you can pick up Soulbrand and convert all your regular damage into spirit damage, which now bypasses foes’ armor. Continue with Fade Burst at level 28.
Start the new Two-Handed chain at level 21 with Sweeping Strike. Continue on at level 25 with Two-Handed Impact, followed by Onslaught at level 26, and Reaving Storm at level 30. You won’t be at a loss for attacks now when you want to heap on the damage. Level
27 gives you Grievous Insult, which can be used in an emergency to draw foes to you and off-tank if your main tank is having problems, but it’s more important as the stepping stone to reach the major AoE attack Massacre at level 29.
Talent Choices: In this version of a DPS warrior, your combat skills revolve around a two-handed weapon that, though slower, generally deals the most DPS of any weapon. Most of your talents maximize damage potential, with a few that give you AoE or stunning capabilities. It’s possible to branch out into Archery and Dual Weapon, but you don’t want to spread yourself too thin or you won’t max out your two- hander’s damage.
Specialization: Berserker is a big plus as soon as you can achieve it. The extra damage from the specialization is exactly what you want in a DPS melee class. The stamina penalty can be rough; however, two of your talents minimize the penalty, and the last talent, Final Blow, will win you some battles.
At higher levels, Spirit Warrior converts your normal damage to spirit damage to avoid enemy armor.
Battle Tactics: Be patient. You can deal a huge amount of damage, which means if you attack too swiftly, you may pull the threat off your tank. You won’t be much use to the group with four enemies stomping on your shredded corpse. Wait for the tank to set up, then attack from the flank or rear and cut through enemy after enemy. It’s fine to go all out on an enemy and even pull it off the tank so long as it dies almost immediately. Watch the battle and see where you’re most needed.
If you have off-tank skills, pick up any stragglers that go for the healer or other non-tank companions. The quicker the enemies drop, the less damage the party receives, so bounce from weakest enemy to weakest enemy as you help the tank chop away at the numbers. Save your big special effects (stuns, critical strikes, etc.) for bosses or tough enemies that just won’t go down with the normal party tactics. If the tank looks to be in trouble, pull out all the stops and dive into the main enemy line.
Ranged DPS Warrior Model
| Level | Talent |
|---|---|
| 0 | Powerful |
| 1 | Threaten |
| 2 | Bravery |
| 3 | Righteous Strike |
| 4 | Cleanse Area |
| 5 | Mental Fortress |
| 6 | Holy Smite |
| 7 | Melee Archer— First Specialization Available at This Level |
| 8 | Aim |
| 9 | Defensive Fire |
| 10 | Master Archer |
| 11 | Pinning Shot |
| 12 | Crippling Shot |
| 13 | Critical Shot |
| 14 | Arrow of Slaying— Second Specialization Available at This Level |
| 15 | Rapid Shot |
| 16 | Scattering Shot |
| 17 | Suppressing Fire |
| 18 | Scattershot, Shield Bash |
| 19 | Death Blow |
| 20 | Second Wind |
| 21 | Accuracy |
| 22 | Peon's Plight— Third Specialization Available at This Level |
| 23 | Arrow Time |
| 24 | Burst Shot |
| 25 | Rain of Arrows |
| 26 | Beyond the Veil |
| 27 | Soul Brand |
| 28 | Fade Burst (Spirit Warrior) |
| 29 | Grievous Insult |
| 30 | Massacre |

Overview: Much like an offensive mage, a ranged DPS warrior concentrates weapons and talents on enemies at a distance. He focuses on the Archery school, and may dip into some talents, such as Dual Weapon and the new Awakening Warrior talents, when melee becomes imminent.
Leveling: As you’ll be working with a bow and dual weapons, load up on dexterity. Your goal is to have 27 dexterity and Master Combat Training by level 6.
With your first three talent points, invest in the Warrior talents Powerful, Threaten, and Bravery. These are generally useful talents to beef up personal defense and to allow the archer to contribute more in combat situations. These also set up the later Warrior talent Death Blow at level 19.
Tap into the Templar specialization. The first talent, Righteous Strike, lets you drain mana with any successful melee strike against an enemy spellcaster. You may have to get close to use this talent, but it’s generally worth it against spellcasters, and it opens the door for Cleanse Area. This removes all magic effects on your party, which is great when you have negative debuffs on the group, but watch that you don’t strip the good buffs in the process.
Mental Fortress gives you a huge upgrade to your mental resistance.
Next, select Holy Smite (which decimates enemy spell- casters by dealing damage and draining mana).
Slip in Melee Archer. It’s an all-around useful ability: it prevents attacks from interrupting your firing. Next, fill out the rest of the Melee Archer chain: Aim, Defensive Fire, and Master Archer. Use Aim for more offense and Defensive Fire when you fear return fire. Master Archer improves almost every Archery talent.
Now choose Pinning Shot, followed by Crippling Shot, which allows you to hamper someone’s attack and defense. If you have 21 dexterity and Expert Combat Training, select Critical Shot. If you hit, Critical Shot inflicts critical damage and a bonus to armor penetration.
If you can reach 30 dexterity, you gain Arrow of Slaying. This scores an automatic critical hit against all but high-level opponents, and it’s another offensive threat you can deliver.
Next, max out your ranged abilities. Reload much faster with Rapid Shot. Shattering Shot imposes an even greater penalty to a foe’s defense as it reduces armor value. Follow that up with Suppressing Fire to further encumber targets with attack penalties.
Scattershot is an awesome talent that automatically stuns your target and deals normal damage, then splinters off and does the same to all nearby enemies. Use this effectively against enemy spellcasters or large enemy groups to impede flanking attempts. If you need additional defense, add to your Weapon and Shield talent chain with Shield Bash.
At level 19, further improve your combat with Death Blow. You won’t be sorry when you buy Second Wind at level 20. Regaining all your stamina at a crucial point in combat can make all the difference.
When you reach level 21, dive into the new Archery talents. Accuracy scores you big bonuses to several combat stats and paves the way for three more talents. At level 23, Arrow Time forces enemies around you to slow down, which gives you that much more time to pick them off. Level 24’s Burst Shot devastates a foe with three automatic critical hits, plus half the damage spilled over in AoE around the target. Level 25’s Rain of Arrows covers an area with projectiles to strike multiple foes.
Pick up the Spirit Warrior specialization with Beyond the Veil at level 26, Soulbrand at level 27, and Fade Burst at level 28. These improve your defense, and allow you to bypass foes’ armor by converting all your regular damage into spirit damage.
At level 22, finish off the new Warrior talents, starting with Peon’s Plight. Peon’s Plight and Grievous Insult at level 29 give your archer more options in melee combat. It all leads up to Massacre at level 30, which can get you out of a melee jam when surrounded by multiple foes. By this point, you’ll destroy them at range, and should they limp into melee range, you’re not half-bad nose-to-nose either.
Talent Choices: The Archery school and all its ranged surprises are your bread and butter. Dual Weapons provide some sup- port talents in case an enemy gets close enough to melee.
Specialization: Templar enhances your skill in taking down enemy spellcasters. Righteous Strike can be fantastic once you reach higher levels and can tap into your melee talents. Cleanse Area and Mental Fortress bulk up your defensive abilities. Holy Smite gives you another powerful ranged attack that will destroy an enemy spellcaster in a single energy burst.
Battle Tactics: Once the battle begins, stand your ground. Let the tank and other melee DPSers embrace the enemy. You want to nuke them from afar. Unlike a mage who stays in the rear, however, the ranged DPS warrior can enter melee with his better armor, weapons, and Dual Weapon talents at higher levels.
Survey the battlefield and pick your targets wisely. Concentrate fire on the tank’s target to bring it down quicker, or look for injured foes that you can drop with an arrow or two. If you see an enemy spellcaster in the enemy’s rear, make it your priority. You don’t want it getting off damaging spells. Same goes for enemy archers. If your melee companions can’t reach them, it’s your job to stop them from pelting the team with damage.
On offense, your rotation goes something like this: Aim, Pinning Shot (against moving targets), Critical Shot (against near-dead targets), Arrow of Slaying. On defense, go Defensive Fire, Crippling Shot, Suppressing Fire, and Scattershot (especially against enemy spellcaster or enemies charging at you).
As a ranged DPS warrior, you have much of the offense of a DPS mage, yet you can still wear most of the better armor and use high quality weapons. Keep on the go to avoid enemy melee encounters and let your arrows serve as warnings to any new darkspawn that stumble across the field of arrow-strewn corpses.