Prima Games eGuides
primagames.com Browse Redeem a code Help
Dragon Age: Origins - Awakening eGuide
Sign in My Guides

Sign in or create an account

We'll email you a link. No password needed, and if you don't have an account yet, the link makes one.

By creating an account or signing in, you agree to our Terms of Service and Privacy Policy.

Have a password?

Had an account on the old eGuides site, or a code from a printed guide? Help and troubleshooting

Sign in with a password

By signing in, you agree to our Terms of Service and Privacy Policy.

Check your email

A sign-in link is on its way. It works once and expires in 15 minutes. Open it and you're in, with an account if you didn't already have one.

Contents

  • Maps
    • World Map
      • World Map
    • Main Quest Walkthrough Maps
      • Assault on Vigil's Keep
      • Keep Interior
      • Throne Room
      • Vigil's Keep Courtyard
      • The Crown and Lion
      • The Blackmarsh
      • The Blackmarsh Undying
      • Shadowy Crypt
      • Baroness's Manor
      • Return to the Blackmarsh
      • Wending Wood
      • Silverite Mine
      • Knotwood Hills
      • Kal'Hirol
      • Main Hall
      • Trade Quarter
      • Lower Reaches
      • Siege of Vigil's Keep
      • Siege of Amaranthine
      • Dragonbone Wastes
      • Drake's Fall
      • The Nest
    • Side Quest Walkthrough Maps
      • The Blackmarsh
      • City of Amaranthine
      • Smuggler's Cove
      • Law and Order
      • Smuggler's Run
      • Smuggler's Cove (Alternate)
      • Vigil's Keep Throne Room
      • Knotwood Hills/Kal'Hirol
      • Vigil's Keep
      • It Comes From Beneath
      • Sealing the Great Barrier Doors
      • Wending Wood
  • Essentials
    • The Basics
      • How to Use This Guide
      • Key Terms
      • Experience and Leveling
      • Your Health
      • Races and Classes
      • Skills, Talents, and Specialties
      • Items
      • Combat
      • The Map
      • The Codex
      • Character Generation
    • The Classes
      • Introduction
      • Leveling
      • Skills
      • The Warrior
      • The Mage
      • The Rogue
    • The Party
      • Party Basics
      • Combat Roles
      • Configurations and Engagement
      • Tactics
    • Companions
      • Understanding Companions
      • Anders
      • Justice
      • Nathaniel Howe
      • Oghren
      • Sigrun
      • Velanna
      • Mhairi
    • Supporting Cast
      • Supporting Cast
    • Equipment
      • Equipment
      • Weapon and Armor Materials
      • Vendor Shopping
      • Weapons
      • Armor
      • Accessories
      • Runes
      • Crafting
      • Usable Items
      • Gifts
    • Bestiary
      • Monster Abilities
      • Monster List
  • Walkthrough
    • Walkthrough
      • How to Use the Walkthrough
      • Essential Locations
    • Assault on Vigil's Keep
      • Exterior
      • Interior
      • Throne Room
      • Courtyard
    • Shadows of Blackmarsh
      • Amaranthine
      • The Crown and Lion
      • The Blackmarsh
      • The Blackmarsh Undying
      • Shadowy Crypt
      • Baroness's Manor
      • Return to the Blackmarsh
    • The Righteous Path
      • Amaranthine
      • Wending Wood
      • Trapped by the Architect
      • Silverite Mine
    • Last of the Legion
      • Amaranthine
      • Knotwood Hills
      • Kal'Hirol
      • Main Hall
      • Trade Quarter
      • Lower Reaches
    • Siege of Vigil's Keep
      • Going to War
      • Siege of Vigil's Keep
      • Siege of Amaranthine
    • Lair of the Mother
      • Dragonbone Wastes
      • Drake's Fall
      • The Nest
    • Side Quests
      • The Blackmarsh
      • City of Amaranthine
      • Companions
      • Knotwood Hills and Kal'Hirol
      • Vigil's Keep
      • The Wending Wood
      • Random Encounters
    • Achievements
      • Achievements and Trophies

Dragon Age: Origins — Awakening Guide › Walkthrough › Assault on Vigil's Keep

Exterior

Vigil's Keep: Exterior

Note

You begin your journey into Awakening at Vigil's Keep. It doesn't matter whether you created a new character for the expansion or imported your hero from Dragon Age: Origins , there is ony a single origin story this time around.

Runthrough (Vigil's Keep: Exterior)

Summary: Investigate a darkspawn attack on the Grey Warden stronghold.

1 - You arrive at Vigil's Keep with the warrior Mhairi, only to discover it's under attack by darkspawn.

2 - Reach the main gate and battle through marauding darkspawn.

3 - To reach the upper level, approach the closed gate and survive the darkspawn push to drive you back.

4 - The courtyard to the east has pockets of darkspawn all around. Be careful of ambush.

5 - Reach the portcullis to the Inner Keep.

Vigil's Keep: Exterior Cheatsheet

Main Plot Quest: The Assault on Vigil's Keep

Important NPCs: Mhairi

Key Items: Stormchaser Helm

Monsters: Genlock Emissary, Genlocks, Hurlocks, Ogre, Shrieks

Side Quests: A Medical Necessity

Spoiler Alert

(1) As your story begins, you reach the outskirts of Vigil's Keep, a Grey Warden stronghold south of Amaranthine, which you are set to take over as Warden-Commander (this is your title no matter if you arrive with a new character or an existing character). You travel with a Grey Warden recruit, the warrior Mhairi, and you both soon realize that something is definitely wrong when no one comes out to greet you. Within seconds, a soldier races out of the keep with darkspawn hot on his heels. Rally behind the soldier and slay the initial trio of genlocks.
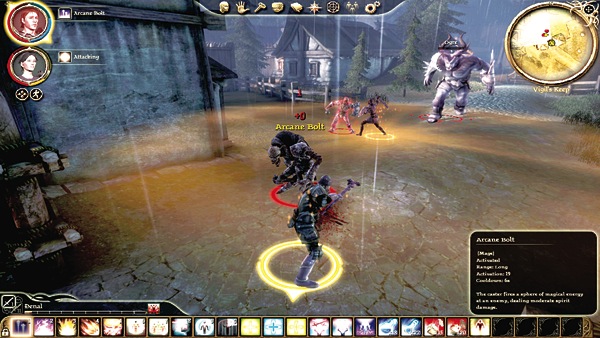
(2) You can explore around the main gate and trigger a few darkspawn encounters if you like while hunting for the scattered loot. Once you pass by the main gate, prepare for three darkspawn to attack from different directions. The hurlock and shriek come from your left, and after a few seconds delay, the ogre charges from directly ahead. Let Mhairi take the brunt of the damage (unless your character is a warrior tank too), while you deal damage quickly to the ogre before it pounds you both.
Tip

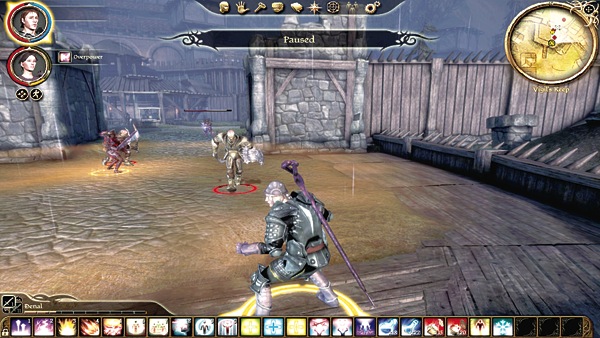
Once inside the Keep's main gate, fight your way west through two groups of genlocks and a shriek. Once you have cleared the area of foes, you can rescue a scared merchant (by chest point 5 on the map). When you encounter the merchant Yuriah in the throne room alter, he will have more extensive stock to sell you.

Note

Try to save as many of the Vigil's Keep soldiers as you can. They fight the darkspawn throughout the fortress grounds and can work with you to defeat the darkspawn in their areas.

(3) After clearing out the lower level, climb up the ladder and approach the closed gate. The gate explodes outward and knocks you off your feet. Fortunately, Mhairi is light on hers and she races ahead to intercept the two hurlocks who charge out. In the back, a genlock emissary will begin casting nasty AoE spells. Don't give him a chance. Interrupt with a disruptive attack such Paralyze, or charge straight for him and stun him with a melee talent. Keep the battle close to the shattered gate so you don't pull in any other enemies while you take these three down.
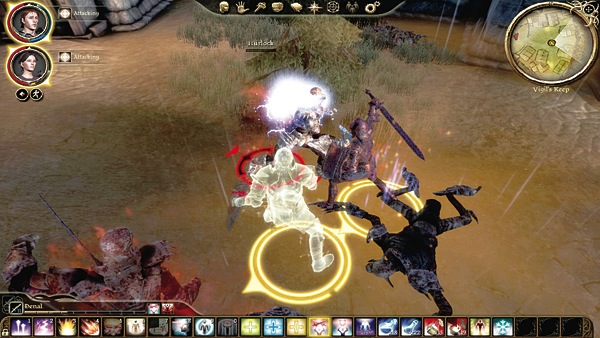
(4) If you head to the right, watch out for a major ambush when you enter the open courtyard. Hurlocks, a genlock, and a shriek all lurk in the area and love to converge as you approach. Deal with the shriek first, because it will appear behind you and try to deal damage to your exposed side.
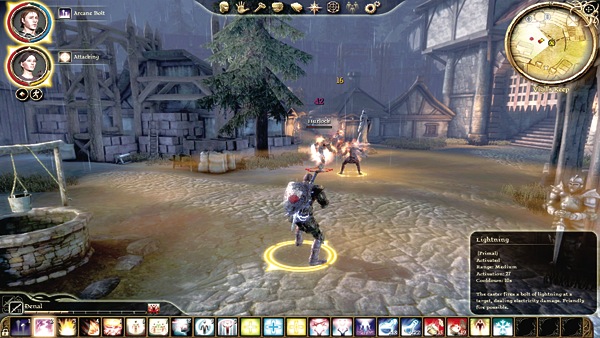
(5) To the left after the shattered gate lies the portcullis entrance to the Inner Keep. Two hurlocks patrol the area, and you'll have to get through them to gain the exit point. If you can kill these two hurlocks before they kill the nearby Vigil's Keep soldier, the grateful soldier offers the "A Medical Necessity" side quest. See the "Vigil's Keep" section in the Side Quest chapter for complete details.

Note

Loot is generally random. In the cases where an item is fixed or codex entry occurs, we've listed the actual reward in parentheses after the treasure location.

Keep reading with a free account

The first 3 sections of Dragon Age: Origins - Awakening are open to everyone. An account opens the rest of it, and every other guide in the archive. It's free, and there's nothing to buy.

Bought guides on the old Prima Games site? Your account and every guide you own moved here, so there's nothing to buy again. Sign in.

Create a free account Or browse our free guides

PreviousEssential Locations NextInterior