
Dragon Age: Origins — Awakening Guide Essentials The Classes
The Mage

You are channeler and healer, death-dealer and life-giver, the spellpower behind the party’s muscle. A mage stays in the rear, choosing targets carefully and always thinking ahead to the next damage spell or heal. A mage can conjure fire, encase allies in impenetrable force fields, or drain the very life from a victim. Tapping into any of the four magic schools (Primal, Creation, Spirit, Entropy), the DPS mage supplies firepower, especially against large enemy groups, the healer supports benevolent spells that can turn the tide in a close contest, or the hybrid mage balances both offense and defense in one versatile package.
Though the mage doesn’t have the same kind of access to weapons and armor as a warrior or rogue (unless the mage specializes in Arcane Warrior), consider his spell arrays his artillery. The Primal school gives the mage the power of the elements: fire, earth, cold, electricity. By the third spell in any of these chains, the mage can cast devastating AoE attacks that destroy large enemy groups. In the Creation school, healing and buffs take precedent. The power to regenerate health, mana, and stamina fuels your party to greater glory. Your last two schools, Spirit and Entropy, grant mind-bogglingly cool abilities that stretch beyond pure damage or healing. With nearly 80 spells to choose from, no two mages need be the same.

Mage specializations offer the greatest possibilities to transform your class into something outside the normal class boundaries. An Arcane Warrior trades magic score for strength, ditches staff and robe for weapons and armor usually restricted to warriors, and can enter melee as a hand-to-hand brawler. A Blood Mage taps into the life force flowing in most creatures’ veins, and uses that dark magic to control minds, damage enemies, convert blood to mana, and heal from the pain of others. A Shapeshifter can change into a combat-oriented spider, bear, and insect swarm, or master them all for potent alternate fighting forms. A Spirit Healer is the ultimate savior, able to heal the entire party at once, cure injuries, and even bring the dead back to life. At level 20 and higher, a Keeper merges with nature itself and forms a powerful union of spellcaster and the surrounding vegetation that traps, hurts, and drains enemies within. Finally, a Battlemage can use all the elements against enemies, freeze them in place, or drain their life. A Battlemage can even regain mana from his own wounds.
If you like to sling spells from tactical positions and play around with the fantastical, the mage class is for you. World-class spells are at your fingertips, and you will rule the battlefield from afar. No other class can touch you when it comes to obliterating hordes of monsters at once. Just remember that if those monsters get up, you’d better have enough mana to knock them back down.
Strengths and Weaknesses

Think of the mage as a cannoneer or a field medic, depending on your play style and spell spec. If you lean toward a DPS mage, your spells can do tremendous damage to single targets (possibly killing them with a single spell) or major damage to a large enemy group. You can even contribute damage over time to opponents with such spells as Fireball and Walking Bomb. If you become a healer, your spells will keep you and your allies alive, even in battles that may seem lost at the start. Either of those skills sets would earn you a place on the team, but you also have crowd control spells (Grease, Earthquake, Cone of Cold, etc.) that keep enemies from swarming the party, and party buffs (the Heroic chain, Spellbloom, etc.) that aid your allies with additional abilities.

With all those great spells a hand gesture away, mages pay the price with armor and weapons: they can use only robes, cowls, staves, and the less powerful armor and weapons. Mages aren’t built for hand-to-hand melee, unless they devote several spells to melee offense/defense or seek out the Arcane Warrior and/or Battlemage specializations, and spellcasters can’t go toe-to-toe with foes like warriors and rogues can. Even worse, mages’ damage spells, especially AoE spells that strike multiple targets, generate significant threat and will pull monsters to you. You need a capable tank to regain the threat or you will find yourself bloodied on the ground.
You may not be the party member who jumps into the thick of melee, but you can be the tactician who stands in the back and surveys the whole battlefield. Whether you like to blow things up or pick your targets off one by one, the mage’s spells have you covered. You will have the firepower to bolster your party from competent fighters to veritable forces of nature.
Attributes

Spells are your livelihood as a mage, thus your magic score is essential. Magic directly increases your character’s spellpower score, which determines the potency of all spells. The prerequisite for the various schools of magic begins at 18 magic, but goes as high as 61 magic for the most expensive of the newer abilities, so put most of your points here to unlock crucial spells. Magic also determines how effective potions, poultices, and salves are for characters; your mage will gain bigger benefits from lyrium potions and health poultices because of your affinity for magic.
Willpower works in conjunction with magic. The more points you throw into willpower, the larger your mana pool and the more spells you can cast. If you have a party member with good Herbalism, you may be able to stock up on lyrium potions to offset a lower willpower score, but you definitely need to spend as many points here as you can afford. If you have a good tank who holds threat well, and you don’t get hit much by monsters in melee, sink all your extra points into growing your mana pool.
After magic and willpower, your attributes will go more according to your play style. In general, you may want to add a little constitution. Every mage, even if they don’t plan on beating mobs over the head with a staff, needs health and resilience. The more you have, the longer you’ll stay in a fight, and if your tank fails to hold a creature’s threat and it comes gunning for you, that extra constitution and health bonus will make a difference.
Cunning contributes to learning skills, and it’s huge if you take Coercion and want to persuade NPCs. If you don’t invest in Coercion, then feel free to spend these points in consti- tution and dexterity.
Dexterity has limited use for most mages. It can be helpful to dodge incoming blows, and an Arcane Warrior mage may want some points in dexterity for accuracy while wielding melee weapons. If you do spend points, spend only a few.
Because you shouldn’t be engaging foes physically, strength means very little. There’s always something better to spend points on, so leave this attribute alone. If you’re worried about combat damage, it’s probably best to spend the points on constitution instead.
During character creation, feel free to choose a race based on overall story possibilities. However, if maximizing your mage stats appeals to you, choose an elf. An elven mage gives you a starting 17 magic and 16 willpower. A human mage offers one fewer point in magic and two fewer points in willpower. Most of your points are socked away in magic and willpower, so later in your character’s evolution you’ll need to spread out the points to other attributes. Dwarves cannot be mages; if you want to play a dwarf, you won’t be casting spells.
Mage Starting Attributes
| Attribute | Human | Elf |
|---|---|---|
| Strength | 11 | 10 |
| Dexterity | 11 | 10 |
| Willpower | 14 | 16 |
| Magic | 16 | 17 |
| Cunning | 12 | 11 |
| Constitution | 10 | 10 |
Once you choose your mage’s race, you begin with 62 points to add to your attributes. Most builds require you to spend the majority of your points in magic and willpower. It’s important to unlock spells early, and because magic is the main prerequisite for spells, you must reach the 25–30 magic range to unlock most spells, and 40 or higher to unlock the new Mage school spells. In general, think about a 2/1 split between magic and willpower each time you earn attribute points from leveling, or a 1/1/1 split among magic, willpower, and constitution.
Skills

Mages are natural herbalists, so it’s fitting that you begin with a skill point in Herbalism (and also one point in Combat Tactics). They stockpile magic attribute points for spell effectiveness, and items produced by Herbalism rely on magic for effectiveness. It’s a perfect union. At least one party member must be skilled in Herbalism per party. Otherwise, you lose out on essential healing and mana potions, and won’t have the same staying power in fights as a fully stocked party. Unless one of your companions (say, Velanna) supports Herbalism, you should strongly consider it as your top skill.
Because mages gravitate toward magic, Herbalism ranks high, but Coercion is usually the best skill to take. As with any other class, Coercion grants you access to story possibilities that aren’t available through brute force. Spend all your skill points here first if you don’t plan on becoming a herbalist.
The more points you spend in Combat Training, the more damage you can take before the damage interrupts your spell- casting. If you’re a mage who expects to get hit often in combat, or you don’t want to blow a key spell because of mob interference, then stock up on Combat Training. Two points is enough to withstand disruption from all but the most damaging attacks.
Survival can be a good skill to have because the more you advance it, the better chance you have to detect creatures on your mini-map before they surprise you. You can save yourself from more than a few ambushes with this skill. Don’t forget about the bonus to nature resistance too.
For companion mages, who you might not always control directly, consider spending skill points in Combat Tactics. The more tactic slots you open, the more you can shape how your companion behaves in battle. Inevitably, even if you plan on controlling your mage during fights, there will be moments when you don’t program your mage’s every move (or something more important is going on) and tactics come into play. One or two points should be good, or max it out if you want the character to go on autopilot.
None of the other lower-level skills really fit the mage profile, except perhaps Trap-Making. At first it seems solely a rogue skill, but if your mage isn’t strong in ranged damage (a healer, for example), you may want Trap-Making to use traps to lure enemies in. Traps deal decent damage up front while you cast a spell barrage from afar.
Once you reach level 20, spend your skill points on Clarity. The new skill boosts your mana pool by 25 mana per level. If you max out on Clarity that’s 100 mana more than you might have had otherwise.
Spells

Mages have access to a vast arsenal of spells, many more than you could attain in the course of the game. Rather than focusing on one school, pick the type of mage you’d like to be (DPS, healer, or blend) then round out your mage with a selection of spells that could deal with an array of situations. For example, you’ll want a few spells for AoE, direct attacks on single targets, buffs, etc. Notice how the stronger spells are at the end of individual chains. With that in mind, develop individual chains rather than focusing on an entire school.
You start with one point in the Mage spell school and 62 more points to spend wherever you like. In addition, you receive one point for every level you gain during your journey through Awakening. It might seem like a lot, but you really have to plan what spell chains you want, because you’ll cap only four or five regular chains if you decide to specialize.
All mages need to familiarize themselves with the cooldown component of each spell. The worst situation is to have plenty of mana and no available spells to cast. Branch out into different spells to avoid the cooldown problem. Yes, you may love to cast Lightning on a target, but you need a follow-up damage spell or two to use while Lightning reloads. You also want to branch out into different chains so that your spell rotation cycles through separate damage types. For example, if you develop the Fire chain as your sole damage source and run into rage demons, who are resistant to fire, you won’t do too well. But if you have Winter’s Grasp or Cone of Cold in your arsenal, you can contribute massive damage.
Even DPS mages should carry a Heal spell. It’s always a luxury to have a mage who can serve the same function as a health poultice, only on a continuous basis with sometimes greater effect. In the same regard, don’t under-value your defensive spells. Your main priority may be to deal damage as a DPS mage, but at some point you will need to protect yourself. Spells such as Arcane Shield and Force Field minimize damage that would otherwise kill you in an encounter.
Your spells draw mana from your pool. Watch how much mana you’re using in a fight and cast accordingly. If you run short without ample lyrium potions to replenish, you could cost your party a victory. Gauge what you have to do to help the team. There’s no sense casting a huge Chain Lightning spell on a group of enemies that go down with one or two swings, just as you may want to hold back on that Petrify spell if the tank has the situation under control. Save your mana. You never know when the next fight will start, and you’ll be grateful you didn’t waste mana.
Mage School

Arcane Bolt is a basic all-around damage spell with a long range, decent damage, and minor cost. Arcane Shield is a sustained ability that helps divert attacks and bolsters your mage’s defense. Staff Focus increases the power of your basic staff attack, and Arcane Mastery grants a permanent bonus to spellpower, augmenting all your spells. Almost any mage build wants Arcane Mastery as soon as it becomes available at level 10. On the attack, cast your powerful spells, then follow them up with Arcane Bolt. When you’re being swarmed, use your Arcane Shield, then let your other characters take the threat while you move back and come at your enemies with another wave of spells.
At level 20, the two new Mage school chains open up. The Fade Shield chain increases your mastery of the elements. Fade Shield soups up your Arcane Shield to further defend against magic attacks and reduce physical damage. Elemental Mastery increases elemental damage from other spells while it’s in effect. Attunement gives a +10 bonus to willpower, magic, and combat mana regeneration. Time Spiral can win you the day when it resets all your cooldowns and suddenly makes all spells possible for active duty.
If you don’t go for that chain, you may want to start with Repulsion Field at level 20. The field knocks back nearby enemies if they fail a physical resistance check, which is fantastic against lesser foes that try to swarm you. Invigorate radiates out to lessen the activation cost of your allies’ talents and spells, though it drains your mana continuously. Arcane Field generates waves of spirit damage that smash through nearby foes. Mystic Negation creates a field that continuously negates hostile magic in the area.
Mage School Chain 1
| Name | Prerequisite | Description | Cost (mana/stamina) | Upkeep (mana/stamina) | Fatigue (% mana/stamina) | Ranged | Cooldown (sec.) | Area of Effect Radius (ft.) |
|---|---|---|---|---|---|---|---|---|
| Arcane Bolt | None | The caster fires a sphere of magical energy at an enemy, dealing moderate spirit damage. | 15 | 0 | 0 | Yes | 6 | 0 |
| Arcane Shield | Level 3 | The caster generates protective sheath that helps divert incoming attacks, gaining a bonus to defense while this mode is active. | 0 | 30 | 5 | No | 10 | 0 |
| Staff Focus | Level 7 | The character has specialized in direct attacks using a mage staff, gaining a permanent bonus to damage from basic attacks. | 0 | 0 | 0 | No | 0 | 0 |
| Arcane Mastery | Level 10 | The mage has gained a keen familiarity with the arcane arts, granting a permanent bonus to spellpower. | 0 | 0 | 0 | No | 0 | 0 |
Mage School Chain 2
| Name | Prerequisite | Description | Cost (mana/stamina) | Upkeep (mana/stamina) | Fatigue (% mana/stamina) | Ranged | Cooldown (sec.) | Area of Effect Radius (ft.) |
|---|---|---|---|---|---|---|---|---|
| Fade Shield | Level 20, Magic 40 | of resisting hostile spells or evading physical attacks while that spell is active, and a lesser chance of both when the spell is inactive (displacement +5, magic resistance +5). | Passive | 0 | 0 | No | 0 | 0 |
| Elemental Mastery | Level 22, Magic 44 | The mage has learned to amplify the effects of each of the elements, increasing any elemental damage inflicted by other attacks while this spell is active. | 0 | 100 | 10 | No | 30 | 0 |
| Attunement | Level 25, Magic 52 | The mage has become more attuned to surrounding magical energies, gaining bonuses to willpower, magic, and mana regeneration (willpower +10, magic +10, combat mana regen +10). | Passive | 0 | 0 | No | 0 | 0 |
| Time Spiral | Level 28, Magic 61 | The mage, through great concentration, is able to alter perception of time, resetting the cooldowns on all spells. | 120 | 0 | 0 | No | 180 | 0 |
Mage School Chain 3
| Name | Prerequisite | Description | Cost (mana/stamina) | Upkeep (mana/stamina) | Fatigue (% mana/stamina) | Ranged | Cooldown (sec.) | Area of Effect Radius (ft.) |
|---|---|---|---|---|---|---|---|---|
| Repulsion Field | Level 20, Magic 43 | For as long as this spell is active, waves of repulsive energy emanate from the mage. With every wave, nearby enemies are knocked back unless they pass a physical resistance check. Mana is consumed each time a creature is knocked back. | 0 | 80 | 10 | No | 10 | 0 |
| Invigorate | Level 22, Magic 49 | Waves of invigorating energy bolster nearby allies, substantially reducing their fatigue, meaning that their spells or talents will cost less to activate while this spell is active. However, the caster’s mana drains continuously. | 0 | 100 | 20 | No | 30 | 0 |
| Arcane Field | Level 24, Magic 55 | While this spell is active, the mage radiates arcane energy every few seconds, emitting waves of projectiles that deal spirit damage to enemies within the field. Each projectile consumes a small amount of mana. | 0 | 80 | 10 | No | 10 | 0 |
| Mystic Negation | Level 26, Magic 58 | An aura of beneficial magic surrounds the mage while this spell is active. Every few seconds, the spell banishes any magical effects within the field that were created by a hostile creature. Each dispelled effect consumes a small amount of mana. | 0 | 100 | 10 | No | 10 | 0 |
Primal School

Your main offensive spells find their home in the Primal school. Mostly focused on activated abilities, both in direct attacks and AoE attacks, Primal taps fire, earth, cold, and electricity for your staple damage attacks. The first spell in each chain gives you a decent damage spell (except for the Earth chain, which gives you Stonefist second), and the third spell grants you a powerful AoE blast.
Monsters will be affected differently based on their resistances and vulnerabilities, and each chain has its own special effects: fire causes damage over time; earth gives you defense and one-shot kill with Petrify; cold hampers enemy movement; electricity forks to adjacent targets.
Primal School Chain 1
| Name | Prerequisite | Description | Cost (mana/stamina) | Upkeep (mana/stamina) | Fatigue (% mana/stamina) | Ranged | Cooldown (sec.) | Area of Effect Radius (ft.) |
|---|---|---|---|---|---|---|---|---|
| Flame Blast | None | The caster’s hands erupt with a cone of flame, inflicting fire damage on all targets in the area for a short time. Friendly fire possible. | 20 | 0 | 0 | Yes | 10 | 35 |
| Flaming Weapons | Magic 18 | While this spell is active, the caster enchants the party’s melee weapons with flame so that they deal additional fire damage with each successful attack. | 0 | 50 | 5 | Yes | 10 | 0 |
| Fireball | Magic 27 | The caster’s hands erupt with an explosive ball of flame, inflicting lingering fire damage on all targets in the area as well as knocking them off their feet unless they pass a physical resistance check. Friendly fire possible. | 40 | 0 | 0 | Yes | 10 | 7 |
| Inferno | Magic 34 | The caster summons a huge column of swirling flame. All targets in the area take constant fire damage as they burn. Friendly fire possible. | 70 | 0 | 0 | Yes | 60 | 10 |
Primal School Chain 2
| Name | Prerequisite | Description | Cost (mana/stamina) | Upkeep (mana/stamina) | Fatigue (% mana/stamina) | Ranged | Cooldown (sec.) | Area of Effect Radius (ft.) |
|---|---|---|---|---|---|---|---|---|
| Lightning | Magic 18 | The caster fires a bolt of lightning at a target, dealing electricity damage. Friendly fire possible. | 20 | 0 | 0 | Yes | 10 | 0 |
| Shock | None | The caster’s hands erupt with a cone of lightning, damaging all targets in the area. Friendly fire possible. | 40 | 0 | 0 | Yes | 15 | 35 |
| Tempest | Magic 28 | The caster unleashes a fierce lightning storm that deals constant electricity damage to anyone in the targeted area. Friendly fire possible. | 50 | 0 | 0 | Yes | 40 | 10 |
| Chain Lightning | Magic 33 | The caster’s hands erupt with a bolt of lightning that inflicts electricity damage on a target, then forks, sending smaller bolts jumping to those nearby, which fork again. Each fork does less damage than the previous. Friendly fire possible. | 60 | 0 | 0 | Yes | 60 | 0 |
Primal School Chain 3
| Name | Prerequisite | Description | Cost (mana/stamina) | Upkeep (mana/stamina) | Fatigue (% mana/stamina) | Ranged | Cooldown (sec.) | Area of Effect Radius (ft.) |
|---|---|---|---|---|---|---|---|---|
| Rock Armor | None | The caster’s skin becomes as hard as stone, granting a bonus to armor for as long as this mode is active. | 0 | 40 | 5 | No | 10 | 0 |
| Stonefist | Magic 18 | The caster hurls a stone projectile that knocks down the target and inflicts nature damage, possibly shattering those that have been petrified or frozen solid. Friendly fire possible. | 30 | 0 | 0 | Yes | 15 | 0 |
| Earthquake | Magic 25 | The caster disrupts the earth, causing a violent quake that knocks everyone in the targeted area to the ground unless they pass a physical resistance check every few seconds.Friendly fire possible. | 40 | 0 | 0 | Yes | 40 | 10 |
| Petrify | Magic 30 | The caster draws from knowledge of the elements to turn the target into stone unless it passes a physical resistance check. While petrified, the target is immobile and vulnerable to shattering from a critical hit. Creatures already made of stone are immune. | 40 | 0 | 0 | Yes | 40 | 0 |
Primal School Chain 4
| Name | Prerequisite | Description | Cost (mana/stamina) | Upkeep (mana/stamina) | Fatigue (% mana/stamina) | Ranged | Cooldown (sec.) | Area of Effect Radius (ft.) |
|---|---|---|---|---|---|---|---|---|
| Winter’s Grasp | None | The caster envelops the target in frost, freezing lower-level targets solid. Those that resist suffer a penalty to movement speed. | 20 | 0 | 0 | Yes | 8 | 0 |
| Frost Weapons | Magic 18 | While this mode is active, the caster enchants the party’s weapons with frost so that they deal additional cold damage with each melee attack. | 0 | 50 | 5 | Yes | 10 | 0 |
| Cone of Cold | Magic 25 | The caster’s hands erupt with a cone of frost, freezing targets solid unless they pass a physical resistance check, and slowing their movement otherwise. Targets frozen solid by Cone of Cold can be shattered with a critical hit. Friendly fire possible. | 40 | 0 | 0 | Yes | 10 | 35 |
| Blizzard | Magic 34 | An ice storm deals continuous cold damage to everyone in the targeted area and slows their movement speed while granting bonuses to defense and fire resistance. Targets can fall or be frozen solid unless they pass a physical resistance check. Friendly fire possible. | 70 | 0 | 0 | Yes | 60 | 10 |
Creation School

Your primary school as a healer, Creation focuses on restoring health, replen- ishing mana, enhancing the party, and warding an area with glyphs. The Heal chain is the most important; you’ll want Heal right out of the gate and Regeneration as soon as you can reach the 23 magic prerequisite. The Spell Wisp chain can work for any mage as well: Spell Wisp increases spellpower, Grease traps enemies in a flammable AoE, Spellbloom regenerates mana, and Stinging Swarm is like an AoE damage spell as it bounces from target to target, except it doesn’t create tons of threat focused on a single creature each time. The Heroic chain is for mages who want to buff the party, sacrificing offense for utility. The Glyph chain gives the mage some crowd control with paralysis, warding, repulsion, and neutralization effects.
Creation School Chain 1
| Name | Prerequisite | Description | Cost (mana/stamina) | Upkeep (mana/stamina) | Fatigue (% mana/stamina) | Ranged | Cooldown (sec.) | Area of Effect Radius (ft.) |
|---|---|---|---|---|---|---|---|---|
| Glyph of Paralysis | None | The caster inscribes a glyph on the ground that paralyzes the first enemy who crosses its bounds, unless the opponent passes a physical resistance check. A single caster can maintain a limited number of Glyphs of Paralysis at once. | 25 | 0 | 0 | Yes | 40 | 2.5 |
| Glyph of Warding | Magic 18 | The caster inscribes a glyph on the ground that bestows nearby allies with bonuses to defense and mental resistance as well as a bonus against missile attacks. | 40 | 0 | 0 | Yes | 30 | 2.5 |
| Glyph of Repulsion | Magic 25 | The caster inscribes a glyph on the ground that knocks back enemies unless they pass a physical resistance check. | 35 | 0 | 0 | Yes | 30 | 2.5 |
| Glyph of Neutralization | Magic 33 | The caster inscribes a glyph on the ground that neutralizes all magic, dispels all effects, drains all mana, and prevents spellcasting or mana regeneration within its bounds. | 60 | 0 | 0 | Yes | 60 | 2.5 |
Creation School Chain 2
| Name | Prerequisite | Description | Cost (mana/stamina) | Upkeep (mana/stamina) | Fatigue (% mana/stamina) | Ranged | Cooldown (sec.) | Area of Effect Radius (ft.) |
|---|---|---|---|---|---|---|---|---|
| Heal | None | The caster causes flesh to knit miraculously, instantly healing an ally by a moderate amount. | 20 | 0 | 0 | Yes | 5 | 0 |
| Rejuvenate | Magic 18 | The caster channels regenerative energy to the selected ally, granting them a short term boost to mana or stamina regeneration. | 25 | 0 | 0 | Yes | 45 | 0 |
| Regeneration | Magic 23 | The caster infuses an ally with beneficial energy, greatly accelerating health regeneration for a short time. | 25 | 0 | 0 | Yes | 5 | 0 |
| Mass Rejuvenation | Magic 28 | The caster channels a stream of rejuvenating energy to all members of the party, significantly increasing mana and stamina regeneration for a short duration. | 45 | 0 | 0 | No | 90 | 0 |
Creation School Chain 3
| Name | Prerequisite | Description | Cost (mana/stamina) | Upkeep (mana/stamina) | Fatigue (% mana/stamina) | Ranged | Cooldown (sec.) | Area of Effect Radius (ft.) |
|---|---|---|---|---|---|---|---|---|
| Heroic Offense | None | The caster enhances an ally’s aptitude in battle, granting a bonus to attack. | 20 | 0 | 0 | Yes | 5 | 0 |
| Heroic Aura | Magic 15 | The caster sheathes an ally in an aura that completely shrugs off most missile attacks for a moderate duration. | 30 | 0 | 0 | Yes | 5 | 0 |
| Heroic Defense | Magic 20 | The caster shields an ally with magic, granting bonuses to defense, cold resistance, electricity resistance, fire resistance, nature resistance, and spirit resistance, although at a penalty to fatigue, meaning that the ally’s talents or spells will cost more to activate. | 40 | 0 | 0 | Yes | 10 | 0 |
| Haste | Magic 30 | While this mode is active, the caster imbues the party with speed, allowing them to move and attack significantly faster, although the spell also imposes a small penalty to attack and drains mana rapidly while in combat. | 0 | 60 | 10 | Yes | 30 | 0 |
Creation School Chain 4
| Name | Prerequisite | Description | Cost (mana/stamina) | Upkeep (mana/stamina) | Fatigue (% mana/stamina) | Ranged | Cooldown (sec.) | Area of Effect Radius (ft.) |
|---|---|---|---|---|---|---|---|---|
| Spell Wisp | None | The caster summons a wisp that grants a small bonus to spellpower for as long as this mode is active. | 0 | 30 | 5 | No | 5 | 0 |
| Grease | Magic 20 | The caster summons a grease slick that slows anyone who walks on it, as well as causing them to slip unless they pass a physical resistance check. If the grease is set on fire, it burns intensely for a time. Friendly fire possible. | 25 | 0 | 0 | Yes | 20 | 7.5 |
| Spellbloom | Magic 23 | The caster creates an energizing bloom of magic that grants anyone nearby, friend or foe, a bonus to mana regeneration. | 25 | 0 | 0 | Yes | 30 | 10 |
| Stinging Swarm | Magic 33 | A swarm of biting insects descend on the target, dealing a large amount of damage over a short time. If the targeted creature dies before the swarm dissipates, the insects will jump to another nearby enemy. | 50 | 0 | 0 | Yes | 30 | 0 |
Spirit School

Two of the chains can be unexpected powerhouses if used well. The Walking Bomb chain poisons a single target, or explodes a host of similar monsters with Virulent Walking Bomb, plus the chain provides mana regeneration and additional melee support through Animate Dead. The Mind Blast chain splits between great defensive and great offensive abilities. Mind Blast stuns all nearby enemies (great for when the mage gets swarmed), Force Field nullifies all damage to a target for a short time (the ultimate threat negation), Telekinetic Weapons beefs up armor penetration for your whole squad, and Crushing Prison completely shuts down a target, rooting the enemy in place and causing enough damage to kill weaker targets.
The Spell Shield chain is a must for defensive mages, especially Dispel Magic to remove devas- tating hexes and Anti-Magic Ward to cancel enemy spellcasting on one of your allies. Finally, the Mana chain centers around disrupting enemy spellcasters’ mana, and replenishing your own in the process. If your party doesn’t have a Templar, think about spending a few points in this chain’s abilities.
Spirit School Chain 1
| Name | Prerequisite | Description | Cost (mana/stamina) | Upkeep (mana/stamina) | Fatigue (% mana/stamina) | Ranged | Cooldown (sec.) | Area of Effect Radius (ft.) |
|---|---|---|---|---|---|---|---|---|
| Mana Drain | None | The caster creates a parasitic bond with a spellcasting target, absorbing a small amount of mana from it. | 0 | 0 | 0 | Yes | 10 | 0 |
| Mana Cleanse | Magic 18 | The caster sacrifices personal mana to nullify the mana of enemies in the area. | 40 | 0 | 0 | Yes | 20 | 10 |
| Spell Might | Magic 25 | While in this mode, the caster overflows with magical energy, making spells more powerful, but expending mana rapidly and suffering a penalty to mana regeneration. | 0 | 60 | 5 | No | 10 | 0 |
| Mana Clash | Magic 33 | The caster expels a large amount of mana in direct opposition to enemy spellcasters, who are completely drained of mana and suffer spirit damage proportional to the amount of mana they lost. | 50 | 0 | 0 | Yes | 40 | 10 |
Spirit School Chain 2
| Name | Prerequisite | Description | Cost (mana/stamina) | Upkeep (mana/stamina) | Fatigue (% mana/stamina) | Ranged | Cooldown (sec.) | Area of Effect Radius (ft.) |
|---|---|---|---|---|---|---|---|---|
| Mind Blast | None | The caster projects a wave of telekinetic force that stuns enemies caught in the sphere. | 20 | 0 | 0 | No | 30 | 5 |
| Force Field | Magic 18 | The caster erects a telekinetic barrier around a target, who becomes completely immune to damage for the duration of the spell but cannot move. Friendly fire possible. | 40 | 0 | 0 | Yes | 30 | 0 |
| Telekinetic Weapons | Magic 23 | While this mode is active, the caster enchants the party’s melee weapons with telekinetic energy that increases armor penetration. The bonus to armor penetration is based on the caster’s spellpower and provides greater damage against heavily armored foes. | 0 | 50 | 5 | Yes | 5 | 0 |
| Crushing Prison | Magic 30 | The caster encloses a target in a collapsing cage of telekinetic force, inflicting spirit damage for the duration and possibly shattering those that have been petrified or frozen solid. | 60 | 0 | 0 | Yes | 60 | 0 |
Spirit School Chain 3
| Name | Prerequisite | Description | Cost (mana/stamina) | Upkeep (mana/stamina) | Fatigue (% mana/stamina) | Ranged | Cooldown (sec.) | Area of Effect Radius (ft.) |
|---|---|---|---|---|---|---|---|---|
| Spell Shield | None | While this ability is active, any hostile spell targeted at the caster has a 75% chance of being absorbed into the Fade, draining mana instead. Once all mana has been depleted, the shield collapses. | 0 | 45 | 5 | No | 10 | 0 |
| Dispel Magic | Magic 18 | The caster removes all dispellable effects from the target. Friendly fire possible. | 25 | 0 | 0 | Yes | 2 | 0 |
| Anti-Magic Ward | Magic 25 | The caster wards an ally against all spells and spell effects, beneficial or hostile, for a short time. | 40 | 0 | 0 | Yes | 30 | 0 |
| Anti-Magic Burst | Magic 33 | This burst of energy eliminates all dispellable magical effects in the area. Friendly fire possible. | 40 | 0 | 0 | Yes | 30 | 7 |
Spirit School Chain 4
| Name | Prerequisite | Description | Cost (mana/stamina) | Upkeep (mana/stamina) | Fatigue (% mana/stamina) | Ranged | Cooldown (sec.) | Area of Effect Radius (ft.) |
|---|---|---|---|---|---|---|---|---|
| Walking Bomb | None | The caster magically injects a target with corrosive poison that inflicts continual nature damage. If the target dies while the effect is still active, it explodes, damaging all targets nearby. Although this spell is related to Virulent Walking Bomb, the magic behind the two does not interact; a target cannot be infected with both. Friendly fire possible. | 30 | 0 | 0 | Yes | 20 | 0 |
| Death Syphon | Magic 20 | While this mode is active, the caster draws in nearby entropic energy, draining residual power from any dead enemy nearby to restore the caster’s mana. | 0 | 45 | 5 | No | 10 | 5 |
| Virulent Walking Bomb | Magic 25 | The caster magically injects a target with corrosive poison that inflicts continual nature damage. If the target dies while the effect is still active, it explodes, damaging nearby targets and possibly infecting them in turn. Although this spell is related to Walking Bomb, the magic behind the two does not interact; a target cannot be infected with both. Friendly fire possible. | 40 | 0 | 0 | Yes | 40 | 0 |
| Animate Dead | Magic 33 | The caster summons a skeleton minion from the corpse of a fallen enemy to fight alongside the party for a short time, although, as a puppet of the caster, it will not use any talents or spells without specific instruction. | 0 | 80 | 10 | No | 60 | 0 |
Entropy School

The Entropy chains slide into the dark side of magic. The Drain/ Death chain may be the most useful; the first two abilities net you health, while Curse of Mortality is lethal against healing mobs and Death Cloud is lethal to everything. The Weakness chain strips offense, defense, and movement from enemies, or it outright paralyzes them. The upgrades (Miasma and Mass Paralysis) do it even better, affecting whole groups. The Fear chain begins with Disorient, which inflicts combat penalties, works toward Horror, which causes the targets to cower in fear, and then knocks out enemies with Sleep. Combo Sleep with Waking Nightmare and hostile targets become randomly stunned, attack other enemies, or become the caster’s ally for the duration of the spell. The last chain of hexes grants four different effects: vulnerability to resistances, AoE resistance penalties, inaccuracy, and bad luck (all normal hits become critical strikes).
Entropy School Chain 1
| Name | Prerequisite | Description | Cost (mana/stamina) | Upkeep (mana/stamina) | Fatigue (% mana/stamina) | Ranged | Cooldown (sec.) | Area of Effect Radius (ft.) |
|---|---|---|---|---|---|---|---|---|
| Disorient | None | The caster engages in subtle mental manipulation that disorients the target for a short time, making the target a less effective combatant by inflicting penalties to attack and defense. | 20 | 0 | 0 | Yes | 10 | 0 |
| Horror | Magic 18 | The caster forces a target to cower in fear, unable to move, unless it passes a mental resistance check. Targets already asleep when the spell is cast cannot resist its effect and take massive spirit damage. | 40 | 0 | 0 | Yes | 20 | 0 |
| Sleep | Magic 30 | All hostile targets in the targeted area fall asleep unless they pass a mental resistance check, although they wake when hit. Sleeping enemies cannot resist the Horror spell, which will inflict additional damage. | 35 | 0 | 0 | Yes | 50 | 10 |
| Waking Nightmare | Magic 32 | Hostile targets are trapped in a waking nightmare unless they pass a mental resistance check. They are randomly stunned, attack other enemies, or become the caster’s ally for the duration of the effect. Enemies that are already asleep cannot resist. | 40 | 0 | 0 | Yes | 40 | 5 |
Entropy School Chain 2
| Name | Prerequisite | Description | Cost (mana/stamina) | Upkeep (mana/stamina) | Fatigue (% mana/stamina) | Ranged | Cooldown (sec.) | Area of Effect Radius (ft.) |
|---|---|---|---|---|---|---|---|---|
| Drain Life | None | The caster creates a sinister bond with the target, draining its life energy in order to heal the caster. | 20 | 0 | 0 | Yes | 10 | 0 |
| Death Magic | Magic 20 | While active, the caster draws in nearby entropic energy, draining residual life-force from any dead enemy nearby to heal the caster. | 0 | 45 | 5 | No | 10 | 5 |
| Curse of Mortality | Magic 25 | The caster curses a target with the inevitability of true death. While cursed, the target cannot heal or regenerate health and takes continuous spirit damage. | 40 | 0 | 0 | Yes | 60 | 0 |
| Death Cloud | Magic 34 | The caster summons a cloud of leeching entropic energy that deals continuous spirit damage to all who enter. Friendly fire possible. | 50 | 0 | 0 | Yes | 60 | 10 |
Entropy School Chain 3
| Name | Prerequisite | Description | Cost (mana/stamina) | Upkeep (mana/stamina) | Fatigue (% mana/stamina) | Ranged | Cooldown (sec.) | Area of Effect Radius (ft.) |
|---|---|---|---|---|---|---|---|---|
| Vulnerability Hex | None | The target suffers a hex that inflicts penalties to cold resistance, electricity resistance, fire resistance, nature resistance, and spirit resistance. | 20 | 0 | 0 | Yes | 20 | 0 |
| Affliction Hex | Magic 20 | A contagious hex inflicts penalties to cold resistance, electricity resistance, fire resistance, nature resistance, and spirit resistance on the target and all other enemies nearby. | 40 | 0 | 0 | Yes | 20 | 10 |
| Misdirection Hex | Magic 28 | The target suffers a frustrating hex of inaccuracy. All hits become misses, while critical hits become normal hits. | 45 | 0 | 0 | Yes | 40 | 0 |
| Death Hex | Magic 36 | The target suffers a hex of lethal bad luck. Every normal hit it suffers becomes a critical hit. | 60 | 0 | 0 | Yes | 60 | 0 |
Entropy School Chain 4
| Name | Prerequisite | Description | Cost (mana/stamina) | Upkeep (mana/stamina) | Fatigue (% mana/stamina) | Ranged | Cooldown (sec.) | Area of Effect Radius (ft.) |
|---|---|---|---|---|---|---|---|---|
| Weakness | None | The caster drains a target of energy, inflicting penalties to attack and defense, as well as reducing its movement speed unless it passes a physical resistance check. | 20 | 0 | 0 | Yes | 10 | 0 |
| Paralyze | Magic 18 | The caster saps a target’s energy, paralyzing it for a time unless it passes a physical resistance check, in which case its movement speed is reduced instead. | 35 | 0 | 0 | Yes | 30 | 0 |
| Miasma | Magic 25 | While this mode is active, the caster radiates an aura of weakness, hindering nearby enemies with penalties to attack and defense. Unless the opponents pass a physical resistance check, they also suffer a penalty to movement speed. | 0 | 60 | 5 | No | 30 | 0 |
| Mass Paralysis | Magic 35 | All hostile targets in the area are paralyzed for a short time unless they pass a physical resistance check, in which case their movement speed is reduced instead. | 70 | 0 | 0 | Yes | 50 | 8 |
Power of Blood School (downloadable content only)
| Name | Prerequisite | Description | Cost (mana/stamina) | Upkeep (mana/stamina) | Fatigue (% mana/stamina) | Ranged | Cooldown (sec.) | Area of Effect Radius (ft.) |
|---|---|---|---|---|---|---|---|---|
| Dark Sustenance | None | A self-inflicted wound lets the mage draw from the power of tainted blood, rapidly regenerating a significant amount of mana but taking a small hit to health. | Health(gains 100 mana) | 0 | 0 | No | 60 | 0 |
| Bloody Grasp | None | The mage’s own tainted blood becomes a weapon, sapping the caster’s health slightly but inflicting spirit damage on the target. Darkspawn targets suffer additional damage for a short period. | 15 | 0 | 0 | Yes | 10 | 0 |
Specializations
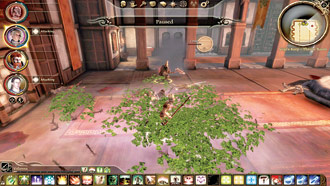
Each class has three specializations (out of six) that they can learn during the game. Your first specialization can be learned at level 7; your second at level 14; and your third at level 22. Some specializations are difficult to achieve, but very rewarding if you gain one. As long as the specific abilities fit with your play style and character breakdown, a specialization is generally worth spending points in over regular spells.
You should definitely experiment with specializations. A pure healer could, for example, specialize in Shapeshifter to add some offense to the mix and some defense if they generate too much threat. Here are some suggested play style fits for the six specializations:
Arcane Warrior
Primary: Melee/ranged mage (standard ranged spells with Arcane Warrior abilities for melee component)
Secondary: Mana powerhouse (use Fade Shroud to regenerate mana faster) or tanking capability
Specialization: Arcane Warrior
| Name | Prerequisite | Description | Cost (mana/stamina) | Upkeep (mana/stamina) | Fatigue (% mana/stamina) | Ranged | Cooldown (sec.) | Area of Effect Radius (ft.) |
|---|---|---|---|---|---|---|---|---|
| Combat Magic | 7 | While this mode is active, the Arcane Warrior channels magic inward, trading increased fatigue for an attack bonus and the ability to use spellpower to determine combat damage. Aura of Might and Fade Shroud improve the effects. Additionally, regardless of whether the mode is active, an Arcane Warrior who has learned this spell may use the magic attribute to satisfy the strength requirement to equip higher-level weapons or armor. | 0 | 50 | 50 | No | 10 | 0 |
| Aura of Might | 12 | The Arcane Warrior’s prowess with Combat Magic grows, granting additional bonuses to attack, defense, and damage while in that mode. | 0 | 0 | 0 | No | 0 | 0 |
| Shimmering Shield | 14 | The Arcane Warrior is surrounded by a shimmering shield of energy that blocks most damage and grants large bonuses to armor and all resistances. When active, however, the Shimmering Shield consumes mana rapidly. | 0 | 40 | 5 | No | 30 | 0 |
| Fade Shroud | 16 | The Arcane Warrior now only partly exists in the physical realm while Com- bat Magic is active. Spanning the gap between the real world and the Fade grants a bonus to mana regeneration and a chance to avoid attacks. | 0 | 0 | 0 | No | 0 | 0 |
Blood Mage
Primary: Enemy control (use Blood Control to possess enemies to fight for you)
Secondary: Health resilient (use Blood Sacrifice to heal self along with standard healing spells)
Specialization: Blood Mage
| Name | Prerequisite | Description | Cost (mana/stamina) | Upkeep (mana/stamina) | Fatigue (% mana/stamina) | Ranged | Cooldown (sec.) | Area of Effect Radius (ft.) |
|---|---|---|---|---|---|---|---|---|
| Blood Magic | 7 | For as long as this mode is active, the Blood Mage sacrifices health to power spells instead of expending mana, but effects that heal the Blood Mage are much less effective than normal. | 0 | 0 | 5 | No | 10 | 0 |
| Blood Sacrifice | 12 | The Blood Mage sucks the life-force from an ally, healing the caster but potentially killing the ally. This healing is not affected by the healing penalty of Blood Magic. | 0 | 0 | 0 | Yes | 15 | 0 |
| Blood Wound | 14 | The blood of all hostile targets in the area boils within their veins, inflicting severe damage. Targets stand twitching, unable to move unless they pass a physical resistance check. Creatures without blood are immune. | 40 | 0 | 0 | Yes | 20 | 10 |
| Blood Control | 16 | The Blood Mage forcibly controls the target’s blood, making the target an ally of the caster unless it passes a mental resistance check. If the target resists, it instead takes great damage from the manipulation of its blood. Creatures without blood are immune. | 40 | 0 | 0 | Yes | 40 | 0 |
Shapeshifter
Primary: DPS mage (Shapeshifter melee attacks complement ranged spells)
Secondary: Health resilient (use Flying Swarm to avoid health damage)
Specialization: Shapeshifter
| Name | Prerequisite | Description | Cost (mana/stamina) | Upkeep (mana/stamina) | Fatigue (% mana/stamina) | Ranged | Cooldown (sec.) | Area of Effect Radius (ft.) |
|---|---|---|---|---|---|---|---|---|
| Spider Shape | 7 | The Shapeshifter can transform into a giant spider, gaining a large bonus to nature resistance as well as the spider’s Web and Poison Spit abilities. The caster’s spellpower determines how powerful the form is. With Master Shapeshifter, the mage becomes a corrupted spider, growing still stronger and gaining the Overwhelm ability. | 0 | 50 | 5 | No | 90 | 0 |
| Bear Shape | 8 | The Shapeshifter can transform into a bear, gaining large bonuses to nature resistance and armor as well as the bear’s Slam and Rage abilities. The caster’s spellpower further enhances this bear’s statistics and abilities. With Master Shapeshifter, this form transforms the caster into a powerful bereskarn and gains the Overwhelm ability. | 0 | 60 | 5 | No | 90 | 0 |
| Flying Swarm | 10 | The Shapeshifter’s body explodes into a swarm of stinging insects that inflict nature damage on nearby foes, with the damage increasing based on the caster’s spellpower and proximity. While in this form, the caster gains Divide the Storm, and any damage the Shapeshifter suffers is drawn from mana instead of health, but the caster regenerates no mana. The swirling cloud of insects is immune to normal missiles and has a very good chance of evading physical attacks but is extremely vulnerable to fire. With Master Shapeshifter, the character gains health whenever the swarm inflicts damage. | 0 | 30 | 5 | No | 60 | 0 |
| Master Shapeshifter | 12 | Mastery of the shifter’s ways alters the forms of Bear Shape and Spider Shape, allowing the caster to become a bereskarn and a corrupted spider, both considerably more powerful than their base forms. In those forms, the Shapeshifter also gains Overwhelm. Additionally, the Flying Swarm shape drains health from foes whenever the main swarm inflicts damage. | 0 | 0 | 0 | No | 0 | 0 |
Spirit Healer
Primary: Main party healer (Group Heal essential for party survival)
Secondary: Savior (return dead comrades to life with Revival)
Specialization: Spirit Healer
| Name | Prerequisite | Description | Cost (mana/stamina) | Upkeep (mana/stamina) | Fatigue (% mana/stamina) | Ranged | Cooldown (sec.) | Area of Effect Radius (ft.) |
|---|---|---|---|---|---|---|---|---|
| Group Heal | 7 | The caster bathes allies in benevolent energy, instantly healing them by a moderate amount. | 40 | 0 | 0 | Yes | 20 | 0 |
| Revival | 8 | The caster revives fallen party members in an area, raising them from unconsciousness and restoring some health. | 60 | 0 | 0 | Yes | 120 | 2 |
| Lifeward | 12 | The caster places a protective ward on an ally that automatically restores health when the ally falls close to death. | 55 | 0 | 0 | Yes | 30 | 0 |
| Cleansing Aura | 14 | While this mode is active, waves of healing and cleansing energy emanate from the caster, restoring health to all nearby allies every few seconds and curing the injuries of allies very close to the caster. | 0 | 60 | 5 | No | 30 | 10 |
Keeper
Primary: Natural powerhouse (create a small area that taps into the powers of nature)
Secondary: Rooter (paralyze foes with vines and roots)
Specialization: Keeper
| Name | Prerequisite | Description | Cost (mana/stamina) | Upkeep (mana/stamina) | Fatigue (% mana/stamina) | Ranged | Cooldown (sec.) | Area of Effect Radius (ft.) |
|---|---|---|---|---|---|---|---|---|
| One with Nature | 20 | The Keeper’s bond with the earth creates a defensive field that immobilizes the Keeper for as long as this spell is active, but inflicts nature damage and a penalty to movement speed on any enemy that enters the field. | 0 | 80 | 10 | No | 10 | 0 |
| Thornblades | 22 | The Keeper calls roots from beneath the earth to inflict physical damage on all enemies within the field created by One with Nature. The roots also knock enemies back unless they pass a physical resistance check. | 60 | 0 | 0 | No | 30 | 10 |
| Replenishment | 25 | No living thing can escape the cycle of life; all who fall return to the earth. The mage now regains some health whenever a Keeper spell inflicts damage. When an enemy dies within the field of One with Nature, the body is consumed, giving the mage a large bonus to health regeneration for a short time. | 80 | 0 | 0 | No | 0 | 0 |
| Nature’s Vengeance | 28 | The Keeper summons gigantic roots from within the ground to attack all enemies in the area, impaling the opponents for a short time unless they pass a physical resistance check. | 100 | 0 | 0 | No | 60 | 10 |
Battlemage
Primary: Combat veteran (wade into melee with greater healing and damage capabilities)
Secondary: Freezer burn (damage and freeze enemies stone cold)
Specialization: Battlemage
| Name | Prerequisite | Description | Cost (mana/stamina) | Upkeep (mana/stamina) | Fatigue (% mana/stamina) | Ranged | Cooldown (sec.) | Area of Effect Radius (ft.) |
|---|---|---|---|---|---|---|---|---|
| Draining Aura | 20 | The Battlemage thrives in the heat of combat, creating a field that drains life from nearby enemies to heal the mage for as long as the spell is ac- tive. Each time an enemy is drained, the spell consumes a small amount of the Battlemage’s mana. | 0 | 100 | 10 | No | 10 | 0 |
| Hand of Winter | 22 | The Battlemage releases a burst of intense cold, damaging nearby enemies as well as freezing them unless they pass a physical resistance check, and inflicting a penalty to movement speed otherwise. | 80 | 0 | 0 | No | 45 | 7.5 |
| Stoic | 25 | The Battlemage has learned to harness pain and transform it into power, restoring mana whenever the mage suffers damage. | 0 | 0 | 0 | No | 0 | 0 |
| Elemental Chaos | 28 | The Battlemage creates a field of chaotic, swirling energy that continuously harms nearby enemies with damage from each of the elements in turn for as long as this spell is active. The spell consumes mana rapidly. | 0 | 140 | 10 | No | 10 | 0 |
Gear

Mages might not get the pick of the litter for equipment, but the gear they do receive should pump up their main abilities if you shop correctly. Don’t worry about defense too much; concentrate on bumping up your magic and willpower scores, or gaining spellpower points to enhance all spells, or adding mana boosts. The goal of all mages is to avoid drawing too much threat, and if you’re achieving that goal, armor won’t be too much of a factor. If you’re worried about taking damage, invest in constitution to increase health and ward you against melee and ranged attacks. The same goes with weapons: don’t pick a staff based on DPS; pick one that increases your main attributes. Also, think about your spell preferences. If you invest in fire spells, for example, a ring that generates extra fire damage is a huge boon.
There’s more mage gear than you could ever hope to equip in a single play. The general rule of thumb is to wait for loot that serves as an upgrade and snatch it up. If you have extra coin to buy a nice gear upgrade, feel free to spend away, though most of the low-level equipment will be easily replaced by future loot, and the high-level equipment is very expensive (generally bought before a run at the Mother).
Ideal Mage Equipment
| Item Type | Item 1 | Item 2 |
|---|---|---|
| Staves | Staff of the Lost | Spellfury |
| Daggers | Voice of Velvet | — |
| Mage Robes | Spellminder | Robes of the Architect |
| Light Chest Armor | Vest of the Nimble | Rainswept |
| Light Helmets | Cap of the Nimble | — |
| Mage Helmets | Toque of the Oblivious | — |
| Light Boots | Mage’s Running Boots | Fadewalker |
| Light Gloves | Oven Mitts | — |
| Amulets | Illumination | Seeker’s Chain |
| Belts | Belt of the Architect | Sash of Power |
| Rings | Ring of Mastery | Ring of Discipline |
Party Responsibilities
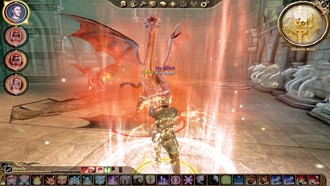
Ask yourself two questions when playing a mage: “Are you primarily a damage-dealer or a healer?” and “Are you the only mage in the party?” If you want to perform the damage role, you will naturally concentrate on ways to harm your opponent. If you want to play the role of healer, regeneration and rejuvenation spells are in order. If you’re the only mage in the party, you must take some healing spells as part of your repertoire.
Another important question: “What need do you fulfill best?” Perhaps, you may look at your other three companions and fill in the void that they lack. For example, if you have a warrior concentrating on two-handed weapons, a backstabbing rogue, and your sword-and-shield tank, DPS would seem to be covered while healing/party buffs are lacking. On the flip side, if you have a Spirit Healer such as Anders in the group, you can stretch out to damage spells and maybe supplement his talents with a heal or two.
In the end, though, choose the role that you want your mage to be and work the team around that. If you want to play DPS, go for it and make sure you have one of your other mages involved in the healing role. If you want to play the healer, make sure you have another DPS-driven companion. If you want to play a little DPS and a little healing, you might be able to swing it as a single mage, or you may need help from one of the companion mages; it all depends on your combat style and tactics.
One thing all mages should strive for is to remain in the background and avoid threat whenever possible. You aren’t built for melee combat (unless you spec an Arcane Warrior properly), and if you draw threat, you will die quickly. Don’t pull targets away from your tank, except, possibly, if they are near death and easy kills.
The mage ranks highest of the three classes in versatility. You can deal damage, heal, control large enemy groups, buff your party, and more. Save your mana for the right reactions at the correct times and you’ll excel in this class. So long as you remember not to lead the battle charge, your magic will work wonders in fights.
Role Models
What role will you play in your party? With tons of spells to choose from and six specializations, you can make myriad mages. Don't feel constrained to play according to the following mage models to the letter; strive for these ideals, but leave room for your own innovation. These are basic models for a DPS mage, healer, or blend mage who balances offense and defense. Each shows you how to choose your spells up to level 30, what spell chains are effective, how specializations fit in, and sample combat strategies for that model. Strive for these ideals, but leave room for your own innovation.
DPS Mage Model
| Level | Spell/Talent |
|---|---|
| 0 | Arcane Bolt |
| 1 | Flame Blast, Heal |
| 2 | Flaming Weapons |
| 3 | Fireball |
| 4 | Spell Wisp |
| 5 | Grease |
| 6 | Walking Bomb |
| 7 | Death Syphon— First Specialization Available at This Level |
| 8 | Arcane Shield |
| 9 | Staff Focus |
| 10 | Arcane Mastery |
| 11 | Virulent Walking Bomb |
| 12 | Inferno |
| 13 | Lightning |
| 14 | Spider Shape — Second Specialization Available at This Level (Shapeshifter) |
| 15 | Bear Shape (Shapeshifter) |
| 16 | Flying Swarm (Shapeshifter) |
| 17 | Master Shapeshifter |
| 18 | Animate Dead |
| 19 | Rejuvenate |
| 20 | Fade Shield |
| 21 | Elemental Mastery |
| 22 | Repulsion Field— Third Specialization Available at This Level |
| 23 | One with Nature |
| 24 | Attunement |
| 25 | Thornblades |
| 26 | Replenishment |
| 27 | Time Spiral |
| 28 | Nature’s Vengeance |
| 29 | Invigorate |
| 30 | Mystical Negation |
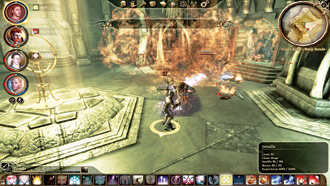
Overview: A DPS mage deals heavy damage from medium to long range. He generally concentrates in the Primal and Spirit schools.
Leveling: What does a DPS mage do best? Damage. Naturally, then, you should start off with a Primal chain. In this case, we’ll choose the Fire chain, mostly because Fireball is such a great AoE damage spell. You could, of course, start with any of the Primal chains. (The Earth chain, however, may prove a little troublesome at its first rank; it’s the only Primal chain that doesn’t start out with a damage spell.)
Invest in Flame Blast to start the Fire chain and give you an additional attack to Arcane Bolt (all mages start with this basic attack). Pick up Heal as well. Yes, it’s a defensive spell, but every mage should carry it to save allies or themselves in a pinch. Take Flaming Weapons for some melee support. Once you learn Fireball, you can roast enemy groups from a great distance. You have fine weapons already, so long as you don’t run into fire-resistant mobs.
Choose Spell Wisp and the second spell in that chain, Grease. Spell Wisp increases spellpower, which augments all your damage spells, and Grease causes enemies to slip if they miss a physical resistance check (crowd control) and the slick surface can be set on fire for extra damage, making it a perfect combo for your fire-based spells.
Start your second damage chain with Walking Bomb. This gives you a separate source of poison damage (and sets you up for another lethal AoE attack). The follow-up to Walking Bomb, Death Syphon, restores mana; it’s always handy in longer battles.
Now fill out the standard Mage school. Arcane Shield helps divert incoming attacks, giving you some more defense. The overlooked Staff Focus powers up your basic staff attack, which you always use as back-up damage when your mana runs low. The real reason for running these spells in a row here is to ensure that you pick up Arcane Mastery at its earliest availability. Because Arcane Mastery grants a permanent bonus to spellpower, it makes all your DPS stronger no matter what spell you choose.
Next, maximize your two damage chains. Virulent Walking Bomb functions similar to Walking Bomb with one big difference: when targets explode, they have a chance to infect other enemies and start a chain reaction of explosions. Inferno, the top of the Fire chain, engulfs an entire area in continuous flame and will decimate enemies if they can’t escape to the cooler perimeter. Note that you need 34 magic to access Inferno.
Branch out into a third damage chain, Lightning. Two separate damage sources are usually enough, but if you rotate three, you should always have a damage spell available as long as your mana lasts.
Try out the Shapeshifter specialization with Spider Shape. With a DPS mage who really wants to hammer out lots of damage, it’s best to go with your core damage spells early and slip into a specialization. The Shapeshifter specialization lets you deal melee DPS, which is fantastic for when your mana runs low or if you find yourself under direct melee attack. To gain all the creature abilities from Shapeshifter, we’ll invest four points in a row to the specialization, though you could spread them out through level 20 if you like.
At levels 18 through 20, you should fill in with whatever tickles your fancy. At level 18, we pick up Animate Dead to finish off the Walking Bomb chain and gain some combat allies in the process. For level 19, select Rejuvenate; its effect on a party member’s stamina/mana is invaluable backup for a healer. By level 20, you have three separate damage chain nearly maxed out, some good support spells, and an entire specialization at your disposal, with one extra point to spend as you wish.
At level 20, invest in the new Mage spell Fade Shield and work your way up to Elemental Mastery at level 21, Attunement at level 24, and Time Spiral at level 27. These are the best spells for a high-level mage looking to maximize damage.
Fill in level 22 with Repulsion Field from the other new Mage school chain. It’s a highly effective defensive spell against swarming creatures and may give you the breathing room you need to deal with a threatening group one by one.
At level 23, go with your second specialization: Keeper. One with Nature sets up an area around you that damages enemies and slows them. It also roots you in place, but that’s not usually a big deal because you don’t plan on moving much with a handful of ranged spells at your disposal. Level 25’s Thornblades, level 26’s Replenishment, and level 28’s Nature’s Vengeance fill out the specialization and load you up with rooting, healing, and more damage against enemies closer to you.
At level 29, spend a spell point on Invigorate. You may not want to drain through your mana in most situations, but it’s good to have in an emergency where your allies are desperate for stamina/mana. Finally, at level 30, select Mystical Negation.
Spell Choices: Fire spells serve as your primary AoE if you have the space to deal damage to your foe without catching the party in friendly fire. The Spell Wisp chain gives you extra spellpower and a crowd control spell in Grease. The Walking Bomb chain focuses on another cycle that can serve as either single-target damage or AoE damage. The Lightning chain gives you a third damage alternative, the effect of bouncing from one target to the next, and another option to avoid cooldown problems.
Specialization: Shapeshifter provides melee DPS so you can conserve on mana and defend yourself if under direct attack. Spider Shape has an effective Web snare, Bear Shape offers a good Overwhelm ability, and Flying Swarm turns into an AoE attack that also protects you from physical damage (all damage comes off your mana instead). Master Shapeshifter improves all forms, and you can hold your own against less powerful mobs. Your higher-level specialization give you more versatility. The Keeper abilities lock down nearby enemies, while harming them and healing you.
Battle Tactics: Your standard tactic is to deal steady damage to enemies without pulling so much threat that the enemies escape your tank’s hold and charge toward you. With that in mind, you may have to delay a few seconds at the start of the fight, or during the fight, depending on the enemy posi- tion and your tank’s ability to lock down the threat.
Your general spell cycle will be Fireball (if you won’t hit your party with friendly fire), Walking Bomb, Arcane Bolt, and Lightning (if you’ve reached level 13 or higher). A neat trick inside dungeons is to open a door and hurl a Fireball at enemies on the far side of the room. The explosion consumes the room and the walls prevent the burst from burning your party; just cast it well away from the door. Similarly, you can use your higher damage spells, such as Tempest, to hurt enemies you can’t even see. Target the spell around a corner or inside another room (if the door is open) and let it rip. Enemies inside will take tons of damage or come running out into your well-positioned party’s ambush.
An important part of your job may be to contain rather than destroy. Think of Grease whenever you see a large group ready to flank your party, or if something unexpected happens, such as your tank getting stunned and losing threat. Grease will delay most of the enemies, and you can always follow up with a Flame Blast to ignite the oil and cause great pain to the enemy.
If you’re playing pure DPS, you should have another mage, a healer, in your party too. They can do the heavy lifting when it comes to healing and keep the party alive. However, don’t ignore the supplemental healer role. In tough fights, throw a Heal into your rotation. If your primary healer is having trouble, you may even heal after every other damage spell. As soon as that Heal spell becomes active, glance at everyone’s health bars and kick it off if wounds are piling up. Yes, you are a master DPSer, but if you are the only one standing, it won’t do you much good.
Healer Mage Model
| Level | Spell/Talent |
|---|---|
| 0 | Arcane Bolt |
| 1 | Heal, Rejuvenate |
| 2 | Regeneration |
| 3 | Winter’s Grasp |
| 4 | Spell Shield |
| 5 | Dispel Magic |
| 6 | Arcane Shield |
| 7 | Group Heal (Spirit Healer)— First Specialization Available at This Level |
| 8 | Revival (Spirit Healer) |
| 9 | Staff Focus |
| 10 | Arcane Mastery |
| 11 | Mass Rejuvenation |
| 12 | Lifeward (Spirit Healer) |
| 13 | Frost Weapons |
| 14 | Cleansing Aura (Spirit Healer)— Second Specialization Available at This Level |
| 15 | Cone of Cold |
| 16 | Blizzard |
| 17 | Vulnerability Hex |
| 18 | Affliction Hex |
| 19 | Force Field |
| 20 | Fade Shield |
| 21 | Elemental Mastery |
| 22 | Attunement— Third Specialization Available at This Level |
| 23 | Draining Aura |
| 24 | Hand of Winter |
| 25 | Time Spiral |
| 26 | Repulsion Field |
| 27 | Invigorate |
| 28 | Arcane Field |
| 29 | Stoic |
| 30 | Elemental Chaos |

Overview: A healer focuses on health regeneration and rejuvenation. These mages generally concentrate in the Creation school.
Leveling: A healer should concentrate in the Creation school, at least until they reach Regeneration and have two solid heals.
Pick up Heal and Rejuvenate. Heal will be your staple health spell; Rejuvenate helps to restore stamina for warriors and mana for mages. If you increase your magic attribute correctly, you can net Regeneration. It’s crucial to have at least two healing spells; otherwise, while Heal is on cooldown, a party member could become gravely wounded and you’ll have no healing to help him.
Every healer should have a form of damage as well. In addition to your standard Arcane Bolt, we’ll pick up Winter’s Grasp. The Cold chain has the built-in effect of freezing a target in place, which serves to slow down foes and help out on defense; this defensive component complements your healing role.
Next, branch out into the Spirit school. Spell Shield comes first as a potential defense against hostile spells, but it’s really a prerequisite for Dispel Magic. This is always handy to remove enemy effects on party members, Dispel Magic proves critical to remove Curse of Mortality, which prevents healing and will kill party members if you don’t eliminate it fast.
Pick up Arcane Shield. Much like Spell Shield, it’s extra defense that may come into play in certain fights, but it’s mostly a prerequisite to ramp up to Arcane Mastery later.
No matter what you have to do, you want to gain the Spirit Healer specialization as soon as you can. The first spell in the chain, Group Heal, is the most important spell as a healer. The ability to heal all your party members at once will turn the tide in many battles. The Spirit Healer ability Revival may tip the battle scales in your favor when one of your companions drops and you can bring them back from the brink of death.
Fill out your basic Mage school. Choose Staff Focus and Arcane Mastery. Arcane Mastery will augment all your healing spells, which is a very good thing for your party’s health.
Mass Rejuvenation comes in big in long battles where everyone needs a boost to stamina and mana. This fills out your main Heal chain.
Grab Lifeward from Spirit Healer. It’s another healing spell that works when a companion’s near death: a nice luxury to throw on a tank, or someone else that you can’t heal immediately.
Frost Weapons inches you up in the Cold chain and lets you boost your party’s offense if it looks to be a light fight that won’t require much healing.
Cleansing Aura finishes off the Spirit Healer special- ization. It’s an AoE healing effect, which also cures injuries (and saves on buying injury kits!).
Fill out your Cold chain with Cone of Cold and Blizzard. You won’t blast an area too much with Blizzard unless your party is desperate for damage, but you will fire off a Cone of Cold once in a while. Cone of Cold also freezes targets in place, and if your enemies aren’t attacking, you don’t have to spend mana healing.
Your final four slots leading up to level 20 can go to any spell chain you like. We’ll start the Hex chain: Vulnerability and Affliction. The hexes can reduce attack percentages against your party (as well as enemy defenses), which plays to your strength as the group’s main defender. At level 18, there’s one extra point to spend as you wish.
Choose Force Field at level 19 for the ultimate damage- preventer. It may nullify an ally’s offensive production for 30 seconds, but it also makes them invulnerable for that time frame. When someone’s nearly down and out, cast Force Field, followed by Regeneration and your ally’s health will slowly tick back up near full without further fuss from you.
At level 20, cash in on the first of the new Mage spells: Fade Shield, which boosts your Arcane Shield if you run into trouble. Level 21’s Elemental Mastery will serve up extra damage when you use your cold spells, but it’s really a stepping stone to reach level 22’s Attunement. With gains to magic, willpower, and mana regeneration, what self- respecting healer wouldn’t die for this upgrade? At level 25, the cooldown-resetting Time Spiral is a wonder for a healing mage. Imagine being able to cast back-to-back Group Heals.
When you reach levels 23 and 24, begin the Battlemage specialization with Draining Aura and Hand of Winter. Complete the Battlemage specialization with Stoic at level 29 and Elemental Chaos at level 30.
At level 26, pick up Repulsion Field, a highly effective defensive spell against swarming creatures that may give you the breathing room you need to deal with a threatening group. Invigorate at level 27 can boost your allies’ stamina/ mana in desperate situations (at the expense of your own mana). Choose Arcane Field at level 28; while active the mage radiates arcane projectiles that deal spirit damage.
Spell Choices: Your Heal chain will be the most active as you cycle back and forth between Heal and Regeneration throughout all future battles. The Cold chain gives you of- fense and defense, because foes may be frozen in place after you hit them with Winter’s Grasp or Cone of Cold. Dispel Magic comes out automatically as soon as one of your com- panions falters to a lingering negative spell effect. At higher levels, your Hex chain supplements your main strategy with spells that reduce the effectiveness of the enemy against your party, and the new Mage school spells boost your over- all effectiveness.
Specialization: Spirit healer is paramount. Seek it out as soon as you unlock the specialization potential. Group Heal proves super effective, healing everyone at once. Revival brings a companion back into the fight who would have been useless otherwise. Lifeward prevents an overwhelming amount of damage from finishing off an ally, while Cleansing Aura generates continuous health to all around you.
Battle Tactics: All good healers know to stay out of the heat of battle and focus not on spilling enemy blood, but on staunching the blood on your companions’ tunics. Stay out of the main confrontation so as not to draw the attention of your foes. Don’t waste mana on offense except in dire circumstances where you need to kill something before it kills you, or possibly minor fights where the outcome is never in doubt. Before you leave one encounter for the next, make sure your mana has topped back off.
Learn your allies’ armor and health reserves. If you misjudge someone’s threshold for damage, they may end up dead before you can heal them. With some practice, you will know when to fire off a Heal to bring a companion back to full health without wasting healing that goes above their max health rating.
Cycle through Heal and Regeneration, throwing in any other healing you have for longer fights. Preventive healing is a good idea; it keeps your companions’ health high and avoids the problem of direly needing a heal that’s unavailable on cooldown.
Once you gain Group Heal, master it. It’s great to use when multiple party members are taking damage: you cast an economical heal that saves several people at once. You can counteract big bursts of damage that wound your team, such as traps or an unexpected Chain Lightning from an enemy spellcaster. Should multiple party members start taking damage over time—such as from a dragon’s firebreathing—Group Heal helps boost everyone’s health at once and keep the party out of immediate danger.
Heal as often as seems feasible. Unlike a DPS mage, you can’t afford to heal conservatively to avoid threat if companions are at risk. Be sure to stock up on lyrium potions to replenish mana. If a DPS mage comes up dry, you might rely on the warrior to belt out the extra damage; if your healer gets stuck on empty, you had better win the fight in a matter of seconds or someone might not make it.
Blend Mage Model
| Level | Spell/Talent |
|---|---|
| 0 | Arcane Bolt |
| 1 | Heal, Rock Armor |
| 2 | Stonefist |
| 3 | Earthquake |
| 4 | Mind Blast |
| 5 | Force Field |
| 6 | Arcane Shield |
| 7 | Combat Magic (Arcane Warrior)— First Specialization Available at This Level |
| 8 | Petrify |
| 9 | Staff Focus |
| 10 | Arcane Mastery |
| 11 | Telekinetic Weapons |
| 12 | Aura of Might (Arcane Warrior) |
| 13 | Crushing Prison |
| 14 | Shimmering Shield (Arcane Warrior)— Second Specialization Available at This Level |
| 15 | Lightning |
| 16 | Fade Shroud (Arcane Warrior) |
| 17 | Rejuvenate |
| 18 | Regeneration |
| 19 | Chain Lightning |
| 20 | Draining Aura (Battlemage) |
| 21 | Repulsion Field |
| 22 | Hand of Winter (Battlemage)— Third Specialization Available at This Level |
| 23 | Fade Shield |
| 24 | Elemental Mastery |
| 25 | Stoic (Battlemage) |
| 26 | Attunement |
| 27 | Invigorate |
| 28 | Elemental Chaos (Battlemage) |
| 29 | Time Spiral |
| 30 | Arcane Field |

Overview: A blend mage has the most versatility, splits talents between offense and defense, and may pull spells from all schools.
Leveling: Choose two defensive spells: Heal and Rock Armor. As with all mages, Heal serves as health rejuvenation whenever someone needs a boost. Rock Armor gives you an armor bonus, which you’ll need because a blend mage draws more threat and enters melee more than the average mage.
You’ll take two offensive spells: Stonefist and Earthquake. Stonefist is a great offensive spell that pummels a single enemy with damage and can knock it off its feet. Earthquake will be your staple AoE attack. Note that you could take any main damage chain here (fire, cold, or electricity).
Next, enter the Mind Blast chain. Mind Blast can play out hugely when surrounded by large groups. Stun them to prevent a swarm on you, or to give your companions more time to get into position and wield their best attacks. Perhaps the best defensive spell in the game, Force Field nullifies all damage against you or a targeted ally for a short duration. You can almost stack Force Fields one after the other and keep a target alive against ridiculous damage—the only drawback is the target of the Force Field can’t react in any way while defended.
Pick up Arcane Shield as added defense and the second step toward Arcane Mastery.
With this blend build, we want the Arcane Warrior special- ization. Learn Combat Magic and suddenly you can equip high-level armor and weapons. You might not be a tank, but you’re no slouch in combat any longer.
Next, boost your offense again. Petrify can be a single- target kill spell if they fail a physical resistance check. (Follow up Petrify with Stonefist for shattering results!) Staff Focus increases the damage done with your basic staff attack.
Arcane Mastery improves spellpower and thus increases the effectiveness of all spells.
Telekinetic Weapons enhances your companions’ weapons, and even your melee weapon if you wade into melee as an Arcane Warrior. Aura of Might bolsters your attack, defense, and damage. Note that you need to reach 34 magic to access Aura of Might.
Your best offensive spell comes with Crushing Prison. Break this out against single foes and encase them in a prison that roots them to the spot and deals continuous spirit damage.
Shimmering Shield continues your Arcane Warrior abilities. The shield sucks up damage and cranks up resistances; it’s great for melee fighting, but it drains mana quickly, so don’t count on casting many spells in conjunction with your defense.
Pick up Lightning. It’s another damage spell that gives you a new source of damage and single-foe targeting.
Finish off the Arcane Warrior specialization with Fade Shroud. While Combat Magic is active, Fade Shroud increases mana regeneration and gives a chance to avoid attacks.
Next, choose Rejuvenate, followed by Regeneration. You’ll have one extra point to spend as you like at this point. Follow these with Chain Lightning at level 19.
At level 20, enter your second specialization: Battlemage. Pop Draining Aura in melee and nearby enemies take damage while healing you. Pick up the other Battlemage spells as soon as you can. Level 22’s Hand of Winter serves as a mini-Cone of Cold in a complete circle around you. Level 25’s Stoic increases your mana availability; each time you take a hit in combat, you gain mana. At level 28, Elemental Chaos damages nearby foes with each of the elements one after the other, which should hit at least one of the enemy’s vulnerabilities.
Grab Repulsion Field at level 21. It’s a great weapon in melee as you scatter throngs of enemies and knock some of their feet for easy pickings.
At level 23, pick up the other new Mage school spells. Fade Shield launches the chain, followed by Elemental Mastery at level 24 for extra damage, Attunement at level 26 for upgrades to your stats, and Time Spiral at level 29 to reset your cooldowns and reuse all your most powerful spells quickly.
Finish off your build with a tad more healing. At level 27 invest in Invigorate to help out an ally’s dwindling stamina or mana pool (at the expense of your own mana).
At level 30, choose Arcane Field; when active, the mage radiates arcane projectiles that deal spirit damage.
Spell Choices: The Earth chain gives you lots of offensive options: single-target stun with Stonefist, AoE with Earth- quake, and single-target kill with Petrify. Mind Blast and Force Field offer excellent defense, all on the way to your best offensive spell in Crushing Prison. The Lightning chain adds an extra damage dimension to your spell rotation, and the higher-level Mage spells improve your melee capabilities dramatically.
Specialization: Arcane Warrior drives this blend build. Rather than drop spells constantly, the Arcane Warrior mixes ranged DPS with defensive spells and hand-to-hand combat. Combat Magic gives the mage access to armor and weapons only the warrior class would normally have. Aura of Might bolsters stats across the board. Shimmering Shield can keep you alive in a melee fight, but will cut you off from spells as your mana drains away. On the opposite extreme, Fade Shroud will replenish your mana and help you avoid damage once you level high enough to unlock it. Your second specialization, Battlemage, dovetails nicely with Arcane Warrior. Because you’re already heavy into the middle of melee, the close-contact Bat- tlemage abilities come in handy in almost all situations.
Battle Tactics: Unlike your standard mage who stays in the rear, this blend mage isn’t afraid to enter melee after he specializes in Arcane Warrior at level 7. Suddenly, the lowly mage can wear excellent armor and wield weapons normally above his pay grade. The specialization is worth it just for that benefit alone, and it gets better for a brawler mage when you add the next three talents.
On the spell end, your offensive rotation will usually go Earthquake or Chain Lighting (if you can avoid friendly fire), Arcane Bolt or Lightning, Stonefist (targeting any enemy heading directly for you), and Petrify or Crushing Prison for the kill (or against the strongest opponent). You can pick and choose the correct spell for the situation if you forgo pure spellcasting and slip into Arcane Warrior/Battlemage mode.
Your defensive spell rotation generally goes Rock Armor, Mind Blast or Repulsion Field (when enemies close), Heal or Regeneration (whenever necessary), and Force Field for all-out defense. You can do lots of tricks with Force Field. You can, of course, save someone from certain death with a handy Force Field. You can send a tank in against a difficult foe, let him pile on threat, then throw up a Force Field; the enemy will most likely stay on the tank while you deal with the surrounding enemies. Even better still, you can take on bosses yourself. Cast a major spell, such as Earthquake or Fireball, on the enemy and follow up with a few damage spells to get him mad and fixated on you. As soon as the return damage heads your way, throw up a Force Field. While you’re trapped in the Force Field, have a second mage cast Rejuvenate on you to replenish your lost mana (or quaff a lyrium potion as soon as you emerge from the Force Field). You can deal a ton of damage over a long time, while barely taking a nick.
As a blend mage, you can tap into anything, dabbling here and there. The idea is to learn a balance of offense and defense to jump into any situation with an answer in hand. To some degree, all good mages are blends.