Prima Games eGuides
primagames.com Browse Redeem a code Help
Dragon Age: Origins - Awakening eGuide
Sign in My Guides

Sign in or create an account

We'll email you a link. No password needed, and if you don't have an account yet, the link makes one.

By creating an account or signing in, you agree to our Terms of Service and Privacy Policy.

Have a password?

Had an account on the old eGuides site, or a code from a printed guide? Help and troubleshooting

Sign in with a password

By signing in, you agree to our Terms of Service and Privacy Policy.

Check your email

A sign-in link is on its way. It works once and expires in 15 minutes. Open it and you're in, with an account if you didn't already have one.

Contents

  • Maps
    • World Map
      • World Map
    • Main Quest Walkthrough Maps
      • Assault on Vigil's Keep
      • Keep Interior
      • Throne Room
      • Vigil's Keep Courtyard
      • The Crown and Lion
      • The Blackmarsh
      • The Blackmarsh Undying
      • Shadowy Crypt
      • Baroness's Manor
      • Return to the Blackmarsh
      • Wending Wood
      • Silverite Mine
      • Knotwood Hills
      • Kal'Hirol
      • Main Hall
      • Trade Quarter
      • Lower Reaches
      • Siege of Vigil's Keep
      • Siege of Amaranthine
      • Dragonbone Wastes
      • Drake's Fall
      • The Nest
    • Side Quest Walkthrough Maps
      • The Blackmarsh
      • City of Amaranthine
      • Smuggler's Cove
      • Law and Order
      • Smuggler's Run
      • Smuggler's Cove (Alternate)
      • Vigil's Keep Throne Room
      • Knotwood Hills/Kal'Hirol
      • Vigil's Keep
      • It Comes From Beneath
      • Sealing the Great Barrier Doors
      • Wending Wood
  • Essentials
    • The Basics
      • How to Use This Guide
      • Key Terms
      • Experience and Leveling
      • Your Health
      • Races and Classes
      • Skills, Talents, and Specialties
      • Items
      • Combat
      • The Map
      • The Codex
      • Character Generation
    • The Classes
      • Introduction
      • Leveling
      • Skills
      • The Warrior
      • The Mage
      • The Rogue
    • The Party
      • Party Basics
      • Combat Roles
      • Configurations and Engagement
      • Tactics
    • Companions
      • Understanding Companions
      • Anders
      • Justice
      • Nathaniel Howe
      • Oghren
      • Sigrun
      • Velanna
      • Mhairi
    • Supporting Cast
      • Supporting Cast
    • Equipment
      • Equipment
      • Weapon and Armor Materials
      • Vendor Shopping
      • Weapons
      • Armor
      • Accessories
      • Runes
      • Crafting
      • Usable Items
      • Gifts
    • Bestiary
      • Monster Abilities
      • Monster List
  • Walkthrough
    • Walkthrough
      • How to Use the Walkthrough
      • Essential Locations
    • Assault on Vigil's Keep
      • Exterior
      • Interior
      • Throne Room
      • Courtyard
    • Shadows of Blackmarsh
      • Amaranthine
      • The Crown and Lion
      • The Blackmarsh
      • The Blackmarsh Undying
      • Shadowy Crypt
      • Baroness's Manor
      • Return to the Blackmarsh
    • The Righteous Path
      • Amaranthine
      • Wending Wood
      • Trapped by the Architect
      • Silverite Mine
    • Last of the Legion
      • Amaranthine
      • Knotwood Hills
      • Kal'Hirol
      • Main Hall
      • Trade Quarter
      • Lower Reaches
    • Siege of Vigil's Keep
      • Going to War
      • Siege of Vigil's Keep
      • Siege of Amaranthine
    • Lair of the Mother
      • Dragonbone Wastes
      • Drake's Fall
      • The Nest
    • Side Quests
      • The Blackmarsh
      • City of Amaranthine
      • Companions
      • Knotwood Hills and Kal'Hirol
      • Vigil's Keep
      • The Wending Wood
      • Random Encounters
    • Achievements
      • Achievements and Trophies

Dragon Age: Origins — Awakening Guide › Walkthrough › Shadows of Blackmarsh

The Blackmarsh Undying

Runthrough (The Blackmarsh Undying)

Summary: Escape the Fade by locating the baroness.

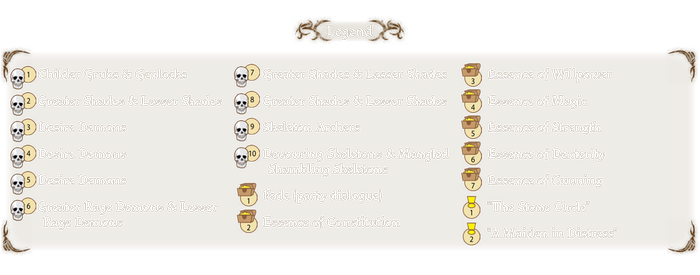
1 - Enter the Fade and fight the First's minions.

2 - Proceed toward the Baroness's Manor.

3 - Head around the manor and battle the shades and skeletons that arise to thwart you.

4 - Follow the Lonely Soul into the Shadowy Crypt.

The Blackmarsh Undying Cheatsheet

Main Plot Quest: Shadows of the Blackmarsh

Important NPCs: The Lonely Soul

Key Items: Essence of Constitution, Essence of Cunning, Essence of Dexterity, Essence of Magic, Essence of Strength, Essence of Willpower

Monsters: Childer Grubs, Desire Demons, Devouring Skeletons, Genlocks, Greater Rage Demons, Greater Shades, Lesser Rage Demons, Lesser Shades, Mangled Shambling Skeletons, Skeleton Archers

Side Quests: A Maiden in Distress, The Stone Circle

Spoiler Alert

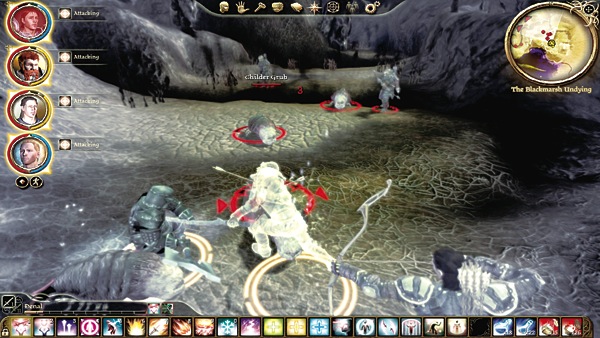
(1) When the First drops you into the Fade, he unexpectedly follows along with you. The First leaves you to fight off a group of childer grubs and genlocks. Dispatch them, get your bearings, and start your journey across the Fade.

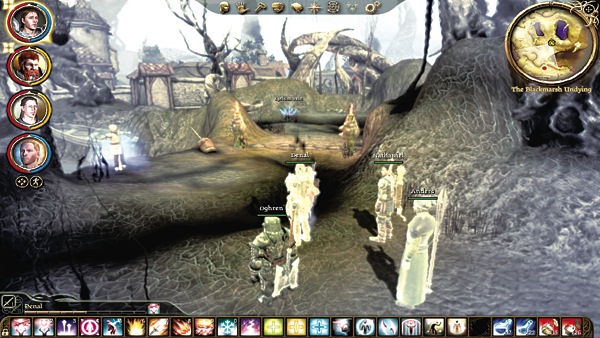
You can interact with a boat next to your starting point, which begins a dialogue about the Fade in your party, but be careful—it might reflect negatively on your companion approval rating.
Note

Lyrium veins can power you back up after a difficult battle. Touch one to recharge your health and mana/stamina.

Tip

Check the map for all essence locations. Each of the essence items grants you a permanent +1 to one of your attributes. Gather all of these attribute bonuses if you can.

(2) Work your way south and battle through the various shades and demons whose paths you cross. Don't advance too quickly or you can draw two enemy groups toward you at once. Go slowly, deal with an enemy group, and move on.

If you plan to finish off the side quests, slay the desire demons to shut down the Veil tears for "Tears in the Veil" and try your hand at the puzzle for "The Stone Circle" in the map's northwest corner.
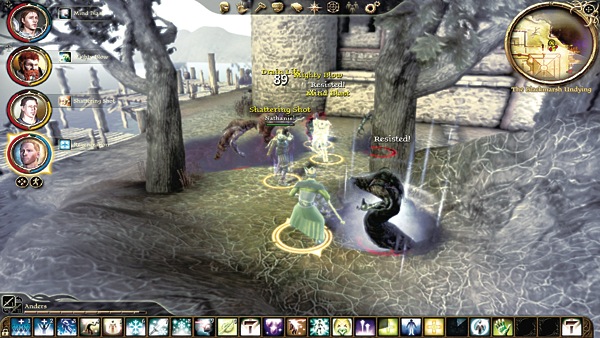
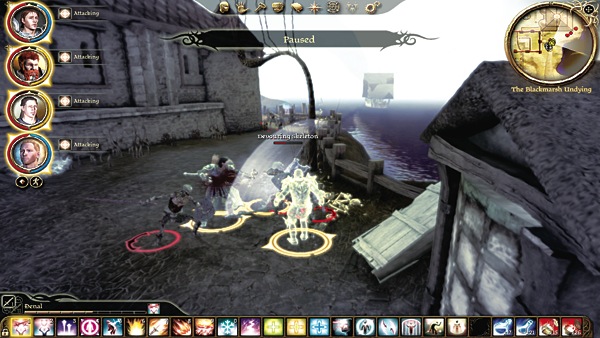
(3) Continue around the outside of the manor house along the docks. You encounter a group of shades at the first corner. After you slay the shades, tread carefully over the "corpses" on the waterfront.

These corpses animate when you turn the next corner, and you'll have skeleton archers behind you and devouring skeletons and mangled shambling skeletons animating around you. Stuns and defensive abilities that repel enemies, such as War Cry/Superiority and Repulsion Field, come in handy.
Tip

Rather than use up your health poultices and stamina/mana potions in the Fade, drink the ethereal ones you find in the Blackmarsh Undying. These are only good while traveling the Fade, so why waste your other hard-earned stockpile?

(4)Finish off any skeletons and follow the Lonely Soul into the Shadowy Crypt entrance to your left. You can't reach the rest of the Baroness's Manor without first traveling through the Shadowy Crypt.

Keep reading with a free account

The first 3 sections of Dragon Age: Origins - Awakening are open to everyone. An account opens the rest of it, and every other guide in the archive. It's free, and there's nothing to buy.

Bought guides on the old Prima Games site? Your account and every guide you own moved here, so there's nothing to buy again. Sign in.

Create a free account Or browse our free guides

PreviousThe Blackmarsh NextShadowy Crypt