
Darksiders III Guide Hunting the Deadly Sins Wrath (Revisited)
Scar: Gnarled Cliffs & Drilling Annex
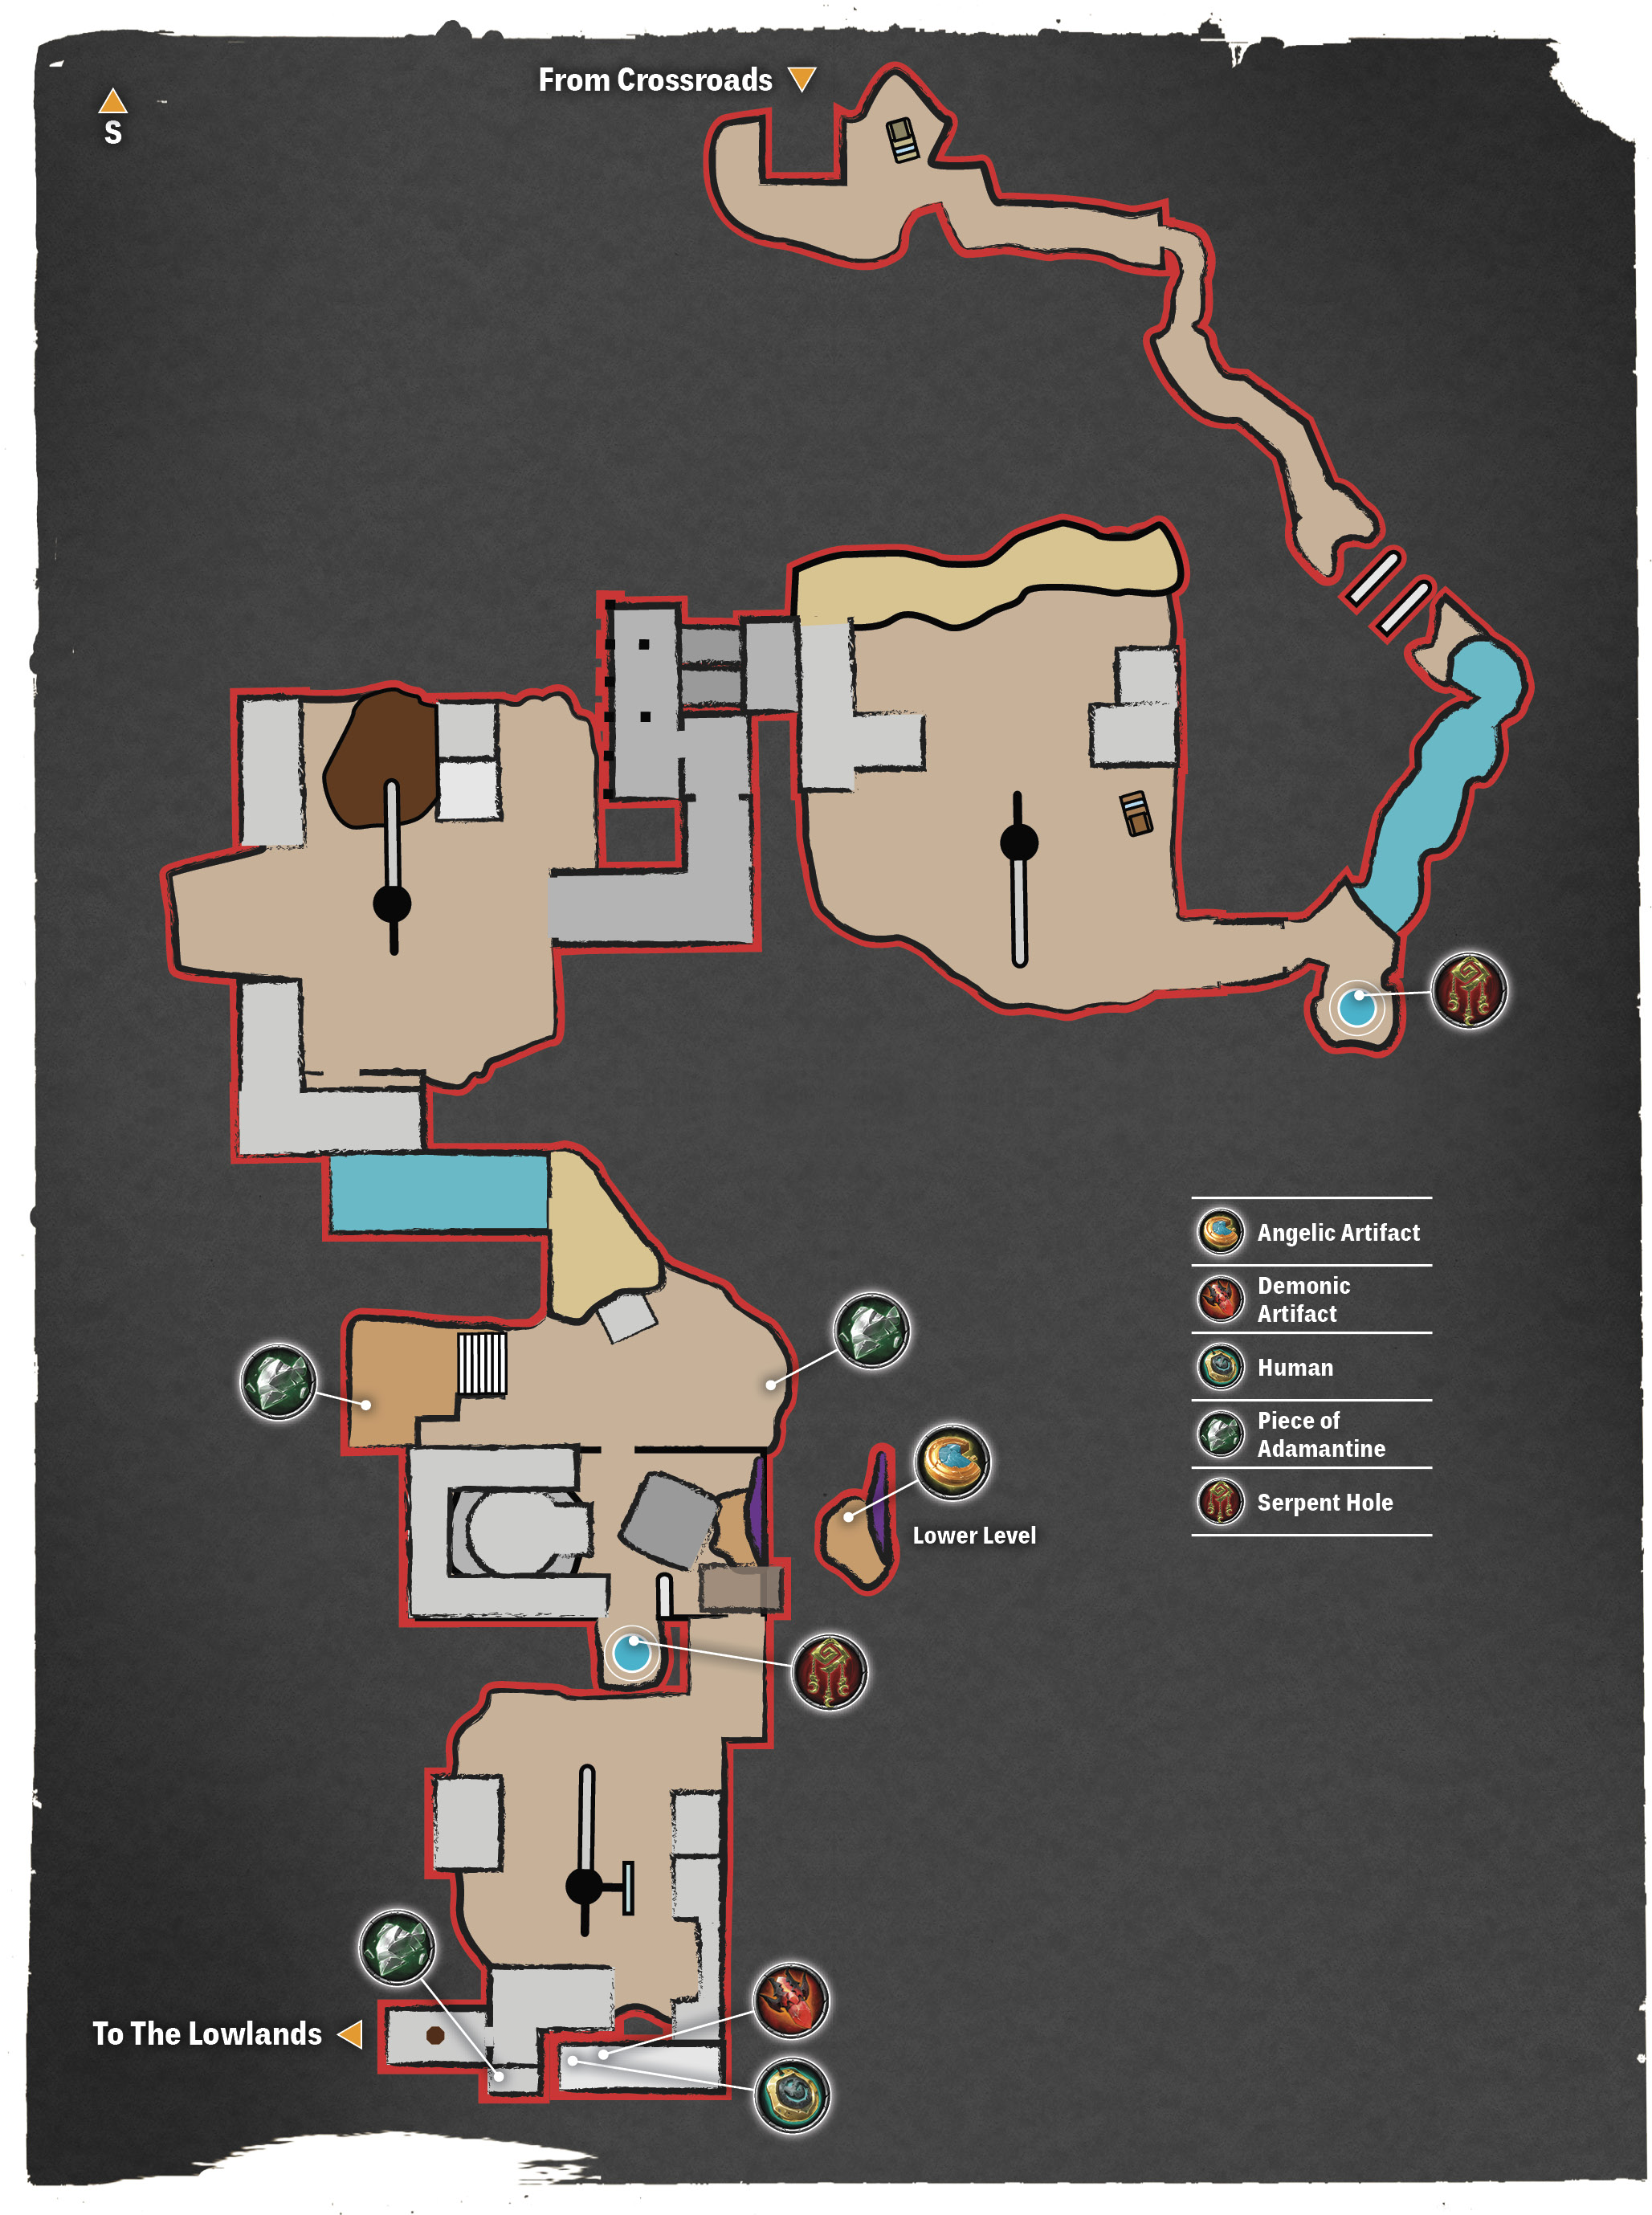
Freezing Time at the Quarry
Hit the purple lever beside the gate with the Mallet of Scorn to access the Gnarled Cliffs region. The area ahead contains several Phantom Wretches toiling with their pickaxes and an Taskmaster watching over them. Target the Taskmaster first. It will summon clones of itself in an effort to confuse you for as long as the original remains. Depending on your upgrades the clones and Phantom Wretches can be killed with one or two strikes of the Barbs of Scorn.
To leave the area, Flame Jump onto the wooden platform on the western side of the site and switch to Force form. Hit the purple-glowing handle of the apparatus above the gears with a charged Salvation toss. This will turn the crank until the wooden beam stops in position for you to whip swing across to the other platform.

Eliminate the Phantom Wretch near the crushing cylinders and switch to Stasis form. Target the two cylinders with Salvation, charge the crossblade with Stasis form, and throw it. This temporarily freezes the machinery, allowing Fury to cross without harm. But don’t delay. The effect only lasts six seconds.

The Scarabs beyond the crushers fight similarly to those encountered in the Nether, but with far greater defenses. Hit them with a Chronomancer attack using the Edge of Scorn, then circle around and lash out with a Judge, Jury combo attack. Continue to the second mining pit.

The second quarry pit you encounter contains a Phantom Guard and Phantom Guard watching over the crew of workers. Try to kite a few of the Phantom Wretches toward the entrance to eliminate them before the Phantom Guard catches sight of you—you don’t need him attacking you while you’re fending off a half dozen other enemies.
Don’t overlook the Frenzy Shard next to the wooden pillar in the center, as it really helps when using the Mallet or Edge of Scorn. Flame Jump onto the wooden platform near the oil slick and whip swing across to the east.
From here, Fury must reach the lower wooden platform where the Incandescent Remains are, but the only way to do so is by using the Force and Stasis Hollows in quick succession. Using Salvation, target the purple handle above the crank while in Force form, then switch to Stasis form. Target the metal gears, wait for the wooden beam to swing into position so you can whip swing across, then hit the gears to stop it from rotating. Swing across and hit the lever to open the gate beneath the platform.

Run along the water in the trench with Stasis form active and Flame Jump out of the pit to continue north.
The Drilling Annex is contained in the building to the north. Note the presence of a Trauma and leap into action with the Storm Hollow active. Ignore the other enemies as you focus on avoiding the Trauma’s mighty ground pound and double-claw uppercuts—you’ll likely defeat the others without focusing on them. Stay on the move, unleash Triple Tempests, and put your finely honed dodging ability to use.

Circle around the massive spinning drill bit to the Serpent Hole on the other side. The Drilling Annex serves as a hub of sorts for Scar, as it contains a lower ground-level path and an upper area that ultimately leads to the Refinery and Wrath. Descend into the pit near the broken drill as a Force Ball to get the Angelic Artifact, then continue north.
Ride the Quarry Lift
At first glance, this area resembles the prior quarry centers, with a gear-driven contraption in the center, but it is a bit different. Not only must Fury rotate the structure twice in order to reach the caged elevator to the northeast, but she must then ride it down to the boardwalks below.
But that’s of no concern at first. Fury’s first task is to eliminate the Phantom Guard Captain before he calls for too many reinforcements. Close on the Phantom Guard Captain as quickly as you can and blast him with the Cataclysm explosion. Continue attacking, preferably in Havoc Form, so he can’t use his horn to summon other Phantoms. Though he’ll primarily attack with intermittent mallet swings, the Phantom Guard Captain also periodically attacks with a shield slam. Watch for the shield to flash yellow, then dodge to the side.

With the area free of enemies, use Salvation to strike one of the wooden beams to spin the contraption around so that the chilled wooden boards are facing those to the west. Use Stasis form to wall jump up to the walkway, then Stasis jump up the shaft to the north to find a Demonic Artifact and a Human.

Whip swing across to the east, then use Salvation to spin the wooden mast again. Switch to Stasis form while it’s moving and hit the gears with an imbued throw to stop the wooden beam so you can use it to swing across to the Incandescent Remains to the north. Board the elevator to the right and step on the switch to access the main quarry canyon.